|
|
|
Porsche, and the Porsche crest are registered trademarks of Dr. Ing. h.c. F. Porsche AG.
This site is not affiliated with Porsche in any way. Its only purpose is to provide an online forum for car enthusiasts. All other trademarks are property of their respective owners. |
|
|


| gereed75 |
 Aug 7 2014, 06:46 PM Aug 7 2014, 06:46 PM
Post
#1
|
|
Senior Member  Group: Members Posts: 1,418 Joined: 19-March 13 From: Pittsburgh PA Member No.: 15,674 Region Association: North East States |
My front bumper top pad is pretty much a loss so thought I would try an idea for a fix that was floating around in my head. I have used this stuff on my boat and thought it had possibilities. It is super sticky adhesive, comes in black, and available at home depot maybe. If not I got this from Grainger.
Attached thumbnail(s) 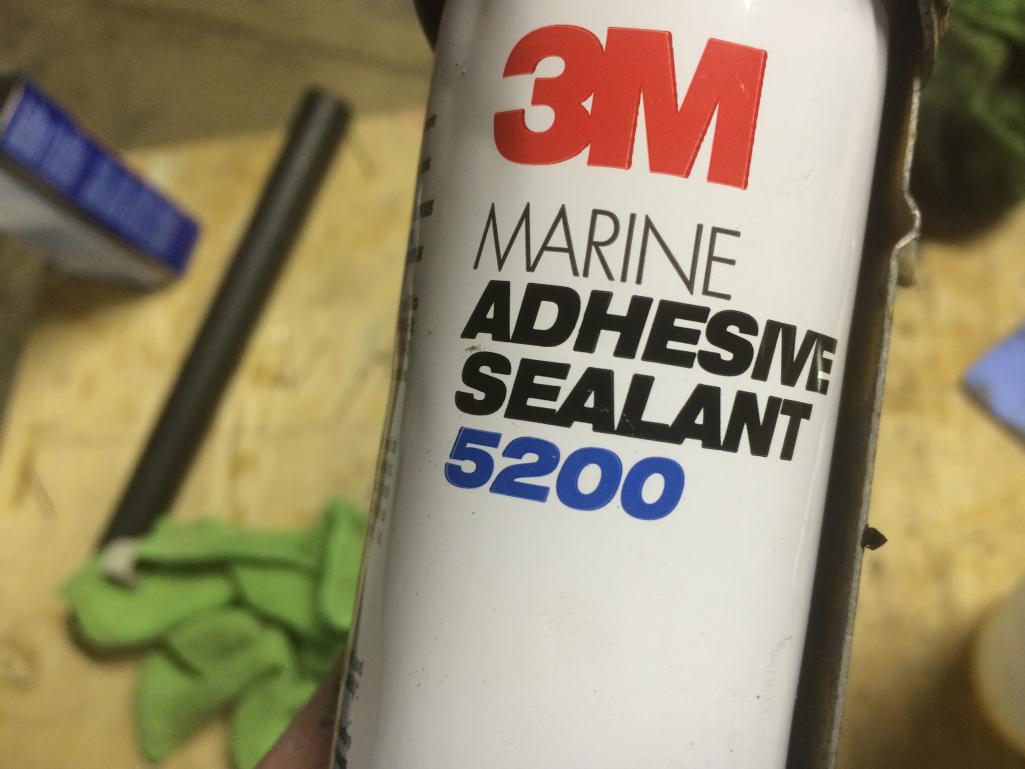
|
   |

 
|
  |
Replies
| gereed75 |
Aug 7 2014, 06:59 PM
Post
#2
|
|
Senior Member Group: Members Posts: 1,418 Joined: 19-March 13 From: Pittsburgh PA Member No.: 15,674 Region Association: North East States |
I gooped on a healthy glob of the 5200, making sure I filed the cavity. I am not a "put on thin layers" kinda guy. It does have a tendency to sag, so I unbolted the bumper and set it on a bench oriented in such a way That gravity held it in place.
I don't have any pictures of the smoothing process because this stuff sticks to everything and I did not want to get my cell phone. It does wipe off when wet using lacquer thinner. I used a soft flexible squeegee cut from a plastic binder cover. It will stick to that or any other squeegee I tried, so you must use a very very slow pulling action like spreading icing on a cake ---slow slow slow movement so it slowly spreads. If you go fast, you will just pull it out of the puddle. I was able to get it fairly into the desired shape and let it dry. I came back a day later and the skin was dry but the inside was still soft. I was afraid that it had skin cured and would never dry inside. I waited a week. After that it was completely cured through!!! There was virtually no shrinkage. This is what it looked like after about 5 minutes of sanding with 100 grit paper. It sands slowly. You almost have to "worry" it off, but it does sand. The durometer feels almost exactly like the original and there is no adhesion break at the joint. So far so good. Attached thumbnail(s) 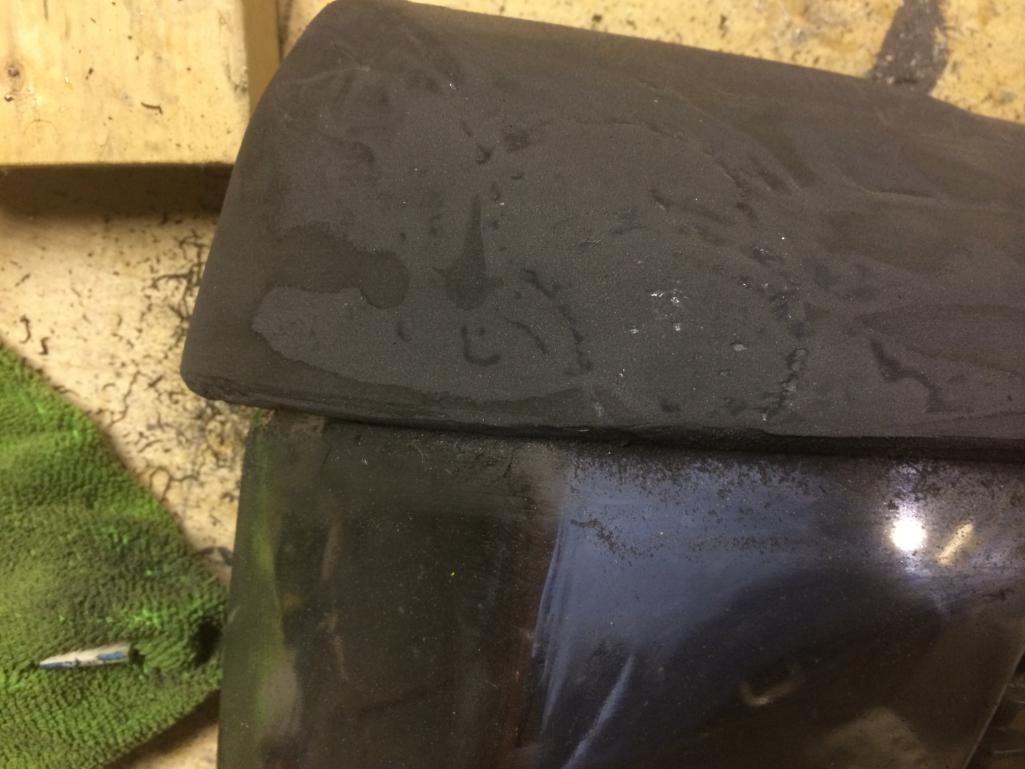
|
|
|
|
Posts in this topic
gereed75 new (I think) bumper top fix Aug 7 2014, 06:46 PM gereed75 Here is the typical bumper pad "D Chunk... Aug 7 2014, 06:49 PM gereed75 Here it is after maybe 15 minutes more sanding wit... Aug 7 2014, 07:10 PM gereed75 I was able to go back and smooth some of the voids... Aug 7 2014, 07:12 PM gereed75 The thin top fill layer dried in a day and had per... Aug 7 2014, 07:21 PM 76-914 Cool. I hope this works and that it ISN'T like... Aug 7 2014, 07:26 PM gereed75 Another "done" pix. Not sure how it wi... Aug 7 2014, 07:28 PM saigon71 Looks good! :beer2: Aug 7 2014, 07:39 PM Porschef 5200 takes a week to cure fully, no problem there.... Aug 7 2014, 08:10 PM
 gereed75
5200 takes a week to cure fully, no problem there... Aug 7 2014, 08:24 PM euro911 Awesome. There's a little chunk out of my rear... Aug 7 2014, 08:25 PM Krieger That looks great. If you had a mold you could mak... Aug 7 2014, 08:26 PM Krieger That looks great. If you had a mold you could mak... Aug 7 2014, 08:26 PM
gereed75
5200 takes a week to cure fully, no problem there... Aug 7 2014, 08:24 PM euro911 Awesome. There's a little chunk out of my rear... Aug 7 2014, 08:25 PM Krieger That looks great. If you had a mold you could mak... Aug 7 2014, 08:26 PM Krieger That looks great. If you had a mold you could mak... Aug 7 2014, 08:26 PM |
2 User(s) are reading this topic (2 Guests and 0 Anonymous Users)
0 Members:

|
Lo-Fi Version | Time is now: 24th February 2026 - 09:46 AM |
Invision Power Board
v9.1.4 © 2026 IPS, Inc.