|
|
|
Porsche, and the Porsche crest are registered trademarks of Dr. Ing. h.c. F. Porsche AG.
This site is not affiliated with Porsche in any way. Its only purpose is to provide an online forum for car enthusiasts. All other trademarks are property of their respective owners. |
|
|


| Joe Bob |
 Feb 10 2017, 08:43 PM Feb 10 2017, 08:43 PM
Post
#1
|
|
Retired admin, banned a few times  Group: Members Posts: 17,427 Joined: 24-December 02 From: Boulder CO Member No.: 5 Region Association: None |
If you are Jonesing for a lighted key head and a Porsche logo....here is a tutorial....First take apart your 914 key by cutting off the black plastic. Then if you can borrow a 911 blank and then buy a 911 lighted key head on eBay and some LEDS.
Trace the outline of the head of the 911 blank onto the the naked 914 key head. Then dremel the 914 head to match. The new 914 key should snap into the 911 lighted key head. You can use it as-is or convert it to LED. Here is what the 911 blank looks like. 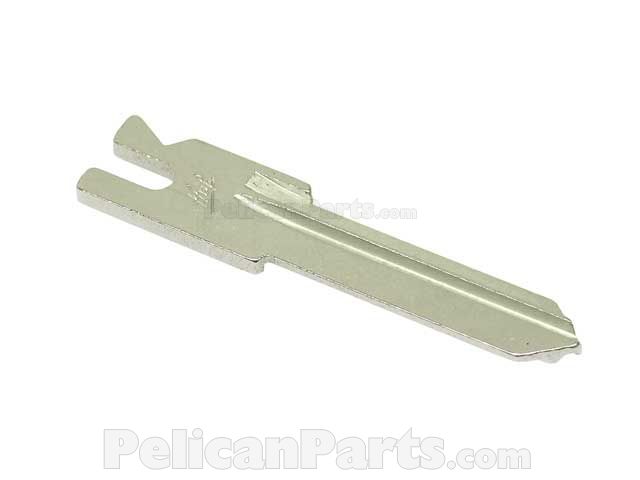 Now....to the conversion. Open the key head and remove the batteries and the copper plate on the side. It should now look like this.... 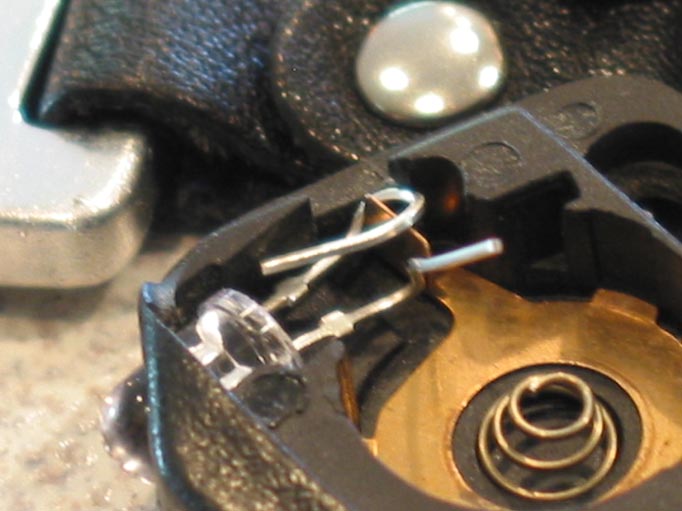 Save ALL parts. Someone will need the copper strip if they stay with the oem bulb. Next take the LED. Seen below and find the flat edge. The flat edge and the short lead is positive.... 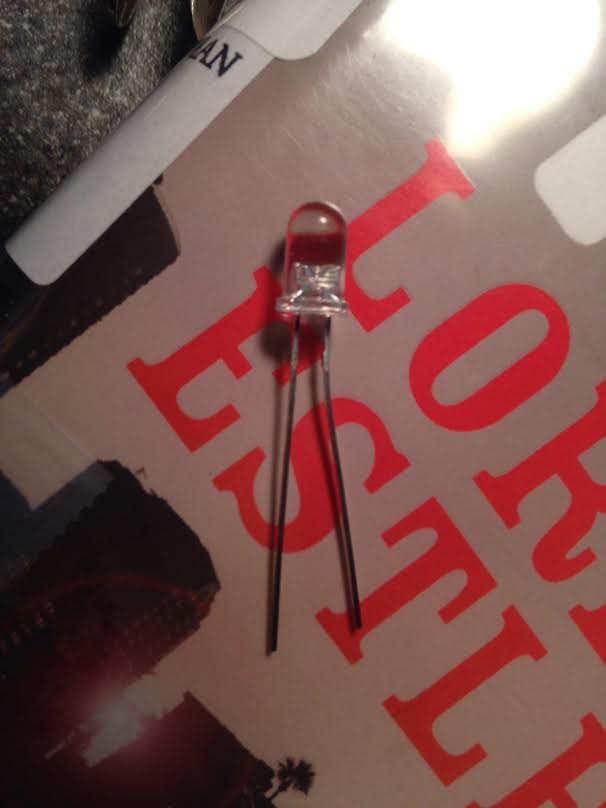 |
   |

 
|
  |
Replies
| Joe Bob |
Feb 10 2017, 08:51 PM
Post
#2
|
|
Retired admin, banned a few times Group: Members Posts: 17,427 Joined: 24-December 02 From: Boulder CO Member No.: 5 Region Association: None |
Insert the bulb into the hole as shown above and wrap the negative around the vertical copper post. Trim it off and crimp it so it has a good contact.
Next, insert the spring. Big side down, small side up. Take two batteries, I used the models below. 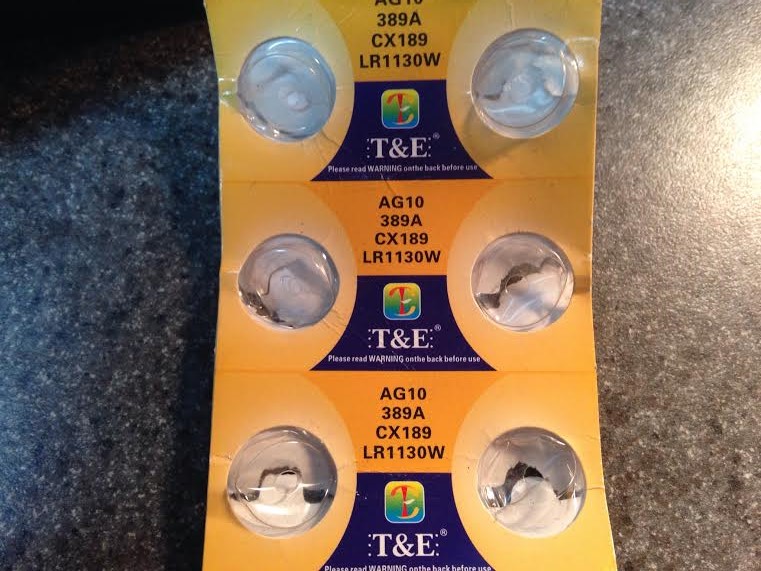 Stack them negative to positive and insert and balance them on top of the spring. 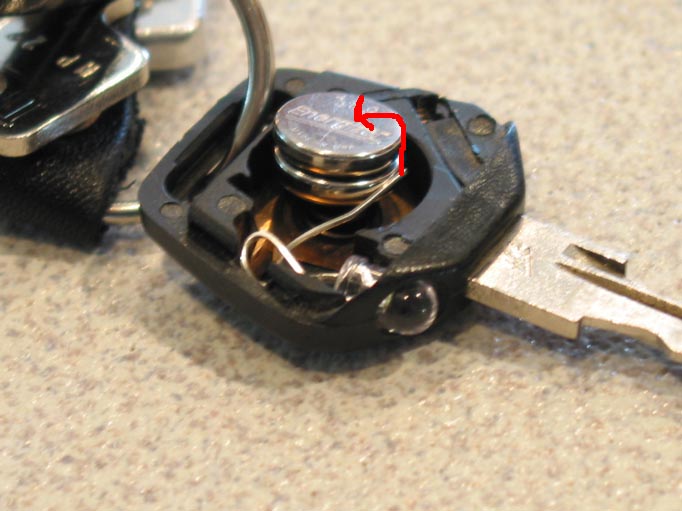 Trim the positive lead and bend it a bit so that the plastic cap can be placed over it. The trimmed lead will rest on top of the top battery. NOTE: You might want to test the batteries with a meter and the bulb. The batteries should read 1.5volts and if you buy cheap China crap they have been known to be flat out of the box. Test the bulb by stacking the batteries placing the positive lead on + and the negative lead on -. Positive is marked, negative is not. Squeeze the leads between your fingers with leads on top of the top battery and the other lead on the bottom of the second battery. 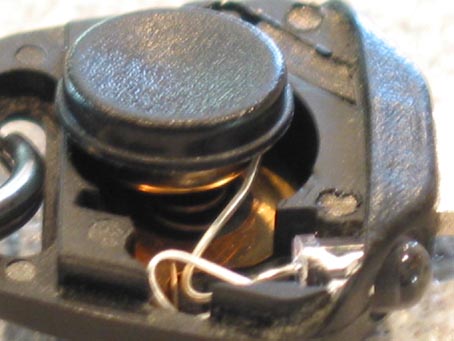 Snap the face plate over the button and snap it in place. Push button and Voila!  |
|
|
|
Posts in this topic
 Joe Bob DIY Porsche keyhead, lighted and LED Feb 10 2017, 08:43 PM
 Joe Bob Now some people say....just buy the LED key head o... Feb 10 2017, 09:06 PM Spoke Nice mod.
I think I like your avatar better. Feb 10 2017, 11:07 PM bandjoey Slow day at the office today eh? :poke:
Cool ke... Feb 10 2017, 11:27 PM
Joe Bob Now some people say....just buy the LED key head o... Feb 10 2017, 09:06 PM Spoke Nice mod.
I think I like your avatar better. Feb 10 2017, 11:07 PM bandjoey Slow day at the office today eh? :poke:
Cool ke... Feb 10 2017, 11:27 PM
 AZBanks
Slow day at the office today eh? :poke:
Cool k... Feb 15 2017, 04:51 PM Elliot Cannon
Slow day at the office today eh? :poke:
Cool ... Feb 15 2017, 09:13 PM Joe Bob Gee, thanks. For those that ask nice I will send ... Feb 10 2017, 11:32 PM Elliot Cannon Gosh Mr Joe Bob, that is really, really Neato... Feb 11 2017, 12:22 AM Joe Bob Good luck with those fat truck driver hands you ha... Feb 11 2017, 07:08 AM Joe Bob :agree: Feb 11 2017, 07:20 AM Joe Bob PMs replied to. 3 sets of freebie LEDs in the mail... Feb 15 2017, 02:03 PM
AZBanks
Slow day at the office today eh? :poke:
Cool k... Feb 15 2017, 04:51 PM Elliot Cannon
Slow day at the office today eh? :poke:
Cool ... Feb 15 2017, 09:13 PM Joe Bob Gee, thanks. For those that ask nice I will send ... Feb 10 2017, 11:32 PM Elliot Cannon Gosh Mr Joe Bob, that is really, really Neato... Feb 11 2017, 12:22 AM Joe Bob Good luck with those fat truck driver hands you ha... Feb 11 2017, 07:08 AM Joe Bob :agree: Feb 11 2017, 07:20 AM Joe Bob PMs replied to. 3 sets of freebie LEDs in the mail... Feb 15 2017, 02:03 PM |
2 User(s) are reading this topic (2 Guests and 0 Anonymous Users)
0 Members:

|
Lo-Fi Version | Time is now: 3rd December 2025 - 12:13 PM |
Invision Power Board
v9.1.4 © 2025 IPS, Inc.