|
|
|
Porsche, and the Porsche crest are registered trademarks of Dr. Ing. h.c. F. Porsche AG.
This site is not affiliated with Porsche in any way. Its only purpose is to provide an online forum for car enthusiasts. All other trademarks are property of their respective owners. |
|
|


| Amphicar770 |
 Jan 20 2018, 08:02 PM Jan 20 2018, 08:02 PM
Post
#1
|
|
Senior Member  Group: Members Posts: 1,198 Joined: 20-April 10 From: PA, USA Member No.: 11,639 Region Association: MidAtlantic Region |
Hi all,
A while back, Uro Parts contacted me and offered to send me one of their new trunk lock repair kits in exchange for reviewing it here. I did get the part for free but have no other affiliation. My own experience with them has been mixed, some junky bits but also some good ones like upper strut mount assembly for Jaguar. Anyway, I told them I will be honest in my evaluation and so I shall. Arrived today so figure the unboxing (unbagging) will be part 1. Part 2 will be install but I can answer any questions in between. Photos are provided. You get three parts (outer housing, inner lock barrel, and rubber seal). The chrome finish seems pretty good. Not sure what they are made of. Weight is light and a magnet does not stick. The included instructions seem well written and detailed. Hope to install over the weekend. 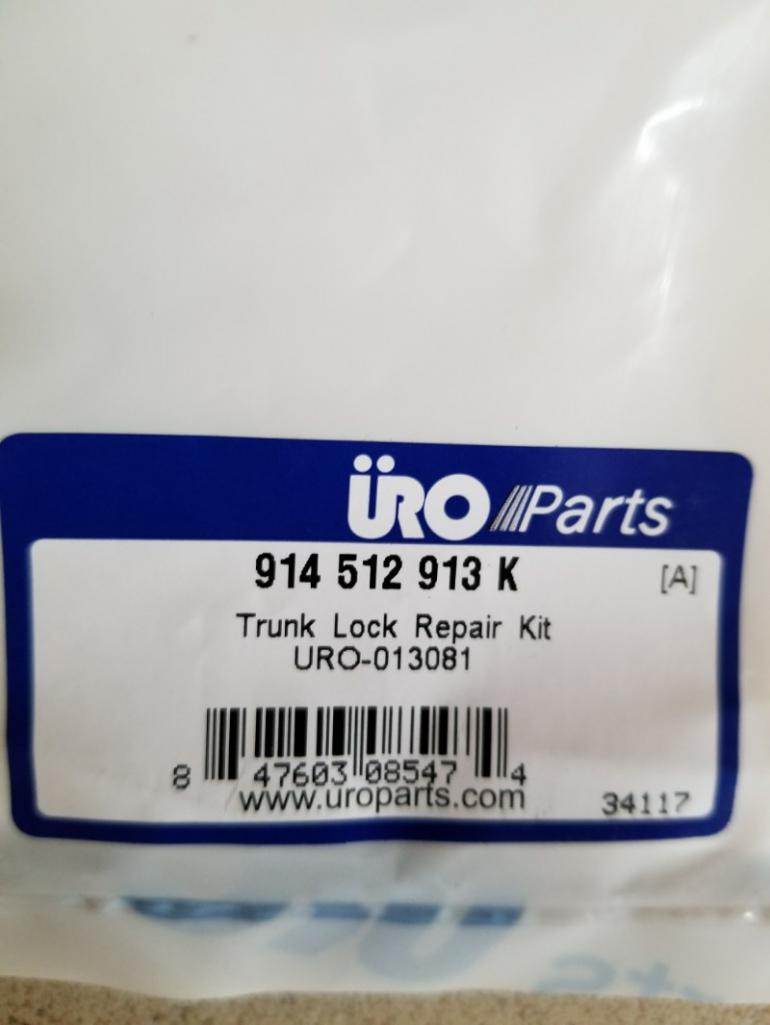 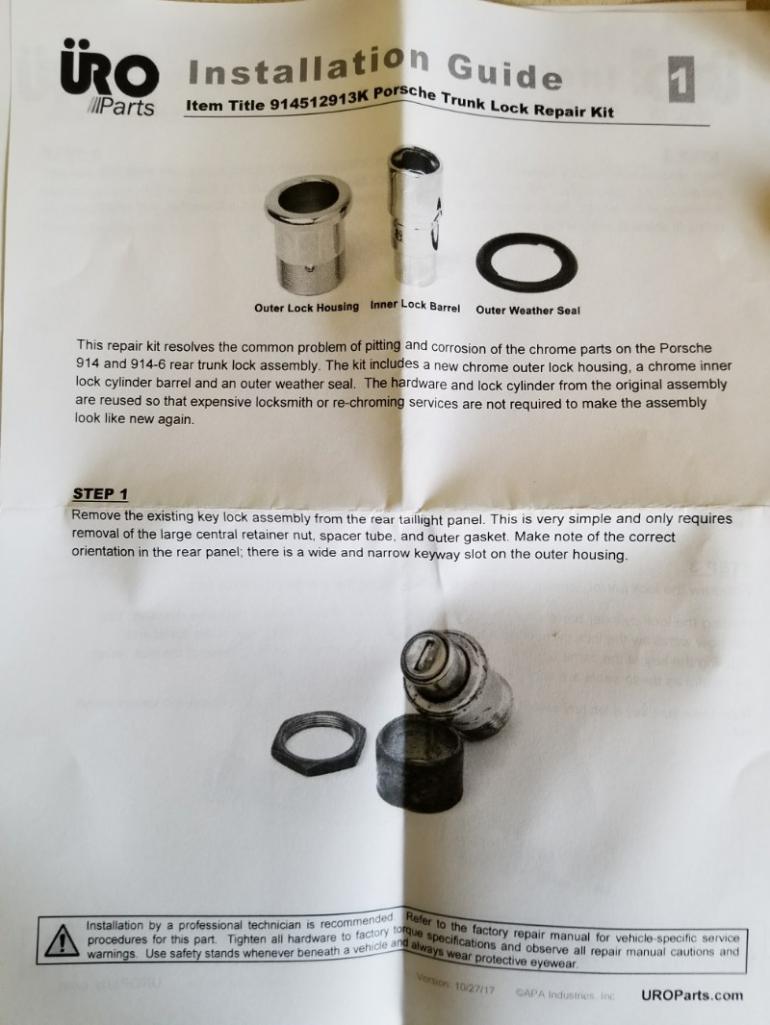 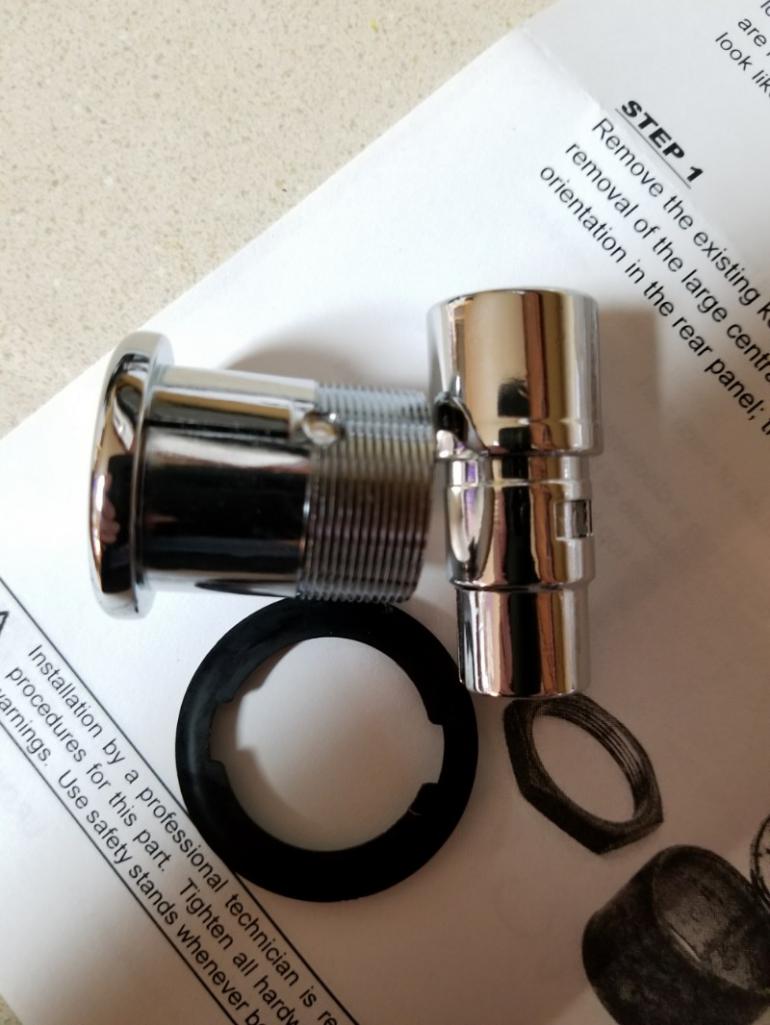 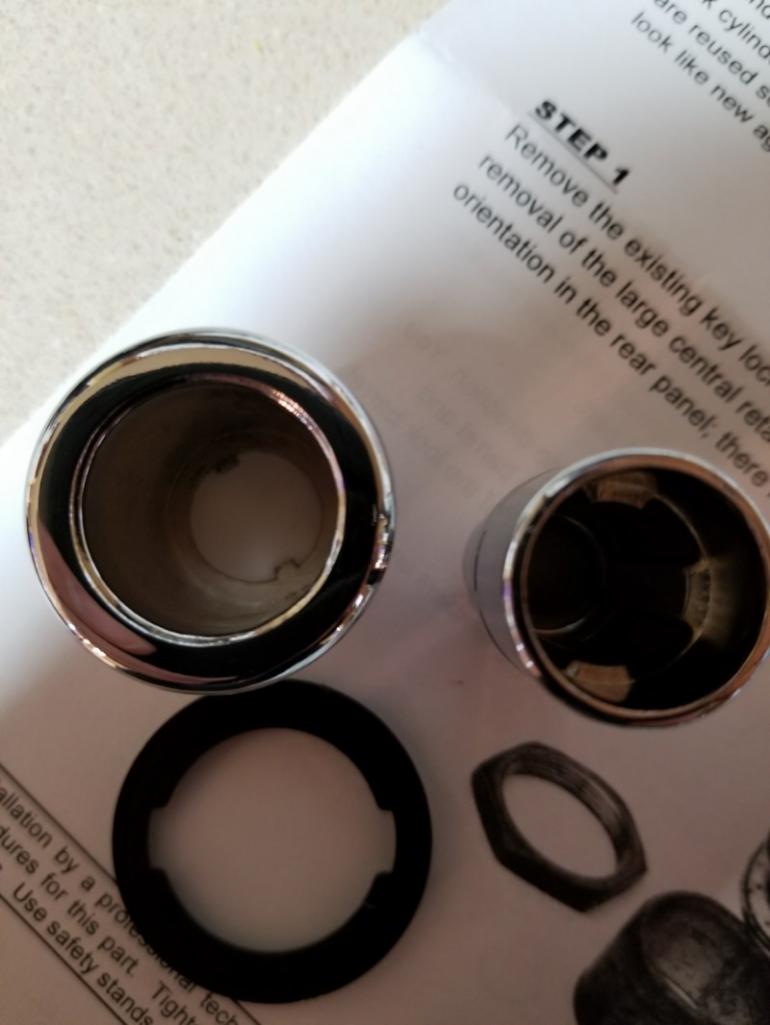  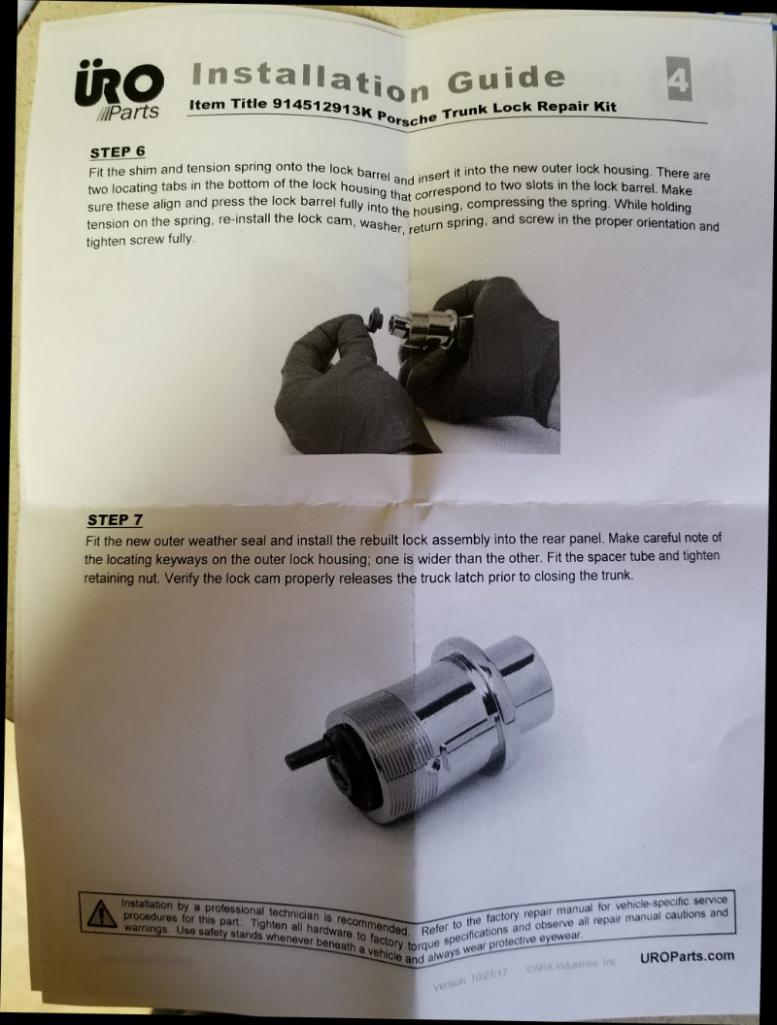 |
   |

 
|
  |
Replies
| Amphicar770 |
Jan 26 2018, 09:49 PM
Post
#2
|
|
Senior Member Group: Members Posts: 1,198 Joined: 20-April 10 From: PA, USA Member No.: 11,639 Region Association: MidAtlantic Region |
OK, here we go.
First off, here is my original assembly. As noted, in pretty decent condition as my 914 is low mileage original in exceptionally nice shape. 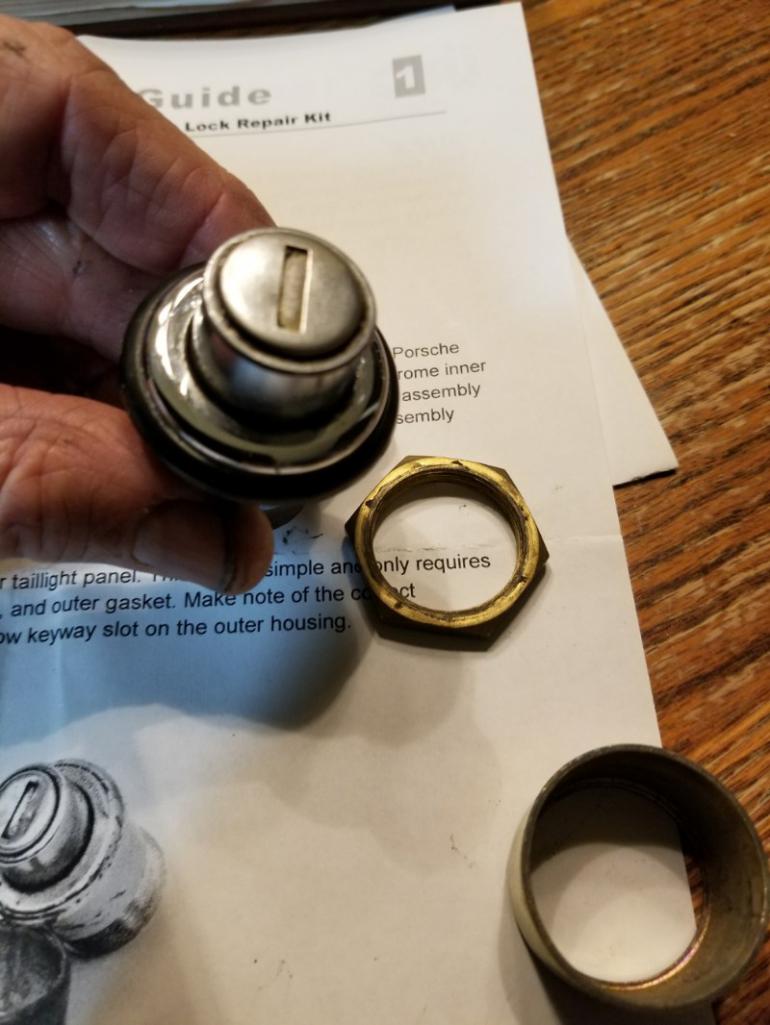 I am including this picture of the original as it shows something pretty important. The position of the rear cam lock in relation to the keyway slot (the wider one is at the top). If this is not properly positioned when you reassemble do not close your trunk or you may not be getting back in! 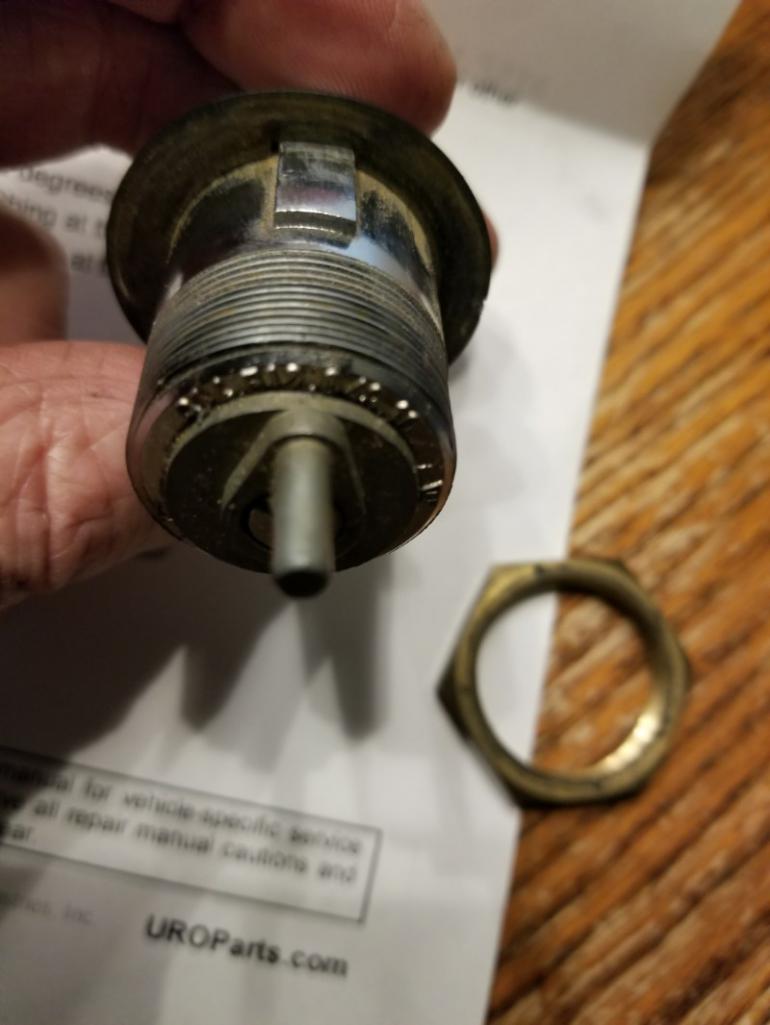 Here is the inner lock barrel removed. Notice the small gasket. The gasket on mine is reusable but certainly fragile after 40+ years. This is one of the two bits that I think should be included in the kit. I reused this one. 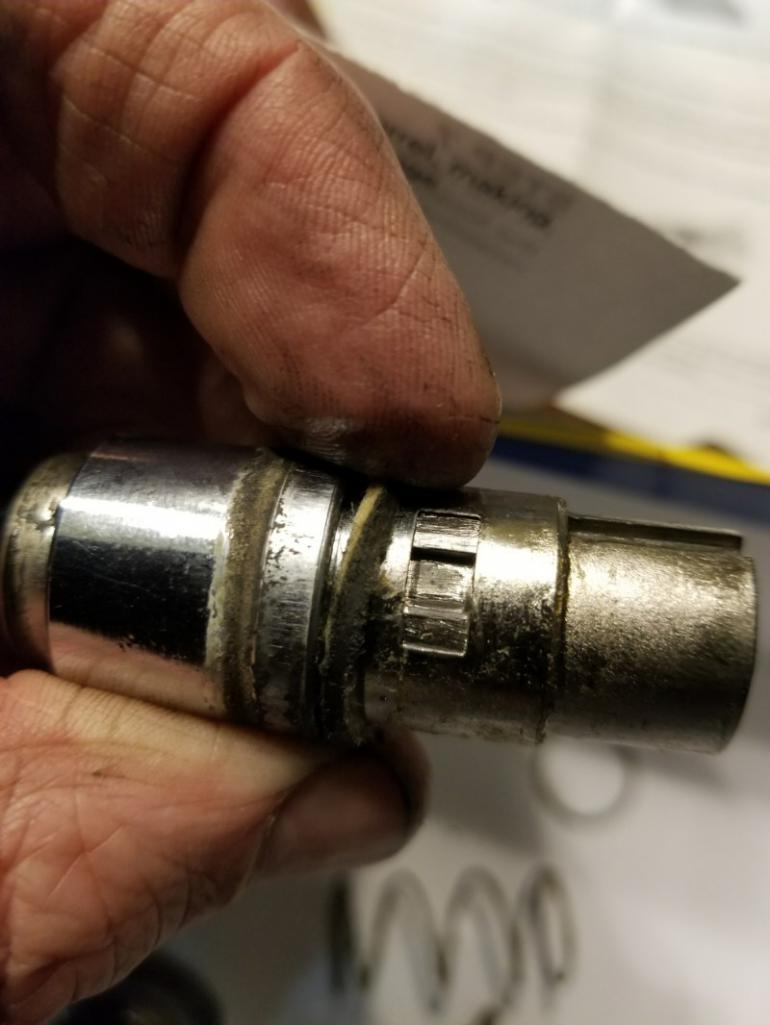 This photo shows the original and new inner barrel. Both new and old parts are an excellent match. The original outer has some part number markings that the new one does not but otherwise, materials and design seem pretty much identical. The instructions not that lock barrel often has a buildup of old grease and dirt. Yes, as does almost everything else. Cleaned up all the parts and oiled / greased. Even if you are keeping your originals, this is a bit of maintenance that is likely overdue. 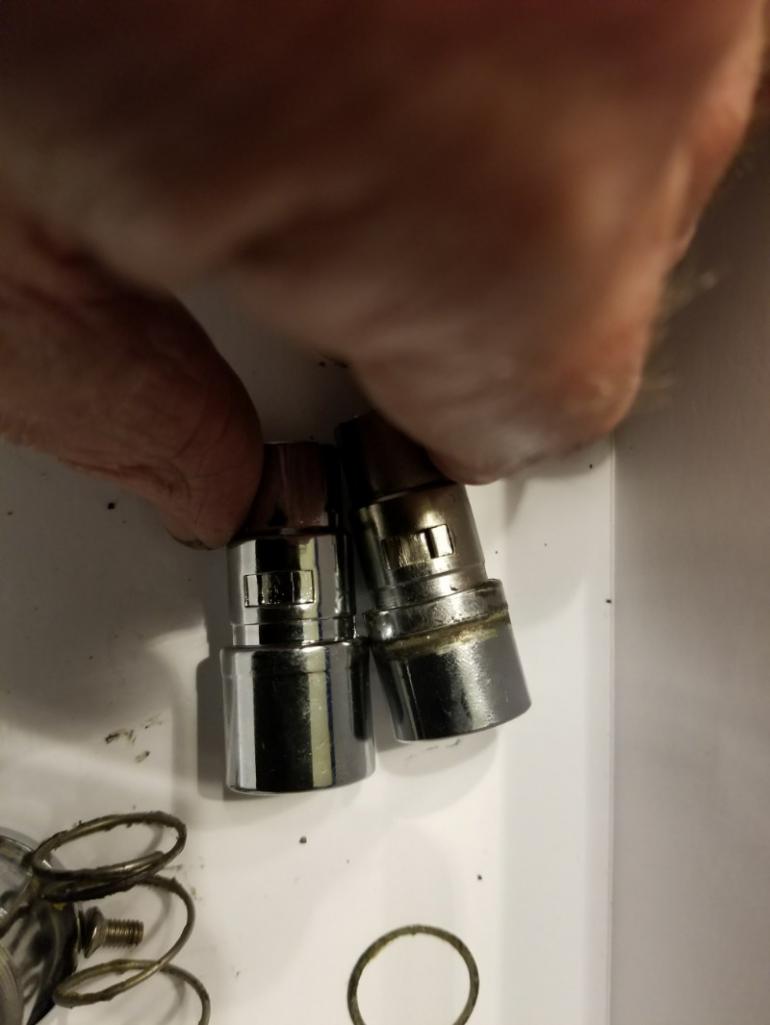 Here is a photo of the original inner lock barrel. In step 3 of instructions it is noted that there is a small plastic seal at the top of the lock barrel and to be careful as these seals are very fragile. That black bit at around 12 o'clock in following photo is what was left of my plastic seal, it has essentially disintegrated. At first I thought it was just old grease. If mine is this bad, I imagine many others are far worse. This is the 2nd part that I do think should be part of the kit. 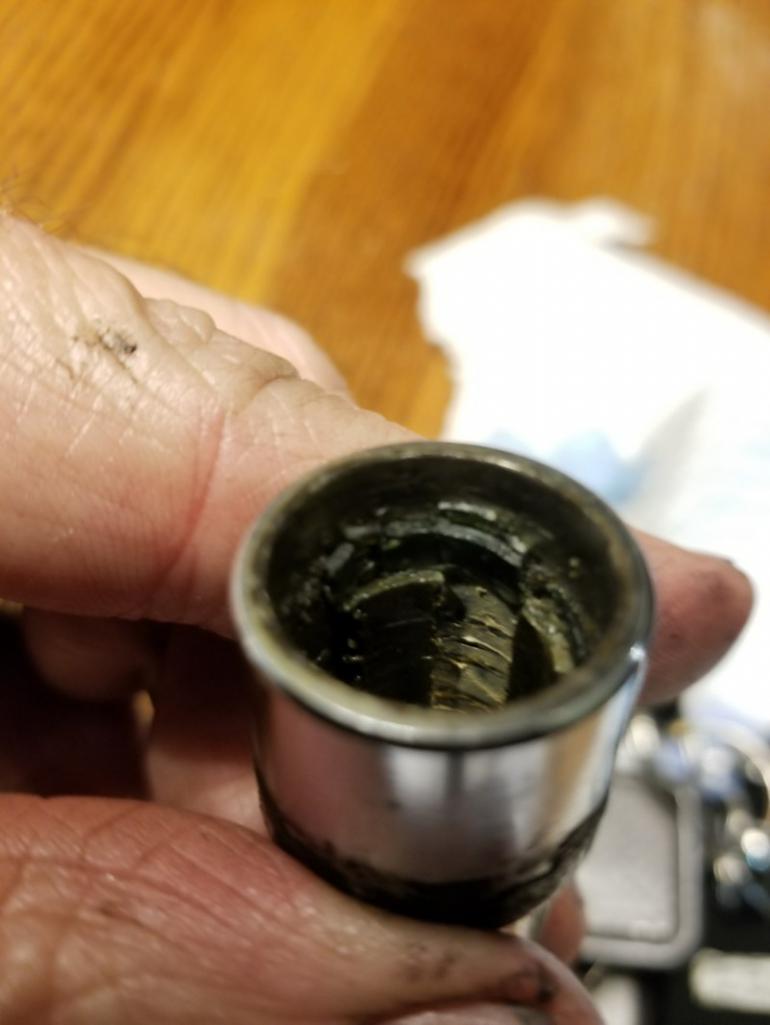 When I went to put the lock cylinder into the inner barrel, I noticed that there was more play than there should be. That is when I realized the aforementioned seal was toast. My field expedient solution was to use an HNBR O-Ring (like used for air conditioning components). I put some grease on the o-ring as well. Seems to do the trick in eliminating the play. Again, wish the proper replacement part had been included.  As noted, instructions were pretty good. Here it is back on the car. Again, before you close the trunk, push the button in and out to make sure the cam is engaging the release for the trunk. 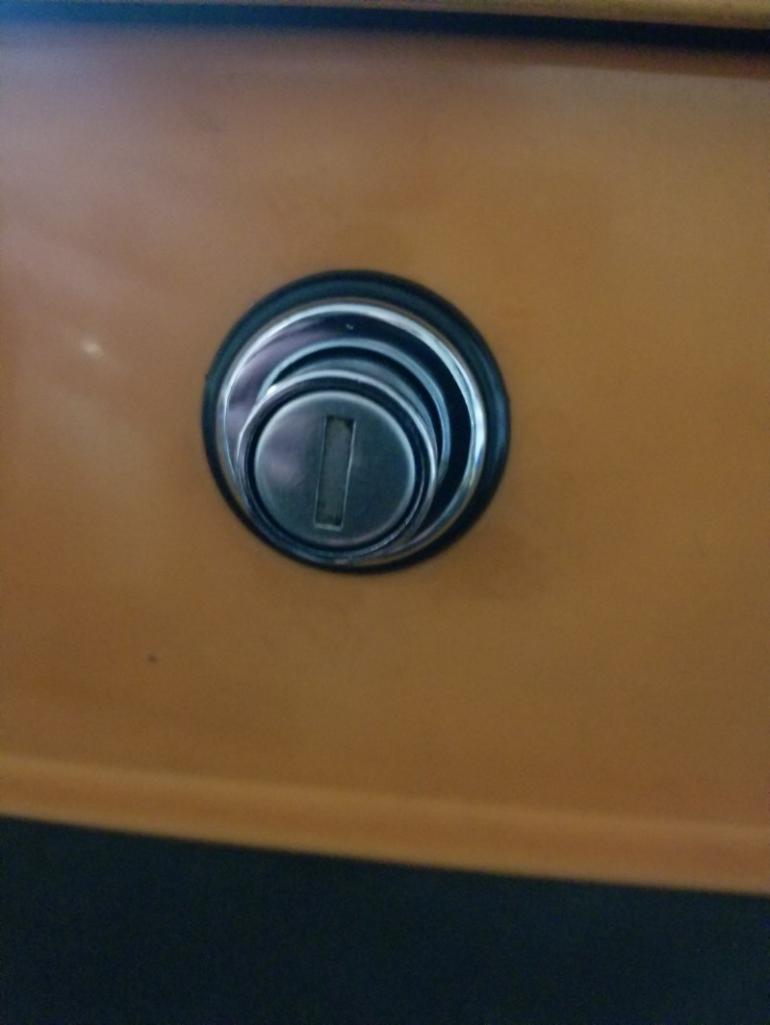 Overall, I think the final fit and finish are excellent. The instructions were easy to follow and reasonably complete. It is short of being a 10 by a gasket and a seal. I am not sure if the kit I received is final production or not, perhaps that is something Uro will address. I can not say how well the finish will hold up over time. It was only installed this evening and I only venture out with the 914 on sunny days. Still, I do not anticipate any problems. Finally, I will reiterate that I have no affiliation with UroParts. They contacted me via the forum here and asked if I would do a review of this product which, in full transparency, they provided to me at no cost. Mostly I did it for fun and, being out of work at the moment, I have nothing better to do! I have tried to be fair and balanced in my review, highlighting both the hits and misses. Hope you all found it useful |
|
|
|
Posts in this topic
 Amphicar770 URO Parts trunk lock repair kit review - part I Jan 20 2018, 08:02 PM
 rdauenhauer A while back, Uro Parts contacted me and offered ... Jan 21 2018, 02:24 PM
 UROpartsman :idea: Following. Curious why were you contacted /... Jan 22 2018, 10:55 AM Front yard mechanic He has a jag and they need a lot of parts :popcorn... Jan 21 2018, 03:05 PM Mikey914 Ok I'll spill the beans on what i see as a ser... Jan 21 2018, 03:52 PM UROpartsman
Ok I'll spill the beans on what i see as a se... Jan 22 2018, 10:30 AM Amphicar770 I'll take some additional pics when I get home... Jan 22 2018, 11:35 AM gothspeed It looks pretty good so far. :) Jan 22 2018, 01:42 PM Amphicar770 Here is a photo showing the inside ribs. They do e... Jan 24 2018, 02:36 PM Mikey914 The original pic looked like it was shinny all the... Jan 24 2018, 02:51 PM Amphicar770
The original pic looked like it was shinny all th... Jan 25 2018, 04:59 PM Firstcar Where is part II, has it been installed :unsure: ... Jan 26 2018, 10:26 AM gothspeed
Where is part II, has it been installed :unsure:... Jan 26 2018, 02:23 PM Amphicar770 Ok guys, your pressure overcame my procrastinating... Jan 26 2018, 09:08 PM Bartlett 914 Looks pretty nice. Jan 27 2018, 08:38 AM Tbrown4x4 This will be tough. I'm certainly glad these p... Jan 27 2018, 09:51 AM ConeDodger
This will be tough. I'm certainly glad these ... Jan 27 2018, 02:48 PM The Cabinetmaker Same here ^ Jan 27 2018, 11:03 AM 914werke Solid review. Thank you Jan 27 2018, 11:54 AM gothspeed
Solid review. Thank you
+1 thank you for posting... Jan 29 2018, 05:00 PM
UROpartsman :idea: Following. Curious why were you contacted /... Jan 22 2018, 10:55 AM Front yard mechanic He has a jag and they need a lot of parts :popcorn... Jan 21 2018, 03:05 PM Mikey914 Ok I'll spill the beans on what i see as a ser... Jan 21 2018, 03:52 PM UROpartsman
Ok I'll spill the beans on what i see as a se... Jan 22 2018, 10:30 AM Amphicar770 I'll take some additional pics when I get home... Jan 22 2018, 11:35 AM gothspeed It looks pretty good so far. :) Jan 22 2018, 01:42 PM Amphicar770 Here is a photo showing the inside ribs. They do e... Jan 24 2018, 02:36 PM Mikey914 The original pic looked like it was shinny all the... Jan 24 2018, 02:51 PM Amphicar770
The original pic looked like it was shinny all th... Jan 25 2018, 04:59 PM Firstcar Where is part II, has it been installed :unsure: ... Jan 26 2018, 10:26 AM gothspeed
Where is part II, has it been installed :unsure:... Jan 26 2018, 02:23 PM Amphicar770 Ok guys, your pressure overcame my procrastinating... Jan 26 2018, 09:08 PM Bartlett 914 Looks pretty nice. Jan 27 2018, 08:38 AM Tbrown4x4 This will be tough. I'm certainly glad these p... Jan 27 2018, 09:51 AM ConeDodger
This will be tough. I'm certainly glad these ... Jan 27 2018, 02:48 PM The Cabinetmaker Same here ^ Jan 27 2018, 11:03 AM 914werke Solid review. Thank you Jan 27 2018, 11:54 AM gothspeed
Solid review. Thank you
+1 thank you for posting... Jan 29 2018, 05:00 PM |
1 User(s) are reading this topic (1 Guests and 0 Anonymous Users)
0 Members:

|
Lo-Fi Version | Time is now: 14th June 2024 - 01:34 PM |
Invision Power Board
v9.1.4 © 2024 IPS, Inc.