|
|
|
Porsche, and the Porsche crest are registered trademarks of Dr. Ing. h.c. F. Porsche AG.
This site is not affiliated with Porsche in any way. Its only purpose is to provide an online forum for car enthusiasts. All other trademarks are property of their respective owners. |
|
|


| Retroracer |
 Nov 17 2018, 07:29 PM Nov 17 2018, 07:29 PM
Post
#1
|
|
Senior Member  Group: Members Posts: 654 Joined: 7-July 13 From: Bend OR Member No.: 16,100 Region Association: Pacific Northwest |
So this post builds on, and references Tim’s (timothy_nd28) awesome post here:
http://www.914world.com/bbs2/index.php?sho...719&hl=tach …which details the steps necessary to improve the original VDO tach performance and provide better transient and damping response, coupled with a more universal input. If you’re not familiar with this DIY tach upgrade, best read that first. Given the flexibility and performance upgrade of retrofitting the SunPro/Bosch innards into the VDO casing, I took on the challenge of seeing if a 10K racing tach could be constructed around an early 914-4 tach housing – with a target cost of $100. Read on if this piques your interest; move on if you don’t think this sort of thing is necessary or sensible. A 10K tachometer was an essential part of the GT cars (and other Porsche race cars too), which typically had no redline area indicated under the glass, such that the actual redline could be indicated with a marker or tape, to suit the particular engine build being run for that event. Original 10K VDO units appear for sale occasionally, but the prices are usually prohibitive. 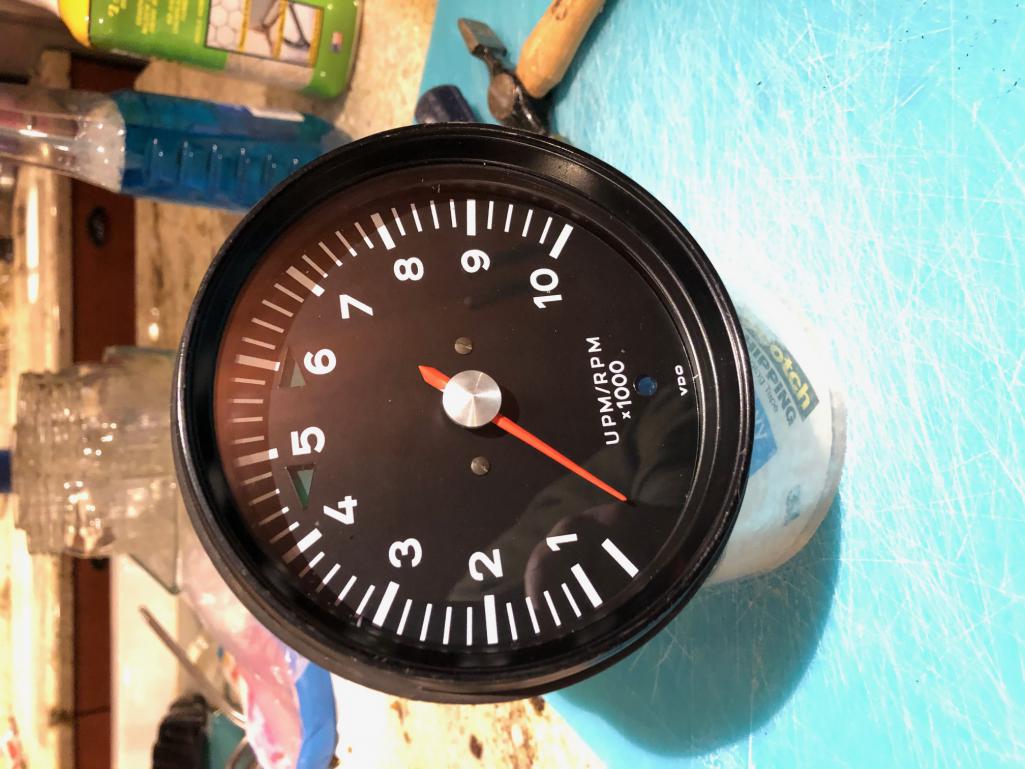 I ordered the Bosch version of the SunPro via Amazon, and disassembled it using Tim's post as suggested: 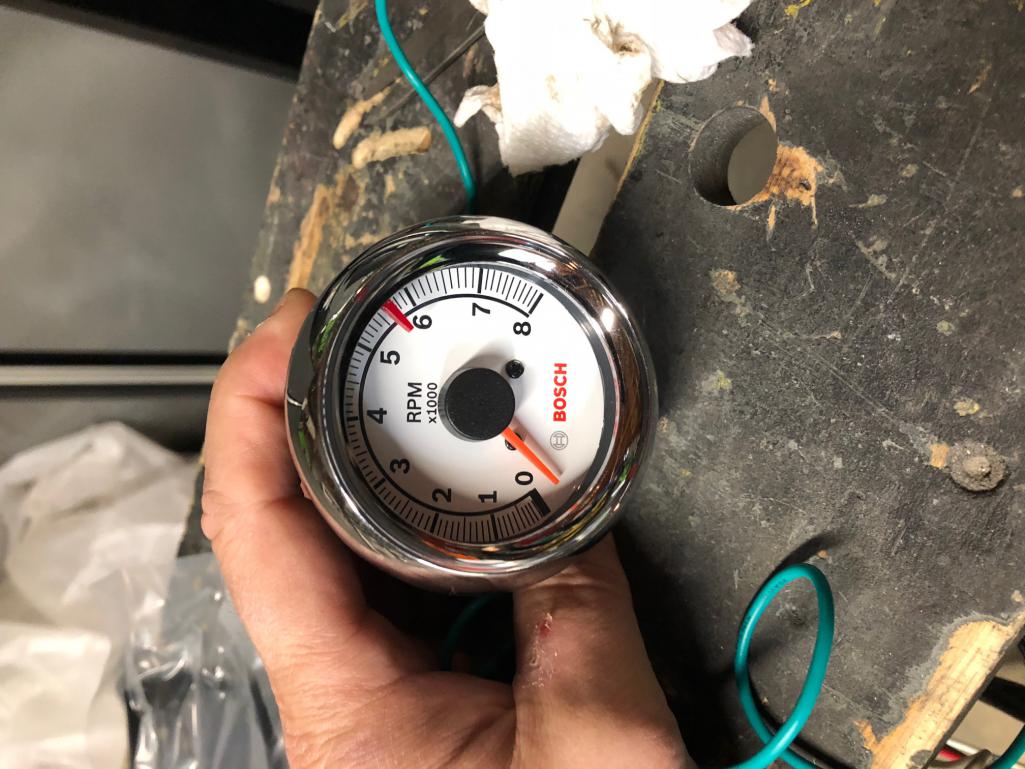 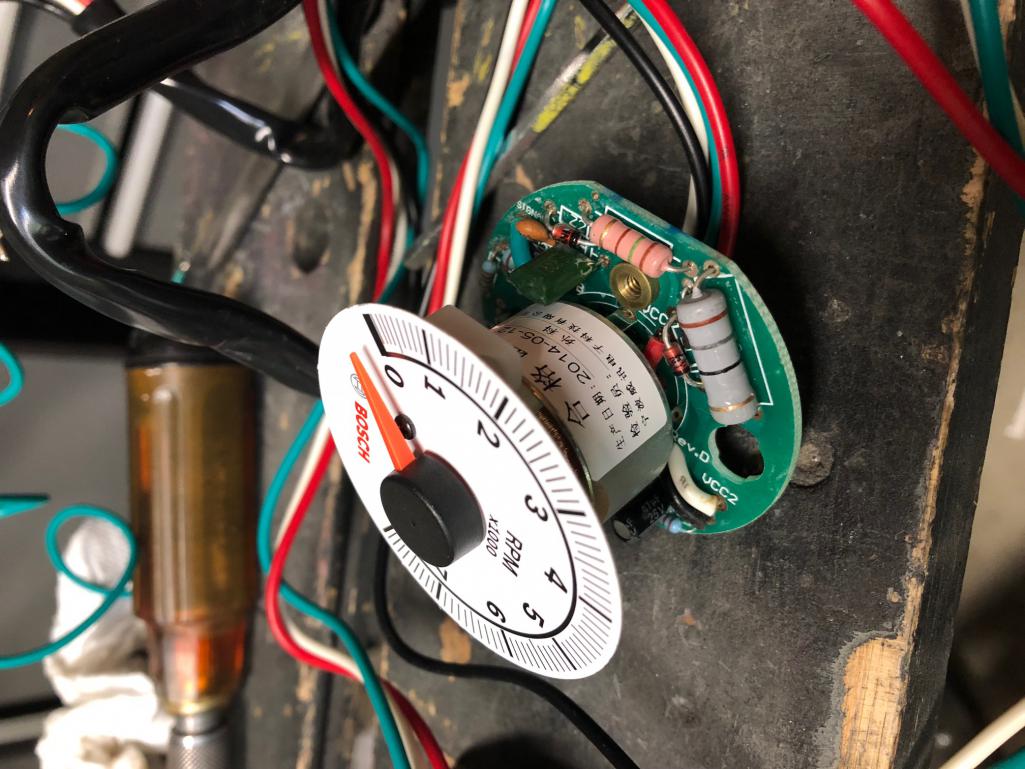 There is some metal fabrication necessary to get the donor VDO fascia to mate up to the new core. This is not difficult, the only thing you may not have around is the M2 tap. 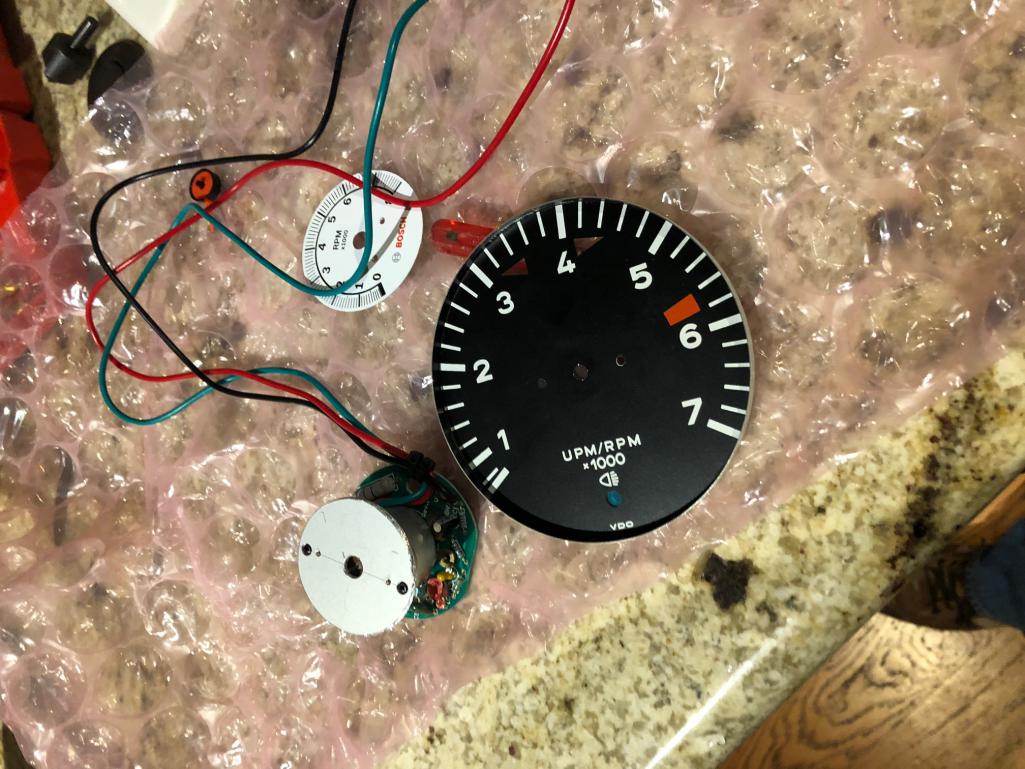 Getting the right fascia: So I toyed with idea of using a drawing or graphics package to replicate the 10K tach face, then somehow print a design on to vinyl, trim it, then glue that over the existing -4 face. Then I realized that I was never going to get round to doing that, so looked at other options. I ended up buying a printed and finished insert fascia from these guys: https://www.heiler-tachodesign.de/Tachomete...ithout-red-Area Not a cheap way to get a result, but they a) offer multiple choices to match various Porsche VDO tachs and other gauges, b) the quality of the fit, paint and graphics are exemplary and c) without the talent and tools for “rolling your own”, there are very few other options. They also allow you to pick custom colors and lettering if you so desire. It took about 2 weeks to arrive, I also ordered a 914-6 style temp gauge replacement at the same time, total cost for both gauge faces including shipping was about $93. 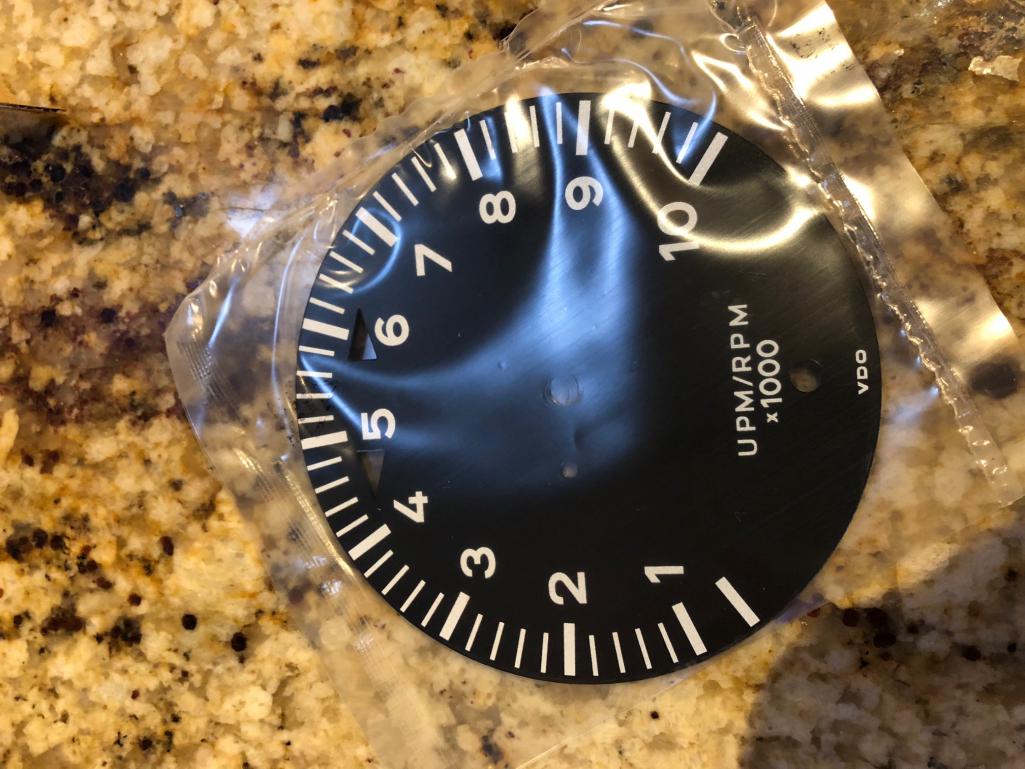 So, $100 target blown already - the tach core is around $35 - but still in the ball park. |
   |

 
|
  |
Replies
| Retroracer |
Nov 17 2018, 07:43 PM
Post
#2
|
|
Senior Member Group: Members Posts: 654 Joined: 7-July 13 From: Bend OR Member No.: 16,100 Region Association: Pacific Northwest |
One of the key steps for the new tach to operate correctly is to make sure the response to the incoming tach pulses matches the markings on the new face:
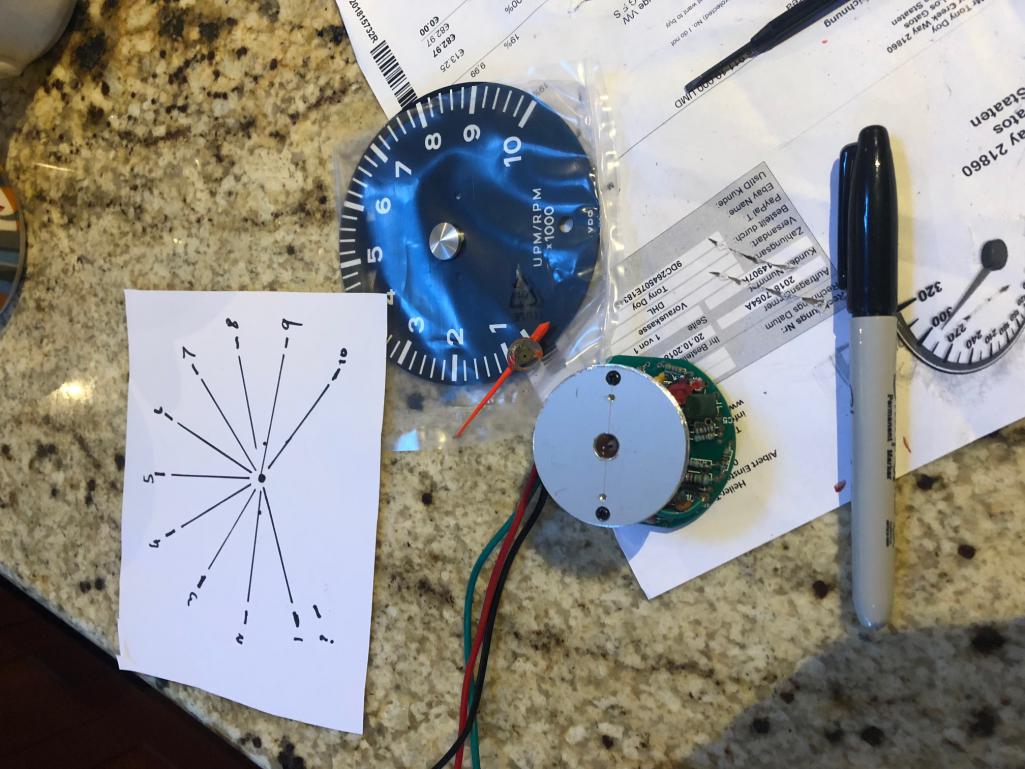 This is accomplished by the combination of adjusting the absolute position of the needle on the core shaft, and adjusting the value of resistor R9 on the PCB. I had the use of a signal generator and PCB rework facilities, so could optimize the R9 value on the bench, which is way easier than tweaking it when it’s in the car. With the fascia I chose, and using a 6-cylinder input, the value that worked for me was 220K. I adjusted the unit based on 1000rpm and 6000rpm settings to optimize, but verified operation up to 10000rpm. Viewing accuracy at 10K with R9=220K was -2% on axis. 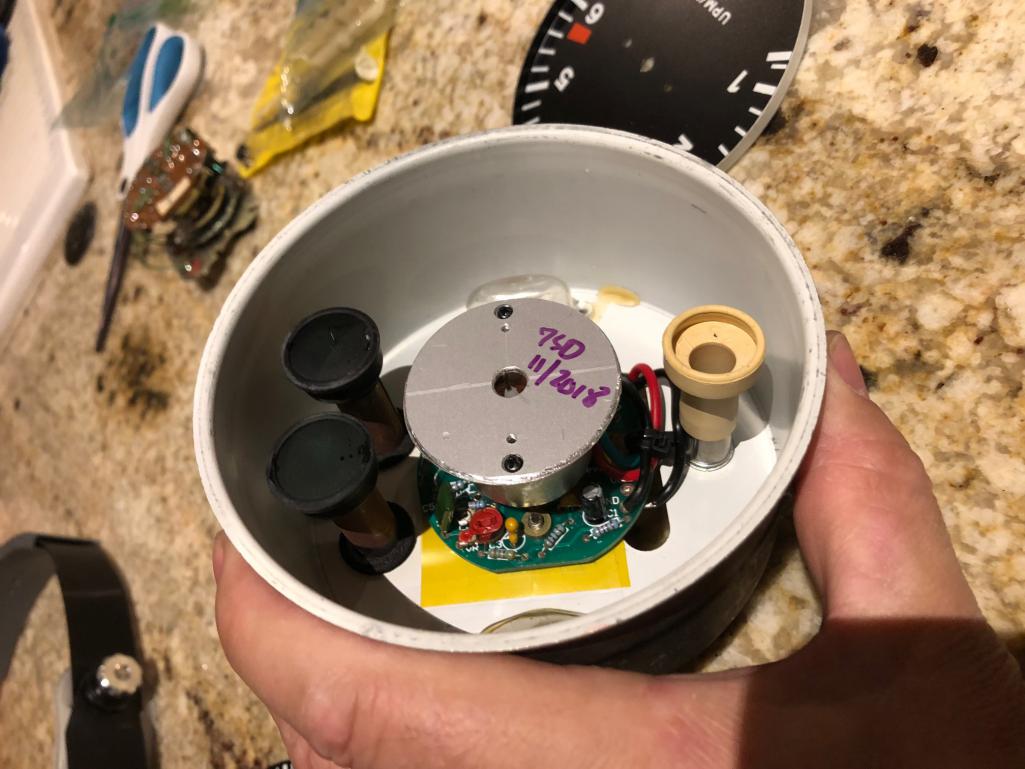 Then it was simply a case of working out the wiring terminations, a quick check on the car itself before sealing up the VDO trim ring (thoroughly cleaning the glass first), to make sure the new tach accepts the MSD Strassefeuer inputs correctly. Then it's basically finished: 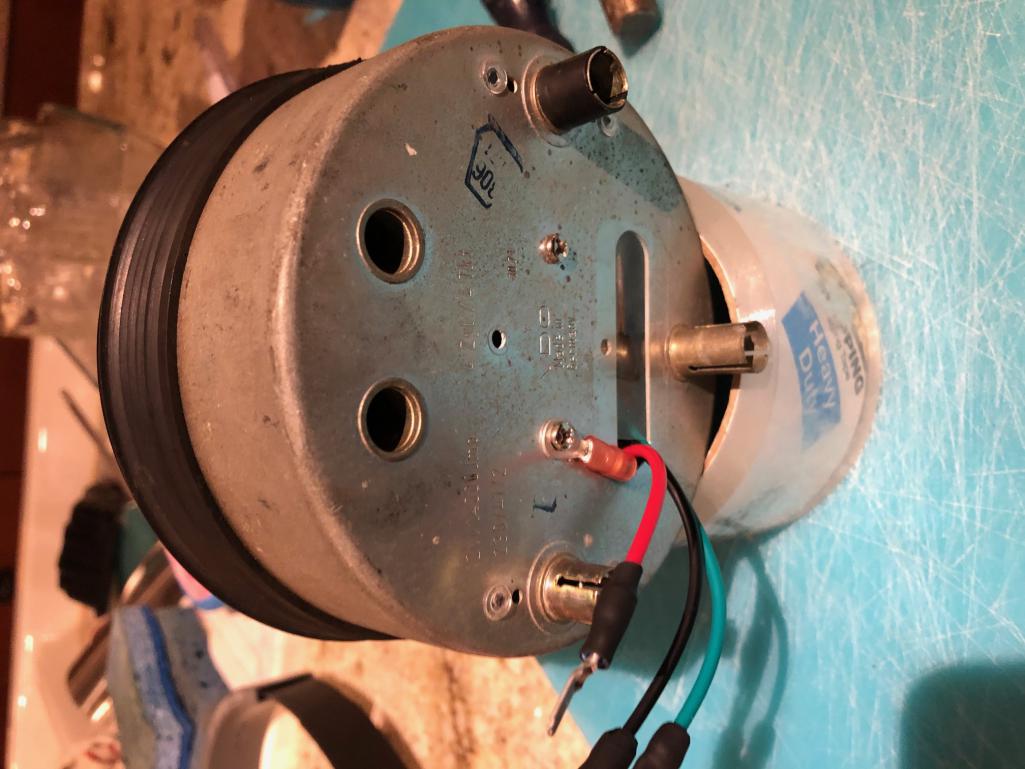 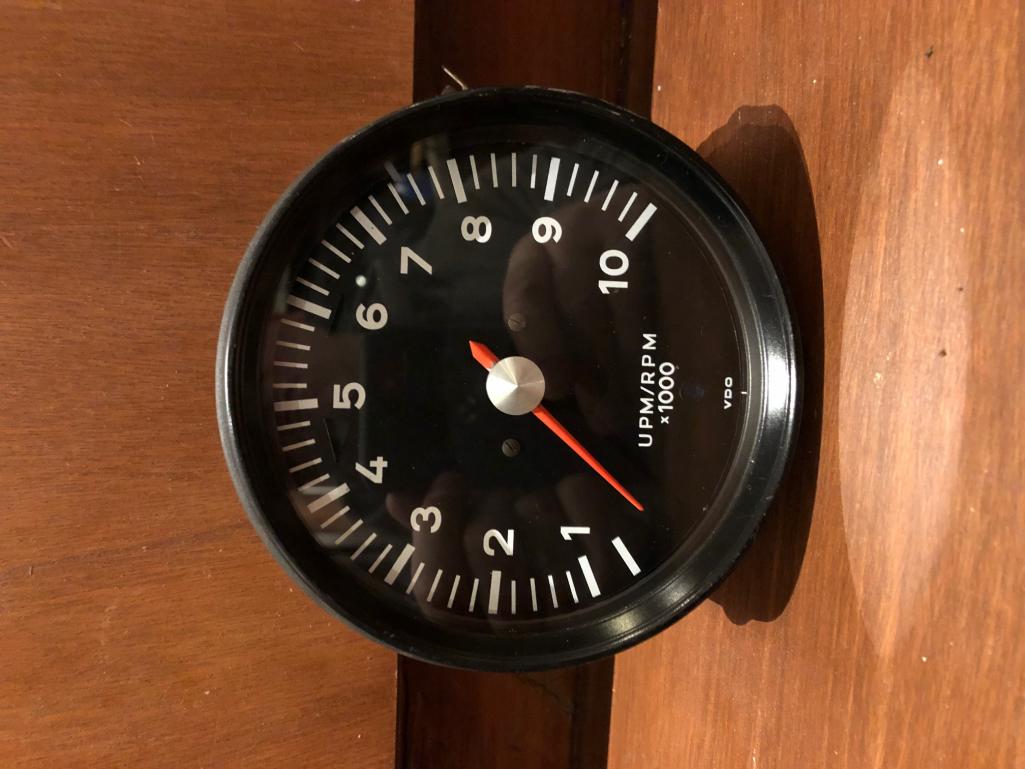 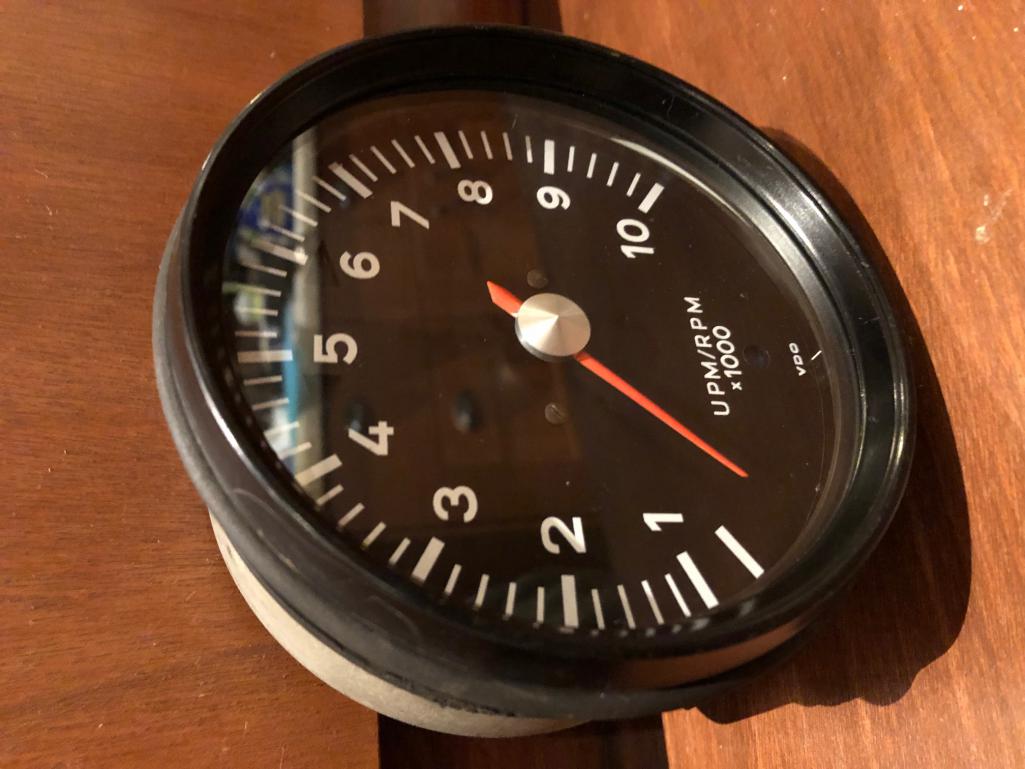 I also replaced the blue material for the high beam bulb - this had gotten opaque over the years. The L/R indicators were fine so I left those. If anyone can suggest an optimum method of removing the trim ring, that would help a lot - small screwdrivers and a lot of patience still did not prevent the occasional slip (and scratch!) when I tried it. I installed it in the car earlier today - I'll post pictures at some future point. Things I noted that add to, or were different to Tim’s instructions: 1) The aluminum adapter plate as spec’ed by Tim, worked perfectly; dimensions are nuts on (thanks Tim!) 2) In my case, I had to add extra washers between the back of the core unit and the casing to get the fascia to sit correctly depth-wise. The Heiler fascia is 2mm or so thick 3) I chose to use a VDO needle from an ’71 914 speedo (chrome dot) and found that it was a loose fit on the Bosch tach spindle. It certainly did not require drilling out. To hold it in place before final assembly I put a sliver of aluminum foil inside to ensure a snug fit 4) I soldered a wire on to the GND node of the PCB (where the black wire is attached) and took that out to an external lug to ensure the case shares the same GND as the tach core. This also gives the two illumination bulbs a GND path too So all in all, am very pleased with it. It looks the part and it is functional, has a well damped response and measures accurately. It did cost more than $100, but only just and MUCH less than an original, or a Palo Alto / Hollywood Speedometer custom order. Very happy with the result! |
|
|
|
Posts in this topic
Retroracer 10Krpm / 6-cyl chrome dot tach build Nov 17 2018, 07:29 PM Retroracer BTW - if someone can please tell me how to rotate ... Nov 17 2018, 07:44 PM
 porschetub
BTW - if someone can please tell me how to rotate... Nov 17 2018, 08:42 PM 914forme Excellent job, and yes you did it all the right wa... Nov 17 2018, 08:06 PM campbellcj Really cool, thanks for the write-up! Nov 18 2018, 09:16 AM TravisNeff Great job Tony! I appreciate the how to. Now... Nov 18 2018, 09:28 AM Retroracer
Now to understand what this generator thingy is a... Nov 18 2018, 10:07 AM Retroracer And installed:
Not the best picture, lots of ... Nov 18 2018, 03:21 PM mepstein
And installed:
Not the best picture, lots of... Nov 19 2018, 06:35 AM larryM of course - this assumes a need for a 10K tach
-... Nov 18 2018, 09:29 PM timothy_nd28 I like it, great job! I'm not sure if my ... Nov 19 2018, 12:26 PM bahnzai Tony,
What would it take to reset the Zero & 6... Dec 27 2018, 09:00 AM Retroracer
Tony,
What would it take to reset the Zero & ... Dec 27 2018, 10:53 AM 914forme :lol4: You really want to know how easy it is :ro... Dec 27 2018, 09:43 AM djway
:lol4: You really want to know how easy it is :r... Dec 27 2018, 09:12 PM bahnzai Guys,
Thank you both for the responses.
Stephen, I... Dec 27 2018, 03:56 PM
porschetub
BTW - if someone can please tell me how to rotate... Nov 17 2018, 08:42 PM 914forme Excellent job, and yes you did it all the right wa... Nov 17 2018, 08:06 PM campbellcj Really cool, thanks for the write-up! Nov 18 2018, 09:16 AM TravisNeff Great job Tony! I appreciate the how to. Now... Nov 18 2018, 09:28 AM Retroracer
Now to understand what this generator thingy is a... Nov 18 2018, 10:07 AM Retroracer And installed:
Not the best picture, lots of ... Nov 18 2018, 03:21 PM mepstein
And installed:
Not the best picture, lots of... Nov 19 2018, 06:35 AM larryM of course - this assumes a need for a 10K tach
-... Nov 18 2018, 09:29 PM timothy_nd28 I like it, great job! I'm not sure if my ... Nov 19 2018, 12:26 PM bahnzai Tony,
What would it take to reset the Zero & 6... Dec 27 2018, 09:00 AM Retroracer
Tony,
What would it take to reset the Zero & ... Dec 27 2018, 10:53 AM 914forme :lol4: You really want to know how easy it is :ro... Dec 27 2018, 09:43 AM djway
:lol4: You really want to know how easy it is :r... Dec 27 2018, 09:12 PM bahnzai Guys,
Thank you both for the responses.
Stephen, I... Dec 27 2018, 03:56 PM |
1 User(s) are reading this topic (1 Guests and 0 Anonymous Users)
0 Members:

|
Lo-Fi Version | Time is now: 2nd April 2026 - 09:03 AM |
Invision Power Board
v9.1.4 © 2026 IPS, Inc.