|
|

|
Porsche, and the Porsche crest are registered trademarks of Dr. Ing. h.c. F. Porsche AG.
This site is not affiliated with Porsche in any way. Its only purpose is to provide an online forum for car enthusiasts. All other trademarks are property of their respective owners. |
|
|
| Medtner3 |
 Oct 4 2020, 07:49 AM Oct 4 2020, 07:49 AM
Post
#1
|
|
Member   Group: Members Posts: 187 Joined: 7-July 20 From: Cedar Park Member No.: 24,467 Region Association: None |
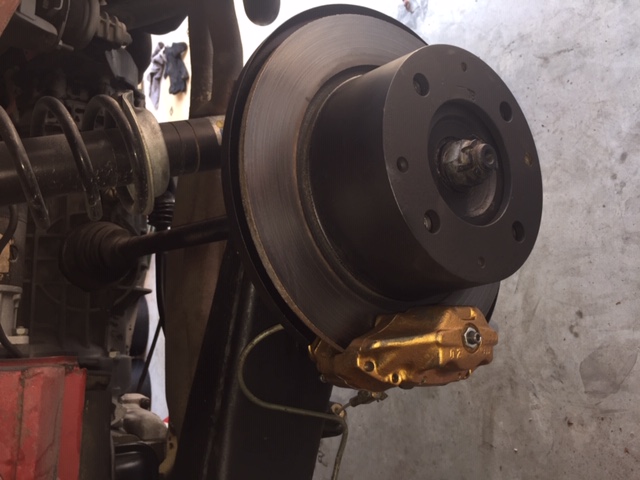
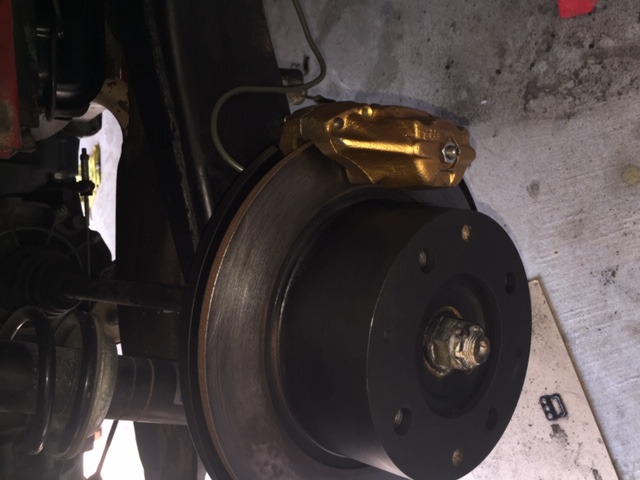
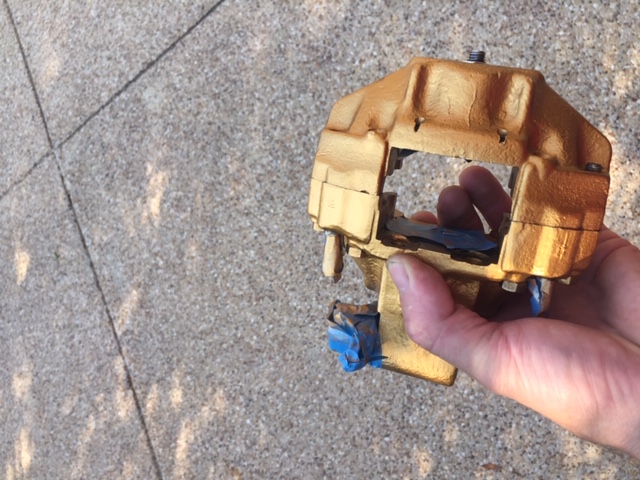
Just rebuilt my rear calipers with seals from PMB Performance. Using a vacuum brake bleeder I started with the right rear caliper lower bleeder screw ( I have two screws) and initially pulled about an inch of brake fluid with lots of bubbles and then zip. I get zero brake fluid now.
What could cause this? I have no signs of any leaks and the brakes were not bad before I rebuilt the calipers. I read somewhere that I might need to bleed the proportioning valve or even pump into the caliper some brake fluid through the top bleeder ? I ordered a Motive pressure bleeder which arrives in a few days Attached image(s)   
|
  |
Replies
| davep |
 Oct 4 2020, 08:55 AM Oct 4 2020, 08:55 AM
Post
#2
|
|
914 Historian      Group: Benefactors Posts: 5,300 Joined: 13-October 03 From: Burford, ON, N0E 1A0 Member No.: 1,244 Region Association: Canada  |
On a caliper with two bleed nipples, the top is the bleed, and the bottom is a drain; only bleed with the top nipple. Air bubbles rise you know.
When bleeding the system, keep checking the reservoir to be sure it is full by removing the cap and looking down inside. The reservoir is divided by a half barrier into front & rear so an external glance may not reveal that the other half is empty. If a half does empty, then you will have to do a long bleed to ensure any air introduced at the reservoir is removed. Pedal bleeding ensures that high pressure is able to be achieved, and it also crushes bubbles and helps them move through the system; keeping them from being trapped within things like the pressure regulator. So I like to finish a bleed with pedal bleeding after using either a vacuum bleed or an air pressure bleed method. |
| Medtner3 |
 Oct 4 2020, 11:51 AM Oct 4 2020, 11:51 AM
Post
#3
|
|
Member   Group: Members Posts: 187 Joined: 7-July 20 From: Cedar Park Member No.: 24,467 Region Association: None |
On a caliper with two bleed nipples, the top is the bleed, and the bottom is a drain; only bleed with the top nipple. Air bubbles rise you know. When bleeding the system, keep checking the reservoir to be sure it is full by removing the cap and looking down inside. The reservoir is divided by a half barrier into front & rear so an external glance may not reveal that the other half is empty. If a half does empty, then you will have to do a long bleed to ensure any air introduced at the reservoir is removed. Pedal bleeding ensures that high pressure is able to be achieved, and it also crushes bubbles and helps them move through the system; keeping them from being trapped within things like the pressure regulator. So I like to finish a bleed with pedal bleeding after using either a vacuum bleed or an air pressure bleed method. Okay the first problem was my master went dry because it was so discolored from ATE super blue that I thought it had fluid. How do I bleed now .. do I need to bleed the master? |
| iankarr |
 Oct 4 2020, 12:08 PM Oct 4 2020, 12:08 PM
Post
#4
|
|
The wrencher formerly known as Cuddy_K     Group: Members Posts: 2,567 Joined: 22-May 15 From: Heber City, UT Member No.: 18,749 Region Association: Intermountain Region 
|
On a caliper with two bleed nipples, the top is the bleed, and the bottom is a drain; only bleed with the top nipple. Air bubbles rise you know. When bleeding the system, keep checking the reservoir to be sure it is full by removing the cap and looking down inside. The reservoir is divided by a half barrier into front & rear so an external glance may not reveal that the other half is empty. If a half does empty, then you will have to do a long bleed to ensure any air introduced at the reservoir is removed. Pedal bleeding ensures that high pressure is able to be achieved, and it also crushes bubbles and helps them move through the system; keeping them from being trapped within things like the pressure regulator. So I like to finish a bleed with pedal bleeding after using either a vacuum bleed or an air pressure bleed method. Okay the first problem was my master went dry because it was so discolored from ATE super blue that I thought it had fluid. How do I bleed now .. do I need to bleed the master? I would. Since it's gone dry, i'd just start from scratch... – Bleed the master (in the car is fine...see video link above). Use pedal only...and put a block or something down to make sure you don't hyper-extend the pedal and damage the seals inside the MC). When no bubbles are coming through... – Put a quart of fluid in the motive, hook it up and pressurize to 5-10 PSI. Use a rubber mallet to rap on the caliper and dislodge air bubbles while bleeding. – Bleed from the top screws LR, RR, RF, LF. – Finish with a pedal bleed all the way around. If you don't have a firm pedal, do it again until you do. If it's firm enough to drive, but not perfect, that's kind of typical. Just carefully drive it on a bumpy road for a bit, then bleed again. Good luck and be safe! |
| Medtner3 |
 Oct 6 2020, 04:28 PM Oct 6 2020, 04:28 PM
Post
#5
|
|
Member   Group: Members Posts: 187 Joined: 7-July 20 From: Cedar Park Member No.: 24,467 Region Association: None |
On a caliper with two bleed nipples, the top is the bleed, and the bottom is a drain; only bleed with the top nipple. Air bubbles rise you know. When bleeding the system, keep checking the reservoir to be sure it is full by removing the cap and looking down inside. The reservoir is divided by a half barrier into front & rear so an external glance may not reveal that the other half is empty. If a half does empty, then you will have to do a long bleed to ensure any air introduced at the reservoir is removed. Pedal bleeding ensures that high pressure is able to be achieved, and it also crushes bubbles and helps them move through the system; keeping them from being trapped within things like the pressure regulator. So I like to finish a bleed with pedal bleeding after using either a vacuum bleed or an air pressure bleed method. Okay the first problem was my master went dry because it was so discolored from ATE super blue that I thought it had fluid. How do I bleed now .. do I need to bleed the master? I would. Since it's gone dry, i'd just start from scratch... – Bleed the master (in the car is fine...see video link above). Use pedal only...and put a block or something down to make sure you don't hyper-extend the pedal and damage the seals inside the MC). When no bubbles are coming through... – Put a quart of fluid in the motive, hook it up and pressurize to 5-10 PSI. Use a rubber mallet to rap on the caliper and dislodge air bubbles while bleeding. – Bleed from the top screws LR, RR, RF, LF. – Finish with a pedal bleed all the way around. If you don't have a firm pedal, do it again until you do. If it's firm enough to drive, but not perfect, that's kind of typical. Just carefully drive it on a bumpy road for a bit, then bleed again. Good luck and be safe! I bled the Master using your video as a guide. Then I bled with the Motive pressure bleeder and very few air bubbles came out. My pedal is firm but not hard. I have not pedal bled yet. I was thinking test drive around then bleed again with the Motive pressure bleeder. It only pressurizes to 5-6 psi I wonder if that is 914 specific or whether mine is defective although seemed to work |
| Olympic 914 |
 Oct 6 2020, 06:42 PM Oct 6 2020, 06:42 PM
Post
#6
|
   Group: Members Posts: 1,745 Joined: 7-July 11 From: Pittsburgh PA Member No.: 13,287 Region Association: North East States 
|
It only pressurizes to 5-6 psi I wonder if that is 914 specific or whether mine is defective although seemed to work Are you pressurizing the Motive bottle before opening the bleeder screw? or opening the screw then pumping the Motive handle. I usually pump up to 7-10 lbs then open the bleeder. The reason you should not pump it to more than 10 lbs is that the lines from the reservoir to the master are attached with hose clamps on rubber hoses and can blow off under high pressure. |
| Medtner3 |
 Oct 6 2020, 06:47 PM Oct 6 2020, 06:47 PM
Post
#7
|
|
Member   Group: Members Posts: 187 Joined: 7-July 20 From: Cedar Park Member No.: 24,467 Region Association: None |
It only pressurizes to 5-6 psi I wonder if that is 914 specific or whether mine is defective although seemed to work Are you pressurizing the Motive bottle before opening the bleeder screw? or opening the screw then pumping the Motive handle. I usually pump up to 7-10 lbs then open the bleeder. The reason you should not pump it to more than 10 lbs is that the lines from the reservoir to the master are attached with hose clamps on rubber hoses and can blow off under high pressure. I have the bleeders closed and it goes to about 6 psi have not tied to pump it much higher it stalls there |
Posts in this topic
 Medtner3 Brake bleeding Oct 4 2020, 07:49 AM
 mlindner Chances are the brake fluid drained out of the mas... Oct 4 2020, 08:06 AM

 Medtner3
Chances are the brake fluid drained out of the ma... Oct 4 2020, 08:25 AM
 mlindner Yes I would try the fronts first...I know that is ... Oct 4 2020, 08:36 AM

 Medtner3
Yes I would try the fronts first...I know that is... Oct 4 2020, 08:42 AM

 Medtner3
[quote name='Medtner3' post='2856582' date='Oct 4... Oct 4 2020, 01:42 PM

 iankarr
[quote name='Olympic 914' post='2857140' date='Oc... Oct 6 2020, 07:59 PM
 Tdskip The other thing that I would add is that for whate... Oct 4 2020, 10:55 AM
 iankarr I like to use pressure (motive @ 5-10 psi) followe... Oct 4 2020, 11:12 AM
 rhodyguy Get some speed bleeders. One for each caliper. Ins... Oct 4 2020, 12:05 PM

 Gint Get some speed bleeders. One for each caliper. Ins... Oct 6 2020, 04:45 PM
 Amphicar770 I had no luck vacuum bleeding the 914, couldn... Oct 6 2020, 05:19 PM

 Medtner3
I had no luck vacuum bleeding the 914, couldn... Oct 6 2020, 06:49 PM
 rjames I could never get the brakes bled properly until I... Oct 7 2020, 11:07 AM

 Medtner3
I could never get the brakes bled properly until ... Oct 9 2020, 05:17 PM
 draganc Assuming you are not in a rush to drive the car I ... Oct 8 2020, 05:38 PM
 Medtner3 Damaged master cylinder or impatient? I put on spe... Oct 8 2020, 07:13 PM
 davep Have you correctly set the venting clearance on th... Oct 8 2020, 08:09 PM

 Medtner3
Have you correctly set the venting clearance on t... Oct 9 2020, 07:27 AM

 Gint Have you correctly set the venting clearance on th... Oct 10 2020, 09:55 AM

 Medtner3
[quote name='Medtner3' post='2857647' date='Oct 9... Oct 11 2020, 08:30 PM
 Medtner3 UPDATE: Pedal bled four times have a pedal now it... Oct 9 2020, 05:19 PM
 Frankvw I understans it is very frustrating yes. Keep up t... Oct 10 2020, 06:44 AM
 davep http://www.914world.com/bbs2/index.php?showtopic=3... Oct 10 2020, 09:27 PM
 mb911 Kind of have the same issue.. The entire brake sys... Oct 11 2020, 06:36 AM
 iankarr
Kind of have the same issue.. The entire brake sy... Oct 11 2020, 07:08 AM
 mb911
Kind of have the same issue.. The entire brake s... Oct 11 2020, 07:10 AM
 Medtner3
[quote name='iankarr' post='2858075' date='Oct 11... Oct 11 2020, 08:31 PM
 Medtner3
[quote name='iankarr' post='2858075' date='Oct 1... Oct 11 2020, 08:33 PM
  |
1 User(s) are reading this topic (1 Guests and 0 Anonymous Users)
0 Members:

|
Lo-Fi Version | Time is now: 1st August 2025 - 02:14 PM |
Invision Power Board
v9.1.4 © 2025 IPS, Inc.


