|
|
|
Porsche, and the Porsche crest are registered trademarks of Dr. Ing. h.c. F. Porsche AG.
This site is not affiliated with Porsche in any way. Its only purpose is to provide an online forum for car enthusiasts. All other trademarks are property of their respective owners. |
|
|


| DaveB |
 Jul 10 2023, 01:41 AM Jul 10 2023, 01:41 AM
Post
#1
|
|
Member  Group: Members Posts: 173 Joined: 25-November 21 From: Portland, Oregon Member No.: 26,107 Region Association: Pacific Northwest |
A while ago I posted a fit check I was doing on the front suspension. The geometry was off I ended up ordering the P863 jig to get everything aligned. The jig confirmed a suspension alignment problem. The jig partially fits. I'm replacing the frunk floor pan and A-arm suspension mounts, so I wanted to get the body adjusted around the other mounting points since they shifted.
This is the first issue with the suspension. 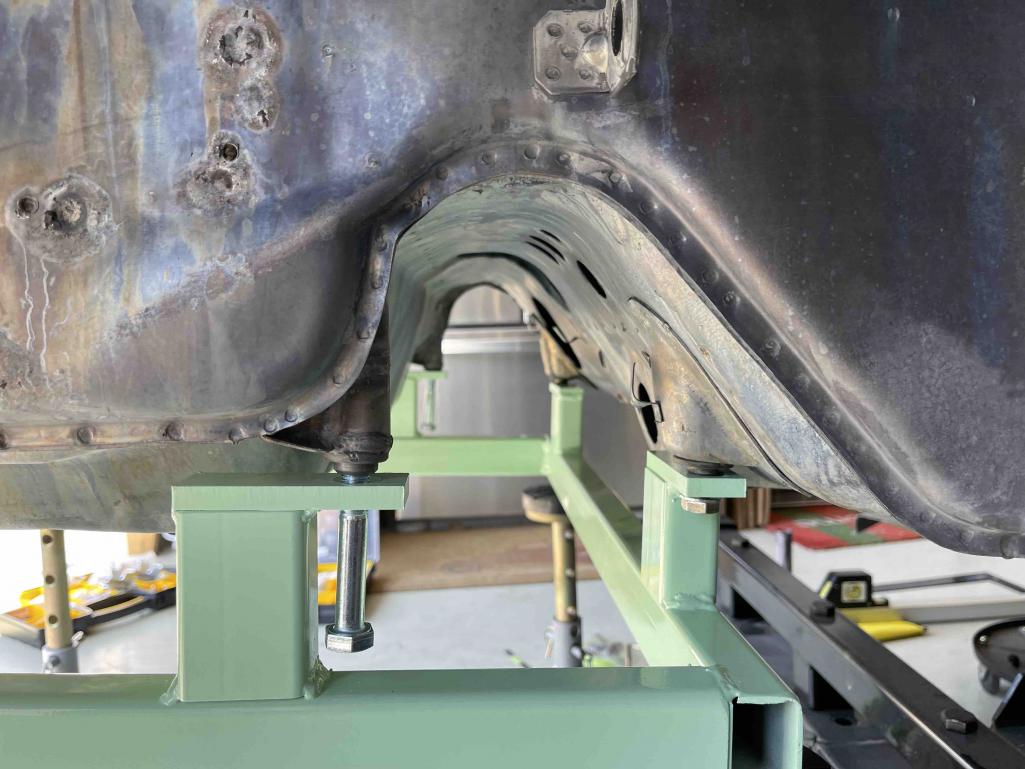 My guess is a PO drove over something which damaged the A-arm and press the floor pan in on the driver side. The area beside the crease is pushed out about 1/2". The rear mount for the cross member is off by a few mm. 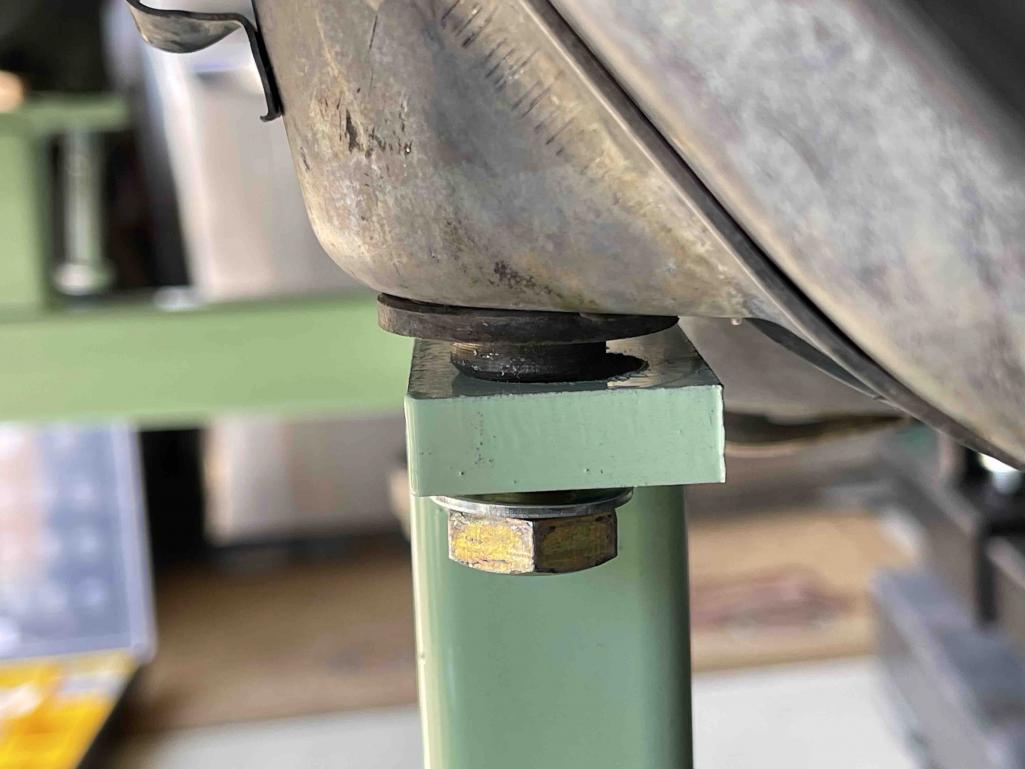 My plan was to planish out the damage to see if this would get the driver side mounting points aligned. I go inside the frunk to figure out how to on-dolly some of the fixes. The sun hits the inside wheel well and notice it looks like a golfball. The course sandpaper is where the PO had used bondo. It was everywhere. It covered a crease and smoothed out all the crappy sheet metal work. 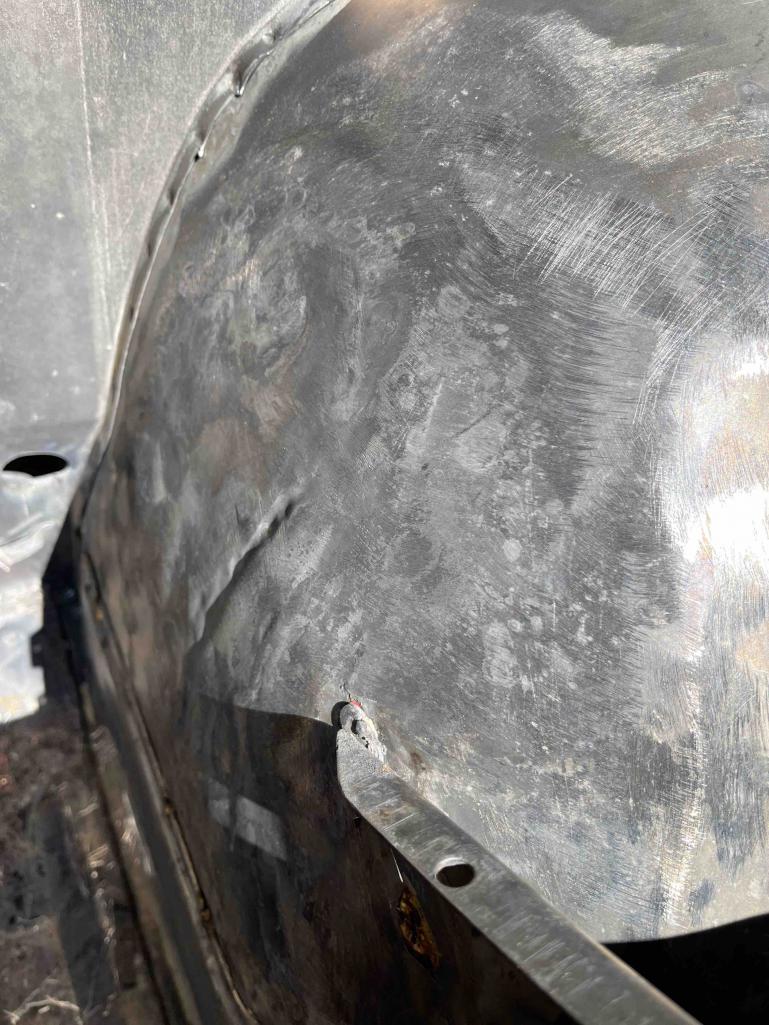  I was able to get a hoop into the wheel well to planish and stretch out most of the damage. It doesn't take that much work to get it straight instead of using a quart of plastic filler. 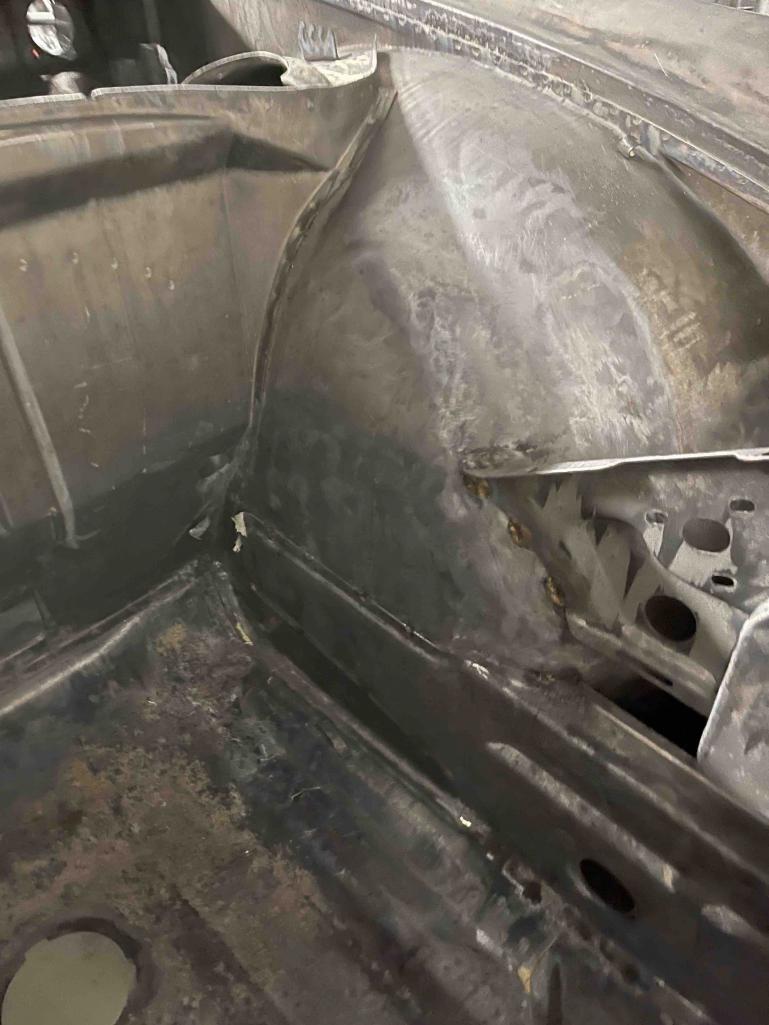 After roughing out the inner wheel well and straightening out the damage, the rear mounting points on the driver side moved to the correct position. 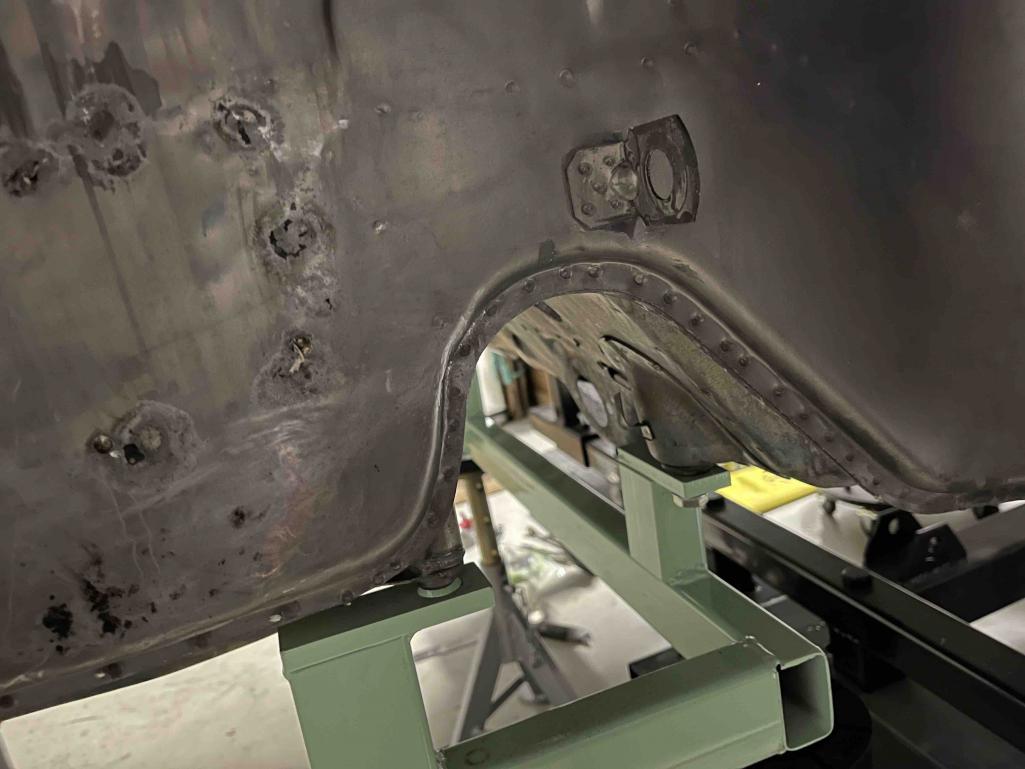 Under the car it looks like this was used for rock climbing. It's really beaten up but most of the key measurements are in line with the workshop manual. This was a good day verifying that that the front alignment drops into the correct position after straightening the sheet metal. I'll tackle the passenger side next week. I am curious, would most 914 front ends fit the alignment jig after 50 years? DaveB |
   |

 
|
  |
Replies
| DaveB |
Jul 10 2023, 11:17 AM
Post
#2
|
|
Member Group: Members Posts: 173 Joined: 25-November 21 From: Portland, Oregon Member No.: 26,107 Region Association: Pacific Northwest |
QUOTE(rhodyguy @ Jul 10 2023, 06:43 AM)  ‘Oil canning’. HARD IMPACT! Hard Impact should be the nick name for this car. (IMG:style_emoticons/default/biggrin.gif) It has oil canning on the rear left quarter panel too. This car has been through a lot over its life. Some good repairs, others repairs look like alcohol was involved. QUOTE(76-914 @ Jul 10 2023, 07:21 AM) Impressive. Wasn't aware there was a jig available and probably don't want to know the cost of one. I would like to see a pic of that loop. Great work. A lot of these cars saw insurance style body repairs by non qualified personnel or a hack like me. (IMG:style_emoticons/default/beerchug.gif) I've used a Pullmax and decided to finally get a Milwaukee based set-up from the Tinman. The 30" hoop was the only one that had the reach I needed. It's big ass heavy hoop I used is for large bench work. it did a great job but it was awkward. I was going to rough it out by hand but I couldn't reach around the inner and outer wheel well with a hammer and dolly. Plus the garage was open and it looked like I was humping the left fender. I cut out a template using the right side 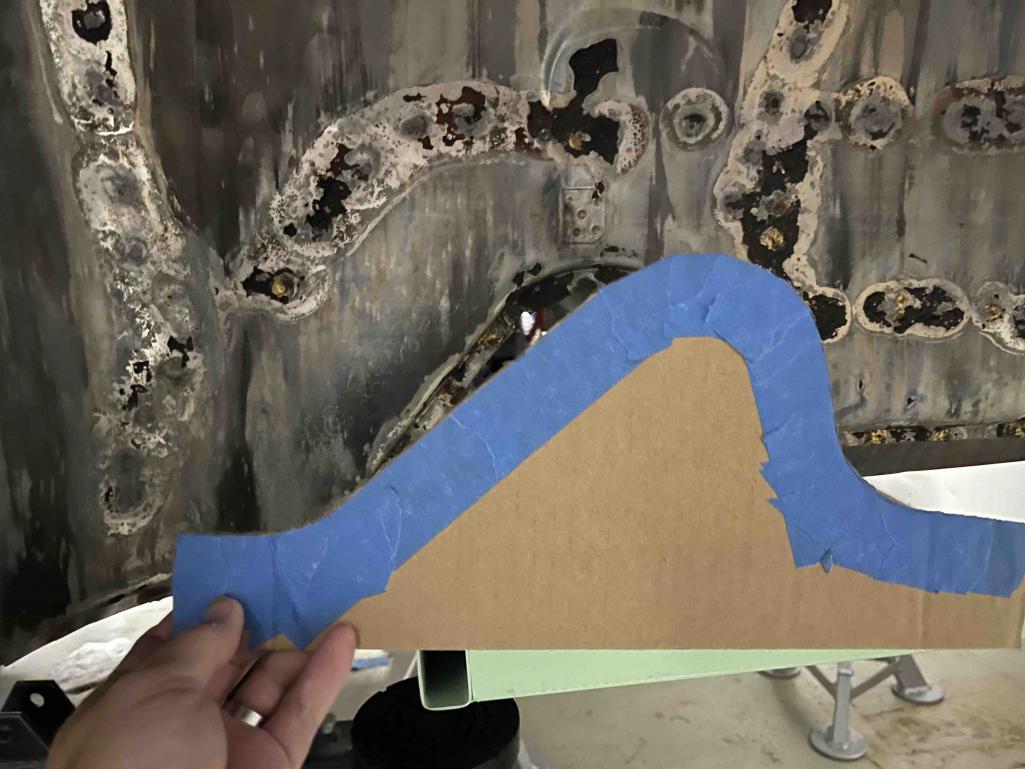 Measured the right inner fender to get the radius die. Started at 0 then move to the 24. 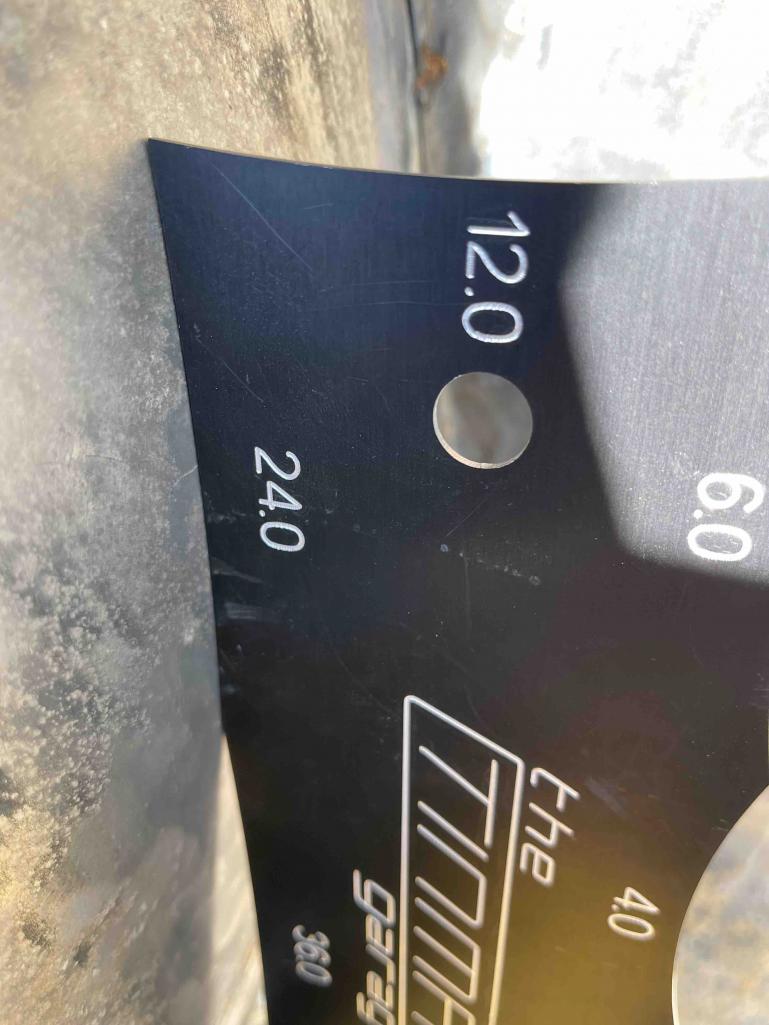 These are the upper and lower dies 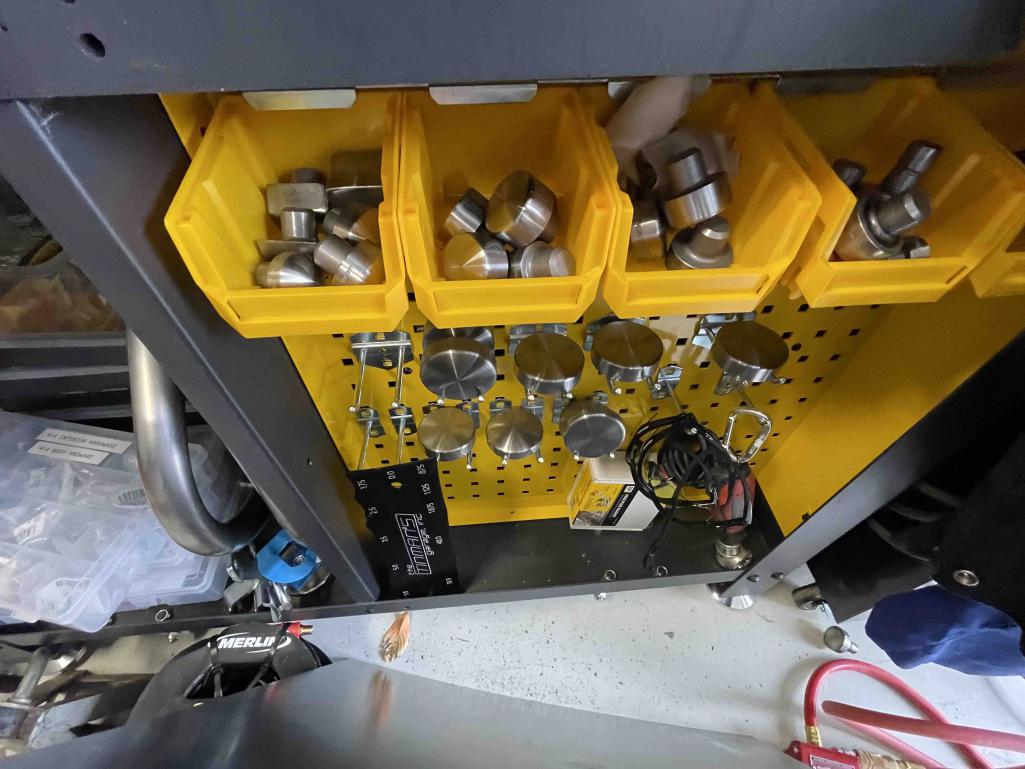 And this is the 30" hoop. I used a 2.5" die on top initially and then went down to my smaller die as I worked the transitions and corners from a 0 radius to the 24 curve. I'm still trying to get this 30" hoop dialed-in since the dies have to be locked a lot tighter to remove the flex from the hoop. 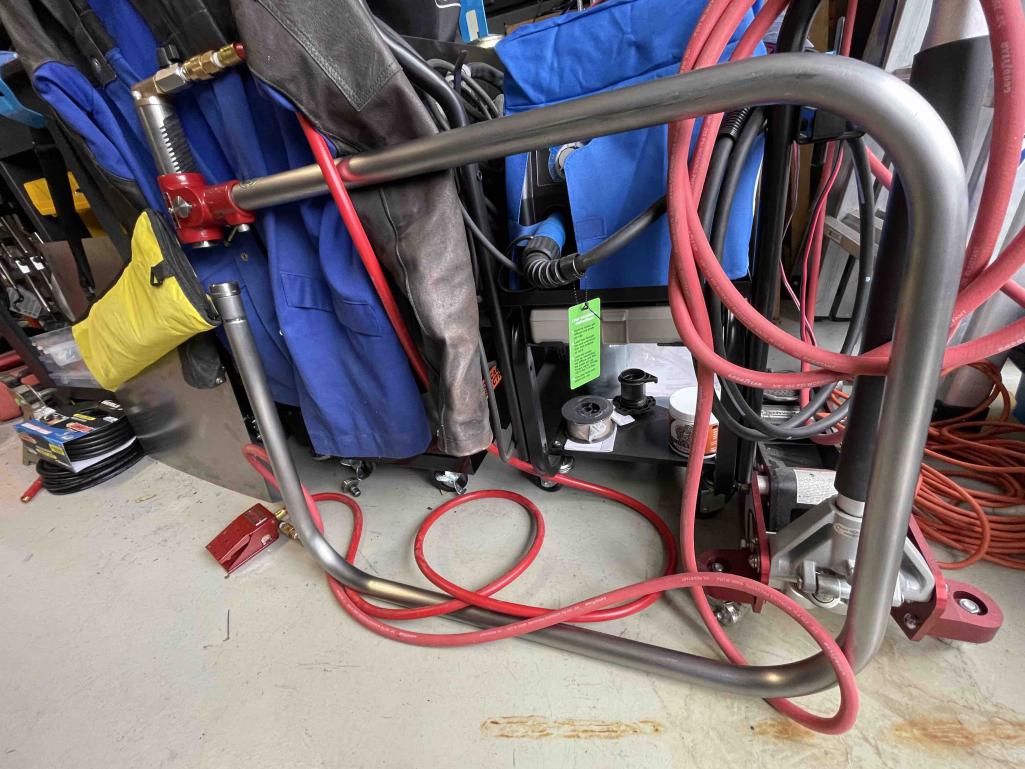 When I cut out the floor pan I'll go in with the smaller hoops and get it finished. These hand held hoops are worth the investment. The quality and control of finished metal on the car is a magnitude better than my hand work. These are the two smaller hoops I've been using on body work. 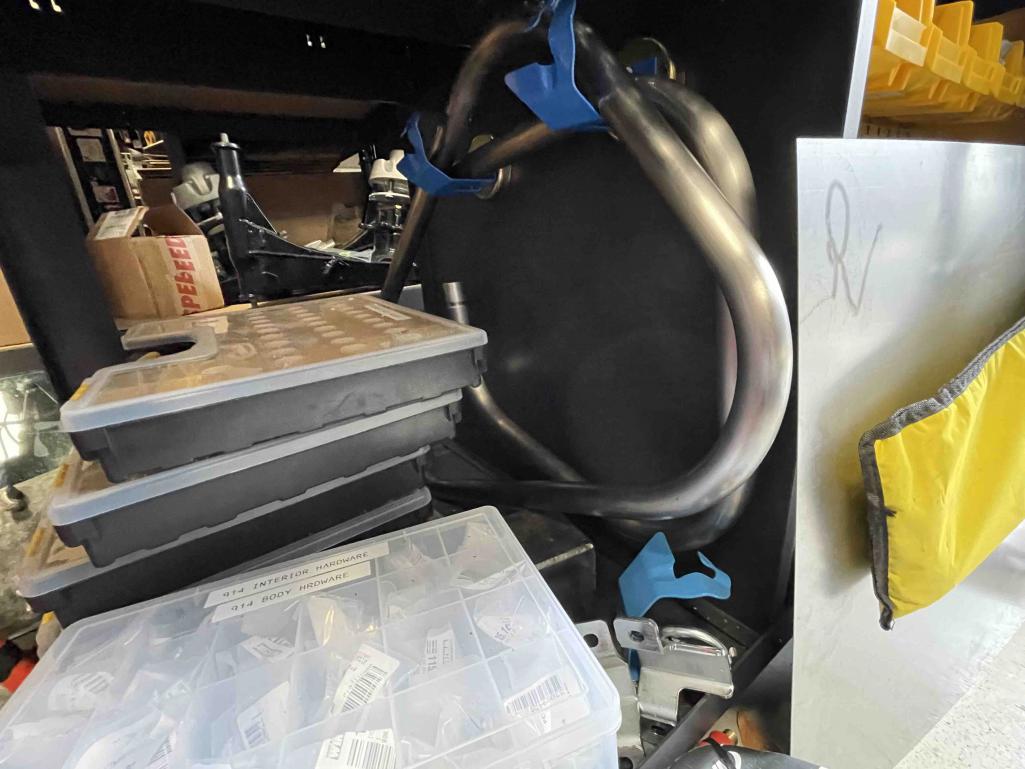 I realized the picture of the hoops under my welding cart are like a "Where's Waldo" for 914 stuff. I was tired and just put stuff back in the right location. You can see the interior hardware kit from George at AA. I've got the towing hooks from Tangerine Racing. They will go on the final car, but if the body needed a frame adjustment, I was going to use these to pull the front. All my metric nuts and bolts for the body from McMaster Carr in the middle boxes. Rear trailing arms rebuilt by PMB on the shelf behind the cart. SpeedHut dials in the Peeed box to replace the 914 dials. And Harbor freight magnetic welding holders. I use these to organize everything I want to grab near the car. QUOTE(dr914@autoatlanta.com @ Jul 10 2023, 08:11 AM) really really great work. Please where did you get the jig? 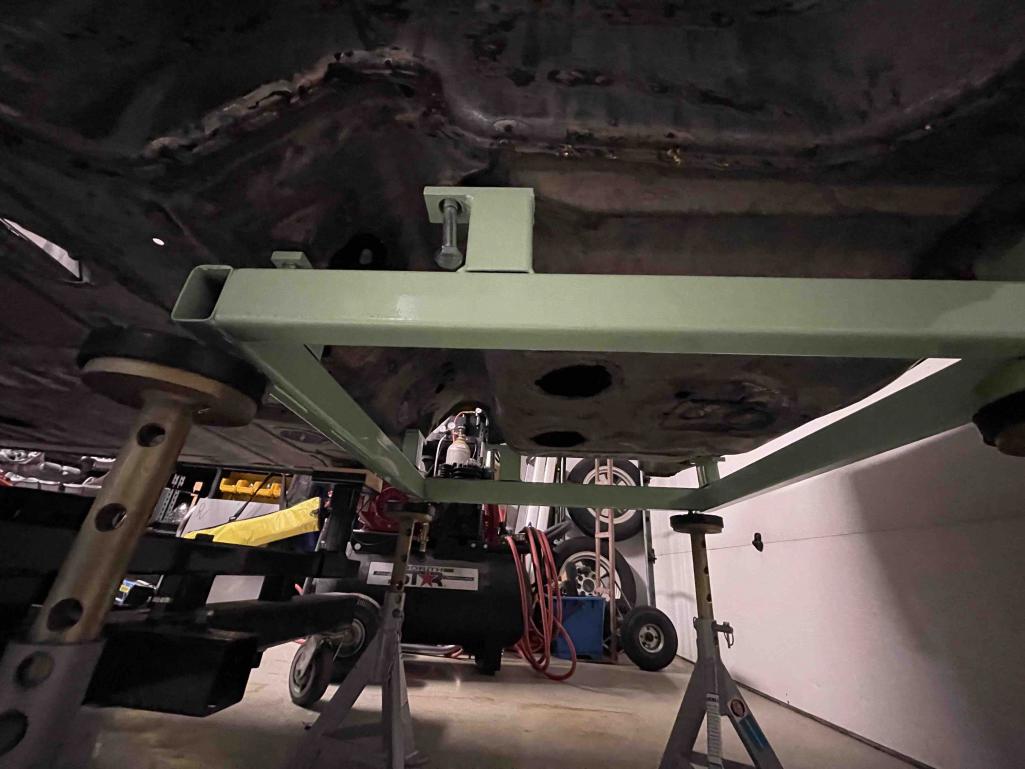 I got the jig from Stoddard. The measurements in the 914 shop manual didn't give me enough information to build this jig. For example, the front bolt for the A-arm mount uses a 5" bolt screwed so the head is 4.09" and then this is measured to a center point on the body pan. Exact location of the hole on the body was a mystery. I tried to find someone with a Celette table and 911 kit to get measurements but that didn't work out. Thanks for all the feedback, DaveB |
|
|
|
Posts in this topic
 DaveB Front alignment, bondo and a jig. Jul 10 2023, 01:41 AM
 930cabman DAPO
We need to remember our 914's were entry... Jul 10 2023, 05:02 AM mepstein Nice work :beer2: Jul 10 2023, 06:09 AM rhodyguy ‘Oil canning’. HARD IMPACT! Jul 10 2023, 07:43 AM 76-914 Impressive. Wasn't aware there was a jig avail... Jul 10 2023, 08:21 AM krazykonrad That's some impressive work! :beer2: Jul 10 2023, 08:27 AM dr914@autoatlanta.com really really great work. Please where did you ge... Jul 10 2023, 09:11 AM
930cabman DAPO
We need to remember our 914's were entry... Jul 10 2023, 05:02 AM mepstein Nice work :beer2: Jul 10 2023, 06:09 AM rhodyguy ‘Oil canning’. HARD IMPACT! Jul 10 2023, 07:43 AM 76-914 Impressive. Wasn't aware there was a jig avail... Jul 10 2023, 08:21 AM krazykonrad That's some impressive work! :beer2: Jul 10 2023, 08:27 AM dr914@autoatlanta.com really really great work. Please where did you ge... Jul 10 2023, 09:11 AM
 SirAndy
really really great work. Please where did you g... Jul 10 2023, 10:59 AM 930cabman I would let DaveB work on any of my machines any d... Jul 10 2023, 01:25 PM
SirAndy
really really great work. Please where did you g... Jul 10 2023, 10:59 AM 930cabman I would let DaveB work on any of my machines any d... Jul 10 2023, 01:25 PM |
1 User(s) are reading this topic (1 Guests and 0 Anonymous Users)
0 Members:

|
Lo-Fi Version | Time is now: 2nd April 2026 - 09:48 AM |
Invision Power Board
v9.1.4 © 2026 IPS, Inc.