|
|
|
Porsche, and the Porsche crest are registered trademarks of Dr. Ing. h.c. F. Porsche AG.
This site is not affiliated with Porsche in any way. Its only purpose is to provide an online forum for car enthusiasts. All other trademarks are property of their respective owners. |
|
|


| Spoke |
 Dec 18 2025, 10:06 PM Dec 18 2025, 10:06 PM
Post
#1
|
|
Jerry  Group: Members Posts: 7,293 Joined: 29-October 04 From: Allentown, PA Member No.: 3,031 Region Association: None |
During a recent build of 914 foglights I decided to take pictures of each step and post them on the Spokeworks Facebook page. The 914 and 911 foglights are the most labor intensive LED assemblies we do and one of the few products which use small (2.7x2.7mm) high power surface mount LEDs. The assemblies also include a massive heat sink, 350ma dc/dc converter, and LED lenses w/frames.
Doing a build is more efficient if several sets are done at once although I've assembled a single set when time was critical for the customer. For this build, I will assemble 4 sets (8 boards). First up is to set the boards aside. 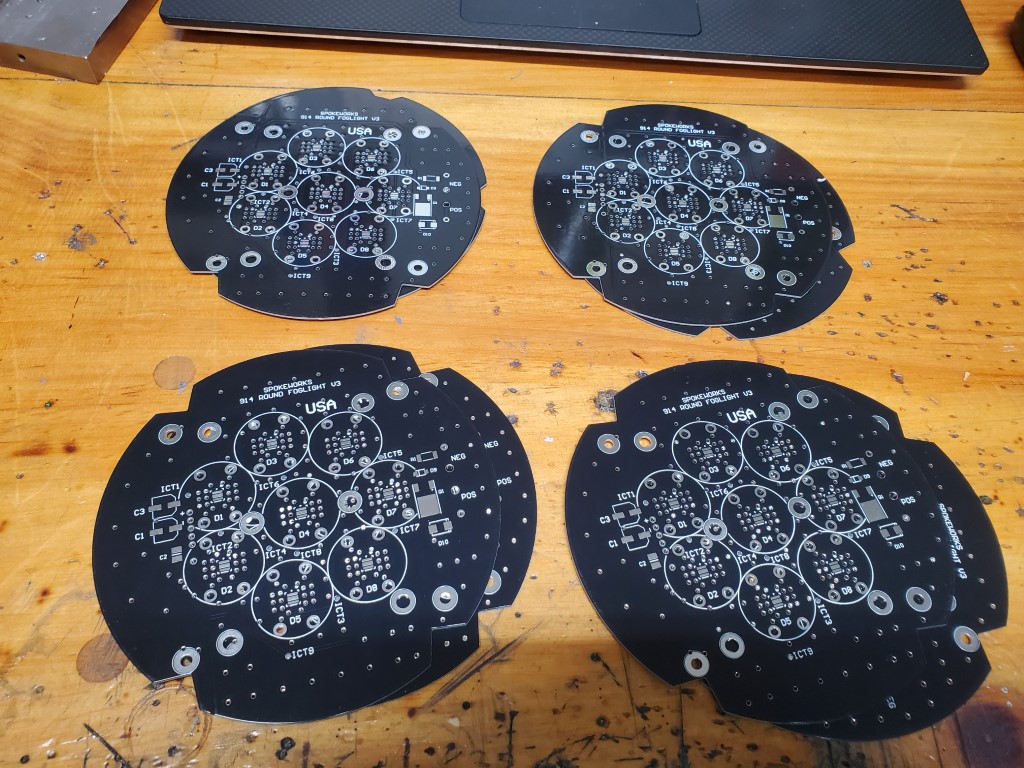 The build has 2 solder processes: - surface mount parts will be placed with solder paste and soldered in an IR oven - Through hole parts include the dc/dc converter and connection wires soldered by hand The surface mount parts are done first. The correct number of components for the eight boards are selected. This step is a pain as the exact number of parts must be pulled from the tape for each component.  The solder paste is put down with a solder paste dispenser by I-extruder. For large components a simple syringe could be used but the tiny LEDs are very sensitive to the amount of paste set down. The dispenser allows adjustment of pressure and duration from 1 to 99. For the LEDs, the settings for both are 1. For the other components the settings are 99. 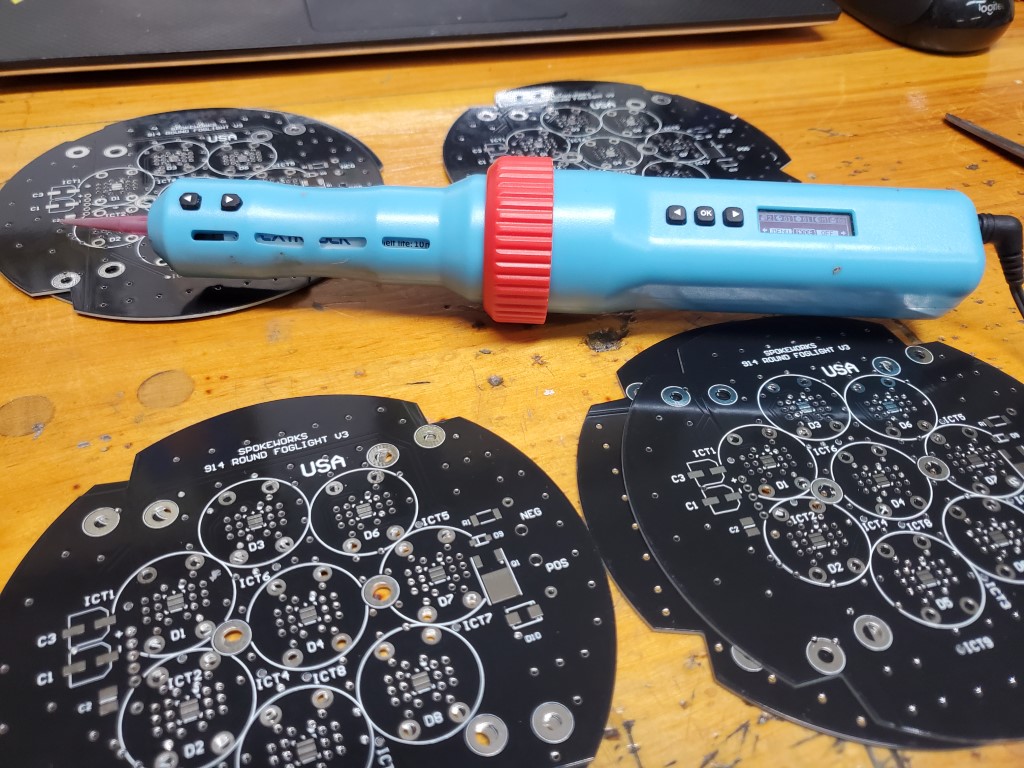 First the paste for the LEDs is put down with pressure and duration both set to 1. 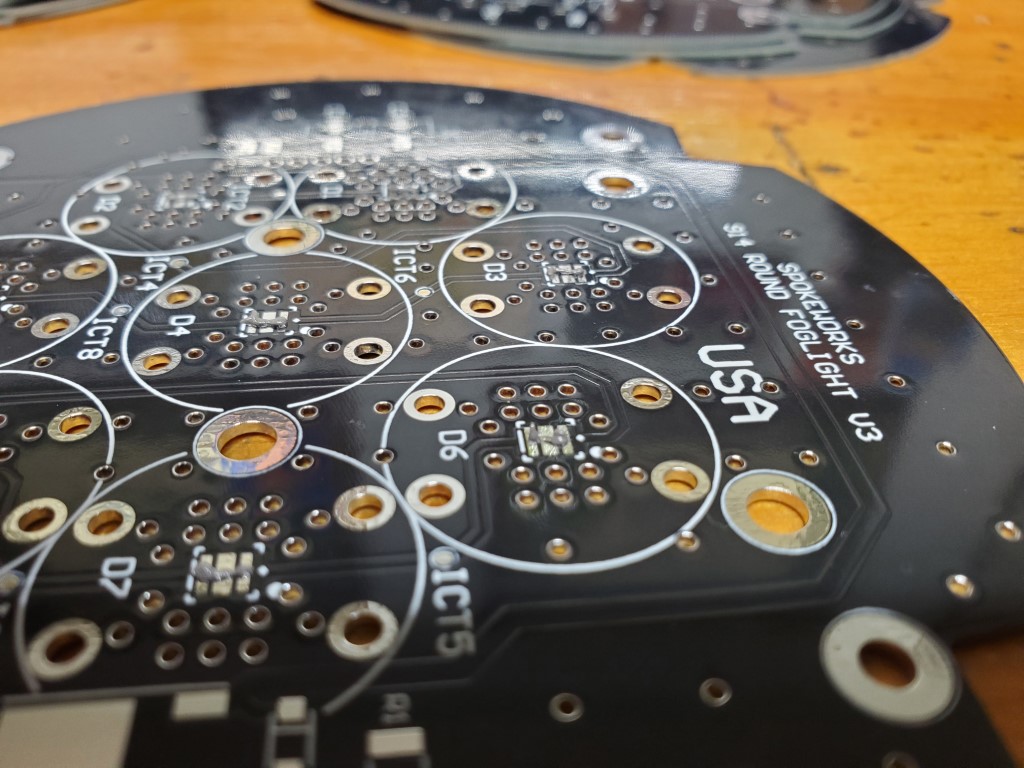 Here's a close-up of one of the LEDs. If too much paste is put down, the paste may puddle under the LED and short out the pads or cause the LED to sit crooked. The center pad is ground for heat removal. The array of vias reduce the thermal resistance of the FR4 board to the heat sink on the bottom of the board. 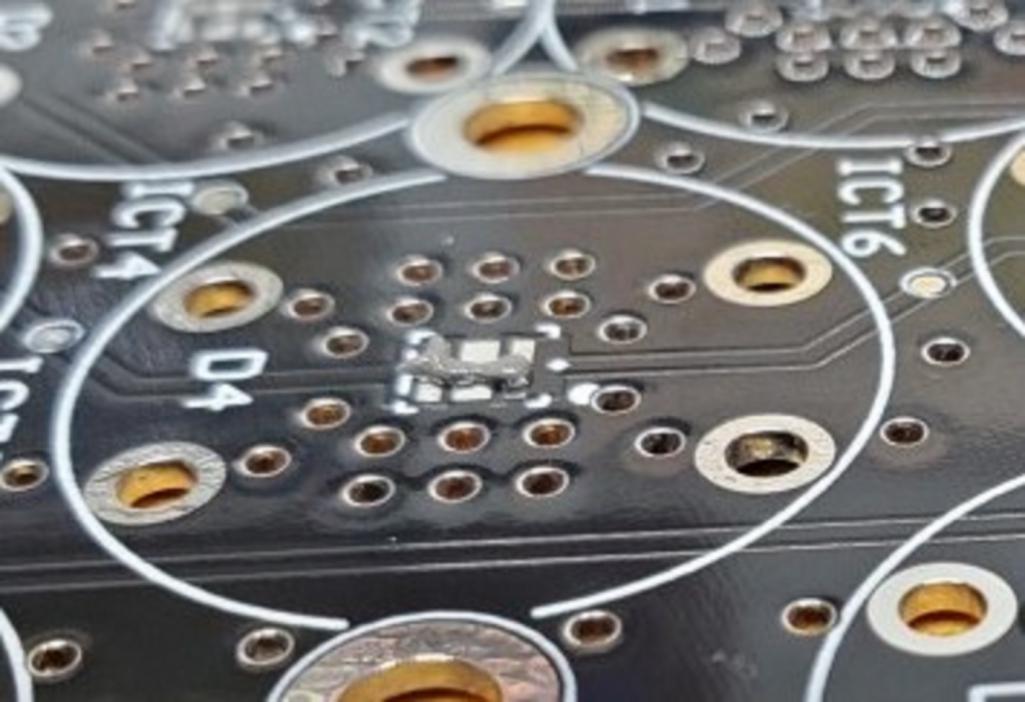 After the LED paste is down, then set the dispenser to 99 for the rest of the components. The paste is not very obvious in the picture although a zig zag of paste can be seen on the Q1 MOSFET pad at the bottom. 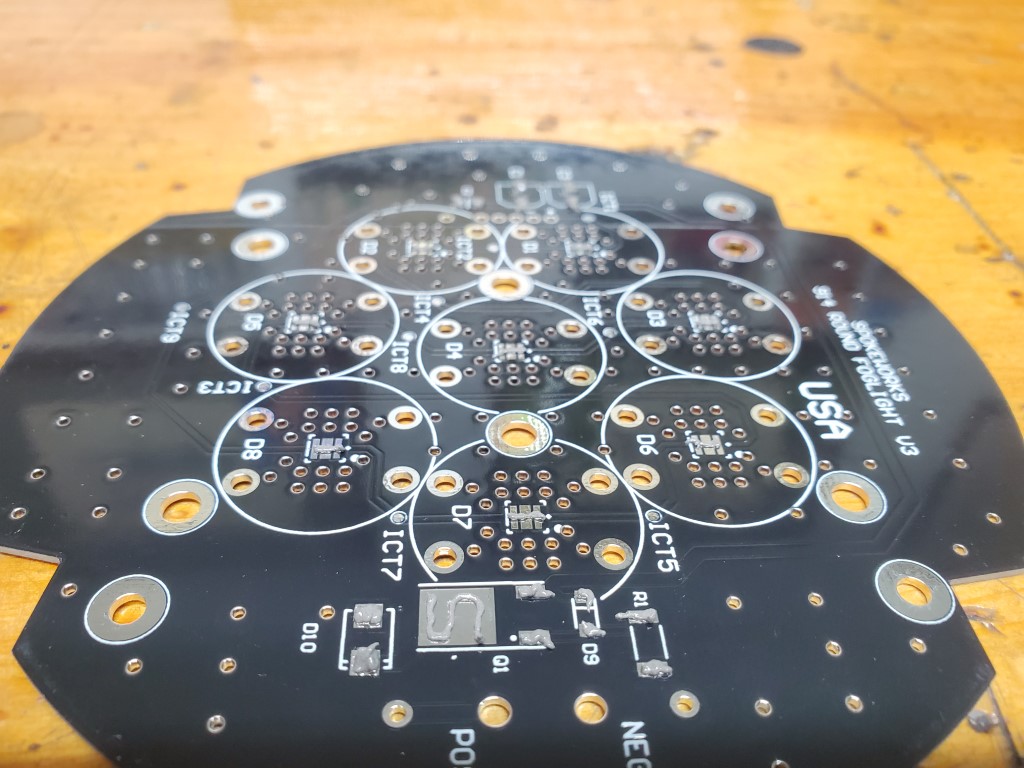 Once all the paste is down on every board, components are selected one board at a time. First step is to place the component near where they will go.  The next step is to place each component on its footprint with a set of tweezers.  All the surface mount components are on their footprints. The paste acts a bit like weak glue and the components will not move but can be easily bumped if not careful. The board is ready for the IR oven. 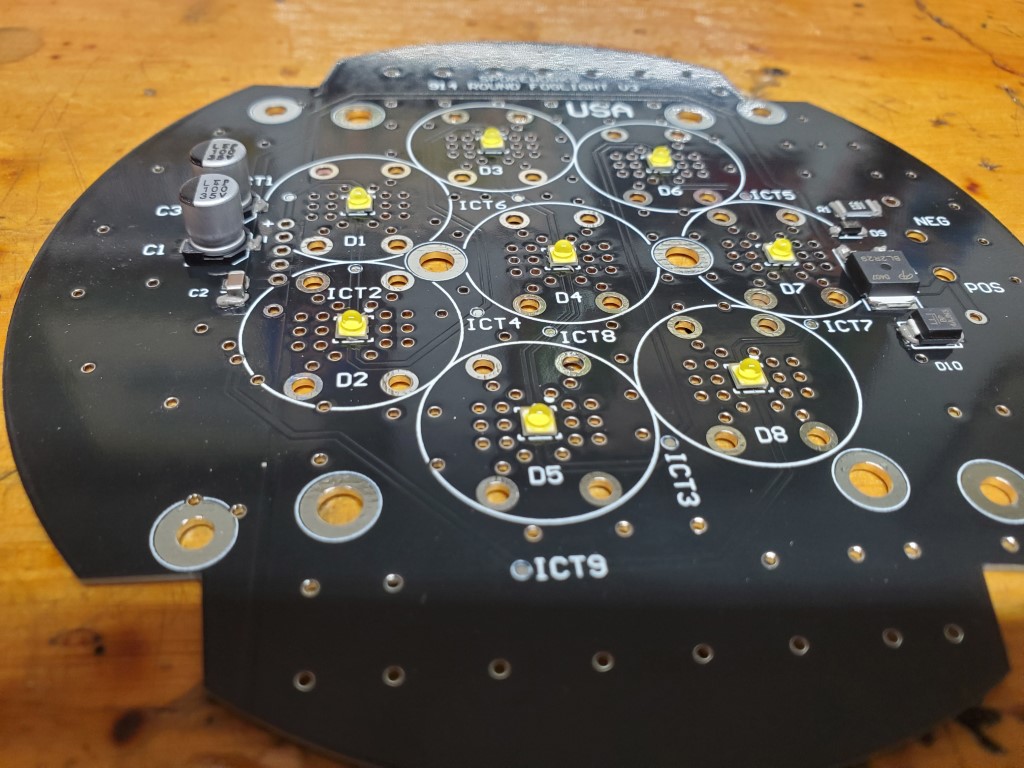 The IR oven can handle one board at a time. The total cook time is about 7.5 minutes. When one board is cooking the next board will go through the component placing. 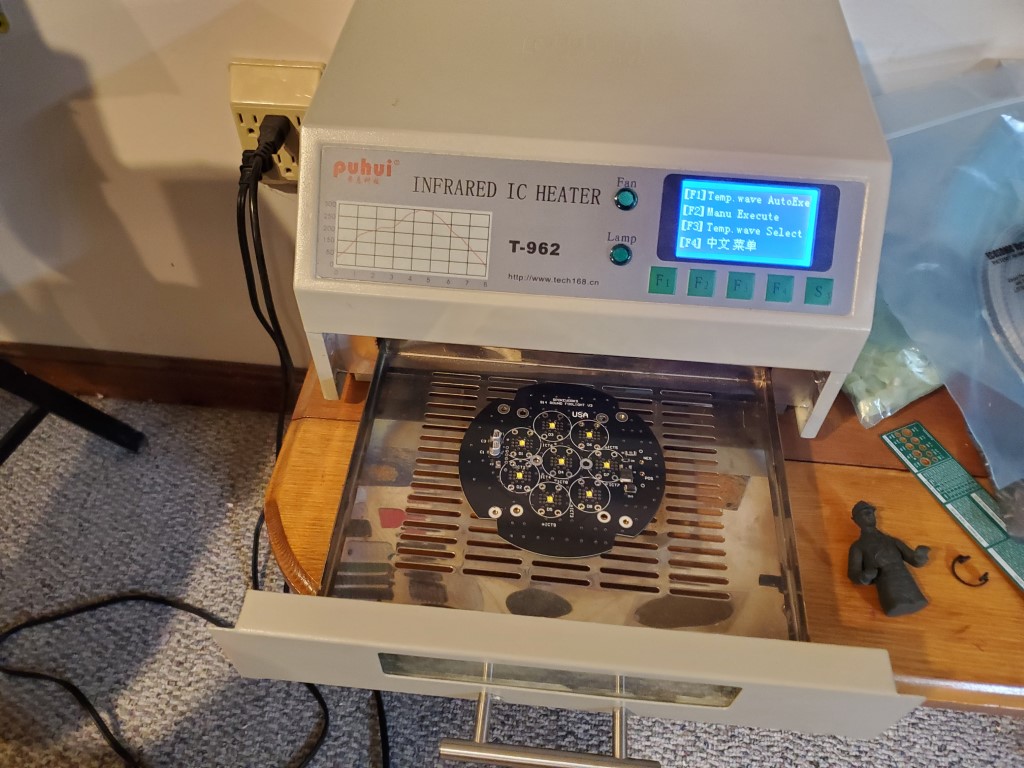 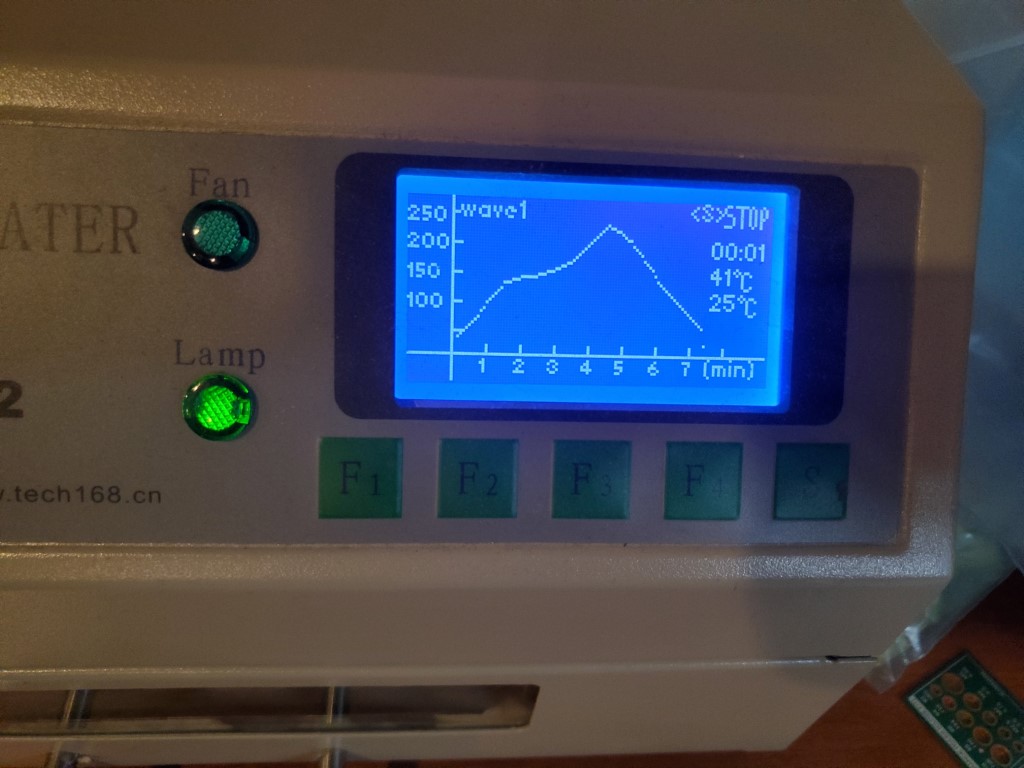 When the board is done in the oven, the LED stack is tested to make sure all LEDs are properly mounted before the dc/dc converter is soldered in. For this test a current limited DC voltage is applied. Start the voltage at zero and increase until about 200ma is flowing. This board looks good. 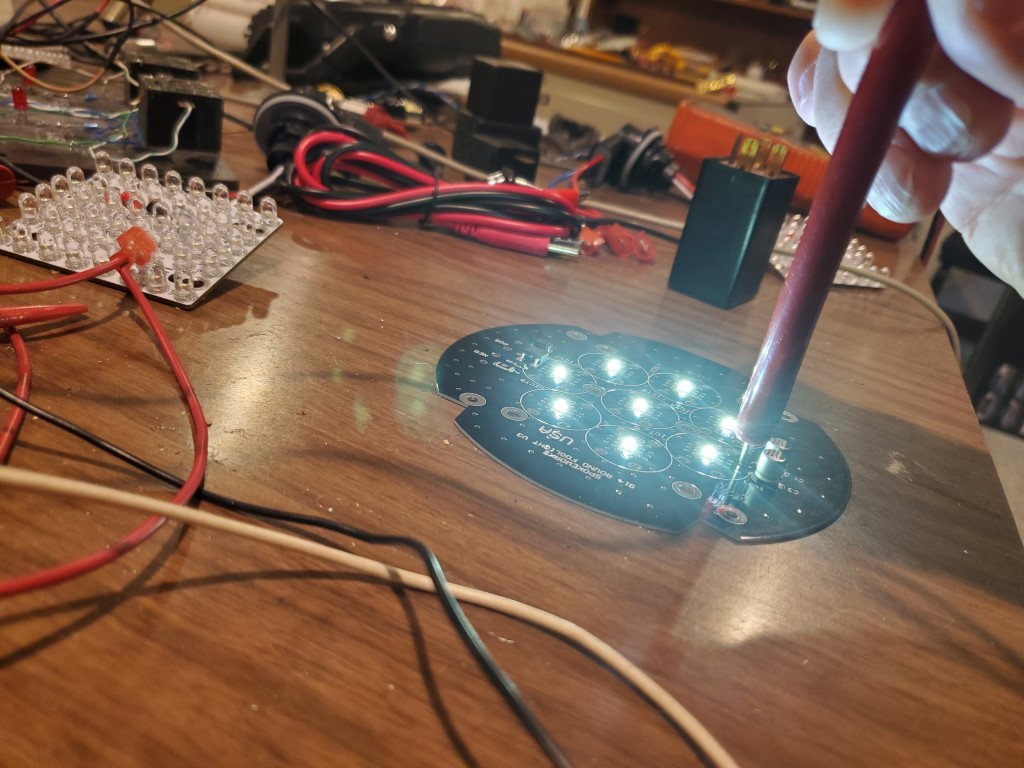 |
   |

 
|
  |
Replies
| Stratfink |
Dec 19 2025, 01:09 AM
Post
#2
|
|
Member Group: Members Posts: 86 Joined: 27-December 21 From: SoCal Member No.: 26,198 Region Association: Southern California |
Great stuff Spoke,
Seeing the ingenuity in design and the labor (of love) and attention to detail in the build makes me appreciate the product that much more… Best - Joe |
 |
|
Posts in this topic
 Spoke LED Foglight Assembly Steps Dec 18 2025, 10:06 PM
 Spoke Next step is to solder the through hole components... Dec 18 2025, 10:46 PM Spoke A length of heat shrink tubing is used as a sleeve... Dec 18 2025, 10:55 PM
 bahnzai
Great stuff Spoke,
Seeing the ingenuity in desig... Dec 19 2025, 05:21 AM
bahnzai
Great stuff Spoke,
Seeing the ingenuity in desig... Dec 19 2025, 05:21 AM Jamie
Great stuff Spoke,
Seeing the ingenuity in desig... Dec 19 2025, 08:34 AM chmillman Yes, great illustrated process! I had no idea... Dec 19 2025, 06:10 AM Spoke
Yes, great illustrated process! I had no ide... Dec 19 2025, 04:45 PM 914Sixer Holy smokes, the amount of labor is incredible. :t... Dec 19 2025, 07:23 AM Cairo94507 I have had Spoke's LED foglight in my car for ... Dec 19 2025, 08:19 AM DennisV
During a recent build of 914 foglights I decided ... Dec 19 2025, 08:56 AM mepstein I was going to build some myself but bought them f... Dec 19 2025, 12:03 PM TheRuttmeister
That's why they make drill bushings.
(And if... Dec 19 2025, 01:21 PM chmillman
(And if you put a generous chamfer on the holes ... Dec 19 2025, 01:51 PM johnhora WOW...just amazing work Jerry...thanks for sharing... Dec 19 2025, 01:35 PM
Jamie
Great stuff Spoke,
Seeing the ingenuity in desig... Dec 19 2025, 08:34 AM chmillman Yes, great illustrated process! I had no idea... Dec 19 2025, 06:10 AM Spoke
Yes, great illustrated process! I had no ide... Dec 19 2025, 04:45 PM 914Sixer Holy smokes, the amount of labor is incredible. :t... Dec 19 2025, 07:23 AM Cairo94507 I have had Spoke's LED foglight in my car for ... Dec 19 2025, 08:19 AM DennisV
During a recent build of 914 foglights I decided ... Dec 19 2025, 08:56 AM mepstein I was going to build some myself but bought them f... Dec 19 2025, 12:03 PM TheRuttmeister
That's why they make drill bushings.
(And if... Dec 19 2025, 01:21 PM chmillman
(And if you put a generous chamfer on the holes ... Dec 19 2025, 01:51 PM johnhora WOW...just amazing work Jerry...thanks for sharing... Dec 19 2025, 01:35 PM |
6 User(s) are reading this topic (3 Guests and 0 Anonymous Users)

|
Lo-Fi Version | Time is now: 19th December 2025 - 05:33 PM |
Invision Power Board
v9.1.4 © 2025 IPS, Inc.