|
|
|
Porsche, and the Porsche crest are registered trademarks of Dr. Ing. h.c. F. Porsche AG.
This site is not affiliated with Porsche in any way. Its only purpose is to provide an online forum for car enthusiasts. All other trademarks are property of their respective owners. |
|
|


| racunniff |
 Aug 5 2007, 11:48 PM Aug 5 2007, 11:48 PM
Post
#1
|
|
volt914  Group: Members Posts: 172 Joined: 21-August 06 From: Fort Collins, CO Member No.: 6,705 Region Association: Rocky Mountains |
Spent the day installing my windshield. Started with new windshield clips from Pelican Parts (you will need 19 of them):
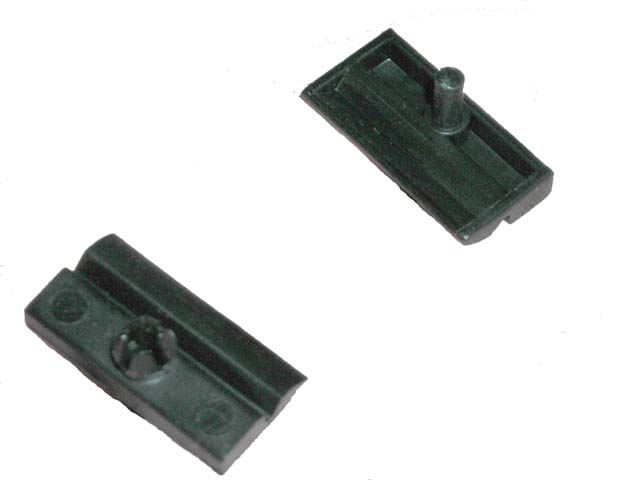 This picture shows the "top" and "bottom" of the clip. The "bottom" of the clip pushes into the windshield frame and also has the notch to capture the trim (see picture below for how this works). The "top" of the clip has the rivet that you'll need to drive in to permanently attach the clip. You'll also need some of this, Butyl Tape (I got mine at NAPA) - 1/4 inch is the recommended size: 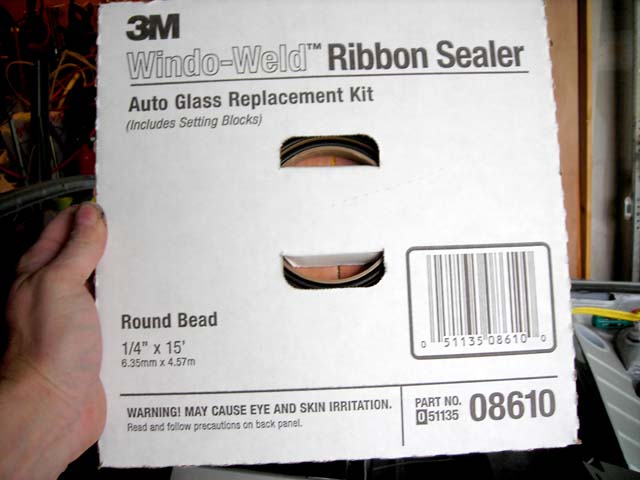 Note the warning about eye and skin irritation. I don't know if it's true, but I did the final cleaning and install wearing gloves, so I would not know. I do know that it is extremely sticky, and would likely be a lot of fun to get off your skin without evil chemicals like acetone. You'll also need these - window spacers (also available from Pelican Parts - you need 2): 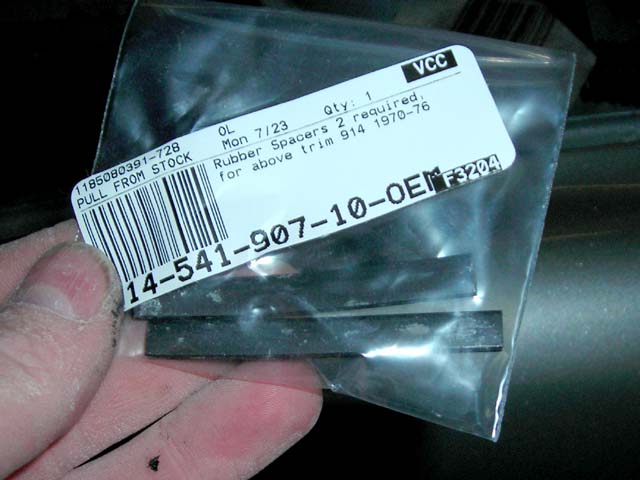 The butyl I bought also came with spacers, but they are not the same shape/size, so I do not trust them. Now for the clips. I dry-fit them on my trim to verify the orientation I wanted when I installed them: 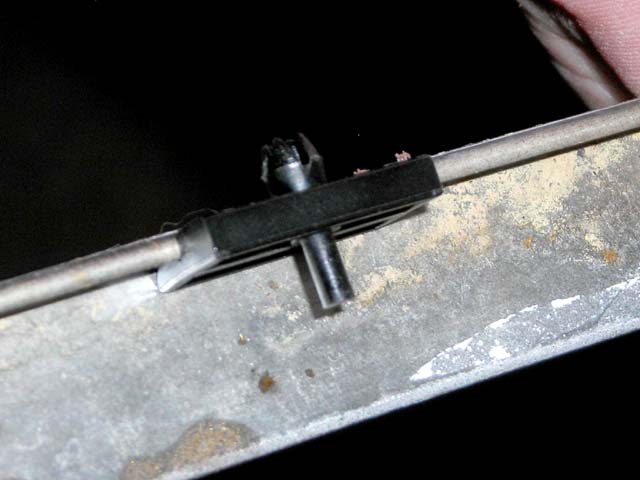 Installing the clips is pretty straightforward. You put a clip in a mounting hole: 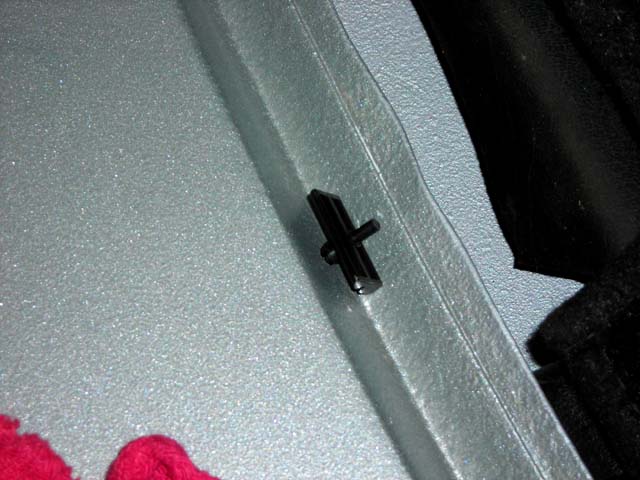 and then you push the clip in with your thumbs as far as you can: 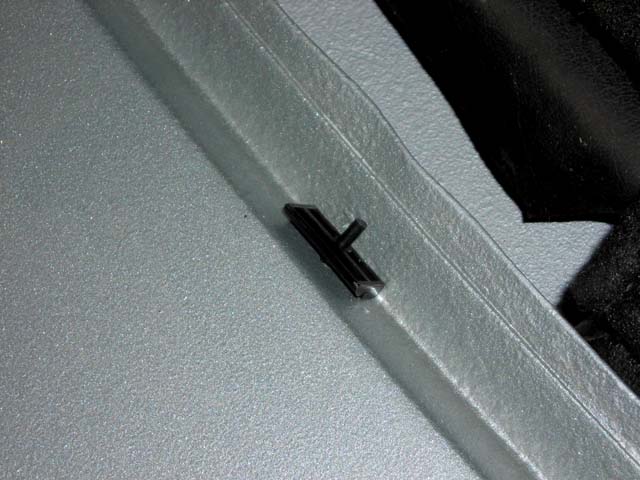 You need to get it very close to flush, because if you don't, when you try to push the rivet in, it will just pop the clip out of the hole (ask me how I know (IMG:style_emoticons/default/dry.gif) ). This is not fatal, though, because you can usually use a pair of pliers to pull the rivet back out and start over (assuming that you have not mashed the rivet as you try to push it in). Part II, coming soon. |
   |

 
|
  |
Replies
| rhodyguy |
Aug 17 2007, 01:15 PM
Post
#2
|
|
Chimp Sanctuary NW. Check it out. Group: Members Posts: 22,252 Joined: 2-March 03 From: Orion's Bell. The BELL! Member No.: 378 Region Association: Galt's Gulch |
i'm in the middle of pulling one and this may help a bit if your trim is nice and you don't want to trash it. the trim on this car was not so good and removal went quick.
1. in the clip picture you can see the little curved notch the slight radius of the outside edge of the trim slips into. 2. end view, note previously mentioned outside edge. this edge needs to be released from the clip. slide the covering piece to one side and start in the center top 3. if you were to notch a putty knife so it could go around the clip, you can gently push from the inside edge and release the trim. with the putty knife so thin, you won't (shouldn't) distort the inside edge much. work your way across, sliding the knife. when you come to a stop you'll need to walk around the clip you just bumped into. 4. it was cool this am and the butyl was pretty stiff. i'm leting it sit in the sun to warm up and it's pretty squishy. i could be impatient and do it now, but i'm not. by 1 or 2 it's going to release very easily and i'll have a nice sigla windshield that only has a few pits. if you plan on polishing your trim, you might think about doing it in place prior to removal. not as apt to bend it up. k edit: discovered a few things. too much heat is no good as it softens the butyl so much it stick/rebond upon touching. i grabed a handfull shims and started them narrow end in after releasing a section. as you move forward you have to fall back once in a while, adjust the shims and re-release any sitcky points. have a breath now and then, work slowly. when it's all loosened, put a strip of foil under each side to avoid any butyl to butly contact. i'm not quite ready to store the window and i'll leave it resting on the frame until just before the body leaves. i pulled the tarp back over to let things cool down slowly. i've broken more than one window in the past. k Attached image(s) 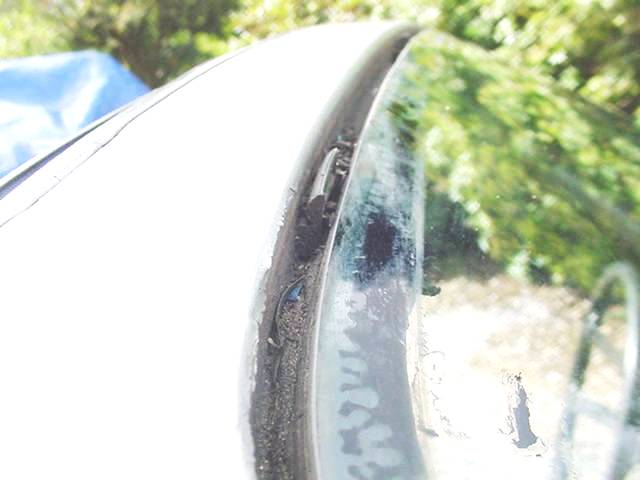 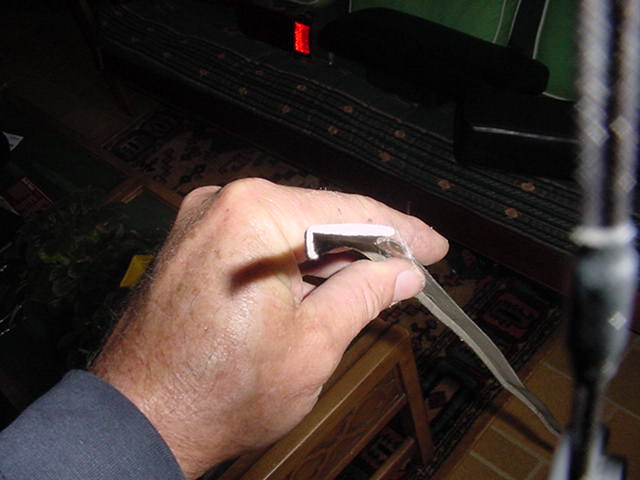 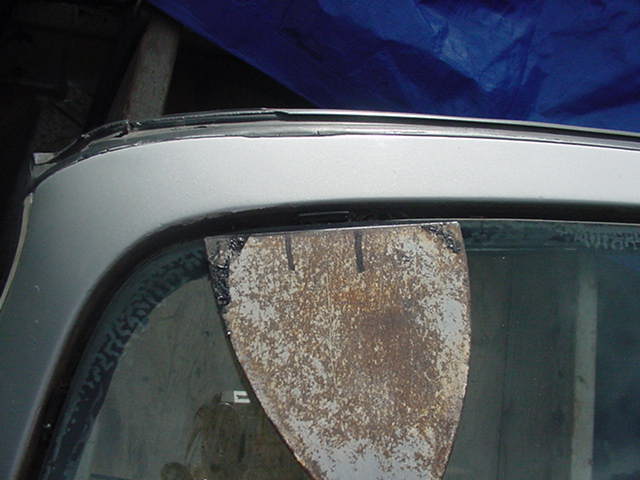
|
|
|
|
Posts in this topic
 racunniff Windshield install Aug 5 2007, 11:48 PM
 racunniff Part II.
The final step in installing a clip is t... Aug 6 2007, 12:08 AM racunniff Part III
Not much in this part - I have yet to ac... Aug 6 2007, 12:12 AM watsonrx13 Excellent write up, definately a classic how-to on... Aug 6 2007, 05:21 AM
racunniff Part II.
The final step in installing a clip is t... Aug 6 2007, 12:08 AM racunniff Part III
Not much in this part - I have yet to ac... Aug 6 2007, 12:12 AM watsonrx13 Excellent write up, definately a classic how-to on... Aug 6 2007, 05:21 AM
 racunniff
Excellent write up, definately a classic how-to o... Aug 6 2007, 11:22 PM 9146986 One thing that I recommend is painting the windshi... Aug 6 2007, 08:01 AM racunniff
One thing that I recommend is painting the windsh... Aug 6 2007, 11:23 PM jmitro
One thing that I recommend is painting the windsh... Sep 28 2018, 06:36 AM rhodyguy great write up. first ever for a windshield i thin... Aug 6 2007, 09:31 AM racunniff
great write up. first ever for a windshield i thi... Aug 6 2007, 11:27 PM KELTY360 Can't believe you did this alone....very impre... Aug 6 2007, 11:39 PM racunniff Part IV
Finished it off this weekend. First orde... Aug 13 2007, 09:39 PM mcbrems Pretty amazing that you didn't overspray onto ... May 19 2011, 03:50 PM racunniff Part V
One thing I discovered after I sanded the ... Aug 13 2007, 09:48 PM racunniff Part VI
Clip the lower piece in, then work your w... Aug 13 2007, 09:54 PM Gint We'll move this to the Lapuwali Classic Thread... Aug 13 2007, 10:31 PM racunniff
We'll move this to the Lapuwali Classic Threa... Aug 13 2007, 10:42 PM iamchappy I am surprised the left and right are marked oppos... Aug 14 2007, 08:24 AM racunniff
I am surprised the left and right are marked oppo... Aug 14 2007, 09:44 AM theer
I am surprised the left and right are marked opp... Sep 28 2018, 07:57 AM aircooledboy A nice install. Good Work. :beer2:
A few detail... Aug 14 2007, 11:21 AM racunniff
A nice install. Good Work. :beer2:
A few detai... Aug 14 2007, 11:17 PM aircooledboy
Thanks for the tips! I am obviously not a p... Aug 15 2007, 07:35 PM buhs914
No hazard beyond the potential reduction in the ... Jun 5 2010, 10:58 PM bandjoey I changed my windshield in the cooler weather at p... Jun 6 2010, 09:23 PM PRS914-6 I really admire people who jump in and do their ow... Jun 6 2010, 10:02 PM ConeDodger For any of you Northern California guys who are do... May 19 2011, 06:16 PM mcbrems I humbly offer my windshield install post from my ... Jun 3 2011, 03:57 PM avidfanjpl Dumb question
Where do the 2 spacers go?
I have ... Jun 3 2011, 04:23 PM sfrenck Just did an install last week. My 2 cents - my fr... Jun 3 2011, 07:23 PM mcbrems
...One thing I wish I had done while the window w... Jun 6 2011, 06:04 PM Mikey914 I came across these while looking at a maintence m... Jun 4 2011, 01:19 AM majkos I love it!
I'm gonna try to make a few.
I... Jun 5 2011, 11:48 AM jaxdream
I love it!
I'm gonna try to make a few.
I... Jun 6 2011, 08:23 AM JawjaPorsche Thanks for an excellent write up. Sep 28 2018, 01:47 PM
racunniff
Excellent write up, definately a classic how-to o... Aug 6 2007, 11:22 PM 9146986 One thing that I recommend is painting the windshi... Aug 6 2007, 08:01 AM racunniff
One thing that I recommend is painting the windsh... Aug 6 2007, 11:23 PM jmitro
One thing that I recommend is painting the windsh... Sep 28 2018, 06:36 AM rhodyguy great write up. first ever for a windshield i thin... Aug 6 2007, 09:31 AM racunniff
great write up. first ever for a windshield i thi... Aug 6 2007, 11:27 PM KELTY360 Can't believe you did this alone....very impre... Aug 6 2007, 11:39 PM racunniff Part IV
Finished it off this weekend. First orde... Aug 13 2007, 09:39 PM mcbrems Pretty amazing that you didn't overspray onto ... May 19 2011, 03:50 PM racunniff Part V
One thing I discovered after I sanded the ... Aug 13 2007, 09:48 PM racunniff Part VI
Clip the lower piece in, then work your w... Aug 13 2007, 09:54 PM Gint We'll move this to the Lapuwali Classic Thread... Aug 13 2007, 10:31 PM racunniff
We'll move this to the Lapuwali Classic Threa... Aug 13 2007, 10:42 PM iamchappy I am surprised the left and right are marked oppos... Aug 14 2007, 08:24 AM racunniff
I am surprised the left and right are marked oppo... Aug 14 2007, 09:44 AM theer
I am surprised the left and right are marked opp... Sep 28 2018, 07:57 AM aircooledboy A nice install. Good Work. :beer2:
A few detail... Aug 14 2007, 11:21 AM racunniff
A nice install. Good Work. :beer2:
A few detai... Aug 14 2007, 11:17 PM aircooledboy
Thanks for the tips! I am obviously not a p... Aug 15 2007, 07:35 PM buhs914
No hazard beyond the potential reduction in the ... Jun 5 2010, 10:58 PM bandjoey I changed my windshield in the cooler weather at p... Jun 6 2010, 09:23 PM PRS914-6 I really admire people who jump in and do their ow... Jun 6 2010, 10:02 PM ConeDodger For any of you Northern California guys who are do... May 19 2011, 06:16 PM mcbrems I humbly offer my windshield install post from my ... Jun 3 2011, 03:57 PM avidfanjpl Dumb question
Where do the 2 spacers go?
I have ... Jun 3 2011, 04:23 PM sfrenck Just did an install last week. My 2 cents - my fr... Jun 3 2011, 07:23 PM mcbrems
...One thing I wish I had done while the window w... Jun 6 2011, 06:04 PM Mikey914 I came across these while looking at a maintence m... Jun 4 2011, 01:19 AM majkos I love it!
I'm gonna try to make a few.
I... Jun 5 2011, 11:48 AM jaxdream
I love it!
I'm gonna try to make a few.
I... Jun 6 2011, 08:23 AM JawjaPorsche Thanks for an excellent write up. Sep 28 2018, 01:47 PM |
1 User(s) are reading this topic (1 Guests and 0 Anonymous Users)
0 Members:

|
Lo-Fi Version | Time is now: 7th May 2026 - 02:58 AM |
Invision Power Board
v9.1.4 © 2026 IPS, Inc.