|
|
|
Porsche, and the Porsche crest are registered trademarks of Dr. Ing. h.c. F. Porsche AG.
This site is not affiliated with Porsche in any way. Its only purpose is to provide an online forum for car enthusiasts. All other trademarks are property of their respective owners. |
|
|


| tomeric914 |
 Jun 27 2017, 06:49 PM Jun 27 2017, 06:49 PM
Post
#1
|
|
One Lap of America in a 914!  Group: Members Posts: 1,324 Joined: 25-May 08 From: Syracuse, NY Member No.: 9,101 Region Association: North East States |
My apologies in advance if this has been documented on here before.
Is 19mm too small and the Mercedes 23mm master cylinder too big? Well I've got a solution that is just right. I was looking for a 20.64mm master cylinder option and stumbled across a thread on Pelican where someone had put a 1990's Corrado master cylinder in a 911 or 914. There was only but one picture and not much of a write-up so I figured I'd try and document what I did. This master cylinder uses the same pushrod that you already have, though some adjustment will be necessary. You will also need to bend new brake lines if you want to do it right. As with any brake work. If you don't know what the hell you're doing, don't do this. Parts: 357 611 019 - this is for the 20.64mm master cylinder 357 611 019 B - this is for the 22.22mm master cylinder 911 355 322 00 - straight reservoir feed fitting 911 355 323 00 - angled reservoir feed fitting 7mm blue braided brake reservoir hose 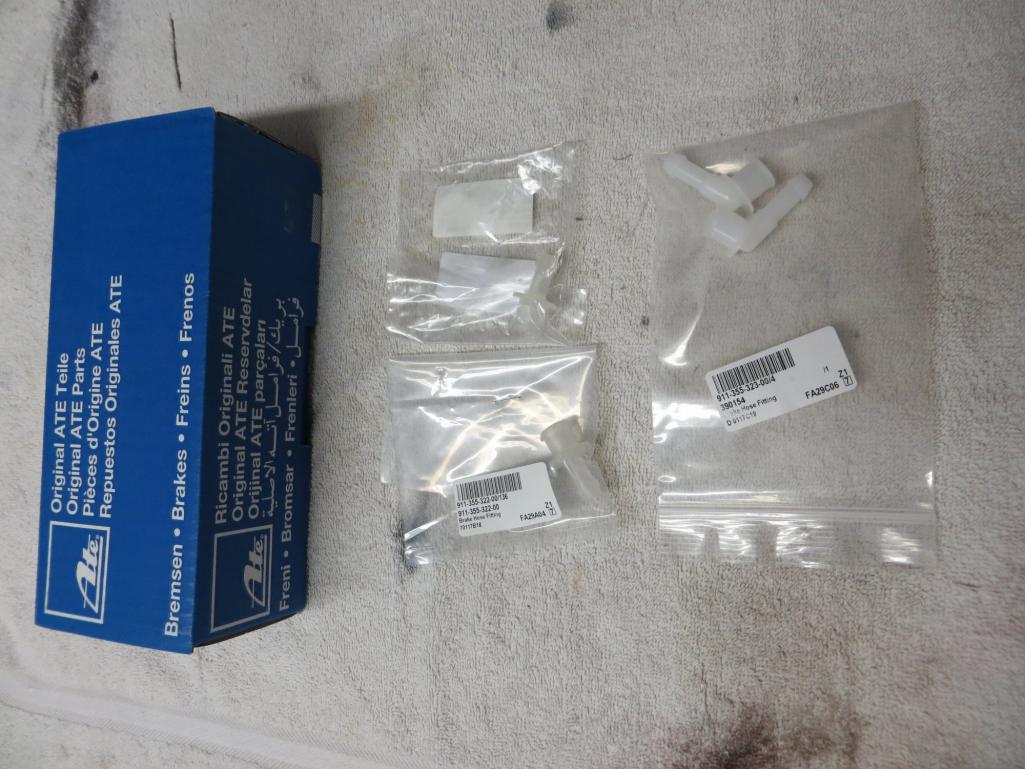 You'll need to decide which master cylinder is right for your application. For example, my braking system is pretty much all mid-1980's Carrera sized calipers and referencing Bill Verberg's brake page, I found that the mid-1980's Carrera used a 20.64mm master cylinder. I also knew that my pedal travel was more than I liked while on track. https://members.rennlist.com/1976c38/brakes.htm I purchased all of the parts through Pelican, the 357 611 019 (20.64mm) is an ATE unit made of aluminum and was only about $100. The 357 611 019 B (22.22mm) is made by a few companies, is a cast iron unit and about $50. Here's where you are today: 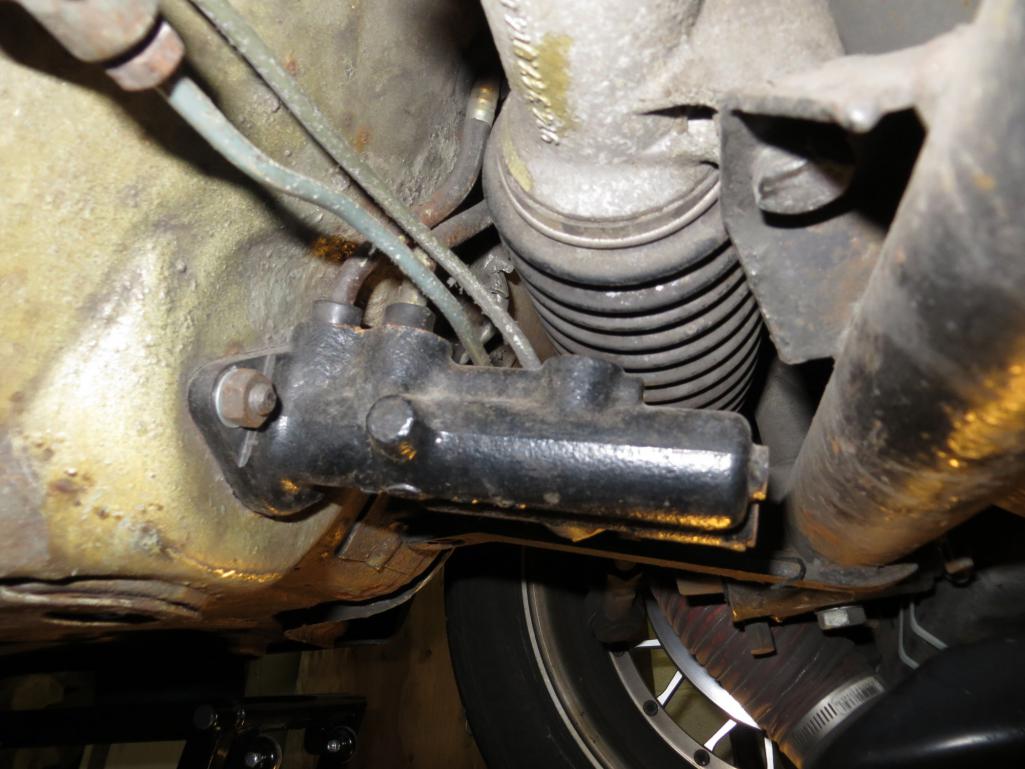 1. Drain your reservoir using a turkey baster so you don't wear the entire contents of the reservoir. 2. Disconnect all brake lines, the reservoir feed lines and unbolt the master cylinder. 3. Loosen the locknut and unthread the master cylinder pushrod from the pedal cluster, then run a tap through the threaded portion still on the pedal cluster to clean it up. Make sure the threads on the pushrod are clean and that the locknut threads all the way down on the pushrod. (I had to find a thinner locknut for my application. You may or may not need to do the same). 4. Unbox your new master cylinder and pop in the fittings as shown in the picture below. Use a dab of brake fluid to help lubricate the fitting where it inserts into the master cylinder. ALSO, you'll need to plug one of the extra ports on the master cylinder that you aren't using as seen below. I placed a piece of tape over all of the openings while fitting the master cylinder to keep dirt out. 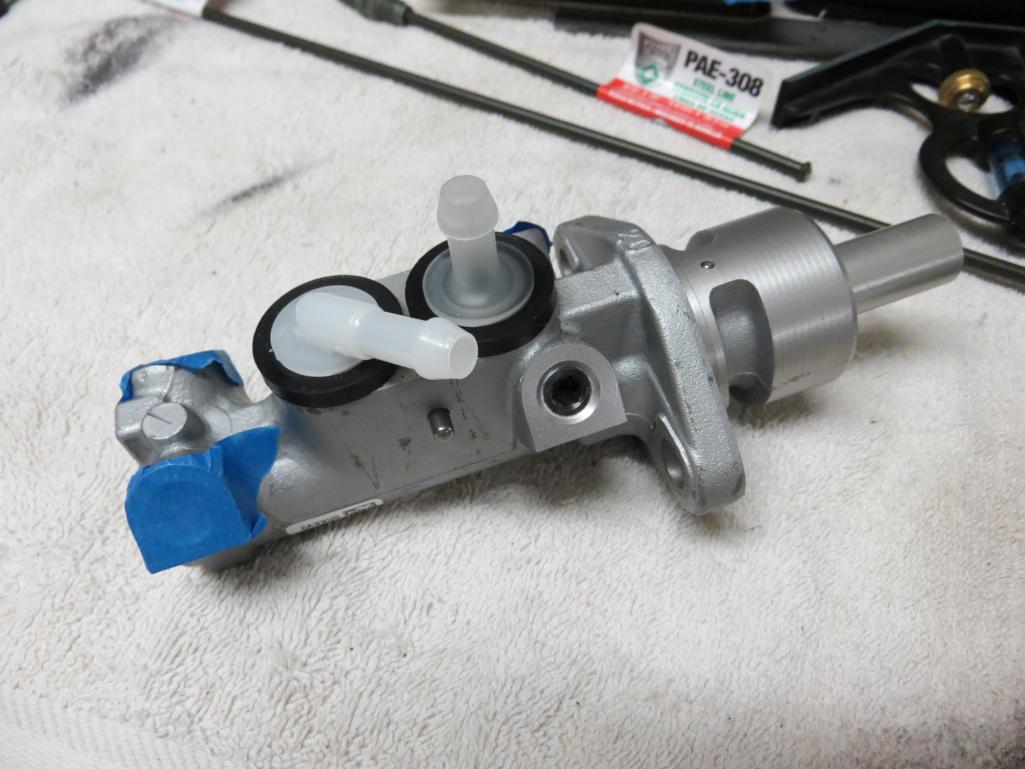 5. Grease the tip of the pushrod before installing the master cylinder. Torque the two 8mm nuts to 18 ft-lbs. I left the washers off. VERY IMPORTANT - now adjust the pedal free play to approximately 1mm by turning the pushrod inside the car at the pedal cluster. Once adjusted, tighten down the locknut. Make sure that the brake light switch lever is in the correct position to actuate when the brake pedal is depressed. 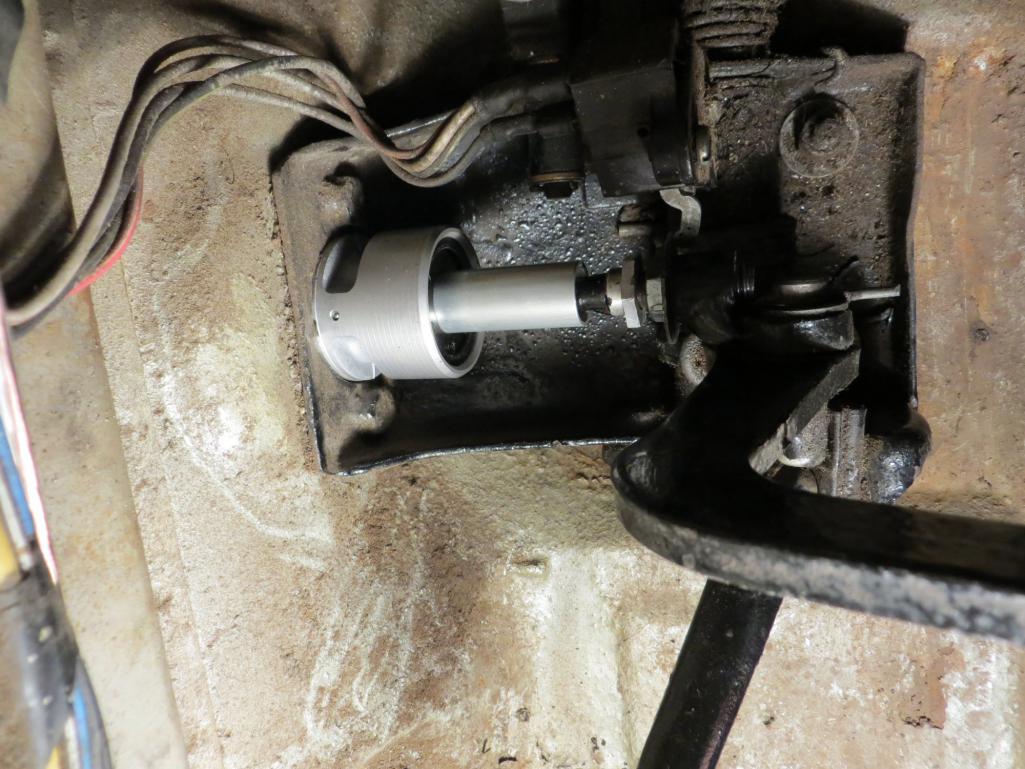 6. Back under the vehicle, decide how you will connect the reservoir to the master cylinder. The metal ends of my plastic lines were rusty so I decided to cut them off and use a short length of 7mm blue braided reservoir hose to each line. You could also run the blue braided hose all the way from the reservoir to master cylinder. Use a dab of brake fluid to make it easier to install the hose on the fittings. 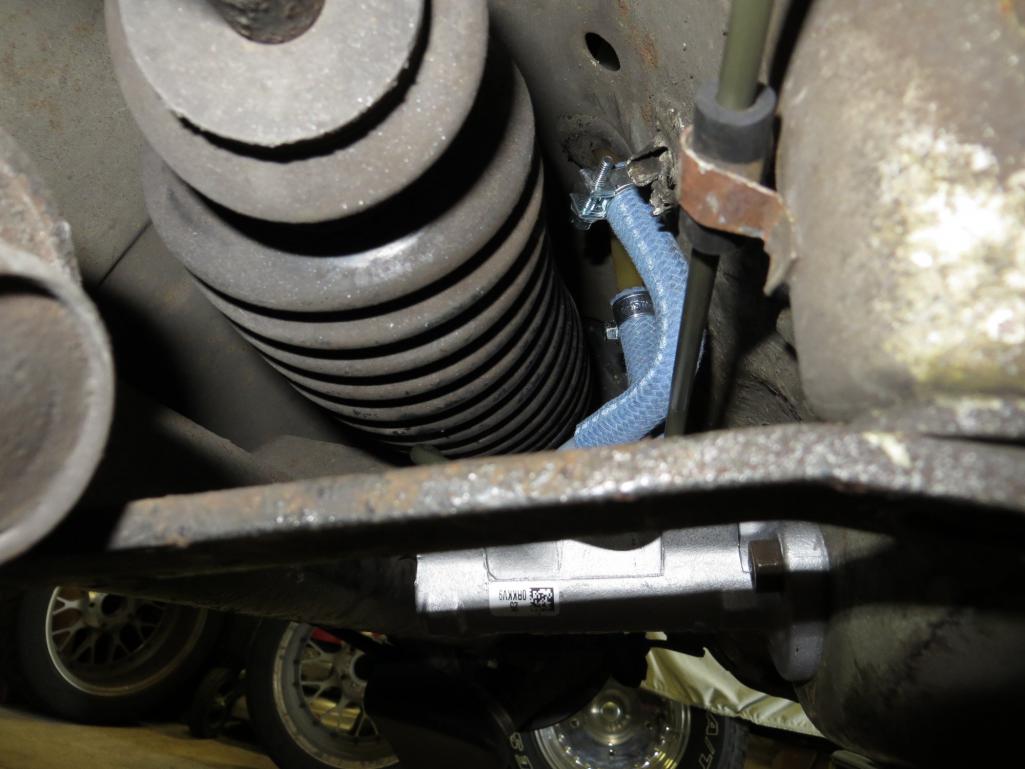 7. Next, bend new brake lines for the front brakes and a short piece for the rears. 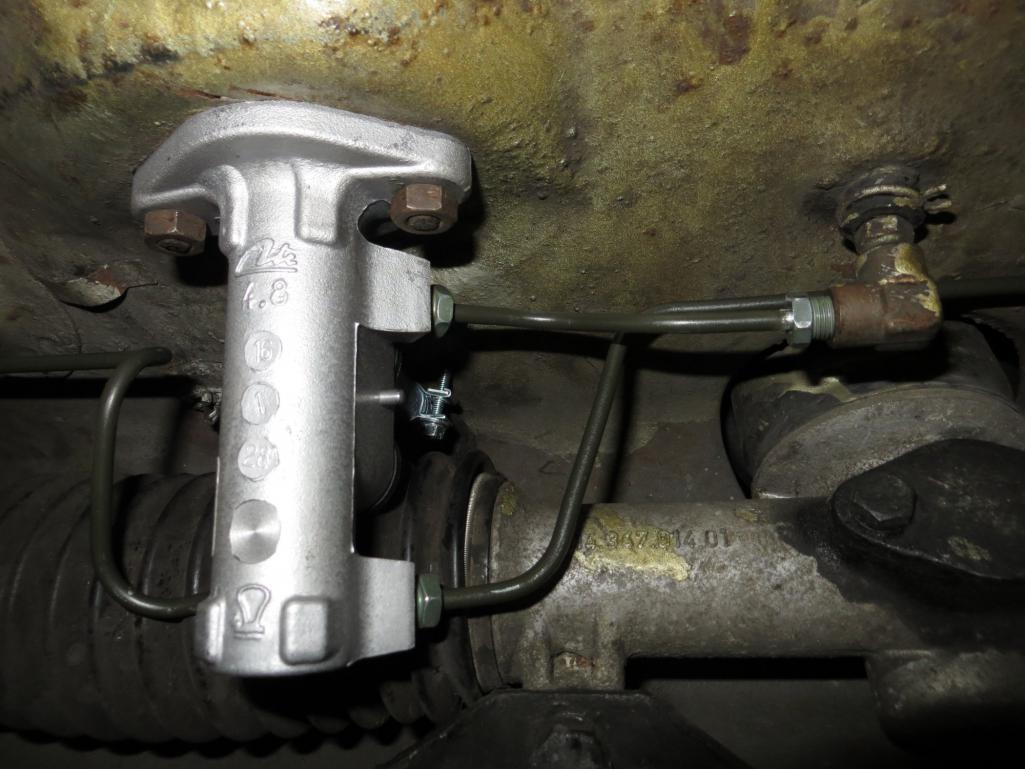 8. Last, but not least, bleed the brakes reinstall the bottom pan and enjoy your new firmer, but not too firm, pedal feel! 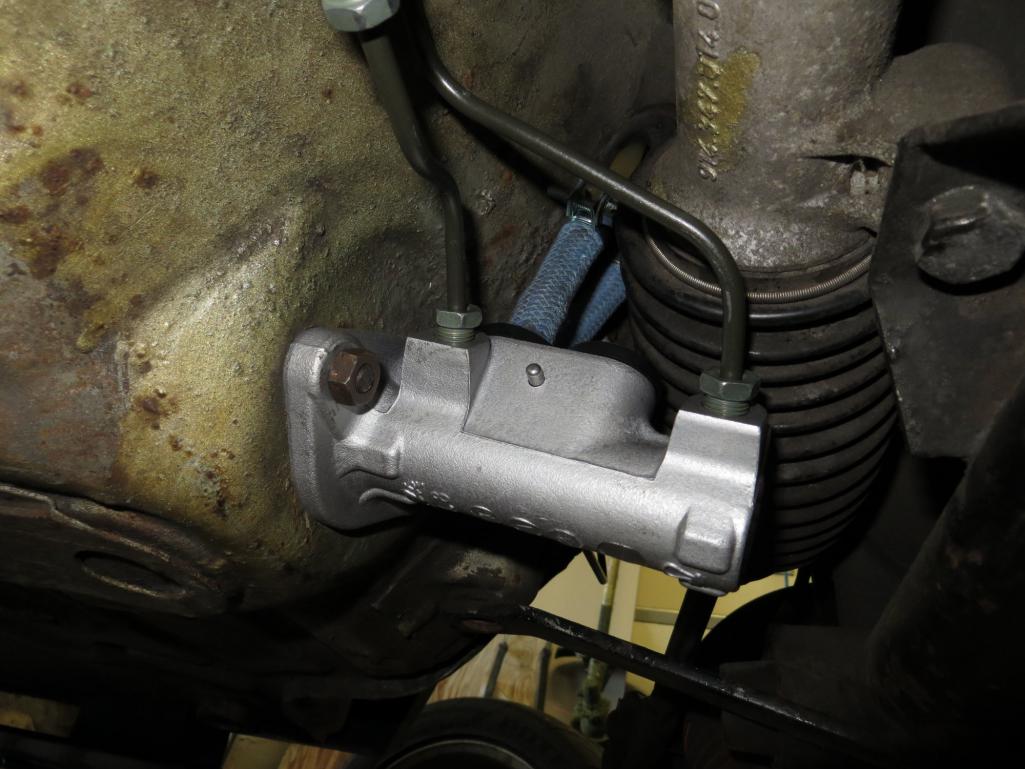 |
   |

 
|
Posts in this topic
 tomeric914 A 20.64mm or 22.22mm Master Cylinder Option Jun 27 2017, 06:49 PM
 Cupomeat This is great Tom, Thanks!
:beer2: Jun 27 2017, 08:52 PM Travis Neff Looks like an interesting option. Can I ask what ... Jun 27 2017, 09:08 PM
Cupomeat This is great Tom, Thanks!
:beer2: Jun 27 2017, 08:52 PM Travis Neff Looks like an interesting option. Can I ask what ... Jun 27 2017, 09:08 PM
 porschetub
Looks like an interesting option. Can I ask what... Jun 27 2017, 10:15 PM tomeric914
Looks like an interesting option. Can I ask wha... Jun 28 2017, 06:22 AM Travis Neff Thank you! I should learn how to read more ca... Jun 28 2017, 09:29 AM tomeric914
Thank you! I should learn how to read more c... Jun 28 2017, 01:59 PM Racer Chris Doing this right now in a car with big brakes. Sep 26 2017, 11:47 AM sithot Nice write up.
Where did you get the "Blue... Nov 2 2017, 06:16 PM tomeric914 Thank you. Blue brake hose either came from Pelic... Nov 2 2017, 07:26 PM h16 I made this mod recently - I underestimated a coup... Jun 23 2020, 05:39 AM screenguy914 Tom,
Excellent write up on this master cylinder up... Dec 29 2020, 04:10 PM djway Fantastic option. Price sure is right. Dec 29 2020, 08:33 PM davep Just for reference, the M/C bore sizes are actuall... Dec 29 2020, 10:01 PM Montreal914
Just for reference, the M/C bore sizes are actual... Dec 30 2020, 01:19 PM davep Just the master cylinders appear to be Imperial me... Dec 31 2020, 10:03 AM
porschetub
Looks like an interesting option. Can I ask what... Jun 27 2017, 10:15 PM tomeric914
Looks like an interesting option. Can I ask wha... Jun 28 2017, 06:22 AM Travis Neff Thank you! I should learn how to read more ca... Jun 28 2017, 09:29 AM tomeric914
Thank you! I should learn how to read more c... Jun 28 2017, 01:59 PM Racer Chris Doing this right now in a car with big brakes. Sep 26 2017, 11:47 AM sithot Nice write up.
Where did you get the "Blue... Nov 2 2017, 06:16 PM tomeric914 Thank you. Blue brake hose either came from Pelic... Nov 2 2017, 07:26 PM h16 I made this mod recently - I underestimated a coup... Jun 23 2020, 05:39 AM screenguy914 Tom,
Excellent write up on this master cylinder up... Dec 29 2020, 04:10 PM djway Fantastic option. Price sure is right. Dec 29 2020, 08:33 PM davep Just for reference, the M/C bore sizes are actuall... Dec 29 2020, 10:01 PM Montreal914
Just for reference, the M/C bore sizes are actual... Dec 30 2020, 01:19 PM davep Just the master cylinders appear to be Imperial me... Dec 31 2020, 10:03 AM  |
1 User(s) are reading this topic (1 Guests and 0 Anonymous Users)
0 Members:

|
Lo-Fi Version | Time is now: 6th July 2026 - 07:32 PM |
Invision Power Board
v9.1.4 © 2026 IPS, Inc.