|
|
|
Porsche, and the Porsche crest are registered trademarks of Dr. Ing. h.c. F. Porsche AG.
This site is not affiliated with Porsche in any way. Its only purpose is to provide an online forum for car enthusiasts. All other trademarks are property of their respective owners. |
|
|


| Eric_Shea |
 Dec 22 2007, 06:59 PM Dec 22 2007, 06:59 PM
Post
#1
|
|
PMB Performance  Group: Admin Posts: 19,304 Joined: 3-September 03 From: Salt Lake City, UT Member No.: 1,110 Region Association: Rocky Mountains |
This all started with a group buy that was a little slow coming. (IMG:style_emoticons/default/blink.gif)
Enough people came together to get the hard bushings that I felt a "How To" would be in order. While these are not the easiest things to install (easy being slide them in and enjoy), it's not that difficult if you have a few simple tools. In this case, difficulty is actually a good thing. What we'll be doing here is honing the bushings for your individual application. All of the trailing arms I have seen can vary… shafts as well. Once you're done, you should have a nice set of Performance-Poly bushings holding up the rear of your car. The control arms will swing with easy being lifted by one finger. The harder 70D poly in the Performance-Poly bushing will hold up and not fade or sag like the softer 94A poly that is a very common replacement for these arms. I would be remise if I didn't cover removal of the old bushings/shafts so let's start with a breif explaination of how that's done. To remove the old shafts I like to put them in a press. I heat the threaded portion of the shaft until I can see the edge of the bushing beginning to melt. Once I've reached that point, I begin to press the rod through the bushing: 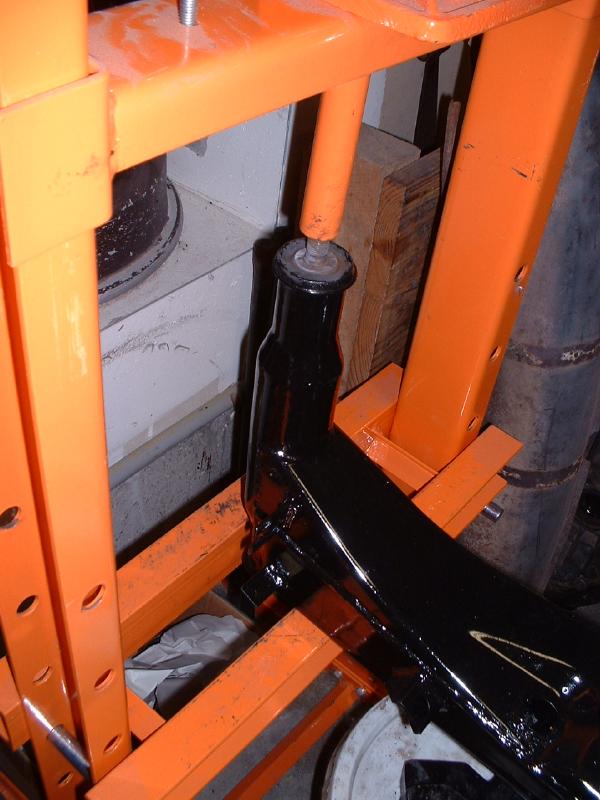 Once the rod has pushed all the way through the first bushing I take it out of the press and use a large screwdriver to pry the old bushing out. It's actually much easier than it sounds. The bushing begins to pull out immediately. 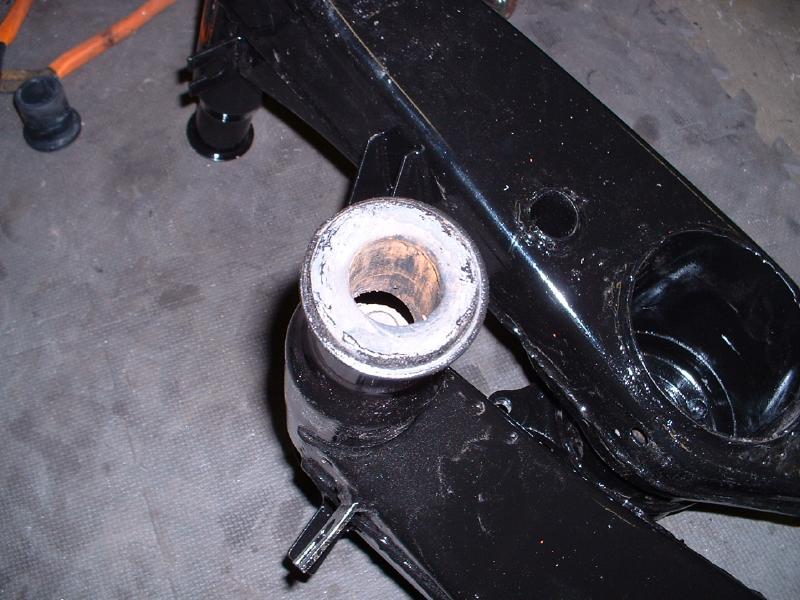 The remainder of the job is to flip the arm in the press and push the shaft back through the second bushing. This will probably require a bench adjustment but not a big deal. Again, make sure you heat the shaft so it slides through the bushing easily. Now, on with the show: Preparation is paramount to any good job. Now might be the time to bead blast your arms, have them painted or powder coated (leave your old bearings in if you're going to do this, you can push them out after the powder coating and your bores will be nice and clean). Along the lines of preparation; I like to have the shafts re-plated with zinc dichromate. If they are rusted and pitted you will need to find some clean replacements. 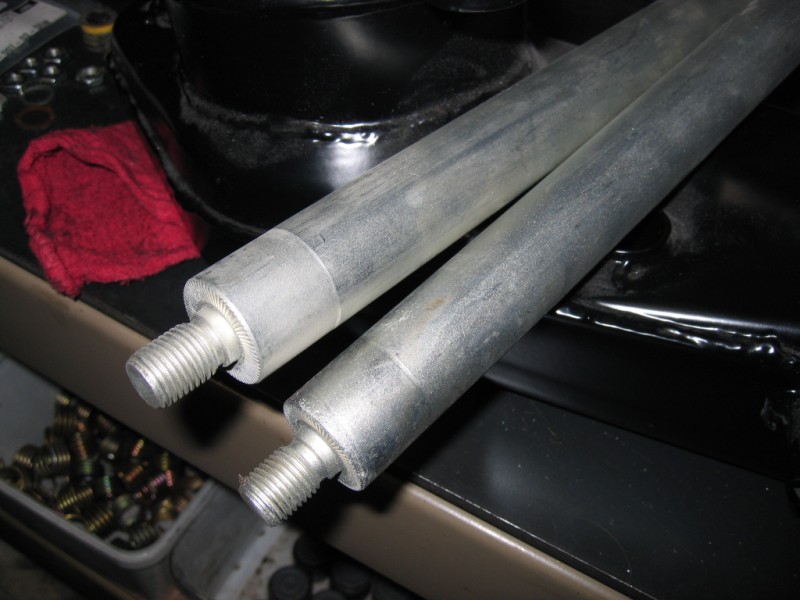 Let's get started on the bushings. To hone the bushings you will need... well... a hone. There are quite a few varieties on the market and even a few for the professional machinist. We'll concentrate on what you can get for the home mechanic. Here's my favorite: www.mcmaster.com part number 6713A12. This should set you back $14.35. You can get the same thing at your FLAPS as well. When you factor in the shipping, it's probably best to support your local guy although... McMaster-Carr is pretty damn cool: 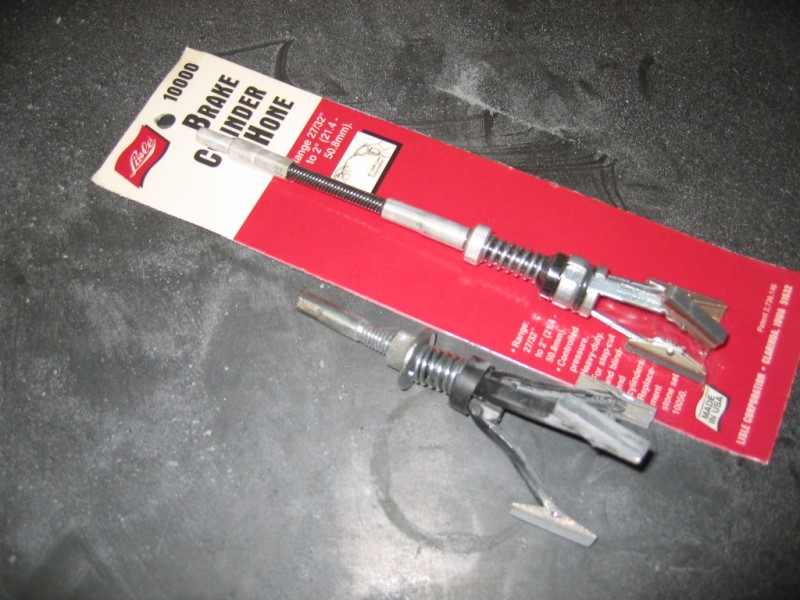 What you're looking at is a standard brake cylinder hone and, my modified version. I simply cut the flex center section out and it made this hone much stouter in the drill. Here's a view of the modified hone in the drill:  The process is fairly straight forward from this point on however; I'll add a few tips for reassurance as you dig in. There will be a lot of trial fitting going on here. Keep your control arm shaft handy as you hone the bushing. Set the hone to the harder end of it's adjustment. The thumb screw you see in the pictures can be cranked down to adjust the tension. WEAR GLOVES AND EYE PROTECTION. The bushing will get to a critical temperature and soften a bit and begin to cut. 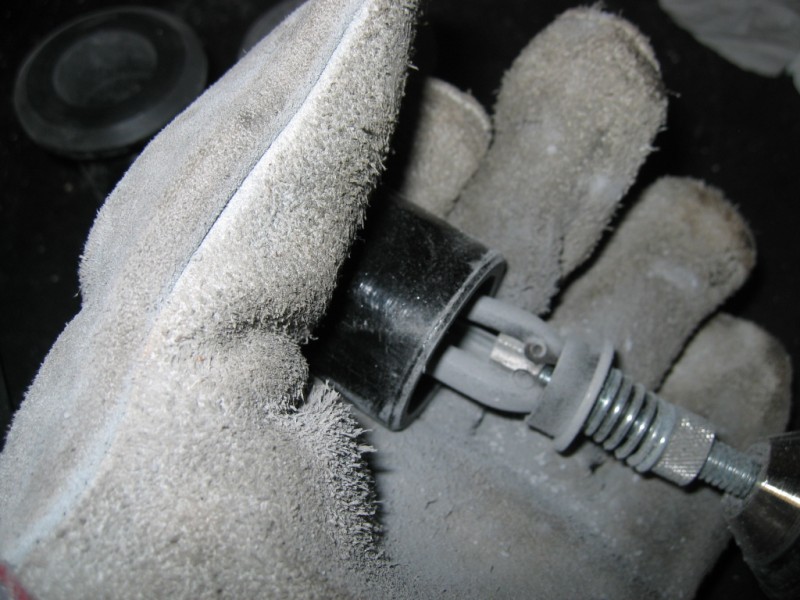 Again, stop after a bit of honing to trial fit the bushing. The bushing will expand considerably while you are honing it. It reacts quite a bit to the temperature. Without the gloves it would be hard to hold. For this reason, you will want the bushing to simply slide down the shaft when it is close to being ready. It will cool and contract and you'll have to go at it again. Remember, there will be a lot of trial fitting here: 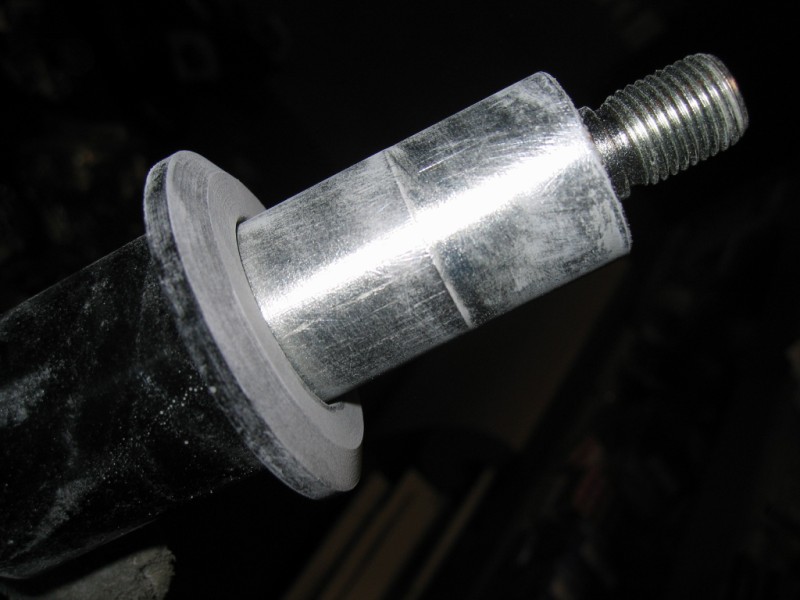 You may want to keep a small tub of ice water handy to cool the bushing again. This will give you a more accurate picture of your progress. 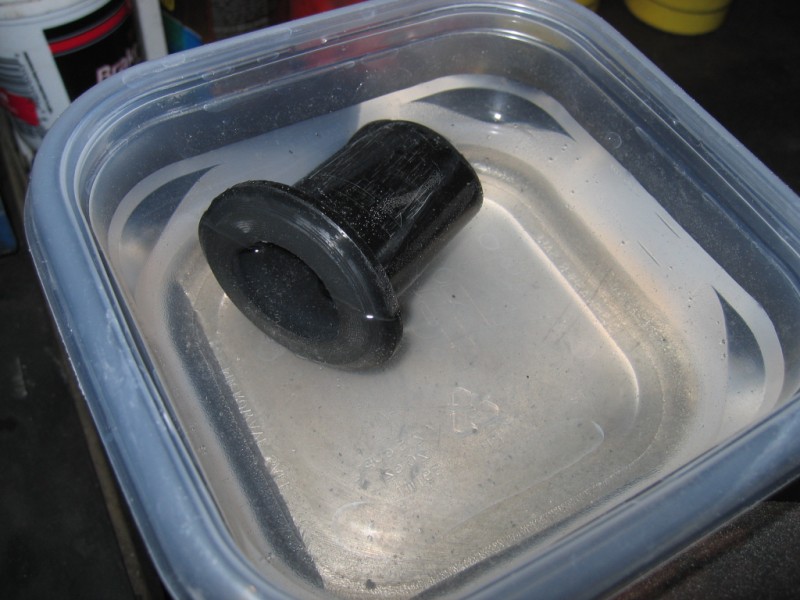 You will be done with the honing process when the cool bushings slide over the shaft with ease. You do not want too much play; just enough for the bushing and shaft to slide effortlessly. Once the assembly is back in the control arm, they can tighten up a bit more (depending on the fit in your individual control arm... remember, they're all slightly different). 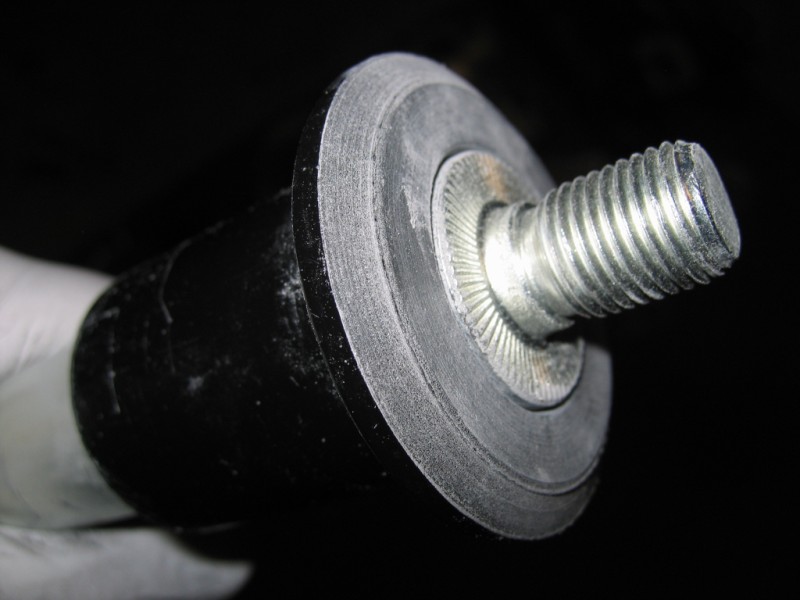 Now, this last part is optional but I think it's a great idea and it's fairly simple "while you're in there". Zerks. I like the 6M zerk. Using some blue masking tape I measure 1" down from the lip of the control arm and make a mark. This is on the inside of the longer riser section of the arm. 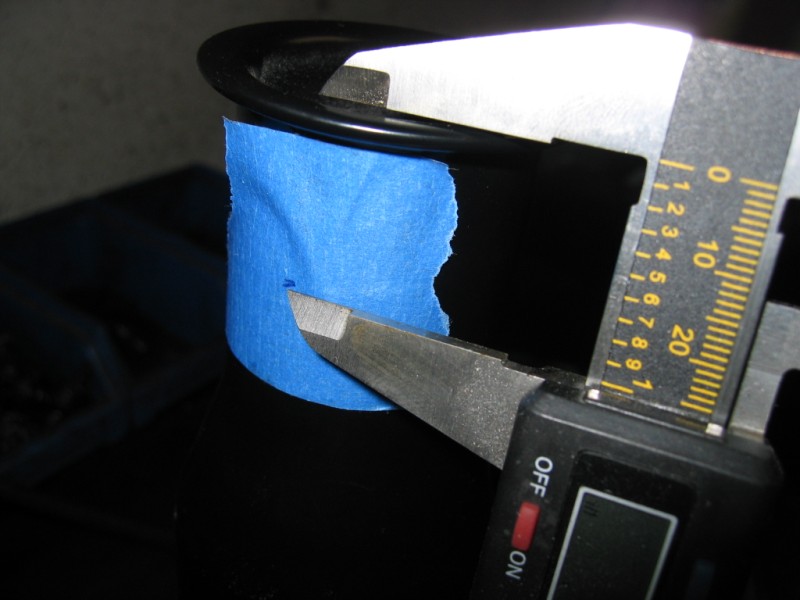 I do the same on the bottom section of the short side: 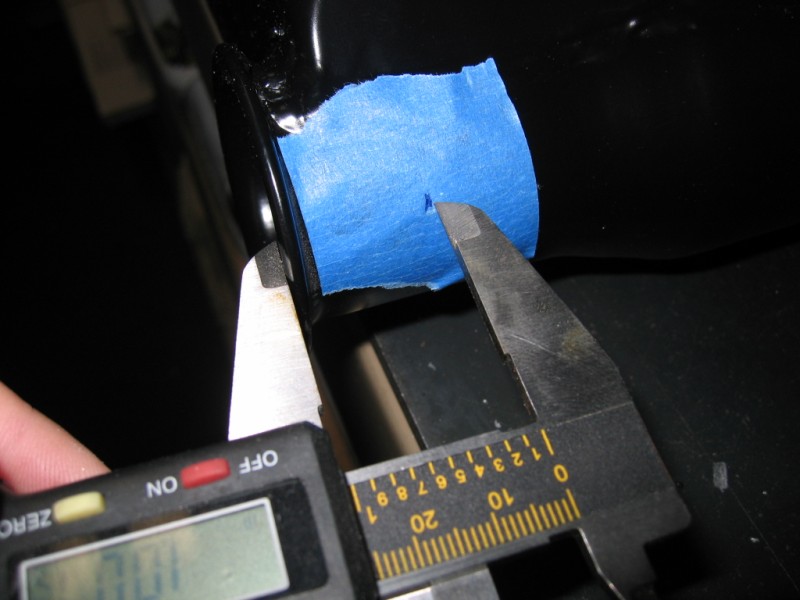 Next it's time to drill and tap. Using a 13/64 bit I drill into the arm at the mark. Make sure your bushings are installed at this point as you'll want to drill and tap completely through them: 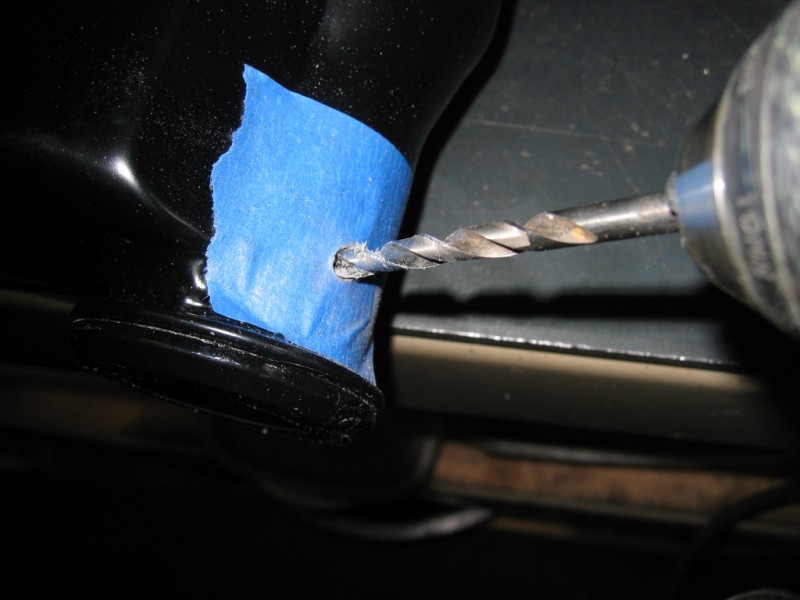 ...and tap the hole with the 6x1 tap: 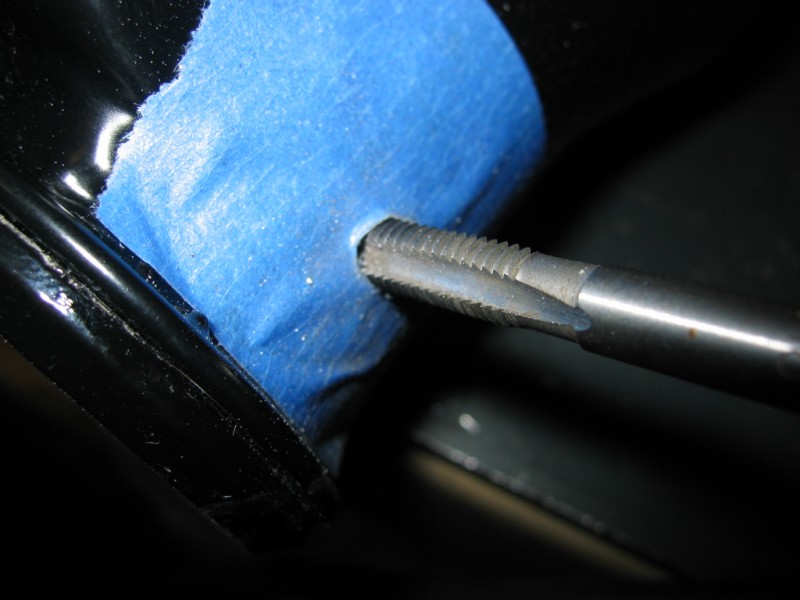 Simply remove the tape and screw in your zerk. 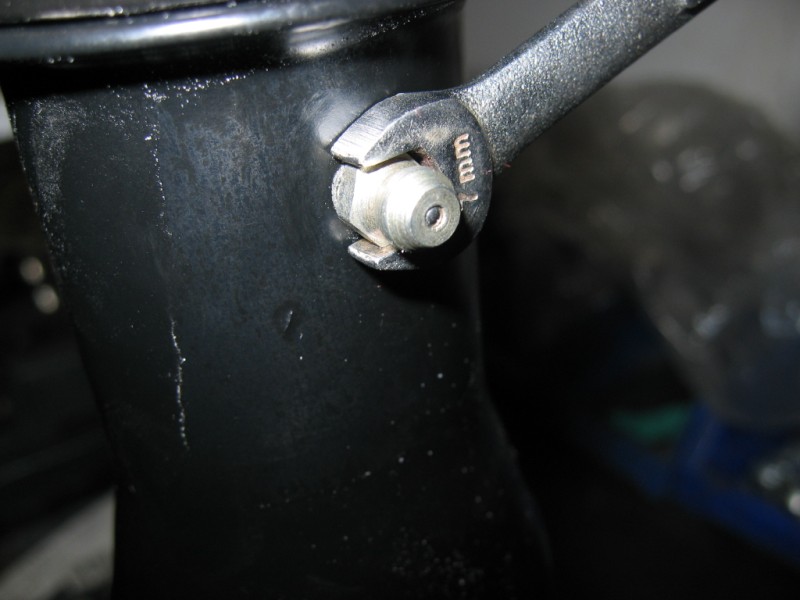 Done. 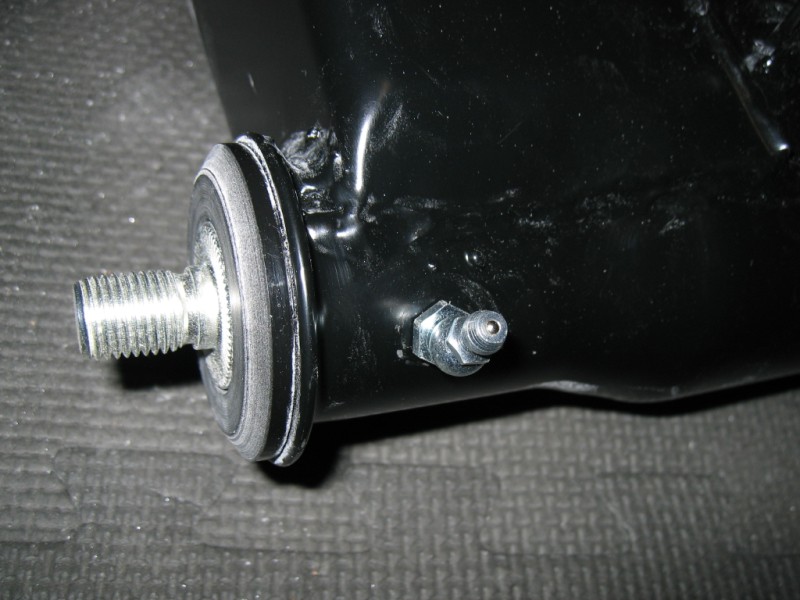 You now have a perfect set of hard Performance-Poly bushings. With a little grease every now and again you will have a trouble free, quiet ride. These bushings are the perfect hardness to provide precise control. When installed properly, they're free floating and non-binding which allows the suspension to work smoothly. Enjoy. |
   |

 
|
Posts in this topic
Eric_Shea How To: Installing 70D Performance Hard Poly Bushings Dec 22 2007, 06:59 PM ConeDodger Sweet!!! Dec 22 2007, 11:58 PM SirAndy :trophy: good writeup Eric-Meister !!... Dec 23 2007, 12:29 AM daveyboybadion Eric, excellent tutorial. As I have recently purch... Dec 23 2007, 10:03 AM Gint What if the grease zirk is longer than the trailin... Dec 24 2007, 07:04 AM
 daveyboybadion Gint, iffen you can't find the correct length ... Dec 24 2007, 01:53 PM scotty b Eric I unfortunately bought rears for my dads car ... Dec 24 2007, 02:00 PM Eric_Shea
This is not a problem on the 6m zerk. They just... Dec 24 2007, 04:41 PM Eric_Shea
Sure... :confused: Dec 24 2007, 04:43 PM euro911 :angry: Crap, I forgot to take notes ... can you g... Jan 6 2008, 07:46 PM jim_hoyland Got a question about how tight the fit should be. ... Feb 23 2008, 12:47 PM Eric_Shea Both the honing process and the trailing arms are ... Feb 23 2008, 01:34 PM jim_hoyland Got it, thanks. : Should I be able to turn the rod... Feb 23 2008, 02:59 PM Eric_Shea
Yes. Not a free "spin" but it should ... Feb 23 2008, 03:38 PM jim_hoyland Worked out pretty good. Got the bushings in, Zics,... Mar 9 2008, 01:43 PM Eric_Shea Bearing caps are on upside down and cut your toe n... Mar 9 2008, 02:23 PM jim_hoyland
Bearing caps are on upside down and cut your toe ... Mar 9 2008, 03:16 PM John E.
A picture showing both zerks installed into th... Mar 9 2008, 02:27 PM Eric_Shea Noticed that while leafing through the past posts.... Mar 9 2008, 02:33 PM Eric_Shea
Possibly both? :confused:
I'll mark up you... Mar 9 2008, 03:32 PM spunone Ya got anymore of them bushings laying around? I m... Mar 10 2008, 09:25 AM sawtooth Thanks mr. E! This old thread is still golden ... Apr 7 2011, 02:54 PM porsche913b_sp Anyone have some good pics of best locations for t... Apr 7 2011, 10:13 PM sawtooth
Anyone have some good pics of best locations for ... Apr 8 2011, 11:09 AM dirk9141973 :D any auto parts store has zerk fittings you get ... Apr 8 2011, 04:27 PM PRS914-6 Eric, another nice write-up!
For honing I wou... Apr 8 2011, 05:47 PM
daveyboybadion Gint, iffen you can't find the correct length ... Dec 24 2007, 01:53 PM scotty b Eric I unfortunately bought rears for my dads car ... Dec 24 2007, 02:00 PM Eric_Shea
This is not a problem on the 6m zerk. They just... Dec 24 2007, 04:41 PM Eric_Shea
Sure... :confused: Dec 24 2007, 04:43 PM euro911 :angry: Crap, I forgot to take notes ... can you g... Jan 6 2008, 07:46 PM jim_hoyland Got a question about how tight the fit should be. ... Feb 23 2008, 12:47 PM Eric_Shea Both the honing process and the trailing arms are ... Feb 23 2008, 01:34 PM jim_hoyland Got it, thanks. : Should I be able to turn the rod... Feb 23 2008, 02:59 PM Eric_Shea
Yes. Not a free "spin" but it should ... Feb 23 2008, 03:38 PM jim_hoyland Worked out pretty good. Got the bushings in, Zics,... Mar 9 2008, 01:43 PM Eric_Shea Bearing caps are on upside down and cut your toe n... Mar 9 2008, 02:23 PM jim_hoyland
Bearing caps are on upside down and cut your toe ... Mar 9 2008, 03:16 PM John E.
A picture showing both zerks installed into th... Mar 9 2008, 02:27 PM Eric_Shea Noticed that while leafing through the past posts.... Mar 9 2008, 02:33 PM Eric_Shea
Possibly both? :confused:
I'll mark up you... Mar 9 2008, 03:32 PM spunone Ya got anymore of them bushings laying around? I m... Mar 10 2008, 09:25 AM sawtooth Thanks mr. E! This old thread is still golden ... Apr 7 2011, 02:54 PM porsche913b_sp Anyone have some good pics of best locations for t... Apr 7 2011, 10:13 PM sawtooth
Anyone have some good pics of best locations for ... Apr 8 2011, 11:09 AM dirk9141973 :D any auto parts store has zerk fittings you get ... Apr 8 2011, 04:27 PM PRS914-6 Eric, another nice write-up!
For honing I wou... Apr 8 2011, 05:47 PM  |
1 User(s) are reading this topic (1 Guests and 0 Anonymous Users)
0 Members:

|
Lo-Fi Version | Time is now: 2nd April 2026 - 06:14 PM |
Invision Power Board
v9.1.4 © 2026 IPS, Inc.