|
|
|
Porsche, and the Porsche crest are registered trademarks of Dr. Ing. h.c. F. Porsche AG.
This site is not affiliated with Porsche in any way. Its only purpose is to provide an online forum for car enthusiasts. All other trademarks are property of their respective owners. |
|
|

  |

| BeatNavy |
 Mar 7 2015, 06:11 PM Mar 7 2015, 06:11 PM
Post
#1
|
|
Certified Professional Scapegoat  Group: Members Posts: 2,962 Joined: 26-February 14 From: Easton, MD Member No.: 17,042 Region Association: MidAtlantic Region |
Ok, this should be easy. I have the engine sitting on a dolly, and I'm trying to figure out where I access the oil cooler seals so I can replace them while the engine's out. I know they are on the vertical side of the cooler, and probably on the inside (not outside) side of the cooler, right? Getting access under the engine is a little difficult since it's on the dolly and I currently don't have a good view up directly underneath. What do I need to remove in order to get access to those seals? Should I attack it from the top or from underneath? I started to remove the oil filter housing but the top nut is pretty well hidden too...
|
   |

 
|
| mepstein |
Mar 7 2015, 06:59 PM
Post
#2
|
|
914-6 GT in waiting Group: Members Posts: 20,587 Joined: 19-September 09 From: Landenberg, PA/Wilmington, DE Member No.: 10,825 Region Association: MidAtlantic Region |
One or 2 pieces of engine tin and the right size wrench does it. I did it so you know its not too hard. Take your time and you'll be good. Cooler isn't completely removed, just pulled out a bit to replace the seals. I don't know how the guys do it with the engine in the car.
|
 |
|
| BeatNavy |
Mar 7 2015, 07:04 PM
Post
#3
|
|
Certified Professional Scapegoat Group: Members Posts: 2,962 Joined: 26-February 14 From: Easton, MD Member No.: 17,042 Region Association: MidAtlantic Region |
QUOTE(mepstein @ Mar 7 2015, 07:59 PM)  One or 2 pieces of engine tin and the right size wrench does it. I did it so you know its not too hard. Take your time and you'll be good. Cooler isn't completely removed, just pulled out a bit to replace the seals. I don't know how the guys do it with the engine in the car. Thanks Mark. Engine tin is off (had it powdercoated). Did you do it from the top or from underneath (wait, that doesn't sound right...you know what I mean). |
|
|
|
| Dave_Darling |
Mar 7 2015, 07:40 PM
Post
#4
|
|
914 Idiot Group: Members Posts: 15,335 Joined: 9-January 03 From: Silicon Valley / Kailua-Kona Member No.: 121 Region Association: Northern California |
Just remove the fan and fan shroud. Three bolts (may be "triple squares") hold the fan on, once those are off there are four nuts that hold the fan shroud onto the case. Pull the shroud forward and off (don't forget to unhook the alternator cooling boot!!) and the cooler will be right there. Remove the retaining nuts, pull the cooler off, replace the seals, then put everything back together.
It's a lot easier than lying on your back trying to fish the seals up into place. --DD |
|
|
|
| BeatNavy |
Mar 7 2015, 07:47 PM
Post
#5
|
|
Certified Professional Scapegoat Group: Members Posts: 2,962 Joined: 26-February 14 From: Easton, MD Member No.: 17,042 Region Association: MidAtlantic Region |
Sweet, thanks Dave. That must be the "trick." I'll tackle it that way.
|
|
|
|
| Larmo63 |
Mar 8 2015, 12:09 AM
Post
#6
|
|
Advanced Member Group: Members Posts: 4,267 Joined: 3-March 14 From: San Clemente, Ca Member No.: 17,068 Region Association: Southern California |
The front of the motor is like a big puzzle. It looks intimidating, but it is really pretty simple. Remember to have proper torque values when putting it all back together while keeping all nuts and bolts organized. I would slide the oil cooler all the way off and clean / inspect that whole area.
I liked Mark's "I did it so you know it's not too hard" comment. |
|
|
|
| bandjoey |
Mar 8 2015, 10:53 AM
Post
#7
|
|
bandjoey Group: Members Posts: 4,935 Joined: 26-September 07 From: Bedford Tx Member No.: 8,156 Region Association: Southwest Region |
|
|
|
|
| r_towle |
Mar 8 2015, 01:44 PM
Post
#8
|
|
Custom Member Group: Members Posts: 24,705 Joined: 9-January 03 From: Taxachusetts Member No.: 124 Region Association: North East States |
Yup, remove fan, fan housing, alternator.
Oil cooled is right in front of you at that point.i would also suggest you replace the motor mounts while there, they are easier to get to at that point and they are 40 years old. You need to paint the fan housing anyways, it will look like crap with new shiny tin. DO NOT take apart the fan and paint it, it's balanced. Do download the degree marking stencil from pelican parts and add those marks to your fan while its out, it's nice to have them easy to see. Rich |
|
|
|
| BeatNavy |
Mar 8 2015, 04:06 PM
Post
#9
|
|
Certified Professional Scapegoat Group: Members Posts: 2,962 Joined: 26-February 14 From: Easton, MD Member No.: 17,042 Region Association: MidAtlantic Region |
Cool, thanks for the comments, gentlemen.
Yup, took Dave and Rich's advice and took the fan shroud off and went that direction. And as Larmo63 said, it's pretty straightforward. I was surprised how the shroud comes off in one piece so easily and how light it is. Here's some progress pics (sorry for bad lighting and phone camera - as warmer weather is arriving I'll get natural light by opening the garage door. Can't wait - feel like I've been working in a cave): 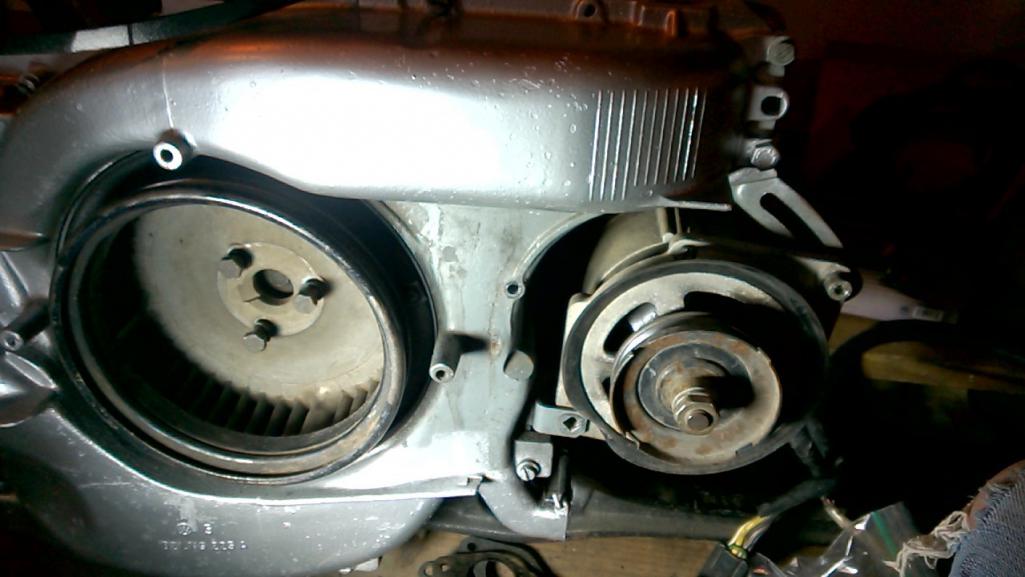 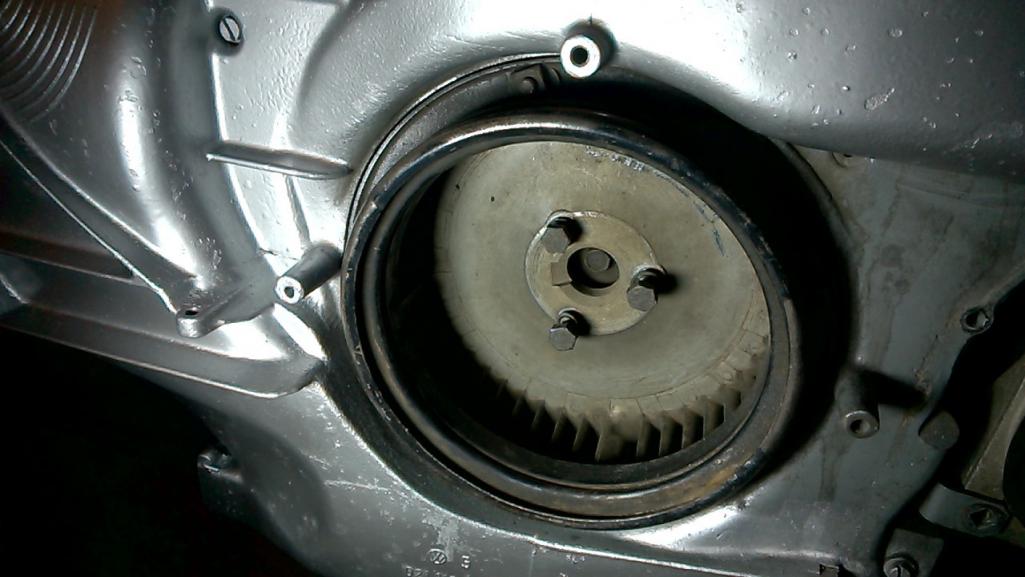 With the fan removed it is a good time to check timing marks as Rich mentioned: 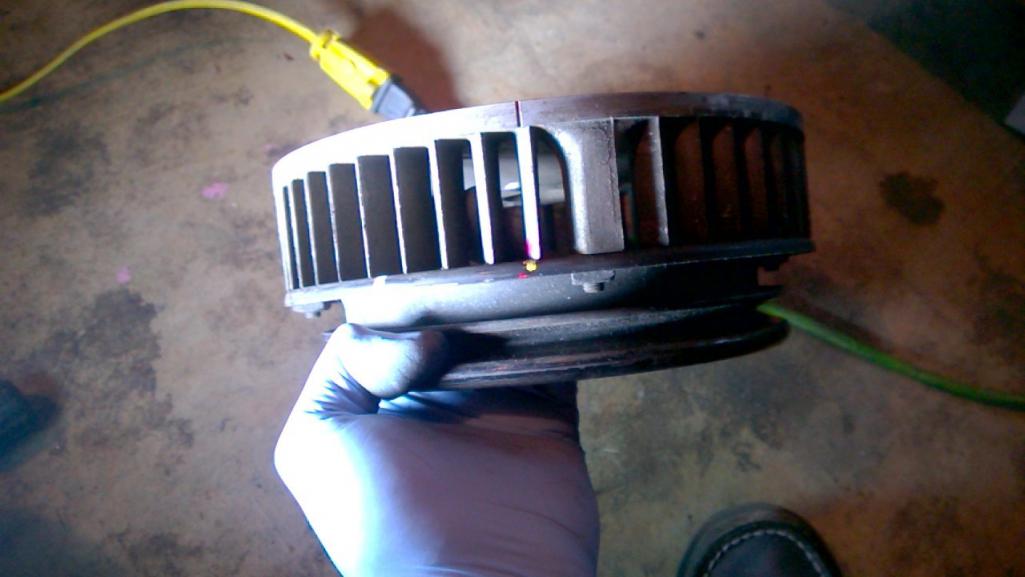 Oil Cooler on Engine. Those three 10mm nuts hold the cooler on the studs: 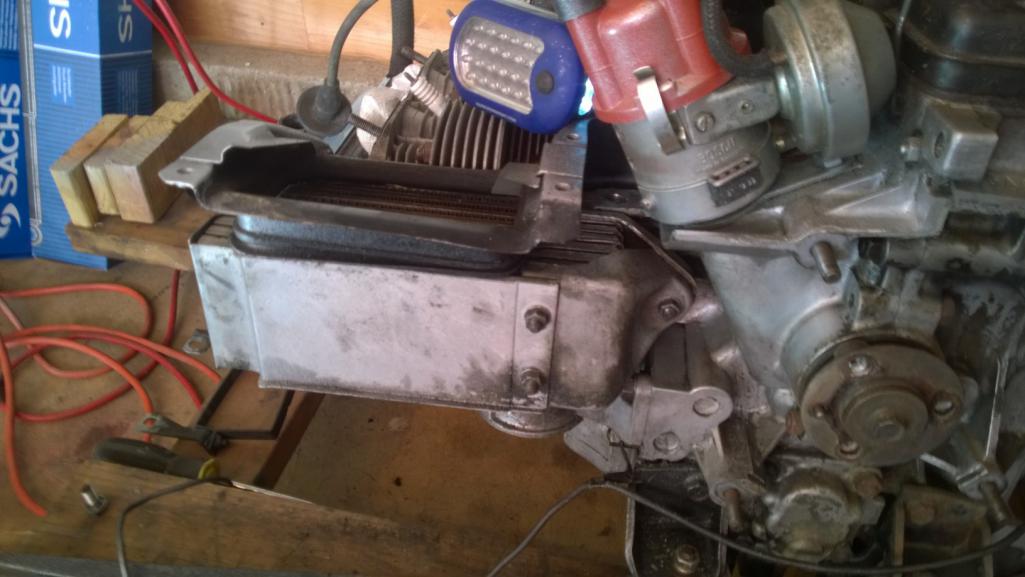 With the cooler removed, here are the old seals. The one on bottom looked pretty good, but the one on top looked old, and the inside "lip" was pretty well worn off. Is the upper the oil "in" line and the lower the "out?" Either that is what happened to the seal on top (hotter oil) or someone previously replaced only the bottom seal. 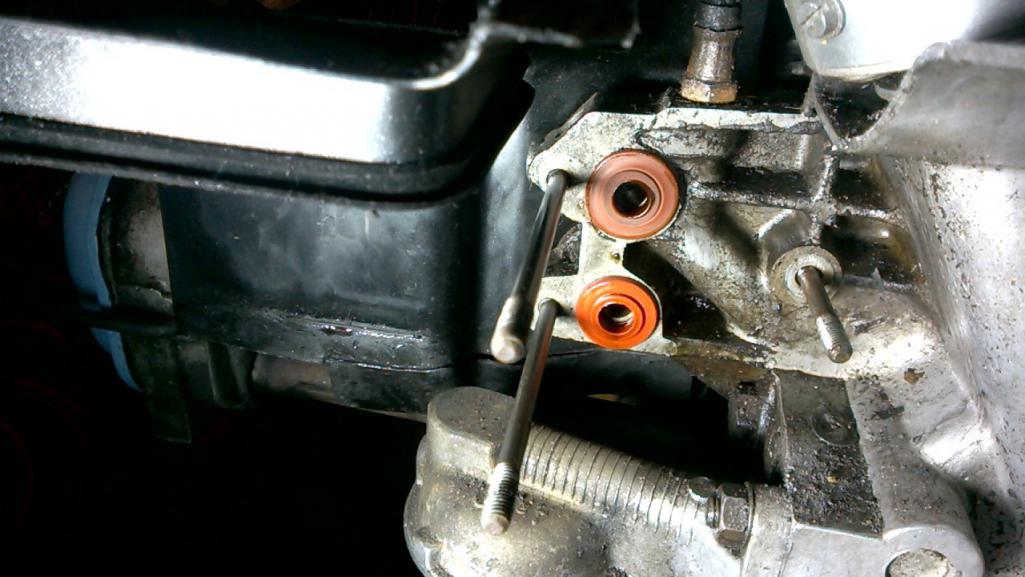 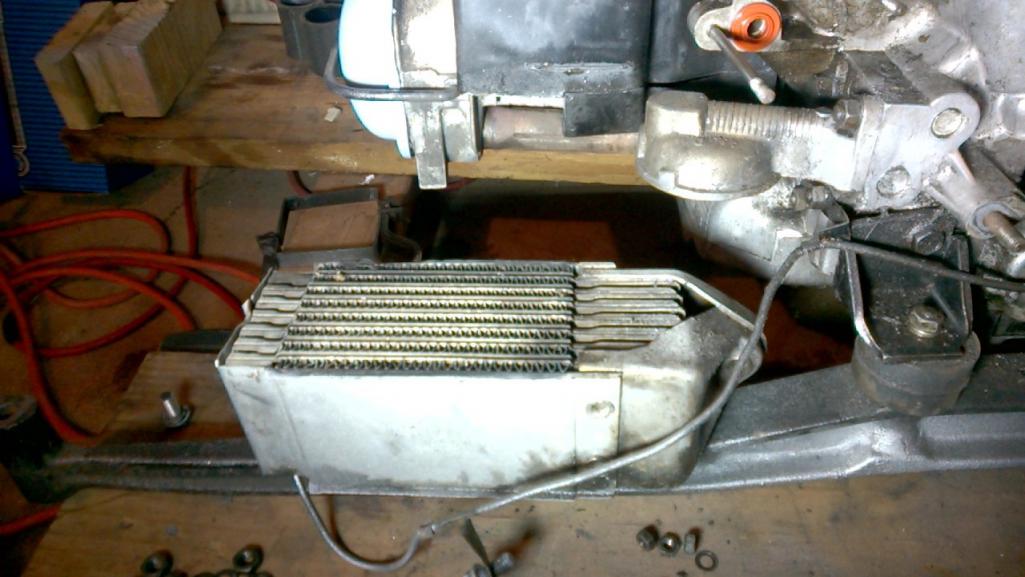 Replacing them was easy. Just a little light grease to hold them in place. I realize I didn't take any pictures of the new seals in place. (IMG:style_emoticons/default/blink.gif) And, as also mentioned, do some cleanup and painting. I had actually painted the front / top yesterday, but this was a chance to do it right and get all of the shroud. I agree, the engine will look pretty sweet now with a clean, shiny fan shroud and the powdercoated engine tin. Took me a fair amount of time to get the grease cleaned off it. Something is leaking oil somewhere... 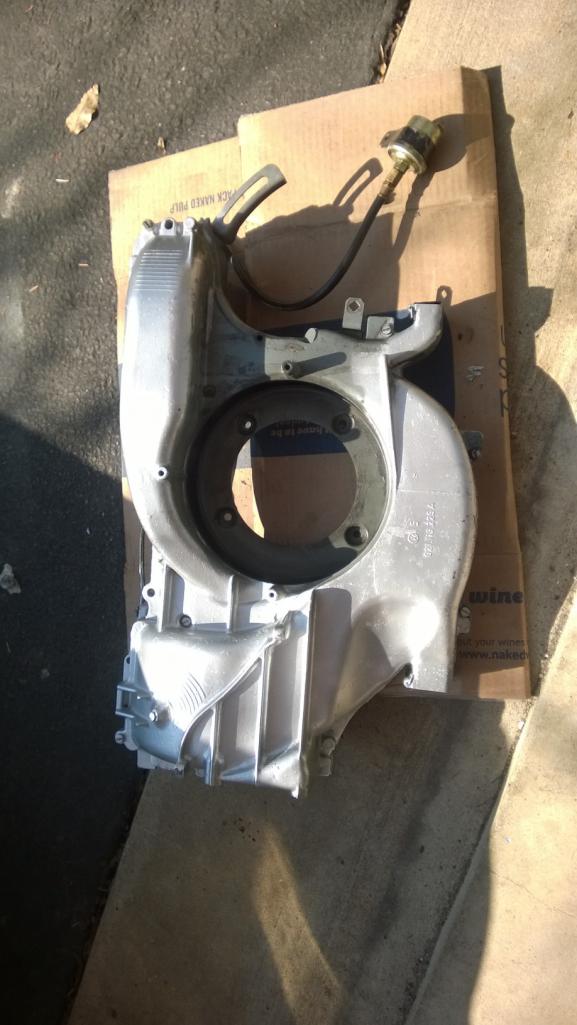 Rich, the engine mounts look like they are in good shape. I don't think they are original. But here's the "bad" news in this process: I noticed The oil pressure sending unit hose looks like it's leaking or about to start leaking: 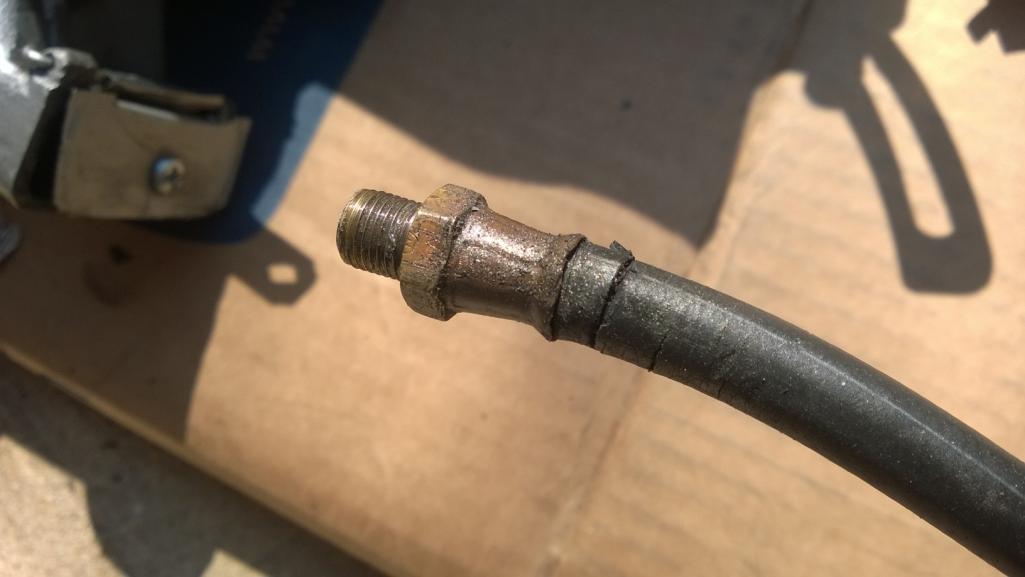 This is one of those "remote" sending units. Any recommendations for what I should do for replacing the hose? If necessary I'll just put the stock "dummy light" sending unit in. Here's the actual unit: 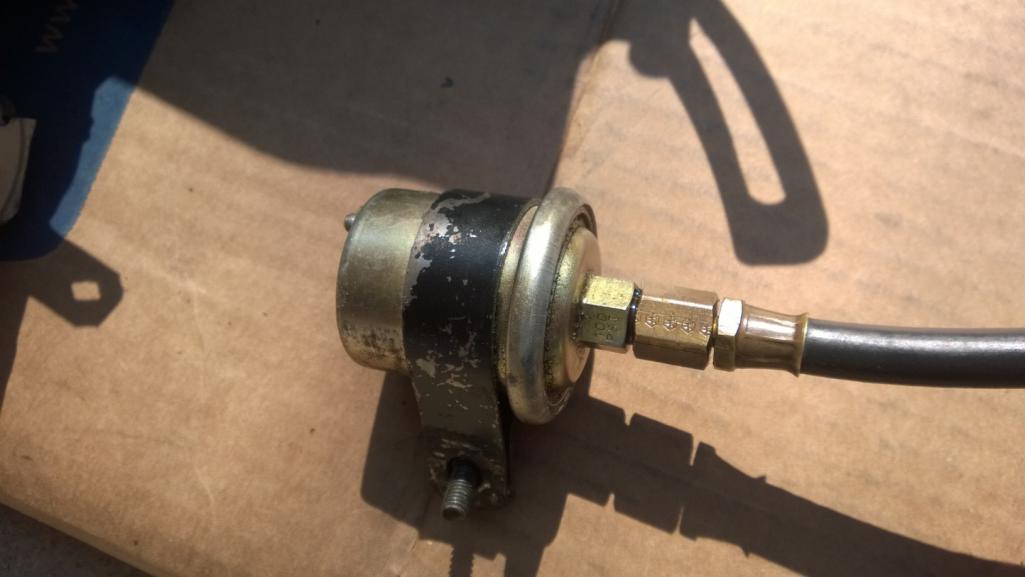 Then, per Dave's comment, the Alternator cooling hose/grommet/fitting is a bit torn. Gonna have to source one of those. 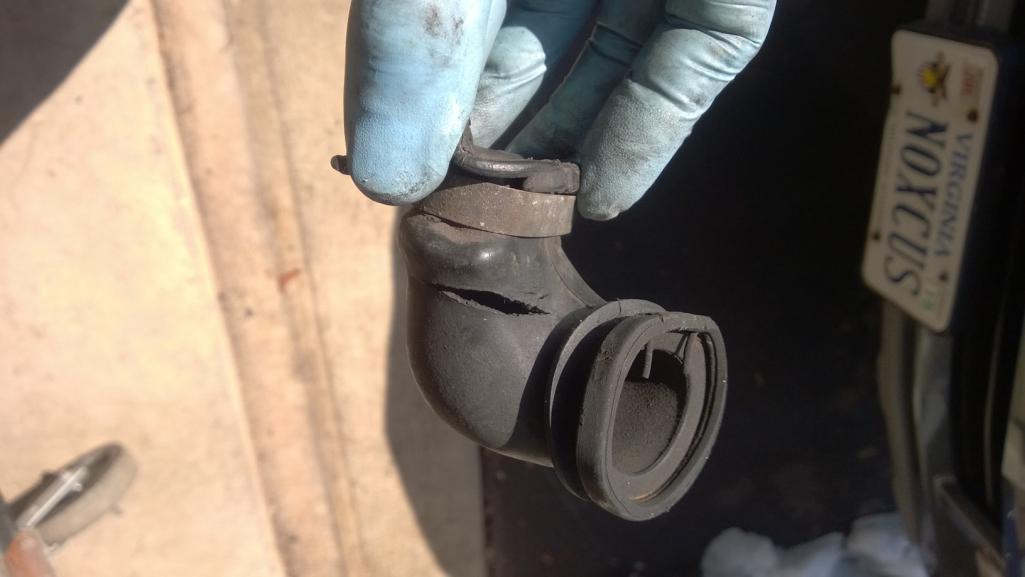 Finally, the fan flaps are giving me a little challenge. Here's a picture of the plastic piece (one on the inside of each flap). Is this the only thing that holds the flap rod in the holder? Does the engine tin then hold this in place? I ask because it doesn't seem to be very secure. 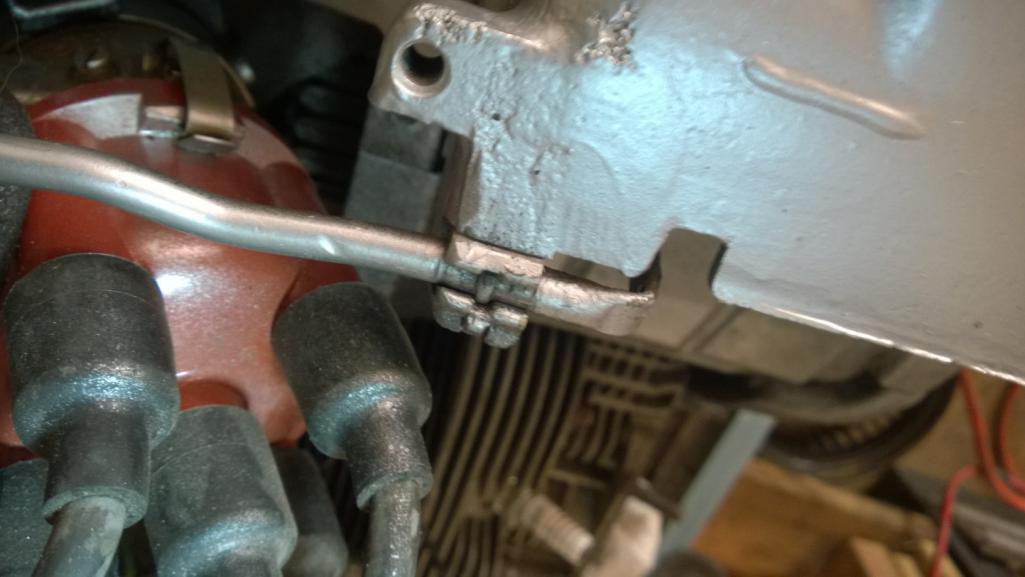 And, I'm not sure the spring on the flap rod is set correctly. Does this look correct? the spring doesn't seem to get "loaded" and do anything this way. (The thermostat wire is not hooked up - something else on my to do list). 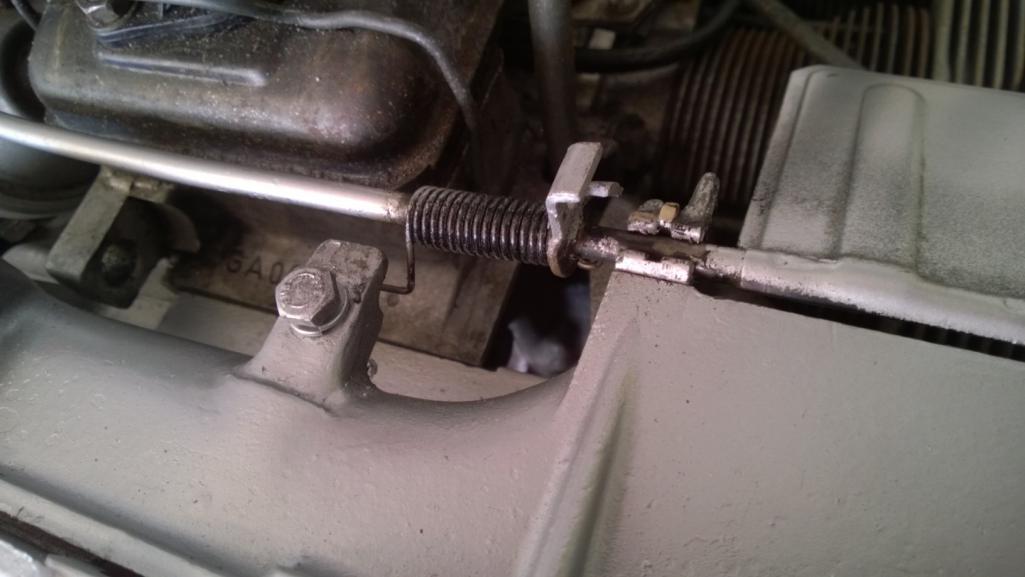 Thanks for the help and advice. Here's the cleaned up shroud temporarily back on engine. I can't finalize putting it back on until I figure out these couple of issues. But with new seals and replacing that oil pressure hose I should probably be able to keep this engine clean for a little while anyway. 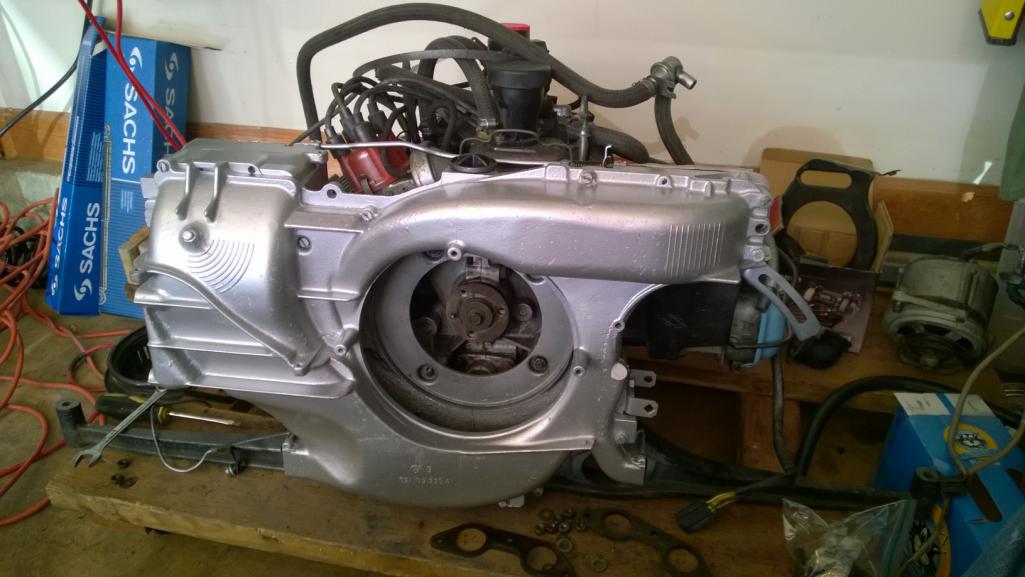 |
|
|
|
| r_towle |
Mar 8 2015, 04:16 PM
Post
#10
|
|
Custom Member Group: Members Posts: 24,705 Joined: 9-January 03 From: Taxachusetts Member No.: 124 Region Association: North East States |
Grease gun hose or paint ball gun hose
Rich |
|
|
|
| BeatNavy |
Mar 8 2015, 04:26 PM
Post
#11
|
|
Certified Professional Scapegoat Group: Members Posts: 2,962 Joined: 26-February 14 From: Easton, MD Member No.: 17,042 Region Association: MidAtlantic Region |
QUOTE(r_towle @ Mar 8 2015, 06:16 PM) Grease gun hose or paint ball gun hose Rich Ok, that's what I've heard. Then that's what I will do. |
|
|
|
| BeatNavy |
Mar 8 2015, 04:28 PM
Post
#12
|
|
Certified Professional Scapegoat Group: Members Posts: 2,962 Joined: 26-February 14 From: Easton, MD Member No.: 17,042 Region Association: MidAtlantic Region |
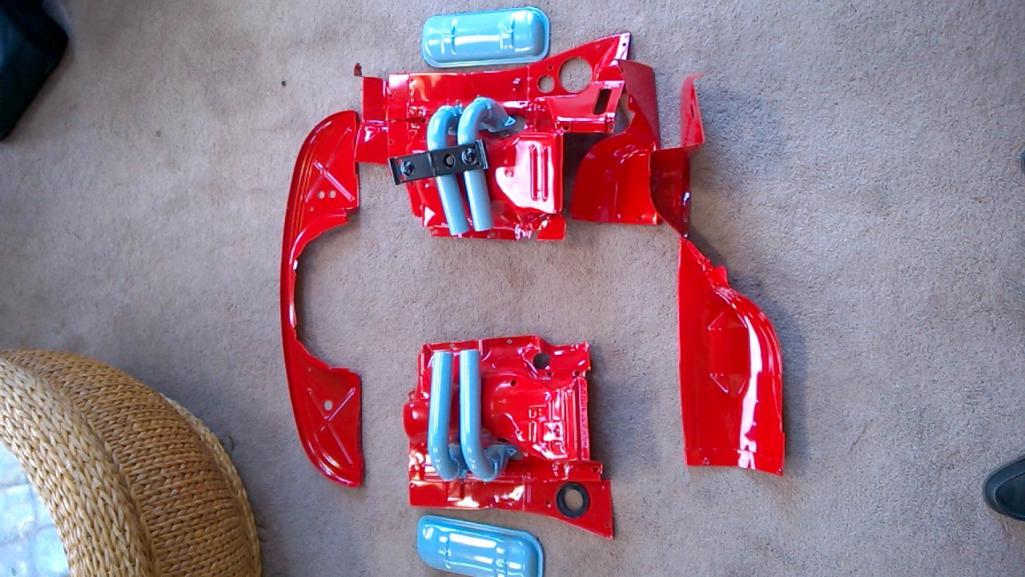
Here's the engine tin after powdercoating. Not stock colors, I know, but I think it will look pretty sweet.
 |
|
|
|
| TheCabinetmaker |
Mar 8 2015, 05:09 PM
Post
#13
|
|
I drive my car everyday Group: Members Posts: 8,373 Joined: 8-May 03 From: Tulsa, Ok. Member No.: 666 |
Your missing two little flat pieces of metal that screw to the shroud and hold the rod in place. They are about 3/4" wide and 1 1/4" long with the corners knocked off at a45, but easy to make them, or get a couple of flat mending plates at the hardware store. Alternator boot is available new at the bughaus. It's the same as a van with a type 4.
|
|
|
|
| BeatNavy |
Mar 8 2015, 05:14 PM
Post
#14
|
|
Certified Professional Scapegoat Group: Members Posts: 2,962 Joined: 26-February 14 From: Easton, MD Member No.: 17,042 Region Association: MidAtlantic Region |
QUOTE(The Cabinetmaker @ Mar 8 2015, 07:09 PM) Your missing two little flat pieces of metal that screw to the shroud and hold the rod in place. They are about 3/4" wide and 1 1/4" long with the corners knocked off at a45, but easy to make them, or get a couple of flat mending plates at the hardware store. Alternator boot is available new at the bughaus. It's the same as a van with a type 4. Cool, thanks Curt. Do you (or anyone) have a picture of those? I'll use the google but a picture would be helpful. Thanks! |
|
|
|
| BeatNavy |
Mar 8 2015, 05:49 PM
Post
#15
|
|
Certified Professional Scapegoat Group: Members Posts: 2,962 Joined: 26-February 14 From: Easton, MD Member No.: 17,042 Region Association: MidAtlantic Region |
Never mind. I see it on my other car. Thanks Curt.
|
|
|
|
| Stltri |
Feb 14 2022, 07:35 PM
Post
#16
|
|
Member Group: Members Posts: 70 Joined: 13-April 15 From: SoCal Member No.: 18,622 Region Association: None |
Reviving an old thread.
Can someone confirm the torque for the 3 oil cooler nuts? I’ve seen 5, 10, and 18 ft/lbs after a search. 10 or 18 seemed like a lot for a small nut and stud. |
|
|
|
| BeatNavy |
Feb 14 2022, 07:47 PM
Post
#17
|
|
Certified Professional Scapegoat Group: Members Posts: 2,962 Joined: 26-February 14 From: Easton, MD Member No.: 17,042 Region Association: MidAtlantic Region |
Dayummm... this is an old thread. I had forgotten about it.
IIRC there is no published torque spec for those nuts, but the Wilson engine rebuild book suggests 60 in-lbs or 5 ft-lbs. I would certainly not go much beyond that. |
|
|
|
| Stltri |
Feb 14 2022, 08:06 PM
Post
#18
|
|
Member Group: Members Posts: 70 Joined: 13-April 15 From: SoCal Member No.: 18,622 Region Association: None |
QUOTE(BeatNavy @ Feb 14 2022, 05:47 PM) Dayummm... this is an old thread. I had forgotten about it. IIRC there is no published torque spec for those nuts, but the Wilson engine rebuild book suggests 60 in-lbs or 5 ft-lbs. I would certainly not go much beyond that. Thanks for that. Curious that at 5 ft/lbs, is the goal to just keep the seals in place and allow the cooler to move around a bit when engine running? or tight enough to make the cooler itself come in contact with the case? |
|
|
|
| 914Mels |
Feb 14 2022, 11:28 PM
Post
#19
|
|
Member Group: Members Posts: 357 Joined: 20-June 11 From: Santee Member No.: 13,221 Region Association: Southern California |
It looks like the remote hose has straight threads on it and is bottomed into the engine case. The original sender was pipe thread with a taper. This might be part of the leak you have as the threads won't seal properly.
|
|
|
|
|
1 User(s) are reading this topic (1 Guests and 0 Anonymous Users)
0 Members:

|
Lo-Fi Version | Time is now: 2nd April 2026 - 04:55 AM |
Invision Power Board
v9.1.4 © 2026 IPS, Inc.