|
|
|
Porsche, and the Porsche crest are registered trademarks of Dr. Ing. h.c. F. Porsche AG.
This site is not affiliated with Porsche in any way. Its only purpose is to provide an online forum for car enthusiasts. All other trademarks are property of their respective owners. |
|
|

  |

| Wew |
 May 4 2021, 12:43 PM May 4 2021, 12:43 PM
Post
#21
|
|
Member  Group: Members Posts: 236 Joined: 17-January 15 From: Novato, ca Member No.: 18,335 Region Association: None |
What are you thoughts on putting the sensor flush to the engine case? The old sensor for the idiot light has a bigger base and possibly could solve the leak problem?
wishful thinking? Also the North hollywood oil pressure sender has a little copper washer with it. Not sure if that washer would actually cover the opening. I have attached to stock photos of both sensors. I also have a call out to a welder but he needs the actual sending unit to check the threads and the shape of the nipple to be sure he actually has the tool to do it. Thanks for the input, Gary 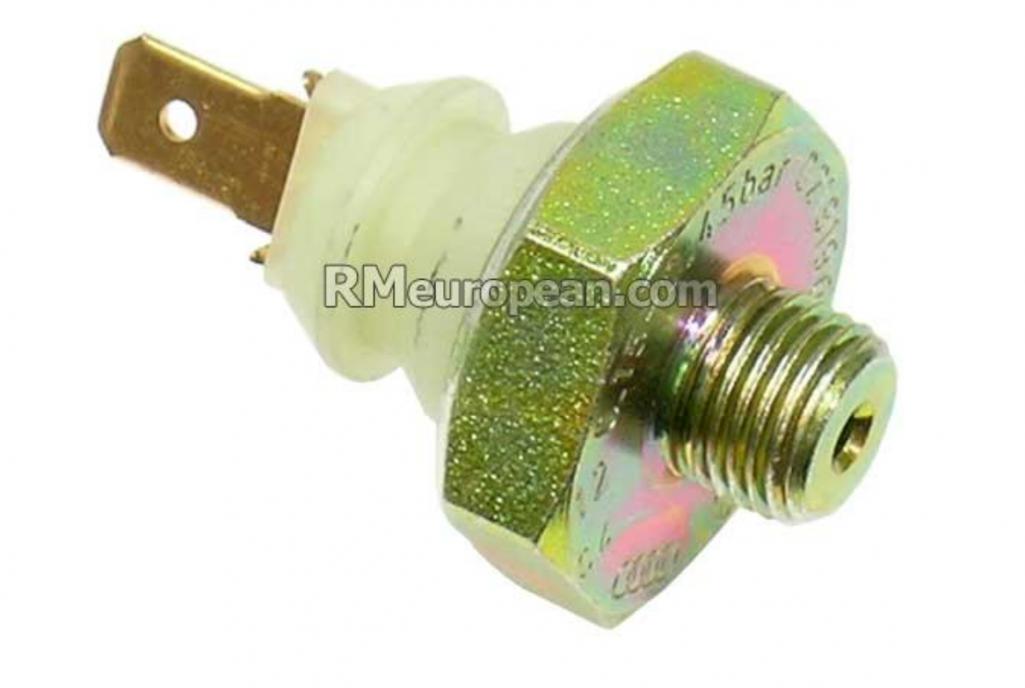 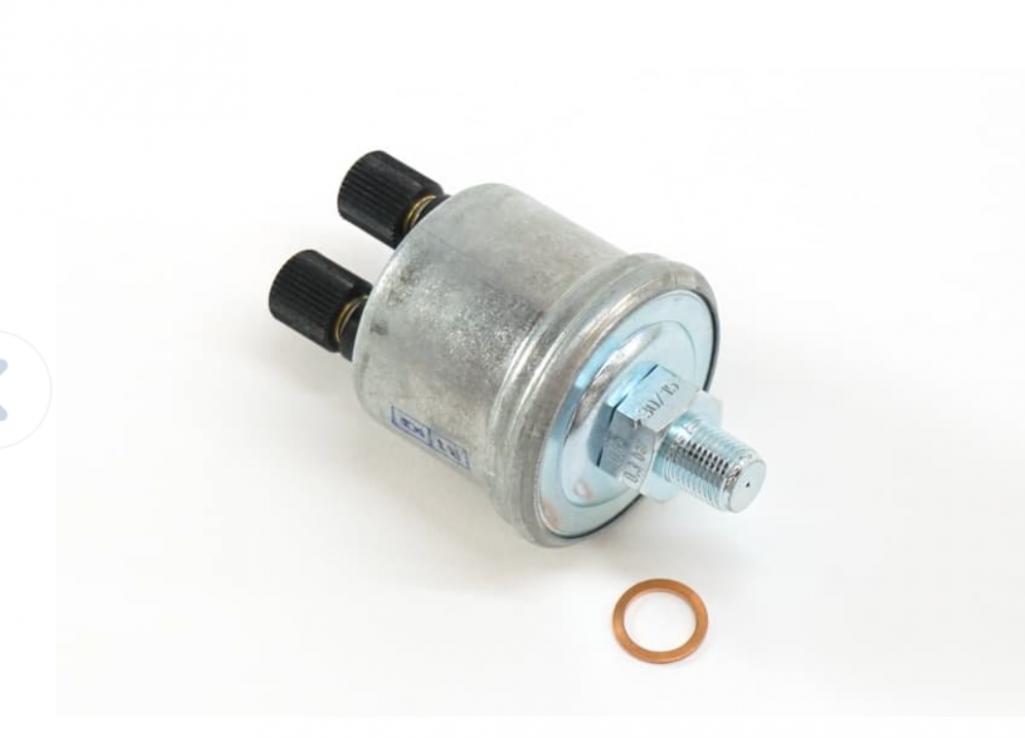 |
   |

 
|
| Root_Werks |
May 4 2021, 01:56 PM
Post
#22
|
|
Village Idiot Group: Members Posts: 8,930 Joined: 25-May 04 From: About 5NM from Canada Member No.: 2,105 Region Association: Pacific Northwest |
Isn't there another galley you can unplug and use? Maybe I'm thinking of the T1 case? Was thinking you could put a plug in the damaged hole and use an alternate oil galley if there's one.
|
 |
|
| Shivers |
May 4 2021, 02:43 PM
Post
#23
|
|
Senior Member Group: Members Posts: 3,335 Joined: 19-October 20 From: La Quinta, CA Member No.: 24,781 Region Association: Southern California |
Before I gave up and started tearing it down. I'd try a good thread sealer. Did you see oil coming out of those threads? Just in case, because I didn't see it mentioned here, Fram oil filters have failed to seat twice. It is right there and looks like the oil cooler or something sprung a leak. It has however on both occasions been a fram. So if you run out of places to look...
|
|
|
|
| Wew |
May 5 2021, 09:18 AM
Post
#24
|
|
Member Group: Members Posts: 236 Joined: 17-January 15 From: Novato, ca Member No.: 18,335 Region Association: None |
Two good points.
I have an appointment with a shop in the north bay that does engine block work and performance tuning. I am curious to see what they think. I will share updates next week. Thanks again for the input. |
|
|
|
| Root_Werks |
May 5 2021, 09:54 AM
Post
#25
|
|
Village Idiot Group: Members Posts: 8,930 Joined: 25-May 04 From: About 5NM from Canada Member No.: 2,105 Region Association: Pacific Northwest |
I would like to know the outcome of this leak. Had a few 914-4's with similar leaks that seemed hard to track down. A bad oil pressure switch was one of them and bad tuna can gasket another. When driving, oil got everywhere and it was hard to track down.
|
|
|
|
| wonkipop |
May 15 2021, 02:04 AM
Post
#26
|
|
914 Guru Group: Members Posts: 5,480 Joined: 6-May 20 From: north antarctica Member No.: 24,231 Region Association: NineFourteenerVille |
QUOTE(Mark Henry @ Apr 28 2021, 02:27 PM)  Where's the underside cooling tin? What did you use to seal the cylinder to the case ? Studs I put in with red loctite. I'm happy if I have no drips, slight weeps are a given...it's an aircooled. i understand mark you are referring to what appears to be missing are the baffle tins located above the pushrod tubes normally and look like they are not there in the photo. not warm air guides which are lower down? i know back in the 80s there were two schools of thought on the lower warm air guides. personally i believe the lower guides simply squirt or help direct the already heated cooling air that has done its job and try to direct that air towards the back of the car. the big problem with a 914 is the heated air builds up under the car when it is at stand still in traffic idling compared to a regular rear engined VW where the air can just squirt out the rear without building up underneath. i know this because i live in australia and it can be very evident on a hot day here just how hot it can get underneath when the car is running but standing still. i'm not sure in the end the lower air guides do much really. maybe save the clutch and accelerator cables. i removed mine with the rusted out heat exchangers way back in the late 80s. the guides were rusted along with the heat exchangers. my american porsche mechanic back then explained what he believed the lower air guides did and it was 50 50 whether they really did push that hot air out from under the car any better than if they were not there. it would be very dangerous to run a 914 engine without the baffle tin ware that is above the pushrods. those baffles are there to bend the air across the bottom of the cylinders and heads. thats going to cook an engine real fast if they are left off. |
|
|
|
| Mark Henry |
May 15 2021, 05:09 AM
Post
#27
|
|
that's what I do! Group: Members Posts: 20,065 Joined: 27-December 02 From: Port Hope, Ontario Member No.: 26 Region Association: Canada |
QUOTE(wonkipop @ May 15 2021, 04:04 AM) QUOTE(Mark Henry @ Apr 28 2021, 02:27 PM) Where's the underside cooling tin? What did you use to seal the cylinder to the case ? Studs I put in with red loctite. I'm happy if I have no drips, slight weeps are a given...it's an aircooled. i understand mark you are referring to what appears to be missing are the baffle tins located above the pushrod tubes normally and look like they are not there in the photo. not warm air guides which are lower down? i know back in the 80s there were two schools of thought on the lower warm air guides. personally i believe the lower guides simply squirt or help direct the already heated cooling air that has done its job and try to direct that air towards the back of the car. the big problem with a 914 is the heated air builds up under the car when it is at stand still in traffic idling compared to a regular rear engined VW where the air can just squirt out the rear without building up underneath. i know this because i live in australia and it can be very evident on a hot day here just how hot it can get underneath when the car is running but standing still. i'm not sure in the end the lower air guides do much really. maybe save the clutch and accelerator cables. i removed mine with the rusted out heat exchangers way back in the late 80s. the guides were rusted along with the heat exchangers. my american porsche mechanic back then explained what he believed the lower air guides did and it was 50 50 whether they really did push that hot air out from under the car any better than if they were not there. it would be very dangerous to run a 914 engine without the baffle tin ware that is above the pushrods. those baffles are there to bend the air across the bottom of the cylinders and heads. thats going to cook an engine real fast if they are left off. In the picture I was talking about the under cylinder (above PR) tin, I don't care if you live in Alaska you have to have these tins. The heat exchanger bottom tins I like to use up here in Canada, but it's not a must have. Obviously you can't even use the heat exchanger tins with headers. Likely the pic the OP pulled from the net is from a DTM or Joe Cali upright fan conversion engine and these deflectors a modifided type1 and you can't see them in the pic. |
|
|
|
| Mark Henry |
May 15 2021, 05:19 AM
Post
#28
|
|
that's what I do! Group: Members Posts: 20,065 Joined: 27-December 02 From: Port Hope, Ontario Member No.: 26 Region Association: Canada |
Wew are you sure it's leaking from the switch?
Engine out remove your spark plugs, jury rig a light to the switch and spin the engine making sure the light goes out. If you need it to spin faster remove the valve train as well. Watch for leaks. |
|
|
|
| Superhawk996 |
May 15 2021, 08:48 AM
Post
#29
|
|
914 Guru Group: Members Posts: 7,767 Joined: 25-August 18 From: Woods of N. Idaho Member No.: 22,428 Region Association: Galt's Gulch |
Been there, done that with leaking oil pressure switch bore.
You're not going to like my solution. Not saying it's the only one but it made sense for me since I'm dealing with a bare case. Considered the other solutions (threaded inserts, taking hole out to 1/4 NPT, etc.) Might give you some other ideas. See post #182 http://www.914world.com/bbs2/index.php?sho...5209&st=181 Note: 1/8 NPT and M10x1.0 tapered pipe thread are almost exactly the same thread form both by OD and thread pitch. I've done the comparison on some other thread elsehwere on how little the thead pitch differs. For practial purposes they are interchangeable if you end up in a bind trying to select thread inserts, adapters, etc. As indicated by Mark above, make absolutely sure that is where it is leaking from before you go nuclear on it. I'd start with your 1st suggestion. See if you can get an ISO tapered pipe thread tap in M10 x 1.0 and tap it deeper to get more engaged threads. Failing that you can try the sealing washer if you can tap deep enough to get the flat base of the sensor to seal on the washer AND have enough threads to establish the needed clamp load. Here is an excerpt on difference between ISO taper and ISO straight threads: There are two variations of ISO pipe threads. Parallel threads (also called straight threads) and taper threads. Taper threads have a 1:16 taper and the same reamers can be used as for NPT threads. Reamers are not strictly necessary but in the larger sizes they enable a better thread to be produced. ISO pipe threads, when specified, are assumed to be parallel unless a taper thread is called out. Taper threads seal on the threads themselves. Parallel threads, if a leaktight fluid seal is required, seal with a gasket, washer, or O-ring against the female seat. Since there is only one thread pitch, the thread pitch is usually not specified and they are called out only by nominal size as noted below. From: https://www.womackmachine.com/engineering-t...t-thread-sizes/ |
|
|
|
| wonkipop |
May 15 2021, 09:52 PM
Post
#30
|
|
914 Guru Group: Members Posts: 5,480 Joined: 6-May 20 From: north antarctica Member No.: 24,231 Region Association: NineFourteenerVille |
QUOTE(Mark Henry @ May 15 2021, 05:09 AM) QUOTE(wonkipop @ May 15 2021, 04:04 AM) QUOTE(Mark Henry @ Apr 28 2021, 02:27 PM) Where's the underside cooling tin? What did you use to seal the cylinder to the case ? Studs I put in with red loctite. I'm happy if I have no drips, slight weeps are a given...it's an aircooled. i understand mark you are referring to what appears to be missing are the baffle tins located above the pushrod tubes normally and look like they are not there in the photo. not warm air guides which are lower down? i know back in the 80s there were two schools of thought on the lower warm air guides. personally i believe the lower guides simply squirt or help direct the already heated cooling air that has done its job and try to direct that air towards the back of the car. the big problem with a 914 is the heated air builds up under the car when it is at stand still in traffic idling compared to a regular rear engined VW where the air can just squirt out the rear without building up underneath. i know this because i live in australia and it can be very evident on a hot day here just how hot it can get underneath when the car is running but standing still. i'm not sure in the end the lower air guides do much really. maybe save the clutch and accelerator cables. i removed mine with the rusted out heat exchangers way back in the late 80s. the guides were rusted along with the heat exchangers. my american porsche mechanic back then explained what he believed the lower air guides did and it was 50 50 whether they really did push that hot air out from under the car any better than if they were not there. it would be very dangerous to run a 914 engine without the baffle tin ware that is above the pushrods. those baffles are there to bend the air across the bottom of the cylinders and heads. thats going to cook an engine real fast if they are left off. In the picture I was talking about the under cylinder (above PR) tin, I don't care if you live in Alaska you have to have these tins. The heat exchanger bottom tins I like to use up here in Canada, but it's not a must have. Obviously you can't even use the heat exchanger tins with headers. Likely the pic the OP pulled from the net is from a DTM or Joe Cali upright fan conversion engine and these deflectors a modifided type1 and you can't see them in the pic. thanks mate. in agreement. i've been looking out for the exchanger guides for a few years. you seem to be able to pick up the lhs ones no trouble, but i have not seen a rhs one (clutch speedo cable side) for sale in all that time. for whatever reason they seem to not be available from any source, repro or used. i'm pretty relaxed about not having those bits of tin but would be happy to put them on if i could ever find some. i think what they do is send as much of the exhausted cooling air towards the under trunk space as possible and alleviate build up of heat under the forward section where the engine is to help with the fuel pump where it was originally located in most cars. its pretty hard for the heat not to build up under a 914 at standstill due to the mid engine. whatever the flow of air out of the oil cooler ends up down there anyway? interesting info re the upright fan conversion. for bugs i guess where they fit type 4 engines? |
|
|
|
| barefoot |
May 16 2021, 06:05 AM
Post
#31
|
|
Senior Member Group: Members Posts: 1,488 Joined: 19-March 13 From: Charleston SC Member No.: 15,673 Region Association: South East States |
When i got my 911SC it had an oil leak I couldn't see. Dropping the engine revealed that the oil pressure idiot light transducer was leaking. That was an easy fix.
|
|
|
|
| Wew |
May 17 2021, 02:32 PM
Post
#32
|
|
Member Group: Members Posts: 236 Joined: 17-January 15 From: Novato, ca Member No.: 18,335 Region Association: None |
Hi all,
Sorry for the absence. Been away on vacation. I took the engine to a very reputable engine builder machine shop (RPM in Rohnert Park CA) that does a lot of the high end dyno testing and race engine building. They gave it a look and said they could fix it. Since the threads didn't go all the way down in the opening the first solution by one of the machinists was let's just tap this thing a little deeper with the original thread pitch and size so the we can rotate and set the male end deeper. He did that with lots of grease and then vacuumed up whatever shaving were made. Then he screwed in the original and it set in much deeper. 7 inch lbs of torque was his recommendation for the sender. He recommended using a permatex high temperature thread sealant, says they use that on all of their high performance engines. Most of the cars they work on are american muscle cars. If it doesn't work bring it back up and they will get more aggressive with solution. He didn't charge me a penny for his work. Pretty awesome. I am going to build an engine stand to test the motor this time rather than going to all the trouble of installing the engine just to find out I missed something. I know my pace and with full time work I doubt I will have the engine start stand build and the engine on it for testing by this weekend. Hoping to have it done before end of May. Keeping my fingers crossed. Gary |
|
|
|
| Wew |
Jun 16 2021, 12:27 PM
Post
#33
|
|
Member Group: Members Posts: 236 Joined: 17-January 15 From: Novato, ca Member No.: 18,335 Region Association: None |
Hi all,
I am back at putting my engine back together. Thanks Mark Henry and Rich from 914 werke and all the others for being so helpful with advice and recommendations. I purchased the oil pressure kit with the brake line adapter to avoid damaging the threaded opening in the case. Loctite thread sealer all the way around the threads throughout the extension and the pressure sender. Fingers crossed. I also purchased the oil cooler for the 914 2.0. Learn from my mistakes and do not buy an oil cooler from your local vw aircooled shop, although a close fit, it doesn't fit right and you have to do some grinding and macgyvering to make it fit right. A recipe for leaks, ask me how I know. Also, when you have your local air cooled shop do your rocker balancing double check their work. I should have sucked it up and done it myself. Would have done a better job in hindsight. #3 exhaust was so loose that you could have stuck a 2x4 between it for the gap. Not impressed with their quality of work to say the least. Nothing was set at zero lash as I had requested. Now I am moving on to other pieces for assembly and am having a heck of a time getting the SSI to line up with the exhaust studs. Three came out of the heads when originally loosening. I had to reset the and tighten them up. Now as a by product of that I cannot get the exhaust opening and the SSI exhaust to line up the way I would like. The only thing I can think of is loosening the studs again then sliding the SSI's back over them and then tighten the studs prior to tightening the actual copper nut. I also had a tough time getting the banana muffler to line up with the exhaust and had to use a strap to pull them a little closer together to line up with the muffler. Even after cranking down on the exhaust and muffler bolts it still seemed like they did not meet flush even with the proper gaskets. Interested to hear what others have done in these situations. Thanks again and getting closer to another install and test. |
|
|
|
| ClayPerrine |
Jun 16 2021, 12:51 PM
Post
#34
|
|
Life's been good to me so far..... Group: Admin Posts: 16,542 Joined: 11-September 03 From: Hurst, TX. Member No.: 1,143 Region Association: NineFourteenerVille |
QUOTE(Wew @ Jun 16 2021, 01:27 PM) I also had a tough time getting the banana muffler to line up with the exhaust and had to use a strap to pull them a little closer together to line up with the muffler. Even after cranking down on the exhaust and muffler bolts it still seemed like they did not meet flush even with the proper gaskets. From experience.. always loose assemble everything on the exhaust system before tightening up any of the nuts and bolts. That way everything moves around a bit before you lock it down. Then tighten up the ones on the muffler flanges before you tighten the ones on the engine. The last ones are the ones holding the boomerang (exhaust hanger) to the transmission. Good luck! Clay |
|
|
|
| Wew |
Jun 29 2021, 07:38 PM
Post
#35
|
|
Member Group: Members Posts: 236 Joined: 17-January 15 From: Novato, ca Member No.: 18,335 Region Association: None |
Hi all,
Engine back in and running better after valve adjustment. I am struggling getting the timing correct. Both advance and retard lines removed at dizzy and lines plugged with golf tees. Aar hose to air cleaner disconnected and plugged. Timed to 27tdc at 3500 rpm and when it goes to idle it drops to low and dies. Bigger issue is the oil sender is still leaking. I purchased the brake hose kit and mounted the sender outside if the tins and mounted on fan housing. I used the loctite thread sealer and torqued down to 7” lbs. I am wondering if I should remove the set up and reapplying loctite and torque down more. Can anyone make a recommendation on what you torque yours at and what tool or techniques you use to access without removing the tins? Any advice is appreciated. Thanks, Gary 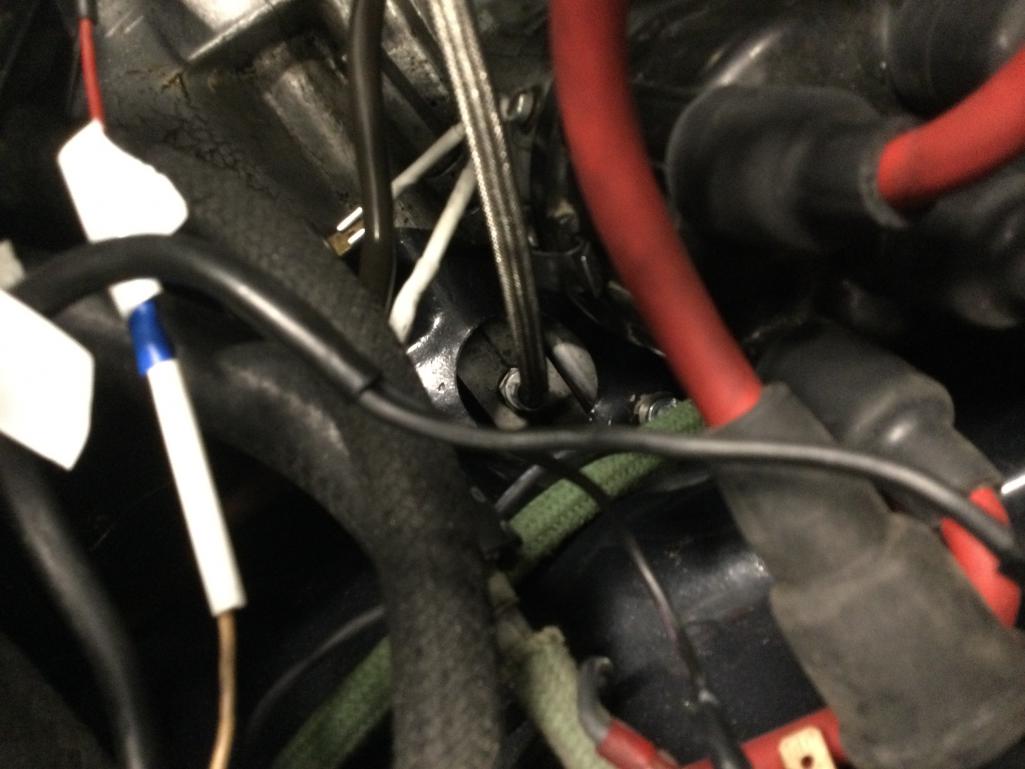 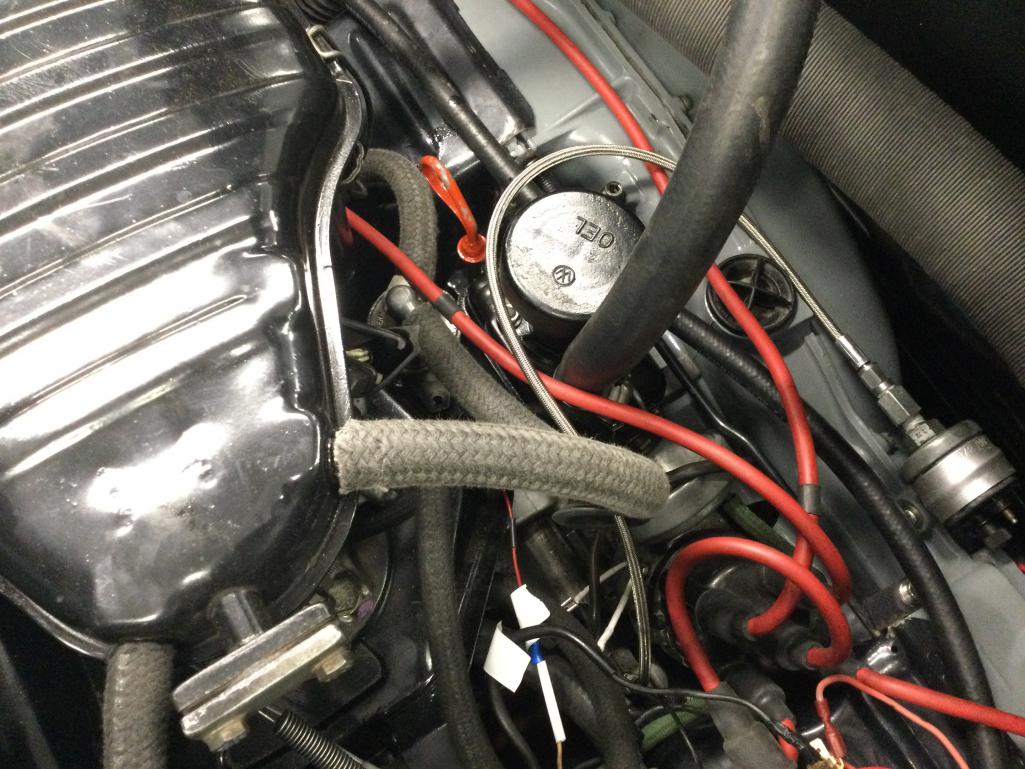 |
|
|
|
| Wew |
Jun 29 2021, 10:42 PM
Post
#36
|
|
Member Group: Members Posts: 236 Joined: 17-January 15 From: Novato, ca Member No.: 18,335 Region Association: None |
I just looked at some torque specs for the oil pressure sender. I torqued mine at 7 inch lbs. I am finding the torque is 20 nm which = 14.75 ft. Lbs. If this is correct no wonder why I am leaking from that. At least it gives me some hope. Please weigh in on my post as all advice is appreciated. I did drive the car and it is zippy as all get out. So much fun. Can’t wait to resolve this.
Thanks again for any input. Gary |
|
|
|
|
1 User(s) are reading this topic (1 Guests and 0 Anonymous Users)
0 Members:

|
Lo-Fi Version | Time is now: 2nd April 2026 - 02:57 PM |
Invision Power Board
v9.1.4 © 2026 IPS, Inc.