|
|
|
Porsche, and the Porsche crest are registered trademarks of Dr. Ing. h.c. F. Porsche AG.
This site is not affiliated with Porsche in any way. Its only purpose is to provide an online forum for car enthusiasts. All other trademarks are property of their respective owners. |
|
|

  |

| Montreal914 |
 Aug 16 2023, 08:56 AM Aug 16 2023, 08:56 AM
Post
#1
|
|
Advanced Member  Group: Members Posts: 2,072 Joined: 8-August 10 From: Claremont, CA Member No.: 12,023 Region Association: Southern California |
I recently bought this used 27 gallon quiet compressor for what I think is a good price with the accessories that it came with.
After watching a YouTube review of this unit, I knew the compressor was supposed to fill up in 7 minutes. So after checking it was empty and little water was coming out from the bottom, I started it. It pass that 7 minute test, which made me happy. Here is the beast! (IMG:style_emoticons/default/rolleyes.gif) 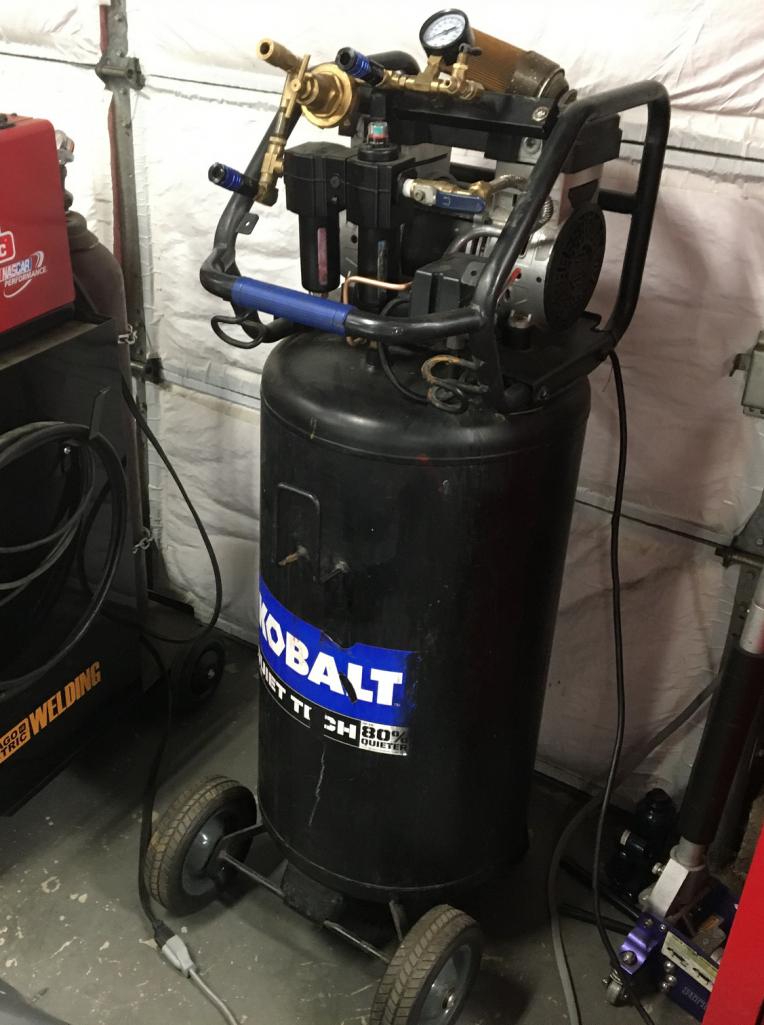 The compressor was modified and that is actually what attracted me to it. That being said, I would appreciate comments or recommendations on the setup. Now for the modification. The previous owner removed the original face panel and installed a filter dryer combo. Then there is a high flow outlet and a regular outlet. Last in the network is a regulator, a high flow outlet, a pressure gauge, and a flip valve (see second picture below). 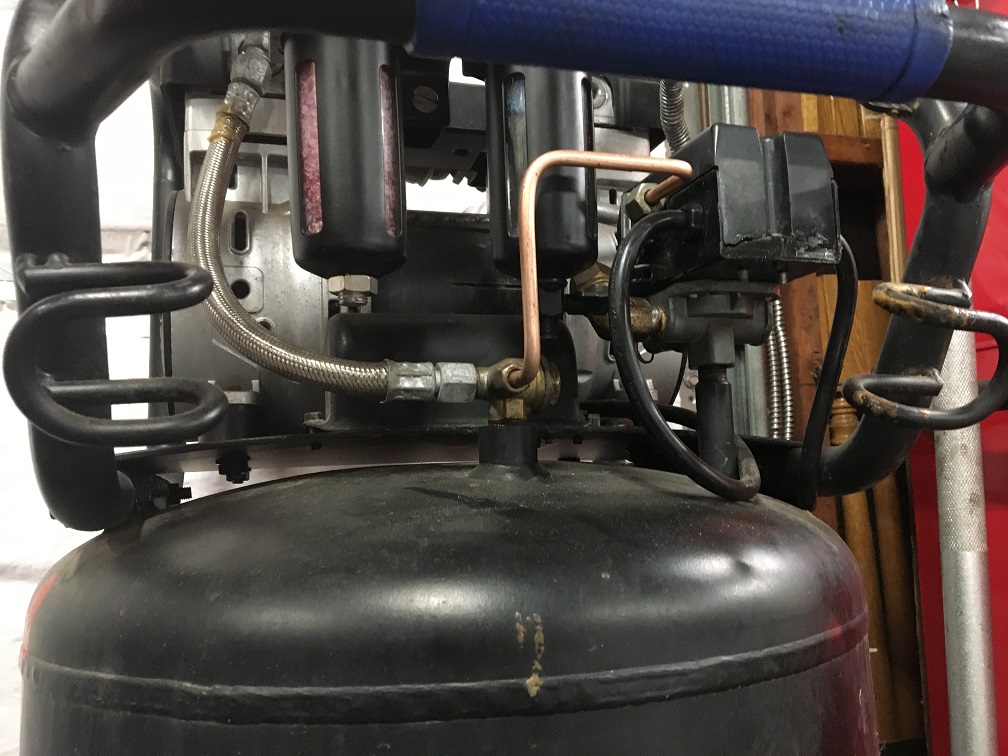 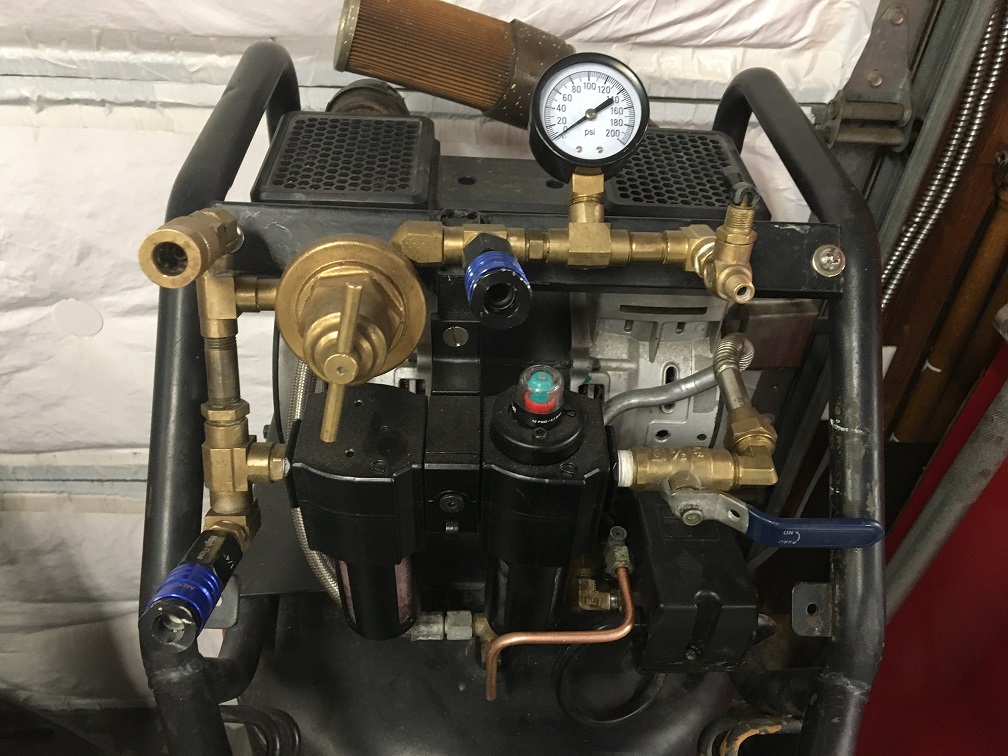 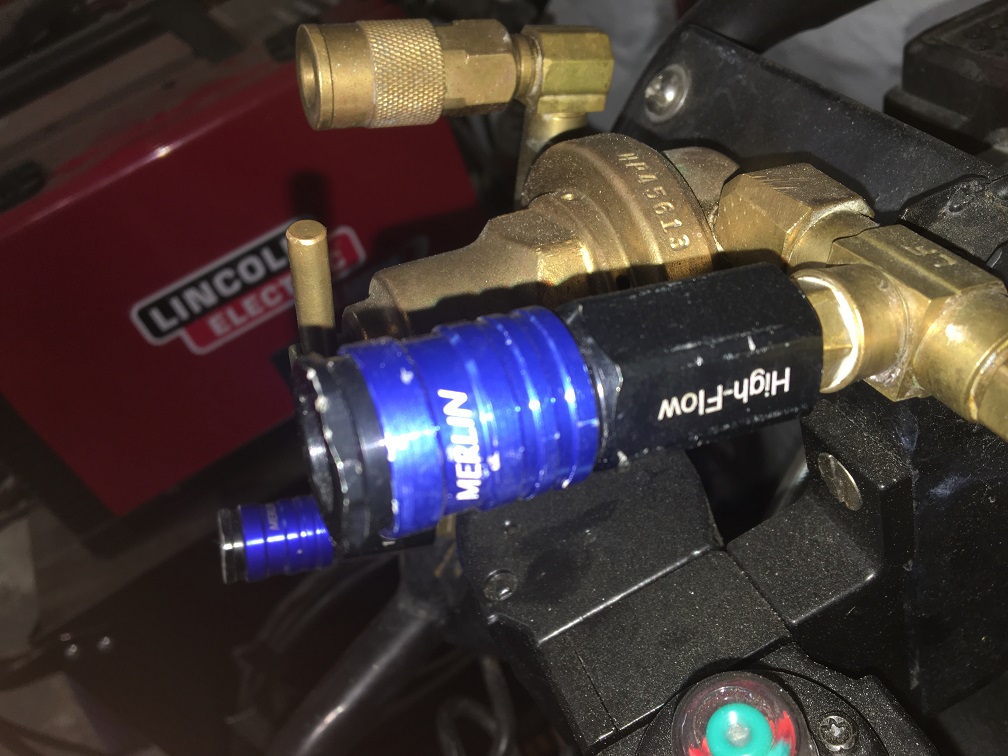 With this compressor, I am hoping to paint small areas on my car (inner trunks, cabin, inner wheel well, ...). Would anyone have suggestion/comments on the current plumbing? I think there are good elements but I am considering making changes as I don't think I need three outlets. Last, the compressor came with a couple of paint gun, one seems to be for details, while the other is this "fancy" HF gun with 1.4 tip. For the detail gun, can this be used to spray harder to reach areas such as under the light buckets or this gun simply isn't of any use for our cars? 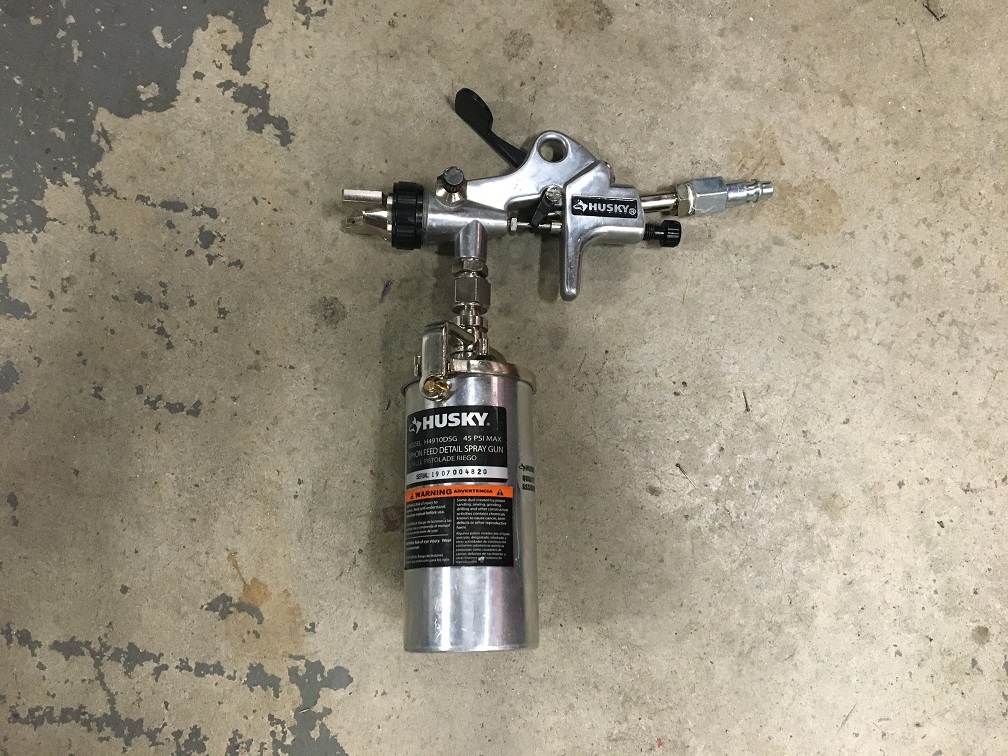 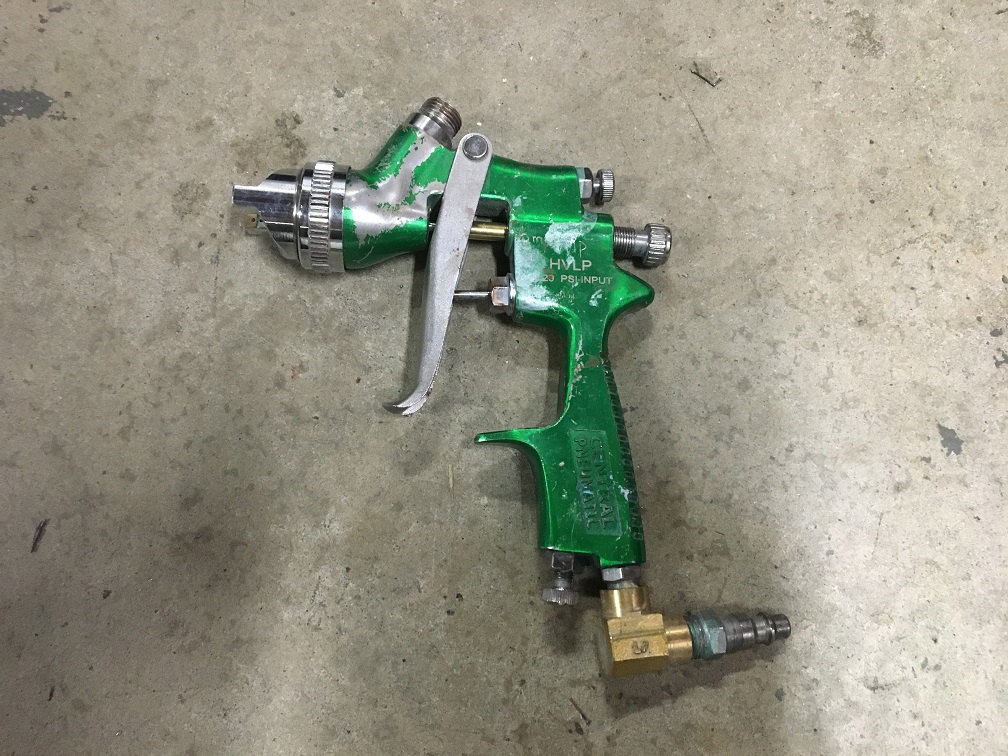 Thank you for chiming in! (IMG:style_emoticons/default/beerchug.gif) |
   |

 
|
| technicalninja |
Aug 16 2023, 10:41 AM
Post
#2
|
|
Advanced Member Group: Members Posts: 2,531 Joined: 31-January 23 From: Granbury Texas Member No.: 27,135 Region Association: Southwest Region |
Nice set up!
I'd leave the extra valves alone until they actually become a problem. Check with the desiccant vendor. Most desiccant is white and turns red when it's wet. I see RED in your desiccant. The little guns should work fine for your purposes. They take a bit of "getting used too" before you are competent with them. Practice with setting up the patterns and adjusting airflow/paint flow on a piece of cardboard first. I always use one of the little "at the gun" desiccant filters even if I'm on clean air. One single drop of water or piece of trash can wreck your paint job. I pre-blow air alone through that last filter first to clear anything that might be in the filter. Drain your tank of water hourly when you're running paint. If one of those cannisters is an oiler, remove it now. Oilers should not be in a shop that runs paint. |
 |
|
| Montreal914 |
Aug 16 2023, 08:49 PM
Post
#3
|
|
Advanced Member Group: Members Posts: 2,072 Joined: 8-August 10 From: Claremont, CA Member No.: 12,023 Region Association: Southern California |
Thank you!
I will look into the filter/dryer combo or whatever it is. Yes, I was wondering about that red media. |
|
|
|
| Van B |
Aug 16 2023, 09:13 PM
Post
#4
|
|
Senior Member Group: Members Posts: 1,621 Joined: 20-October 21 From: WR, GA Member No.: 26,011 Region Association: None |
This is my setup. Lots of ways to cool the air down, but that’s pretty much the only way to get the moisture out. Desiccants put debris in the air flow that you need to remove. And a disposable filter at the gun is your safety net.
Attached thumbnail(s) 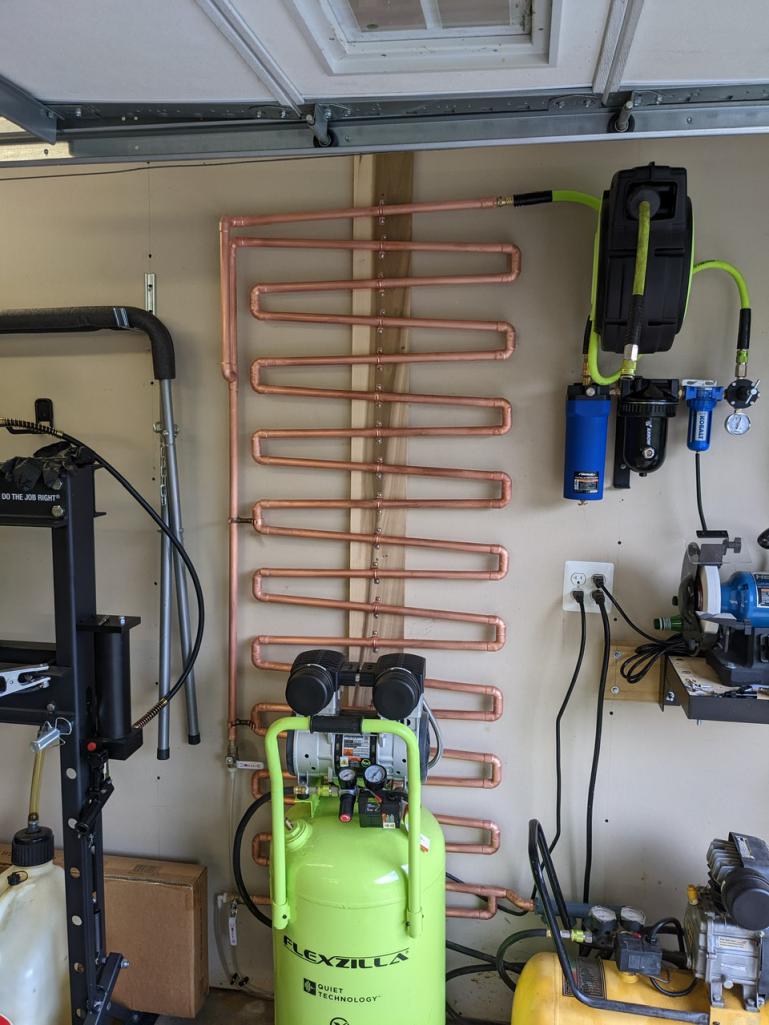
|
|
|
|
| Montreal914 |
Aug 17 2023, 08:32 AM
Post
#5
|
|
Advanced Member Group: Members Posts: 2,072 Joined: 8-August 10 From: Claremont, CA Member No.: 12,023 Region Association: Southern California |
Van, nice setup!
I think what i am seeing is: Compressor (set at max pressure?), copper coil (each lowest ends with drain valve), then a series of three canisters (dryer, filter coarse?, filter fine?) (IMG:style_emoticons/default/confused24.gif) , regulator with gauge, hose spool. Did you use "L" type copper pipe? What about solder, 50/50 Sn/Pb(tin-lead) or 95/5 Sn/Sb(tin-antimony)? Thanks! |
|
|
|
| Van B |
Aug 17 2023, 04:17 PM
Post
#6
|
|
Senior Member Group: Members Posts: 1,621 Joined: 20-October 21 From: WR, GA Member No.: 26,011 Region Association: None |
Below is a list of parts I used. Some I had, some I bought for this setup. For the copper manifold, I used 3/4” copper tubing and elbows… cheapest they had at lowes. I tig welded the whole setup… for aesthetics, but soldering would’ve been the responsible course.
You’ll love this part: I used the alternator pulley from my 914 as the spacer to set the donkey kong runs lol. Keeping everything running downhill is what worked best to gather the condensation to the bottom. And the pretty wood plank is a piece of Poplar, since that the street I live on lol https://www.amazon.com/Plews-56-081-Desicca...r/dp/B00HY4Q1U8 https://www.amazon.com/Solberg-FS-10-050-Co...r/dp/B00H43L4M4 https://www.harborfreight.com/12-in-nptf-in...ator-58547.html https://www.harborfreight.com/disposable-in...lter-63951.html https://www.lowes.com/pd/Kobalt-3-8-in-Air-Filter/3414724 I disassembled the filter from harbor freight and reconfigured to add the final stages. Large filter and desiccant are 1/2”, and then 3/8” for the lowes filter to collect the desiccant pieces down to 5 micron. Then the harbor freight regulator on the very end. You are correct both compressors are full pressure. 100psi compressor start to 125psi full on one and 90psi start to 120psi full on the noisy one. This staggers the surge load on the breaker and minimizes how often the loud one runs. |
|
|
|
|
1 User(s) are reading this topic (1 Guests and 0 Anonymous Users)
0 Members:

|
Lo-Fi Version | Time is now: 2nd April 2026 - 11:57 AM |
Invision Power Board
v9.1.4 © 2026 IPS, Inc.