|
|
|
Porsche, and the Porsche crest are registered trademarks of Dr. Ing. h.c. F. Porsche AG.
This site is not affiliated with Porsche in any way. Its only purpose is to provide an online forum for car enthusiasts. All other trademarks are property of their respective owners. |
|
|

  |

| autohausdolby |
 Jan 24 2007, 08:18 AM Jan 24 2007, 08:18 AM
Post
#21
|
|
Member  Group: Members Posts: 232 Joined: 12-September 06 From: Sheffield, England Member No.: 6,821 |
Yay for resto threads! Keep it up (IMG:style_emoticons/default/smile.gif)
|
   |

 
|
| Cevan |
Jan 25 2007, 04:56 PM
Post
#22
|
|
Senior Member Group: Members Posts: 1,079 Joined: 11-December 06 From: Western Massachusetts Member No.: 7,351 |
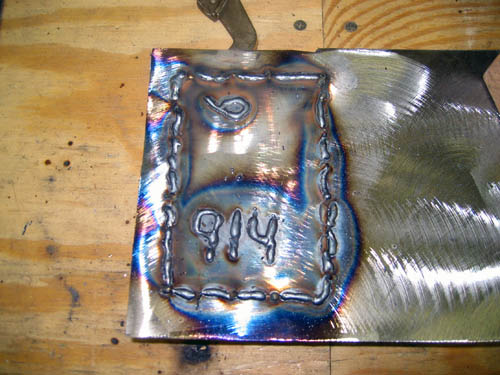
Well, I gave welding another try, thanks to all your encouragement. I switched to some 18 ga steel that I bought and practiced some more: (IMG:style_emoticons/default/welder.gif)
 |
|
|
|
| Cevan |
Jan 25 2007, 04:58 PM
Post
#23
|
|
Senior Member Group: Members Posts: 1,079 Joined: 11-December 06 From: Western Massachusetts Member No.: 7,351 |
Back to the repairs. I had pulled out the patches I made before (those welds truly sucked) and redid them with the 18 ga.
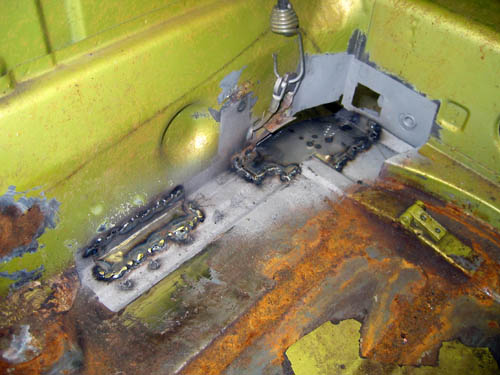 This time I went around the seatbelt attachment point. 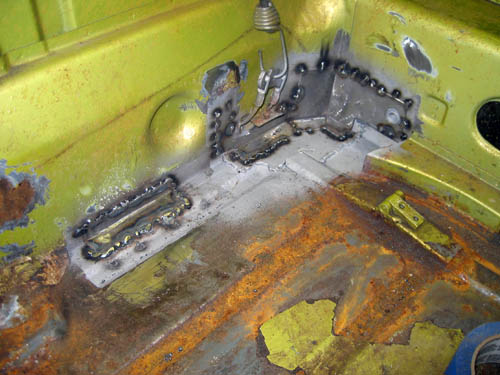 |
|
|
|
| Cevan |
Jan 25 2007, 05:01 PM
Post
#24
|
|
Senior Member Group: Members Posts: 1,079 Joined: 11-December 06 From: Western Massachusetts Member No.: 7,351 |
On to the front corner. I figure I'd try easier, less structural repairs first.
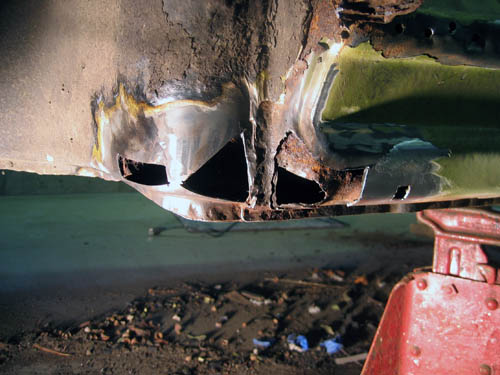 A little weld thru primer and a shot of rust converter into the longitudinal. 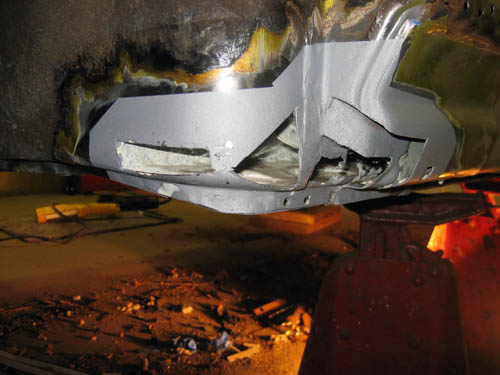 |
|
|
|
| Cevan |
Jan 25 2007, 05:06 PM
Post
#25
|
|
Senior Member Group: Members Posts: 1,079 Joined: 11-December 06 From: Western Massachusetts Member No.: 7,351 |
First one welded:
 Second one fitted. I bought an inner rocker panel. I need to replace the back half. It took alot of going back and forth taking a little metal off and checking the fit: 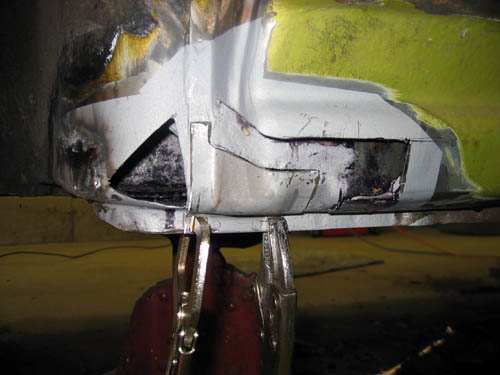 Second patch welded:  Success!!!! (IMG:style_emoticons/default/beerchug.gif) Not pretty but no one will see this when I'm done. I'll do some more grinding and check to see if I missed any spots. I do notice that it's more difficult to get the molten metal to fuse to the old metal, especially where I have to use a wire brush instead of a sanding disc. |
|
|
|
| Bartlett 914 |
Jan 25 2007, 07:24 PM
Post
#26
|
|
Advanced Member Group: Members Posts: 2,218 Joined: 30-August 05 From: South Elgin IL Member No.: 4,707 Region Association: Upper MidWest |
For a little welding help, I found this to be interesting reading. It may help you improve your welds.
http://www.autobodystore.com/new_page_11.htm |
|
|
|
| rjames |
Jan 25 2007, 09:15 PM
Post
#27
|
|
I'm made of metal Group: Members Posts: 4,447 Joined: 24-July 05 From: Shoreline, WA Member No.: 4,467 Region Association: Pacific Northwest |
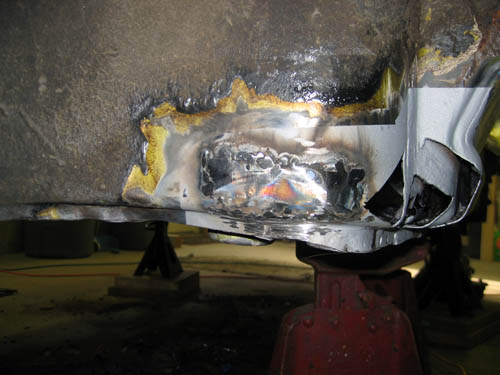
Looks like you're doing a good job! (IMG:style_emoticons/default/beer.gif)
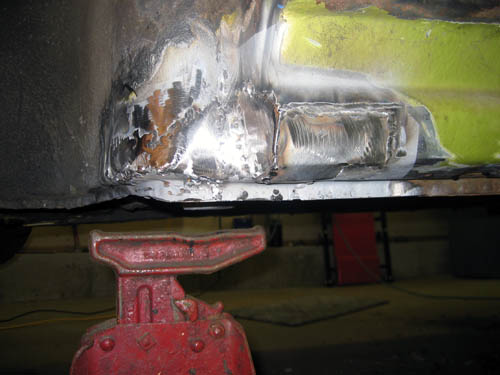
Just make sure you're getting enough penetration- What's the back side of the metal in this pic look like? It will let you know if you're gettin enough penetration. QUOTE |
|
|
|
| Cevan |
Jan 26 2007, 09:24 AM
Post
#28
|
|
Senior Member Group: Members Posts: 1,079 Joined: 11-December 06 From: Western Massachusetts Member No.: 7,351 |
From the other side you can see where the welding was done.
I'm looking for some body parts for my rusto-ration: - front corners, up to the fog light mounting area - door jamb on passenger side, even just the area around the door latch, say 2 inches above and below the latch area Also had a question. Some of the inner bracing on the trunk lids has started to pull away. How is this best repaired? |
|
|
|
| SGB |
Jan 26 2007, 09:38 AM
Post
#29
|
|
just visiting Group: Members Posts: 4,086 Joined: 8-March 03 From: Huntsville, AL Member No.: 404 Region Association: South East States |
I surprised myself at being able to make strong (but UGLY) welds. Go to a body shop or metal recycler and get some scrap. I think body panals are 10 guage mostly. Cut out pieces and start trying to reattach somewhere. I'm just usig a cheap harbor frieght flux core welder. Here are the real BASICS- about as far as I've gotten so far.
When you first strick the arc, sparks and slag fly everywhere, but if you feed for a second into that initial spot, more of the wire starts melting onto the molten blob. The magic is in getting the wire to feed out and melt at a rate that corresponds to the rate the base metal is melting and re-solidifying. I've had some success "placing" little globs of welding material to build in missing metal, then melting that into the base byapplying the welder to the base metal a few mm away from the built up part so that the heat to melt the globs comes up from the good metal I want to fuse to. Get one of those auto-darkening helmets from China frieght. Take some scrap, weld some pieces on, then beat the whee out of the weld with a hammer to see if it really penetrated. The metal should bend . The weld should stay strong. edit- well, in the time it took me to write this, you got good. ALRIGHT! |
|
|
|
| Cevan |
Jan 26 2007, 09:49 AM
Post
#30
|
|
Senior Member Group: Members Posts: 1,079 Joined: 11-December 06 From: Western Massachusetts Member No.: 7,351 |
QUOTE(SGB @ Jan 26 2007, 07:38 AM)  I surprised myself at being able to make strong (but UGLY) welds. Go to a body shop or metal recycler and get some scrap. I think body panals are 10 guage mostly. Cut out pieces and start trying to reattach somewhere. I'm just usig a cheap harbor frieght flux core welder. Here are the real BASICS- about as far as I've gotten so far. When you first strick the arc, sparks and slag fly everywhere, but if you feed for a second into that initial spot, more of the wire starts melting onto the molten blob. The magic is in getting the wire to feed out and melt at a rate that corresponds to the rate the base metal is melting and re-solidifying. I've had some success "placing" little globs of welding material to build in missing metal, then melting that into the base byapplying the welder to the base metal a few mm away from the built up part so that the heat to melt the globs comes up from the good metal I want to fuse to. Get one of those auto-darkening helmets from China frieght. Take some scrap, weld some pieces on, then beat the whee out of the weld with a hammer to see if it really penetrated. The metal should bend . The weld should stay strong. edit- well, in the time it took me to write this, you got good. ALRIGHT! The link in Bartlett 914's post above is pretty good, worth reading. I tried welding the end of 1 inch strips onto a bigger piece and then pulled them off to see where the metal would bend/break. I think body panels are less than 18 gauge (the stuff I'm using). I'd guess they're 20 or 22 ga. |
|
|
|
| rjames |
Jan 26 2007, 11:35 AM
Post
#31
|
|
I'm made of metal Group: Members Posts: 4,447 Joined: 24-July 05 From: Shoreline, WA Member No.: 4,467 Region Association: Pacific Northwest |
QUOTE I tried welding the end of 1 inch strips onto a bigger piece and then pulled them off to see where the metal would bend/break Just remember that nothing should 'break off' after it's welded. The idea is to make two pieces into one. (IMG:style_emoticons/default/smile.gif) |
|
|
|
| Festive_Zombie |
Jan 26 2007, 12:26 PM
Post
#32
|
|
Newbie Group: Members Posts: 24 Joined: 10-January 07 From: Vancouver, BC, Canada Member No.: 7,444 Region Association: None |
QUOTE(rjames @ Jan 26 2007, 09:35 AM) QUOTE I tried welding the end of 1 inch strips onto a bigger piece and then pulled them off to see where the metal would bend/break Just remember that nothing should 'break off' after it's welded. The idea is to make two pieces into one. (IMG:style_emoticons/default/smile.gif) On the 914 you have different gauge metal everywhere, you can fin 18, 20 and 16. The key to good welding is preperation, make sure your metal is cleaned on both sides, that also prevents fires |
|
|
|
| dkos |
Jan 26 2007, 02:39 PM
Post
#33
|
|
say, "RUST"! Group: Members Posts: 295 Joined: 1-December 04 From: Philadelphia, PA Member No.: 3,204 Region Association: None |
Hi Chirs,
We've been talking about those two parts cars in the Philly area. I just found your resto thread. My story is similar to yours. Bought a car that looked ok. Started digging and found a big mess hidden under bondo, fiberglass and riveted in scrap metal (I think one piece was an old license plate!). My car's probably not worth repairing, but I'm learning a lot and having fun. I've been rebuilding my longs in a similar way and was concerned about rigidity too. I bought an aftermarket reinforcement piece made by Brad Mayuers (sp?). It's heavy (at least 1/8" thick), but it's stiff. I've finished one side...here's a pic. Attached image(s) 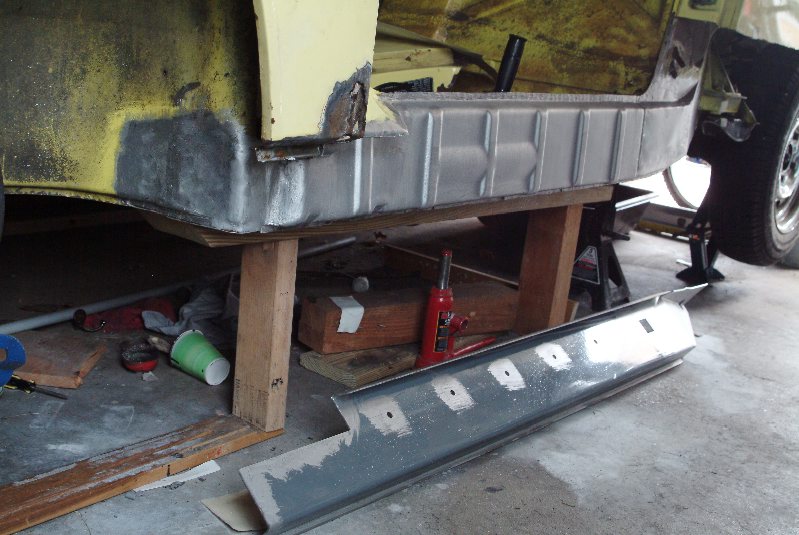 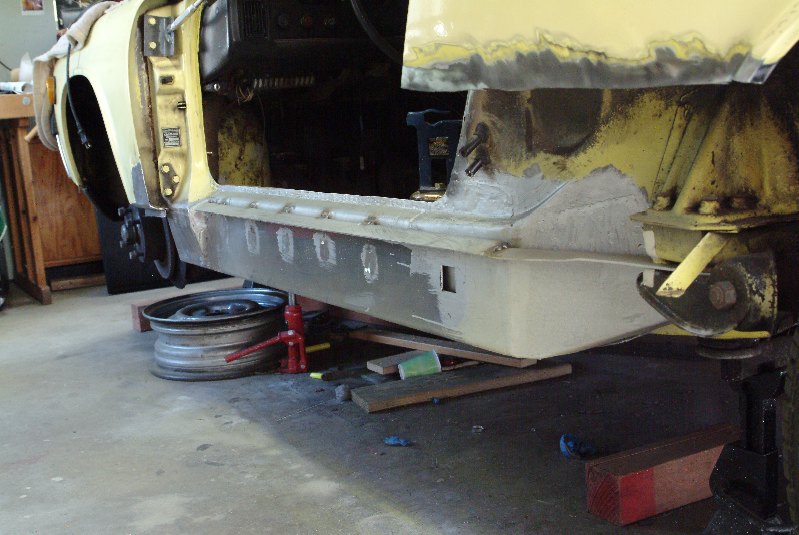
|
|
|
|
| dkos |
Jan 27 2007, 11:23 AM
Post
#34
|
|
say, "RUST"! Group: Members Posts: 295 Joined: 1-December 04 From: Philadelphia, PA Member No.: 3,204 Region Association: None |
ooops! Sorry posted this on the wrong thread. Meant to post this on typ11969's restoration thread. I had too many windows open!
|
|
|
|
| Cevan |
Jan 27 2007, 03:46 PM
Post
#35
|
|
Senior Member Group: Members Posts: 1,079 Joined: 11-December 06 From: Western Massachusetts Member No.: 7,351 |
Finished the rest of the front corner. One part of my car is actually repaired. (IMG:style_emoticons/default/beer3.gif)
 I need a break from looking at rust. Hitting the slopes tomorrow. (IMG:style_emoticons/default/rocking nana.gif) |
|
|
|
|
1 User(s) are reading this topic (1 Guests and 0 Anonymous Users)
0 Members:

|
Lo-Fi Version | Time is now: 2nd April 2026 - 06:45 AM |
Invision Power Board
v9.1.4 © 2026 IPS, Inc.