|
|
|
Porsche, and the Porsche crest are registered trademarks of Dr. Ing. h.c. F. Porsche AG.
This site is not affiliated with Porsche in any way. Its only purpose is to provide an online forum for car enthusiasts. All other trademarks are property of their respective owners. |
|
|

  |

| Cheapsnake |
 Mar 3 2010, 08:43 PM Mar 3 2010, 08:43 PM
Post
#81
|
|
Member  Group: Members Posts: 419 Joined: 15-November 07 From: Door County, WI Member No.: 8,341 |
Krank, yep, used the 215 distributor but I'm 99% sure a Rover dizzy and quite a few GM Delco's would work for you with a little research. I've got a Rover dizzy in my TR8 Buick block (don't ask) and it fits like a glove.
Streetrover, that's one purty flywheel and you don't know how much work that's going to save you. Mounting a trigger wheel on the front of the balancer presents clearance issues that negate the elimination of the distributor. I mounted mine behind the balancer and it was a very tight fit. The flywheel setup is much cleaner. Tom |
   |

 
|
| Krank |
Mar 3 2010, 10:30 PM
Post
#82
|
|
Member Group: Members Posts: 140 Joined: 11-October 09 From: Winnipeg, MB Member No.: 10,922 Region Association: Canada |
O.K. Thanks Bob, now I'm gonna dream a little dream of flywheels with trigger wheels on it all night long. (IMG:style_emoticons/default/dry.gif) sure looks purdy tho...
I Emailed KE and they replied that I would have to supply the trigger wheel to them and add a C note and they would mod the flywheel. I have ordered a Megajolt jr kit so I just have to deal with the 36-1 trigger wheel somehow and I am set. I think I will try to find a balancer mounted trigger wheel. There are literally hundreds of scrap 4.6 powered cabs around here as they are all changing over to hybrids so there is lots of free or next to nothing EDIS unit, coils and sensors floating around. That flywheel looks a little more beefy than stock...any weight gain? |
|
|
|
| Cheapsnake |
Mar 4 2010, 07:03 AM
Post
#83
|
|
Member Group: Members Posts: 419 Joined: 15-November 07 From: Door County, WI Member No.: 8,341 |
QUOTE(Krank @ Mar 3 2010, 08:30 PM)  O.K. Thanks Bob, now I'm gonna dream a little dream of flywheels with trigger wheels on it all night long. (IMG:style_emoticons/default/dry.gif) sure looks purdy tho... I Emailed KE and they replied that I would have to supply the trigger wheel to them and add a C note and they would mod the flywheel. I have ordered a Megajolt jr kit so I just have to deal with the 36-1 trigger wheel somehow and I am set. I think I will try to find a balancer mounted trigger wheel. There are literally hundreds of scrap 4.6 powered cabs around here as they are all changing over to hybrids so there is lots of free or next to nothing EDIS unit, coils and sensors floating around. That flywheel looks a little more beefy than stock...any weight gain? Krank, if you ordered the Megajolt kit I sure hope you're an experienced electronics guy. I ordered the kit, having assembled PCB's in the distant past and found the Megajolt components so tiny that if you sneeze they're all over the place. I ended sending mine back to Brent for assembly. Just my $.02. Good luck. Tom |
|
|
|
| Krank |
Mar 4 2010, 11:09 AM
Post
#84
|
|
Member Group: Members Posts: 140 Joined: 11-October 09 From: Winnipeg, MB Member No.: 10,922 Region Association: Canada |
QUOTE(Cheapsnake @ Mar 4 2010, 07:03 AM) QUOTE(Krank @ Mar 3 2010, 08:30 PM) O.K. Thanks Bob, now I'm gonna dream a little dream of flywheels with trigger wheels on it all night long. (IMG:style_emoticons/default/dry.gif) sure looks purdy tho... I Emailed KE and they replied that I would have to supply the trigger wheel to them and add a C note and they would mod the flywheel. I have ordered a Megajolt jr kit so I just have to deal with the 36-1 trigger wheel somehow and I am set. I think I will try to find a balancer mounted trigger wheel. There are literally hundreds of scrap 4.6 powered cabs around here as they are all changing over to hybrids so there is lots of free or next to nothing EDIS unit, coils and sensors floating around. That flywheel looks a little more beefy than stock...any weight gain? Krank, if you ordered the Megajolt kit I sure hope you're an experienced electronics guy. I ordered the kit, having assembled PCB's in the distant past and found the Megajolt components so tiny that if you sneeze they're all over the place. I ended sending mine back to Brent for assembly. Just my $.02. Good luck. Tom Hell, at my age I would not even attempt to assemble small parts (and into the correct place to boot), I ordered the preassembled version. |
|
|
|
| streetrover |
Apr 4 2010, 12:21 PM
Post
#85
|
|
Member Group: Members Posts: 87 Joined: 22-December 09 From: Inland Empire Member No.: 11,163 Region Association: Southern California |
Got the engine in to check all the clearances. Fabricated a couple of motor mounts that I welded to the stock early 914 crossbar.
(IMG:http://www.914world.com/bbs2/uploads_offsite/i221.photobucket.com-11163-1270405285.1.jpg) Was brainstorming how to mount alternator down low (where space is available). Figured out that I could simply flip stock alternator bracket 180 degrees and the mounting holes (2 at least) would line up. When everything is tight it is very solid. (IMG:http://www.914world.com/bbs2/uploads_offsite/i221.photobucket.com-11163-1270405286.2.jpg) Location is perfect, though I may need to cut a bit of the tin near the firewall. Had to make several trips to Parts Store to determine the perfect belt (41"). (IMG:http://www.914world.com/bbs2/uploads_offsite/i221.photobucket.com-11163-1270405287.3.jpg) (IMG:http://www.914world.com/bbs2/uploads_offsite/i221.photobucket.com-11163-1270405289.4.jpg) Working on water pump cover at the moment. |
|
|
|
| realred914 |
Apr 4 2010, 02:07 PM
Post
#86
|
|
Senior Member Group: Retired Members Posts: 1,086 Joined: 1-April 10 From: california Member No.: 11,541 Region Association: None |
you might check with teh VW sand rail folks, they sometimes run aluminum rover V-8s in teh sand rails, my uncle does. that might be a good source for parts info.
|
|
|
|
| quick six |
Apr 4 2010, 04:23 PM
Post
#87
|
|
Newbie Group: Members Posts: 22 Joined: 4-January 05 From: Paso Robles, Ca. Member No.: 3,406 Region Association: Central California |
QUOTE(realred914 @ Apr 4 2010, 01:07 PM) you might check with teh VW sand rail folks, they sometimes run aluminum rover V-8s in teh sand rails, my uncle does. that might be a good source for parts info. That looks like a lot more fun than when I was putting olds or buick 215s in jeeps and dune buggies. The olds and buick heads/pistons were different so the closed chamber head in place of the open chambered ones made for around 11-1 compression without a big budget. Also the other way worked pretty well for a low compression Turbo motor. Now if I could only remember which worked on which. I may have to dig around and see what I can find to put in another body. The availability of the aftermarket pieces might take the fun (?) out of fabing everything. Thanks guys. Keep up the good work. You may have started another project around here. |
|
|
|
| Cheapsnake |
Apr 4 2010, 04:43 PM
Post
#88
|
|
Member Group: Members Posts: 419 Joined: 15-November 07 From: Door County, WI Member No.: 8,341 |
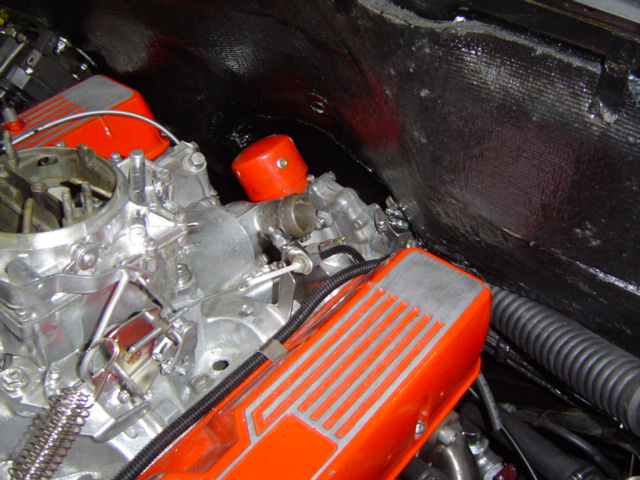
Hey Bob, you're making progress, looking good. I got my engine installed a couple weeks ago and it sits pretty close to where yours appears to be. That'll put your axles back about 1" from the stock location, not a big deal.
Just a heads up - when you get you water pump and hoses on you'll find a hit with the firewall, even with the pulley removed. The inlet hose intrudes a good half inch as it exits the pump and goes to the passenger side. It looks bad at first but it's not fatal. I cut the firewall in way of the hose and will rivet a patch over. I don't think it'll have much effect on the passenger seat. I'll try to post some pics tomorrow. BTW, that trigger ring on the flywheel will be the best money you spend. Tom |
|
|
|
| Cheapsnake |
Apr 5 2010, 06:39 PM
Post
#89
|
|
Member Group: Members Posts: 419 Joined: 15-November 07 From: Door County, WI Member No.: 8,341 |
For you Rover V8 guys, here's where you're going to hit the firewall.
 The cut in the firewall from inside the cabin: 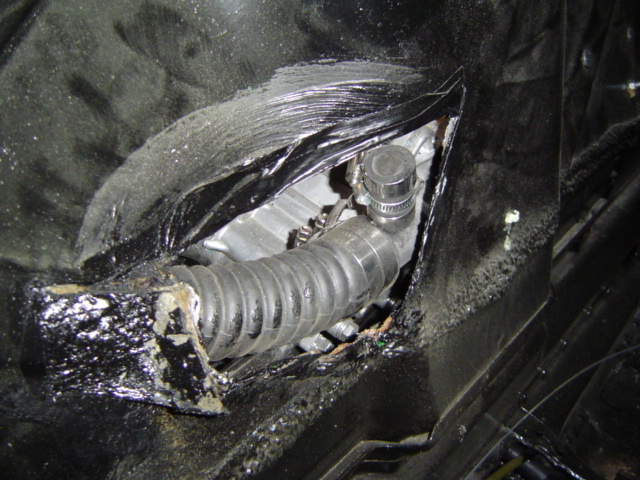 This is with the transaxle back about 1" from stock. You could probably move it back another 3/4" and avoid a cut altogether, but I just wasn't comfortable with that much angle on the CV joints. With some judicious carving on the backpad and passenger seat and a bit of sheetmetal I don't think it'll be noticeable. Tom |
|
|
|
| streetrover |
Apr 5 2010, 08:45 PM
Post
#90
|
|
Member Group: Members Posts: 87 Joined: 22-December 09 From: Inland Empire Member No.: 11,163 Region Association: Southern California |
Thanks for the good words! (IMG:style_emoticons/default/beerchug.gif) (IMG:style_emoticons/default/beerchug.gif) This is still fun! I think I'll hit the frustration levels when the radiator fabrication begins. Tom, thanks for the firewall pix. Yeah, it was real clear upon the initial fitting that the pump wasn't going to make it. I've decided to go the other route, however, and have ordered a 42gpm electric remote pump from Meziere Ent. here in So. Cal. I am presently fabricating the pump block-off plate with inlet fittings. As always, pix will be forthcoming.
Bob |
|
|
|
| streetrover |
Apr 27 2010, 09:36 PM
Post
#91
|
|
Member Group: Members Posts: 87 Joined: 22-December 09 From: Inland Empire Member No.: 11,163 Region Association: Southern California |
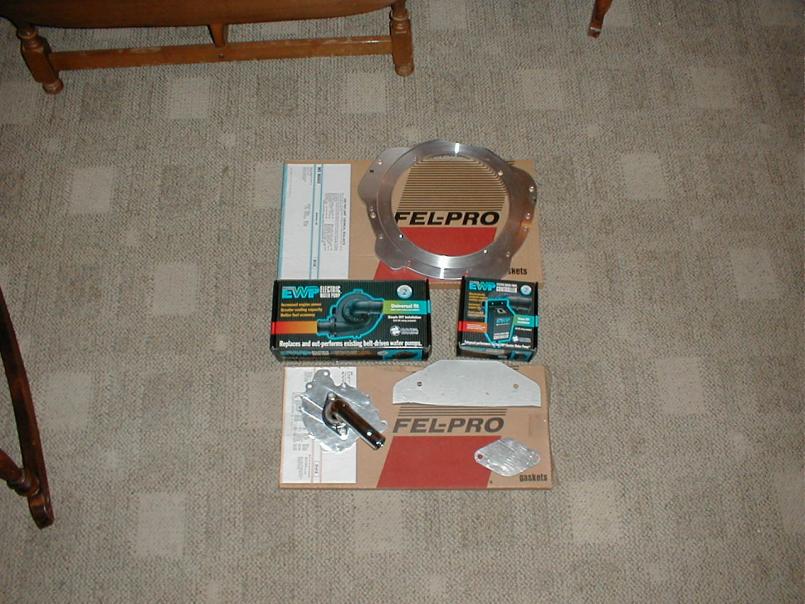
Hi Tom,
You asked for a few pics of the water-pump block-off plate a made. Here you go...! (IMG:http://www.914world.com/bbs2/uploads_offsite/i221.photobucket.com-11163-1272425754.1.jpg) (IMG:http://www.914world.com/bbs2/uploads_offsite/i221.photobucket.com-11163-1272425754.2.jpg) (IMG:http://www.914world.com/bbs2/uploads_offsite/i221.photobucket.com-11163-1272425755.3.jpg) (IMG:http://www.914world.com/bbs2/uploads_offsite/i221.photobucket.com-11163-1272425757.4.jpg) (IMG:http://www.914world.com/bbs2/uploads_offsite/i221.photobucket.com-11163-1272425758.5.jpg) (IMG:http://www.914world.com/bbs2/uploads_offsite/i221.photobucket.com-11163-1272425759.6.jpg) Bob |
|
|
|
| JRust |
Apr 27 2010, 09:41 PM
Post
#92
|
|
914 Guru Group: Members Posts: 6,316 Joined: 10-January 03 From: Albany Oregon Member No.: 129 Region Association: Pacific Northwest |
Looking good Bob! Lvoe to see what you do with the Mezeire as I was contemplating that very pump. Keep up the pictures brother (IMG:style_emoticons/default/biggrin.gif)
|
|
|
|
| Cheapsnake |
Apr 28 2010, 06:57 AM
Post
#93
|
|
Member Group: Members Posts: 419 Joined: 15-November 07 From: Door County, WI Member No.: 8,341 |
Nice work Bob. That plate is going to save you a huge amount of space up front and simplify your plumbing to boot. Thanks for the pics.
Tom |
|
|
|
| codices |
Apr 28 2010, 01:39 PM
Post
#94
|
|
Member Group: Members Posts: 95 Joined: 9-October 08 From: Morrison, Colorado Member No.: 9,626 Region Association: Rocky Mountains |
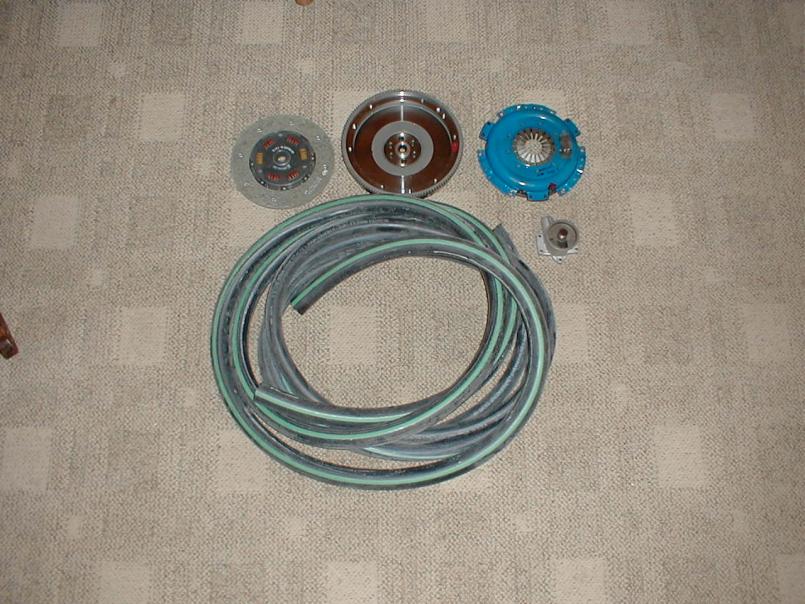
Good to see some progress being made. My picture of the plate I had made. It is in the lower left part of the photo.
 Be good to see if we can make this engine shorter. Dave |
|
|
|
| codices |
Apr 28 2010, 01:50 PM
Post
#95
|
|
Member Group: Members Posts: 95 Joined: 9-October 08 From: Morrison, Colorado Member No.: 9,626 Region Association: Rocky Mountains |
Let me add a few more photos--perhaps it will motivate me to get going.
  |
|
|
|
| codices |
Apr 28 2010, 01:53 PM
Post
#96
|
|
Member Group: Members Posts: 95 Joined: 9-October 08 From: Morrison, Colorado Member No.: 9,626 Region Association: Rocky Mountains |
Just a few more.
  |
|
|
|
| codices |
Apr 28 2010, 02:02 PM
Post
#97
|
|
Member Group: Members Posts: 95 Joined: 9-October 08 From: Morrison, Colorado Member No.: 9,626 Region Association: Rocky Mountains |
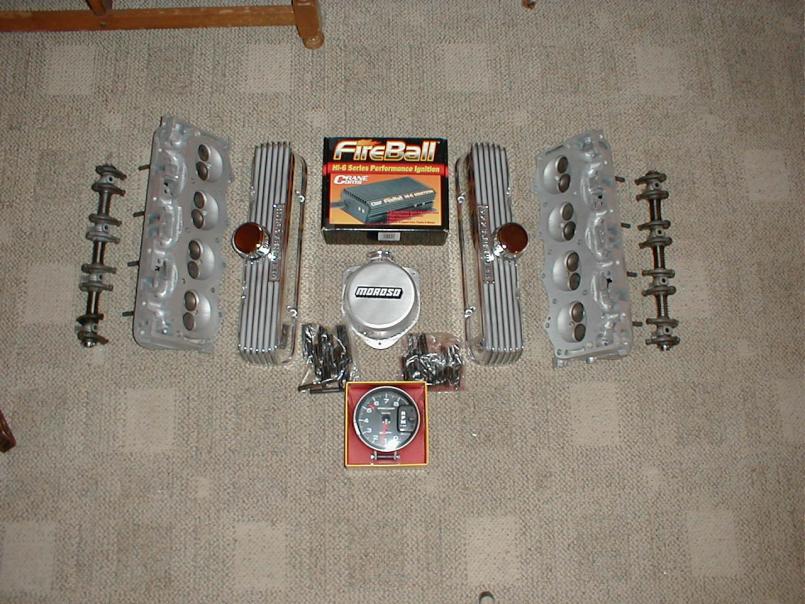
Maybe a couple more.
 This last one shows the engine block with the cradle in the background. 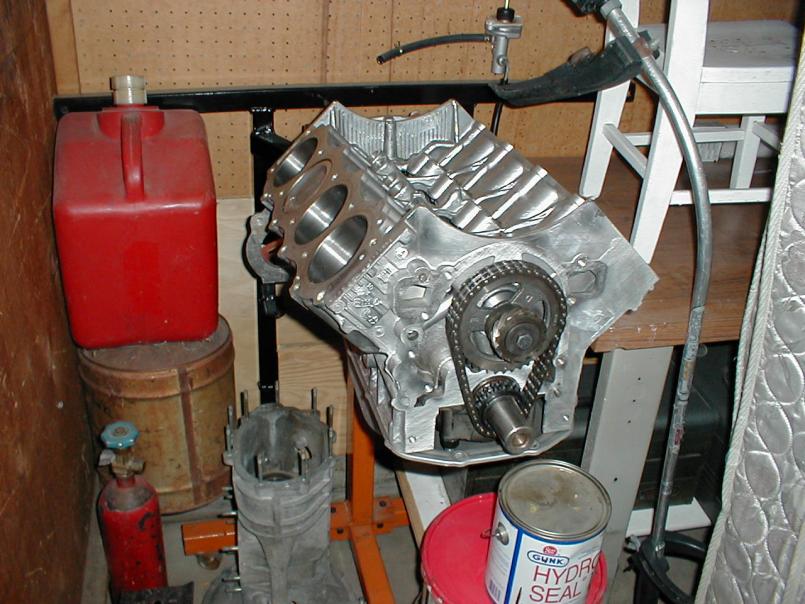 Engine has ARP studs throughout with Crane cam, high pump-up lifters, double valve springs. Had to add "heavy metal" to the crank during the balancing. Perhaps this summer after my welding stint. Dave |
|
|
|
| codices |
Apr 28 2010, 02:15 PM
Post
#98
|
|
Member Group: Members Posts: 95 Joined: 9-October 08 From: Morrison, Colorado Member No.: 9,626 Region Association: Rocky Mountains |
Help me, I can't stop. Last two. The first one is the restored '74 2.0 that now lives with my daughter. The second one in the garage is the present victim also a '74 originally a 1.8 Zambezi Green going back to that color upon completion.
Dave 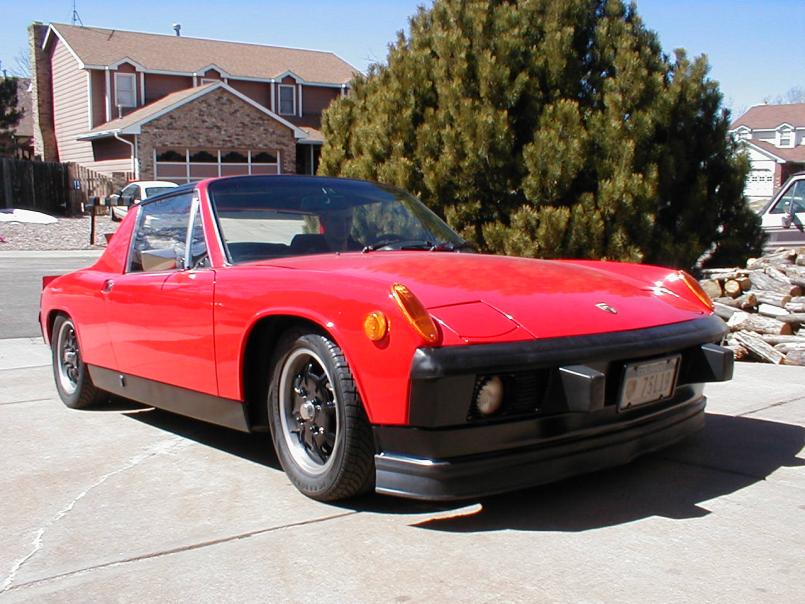 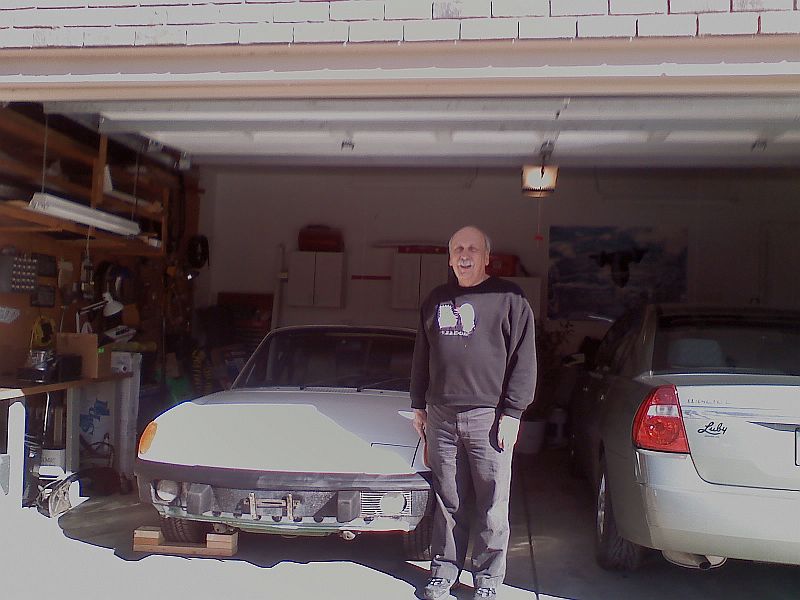 |
|
|
|
| streetrover |
Apr 28 2010, 02:18 PM
Post
#99
|
|
Member Group: Members Posts: 87 Joined: 22-December 09 From: Inland Empire Member No.: 11,163 Region Association: Southern California |
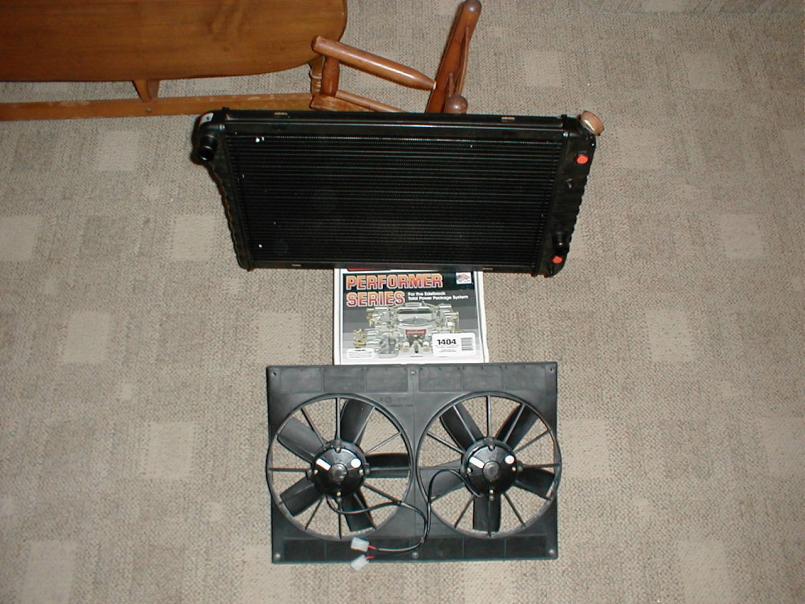
Wow Dave - Great Stuff! GET GOING! Hey, tell me about that radiator/shroud/fan assembly.
Bob |
|
|
|
| codices |
Apr 28 2010, 02:26 PM
Post
#100
|
|
Member Group: Members Posts: 95 Joined: 9-October 08 From: Morrison, Colorado Member No.: 9,626 Region Association: Rocky Mountains |
QUOTE(streetrover @ Apr 28 2010, 02:18 PM) Wow Dave - Great Stuff! GET GOING! Hey, tell me about that radiator/shroud/fan assembly. Bob I measured the space for an upright radiator and I believe that it is a double row 1984 Corvette. The fans are the SPAL unit but may take too much power. I have a larger alternator and that may take care of it Dave |
|
|
|
|
2 User(s) are reading this topic (2 Guests and 0 Anonymous Users)
0 Members:

|
Lo-Fi Version | Time is now: 6th June 2025 - 11:50 AM |
Invision Power Board
v9.1.4 © 2025 IPS, Inc.