|
|
|
Porsche, and the Porsche crest are registered trademarks of Dr. Ing. h.c. F. Porsche AG.
This site is not affiliated with Porsche in any way. Its only purpose is to provide an online forum for car enthusiasts. All other trademarks are property of their respective owners. |
|
|


| Ericv1 |
 Apr 1 2010, 06:06 PM Apr 1 2010, 06:06 PM
Post
#1
|
|
Member  Group: Members Posts: 259 Joined: 30-December 07 From: Cincinnati, Ohio Member No.: 8,518 Region Association: Upper MidWest |
To try to make a long story short, I acquired a 70T with this engine 2 years ago. I cleaned the engine up, got it running to find I had low compression in cylinder #1. When I pulled it a part, I found that #1 had a blown head gasket. I pulled the three pistons and cylinders on the 1,2,3 side to clean off the carbon. I had the heads checked out and the heads and valves, guides etc were in spec. I accidentley broke an oil ring attempting to take it off and clean the piston. So, I ordered a new set of rings and have successfully put them on cylinders 1,2,and 3 as well as alot of "while your in there" gaskets to reseal the engine. So here's my question. Is it necessary to rering cylinders 4,5,and 6 with the new rings as well? Those cylinders had good compression before I tore down the engine. They were all in the 150-155psi range. I've rebuilt a type IV engine before but never a six. But I have Wyanes book from the bird board and have read it several times. Thanks in advance for your assistance. By the way, this engines going in my 74 teener and will be a nice summer/spring project. java script:emoticon':wavebye:', 'smid_58')
|
   |

 
|
  |
Replies(40 - 59)
| Ericv1 |
Jul 17 2010, 04:38 PM
Post
#41
|
|
Member Group: Members Posts: 259 Joined: 30-December 07 From: Cincinnati, Ohio Member No.: 8,518 Region Association: Upper MidWest |
It took some time but I finally figured out the wiring harness. There was a particular blue wire with a yellow stripe that was giving me some trouble because I couldn't figure out what it was. It ended up being nothing that I needed in the conversion. It originally went to the rear fuse box on the 70T. So, I should be good.
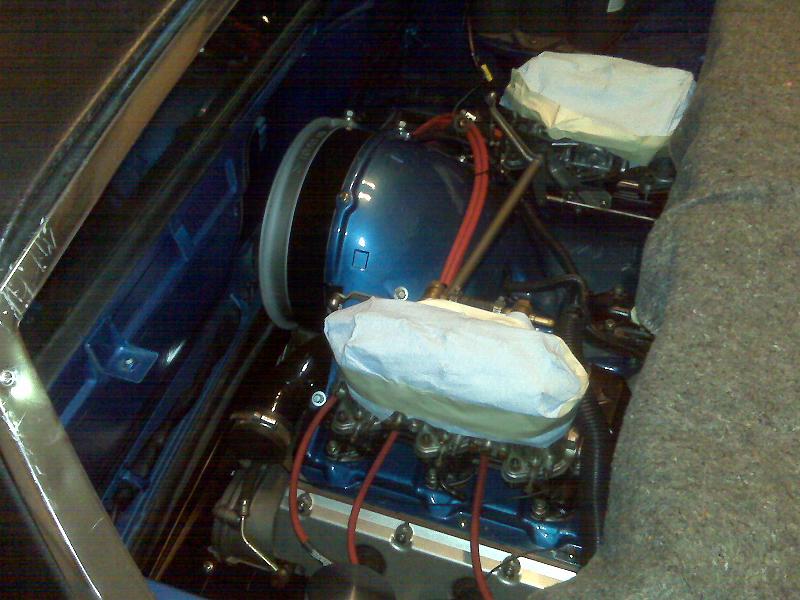
I spent some time replacing the input shaft seal on the transmission and some of the bushings for the shift linkage. I was able to replace the seals on the speedo drive gear and stop the leaks as well as replace the throw out bearing and bushings for the fork. The clutch disc measured at 10mm (almost brand new) and the pressure plate was in excellent condition. Today, I connected the transmission and the engine and torqued it down. It turns out that I overtightened the small nut on terminal 15 of the coil and pulled the post out. This sucks because I just bought the coil last summer and it maybe had 8 hours of use on it. The next step is to get my dad over here and help me put this beast in the car. Here's some recent pictures. 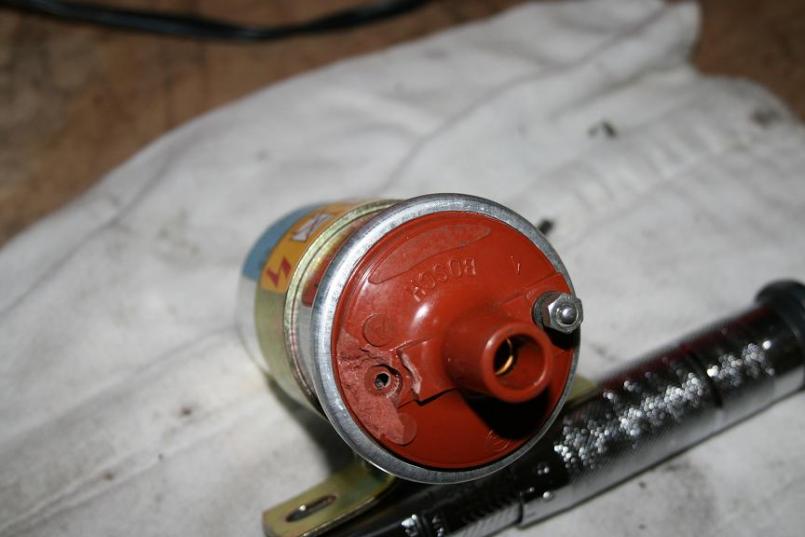 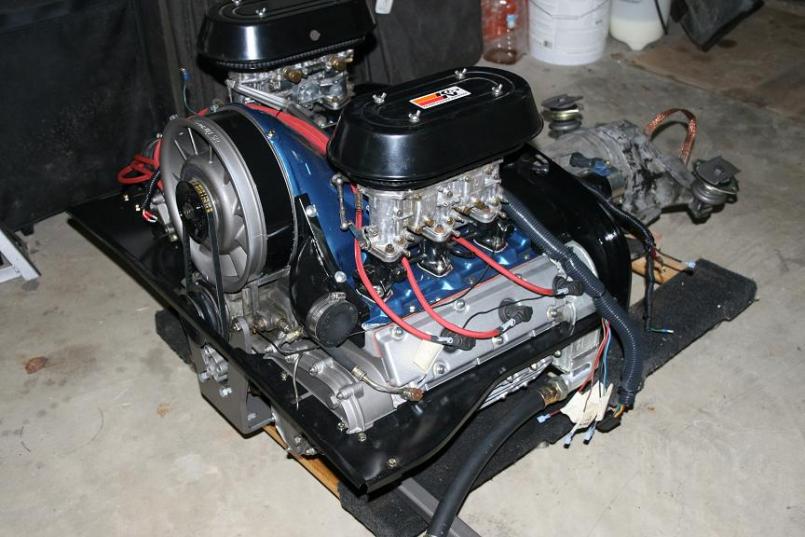 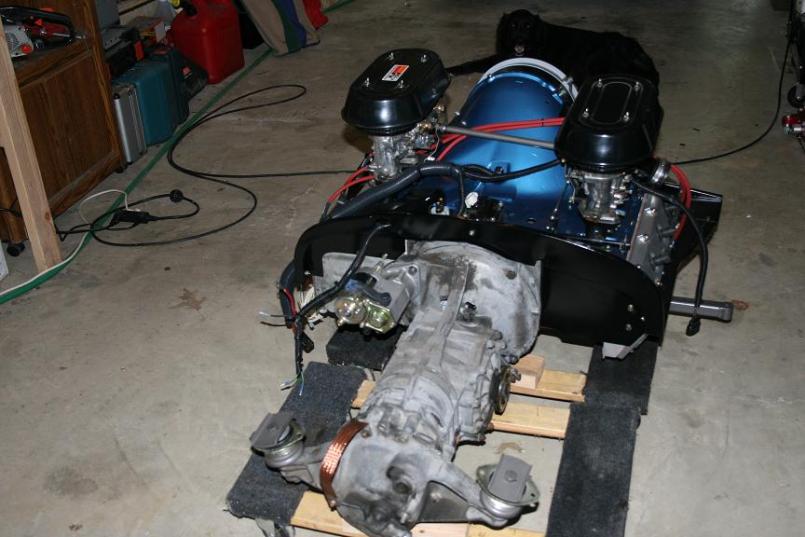 |
|
|
|
| jaxdream |
Jul 18 2010, 08:24 AM
Post
#42
|
|
Senior Member Group: Members Posts: 974 Joined: 8-July 08 From: North Central Tennessee Member No.: 9,270 Region Association: South East States |
Congrats !!!! (IMG:style_emoticons/default/piratenanner.gif) That just looks sweet !!! (IMG:style_emoticons/default/drooley.gif)
Jack / Jaxdream |
|
|
|
| jcambo7 |
Jul 18 2010, 09:09 AM
Post
#43
|
|
Senior Member Group: Members Posts: 1,664 Joined: 24-December 08 From: Graham, WA Member No.: 9,867 Region Association: Pacific Northwest |
Awesome work! Keep it up! (IMG:style_emoticons/default/popcorn[1].gif)
|
|
|
|
| IronHillRestorations |
Jul 18 2010, 09:21 AM
Post
#44
|
|
I. I. R. C. Group: Members Posts: 6,724 Joined: 18-March 03 From: West TN Member No.: 439 Region Association: None |
Bummer about the "coil". Remember it's not really a coil, but an ignition transformer for the CDI system, and is not interchangeable with something like your standard Bosch blue coil.
Torque those small fasteners with two fingers only, not your fist. |
|
|
|
| Ericv1 |
Jul 18 2010, 10:32 AM
Post
#45
|
|
Member Group: Members Posts: 259 Joined: 30-December 07 From: Cincinnati, Ohio Member No.: 8,518 Region Association: Upper MidWest |
QUOTE(9146986 @ Jul 18 2010, 11:21 AM)  Bummer about the "coil". Remember it's not really a coil, but an ignition transformer for the CDI system, and is not interchangeable with something like your standard Bosch blue coil. Torque those small fasteners with two fingers only, not your fist. Sometimes I have to learn the hard way. I've been so careful during the top end rebuild to torque everything tho specs. If this is the worst of it, I'll be a happy camper. |
|
|
|
| Ericv1 |
Jul 24 2010, 03:59 PM
Post
#46
|
|
Member Group: Members Posts: 259 Joined: 30-December 07 From: Cincinnati, Ohio Member No.: 8,518 Region Association: Upper MidWest |
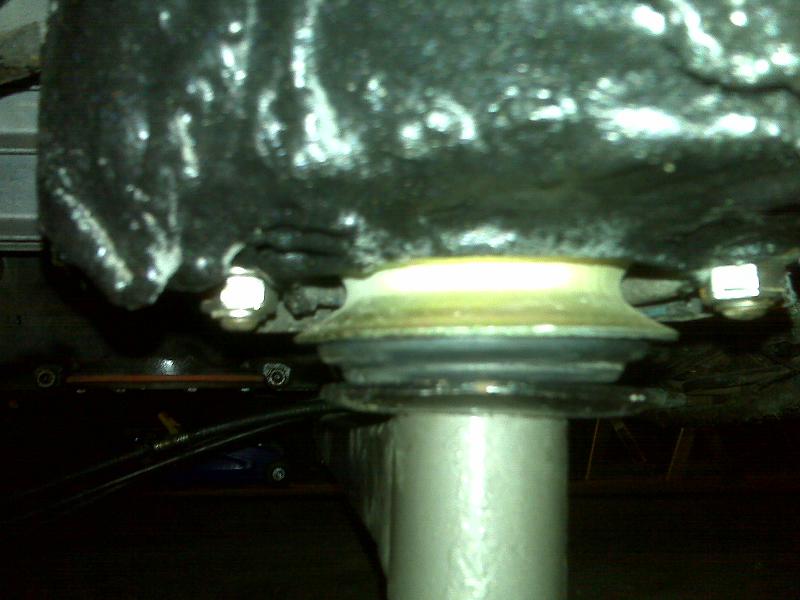
I got tired of looking at the engine today and decided to put it in. It took four hours (by myself) amongst the humidity and heat index of 102 but it's in. When I look from the top of the engine compartment, it appears the engine could come up about 3/4 of an inch. But, all the fasteners are snug and secure and the mount is line up correctly. I've added a picture of the motor mount. I used a quick six bar with the original pods. I'm wondering if I installed the mounts upside down. If I flip them that 3/4 of an inch would be taken up. So, my questions is are the mounts installed correctly? In the Haynes manual, it looks like they hang down as I've installed them. The engine doesn't look like it's sitting too low. It would just be more of a flush fit if that 3/4 of an inch were not there. Thoughts please. Thanks.
  |
|
|
|
| markb |
Jul 24 2010, 04:10 PM
Post
#47
|
|
914less :( Group: Members Posts: 5,449 Joined: 22-January 03 From: Nipomo, CA Member No.: 180 Region Association: Central California |
|
|
|
|
| Ericv1 |
Jul 26 2010, 06:48 PM
Post
#48
|
|
Member Group: Members Posts: 259 Joined: 30-December 07 From: Cincinnati, Ohio Member No.: 8,518 Region Association: Upper MidWest |
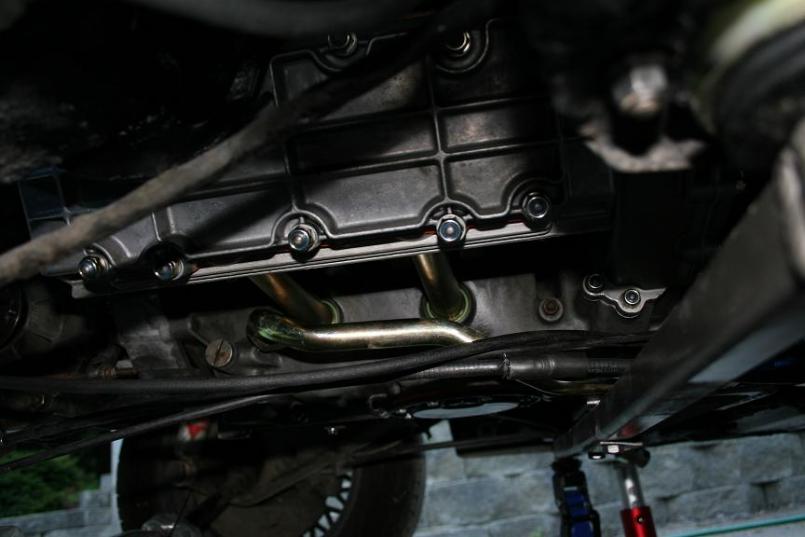
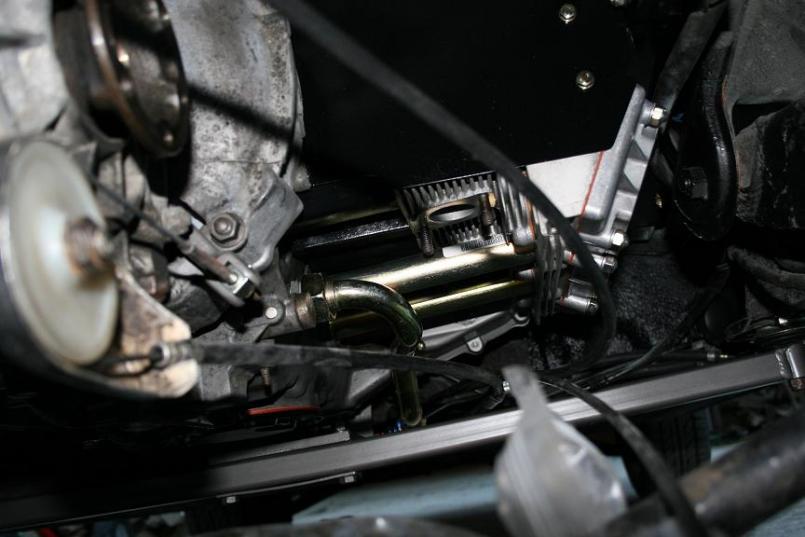
Today I was able to install the oil return line. I bought a short pipe from Patrick and some braided line. Somehow, I thought it would take longer but it actually went pretty smooth. I had to bend the tube about an inch so it would not hit the motor mount. I also got the clutch hooked back up and the speedo angle drive. In the next couple of days, I would like to get the CV joints attached, throttle hooked up with the bell crank, and get the headers on. That should take care of all of the work underneath the car and I can put my focus in the engine compartment.
  |
|
|
|
| jt914-6 |
Jul 26 2010, 06:59 PM
Post
#49
|
|
Driving & working on teeners 41 years Group: Members Posts: 1,786 Joined: 3-May 08 From: Bryant, Arkansas Member No.: 9,003 Region Association: South East States |
Looks great.......I remember when my motor went up into the car.....put the axles on BEFORE the headers/heat exchangers..... (IMG:style_emoticons/default/smash.gif)
|
|
|
|
| ArtechnikA |
Jul 26 2010, 07:30 PM
Post
#50
|
|
rich herzog Group: Members Posts: 7,390 Joined: 4-April 03 From: Salted Roads, PA Member No.: 513 Region Association: None |
QUOTE(Ericv1 @ Jul 26 2010, 08:48 PM) Did you shave the ribs on the Turbo rocker cover? |
|
|
|
| Ericv1 |
Jul 26 2010, 07:35 PM
Post
#51
|
|
Member Group: Members Posts: 259 Joined: 30-December 07 From: Cincinnati, Ohio Member No.: 8,518 Region Association: Upper MidWest |
QUOTE(ArtechnikA @ Jul 26 2010, 09:30 PM) QUOTE(Ericv1 @ Jul 26 2010, 08:48 PM) Did you shave the ribs on the Turbo rocker cover? No, I didn't know where to shave them. I was going to finger tighten the headers to see where the covers would bind and then shave them down. |
|
|
|
| EdArango |
Jul 26 2010, 07:36 PM
Post
#52
|
|
914 Enthusiast Group: Members Posts: 267 Joined: 30-January 10 From: Huntington Beach, CA Member No.: 11,309 Region Association: Southern California |
THAT LOOKS AWESOMMMEE
(IMG:style_emoticons/default/beerchug.gif) (IMG:style_emoticons/default/piratenanner.gif) (IMG:style_emoticons/default/smilie_pokal.gif) (IMG:style_emoticons/default/driving.gif) (IMG:style_emoticons/default/smilie_flagge24.gif) |
|
|
|
| ArtechnikA |
Jul 26 2010, 07:39 PM
Post
#53
|
|
rich herzog Group: Members Posts: 7,390 Joined: 4-April 03 From: Salted Roads, PA Member No.: 513 Region Association: None |
QUOTE(Ericv1 @ Jul 26 2010, 09:35 PM) No, I didn't know where to shave them. I was going to finger tighten the headers to see where the covers would bind and then shave them down. It's been a while - IIRC they'll hit either the longs or the trailing arms... |
|
|
|
| Ericv1 |
Jul 26 2010, 07:57 PM
Post
#54
|
|
Member Group: Members Posts: 259 Joined: 30-December 07 From: Cincinnati, Ohio Member No.: 8,518 Region Association: Upper MidWest |
QUOTE(ArtechnikA @ Jul 26 2010, 09:39 PM) QUOTE(Ericv1 @ Jul 26 2010, 09:35 PM) No, I didn't know where to shave them. I was going to finger tighten the headers to see where the covers would bind and then shave them down. It's been a while - IIRC they'll hit either the longs or the trailing arms... That makes sense now that I think about it. I'd better do some more research before I modify them. I don't want to drop the engine every time I adjust the valves. |
|
|
|
| Ericv1 |
Jul 29 2010, 07:12 PM
Post
#55
|
|
Member Group: Members Posts: 259 Joined: 30-December 07 From: Cincinnati, Ohio Member No.: 8,518 Region Association: Upper MidWest |
I spent the past few days after work underneath the car. All oil lines are hooked up. Today, I drilled and tapped the spot for the bell crank that I bought from Rich Johnson. I also hooked up the accelerator cable and rod. And, I finally broke out those beautiful headers that I purchased from Marty at MSDS in March. The last thing I need to complete under the car is cut and weld in a piece of straight tube for the shift rod. I also need to place an order for a muffler and ignition transformer in the next couple of days. On the topside, I need to plug in the wires for the alternator. Then, mount and plug in the CDI box. I'm on vacation next week so the car should be completed and ready to fire up. (IMG:style_emoticons/default/piratenanner.gif) 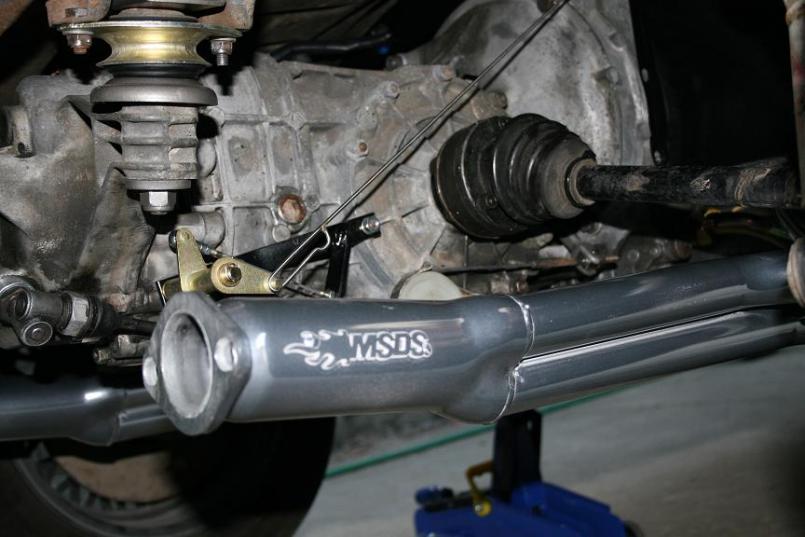 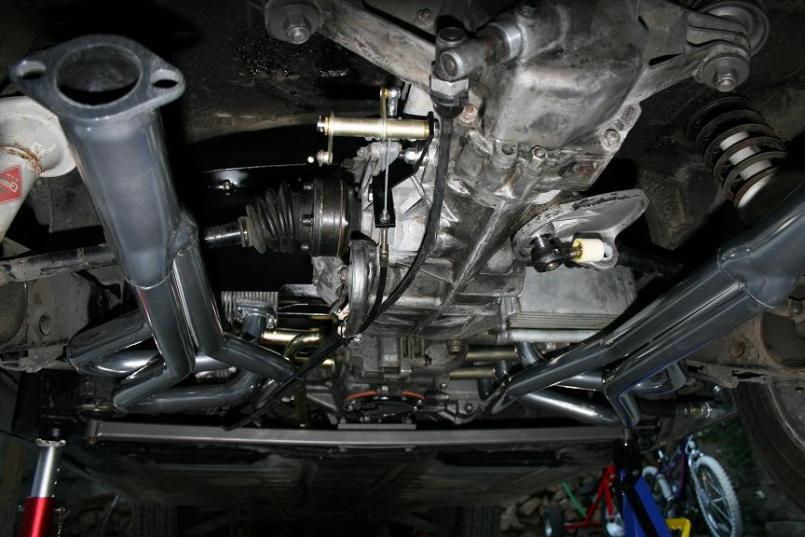 |
|
|
|
| rfuerst911sc |
Jul 30 2010, 03:44 AM
Post
#56
|
|
Advanced Member Group: Members Posts: 2,158 Joined: 4-May 06 From: Dahlonega , Georgia Member No.: 5,980 Region Association: South East States |
QUOTE(Ericv1 @ Jul 26 2010, 05:57 PM) QUOTE(ArtechnikA @ Jul 26 2010, 09:39 PM) QUOTE(Ericv1 @ Jul 26 2010, 09:35 PM) No, I didn't know where to shave them. I was going to finger tighten the headers to see where the covers would bind and then shave them down. It's been a while - IIRC they'll hit either the longs or the trailing arms... That makes sense now that I think about it. I'd better do some more research before I modify them. I don't want to drop the engine every time I adjust the valves. Replace the studs that hold the covers on with bolts and you don't have to shave the covers. At least that worked on mine. Your car is looking good. (IMG:style_emoticons/default/smilie_pokal.gif) |
|
|
|
| Ericv1 |
Jul 30 2010, 04:05 AM
Post
#57
|
|
Member Group: Members Posts: 259 Joined: 30-December 07 From: Cincinnati, Ohio Member No.: 8,518 Region Association: Upper MidWest |
QUOTE(rfuerst911sc @ Jul 30 2010, 05:44 AM) QUOTE(Ericv1 @ Jul 26 2010, 05:57 PM) QUOTE(ArtechnikA @ Jul 26 2010, 09:39 PM) QUOTE(Ericv1 @ Jul 26 2010, 09:35 PM) No, I didn't know where to shave them. I was going to finger tighten the headers to see where the covers would bind and then shave them down. It's been a while - IIRC they'll hit either the longs or the trailing arms... That makes sense now that I think about it. I'd better do some more research before I modify them. I don't want to drop the engine every time I adjust the valves. Replace the studs that hold the covers on with bolts and you don't have to shave the covers. At least that worked on mine. Your car is looking good. (IMG:style_emoticons/default/smilie_pokal.gif) Great Idea. After the break-in, I'll make that an afternoon project. Thanks. |
|
|
|
| Mark Henry |
Jul 30 2010, 07:16 AM
Post
#58
|
|
that's what I do! Group: Members Posts: 20,065 Joined: 27-December 02 From: Port Hope, Ontario Member No.: 26 Region Association: Canada |
QUOTE(Ericv1 @ Jul 29 2010, 09:12 PM) I spent the past few days after work underneath the car. All oil lines are hooked up. Today, I drilled and tapped the spot for the bell crank that I bought from Rich Johnson. I also hooked up the accelerator cable and rod. And, I finally broke out those beautiful headers that I purchased from Marty at MSDS in March. The last thing I need to complete under the car is cut and weld in a piece of straight tube for the shift rod. I also need to place an order for a muffler and ignition transformer in the next couple of days. On the topside, I need to plug in the wires for the alternator. Then, mount and plug in the CDI box. I'm on vacation next week so the car should be completed and ready to fire up. (IMG:style_emoticons/default/piratenanner.gif) My MSDS headers don't have the logo, I feel ripped off. (IMG:style_emoticons/default/shades.gif) Nice! (IMG:style_emoticons/default/beerchug.gif) |
|
|
|
| Root_Werks |
Jul 30 2010, 08:56 AM
Post
#59
|
|
Village Idiot Group: Members Posts: 8,331 Joined: 25-May 04 From: About 5NM from Canada Member No.: 2,105 Region Association: Pacific Northwest |
Was this shot taken in a mirror? (IMG:style_emoticons/default/blink.gif)
Attached image(s) 
|
|
|
|
| Root_Werks |
Jul 30 2010, 08:58 AM
Post
#60
|
|
Village Idiot Group: Members Posts: 8,331 Joined: 25-May 04 From: About 5NM from Canada Member No.: 2,105 Region Association: Pacific Northwest |
Seems like it should look like this:
Attached image(s) 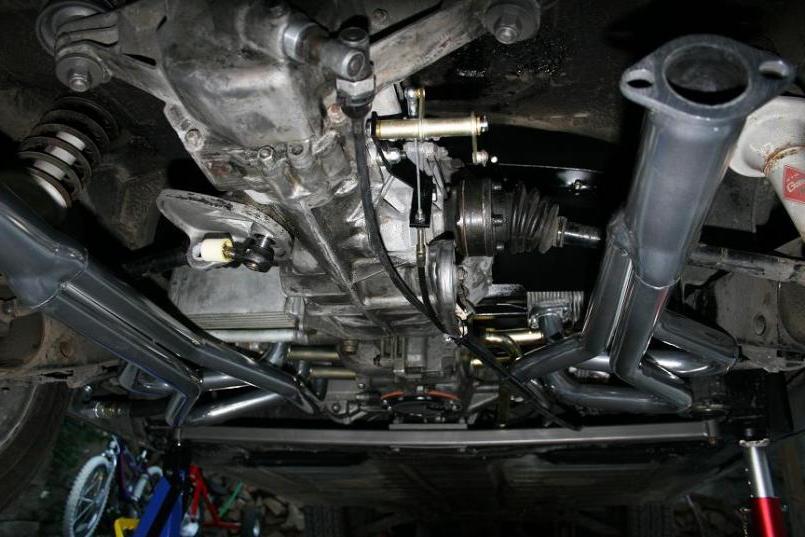
|
|
|
|
|
1 User(s) are reading this topic (1 Guests and 0 Anonymous Users)
0 Members:

|
Lo-Fi Version | Time is now: 1st June 2024 - 01:13 AM |
Invision Power Board
v9.1.4 © 2024 IPS, Inc.