|
|
|
Porsche, and the Porsche crest are registered trademarks of Dr. Ing. h.c. F. Porsche AG.
This site is not affiliated with Porsche in any way. Its only purpose is to provide an online forum for car enthusiasts. All other trademarks are property of their respective owners. |
|
|

  |

| MrKona |
 Jun 19 2010, 06:59 PM Jun 19 2010, 06:59 PM
Post
#1
|
|
Senior Member  Group: Members Posts: 597 Joined: 25-July 05 From: Santa Rosa, CA Member No.: 4,469 Region Association: None |
Thought I would share my most recent project - my redone steering wheel. Started out with a plastic steering wheel that I wanted to recover in leather. I also wanted a little padding, so I bought the complete kit from AGLA, which includes felt padding, leather, thread, and a couple of needles. I read on the early 911 registry that Porsche used 380mm (aka 914) plastic wheels and felt for the 911RSR thick grip leather wheels. It took close to two months to receive the kit, but in the end, it was decent quality.
I first sanded the existing paint, primed, and repainted the spokes with L43 Grey Black from Wolfsburg West. I read somewhere that this is a good match with the original paint and that proved true. Attached thumbnail(s) 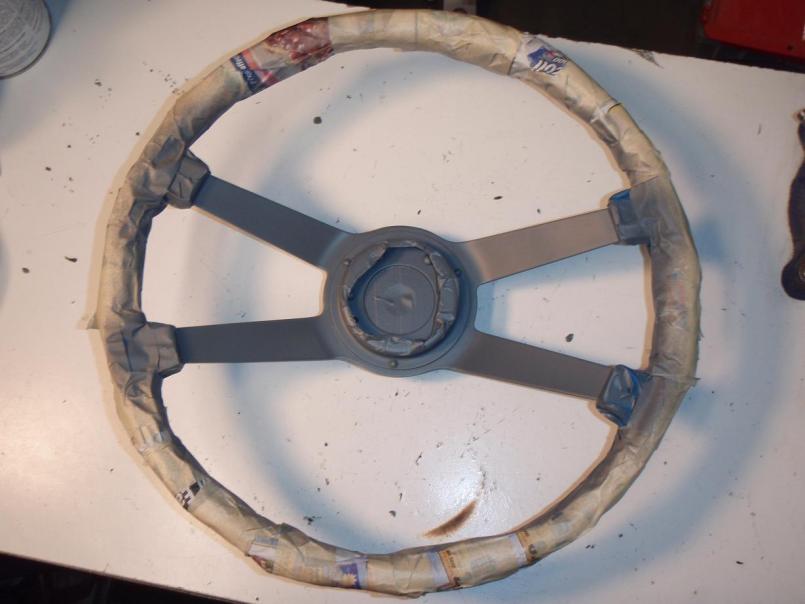  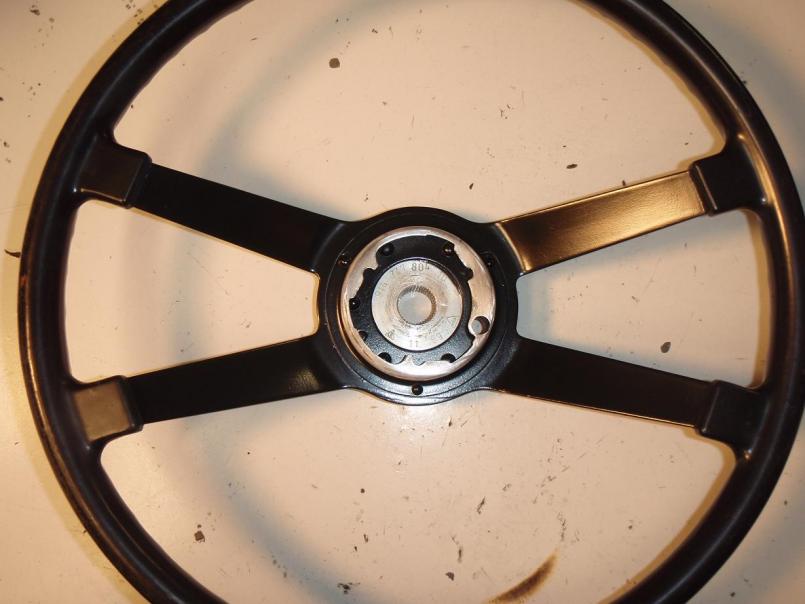
|
   |

 
|
| MrKona |
Jun 19 2010, 07:03 PM
Post
#2
|
|
Senior Member Group: Members Posts: 597 Joined: 25-July 05 From: Santa Rosa, CA Member No.: 4,469 Region Association: None |
I then sprayed the plastic with some 3m spray adhesive and let it get tacky before applying the felt. I had to cut the felt to size. A little trial and error trimming was necessary. I held the felt with tape while it dried, and then removed the tape before starting the fun part.
Attached thumbnail(s) 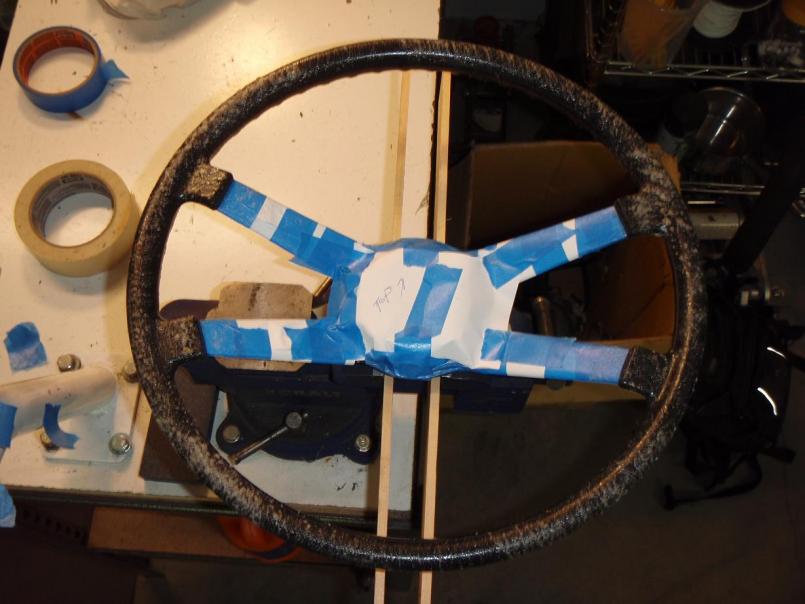 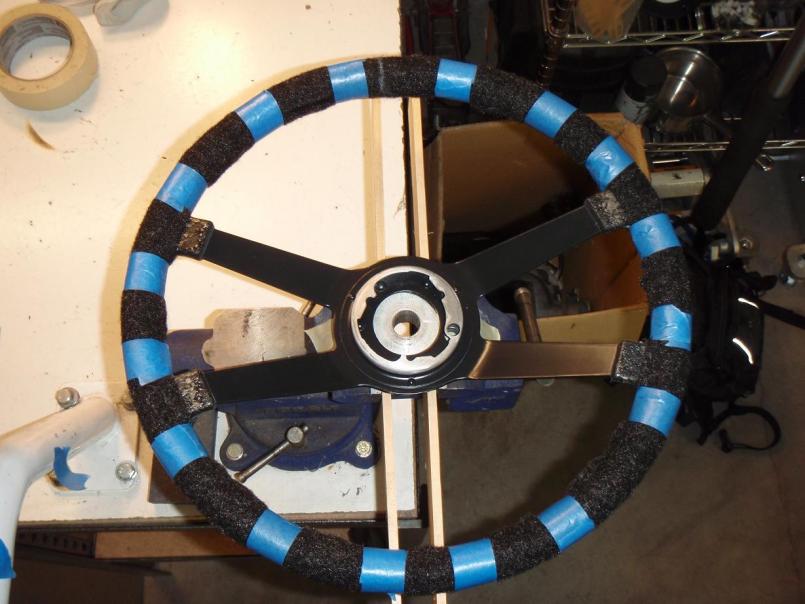 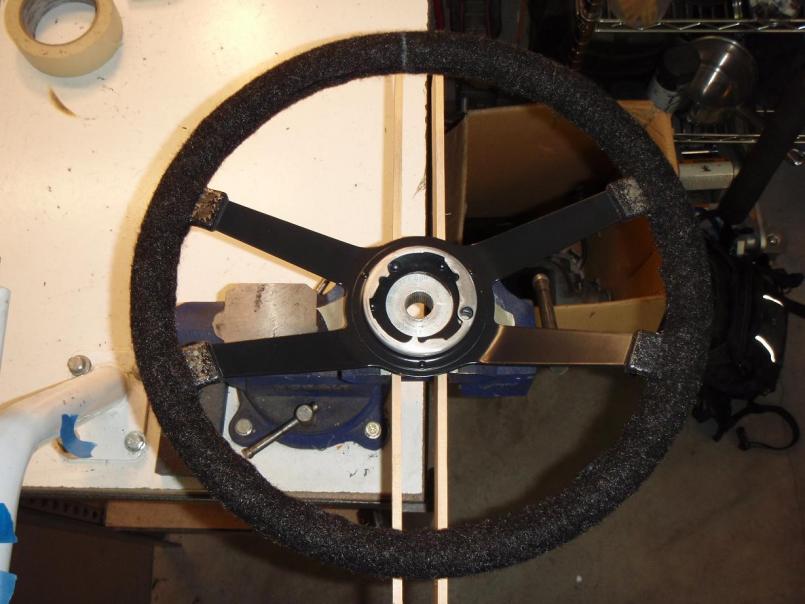
|
|
|
|
| VaccaRabite |
Jun 19 2010, 07:06 PM
Post
#3
|
|
En Garde! Group: Admin Posts: 13,442 Joined: 15-December 03 From: Dallastown, PA Member No.: 1,435 Region Association: MidAtlantic Region |
Gah, more pics! Can't get into the middle of thew thread like this with it half way. I need the reveal!
|
|
|
|
| MrKona |
Jun 19 2010, 07:11 PM
Post
#4
|
|
Senior Member Group: Members Posts: 597 Joined: 25-July 05 From: Santa Rosa, CA Member No.: 4,469 Region Association: None |
I fit the leather on the wheel and started stitching. First though, I watched a couple videos on Youtube to learn how to do the cross stitching and baseball stitch pattern at the spokes. One word of caution. I started by holding the wheel loosely between two pieces of wood in the bench vice. Don't do that! It indents the leather. (Duh..) Luckily, the indent went away, but I wasn't too happy at first. Later, I found a better way to hold the wheel while I stitched.
Attached thumbnail(s) 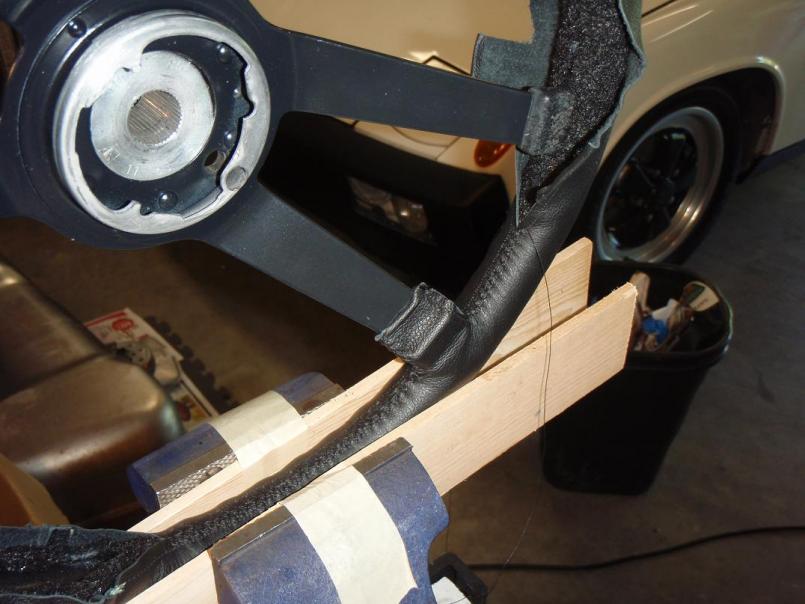 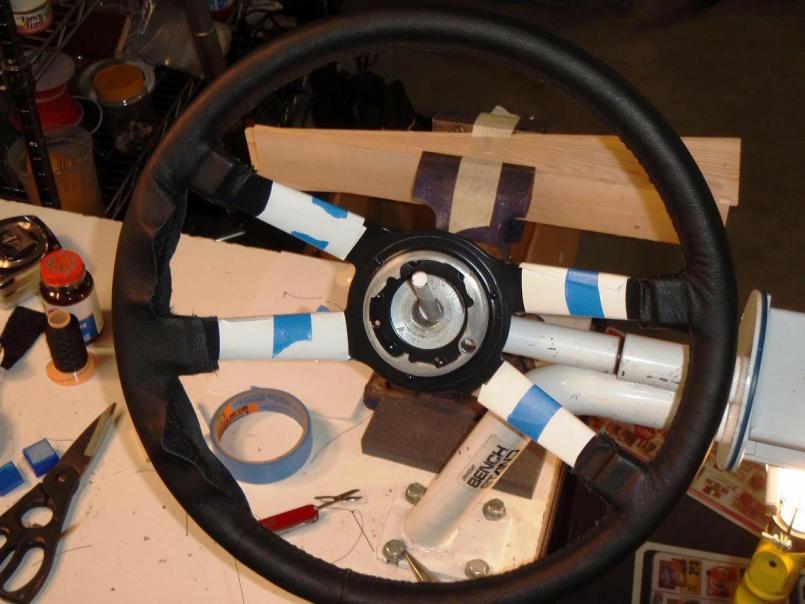
|
|
|
|
| MrKona |
Jun 19 2010, 07:14 PM
Post
#5
|
|
Senior Member Group: Members Posts: 597 Joined: 25-July 05 From: Santa Rosa, CA Member No.: 4,469 Region Association: None |
Some stitching pics along the way...
Attached thumbnail(s) 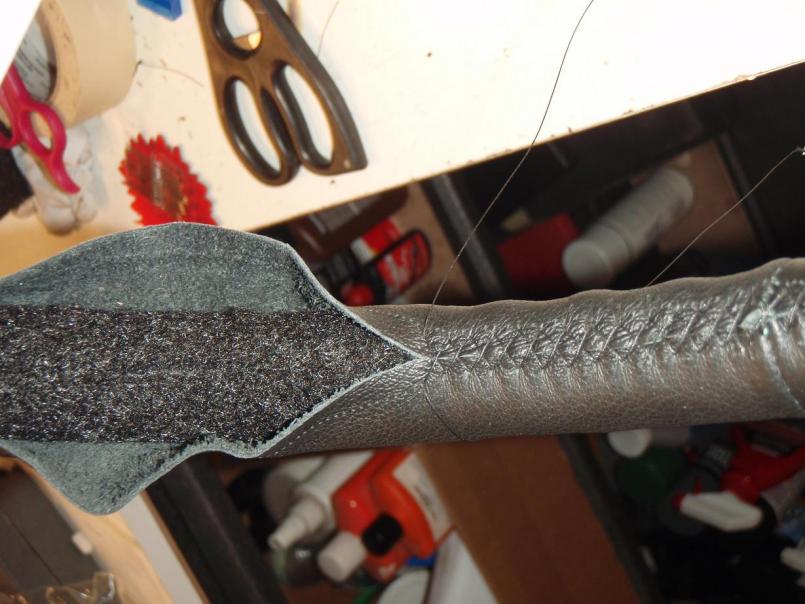 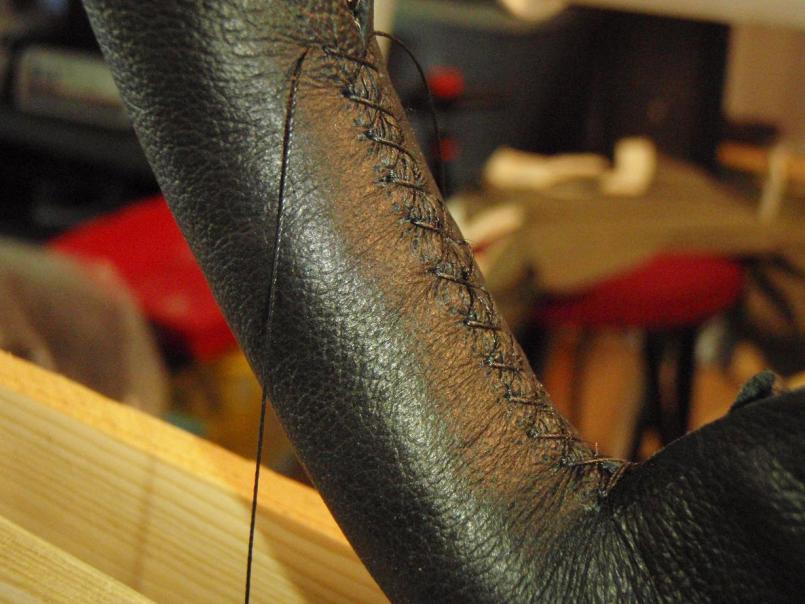 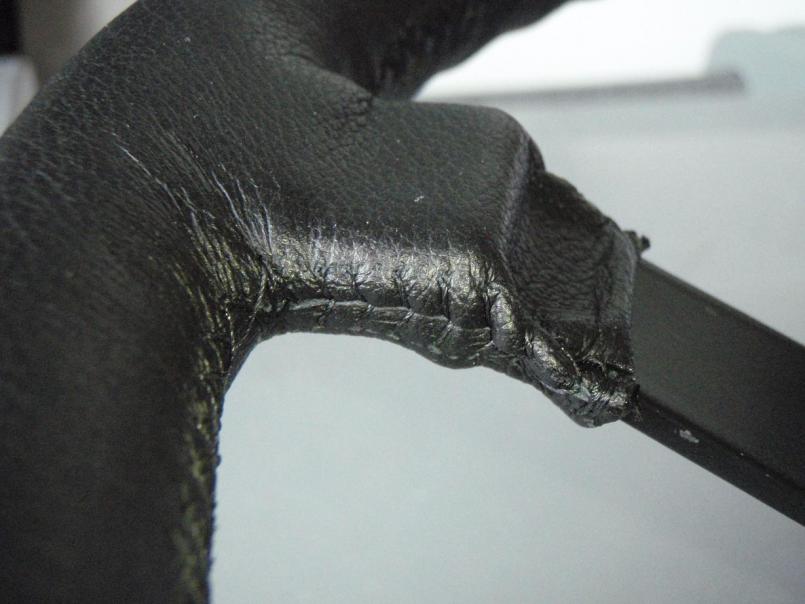
|
|
|
|
| MrKona |
Jun 19 2010, 07:18 PM
Post
#6
|
|
Senior Member Group: Members Posts: 597 Joined: 25-July 05 From: Santa Rosa, CA Member No.: 4,469 Region Association: None |
And the final result! Certainly not perfect, but I'm happy with the results, especially on my first try. I did learn a couple things from this first wheel. Main point being not to let the leather bunch as you approach a spoke. On one of the spokes, there was a bit of wrinkling because of that, but I smoothed it out afterward with a little heat from the heat gun. Make sure to spread the "bunching" out over a longer area, so it isn't noticeable.
This was a pretty tedious project, but once you get the hang of it, it was almost fun! Attached thumbnail(s) 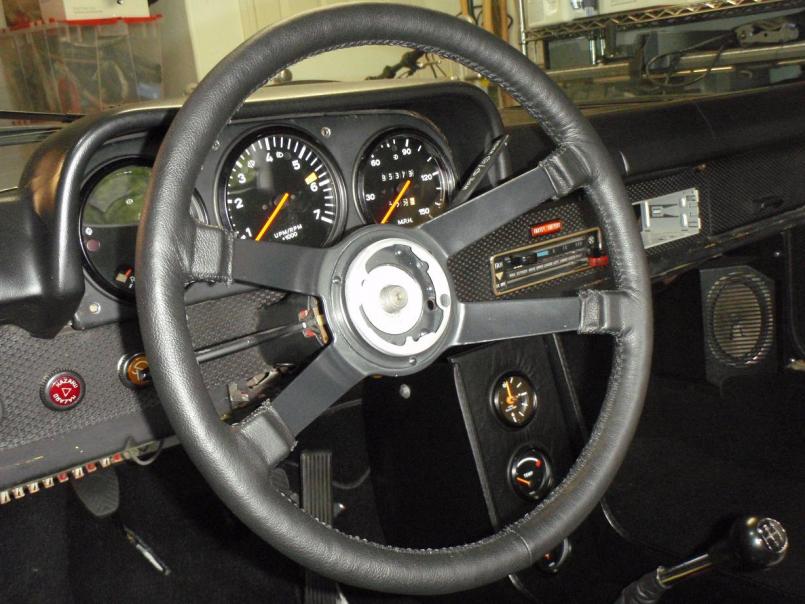
|
|
|
|
| Mikey914 |
Jun 19 2010, 07:20 PM
Post
#7
|
|
The rubber man Group: Members Posts: 12,659 Joined: 27-December 04 From: Hillsboro, OR Member No.: 3,348 Region Association: None |
Really nice. I'm interested on what the kit cost. I have a wheel I'd like to do.
|
|
|
|
| MrKona |
Jun 19 2010, 07:26 PM
Post
#8
|
|
Senior Member Group: Members Posts: 597 Joined: 25-July 05 From: Santa Rosa, CA Member No.: 4,469 Region Association: None |
QUOTE(Mikey914 @ Jun 19 2010, 06:20 PM)  Really nice. I'm interested on what the kit cost. I have a wheel I'd like to do. Kit was $90 from AGLA. http://www.aglausa.com/ The thick grip isn't on their website, but I emailed them to see if their leather pattern would fit over felt and they informed me that they sell the thick grip kit with everything. Only thing I must say is that the shipping and service wasn't good. You'll see the same thing if you perform a search on the Pelican 911 board. But finally, I did receive it... |
|
|
|
| VaccaRabite |
Jun 19 2010, 08:24 PM
Post
#9
|
|
En Garde! Group: Admin Posts: 13,442 Joined: 15-December 03 From: Dallastown, PA Member No.: 1,435 Region Association: MidAtlantic Region |
looks like a great result. thanks for posting up your project.
Working with leather is fun, and you would be amazed how much smoothing and stretching it can stand. Zach |
|
|
|
| DanT |
Jun 19 2010, 08:26 PM
Post
#10
|
|
Going back to the Dark Side! Group: Members Posts: 4,300 Joined: 4-October 04 From: Auburn, CA Member No.: 2,880 Region Association: None |
very nice result for your first go at it... (IMG:style_emoticons/default/smilie_pokal.gif)
|
|
|
|
| biggy72 |
Jul 16 2010, 11:59 PM
Post
#11
|
|
Member Group: Members Posts: 209 Joined: 14-January 06 From: Olympia, WA Member No.: 5,418 Region Association: Pacific Northwest |
What's the difference between the regular kit and the presewn kit?
|
|
|
|
| bradtho |
Jul 17 2010, 11:43 AM
Post
#12
|
|
Member Group: Members Posts: 266 Joined: 22-December 09 From: Seattle, WA Member No.: 11,165 Region Association: None |
about how much thread did this take? I need to restitch my wheel but not sure how much to get. would suck to get almost done and not have enough!
|
|
|
|
|
1 User(s) are reading this topic (1 Guests and 0 Anonymous Users)
0 Members:

|
Lo-Fi Version | Time is now: 10th May 2024 - 12:25 PM |
Invision Power Board
v9.1.4 © 2024 IPS, Inc.