|
|
|
Porsche, and the Porsche crest are registered trademarks of Dr. Ing. h.c. F. Porsche AG.
This site is not affiliated with Porsche in any way. Its only purpose is to provide an online forum for car enthusiasts. All other trademarks are property of their respective owners. |
|
|

  |

| william harris |
 Apr 11 2004, 08:54 PM Apr 11 2004, 08:54 PM
Post
#1
|
|
914 Restorer  Group: Members Posts: 1,459 Joined: 9-January 04 From: Hamilton, MA Member No.: 1,539 |
So, after seeing Mark Allin's 914-6 GT, decided to go home a grab the wrenches. Next step will be the suspension rebuild. First step, drop the rear suspension.
Attached image(s) 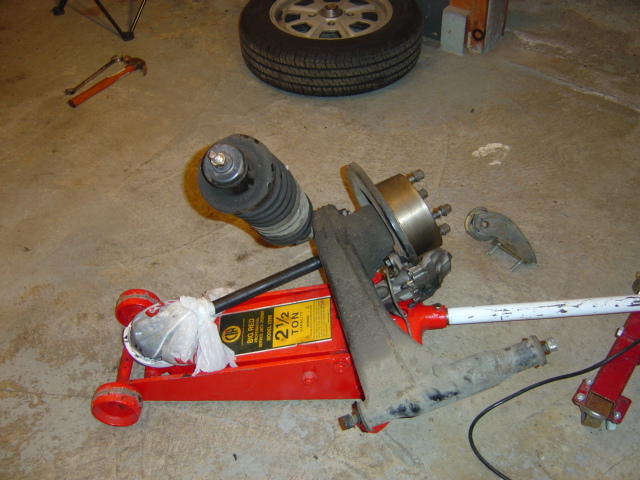
|
   |

 
|
| william harris |
Apr 11 2004, 08:56 PM
Post
#2
|
|
914 Restorer Group: Members Posts: 1,459 Joined: 9-January 04 From: Hamilton, MA Member No.: 1,539 |
Here the car sits until the front and rear suspension are removed. Then what's left goes off to be media blasted and primed. Sorta looks sad after the 914-6 GT, but I remember what Mark's car looked like a couple of years ago - about the same.
Attached image(s) 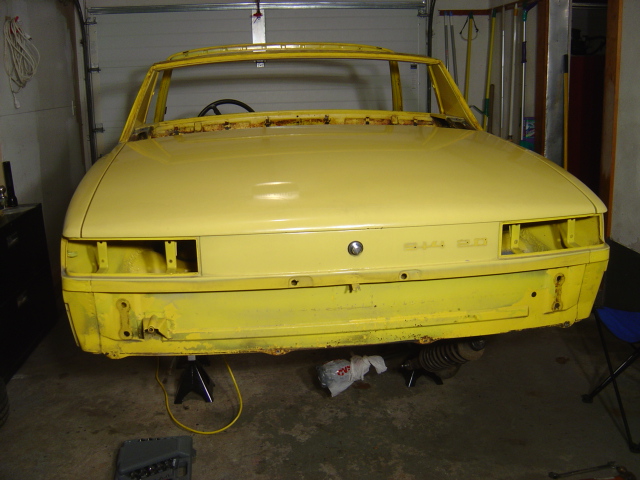
|
|
|
|
| william harris |
Apr 11 2004, 08:59 PM
Post
#3
|
|
914 Restorer Group: Members Posts: 1,459 Joined: 9-January 04 From: Hamilton, MA Member No.: 1,539 |
Here's a close up of the control arm bearing and the shims that go under the bearing (next to body). I take these pictures so I'll remember how to put it back together.
Attached image(s) 
|
|
|
|
| william harris |
Apr 11 2004, 09:00 PM
Post
#4
|
|
914 Restorer Group: Members Posts: 1,459 Joined: 9-January 04 From: Hamilton, MA Member No.: 1,539 |
Here's what you see from under the car as you remove the control arm bearing.
Attached image(s) 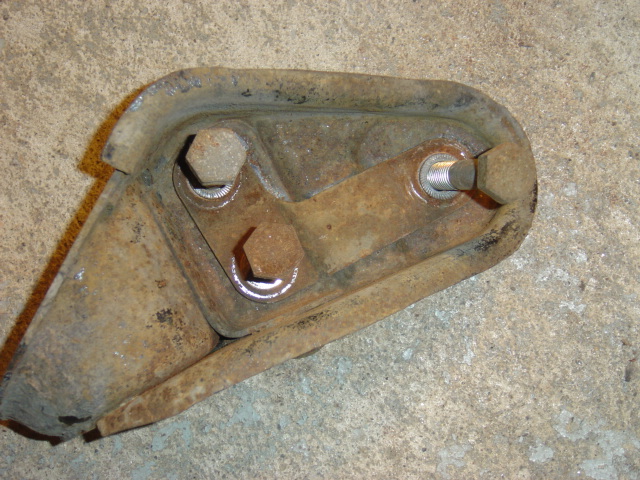
|
|
|
|
| J P Stein |
Apr 11 2004, 09:20 PM
Post
#5
|
|
Irrelevant old fart Group: Members Posts: 8,797 Joined: 30-December 02 From: Vancouver, WA Member No.: 45 Region Association: None |
picture at random
Attached image(s) 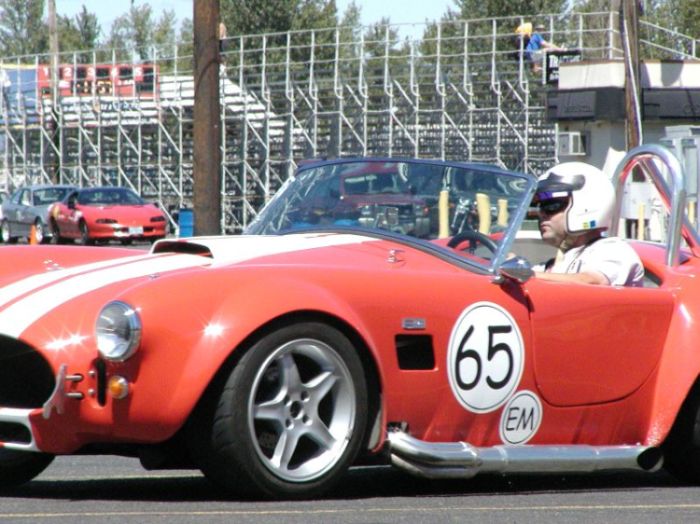
|
|
|
|
| watsonrx13 |
Apr 12 2004, 04:13 PM
Post
#6
|
|
Advanced Member Group: Members Posts: 2,734 Joined: 18-February 03 From: Plant City, FL Member No.: 312 Region Association: South East States |
Will, shots look similar to the ones that I took when I took my suspension apart. You know what they say, 'A picture is worth a thound words'. I've set up a personal web site on my lap top to document the disassembly of the 2 cars I'm working on.
Attached image(s) 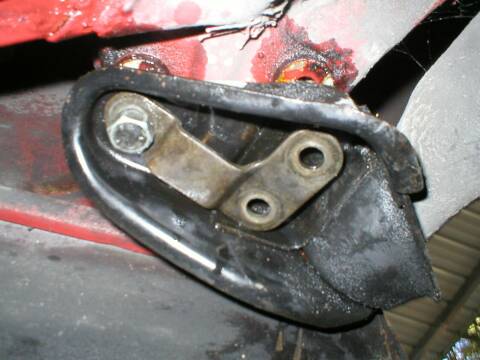
|
|
|
|
| anthony |
Apr 12 2004, 05:34 PM
Post
#7
|
|
2270 club Group: Benefactors Posts: 3,107 Joined: 1-February 03 From: SF Bay Area, CA Member No.: 218 |
QUOTE Then what's left goes off to be media blasted and primed. How do you move the car without suspension on it? |
|
|
|
| vortrex |
Apr 12 2004, 05:52 PM
Post
#8
|
|
Senior Member Group: Members Posts: 1,687 Joined: 24-December 02 From: SF, CA Member No.: 4 Region Association: None |
didn't someone (brad?) just load the car onto a flat bed truck sitting on the pan? or maybe there were tires underneath it for cushion??
|
|
|
|
| william harris |
Apr 12 2004, 06:34 PM
Post
#9
|
|
914 Restorer Group: Members Posts: 1,459 Joined: 9-January 04 From: Hamilton, MA Member No.: 1,539 |
For $300 I purchased a steel body dolly with casters. Will post pictures when I move the car onto the dolly. So here's the stuff I was going to post yesterday before burnout caught up with me. When you remove the control arms, first you must remove the cable to the parking brake and the hard line and rubber hose to the brake. Here's a view of the parking brake cable end secured by pin with small clip. Easily removed with a screw driver.
Attached image(s) 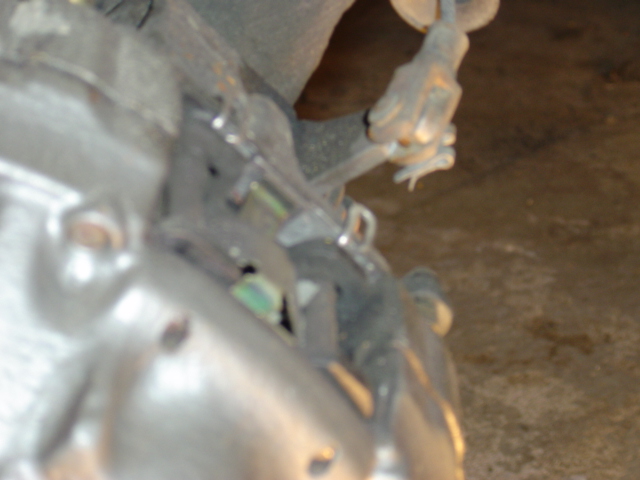
|
|
|
|
| william harris |
Apr 12 2004, 06:35 PM
Post
#10
|
|
914 Restorer Group: Members Posts: 1,459 Joined: 9-January 04 From: Hamilton, MA Member No.: 1,539 |
Here I have inserted a small scribe into the end of the clip.
Attached image(s) 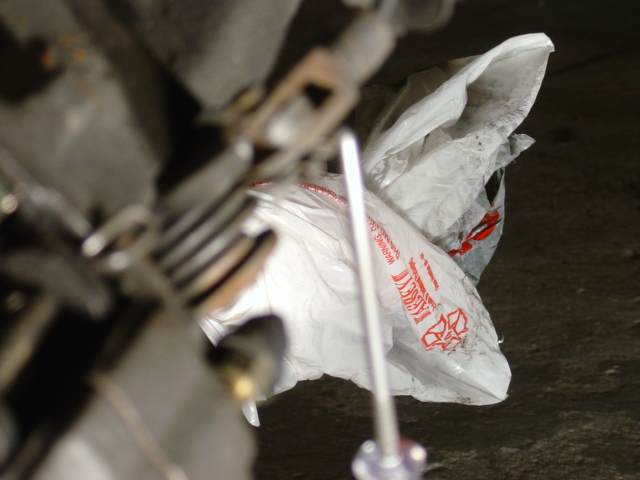
|
|
|
|
| william harris |
Apr 12 2004, 06:38 PM
Post
#11
|
|
914 Restorer Group: Members Posts: 1,459 Joined: 9-January 04 From: Hamilton, MA Member No.: 1,539 |
After this clip is removed, there is another clip up where the cable is covered by a small rubber boot. This is a semi-circle clip and again is easily removed with a screw driver. Here I have partially dislodged the clip.
Attached image(s) 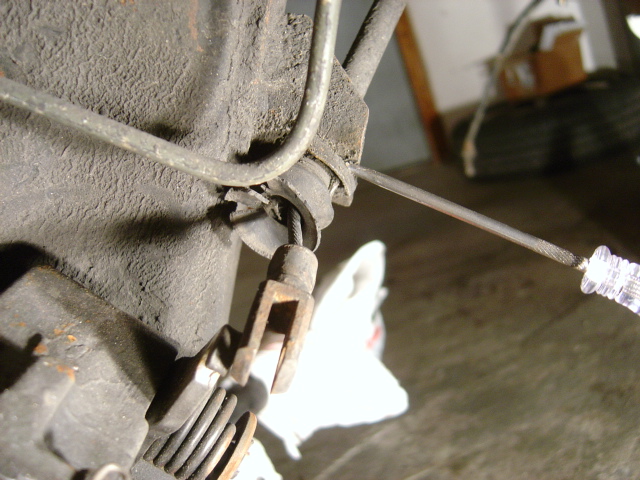
|
|
|
|
| william harris |
Apr 12 2004, 06:39 PM
Post
#12
|
|
914 Restorer Group: Members Posts: 1,459 Joined: 9-January 04 From: Hamilton, MA Member No.: 1,539 |
After this clip is removed you need to slip the rubber boot over the end of the cable and then you can feed the cable back through the bracket.
Attached image(s) 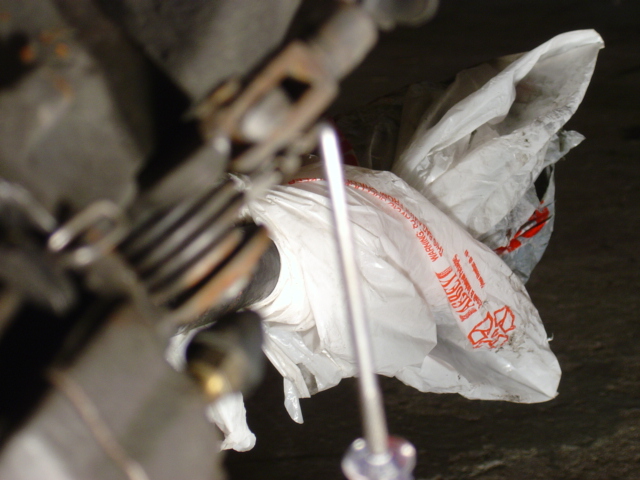
|
|
|
|
| william harris |
Apr 12 2004, 06:41 PM
Post
#13
|
|
914 Restorer Group: Members Posts: 1,459 Joined: 9-January 04 From: Hamilton, MA Member No.: 1,539 |
Well that pictures sucks, getting the macros into focus is a bitch, especially when you cannot see up close like us old folks.
Attached image(s) 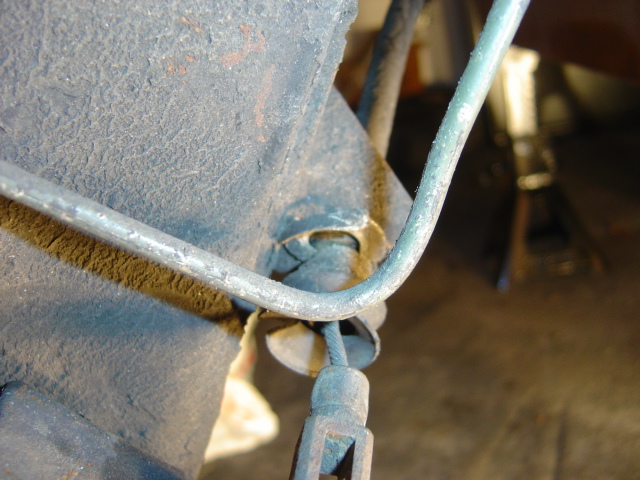
|
|
|
|
| william harris |
Apr 12 2004, 06:42 PM
Post
#14
|
|
914 Restorer Group: Members Posts: 1,459 Joined: 9-January 04 From: Hamilton, MA Member No.: 1,539 |
Next move up to the brake hose and find another clip that is easily pushed off with the blade of a screw driver.
Attached image(s) 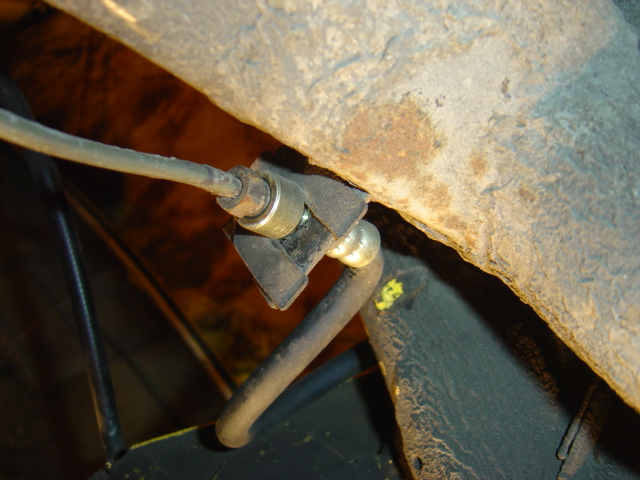
|
|
|
|
| william harris |
Apr 12 2004, 06:45 PM
Post
#15
|
|
914 Restorer Group: Members Posts: 1,459 Joined: 9-January 04 From: Hamilton, MA Member No.: 1,539 |
Then using a flare nut wrench, remove the hard brake line and the hose can be worked back out. By now the parking brake cable and brake lines should be disconnected. Here's what you should have. Next step will be disassembly of the rear suspension. Sand blasting all parts, powder coat all parts, replace all bushings, etc. and them assemble with new suspension goodies from High Performance House.
Attached image(s) 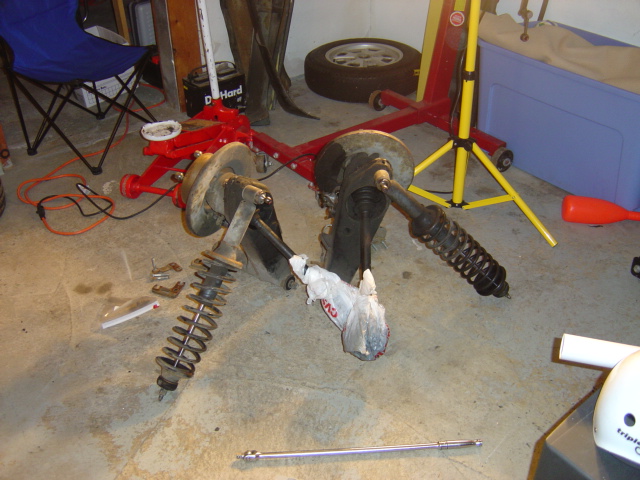
|
|
|
|
| william harris |
Apr 12 2004, 06:52 PM
Post
#16
|
|
914 Restorer Group: Members Posts: 1,459 Joined: 9-January 04 From: Hamilton, MA Member No.: 1,539 |
Here's a close up view of the various clips and what's left of the rubber boot on the parking brake cable.
Attached image(s) 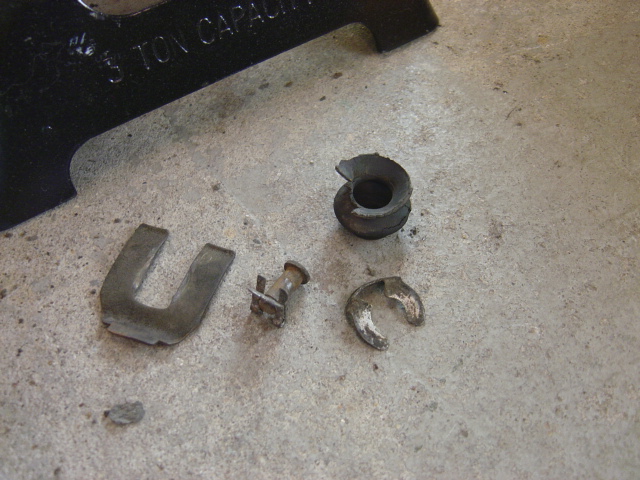
|
|
|
|
| william harris |
Apr 15 2004, 06:57 AM
Post
#17
|
|
914 Restorer Group: Members Posts: 1,459 Joined: 9-January 04 From: Hamilton, MA Member No.: 1,539 |
(IMG:style_emoticons/default/ar15.gif) Ok, so now we move to the front of the car. First item, remove brake lines. Again you will find the clip that holds the hose to the hard line into the brake caliper: removal is easy.
Attached image(s) 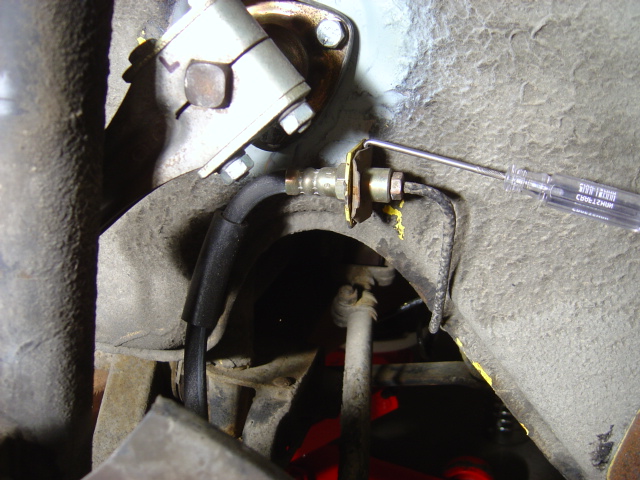
|
|
|
|
| william harris |
Apr 15 2004, 07:01 AM
Post
#18
|
|
914 Restorer Group: Members Posts: 1,459 Joined: 9-January 04 From: Hamilton, MA Member No.: 1,539 |
Here's a better shot from the back of the clip. After this clip is removed, use the 11mm flare nut wrench on the hard line and hold the hose with a 17mm wrench and the brake lines are off. My plan is to drop the entire front suspension as a sub-assembly and then disassemble, sandblast (media?) and then powder coat, and replace tie rods, etc. before reassembly. Also, I have located a new stripper in Massachusetts that uses baking soda - the real big advantage being the soda media does not generate any heat: Tango Classics, check them out at www.shelbymustang.com. Will post more tomorrow as progress allows.
Attached image(s) 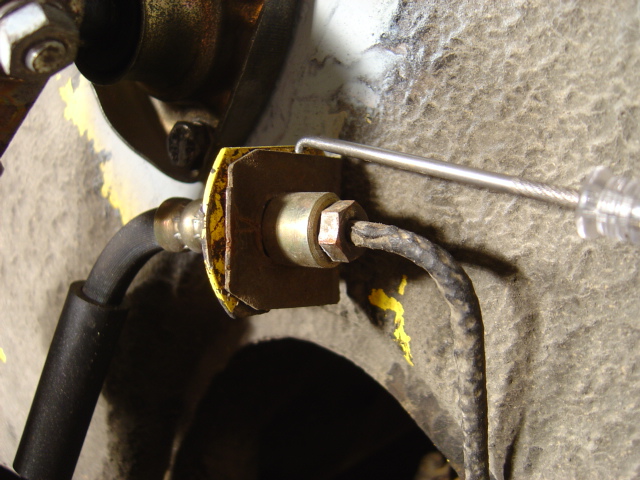
|
|
|
|
| Porsche Rescue |
Apr 15 2004, 09:24 AM
Post
#19
|
|
Saving and Enjoying Old Porsches Group: Members Posts: 2,978 Joined: 31-December 02 From: Bend, Oregon Member No.: 64 Region Association: None |
How do you remove the large stub axle nut with control arm on the ground? Did you loosen it before removal? Or can it be spun off with an impact wrench? It is torqued very tight as I recall.
|
|
|
|
| East coaster |
Apr 15 2004, 10:13 AM
Post
#20
|
|
Senior Member Group: Members Posts: 1,673 Joined: 28-March 03 From: Brigantine, NJ Member No.: 487 Region Association: None |
Just did mine with an impact wench..FYI
|
|
|
|
|
1 User(s) are reading this topic (1 Guests and 0 Anonymous Users)
0 Members:

|
Lo-Fi Version | Time is now: 18th May 2024 - 04:11 PM |
Invision Power Board
v9.1.4 © 2024 IPS, Inc.