|
|
|
Porsche, and the Porsche crest are registered trademarks of Dr. Ing. h.c. F. Porsche AG.
This site is not affiliated with Porsche in any way. Its only purpose is to provide an online forum for car enthusiasts. All other trademarks are property of their respective owners. |
|
|

  |

| Eric_Shea |
 Jul 21 2011, 09:12 AM Jul 21 2011, 09:12 AM
Post
#41
|
|
PMB Performance  Group: Admin Posts: 19,275 Joined: 3-September 03 From: Salt Lake City, UT Member No.: 1,110 Region Association: Rocky Mountains |
Leave it like it is and bed your pads using the procedure on my site. Your pedal will eventually come back up.
This happens all the time with new seals. Your seals will eventually bed in and the pad bedding process helps. |
   |

 
|
| jk76.914 |
Jul 22 2011, 04:06 AM
Post
#42
|
|
Senior Member Group: Members Posts: 809 Joined: 12-April 05 From: Massachusetts Member No.: 3,925 Region Association: North East States |
QUOTE(Eric_Shea @ Jul 21 2011, 11:12 AM)  Leave it like it is and bed your pads using the procedure on my site. Your pedal will eventually come back up. This happens all the time with new seals. Your seals will eventually bed in and the pad bedding process helps. Will do. Should be driving again on Sunday. (famous last words!) Thanks for the advice. Jim |
|
|
|
| jk76.914 |
Jul 22 2011, 08:27 PM
Post
#43
|
|
Senior Member Group: Members Posts: 809 Joined: 12-April 05 From: Massachusetts Member No.: 3,925 Region Association: North East States |
OK, I got it. As Eric indicated, the new rubber dust boots weren't slipping along the fresh (slightly granular) surface of the piston. It isn't supposed to, except to adjust for wear. It's intended to act as a spring to pull the piston back in slightly to get it away from the rotor when you release the brakes. As the pads wear, the piston travel will increase, until there is finally some slip along the piston to reset everything. On mine, because there was no slip (no adjustment), the seals pulled the pistons too far back into the cylinder. There was enough volume of displacement between the larger diameter of the M caliper and the too long travel of the pistons that the entire volume of the master cylinder was required to just push the pistons out near the rotor. So the pedal went all the way to the floor before the pads were tight between rotor and piston.
So first, I made myself a homemade set of pads. Real organics- 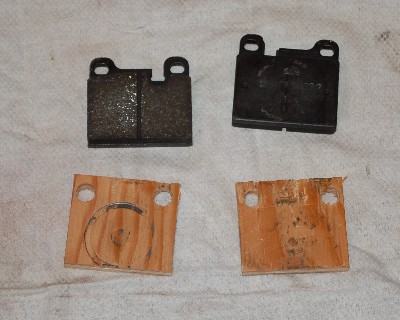 I wanted them to be thinner than the new pads, but thicker than the backing plate. My goal was to get the pistons out enough to get that first slip of the rubber dust seal along the piston- 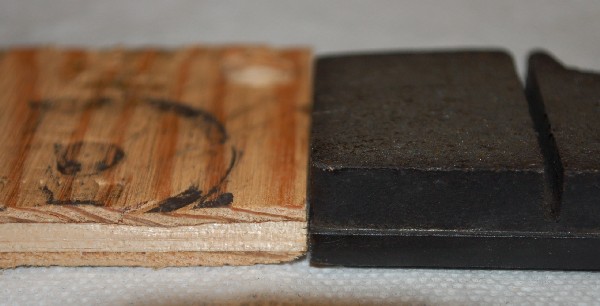 I installed them into one caliper... 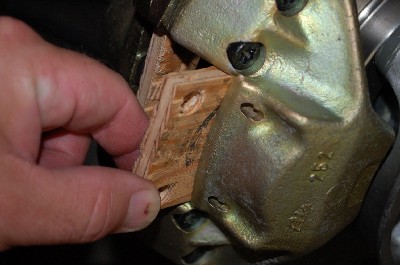 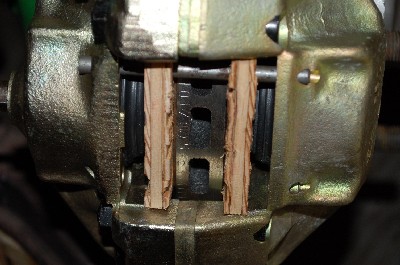 And pumped the brake. The brake went from "nothing" to "not bad" in about five pumps! I removed the plywood brake pads, pried the pistons back in, reassembled the real pads and hardware, topped off the reservoir, and then repeated on the other side! 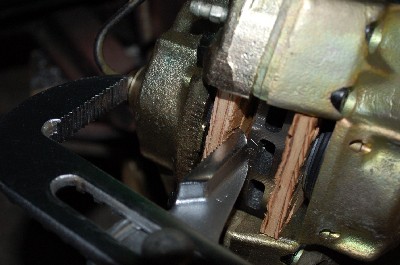 As I pumped the brakes with the "organics" in, one nice thing is that I could hear the pistons coming out of the cylinders- actually the plywood was creaking as it was being crushed! Also, when I was all done, real pads installed, I could hear the equalizer in back of me thump every time I pumped. A good sign. Feeling good about the brakes now. Still need to bleed the rears, but I'll do that after my first drive. Now on to the toe-in. Thanks, everyone, for the suggestions! 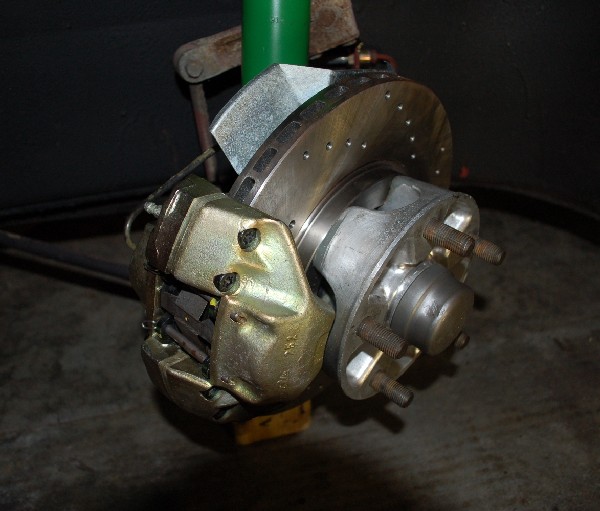 |
|
|
|
| jk76.914 |
Aug 7 2011, 06:42 PM
Post
#44
|
|
Senior Member Group: Members Posts: 809 Joined: 12-April 05 From: Massachusetts Member No.: 3,925 Region Association: North East States |
Getting there. Devil's in the details I s'pose.
New tie rod ends and boots all around.  Seals for the bearing caps. Never saw these before, but they were in PET so I ordered a pair from Pelican. They're little tubes- not solid.  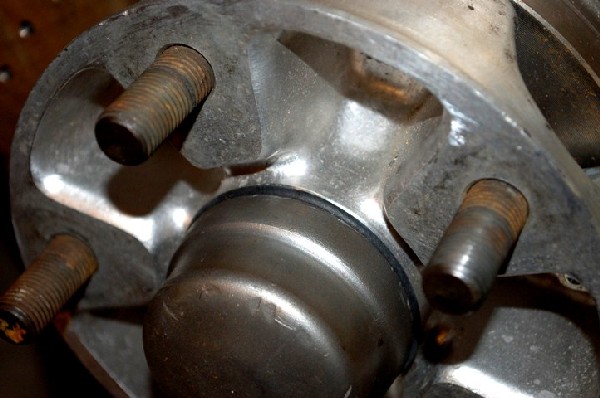 |
|
|
|
| jk76.914 |
Aug 7 2011, 07:40 PM
Post
#45
|
|
Senior Member Group: Members Posts: 809 Joined: 12-April 05 From: Massachusetts Member No.: 3,925 Region Association: North East States |
Built a big T-square to set toe. Before I started the project, I measured the height off the floor to the outer end of the control arms at 5.25". Two 4x4's were cut to this length, and the car lowered onto them. This approximated ride height, but with no tires so access was easy and I didn't have to worry about settling the rubber every change. I made sure the control arm front edge was flush with the front surface of the 4x4, so I could set the T-square bridging across them. A small carpenter square from the cleat on the T-square to the brake disk, adjust the tie rod so fore and aft are square, flip the T-square to the other side, repeat, and done. It would have worked better if I had done it before the caliper was mounted, to give me a longer base, but it was OK.
I had it aligned on Thursday, and it came up -.79 degrees on the right, and -.52 degrees on the left. Not very good, but it got me to the alignment shop. Alignment shop was interesting- next post. 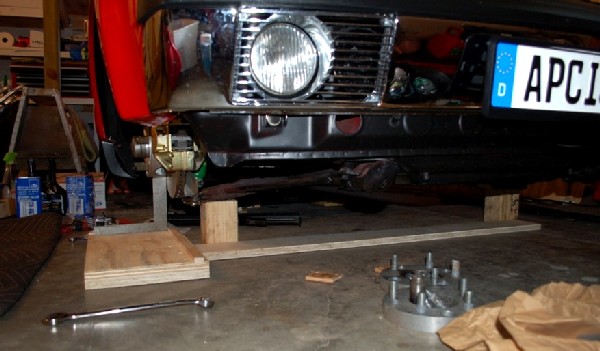 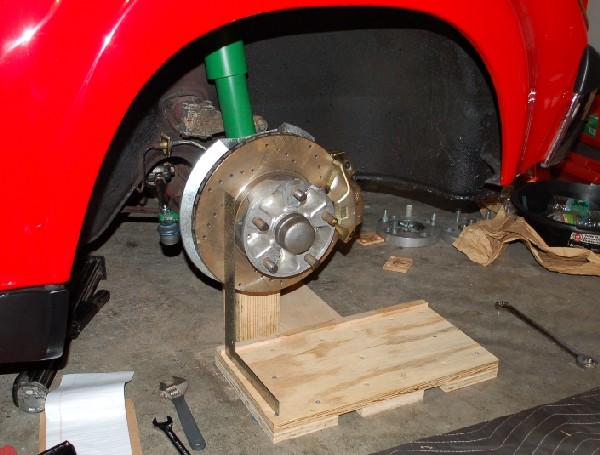 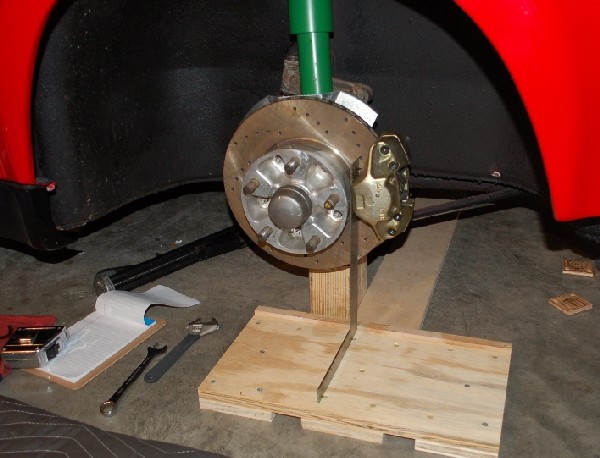 |
|
|
|
| jk76.914 |
Aug 8 2011, 04:17 AM
Post
#46
|
|
Senior Member Group: Members Posts: 809 Joined: 12-April 05 From: Massachusetts Member No.: 3,925 Region Association: North East States |
Took it for alignment on Thursday morning. They couldn't get the front end camber set. Best they could do is:
Right: -1.4 degrees Left: -0.8 degrees Caster OK at 5.5 degrees both sides, the bottom end of the range. On the front camber, the adjustment topped out at the edge of the adjustment range on the right, and when he tried to match it on the left it bottomed out at the -0.8 degrees. When I got home, I think I figured out part of the problem- the car is sitting too low. After installing the new Bilsteins, I had to lower it. Makes sense. The old KYBs were shot, and I think the new Bils were lifting the front end maybe 100 pounds? So I lowered it some one night, but didn't settle and recheck it before I went to alignment. Duh. Not only did it settle too low, but the left was about an inch lower then the right. Lowering increases camber by itself, but the tilt will increase it on the right and decrease it on the left on top of it. Is this making sense? I raised the front end some and leveled it. It's still raked about an inch back to front, but now I'm going to drive it several times, checking and tweaking height in between, before going back to alignment. Rear is pretty good at -1.5 degrees camber both sides and .12 degrees toe both sides. A bit more camber than I wanted (wanted closer to stock). It would have been nice if the shop, who specializes in German cars and does a lot of Porsche, would have noticed the height issues.... Car is getting there. The new front end is the biggest improvement to driving of all the work I've done in the past 10 years. Can't wait to get this all dialed in. Am I right in my assumption that with more negative camber you should have a bit more toe out? |
|
|
|
|
1 User(s) are reading this topic (1 Guests and 0 Anonymous Users)
0 Members:

|
Lo-Fi Version | Time is now: 16th May 2024 - 04:23 AM |
Invision Power Board
v9.1.4 © 2024 IPS, Inc.