|
|
|
Porsche, and the Porsche crest are registered trademarks of Dr. Ing. h.c. F. Porsche AG.
This site is not affiliated with Porsche in any way. Its only purpose is to provide an online forum for car enthusiasts. All other trademarks are property of their respective owners. |
|
|

  |

| Krieger |
 Sep 24 2010, 08:48 PM Sep 24 2010, 08:48 PM
Post
#1
|
|
Advanced Member  Group: Members Posts: 4,870 Joined: 24-May 04 From: Santa Rosa CA Member No.: 2,104 Region Association: None |
So I have been working like a dog at work, on the house, with my kids, wife and not in this order. The last 20 months have been when the majority of the work has been done. I do enjoy the post here and try to contibute, but I just haven't had the time to make a progress thread. What may or may not be seen in the pics: chasis stiffening kit, engman kit and suspension console reinforcement of my own design. This console reinforcing was detailed on the club site and is in the classics. This car is being built for mostly track use, but I intend for now to keep it street legal...or at least appear like it is. The car started life as a 1972 1.7 I bought for $300 complete with 86k total miles. I got it to run with the replacement of one seal and a used head sensor. I bought it for my ding dong brother who later said he didn't want it. It made sense for me to convert this car for track use rather than butcher up my very nice 75. As luck would have it, about 6 months later I purchased a very wrecked original 70 six with a 3.0L in it........
Attached image(s) 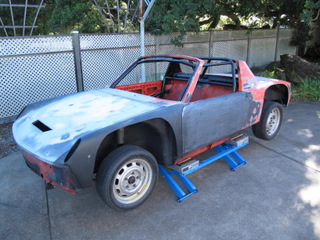
|
   |

 
|
| Krieger |
Sep 24 2010, 08:52 PM
Post
#2
|
|
Advanced Member Group: Members Posts: 4,870 Joined: 24-May 04 From: Santa Rosa CA Member No.: 2,104 Region Association: None |
The body on this car is very straight, just uglier than crap. Hood was rusty and dinged up, but it mostly worked out. I made steel panels and welded them in place of the headlights. I intend to put some HID bulbs in the turn buckets
Attached image(s) 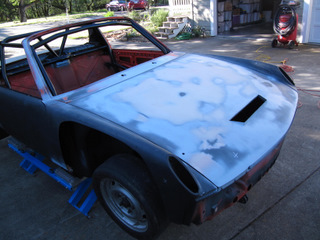
|
|
|
|
| Krieger |
Sep 24 2010, 08:53 PM
Post
#3
|
|
Advanced Member Group: Members Posts: 4,870 Joined: 24-May 04 From: Santa Rosa CA Member No.: 2,104 Region Association: None |
I have an RX-7 cooler with a shroud that I built to vent up through the hood. I will get to these pics prolly another day.
Attached image(s) 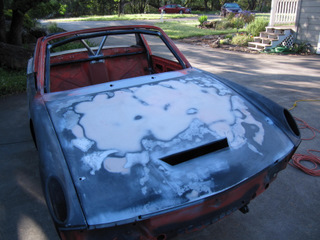
|
|
|
|
| Krieger |
Sep 24 2010, 08:57 PM
Post
#4
|
|
Advanced Member Group: Members Posts: 4,870 Joined: 24-May 04 From: Santa Rosa CA Member No.: 2,104 Region Association: None |
The cage is from Tangerine racing with some other bits I added tying into the front and the rear suspension.
Attached image(s) 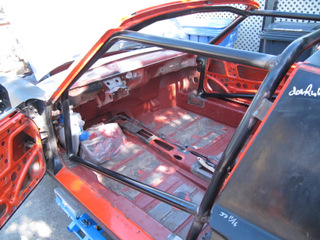
|
|
|
|
| Krieger |
Sep 24 2010, 08:59 PM
Post
#5
|
|
Advanced Member Group: Members Posts: 4,870 Joined: 24-May 04 From: Santa Rosa CA Member No.: 2,104 Region Association: None |
The engine compartment, with bracing and angle iron added to shock tower/long area. And my home depot battery tray for a smaller odessey battery. Link for my console reinforcing: My Webpage
Attached image(s) 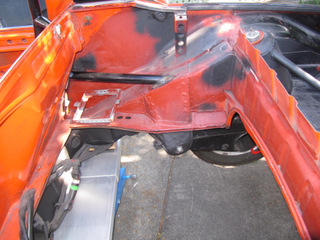
|
|
|
|
| Krieger |
Sep 24 2010, 09:07 PM
Post
#6
|
|
Advanced Member Group: Members Posts: 4,870 Joined: 24-May 04 From: Santa Rosa CA Member No.: 2,104 Region Association: None |
I did some bracing in the rear trunk as well. I copied a lot of ideas from Jim Patrick's web site. I studied those cages a lot, Oh and I LOVED the way someone on our site did their rear lid. It folds back out of the way for some mad access to the engine compartment. It involves the front trunk mechanism from an 89 Buick Le Sabre. It was pretty easy to get bolted to the body and the welded to the trunk. The square tubing on the top of the lid keeps the front of the lid from lifting up.
Attached image(s) 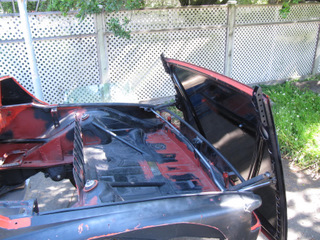
|
|
|
|
| Krieger |
Sep 24 2010, 09:08 PM
Post
#7
|
|
Advanced Member Group: Members Posts: 4,870 Joined: 24-May 04 From: Santa Rosa CA Member No.: 2,104 Region Association: None |
closer
Attached image(s) 
|
|
|
|
| Krieger |
Sep 24 2010, 09:12 PM
Post
#8
|
|
Advanced Member Group: Members Posts: 4,870 Joined: 24-May 04 From: Santa Rosa CA Member No.: 2,104 Region Association: None |
I also did away with the front trunk springs and made a simple prop rod out of one of the rear trunk torsion bars, cut down and bent. A part from a 96 pontiac fits the od of this rod and hold it securely in place!
Attached image(s) 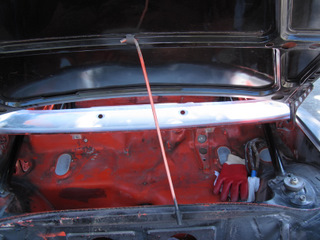
|
|
|
|
| Krieger |
Sep 24 2010, 09:13 PM
Post
#9
|
|
Advanced Member Group: Members Posts: 4,870 Joined: 24-May 04 From: Santa Rosa CA Member No.: 2,104 Region Association: None |
$2.00 Pontiac part and reinforcing for front trunk.
Attached image(s) 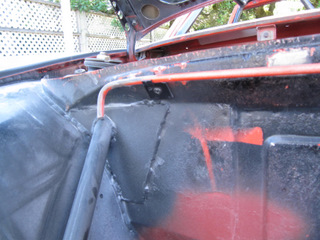
|
|
|
|
| Krieger |
Sep 24 2010, 09:21 PM
Post
#10
|
|
Advanced Member Group: Members Posts: 4,870 Joined: 24-May 04 From: Santa Rosa CA Member No.: 2,104 Region Association: None |
Other bits not seen but on:
Rennmetal flat-tow bracket, reinforcing for body near sway bar. Tangerine Racing raised spindles. Elephant poly-bronze bushings. Factory 6 engine mount. Seen, but not described: And YES riveted on fiberglass fenders! Lots of holes drilled in parts like doors, lids and brackets. Not because its really that much lighter but because I had hole saws and it looks way cool! (IMG:style_emoticons/default/beer3.gif) and goes with the aviation theme/scheme i've got going on. |
|
|
|
| FourBlades |
Sep 25 2010, 09:30 PM
Post
#11
|
|
From Wreck to Rockin Group: Members Posts: 2,056 Joined: 3-December 07 From: Brevard, FL Member No.: 8,414 Region Association: South East States |
This is a cool looking build! (IMG:style_emoticons/default/smilie_pokal.gif) (IMG:style_emoticons/default/welder.gif) Lets see some more and larger pictures. (IMG:style_emoticons/default/popcorn[1].gif) John |
 |
|
| Krieger |
Sep 26 2010, 10:49 AM
Post
#12
|
|
Advanced Member Group: Members Posts: 4,870 Joined: 24-May 04 From: Santa Rosa CA Member No.: 2,104 Region Association: None |
I have some more time to post pictures correctly. The car was painted last month a matte metalic silver. This paint is a polyurethane and looks awsome in the sun. In the garage it looks a little dull. Basically it looks like glass beaded aluminum! The paint is from TCP Global in San Diego. Hot Rod Flats is the color line.
Attached thumbnail(s) 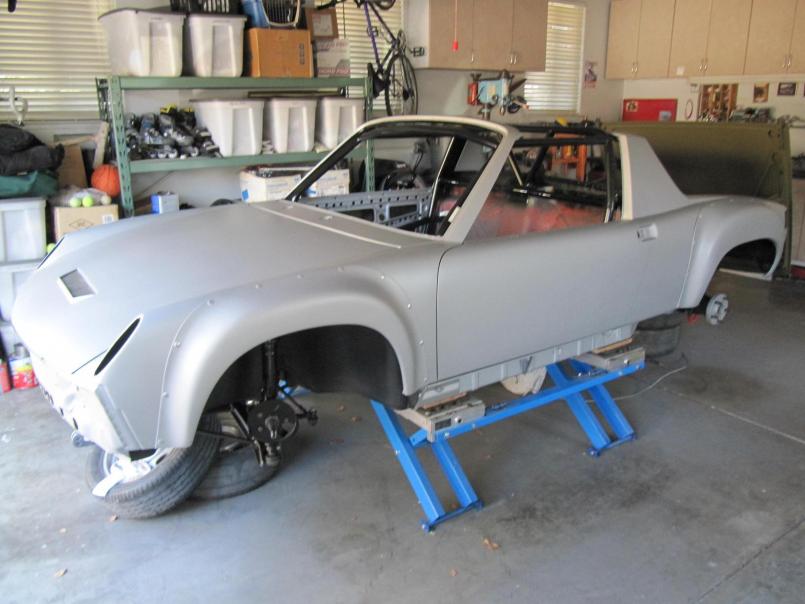
|
|
|
|
| Krieger |
Sep 26 2010, 10:52 AM
Post
#13
|
|
Advanced Member Group: Members Posts: 4,870 Joined: 24-May 04 From: Santa Rosa CA Member No.: 2,104 Region Association: None |
I thought the big rivets, silver paint, and the holes I drilled in the car lent itself nicely to an aviation theme so I'm running with it.
Attached thumbnail(s) 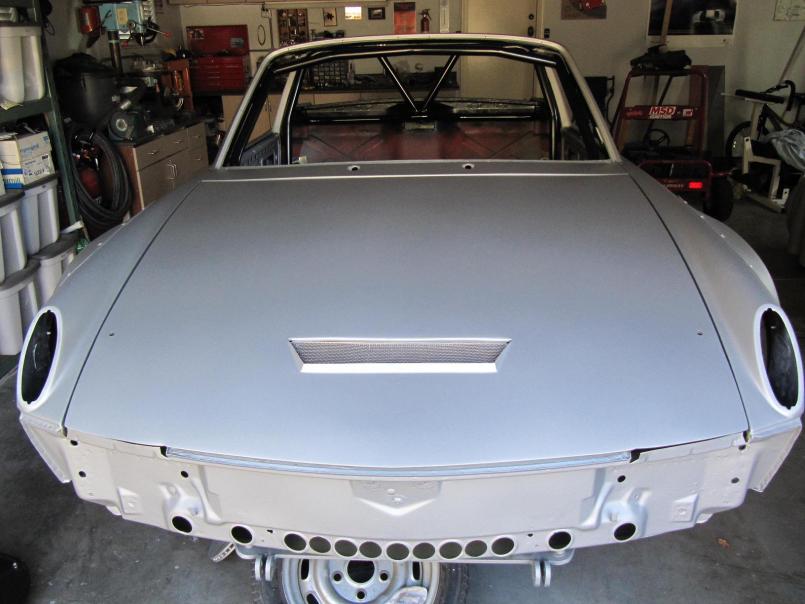
|
|
|
|
| Krieger |
Sep 26 2010, 10:54 AM
Post
#14
|
|
Advanced Member Group: Members Posts: 4,870 Joined: 24-May 04 From: Santa Rosa CA Member No.: 2,104 Region Association: None |
A dozen spray cans of olive drab was easy to do in the front/rear trunks, inside the doors.
Attached thumbnail(s) 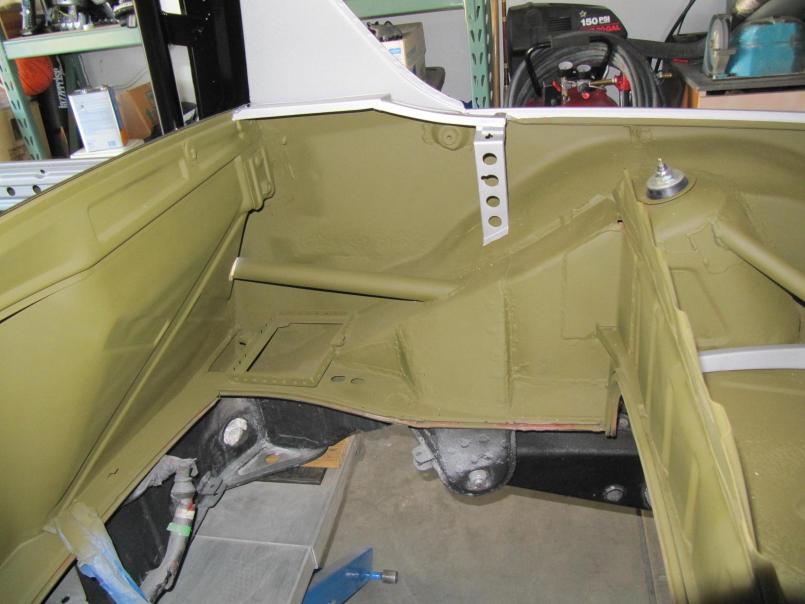
|
|
|
|
| Krieger |
Sep 26 2010, 10:56 AM
Post
#15
|
|
Advanced Member Group: Members Posts: 4,870 Joined: 24-May 04 From: Santa Rosa CA Member No.: 2,104 Region Association: None |
It looks so freakin cool (IMG:style_emoticons/default/biggrin.gif)
Attached thumbnail(s) 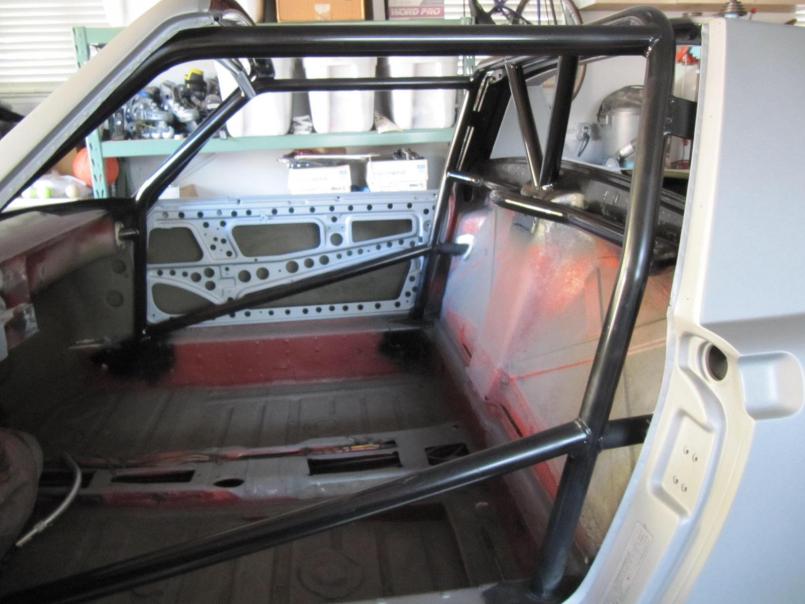
|
|
|
|
| Krieger |
Sep 26 2010, 10:58 AM
Post
#16
|
|
Advanced Member Group: Members Posts: 4,870 Joined: 24-May 04 From: Santa Rosa CA Member No.: 2,104 Region Association: None |
Here is the front trunk with my "deluxe" home made shroud. This was fun to do.
Attached thumbnail(s) 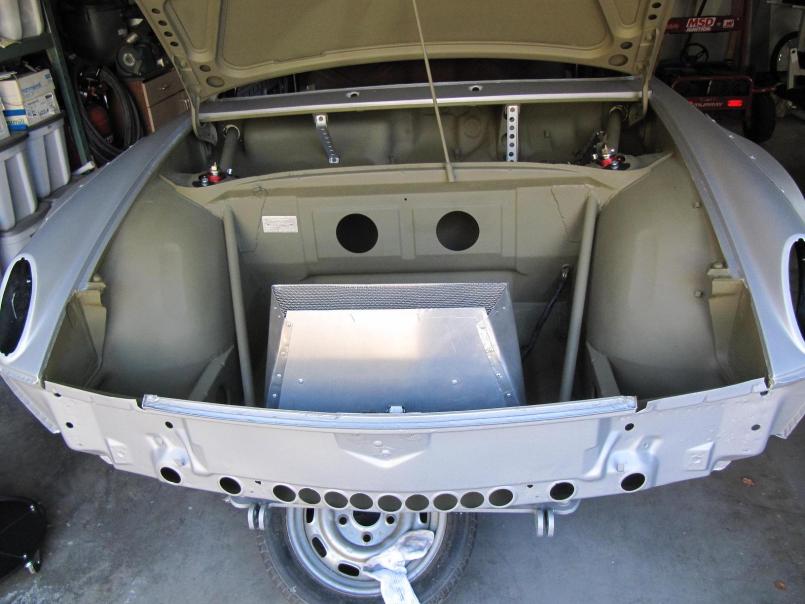
|
|
|
|
| DanT |
Sep 26 2010, 11:06 AM
Post
#17
|
|
Going back to the Dark Side! Group: Members Posts: 4,300 Joined: 4-October 04 From: Auburn, CA Member No.: 2,880 Region Association: None |
looking nice Andy, and some excellent "outside the box" touches.. (IMG:style_emoticons/default/biggrin.gif)
I also see your Rennenmetal super beetle tow bar bracket! |
|
|
|
| Krieger |
Sep 26 2010, 11:06 AM
Post
#18
|
|
Advanced Member Group: Members Posts: 4,870 Joined: 24-May 04 From: Santa Rosa CA Member No.: 2,104 Region Association: None |
I owe some credit to Sir Andy for the how I cut the front lid for the exit. He posted a drawing how he was going to cut and bend the front of the hole up and the rear down for venting out his hood. The exit area is more than twice the intake area. I placed the exit towards the front of the lid after studying the aerodynamics project that was going on at San Diego State? that shows a lower pressure area on the front portion of our trunks ahead of the turn buckets. Will it work.......well see.
Attached thumbnail(s) 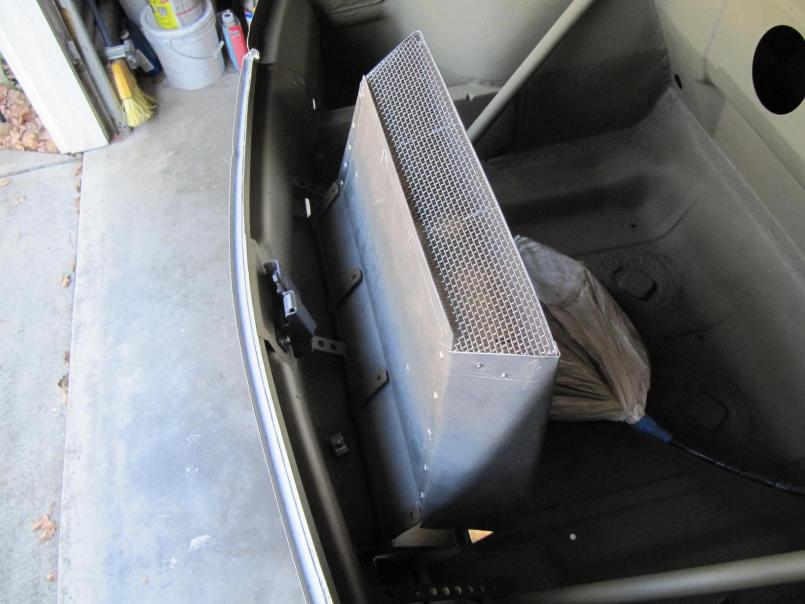
|
|
|
|
| Krieger |
Sep 26 2010, 11:09 AM
Post
#19
|
|
Advanced Member Group: Members Posts: 4,870 Joined: 24-May 04 From: Santa Rosa CA Member No.: 2,104 Region Association: None |
QUOTE(DanT @ Sep 26 2010, 10:06 AM)  looking nice Andy, and some excellent "outside the box" touches.. (IMG:style_emoticons/default/biggrin.gif) I also see your Rennenmetal super beetle tow bar bracket! Ha Ha thats funny Dan! (IMG:style_emoticons/default/biggrin.gif) |
|
|
|
| Krieger |
Sep 26 2010, 11:11 AM
Post
#20
|
|
Advanced Member Group: Members Posts: 4,870 Joined: 24-May 04 From: Santa Rosa CA Member No.: 2,104 Region Association: None |
Another rear trunk done!
Attached thumbnail(s) 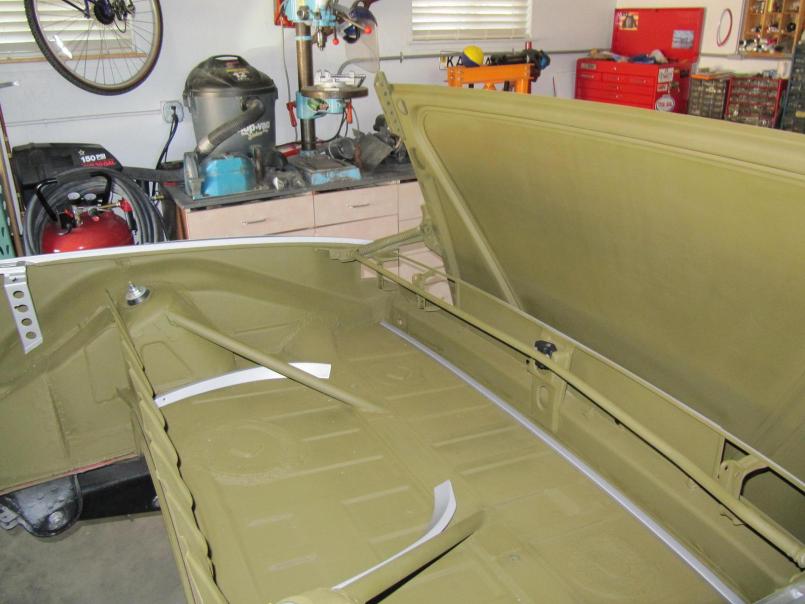
|
|
|
|
|
1 User(s) are reading this topic (1 Guests and 0 Anonymous Users)
0 Members:

|
Lo-Fi Version | Time is now: 21st July 2026 - 11:03 AM |
Invision Power Board
v9.1.4 © 2026 IPS, Inc.