|
|
|
Porsche, and the Porsche crest are registered trademarks of Dr. Ing. h.c. F. Porsche AG.
This site is not affiliated with Porsche in any way. Its only purpose is to provide an online forum for car enthusiasts. All other trademarks are property of their respective owners. |
|
|

  |

| Krieger |
 Nov 4 2010, 09:23 PM Nov 4 2010, 09:23 PM
Post
#41
|
|
Advanced Member  Group: Members Posts: 4,870 Joined: 24-May 04 From: Santa Rosa CA Member No.: 2,104 Region Association: None |
Got the cover made and riveted in place. I used seam sealer on the inside between the cover and the dash to fill any gaps an hold it in place from vibrating.
Attached thumbnail(s) 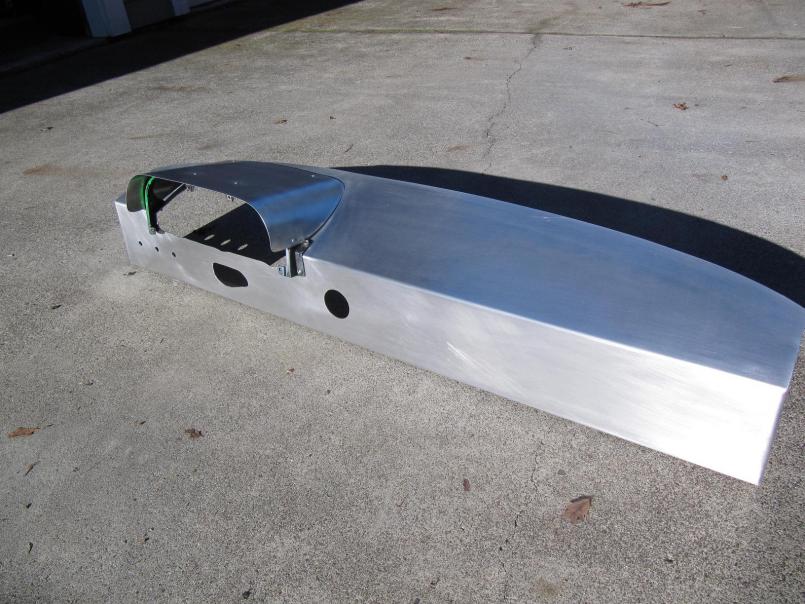
|
   |

 
|
| Krieger |
Nov 4 2010, 09:25 PM
Post
#42
|
|
Advanced Member Group: Members Posts: 4,870 Joined: 24-May 04 From: Santa Rosa CA Member No.: 2,104 Region Association: None |
Bird's eye. (IMG:style_emoticons/default/biggrin.gif) I have a can of krylon wrinkle paint for the gauge plate and dash!
Attached thumbnail(s) 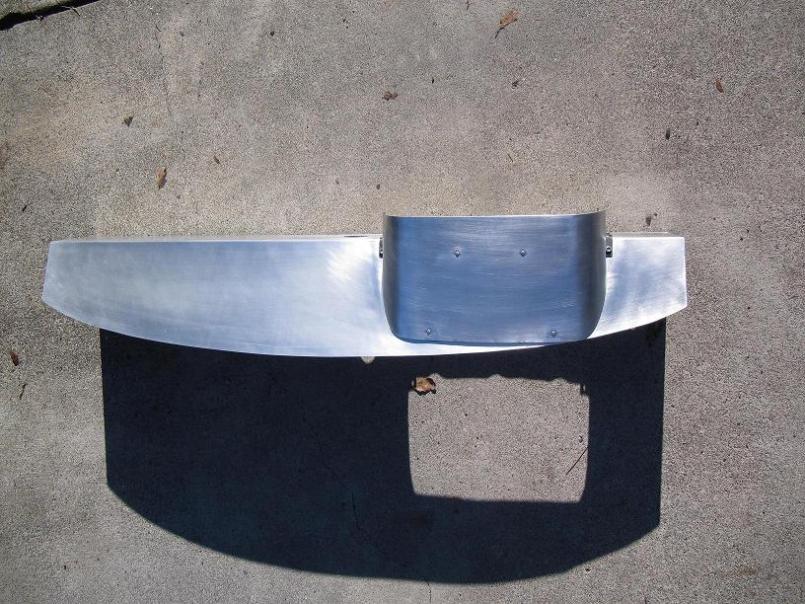
|
|
|
|
| SGB |
Nov 5 2010, 07:16 AM
Post
#43
|
|
just visiting Group: Members Posts: 4,086 Joined: 8-March 03 From: Huntsville, AL Member No.: 404 Region Association: South East States |
the coolness of simplicity.
So minimalist. Great. |
|
|
|
| tdgray |
Nov 5 2010, 09:14 AM
Post
#44
|
|
Thank God Nemo is not here to see this Group: Members Posts: 9,706 Joined: 5-August 03 From: Akron, OH Member No.: 984 Region Association: None |
Really Neat... like what you are doing.
|
|
|
|
| Krieger |
Dec 12 2010, 10:47 PM
Post
#45
|
|
Advanced Member Group: Members Posts: 4,870 Joined: 24-May 04 From: Santa Rosa CA Member No.: 2,104 Region Association: None |
Dash pic added. Wrinkle finished failed large flat surface area. My Webpage Painted SEM Tirm Black.
Attached thumbnail(s) 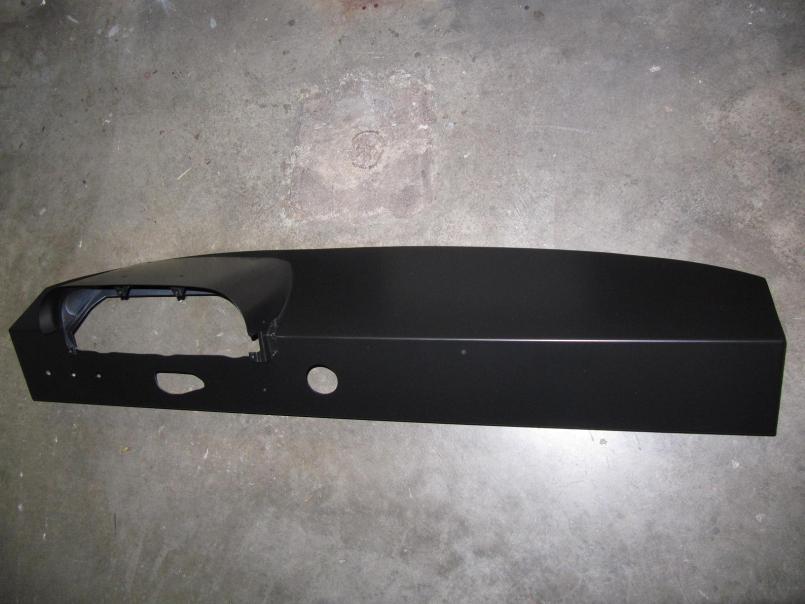
|
|
|
|
| Krieger |
Dec 12 2010, 11:22 PM
Post
#46
|
|
Advanced Member Group: Members Posts: 4,870 Joined: 24-May 04 From: Santa Rosa CA Member No.: 2,104 Region Association: None |
Got the engine lid finished. Home depot handle and pins to locate on the fire wall. Hood pins will hold it on to body
Attached thumbnail(s) 
|
|
|
|
| Krieger |
Dec 9 2011, 06:30 PM
Post
#47
|
|
Advanced Member Group: Members Posts: 4,870 Joined: 24-May 04 From: Santa Rosa CA Member No.: 2,104 Region Association: None |
So I have been working on my car and its been nearly a year since I've updated. My new economy throttle linkage. $15 for two of the ball joints that the cable goes to (one spare). My goal was to get rid of the monkey motion, use a stock throttle cable and not spend much. I am using an aftermarket 914/6 cable from Patrick motorsports $50. I bought two so I'd have a spare. This set up has been tested with the engine rolled under the car and the cable installed in the car with the pedal assembly. I get full throttle and still have some adjustment that I can make to the rod lengths, cable length or bracket position.
Attached thumbnail(s) 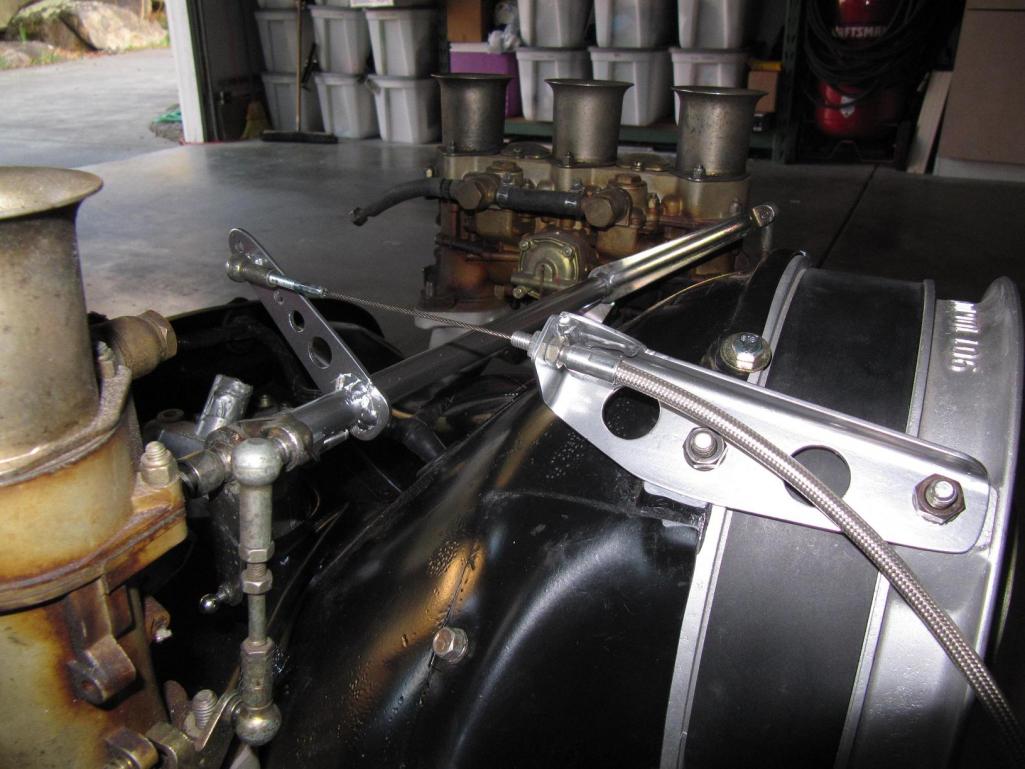
|
|
|
|
| Krieger |
Dec 9 2011, 06:34 PM
Post
#48
|
|
Advanced Member Group: Members Posts: 4,870 Joined: 24-May 04 From: Santa Rosa CA Member No.: 2,104 Region Association: None |
I need to rebuild the carbs still. The bracket on the shroud is made from a recycled chunk of steel I cut out of the rear bumper of my 75 when I was lightening it. So there is some value to those big bumpers!
|
|
|
|
| Krieger |
Dec 9 2011, 06:41 PM
Post
#49
|
|
Advanced Member Group: Members Posts: 4,870 Joined: 24-May 04 From: Santa Rosa CA Member No.: 2,104 Region Association: None |
Since this car is such a mix of parts I needed to make my own wire harness. I also wanted to eliminate the relay board. This is not a fancy connector. I found it was a big hassle trying to find just one male/female connector. I called JEGS and ordered a weather pak unit.
Attached thumbnail(s) 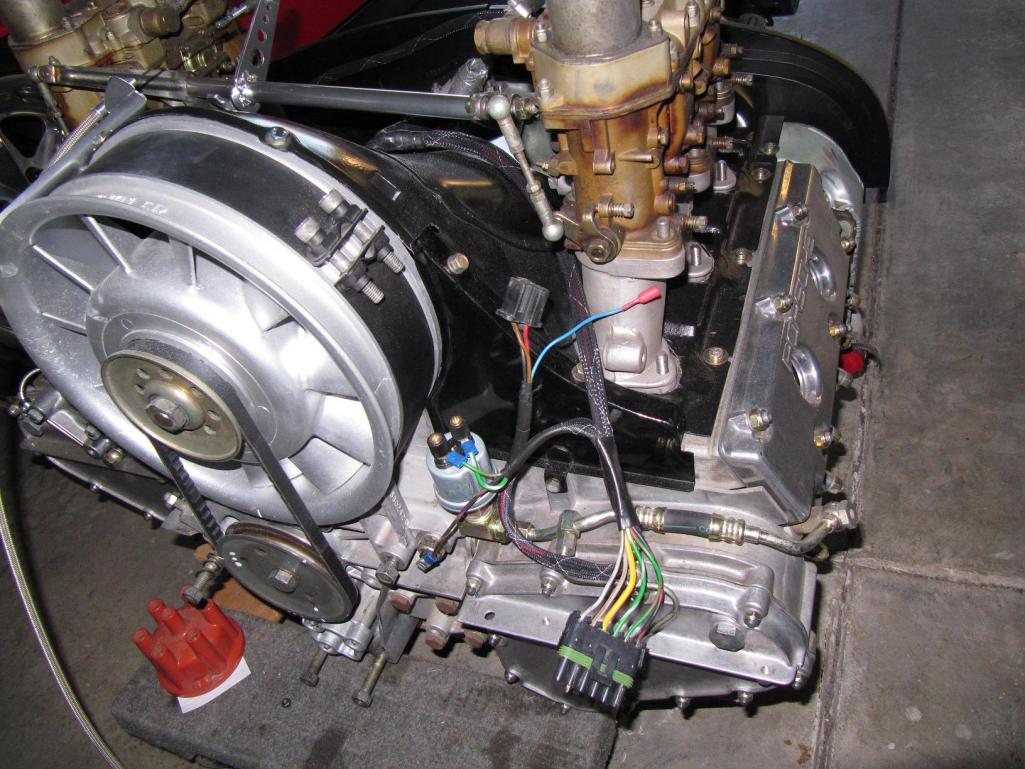
|
|
|
|
| Krieger |
Dec 9 2011, 06:52 PM
Post
#50
|
|
Advanced Member Group: Members Posts: 4,870 Joined: 24-May 04 From: Santa Rosa CA Member No.: 2,104 Region Association: None |
Here is the rest of the harness. Most of my supplies came from a local electronics supply. For the actual wires within the harness I cut the rear half of the wire harness from a 914 that was at my local pick n pull. It was in great shape. I used these wires in my new engine harness so they would match the wires in my body harness when pluggen in. Hi torque starter. Ottos built trans. I put the heavy cable from the battery to the starter in the harness as well.
Attached thumbnail(s) 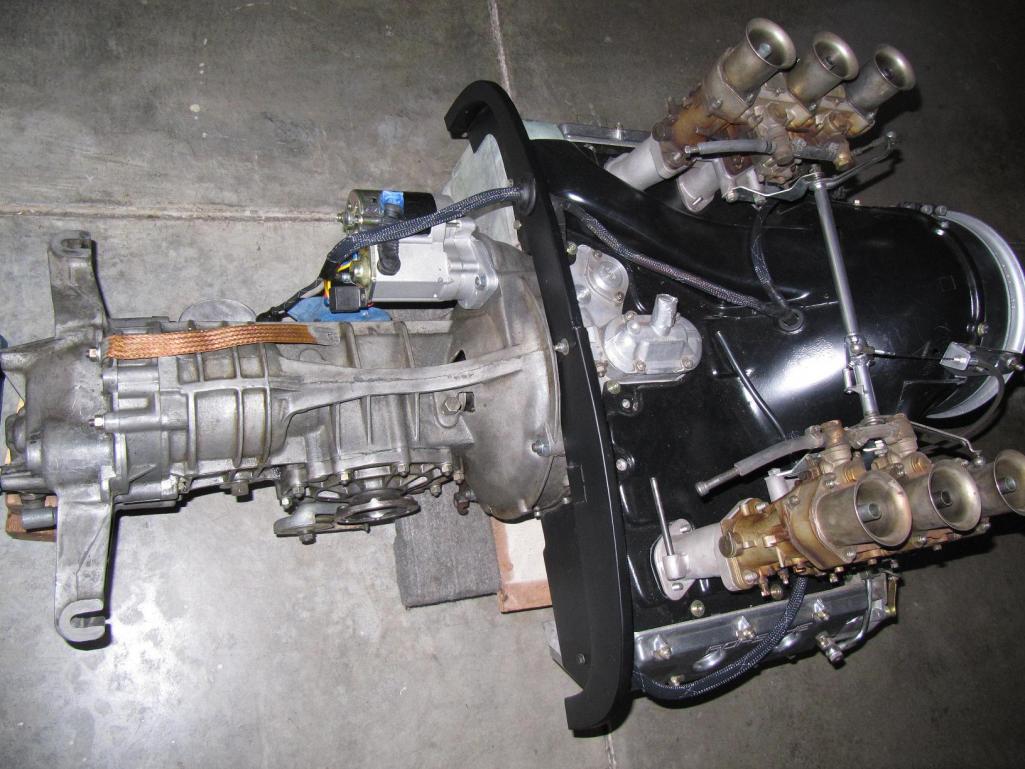
|
|
|
|
| Krieger |
Dec 9 2011, 06:57 PM
Post
#51
|
|
Advanced Member Group: Members Posts: 4,870 Joined: 24-May 04 From: Santa Rosa CA Member No.: 2,104 Region Association: None |
Here is one of my rebuilt Ferrari rear calipers. All I need for the rears are pads!
Attached thumbnail(s) 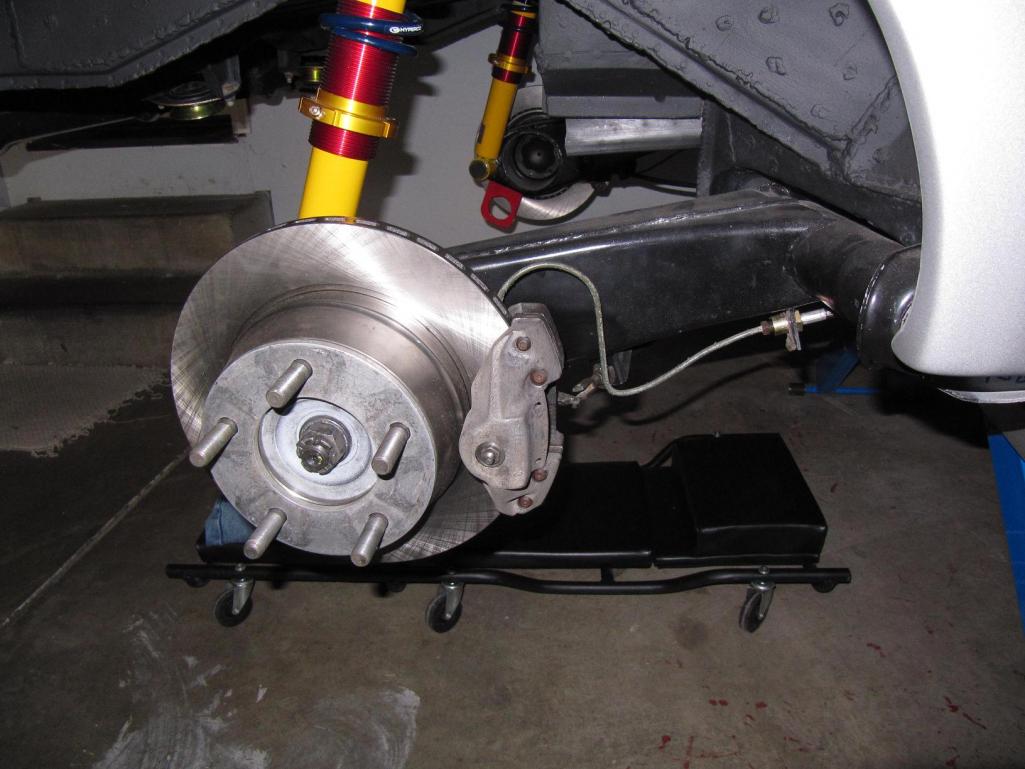
|
|
|
|
| Krieger |
Dec 9 2011, 07:02 PM
Post
#52
|
|
Advanced Member Group: Members Posts: 4,870 Joined: 24-May 04 From: Santa Rosa CA Member No.: 2,104 Region Association: None |
Front sway bar and heavy A calipers. When I learn how to drive I will replace the A's with something better. I need to run brake lines and add master cylinder.
Attached thumbnail(s) 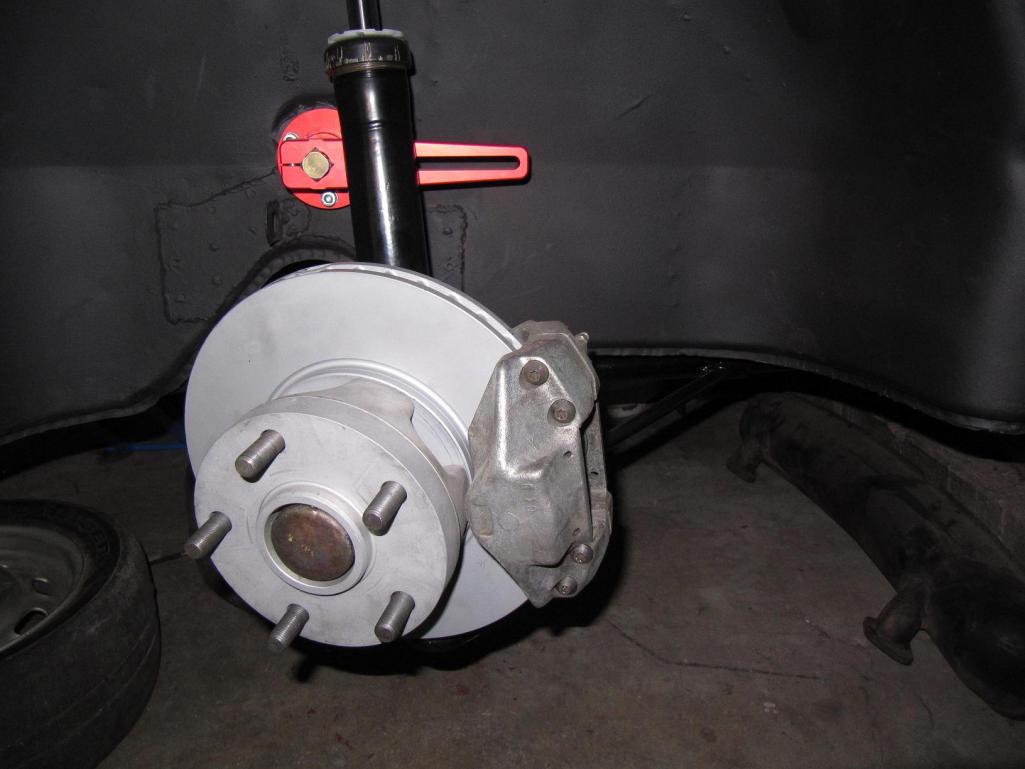
|
|
|
|
| Krieger |
Dec 9 2011, 07:08 PM
Post
#53
|
|
Advanced Member Group: Members Posts: 4,870 Joined: 24-May 04 From: Santa Rosa CA Member No.: 2,104 Region Association: None |
Something simple, cheap, light and fun. If you were in a US made jet and wanted to get out of a plane in a hurry you'd reach up above your head and grab yellow/black cable like this to punch out. Home Depot special $9. Eject label from office label maker free. Effect...priceless (IMG:style_emoticons/default/biggrin.gif)
Attached thumbnail(s) 
|
|
|
|
| Krieger |
Dec 9 2011, 07:13 PM
Post
#54
|
|
Advanced Member Group: Members Posts: 4,870 Joined: 24-May 04 From: Santa Rosa CA Member No.: 2,104 Region Association: None |
I didn't want to do this project. I'm getting tired of projects and I just want to drive this freakin car. Oh well, it was pretty easy with my drill and jig saw. I also had some aluminum left over from making the dash. I forget how cool it is to work with aluminum. I welded nuts on the engine compartment side of the firewall to hold it down.
Attached thumbnail(s) 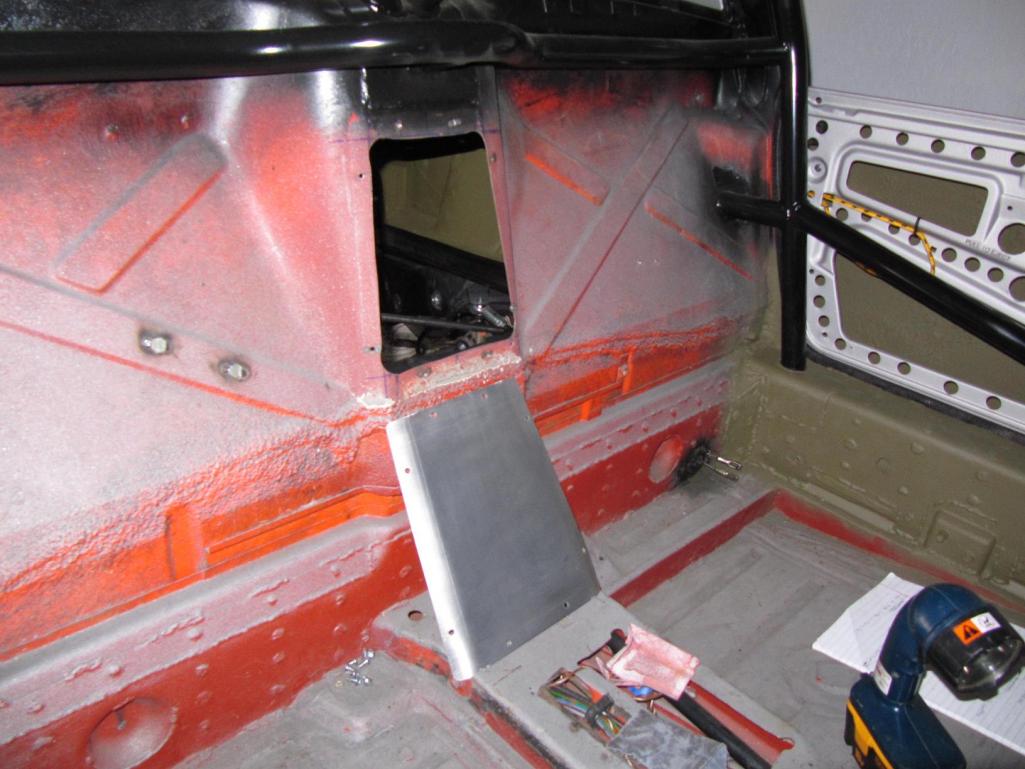
|
|
|
|
| Krieger |
Dec 9 2011, 07:16 PM
Post
#55
|
|
Advanced Member Group: Members Posts: 4,870 Joined: 24-May 04 From: Santa Rosa CA Member No.: 2,104 Region Association: None |
One of my "buddies" conviced me I needed to do the access panel. Just to the left you can see the bolt heads I tacked in place to mount the coil in the engine compartment.
|
|
|
|
| Krieger |
Dec 9 2011, 07:22 PM
Post
#56
|
|
Advanced Member Group: Members Posts: 4,870 Joined: 24-May 04 From: Santa Rosa CA Member No.: 2,104 Region Association: None |
Here is the engine compartment with my new connector eliminating the use of the relay board. I shortened a good amount of the original harness to put the plug in this location. The voltage reg was the only "compromise" if you want to call it that. I have the bracket for the engine mount temporarily mounted to help me with figuring out the oil line routing. My coil is wired in to the body harness and so is the distributor pick up lead.
Attached thumbnail(s) 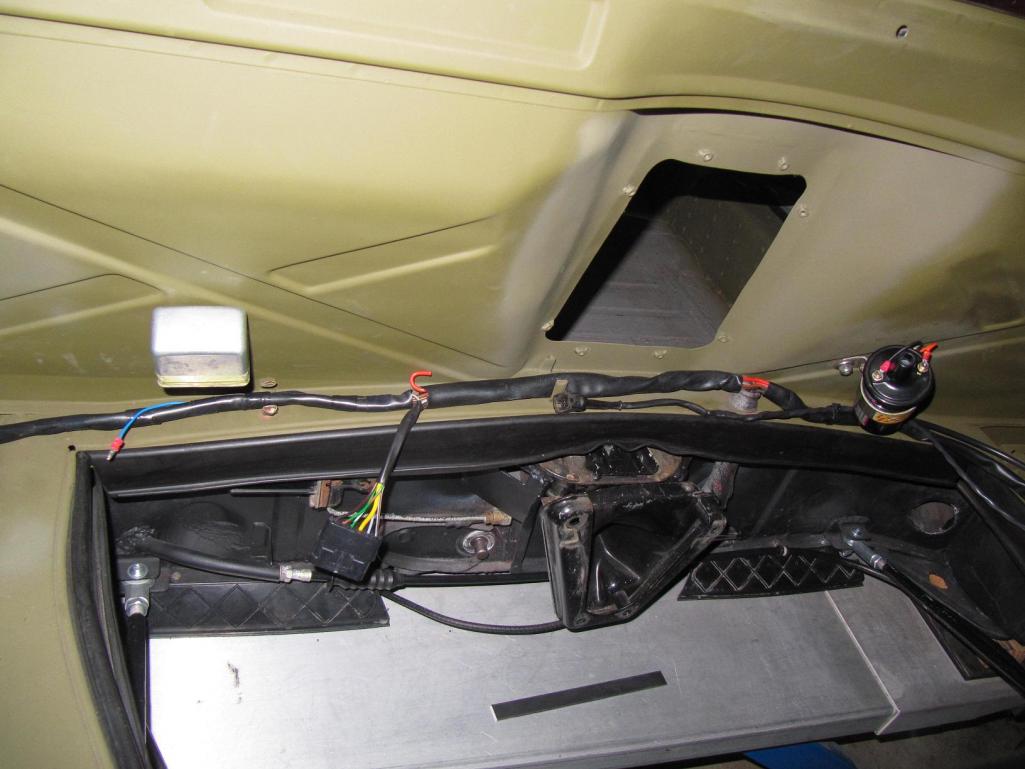
|
|
|
|
| Krieger |
Dec 9 2011, 07:28 PM
Post
#57
|
|
Advanced Member Group: Members Posts: 4,870 Joined: 24-May 04 From: Santa Rosa CA Member No.: 2,104 Region Association: None |
Oil line routing in front trunk. The lines are going in the passenger long, then into the passenger compartment. Through the front bulkhead to the cooler. (IMG:style_emoticons/default/sawzall-smiley.gif)
Attached thumbnail(s) 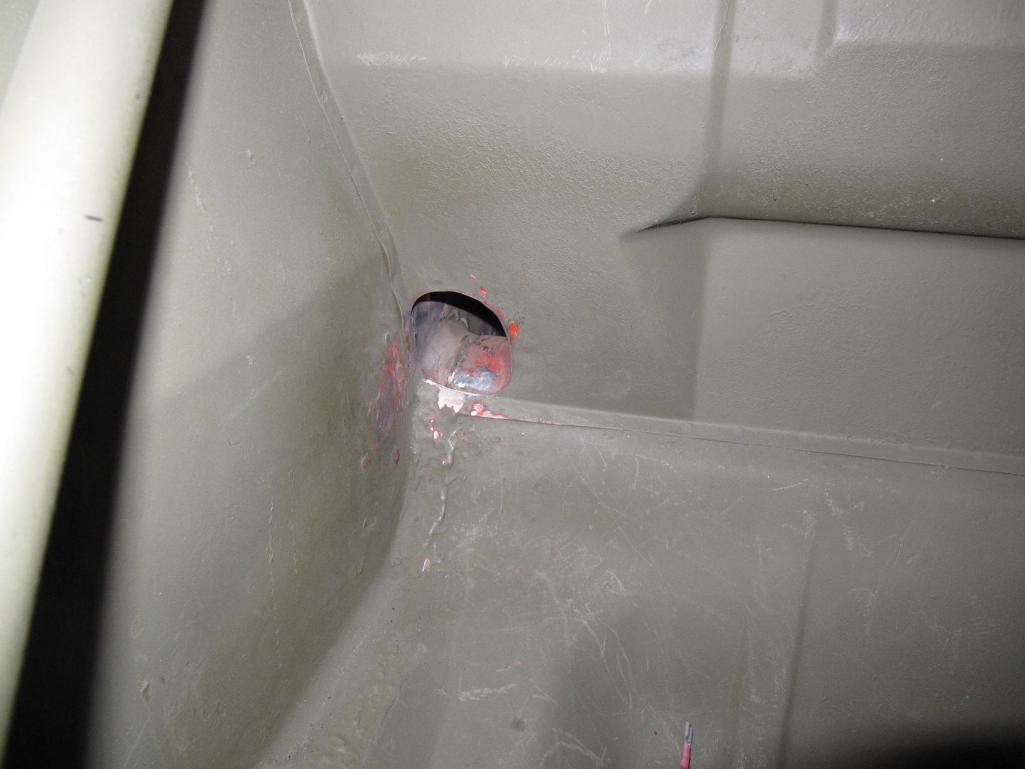
|
|
|
|
| Krieger |
Dec 9 2011, 07:32 PM
Post
#58
|
|
Advanced Member Group: Members Posts: 4,870 Joined: 24-May 04 From: Santa Rosa CA Member No.: 2,104 Region Association: None |
Passenger side. Hole saws courtesy my pal Marty. (IMG:style_emoticons/default/sawzall-smiley.gif)
Attached thumbnail(s) 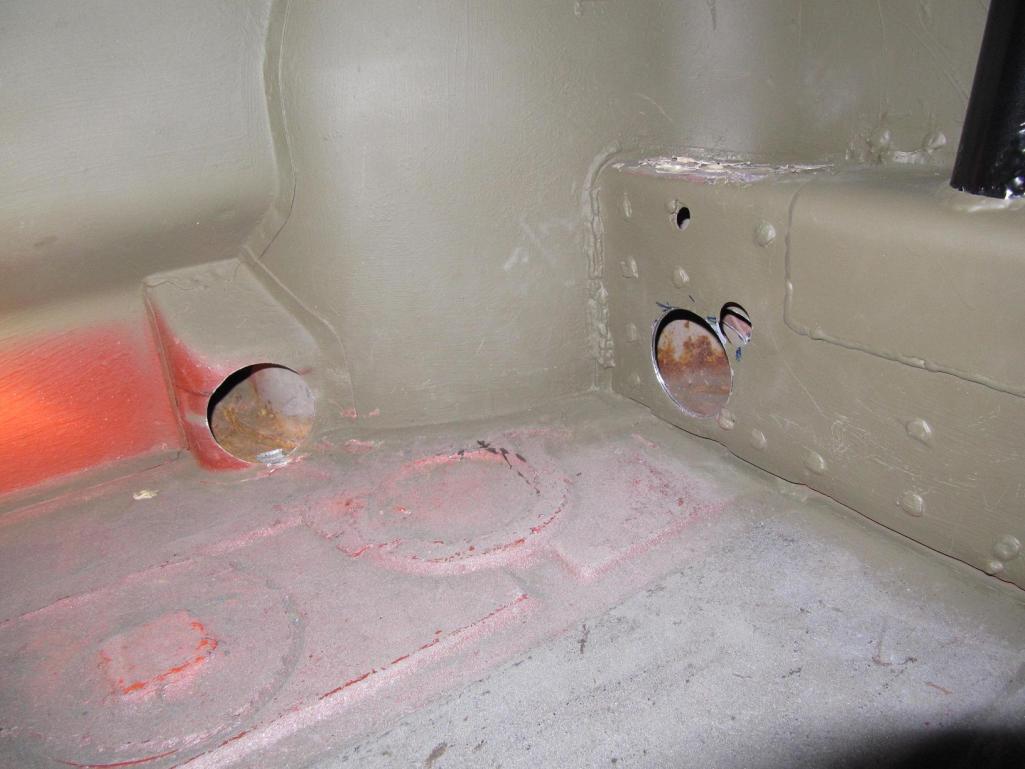
|
|
|
|
| Krieger |
Dec 9 2011, 07:37 PM
Post
#59
|
|
Advanced Member Group: Members Posts: 4,870 Joined: 24-May 04 From: Santa Rosa CA Member No.: 2,104 Region Association: None |
Windshield from that same doner car at pick n pull. It has a couple of small scratches otherwise awesome shape. I got it out, home and installed without breaking it! Rubber seal/butyl from Mikey. 3m black primer.
Attached thumbnail(s) 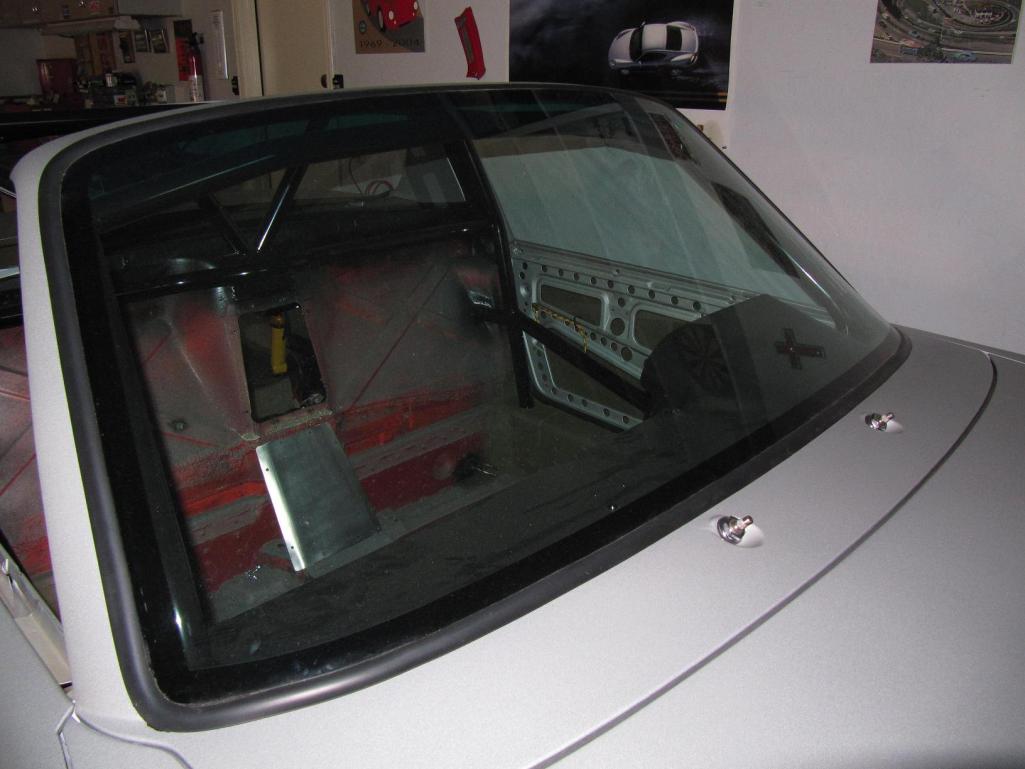
|
|
|
|
| Krieger |
Dec 9 2011, 07:46 PM
Post
#60
|
|
Advanced Member Group: Members Posts: 4,870 Joined: 24-May 04 From: Santa Rosa CA Member No.: 2,104 Region Association: None |
I liked the look of the original chrome wiper harware.
|
|
|
|
|
2 User(s) are reading this topic (2 Guests and 0 Anonymous Users)
0 Members:

|
Lo-Fi Version | Time is now: 22nd July 2026 - 02:01 PM |
Invision Power Board
v9.1.4 © 2026 IPS, Inc.