|
|
|
Porsche, and the Porsche crest are registered trademarks of Dr. Ing. h.c. F. Porsche AG.
This site is not affiliated with Porsche in any way. Its only purpose is to provide an online forum for car enthusiasts. All other trademarks are property of their respective owners. |
|
|

  |

| jkb944t |
 Apr 14 2011, 05:55 AM Apr 14 2011, 05:55 AM
Post
#1
|
|
Member  Group: Members Posts: 470 Joined: 17-January 05 From: Canton, OH Member No.: 3,459 Region Association: None |
I am working on restoring a 1973 914 and converting it to a GT clone with the flares and chassis stiffening. Here is a picture of where I am on it.
Jeff B Attached image(s) 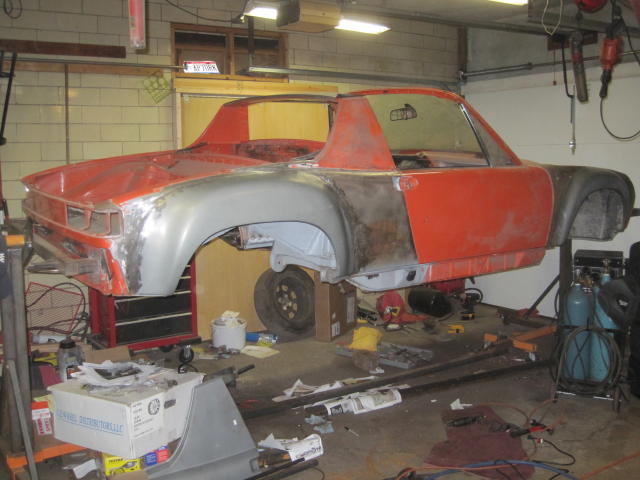 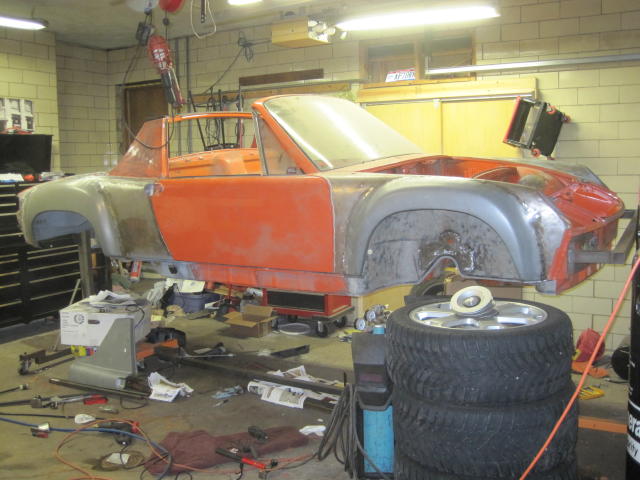
|
   |

 
|
| jkb944t |
Apr 14 2011, 05:58 AM
Post
#2
|
|
Member Group: Members Posts: 470 Joined: 17-January 05 From: Canton, OH Member No.: 3,459 Region Association: None |
I removed the tar sound insulation on the floor panels per a suggestion I saw from Scotty and I am glad I followed his advice. I did find some rust but fortunately it was fairly minor with only one 1/8 hole that I welded up last night.
Jeff B Attached image(s) 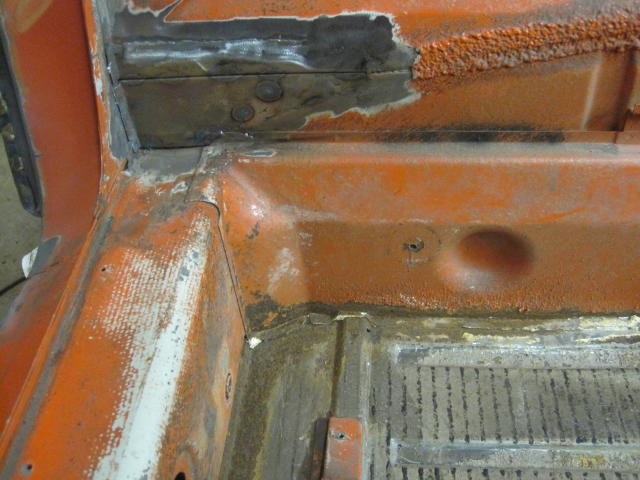 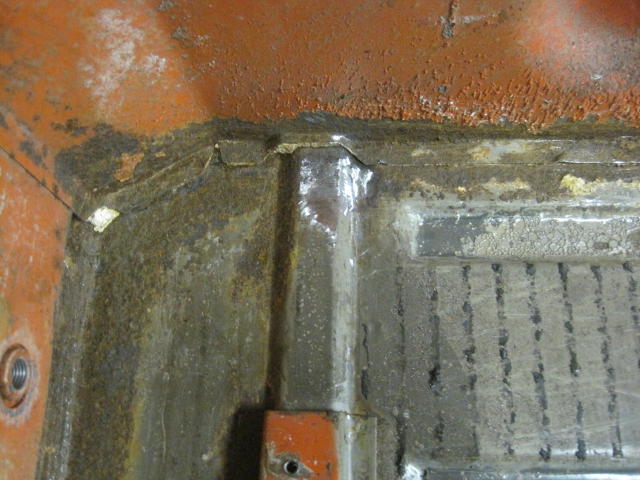
|
|
|
|
| jkb944t |
Apr 14 2011, 06:03 AM
Post
#3
|
|
Member Group: Members Posts: 470 Joined: 17-January 05 From: Canton, OH Member No.: 3,459 Region Association: None |
I can see rust inside the center tunnel but it is still solid. What would be the best way to approach addressing this rust so that it doesn’t get any worse? Here are some pictures of the rust that I have in the center tunnel.
Jeff B Attached image(s) 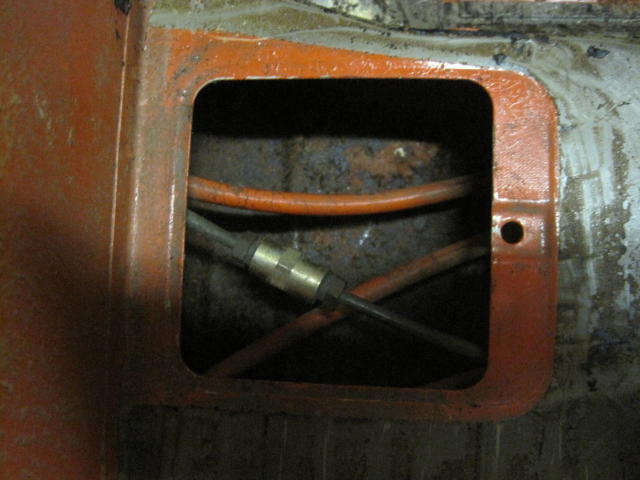 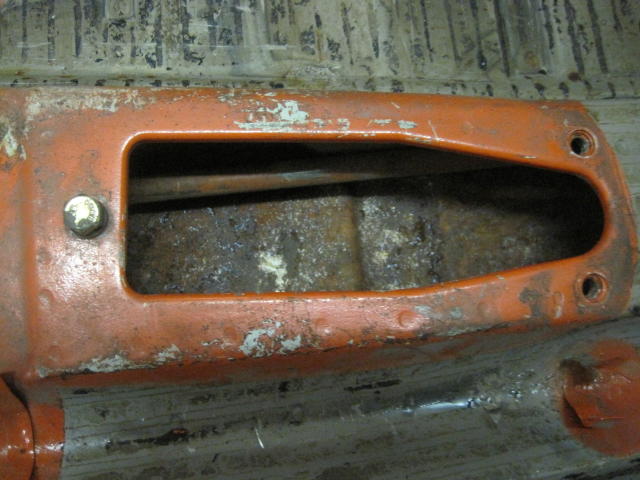 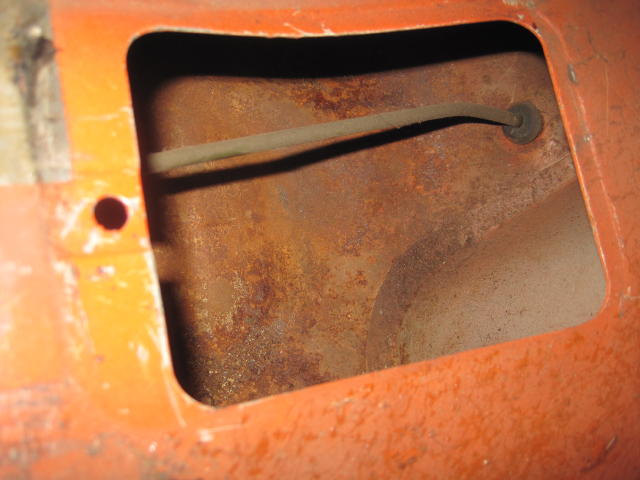
|
|
|
|
| type47 |
Apr 14 2011, 06:11 AM
Post
#4
|
|
Viermeister Group: Members Posts: 4,254 Joined: 7-August 03 From: Vienna, VA Member No.: 994 Region Association: MidAtlantic Region |
I think Eastwood, probably among others, offers a rust converter that has a wand or hose to get into areas like the central tunnel. Maybe there was a thread here about it as this is where I read just about everything. (more caffiene needed...)
|
|
|
|
| proto31 |
Apr 14 2011, 08:06 AM
Post
#5
|
|
Member Group: Members Posts: 413 Joined: 2-February 06 From: Costa Mesa, CA. Member No.: 5,515 Region Association: None |
Nice start! Are you going to keep it Tangerine? This will be a fun build thread to watch (IMG:style_emoticons/default/biggrin.gif)
Dan |
|
|
|
| jkb944t |
Apr 14 2011, 09:24 PM
Post
#6
|
|
Member Group: Members Posts: 470 Joined: 17-January 05 From: Canton, OH Member No.: 3,459 Region Association: None |
I am going to keep it the same color but it is actually Phoenix Red L32K. It sure looks orange to me too.
|
|
|
|
| jasons |
Apr 14 2011, 11:31 PM
Post
#7
|
|
Jackstand Extraordinaire Group: Members Posts: 2,011 Joined: 19-August 04 From: Scottsdale, AZ Member No.: 2,573 Region Association: None |
QUOTE(jkb944t @ Apr 14 2011, 05:03 AM)  I can see rust inside the center tunnel but it is still solid. What would be the best way to approach addressing this rust so that it doesn’t get any worse? Here are some pictures of the rust that I have in the center tunnel. Jeff B I don't know if its best, but I sprayed Ospho up down my tunnel. I had already cut an access hole to fix the clutch tube and that helped me get better distribution. Honestly, I'm not sure what else you can do? (IMG:style_emoticons/default/confused24.gif) |
|
|
|
| FourBlades |
Apr 14 2011, 11:51 PM
Post
#8
|
|
From Wreck to Rockin Group: Members Posts: 2,056 Joined: 3-December 07 From: Brevard, FL Member No.: 8,414 Region Association: South East States |
That is a very solid looking car. Looks like you are off to a good start. I would just get the inside of the tunnel damp with ospho or better yet, metal ready (which contains zinc). You are supposed to rinse ospho or metal ready off after it is done reacting, which is hard to do inside the tunnel. Getting a lot of moisture in there would be a bad idea. I sprayed metal ready followed a few days later by eastwood rust encapsulator into areas I did not open up. Not perfect solution but it has to help. John |
|
|
|
| ellisor3 |
Apr 15 2011, 04:50 AM
Post
#9
|
|
HPWhore Group: Members Posts: 811 Joined: 23-October 08 From: Fleming Island, Florida Member No.: 9,683 Region Association: South East States |
I used the Eastwood Rust Converter followed by the Rust Encapsulator and it produced a very smooth finish. I used it in the floor pans as well. Not cheap, but I think it works well.
http://www.eastwood.com/rust-solutions.html |
|
|
|
| nsr-jamie |
Apr 15 2011, 05:03 AM
Post
#10
|
|
914 guy in Japan Group: Members Posts: 1,182 Joined: 7-November 07 From: Nagoya, Japan Member No.: 8,305 Region Association: None |
need more pictures...looks very good for now. I hope to see more updates and pictures soon (IMG:style_emoticons/default/biggrin.gif)
|
|
|
|
| jkb944t |
Apr 15 2011, 10:34 AM
Post
#11
|
|
Member Group: Members Posts: 470 Joined: 17-January 05 From: Canton, OH Member No.: 3,459 Region Association: None |
Thanks for the help and encouragement.
The car is very solid other than a few minor spots. Here are some pictures of the front trunk seal repair around the headlight. I had to grind out the rusty front channel.  Then I made a new piece of channel and fit it. 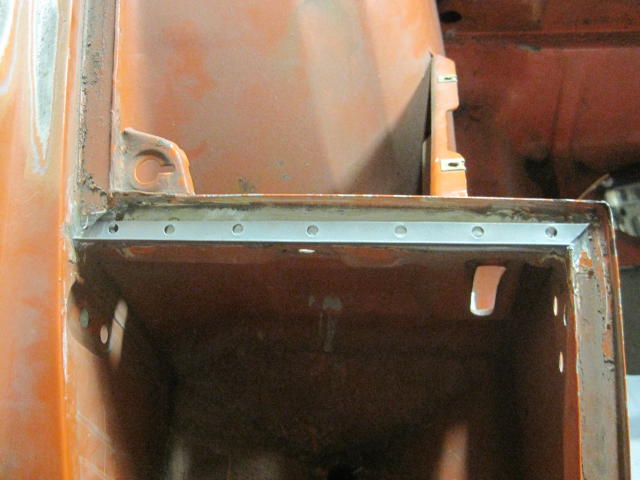 Then I welded it in and finished it. 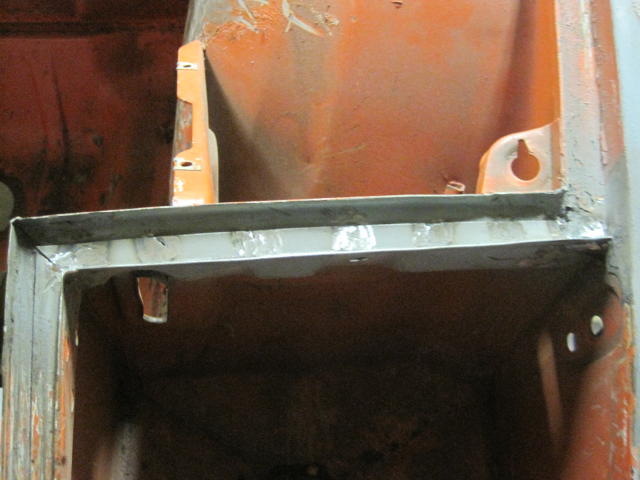 |
|
|
|
| stugray |
Apr 16 2011, 02:19 AM
Post
#12
|
|
Advanced Member Group: Members Posts: 3,825 Joined: 17-September 09 From: Longmont, CO Member No.: 10,819 Region Association: None |
You can spray the insides of some of the cavities with a tool like this:
http://professionalautomotivetools.com/hus...washer-sprayer/ You just hook it to pressure, drop the hose in the "paint", and spray away. It can be used to apply paints/coatings as well, just wear clothes you never want to wear in public again if you restrict the flow with the nozzle too much ;-) Stu |
|
|
|
| jkb944t |
Apr 26 2011, 11:01 AM
Post
#13
|
|
Member Group: Members Posts: 470 Joined: 17-January 05 From: Canton, OH Member No.: 3,459 Region Association: None |
Made some more progress on the front swaybar improvements. Here is the cutting open and fitting part:
 Then welded it back together: 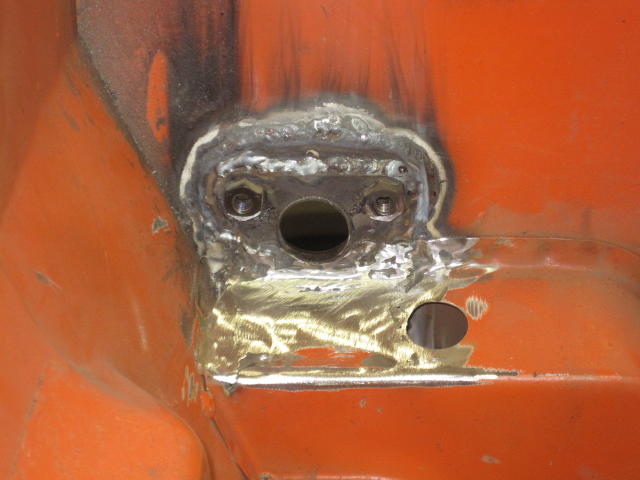 Then the fitting of the outside reinforcement pieces: 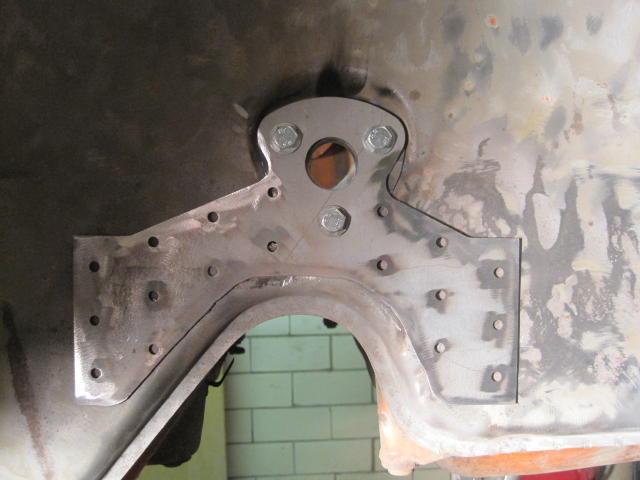 After welding and some grinding: 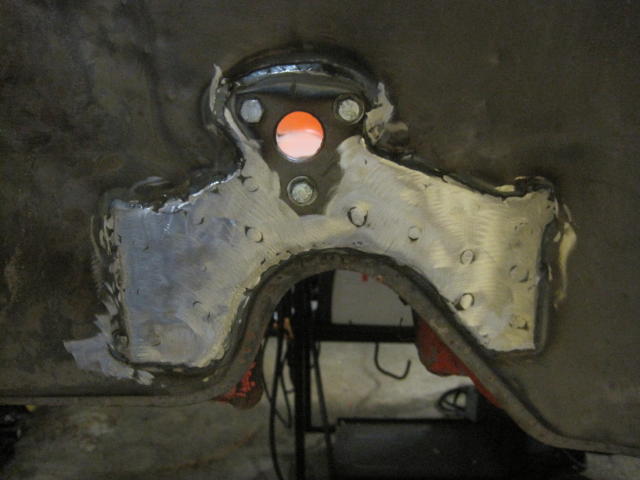 Then I worked on the rear of the car and did the dog ear supports. 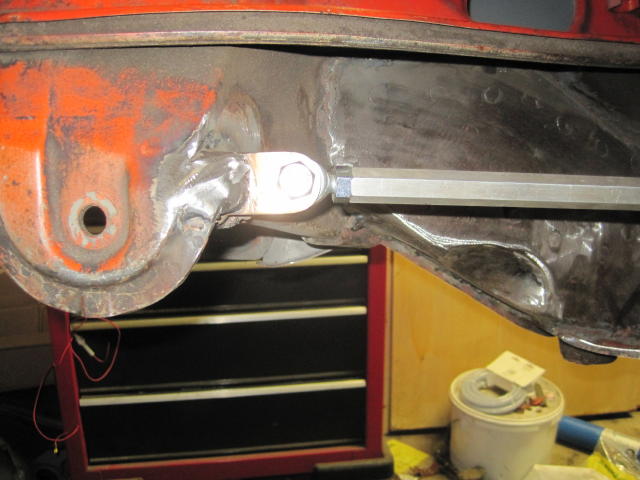 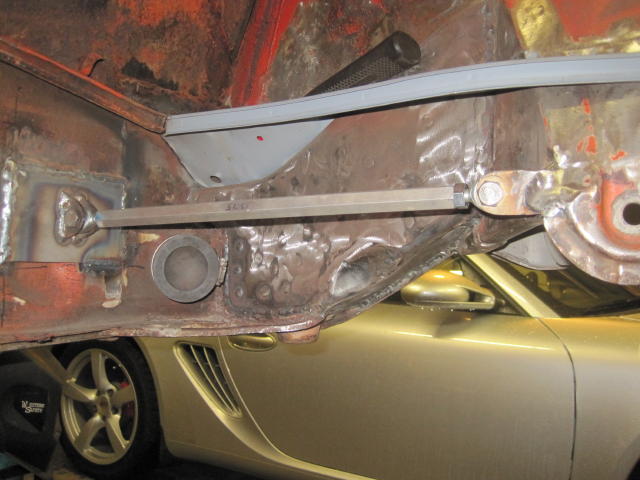 One of the next things I need to do is check some dimensions on my GT flares. Is there anyone anywhere near the Canton, Ohio area that has steel GT flares on their car? Jeff B |
|
|
|
| jkb944t |
Apr 27 2011, 05:31 AM
Post
#14
|
|
Member Group: Members Posts: 470 Joined: 17-January 05 From: Canton, OH Member No.: 3,459 Region Association: None |
I am finishing up the rear camber adjustment links.
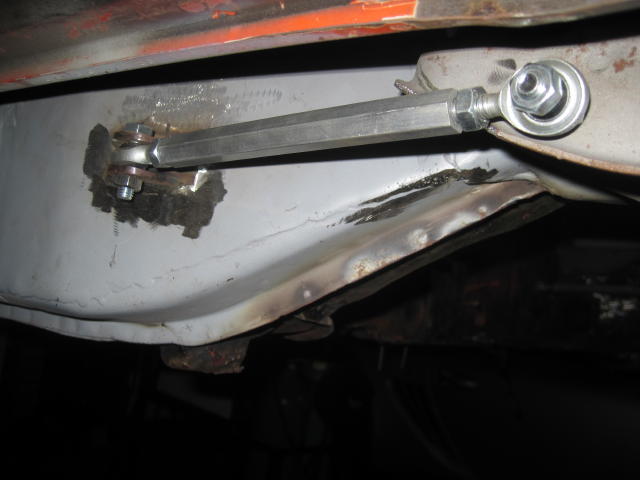 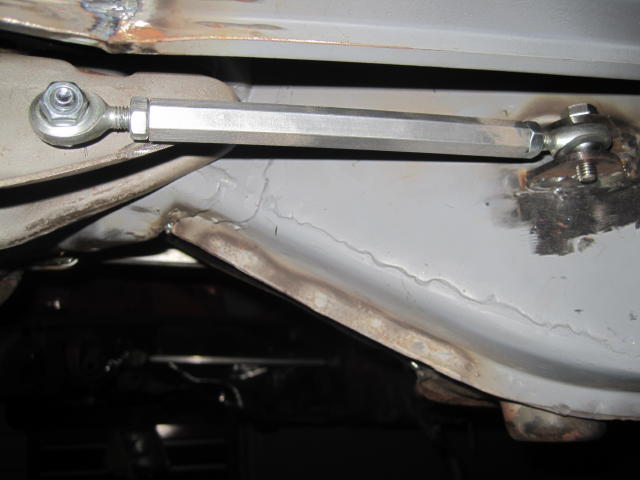 I also bought another 914 a week ago to get parts off of but it is already pretty well stripped. 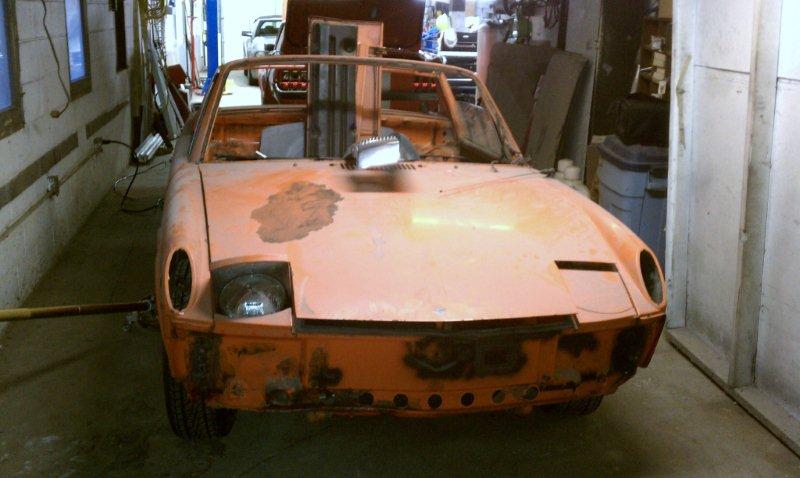 It is a 1973 with the 1.8 L motor. I plan to cut the parts off that I need and then part out the rest of what is left of it. Jeff B |
|
|
|
| jkb944t |
May 2 2011, 06:17 AM
Post
#15
|
|
Member Group: Members Posts: 470 Joined: 17-January 05 From: Canton, OH Member No.: 3,459 Region Association: None |
I thought that since I am converting a 1973 I would document how I reinforced the area where I cut out the 4 cylinder motor mounts for anyone interested. I ended up making custom reinforcement plates for this area.
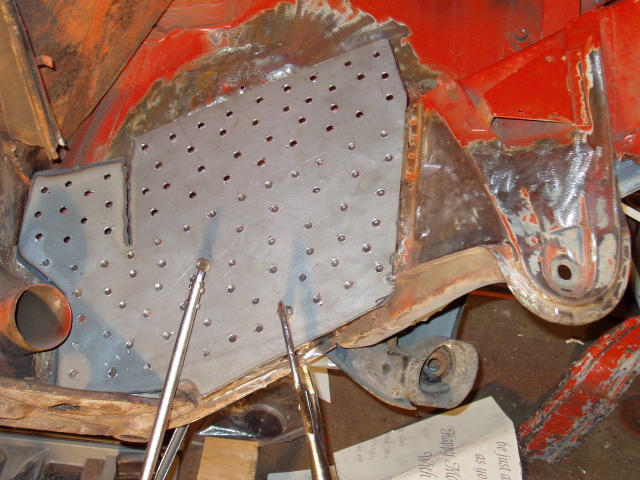 Then I tacked them and heated them up to form them around the rear suspension console. 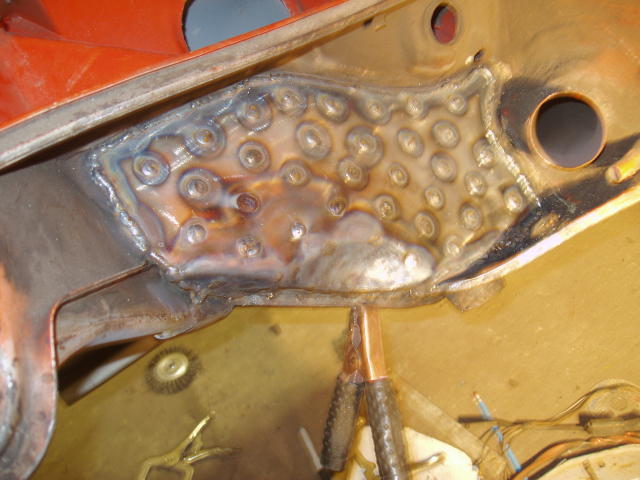 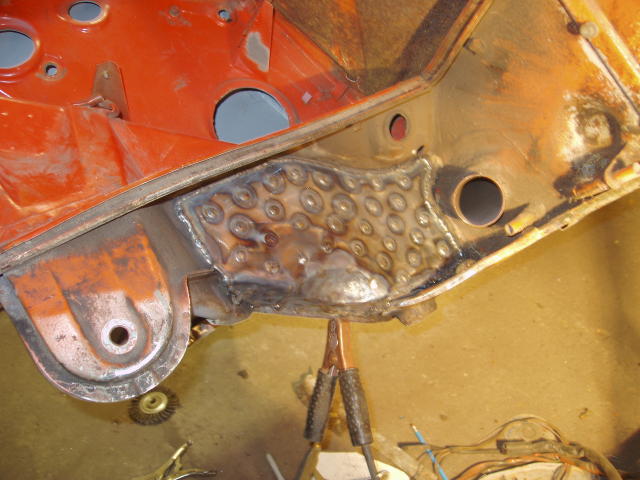 I also had to put in a new engine tray piece that I got from Restoration Design. 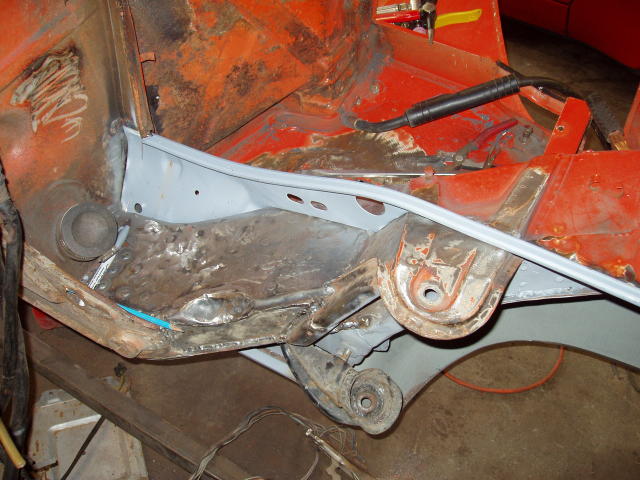 Next I have to weld the battery support bracket and the battery tray back in. Jeff B |
|
|
|
| 0396 |
May 2 2011, 07:25 AM
Post
#16
|
|
Advanced Member Group: Members Posts: 2,046 Joined: 13-October 03 From: L.A. Calif Member No.: 1,245 Region Association: Southern California |
very interesting project- good luck!
|
|
|
|
| Eric_Shea |
May 2 2011, 02:38 PM
Post
#17
|
|
PMB Performance Group: Admin Posts: 19,304 Joined: 3-September 03 From: Salt Lake City, UT Member No.: 1,110 Region Association: Rocky Mountains |
Looking good... I'd say the Eastwood Internal Frame Coating w/Spray Nozzle would be the trick setup for your tunnel.
|
|
|
|
| PeeGreen 914 |
May 2 2011, 02:59 PM
Post
#18
|
|
Just when you think you're done...wait, there is more..lol Group: Members Posts: 10,219 Joined: 21-September 06 From: Seattle, WA... actually Everett Member No.: 6,884 Region Association: Pacific Northwest |
QUOTE(jkb944t @ May 2 2011, 05:17 AM) I thought that since I am converting a 1973 I would document how I reinforced the area where I cut out the 4 cylinder motor mounts for anyone interested. I ended up making custom reinforcement plates for this area. That looks very similar to what I did on my car when I removed the mounts (IMG:style_emoticons/default/smile.gif) Looks nice. Actually a much cleaner job than I did as I had to get the car ready for the AX season (IMG:style_emoticons/default/happy11.gif) |
|
|
|
| fasthonda |
May 2 2011, 04:12 PM
Post
#19
|
|
914 Type R Group: Members Posts: 144 Joined: 10-January 04 From: Simpsonville, SC Member No.: 1,544 Region Association: None |
Excellent work. I really like your approach and the quality of work done on the chassis. I'll be following your thread.
I would add a plate over the ears if your not already planning to. This is a project I would buy if you consider selling at any point. Regards, Michael |
|
|
|
| jkb944t |
Jul 18 2012, 12:03 PM
Post
#20
|
|
Member Group: Members Posts: 470 Joined: 17-January 05 From: Canton, OH Member No.: 3,459 Region Association: None |
I have been travelling a lot for work over the past year but I have gotten some work accomplished that I thought might be worth documenting.
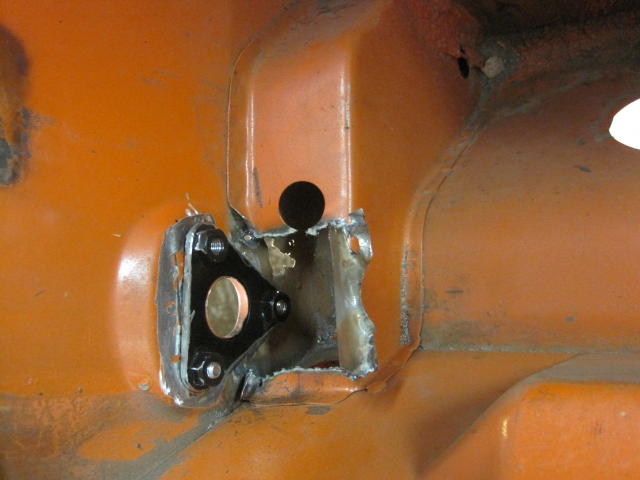
I have been working on the front of the car where the oil cooler will be going. I have studied all of the photos on Armando Serrano’s web site for many hours. This site is an amazing resource for GT info. I cut open the front trunk area to get access to add the reinforcement bars and marked the area that needed to be opened up. 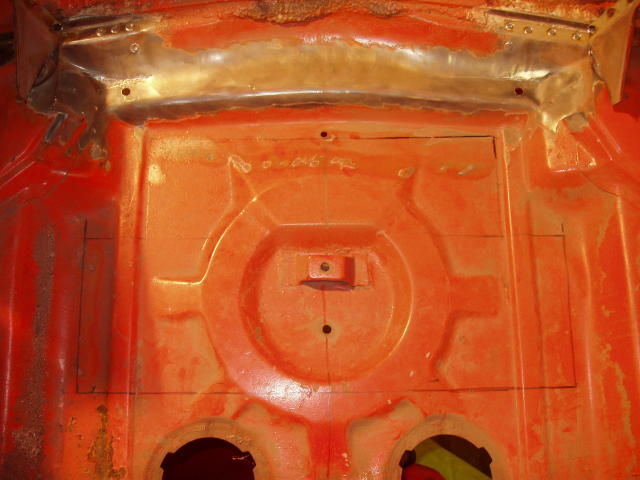 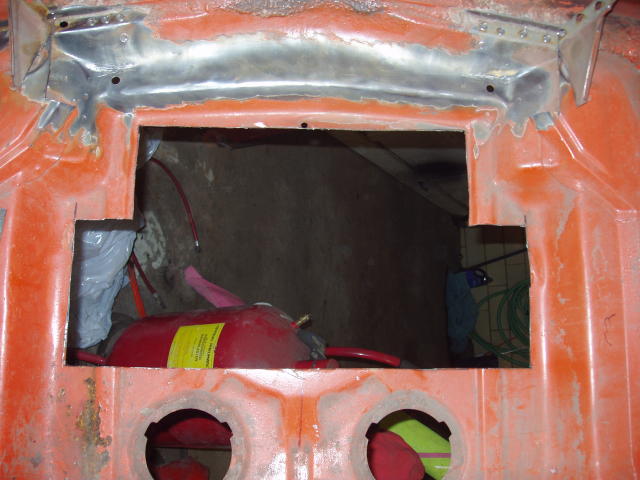 Then I custom fit the first reinforcement bar in. 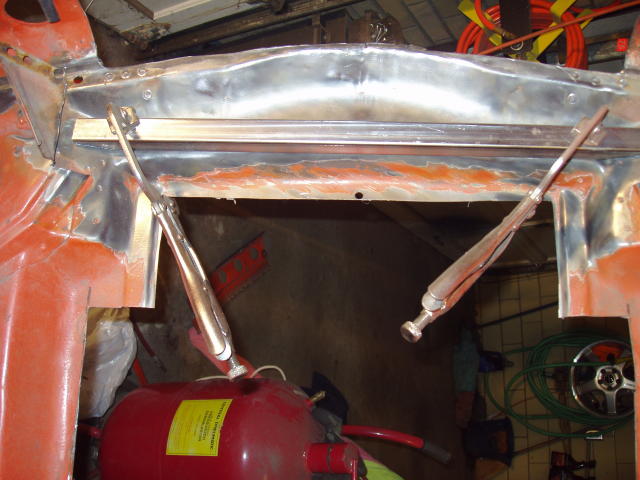 Next I fit the filler panel and the second reinforcement bar in. Then I welded the filler panel in place. 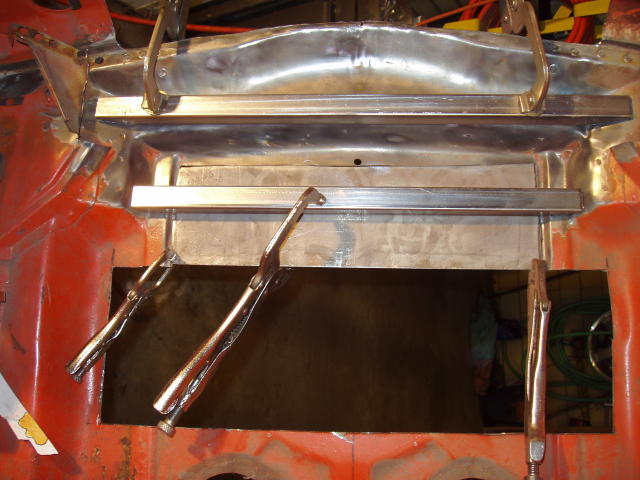 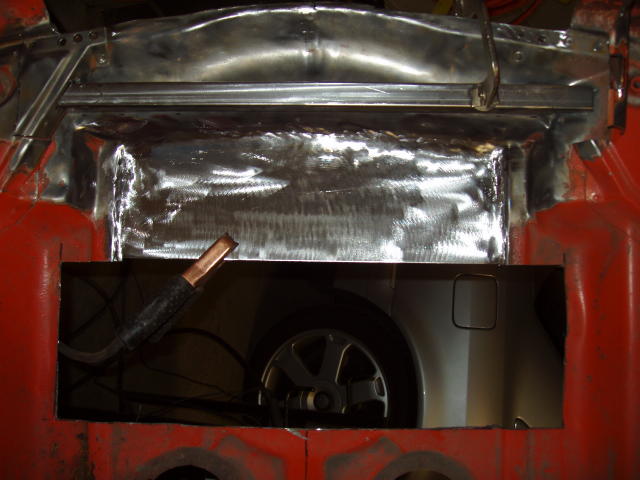 Next I fit the filler panel and the second reinforcement bar in. Then I welded the filler panel in place. 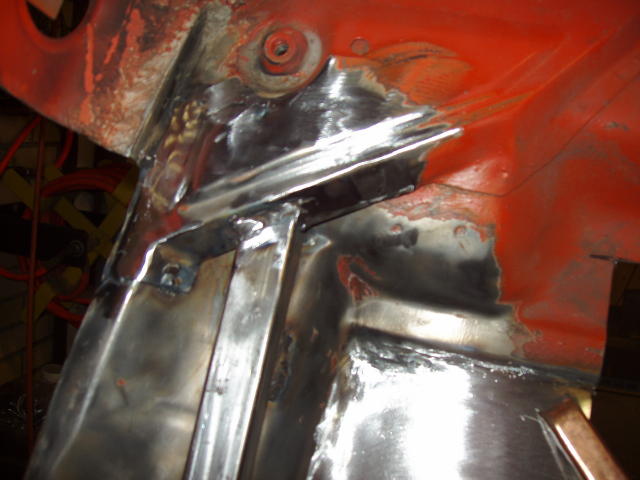  Next I have to fabricate the oil cooler shroud which I am not looking forward to doing. I may move to the back of the car to do some more work there. Jeff B |
|
|
|
|
1 User(s) are reading this topic (1 Guests and 0 Anonymous Users)
0 Members:

|
Lo-Fi Version | Time is now: 13th March 2026 - 08:09 AM |
Invision Power Board
v9.1.4 © 2026 IPS, Inc.