|
|
|
Porsche, and the Porsche crest are registered trademarks of Dr. Ing. h.c. F. Porsche AG.
This site is not affiliated with Porsche in any way. Its only purpose is to provide an online forum for car enthusiasts. All other trademarks are property of their respective owners. |
|
|

  |

| sean_v8_914 |
 Apr 19 2011, 07:18 AM Apr 19 2011, 07:18 AM
Post
#1
|
|
Chingon 601  Group: Members Posts: 4,011 Joined: 1-February 05 From: San Diego Member No.: 3,541 |
this project has a major case of the " while youre in there" syndrome. this started as a cowl rust repair and chrome delete.
Peter's chrome trim is in great shape. it is RARE to find 914 window trim that fits flush. it is soft AL and the shape is critical to a snug fit after removign the wipers, we have to locate 20 plastic trim clips Attached thumbnail(s) 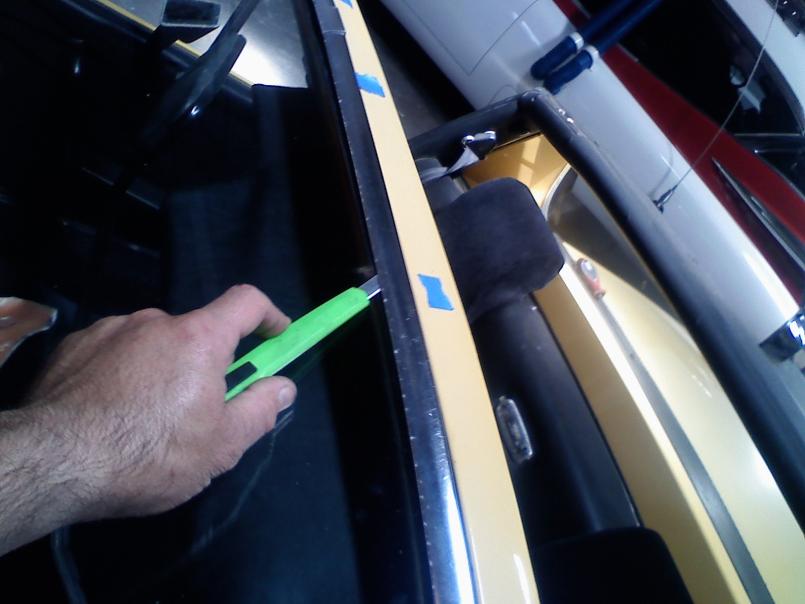
|
   |

 
|
| sean_v8_914 |
Apr 19 2011, 07:22 AM
Post
#2
|
|
Chingon 601 Group: Members Posts: 4,011 Joined: 1-February 05 From: San Diego Member No.: 3,541 |
I marked their position with blue tape. you can feel the bump against the inside trim ledge. I use a single edge and a box cutter. depending on how tight the trim is, I go in from teh window surface or i go to the outside between teh trim and teh body
remember, this trim is SOFT so go gentle Attached thumbnail(s) 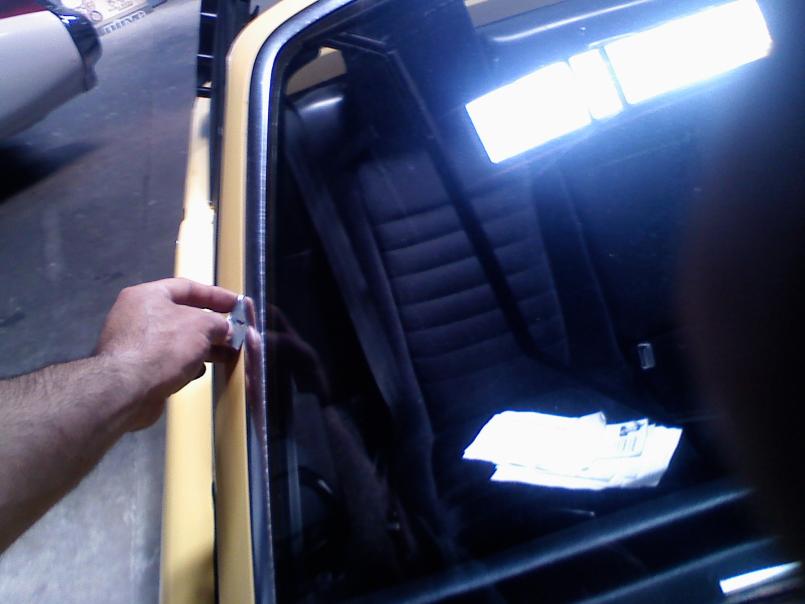
|
|
|
|
| sean_v8_914 |
Apr 19 2011, 07:28 AM
Post
#3
|
|
Chingon 601 Group: Members Posts: 4,011 Joined: 1-February 05 From: San Diego Member No.: 3,541 |
the 20 trim clips are little plastic things held in by a 1/8 plastic pin that goes into the body. all we need to do is cut the pin to release the clip.
all clips must be cut before you try to move the trim surround it should come out in one pc without ANY force I use a utility blade placed in teh gap between teh trim and the window frame perpendicular to the window very gentle taps is all you need to cut that little pin. I use both hands to control the hammer. A rubber mallet would work and be safer Attached thumbnail(s) 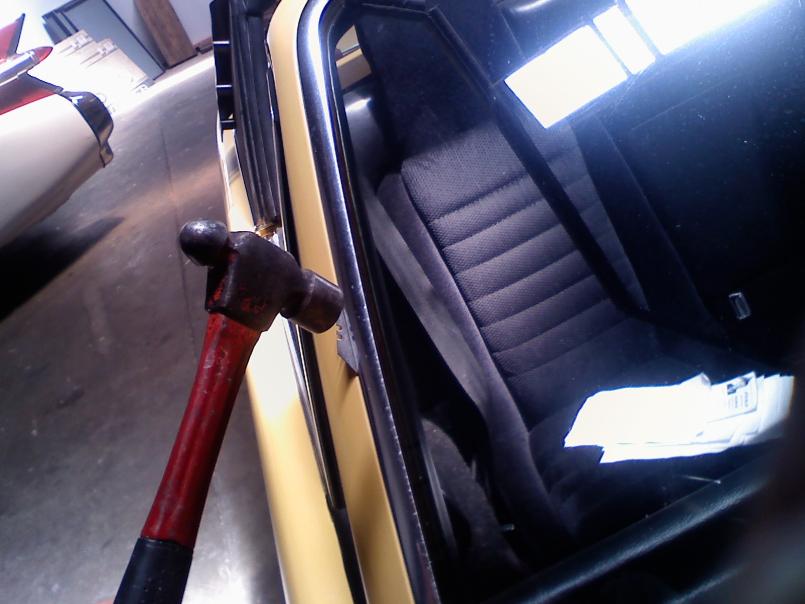
|
|
|
|
| sean_v8_914 |
Apr 19 2011, 07:34 AM
Post
#4
|
|
Chingon 601 Group: Members Posts: 4,011 Joined: 1-February 05 From: San Diego Member No.: 3,541 |
the single edge is thinner and great for locating the clips by feel but too fragile to tap on to cut the clips. it will break and require good needle nose plyers to remove
feeling out more clips... Attached thumbnail(s) 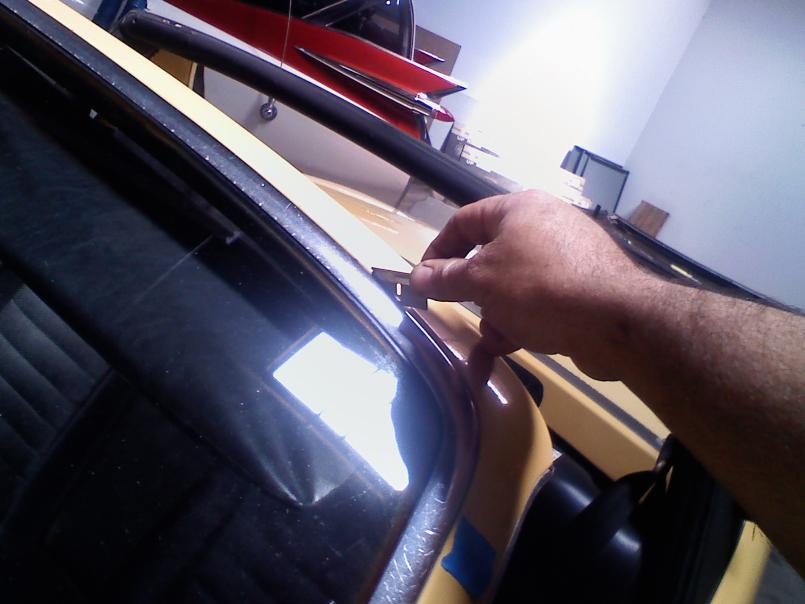
|
|
|
|
| sean_v8_914 |
Apr 19 2011, 07:35 AM
Post
#5
|
|
Chingon 601 Group: Members Posts: 4,011 Joined: 1-February 05 From: San Diego Member No.: 3,541 |
slow and easy taps
Attached thumbnail(s) 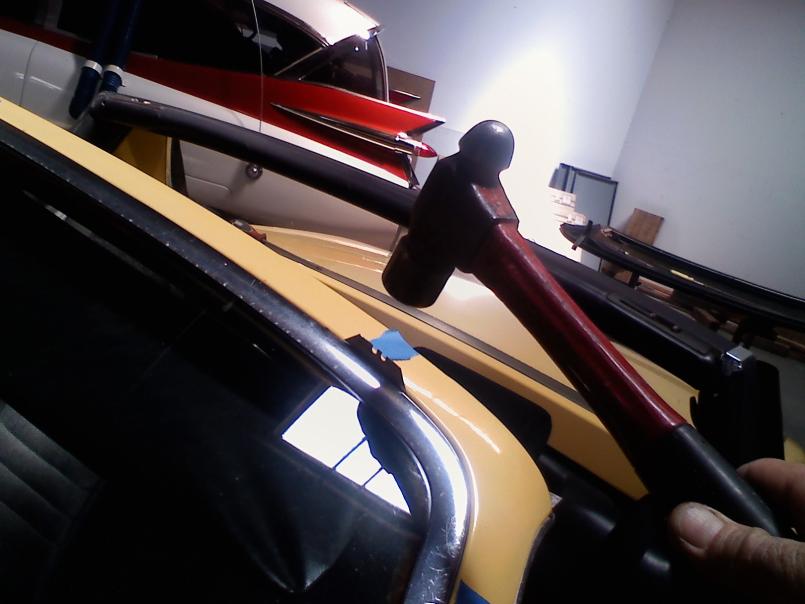
|
|
|
|
| sean_v8_914 |
Apr 19 2011, 07:36 AM
Post
#6
|
|
Chingon 601 Group: Members Posts: 4,011 Joined: 1-February 05 From: San Diego Member No.: 3,541 |
clip locations near blue tape
Attached thumbnail(s) 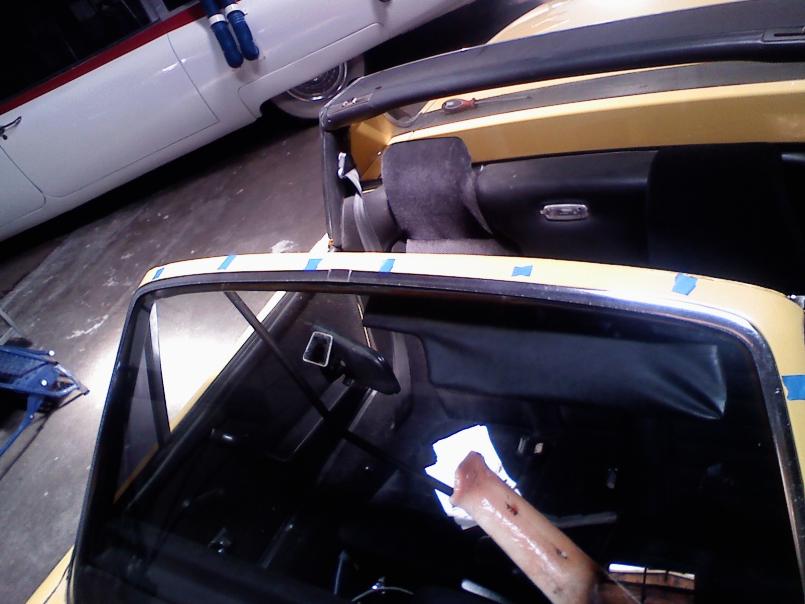
|
|
|
|
| sean_v8_914 |
Apr 19 2011, 07:39 AM
Post
#7
|
|
Chingon 601 Group: Members Posts: 4,011 Joined: 1-February 05 From: San Diego Member No.: 3,541 |
this one was too tight for the utility blade so i sacrificed a few single edge blades to get it without risk trim deformation
the lower trim is at a difficult angle to the windsheild and requires GREAT care when tapping on. I recommend some tape to protect the trim and teh body Attached thumbnail(s) 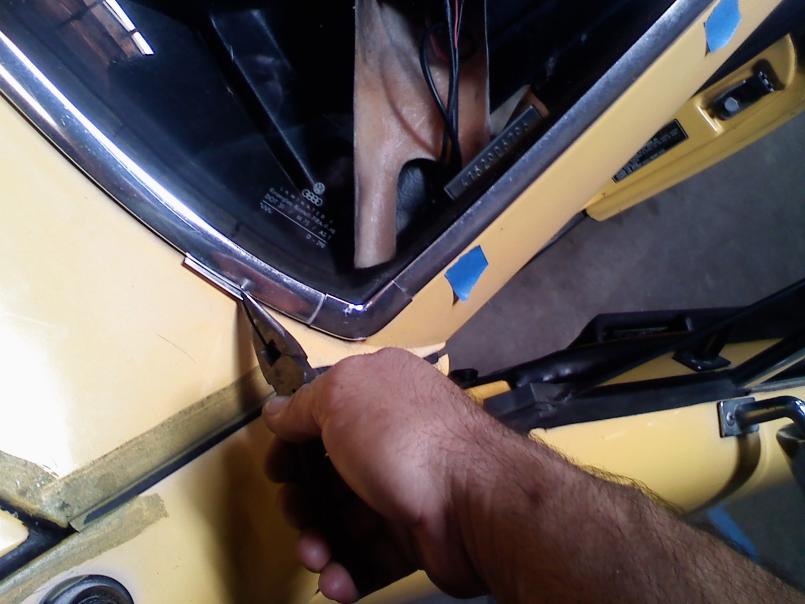
|
|
|
|
| sean_v8_914 |
Apr 19 2011, 07:40 AM
Post
#8
|
|
Chingon 601 Group: Members Posts: 4,011 Joined: 1-February 05 From: San Diego Member No.: 3,541 |
dftj
Attached thumbnail(s) 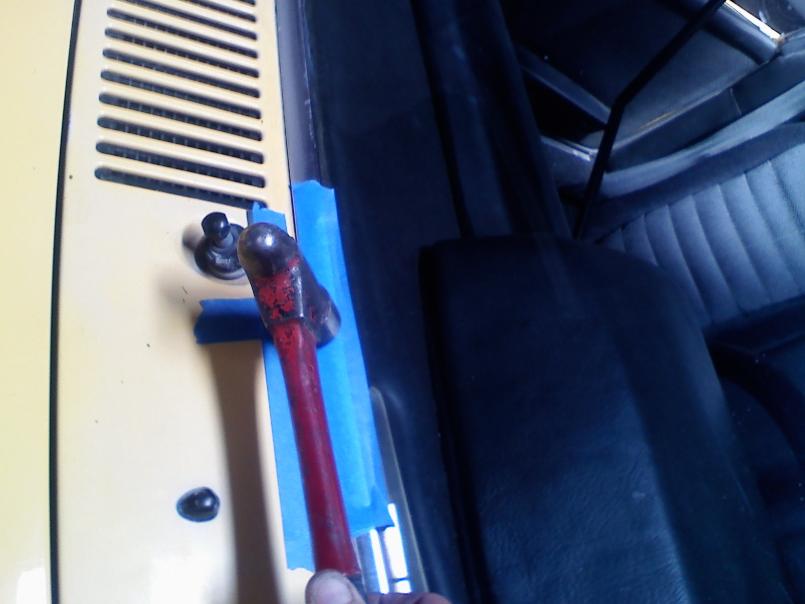
|
|
|
|
| sean_v8_914 |
Apr 19 2011, 07:43 AM
Post
#9
|
|
Chingon 601 Group: Members Posts: 4,011 Joined: 1-February 05 From: San Diego Member No.: 3,541 |
this lower corner has dirt and debris in teh crack confusing the locating "feel" the dirt also gave resistance to trim removal after all clips were cut
DO NOT PULL ON TEH TRIM. Did I mention how soft and easy it is to bend? Attached thumbnail(s) 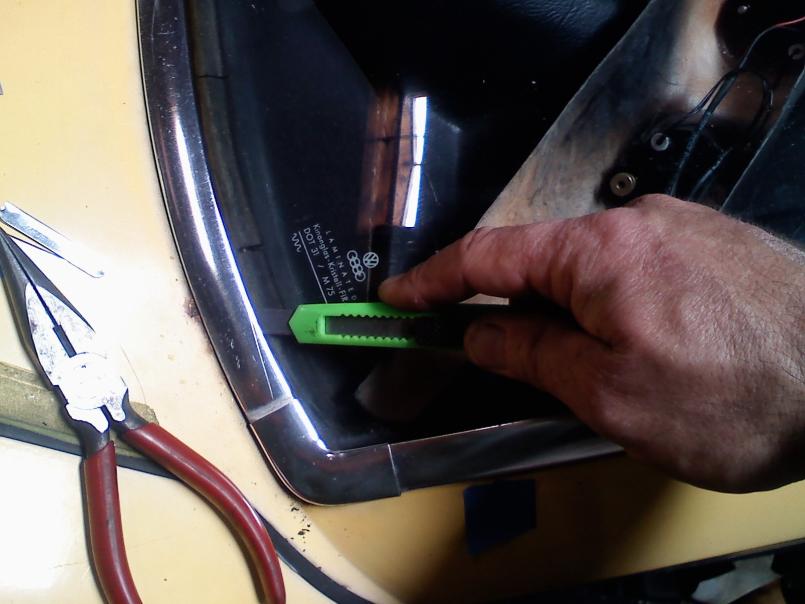
|
|
|
|
| sean_v8_914 |
Apr 19 2011, 07:45 AM
Post
#10
|
|
Chingon 601 Group: Members Posts: 4,011 Joined: 1-February 05 From: San Diego Member No.: 3,541 |
side clip locations
Attached thumbnail(s) 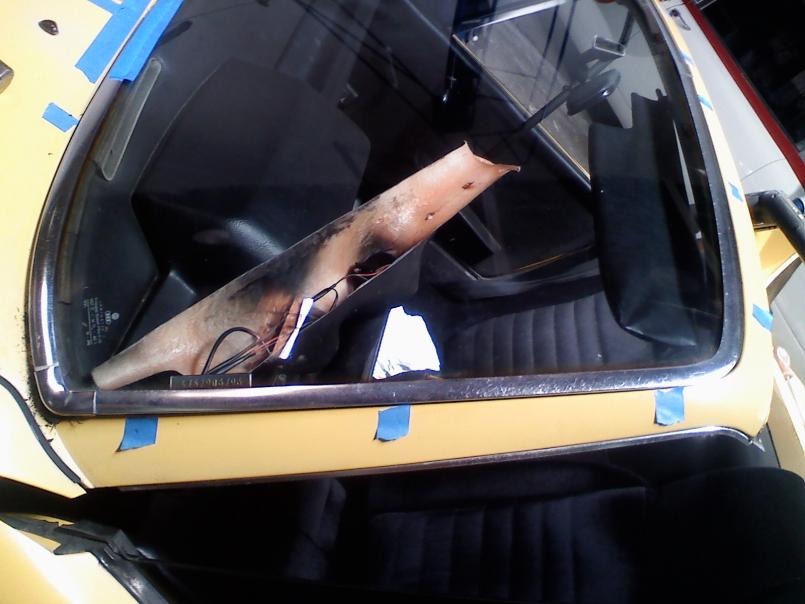
|
|
|
|
| sean_v8_914 |
Apr 19 2011, 07:46 AM
Post
#11
|
|
Chingon 601 Group: Members Posts: 4,011 Joined: 1-February 05 From: San Diego Member No.: 3,541 |
bottom clip locations
Attached thumbnail(s) 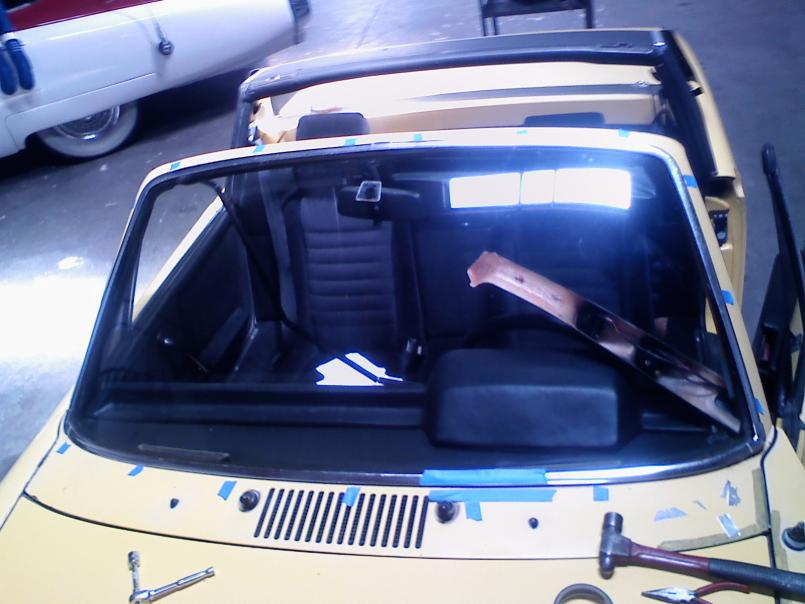
|
|
|
|
| sean_v8_914 |
Apr 19 2011, 07:48 AM
Post
#12
|
|
Chingon 601 Group: Members Posts: 4,011 Joined: 1-February 05 From: San Diego Member No.: 3,541 |
clip close up.
here you can see the size and shape. the thin plastic pin is in teh center and goes into the outer edge of teh window frame Attached thumbnail(s) 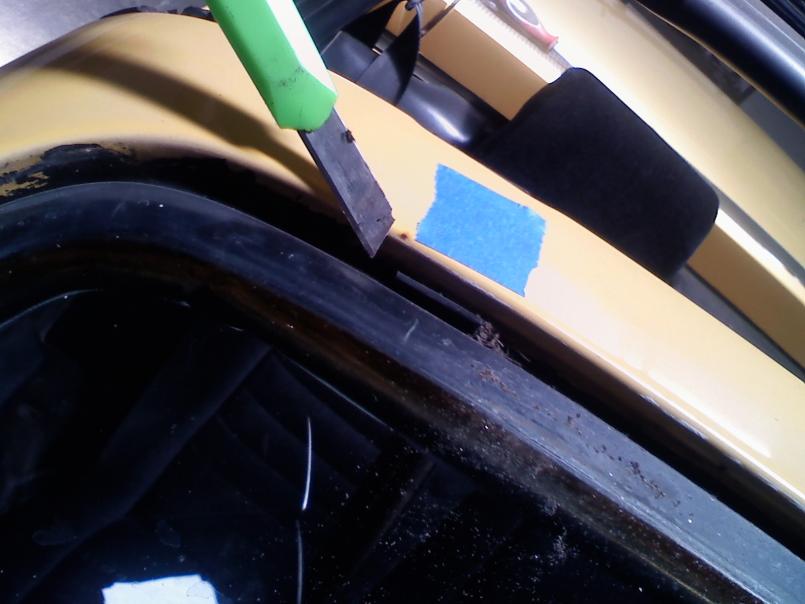
|
|
|
|
| sean_v8_914 |
Apr 19 2011, 07:50 AM
Post
#13
|
|
Chingon 601 Group: Members Posts: 4,011 Joined: 1-February 05 From: San Diego Member No.: 3,541 |
the trim frame should coe out in one pc. if you get ANY resistance at all STOP. trace the edges with the razor to find the hang up point
Attached thumbnail(s) 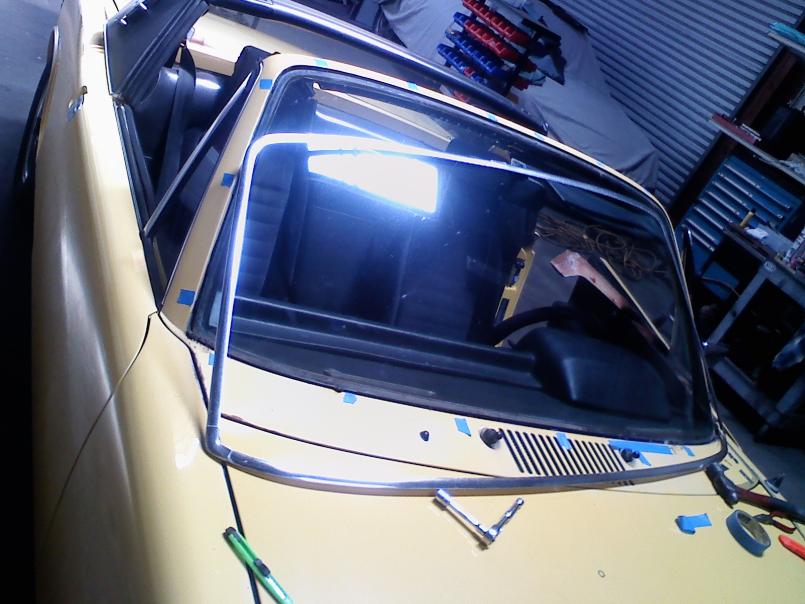
|
|
|
|
| sean_v8_914 |
Apr 19 2011, 07:54 AM
Post
#14
|
|
Chingon 601 Group: Members Posts: 4,011 Joined: 1-February 05 From: San Diego Member No.: 3,541 |
typical to many 914s is the rust in teh windsheild frame and teh cowl.
I will hit this with a wire wheel, then SEM rust MORT for a day or 2. then etch teh bare metal with Metal Ready or PPG DX 530 or Ospho, jasco metal prep Attached thumbnail(s) 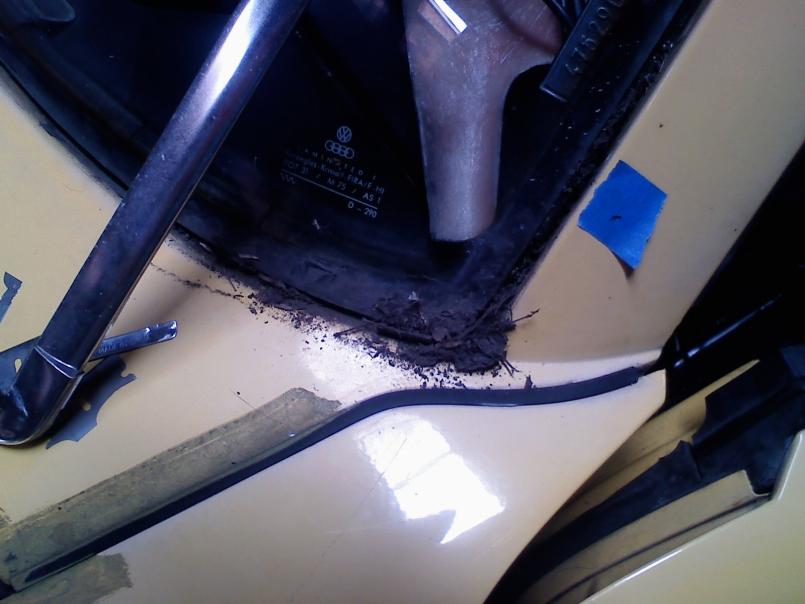
|
|
|
|
| sean_v8_914 |
Apr 19 2011, 07:56 AM
Post
#15
|
|
Chingon 601 Group: Members Posts: 4,011 Joined: 1-February 05 From: San Diego Member No.: 3,541 |
I found a pic of where the clip pin engages teh winsheild frame
Attached thumbnail(s) 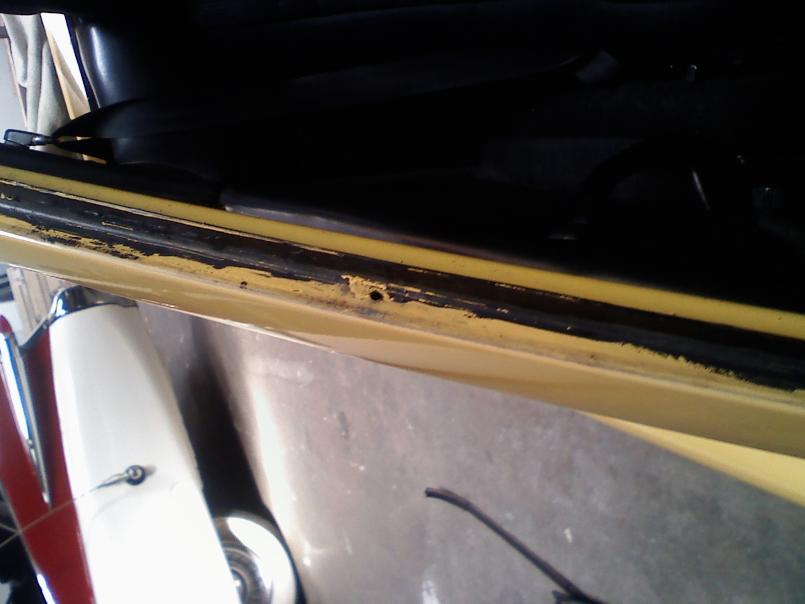
|
|
|
|
| sean_v8_914 |
Apr 19 2011, 07:56 AM
Post
#16
|
|
Chingon 601 Group: Members Posts: 4,011 Joined: 1-February 05 From: San Diego Member No.: 3,541 |
they all have rust in them
|
|
|
|
| sean_v8_914 |
Apr 19 2011, 08:03 AM
Post
#17
|
|
Chingon 601 Group: Members Posts: 4,011 Joined: 1-February 05 From: San Diego Member No.: 3,541 |
I guess you could remove the window with the interior trim in place. the glass man would not remove it but I cant do things like that. if I see rust I have to attack! if I do allt his work up to this point, I just cant stop short of sweetness so i press onward...
remove teh lower targa seal remove visors remove side window frame A pillar interior covers remove top winsheild frame interior cover there are a bunch of little phillips head screws under these plactic round plugs these are EASY to strip. be sure you are fully inserted, at the correct angle to the screw and have the correct driver bit Attached thumbnail(s) 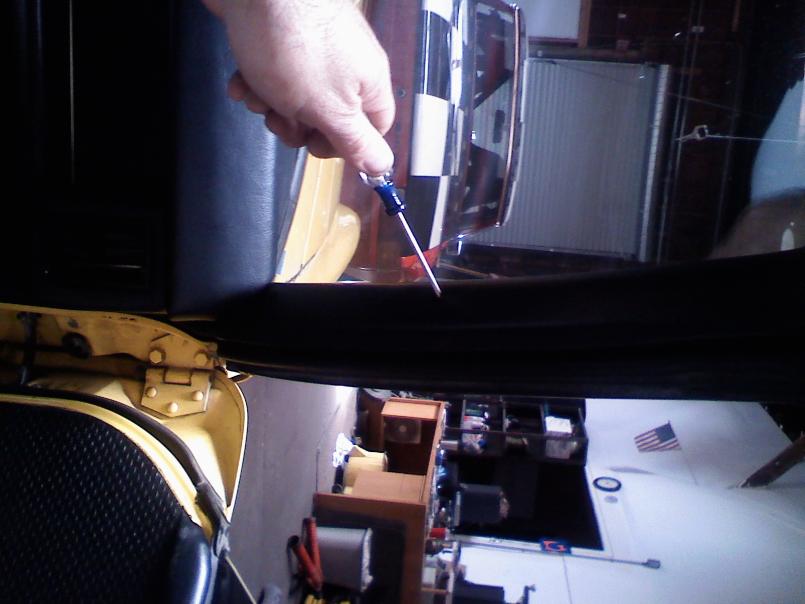
|
|
|
|
| sean_v8_914 |
Apr 19 2011, 08:12 AM
Post
#18
|
|
Chingon 601 Group: Members Posts: 4,011 Joined: 1-February 05 From: San Diego Member No.: 3,541 |
im so retarded...more coffee please
admins: please move this to the garage |
|
|
|
| okieflyr |
Apr 19 2011, 10:21 AM
Post
#19
|
|
9fauxteen Group: Members Posts: 816 Joined: 9-January 05 From: Phila PA Member No.: 3,426 Region Association: North East States |
This is very relevant to what I want to do. I have the same aluminum trim and have been trying to build the courage to remove it for powdercoating. Cleaning out the dirt build up would be a good thing to. (IMG:style_emoticons/default/popcorn[1].gif)
|
|
|
|
| silver74insocal |
Apr 19 2011, 10:47 AM
Post
#20
|
|
Senior Member Group: Members Posts: 736 Joined: 26-November 09 From: rancho cucamonga Member No.: 11,073 Region Association: Southern California |
(IMG:style_emoticons/default/popcorn[1].gif) cool thread Sean. keep posting them pics (IMG:style_emoticons/default/beer.gif)
|
|
|
|
|
1 User(s) are reading this topic (1 Guests and 0 Anonymous Users)
0 Members:

|
Lo-Fi Version | Time is now: 15th May 2024 - 01:14 PM |
Invision Power Board
v9.1.4 © 2024 IPS, Inc.