|
|
|
Porsche, and the Porsche crest are registered trademarks of Dr. Ing. h.c. F. Porsche AG.
This site is not affiliated with Porsche in any way. Its only purpose is to provide an online forum for car enthusiasts. All other trademarks are property of their respective owners. |
|
|

  |

| thomasotten |
 May 29 2004, 04:26 PM May 29 2004, 04:26 PM
Post
#1
|
|
Senior Member  Group: Members Posts: 1,544 Joined: 16-November 03 From: San Antonio, Texas Member No.: 1,349 |
Just in case anyone is interested, here are the pics from the rust repair, completed. This entailed the suspension console, the inner wheel house (upper and lower), and the top of the longitudinal. I also put on a new engine sheld. I started some threads last year, where I showed the progress, then I took a few months off in the middle of it all. All in all, it was probably the most involved thing I have ever done to the 914, and any car for that matter. I had to learn to weld in the process. My welds look like crap, but I think they will hold (I weld like Mikey on American Chopper).
Attached image(s) 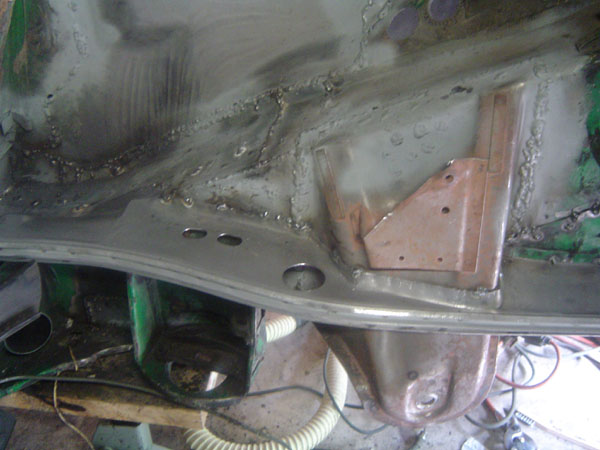
|
   |

 
|
| thomasotten |
May 29 2004, 04:28 PM
Post
#2
|
|
Senior Member Group: Members Posts: 1,544 Joined: 16-November 03 From: San Antonio, Texas Member No.: 1,349 |
Test mounted the suspension and tire. The tire clears the fender!
Attached image(s) 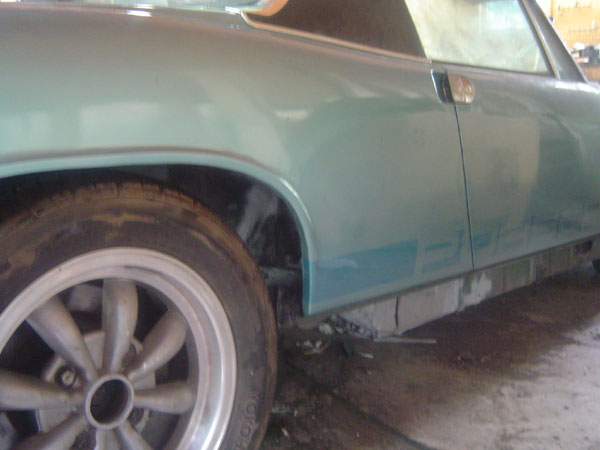
|
|
|
|
| thomasotten |
May 29 2004, 04:33 PM
Post
#3
|
|
Senior Member Group: Members Posts: 1,544 Joined: 16-November 03 From: San Antonio, Texas Member No.: 1,349 |
I also welded in two new engine lid hinges. The hinges on my car were made out of alge iron, and held in with screws and nails! Yes, I said nails. Therefore, the hear lid never closed flush. Welding the new ones in was a little tricky, becase it was hard for me to tell where the old ones were. I ended up being a little low on one side, but I found that if you shim them near the firewall, that gives you alot of control to the actual height of the lid.
Attached image(s) 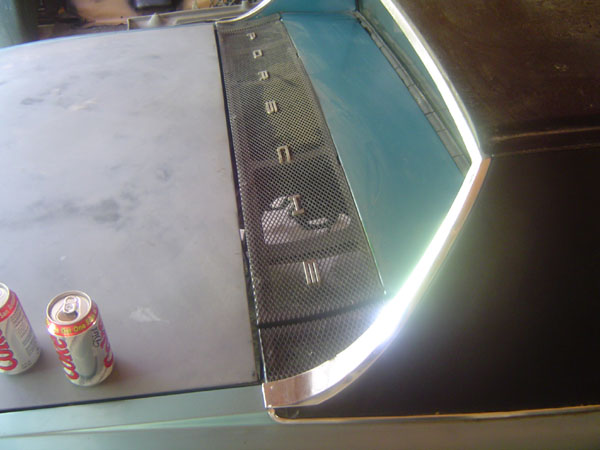
|
|
|
|
| ein 6er |
May 29 2004, 06:37 PM
Post
#4
|
|
Senior Member Group: Benefactors Posts: 1,115 Joined: 11-February 03 Member No.: 300 Region Association: None |
hey mikey!! (IMG:style_emoticons/default/laugh.gif)
errrrrrr ... thomas!! that IS quite an accomplishment!! congrats!! (IMG:style_emoticons/default/clap56.gif) what welder did you get? |
|
|
|
| Levi |
May 29 2004, 06:42 PM
Post
#5
|
|
Lick my nuts Group: Benefactors Posts: 623 Joined: 11-March 04 Member No.: 1,783 |
Nice job dude, I for one am very proud of you.. (IMG:style_emoticons/default/biggrin.gif)
(IMG:style_emoticons/default/beerchug.gif) |
|
|
|
| 415PB |
May 29 2004, 07:21 PM
Post
#6
|
|
Member Group: Benefactors Posts: 498 Joined: 7-August 03 From: So Cal Member No.: 996 |
QUOTE(thomasotten @ May 29 2004, 02:33 PM) I also welded in two new engine lid hinges. The hinges on my car were made out of alge iron, and held in with screws and nails! Yes, I said nails. Therefore, the hear lid never closed flush. Welding the new ones in was a little tricky, becase it was hard for me to tell where the old ones were. I ended up being a little low on one side, but I found that if you shim them near the firewall, that gives you alot of control to the actual height of the lid. Good job. What do you mean by shimming them? My lid sits a little low on the driver's side and I wonder If I can shim it as well. Can you show me a pic of your shimming? |
|
|
|
| thomasotten |
May 29 2004, 08:39 PM
Post
#7
|
|
Senior Member Group: Members Posts: 1,544 Joined: 16-November 03 From: San Antonio, Texas Member No.: 1,349 |
The welder I am using is a Campbell Hausfeld WG3000. They retail for $300, but I got mine for like $260 (shipped) from Ebay new. It is really one of the cheaper welders, but it has held up great so far.
As far as the shimming goes of the engine lid, I am using those little stainless steel gappers that you use to set the gap on the points in your distributer. I just stack em up, as many as I need, and will cut them down later. I put the shim between the bold and the firewall. This causes the hinge bracket to raise the pivot end of the lid. You can get very precise this way. Try loosening one of your bolts up, and you will see that you get alot of movement that will allow you to "angle" the hinge just the right way. As a side note, that is the same way I adjusted my rear trunk lid to close flush. Mine would always stick up high one one end, at the back of the car. I just hated it. Here you have a nice, refined, Germain car, where the body panels don't fit right. In that situation, the pivoting brackets bend over time, so you either need new brackets, or you shim em! |
|
|
|
|
1 User(s) are reading this topic (1 Guests and 0 Anonymous Users)
0 Members:

|
Lo-Fi Version | Time is now: 4th May 2024 - 05:57 PM |
Invision Power Board
v9.1.4 © 2024 IPS, Inc.