|
|
|
Porsche, and the Porsche crest are registered trademarks of Dr. Ing. h.c. F. Porsche AG.
This site is not affiliated with Porsche in any way. Its only purpose is to provide an online forum for car enthusiasts. All other trademarks are property of their respective owners. |
|
|

  |

| Andyrew |
 Jul 7 2011, 10:43 PM Jul 7 2011, 10:43 PM
Post
#41
|
|
Spooling.... Please wait  Group: Members Posts: 13,376 Joined: 20-January 03 From: Riverbank, Ca Member No.: 172 Region Association: Northern California |
Got in 2 hours today. (IMG:style_emoticons/default/smile.gif)
Not pictured, but finished up sanding the front fender, then proceeded to knock out a couple of low spots in the top of the door. Door will need some filler due to some chips it had. (actually had a bunch of them..) Started work on the rear 1/4 as well. Just under 1/8" of bondo the whole front portion of the fender, Looked at the oil canning and came up with a solution to fixing it, I'll go over that with Peter on saturday, it should be easy, but there still is a bunch of filler that I removed, even though it looks fairly straight, there are a lot of little dents in it, and it looks that at some point this area was hit causing the fender to be pushed in. We might need to try to pull the fender out some more. I think i'll take some measurements of the drivers side and compare it to the pass side. Pics. Pics 3 and 4 are the out and in of the oil canning. Attached image(s) 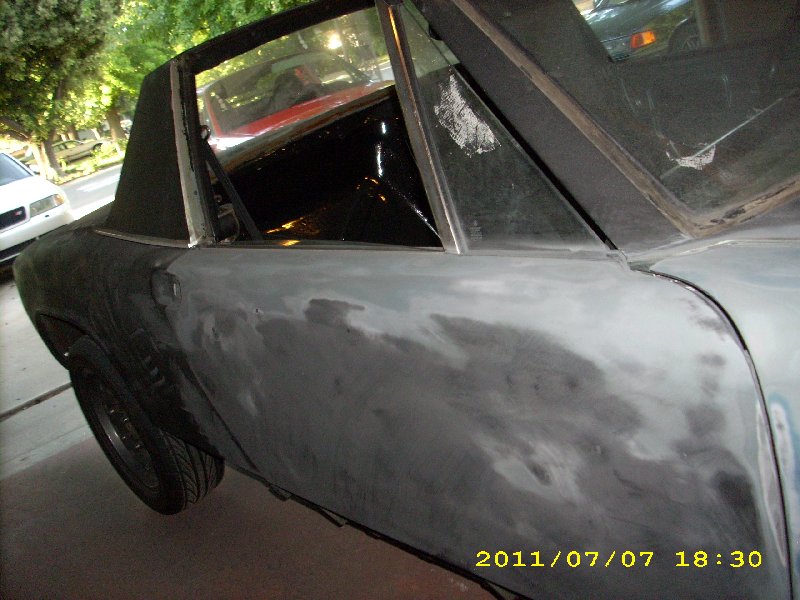 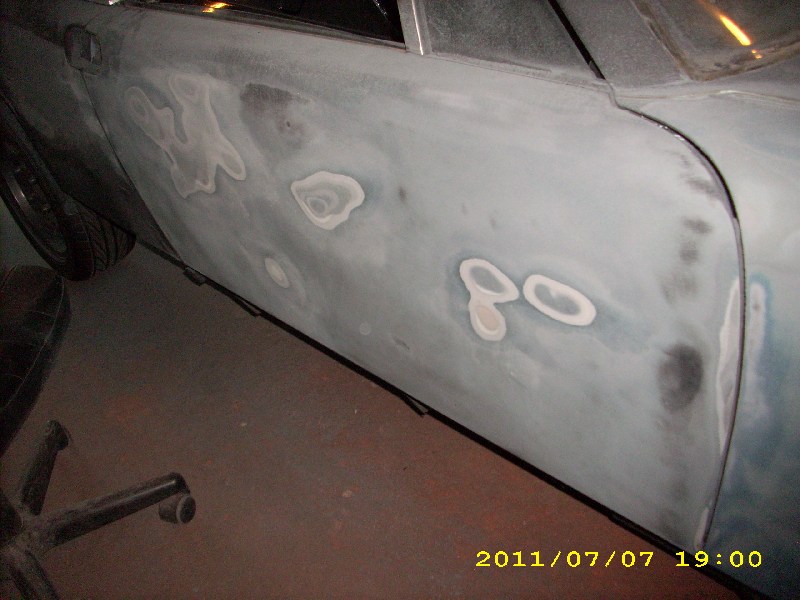 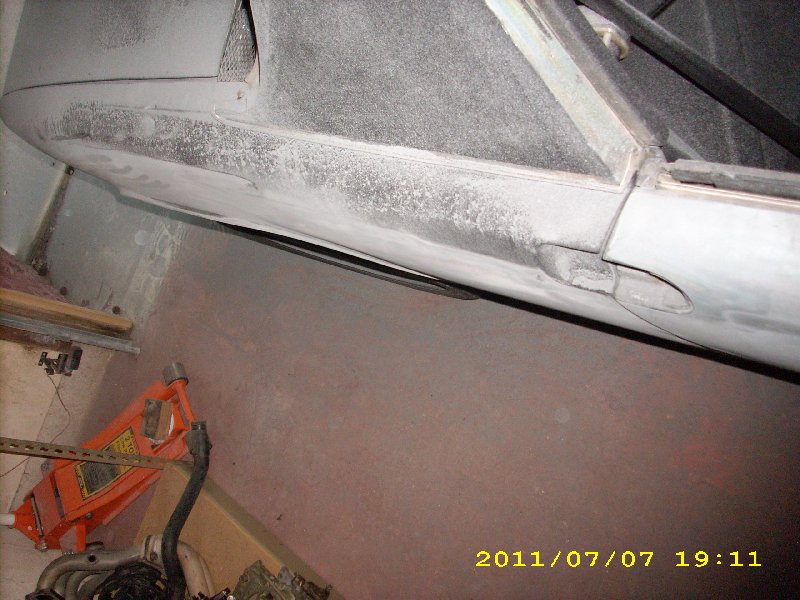 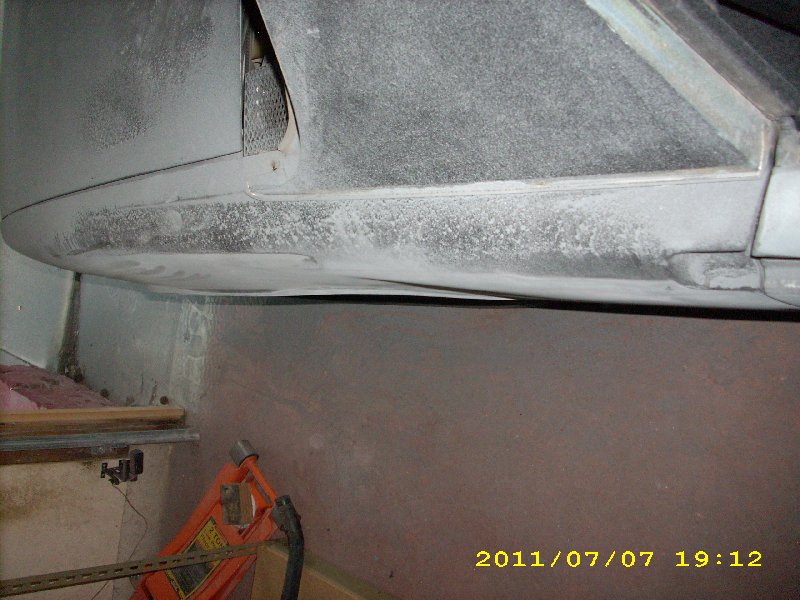 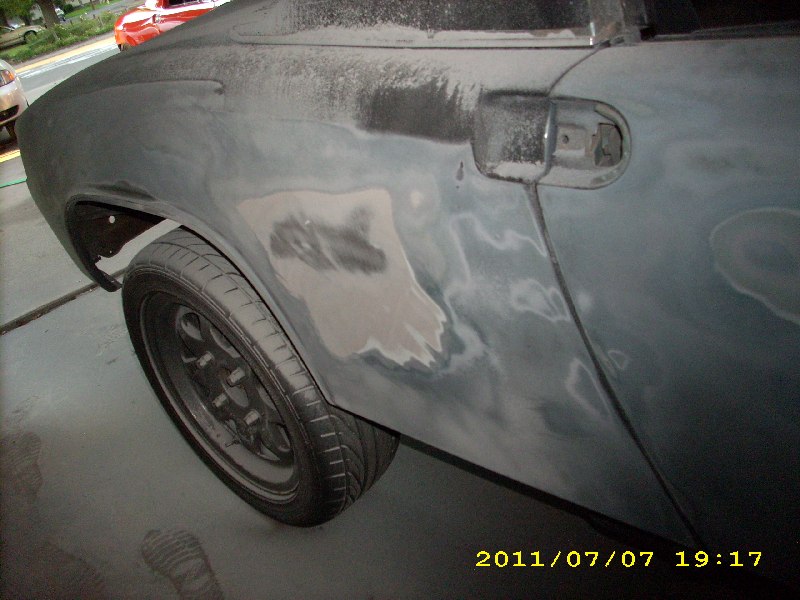
|
   |

 
|
| Andyrew |
Jul 7 2011, 10:44 PM
Post
#42
|
|
Spooling.... Please wait Group: Members Posts: 13,376 Joined: 20-January 03 From: Riverbank, Ca Member No.: 172 Region Association: Northern California |
Lots of dust. Thats my size 13 for reference.
Attached image(s) 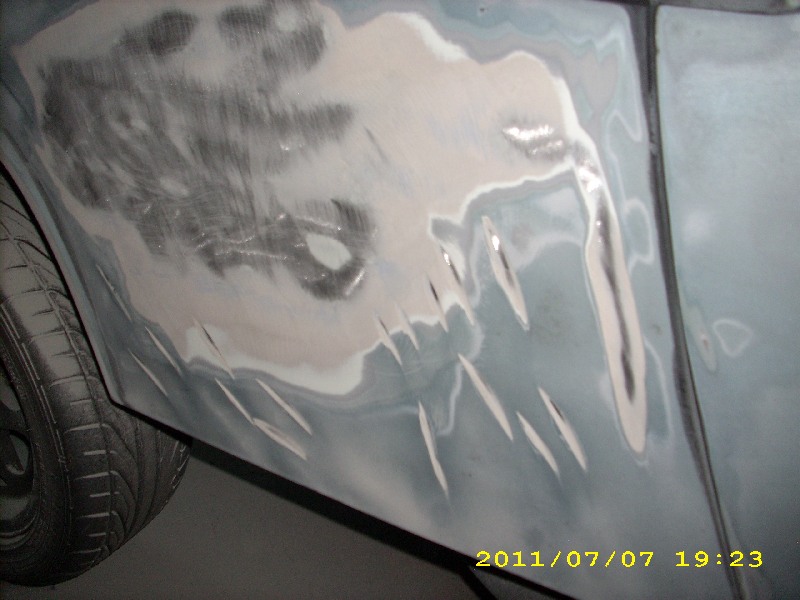 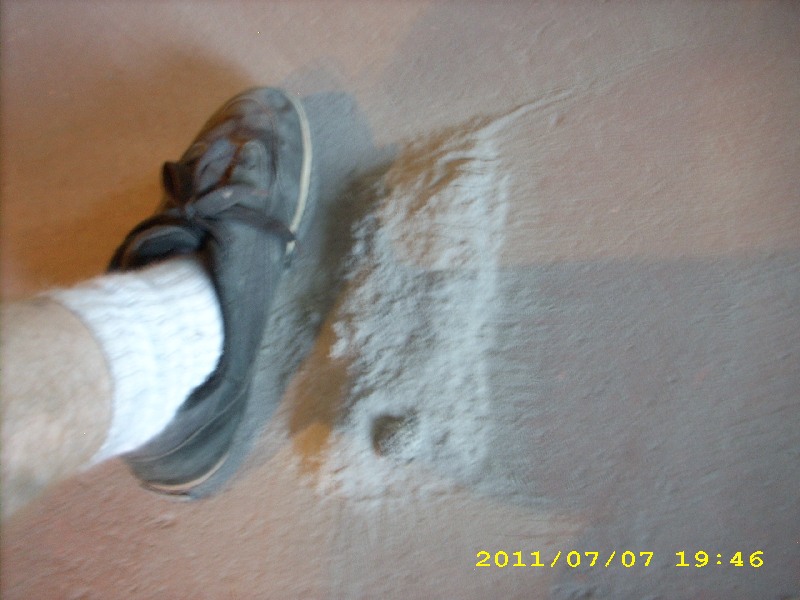 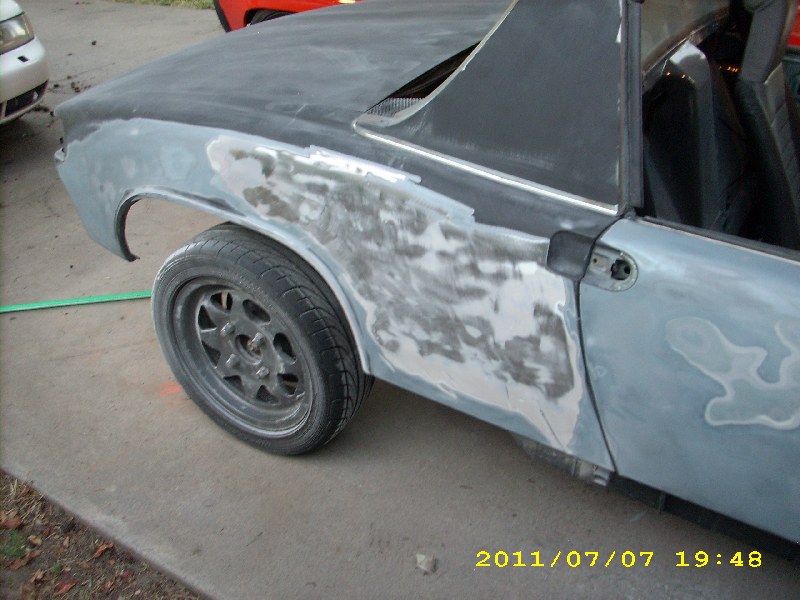
|
|
|
|
| malaga_red75 |
Jul 8 2011, 09:30 AM
Post
#43
|
|
'74 2.5L N/A Subie Group: Members Posts: 454 Joined: 5-March 06 From: Menlo Park, CA Member No.: 5,674 Region Association: None |
Progress looks great! Excited about tomorrow. I'll PM you today about details. Ill also most likely bring over the rest of the parts tomorrow and just have you fill the bumpers. My uncle is on dissability for his back right now and can only work a little bit at a time.
|
|
|
|
| Andyrew |
Jul 8 2011, 10:12 AM
Post
#44
|
|
Spooling.... Please wait Group: Members Posts: 13,376 Joined: 20-January 03 From: Riverbank, Ca Member No.: 172 Region Association: Northern California |
The bumpers should be easy. Should be no more than a couple hours for both.
Bring your checkbook (IMG:style_emoticons/default/smile.gif) Were going to have to go shopping for paint supplies. Its possible that we may lay down some primer tomorrow and I dont think I have enough primer epoxy. |
|
|
|
| Andyrew |
Jul 11 2011, 09:18 AM
Post
#45
|
|
Spooling.... Please wait Group: Members Posts: 13,376 Joined: 20-January 03 From: Riverbank, Ca Member No.: 172 Region Association: Northern California |
This work was from Saturday.
Peter came over, we went and picked up some supplies and talked about a gameplan. We successfully rolled the rear fenders, and in doing so it eliminated the oil canning issue that we were having. The fenders need a little hammer and dolly work, but i'll do that after stripping them a little more (Specifically the Pass side), Overall they really look good. Front turn signal lenses are welded up and the bumpers are ground to metal and ready for me to finish welding the holes and then a little bit of filler and primer. They were tweaked pretty good, by the holes I welded, but straightened them. Peter also sanded the rear trunk down most of the way. We decided to go ahead and lay the filler down now, then i'll lay primer filler and finish the bodywork, then i'll lay primer epoxy to seal everything up and then paint over that. This eliminates the first layer of epoxy I was going to do but then realized that there really is no point to it. And here are the pics! Attached image(s) 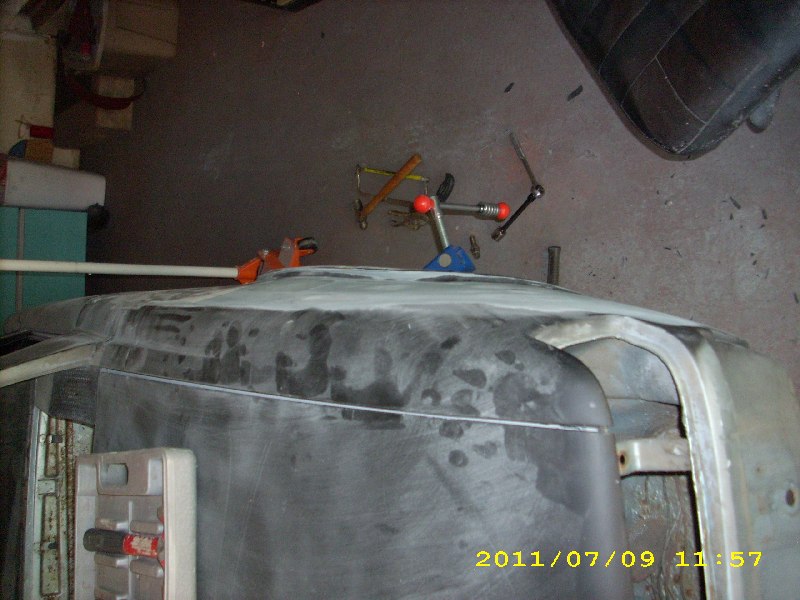 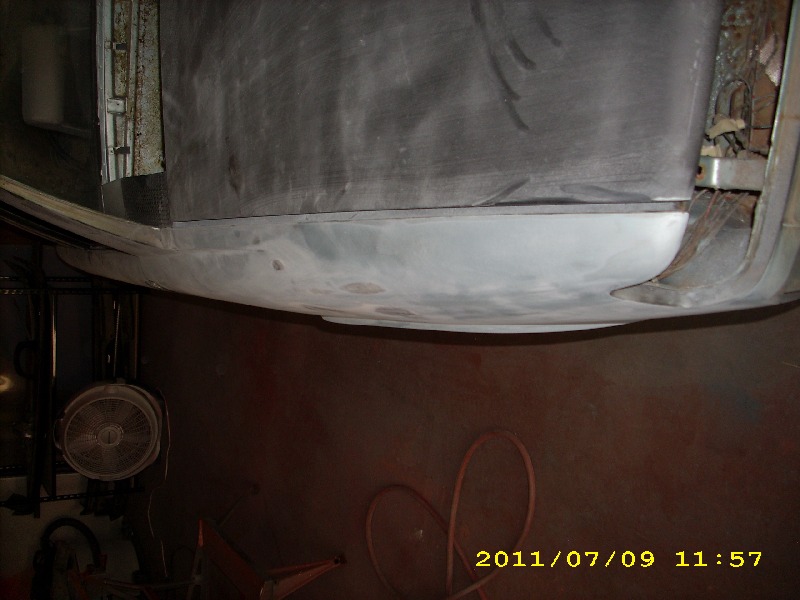 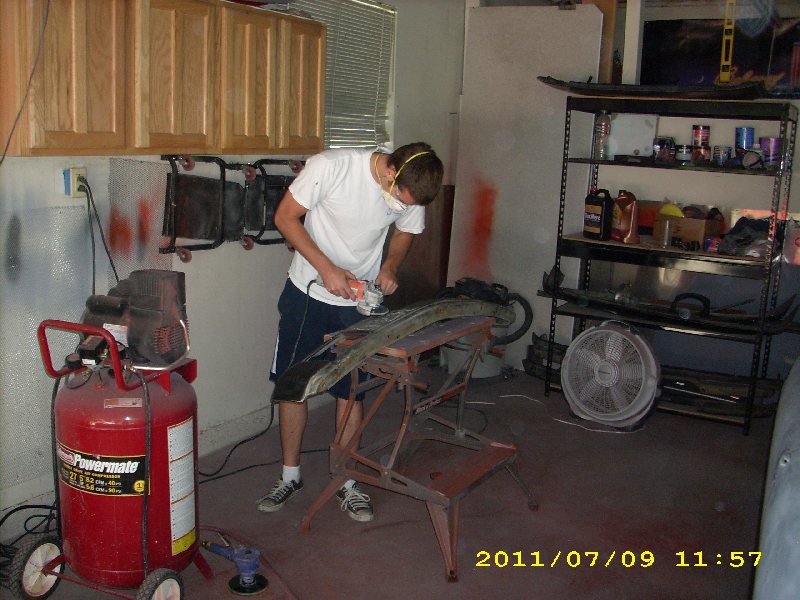 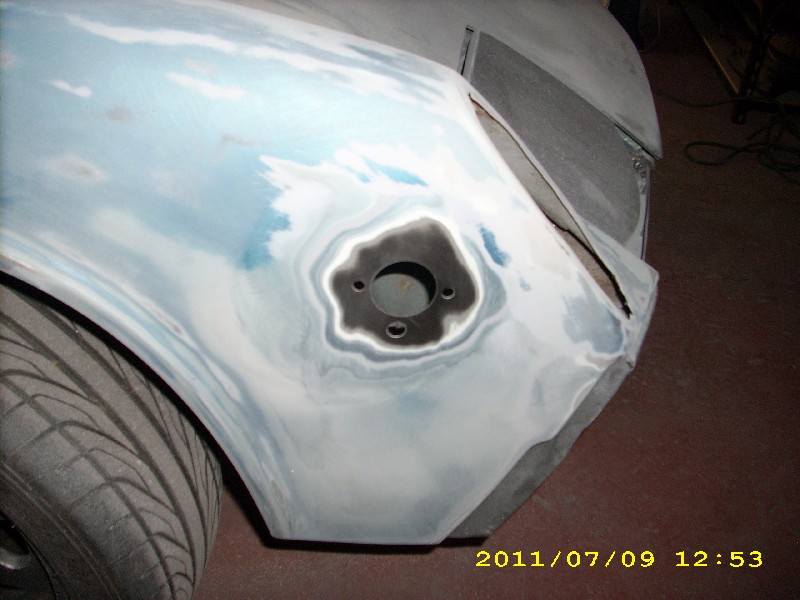 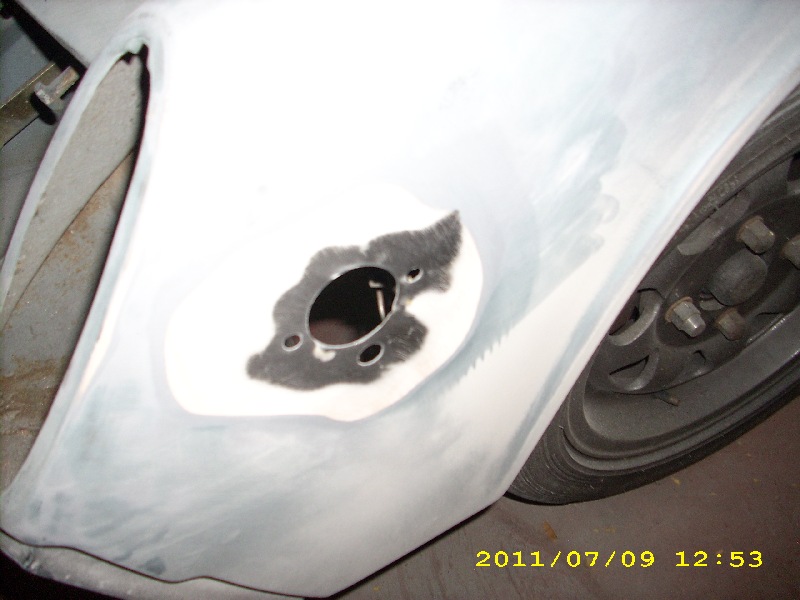
|
|
|
|
| Andyrew |
Jul 11 2011, 09:19 AM
Post
#46
|
|
Spooling.... Please wait Group: Members Posts: 13,376 Joined: 20-January 03 From: Riverbank, Ca Member No.: 172 Region Association: Northern California |
Next
Attached image(s) 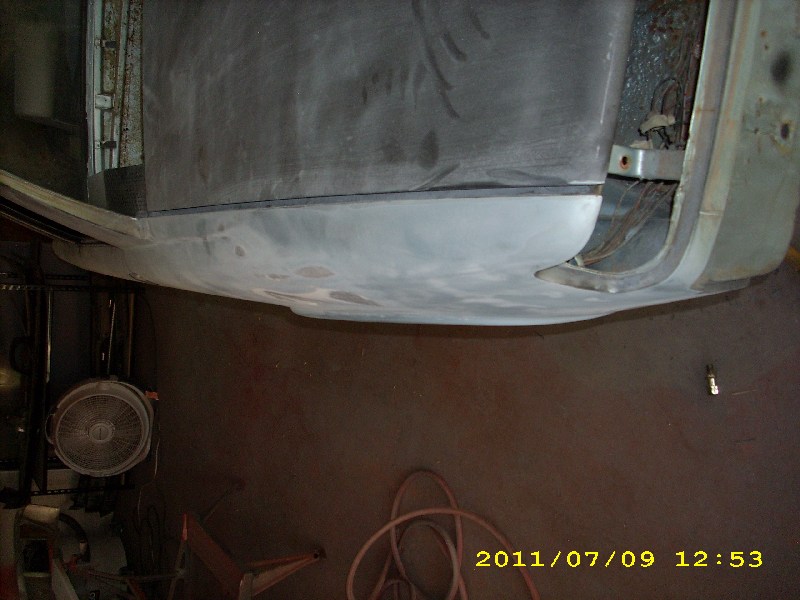 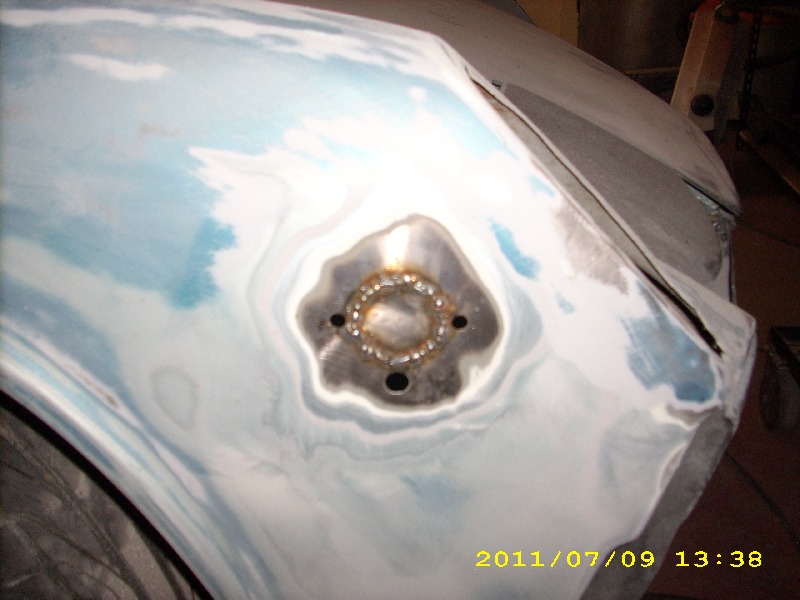 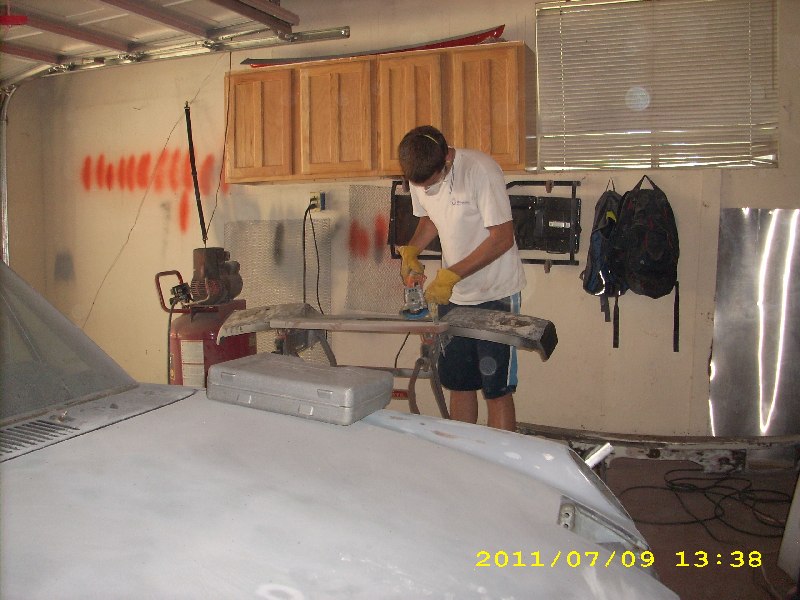 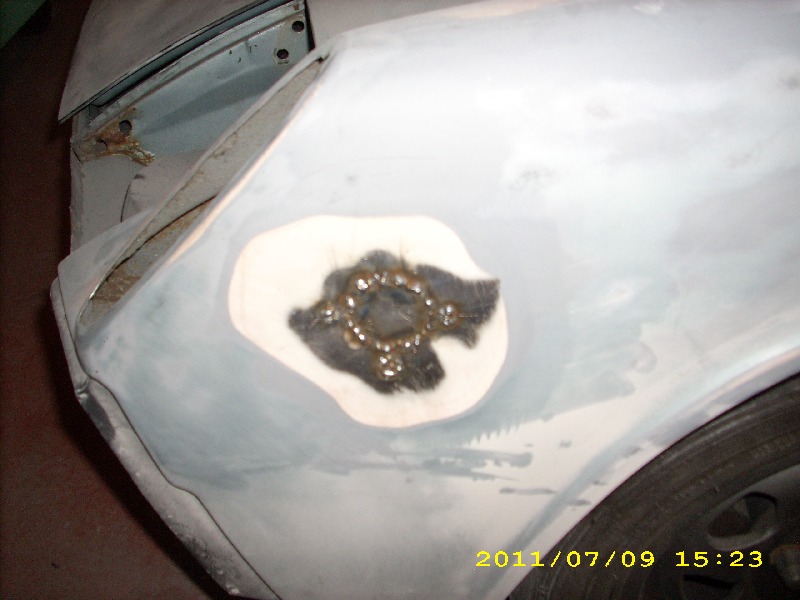 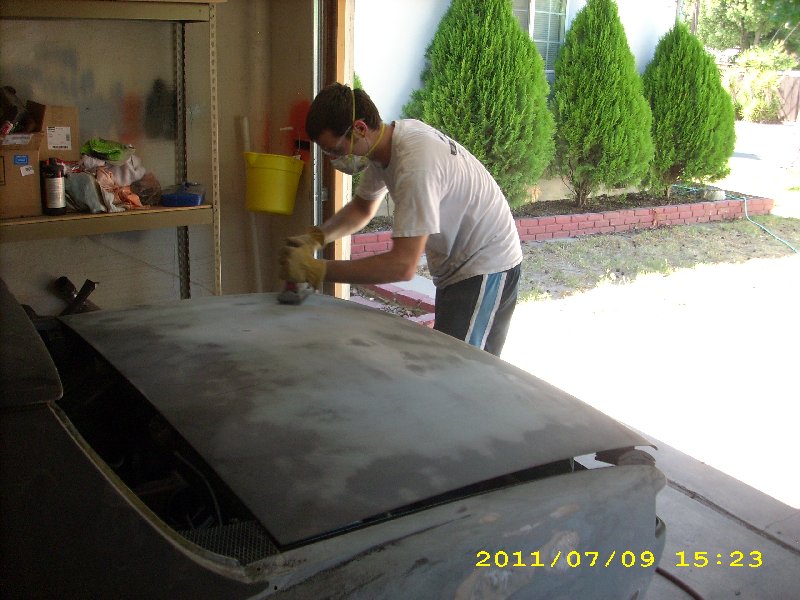
|
|
|
|
| Andyrew |
Jul 11 2011, 09:21 AM
Post
#47
|
|
Spooling.... Please wait Group: Members Posts: 13,376 Joined: 20-January 03 From: Riverbank, Ca Member No.: 172 Region Association: Northern California |
Last.
I started working on filling the bumper, but I got stopped when the fiancee came back from her dress shopping trip. BTW, 4 holes are filled, I just only got a pic of one side. We decided to go ahead and fill the tow hook hole but i'll probably get to that tonight. Attached image(s) 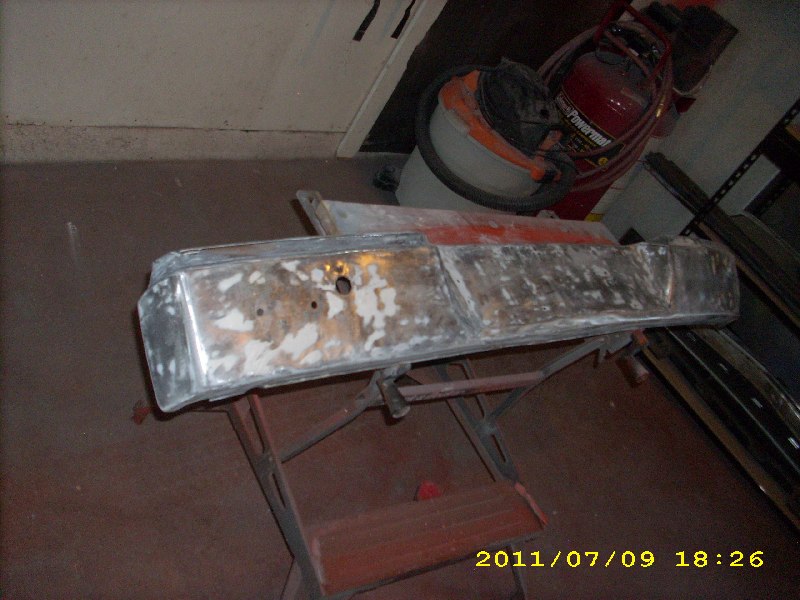 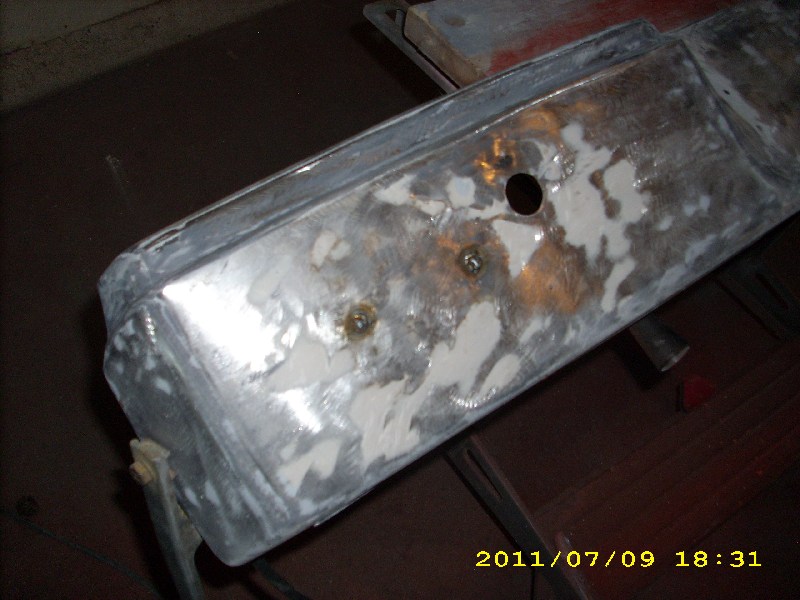 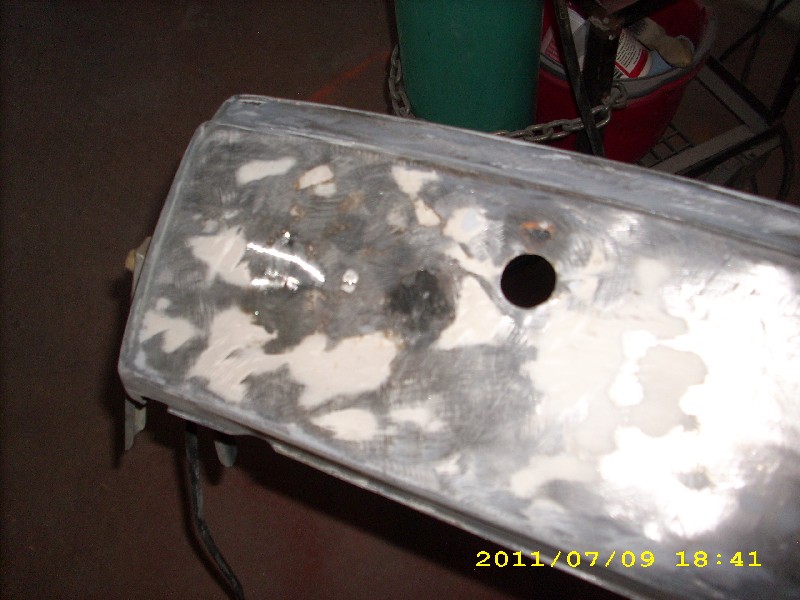
|
|
|
|
| RiqueMar |
Jul 11 2011, 09:33 AM
Post
#48
|
|
Enrique Allen Mar Group: Members Posts: 2,169 Joined: 28-August 08 From: San Diego, CA Member No.: 9,478 Region Association: Southern California |
Looks good guys! Your making really good time!
Peter, I like that you decided to fill the front turn signal holes, I think you'll be really happy with it! Are you going with Euro turn signals between the door and wheel? |
|
|
|
| jonferns |
Jul 11 2011, 10:14 AM
Post
#49
|
|
Advanced Member Group: Members Posts: 2,081 Joined: 29-March 07 From: New Jersey Member No.: 7,631 Region Association: North East States |
Great thread, and great work! Can't wait to see some paint (IMG:style_emoticons/default/popcorn[1].gif)
|
|
|
|
| malaga_red75 |
Jul 11 2011, 02:36 PM
Post
#50
|
|
'74 2.5L N/A Subie Group: Members Posts: 454 Joined: 5-March 06 From: Menlo Park, CA Member No.: 5,674 Region Association: None |
QUOTE(RiqueMar @ Jul 11 2011, 08:33 AM)  Looks good guys! Your making really good time! Peter, I like that you decided to fill the front turn signal holes, I think you'll be really happy with it! Are you going with Euro turn signals between the door and wheel? Thanks!! I am also very excited the progress. A lot quicker than I thought, but it is still getting done correctly. Andrew really knows his stuff (at least he makes me think that he does) haha. I am also very excited about filling the holes. I realized that if I didn't I would need to get new lenses and seals and the cost of that was more than the cost of Andrew filling the holes, a no brainer decision. I will not be adding in the euro turn signals, it will just be smooth and flat. can't wait!!! I will be sanding/grinding down the valences before next weekend, so i will post pictures when i do that, hopefully tonight or tomorrow. also, andrew- I was going to start painting the chrome pieces, but I forgot what you said about prepping them. 180 grit? or scotch brite? primer then flat black? or just straight to black. -peter |
|
|
|
| Andyrew |
Jul 11 2011, 03:24 PM
Post
#51
|
|
Spooling.... Please wait Group: Members Posts: 13,376 Joined: 20-January 03 From: Riverbank, Ca Member No.: 172 Region Association: Northern California |
Anywhere between 180-400 grit should be good, if you have scotch brite pads or some steel wool that should work.. They only need to be scuffed up just a tad to clean off any polish and give the paint somewhere to bite.
Just painting them with the black should be fine. Put a medium coat on them then let them sit in the sun for about a week, then bring them in the garage (aka let them cool off) and spray them again with another medium to heavy coat and let that sit out in the sun until your ready to put the pieces on. Oh and you should straighten them up as best you can. If you need help with that bring it with you and i'll help. This process should bake the paint on really good or show you if you'll have any issues with the paint bubbling after getting really hot in the sun. No need for primer with the rattle can paint as it sticks pretty good to aluminum, especially when baked on. At least I didnt have any problems. |
|
|
|
| Mike Bellis |
Jul 11 2011, 05:58 PM
Post
#52
|
|
Resident Electrician Group: Members Posts: 8,345 Joined: 22-June 09 From: Midlothian TX Member No.: 10,496 Region Association: None |
I thought we were going to see detailed before and after pics of the rolled fenders? I'm glad I could help with the use of my roller. Progress looks good!
|
|
|
|
| Andyrew |
Jul 11 2011, 06:11 PM
Post
#53
|
|
Spooling.... Please wait Group: Members Posts: 13,376 Joined: 20-January 03 From: Riverbank, Ca Member No.: 172 Region Association: Northern California |
Mike,
Thank you very much for the use of your roller! It was awesome! I didnt get as good of pictures as I had hoped... I deleted most of them. Time stamp 1157 is before on the DR side and time stamp 1253 is after. I should have brought my camera lower to get a good profile shot. I'll get some shots tonight so you can see the stretch.. my little 1.8" screen on my camera doesnt show me much... Also Mike thank you for the emblem!!! I owe you one! |
|
|
|
| Andyrew |
Jul 11 2011, 11:14 PM
Post
#54
|
|
Spooling.... Please wait Group: Members Posts: 13,376 Joined: 20-January 03 From: Riverbank, Ca Member No.: 172 Region Association: Northern California |
Aaaand progress from today (IMG:style_emoticons/default/smile.gif)
Got an hour and a half in. Bumpers are filled, I noticed some cracks in the back that need to be welded for strength, but im running low on gas so I decided to stop and move onto trying out the bondo (plastic filler). Its a lot thinner than the stuff im used to which im used to because I typically thin my bondo anyways! I need some more sanding done, but the ruff work is done, maybe a hair more filler here or there. Attached image(s) 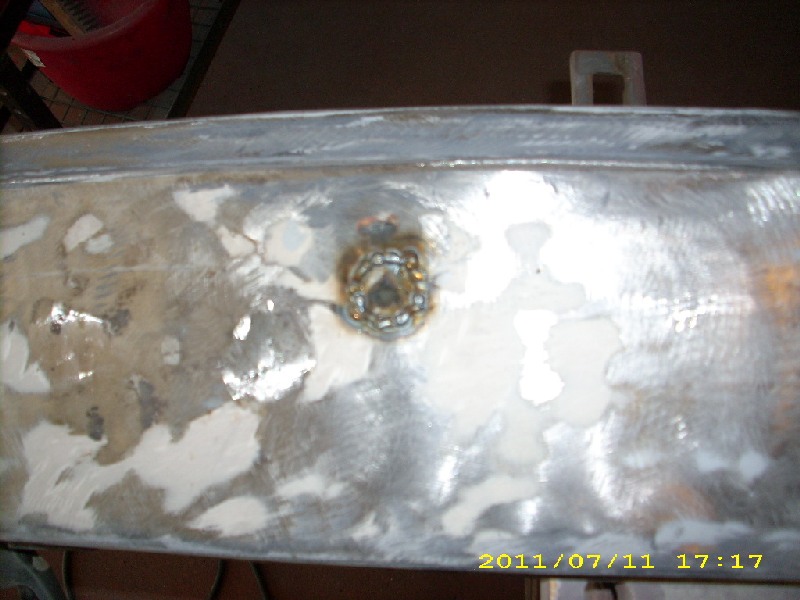 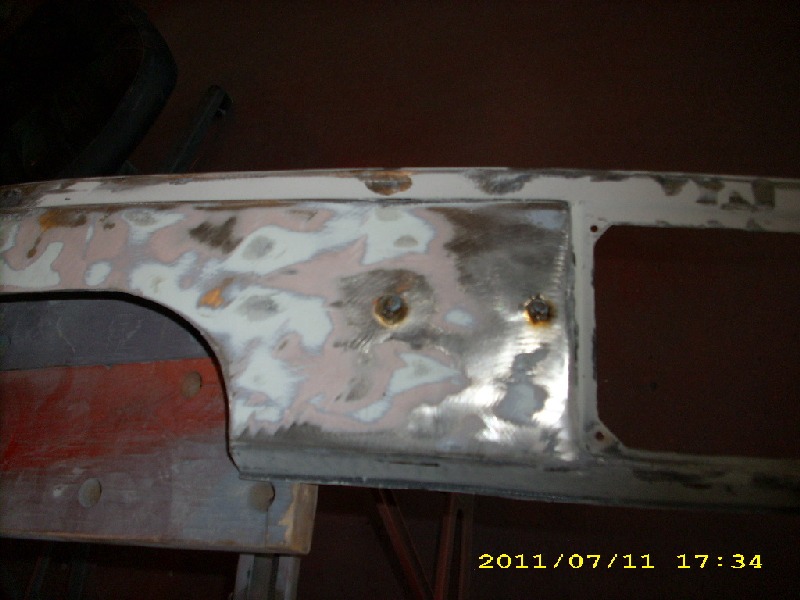 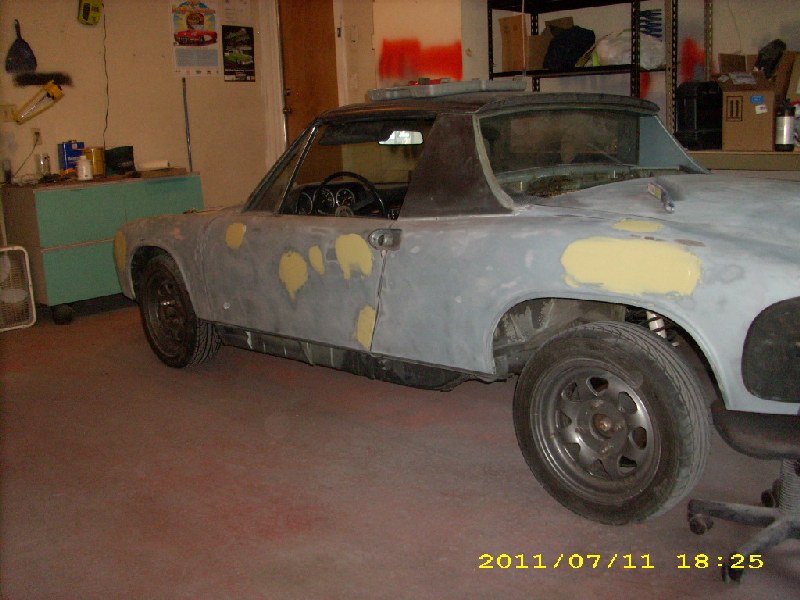 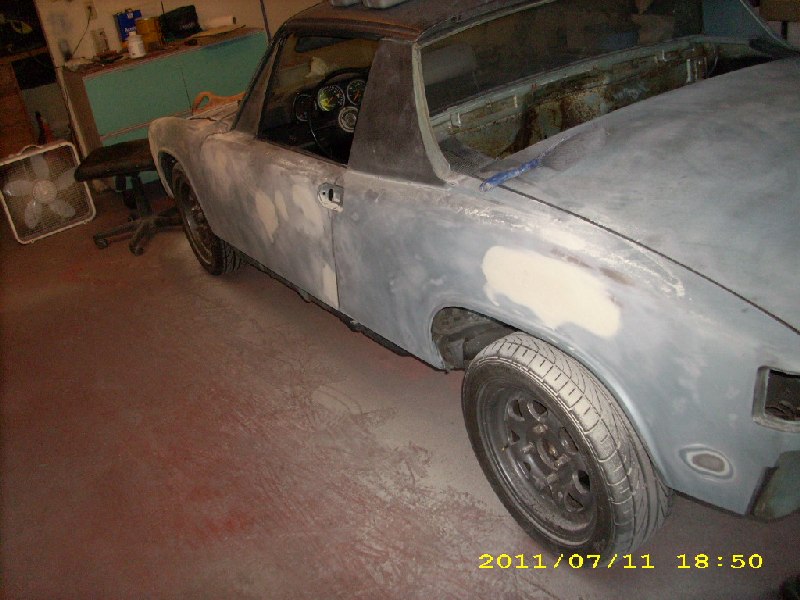 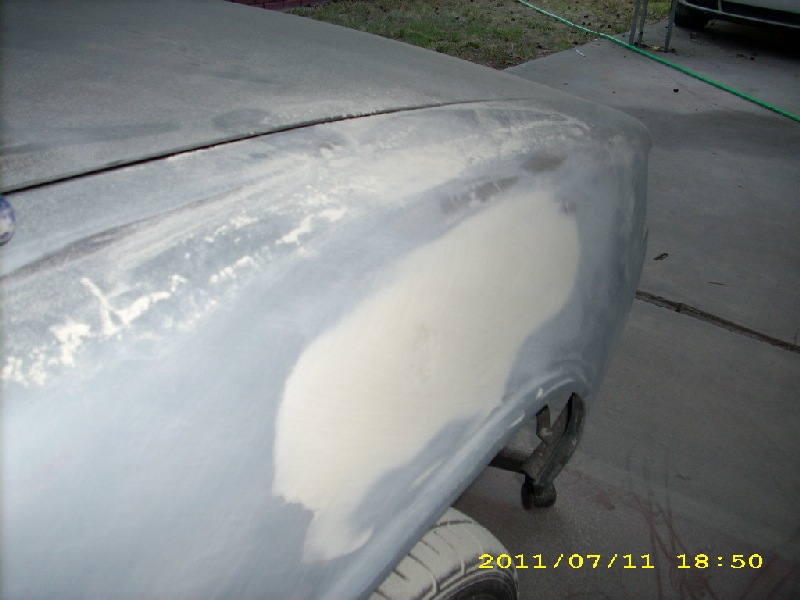
|
|
|
|
| Andyrew |
Jul 11 2011, 11:16 PM
Post
#55
|
|
Spooling.... Please wait Group: Members Posts: 13,376 Joined: 20-January 03 From: Riverbank, Ca Member No.: 172 Region Association: Northern California |
Last pic shows the fender rolled.
Attached image(s) 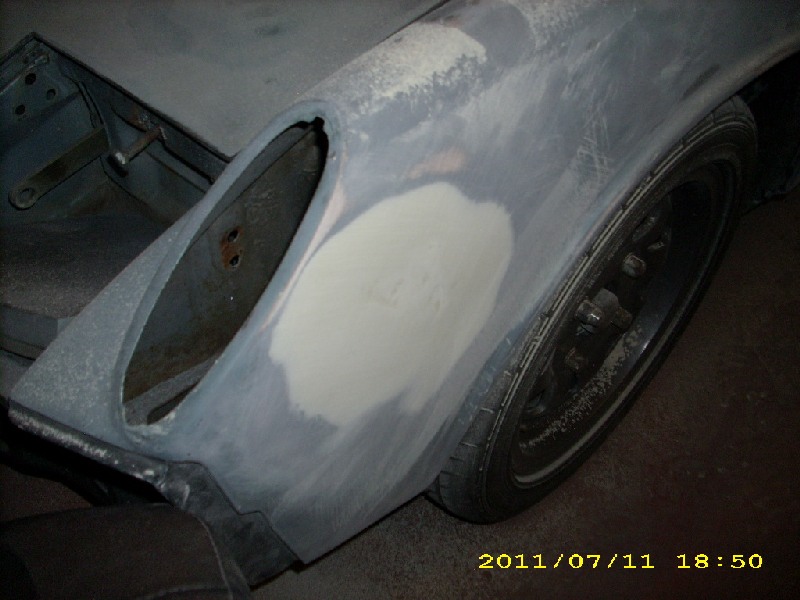 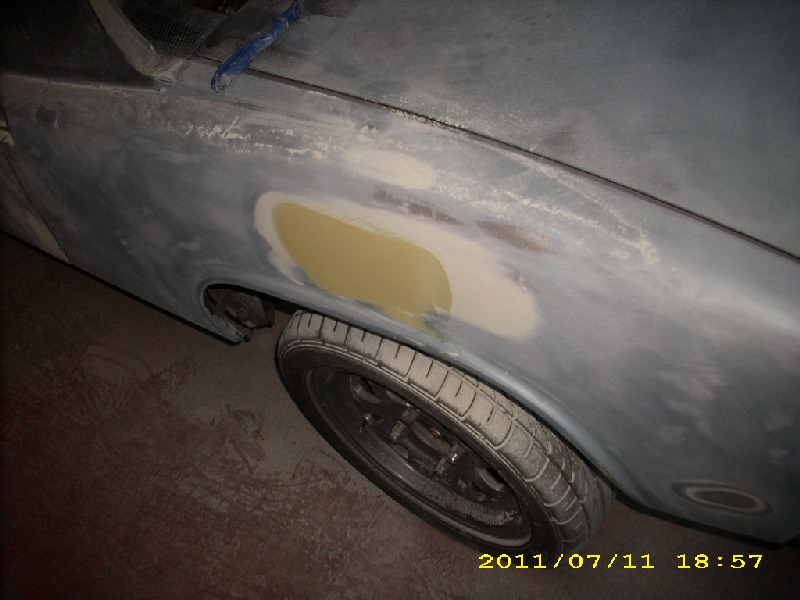 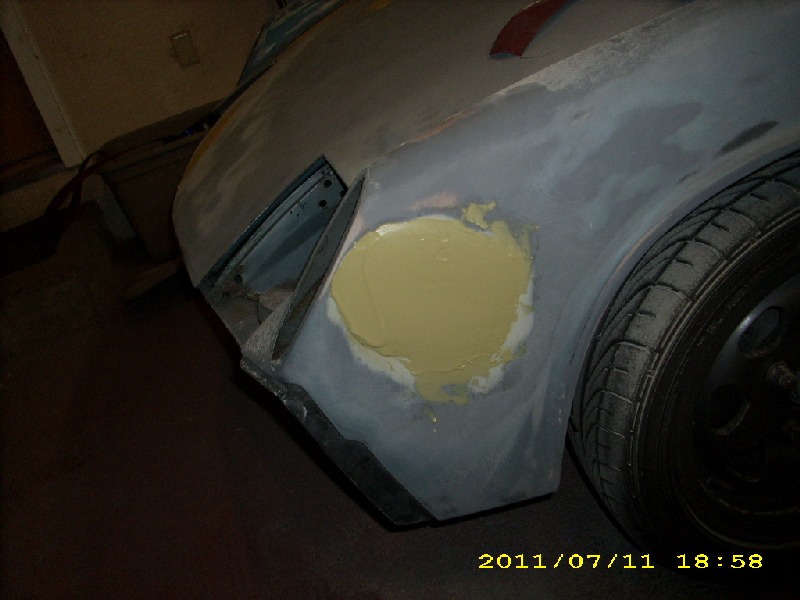 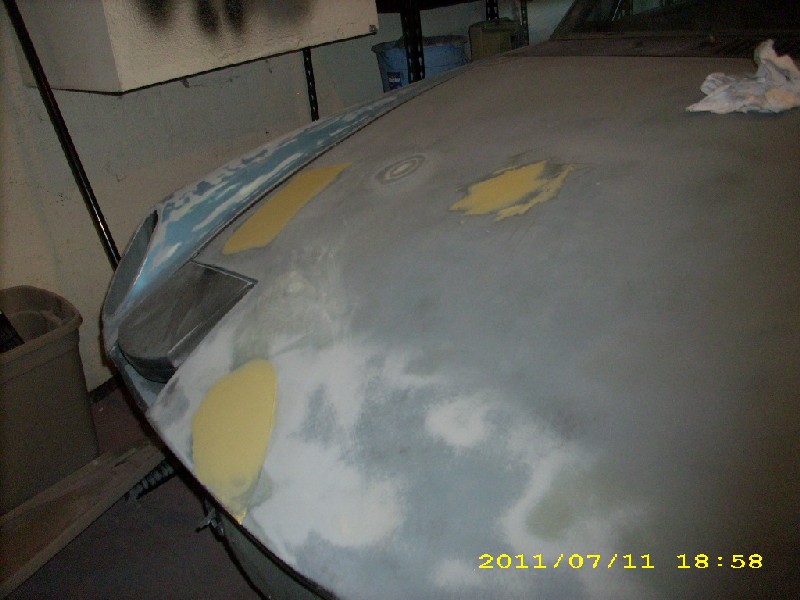 
|
|
|
|
| malaga_red75 |
Jul 11 2011, 11:26 PM
Post
#56
|
|
'74 2.5L N/A Subie Group: Members Posts: 454 Joined: 5-March 06 From: Menlo Park, CA Member No.: 5,674 Region Association: None |
looks great andrew!! I should be able to get to the bumpers tomorrow night.
keep up the great work! |
|
|
|
| Andyrew |
Jul 12 2011, 09:24 PM
Post
#57
|
|
Spooling.... Please wait Group: Members Posts: 13,376 Joined: 20-January 03 From: Riverbank, Ca Member No.: 172 Region Association: Northern California |
Spend another hour and a half tonight.
Sanded down the filler I put on last night and spent some time prepping the door some more then I put two applications of filler there (Sanded in between). Overall it looks pretty good. Got some work ahead of me tomorrow, Goal is to get the rear fender 100% ready for filler. Didnt get any pics of the middle or beginning of the process like yesterday.. But you guys get the drift. (IMG:style_emoticons/default/smile.gif) Also I threw some more filler in the Dr rear by the tail light but didnt get a pic of it.. Attached image(s) 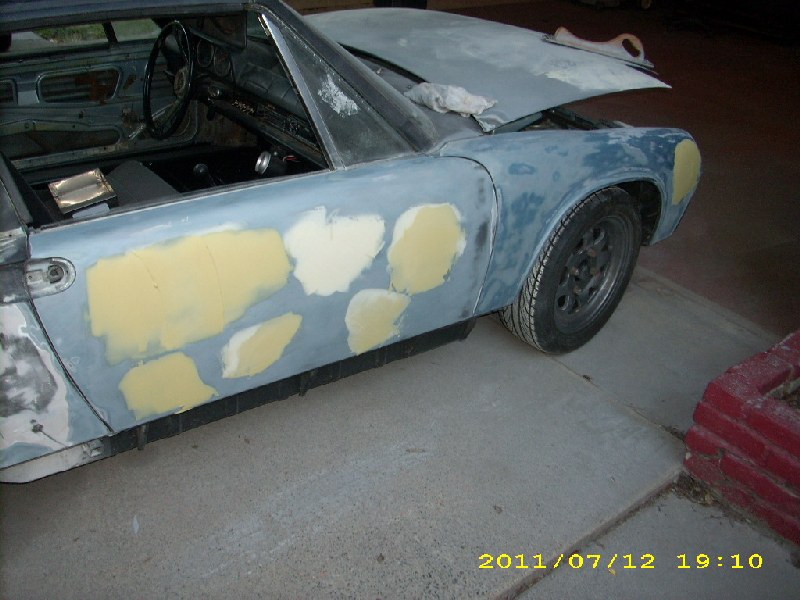 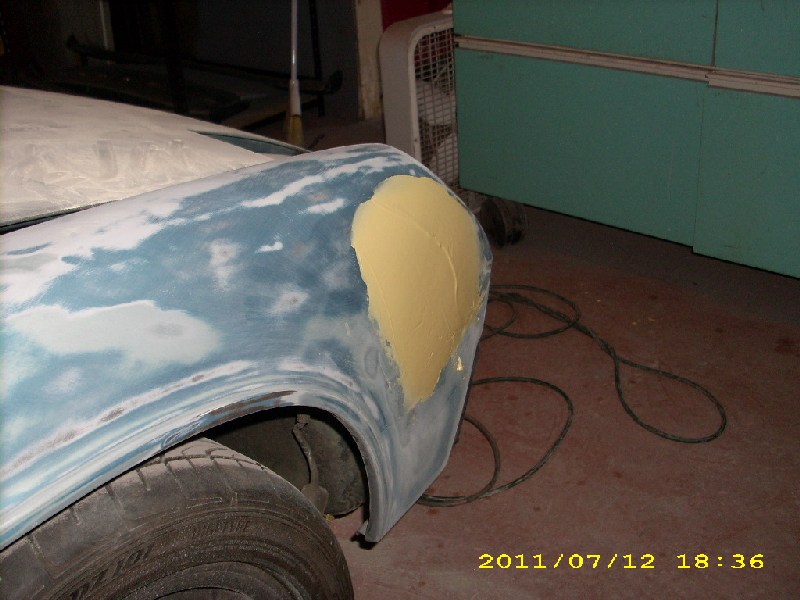 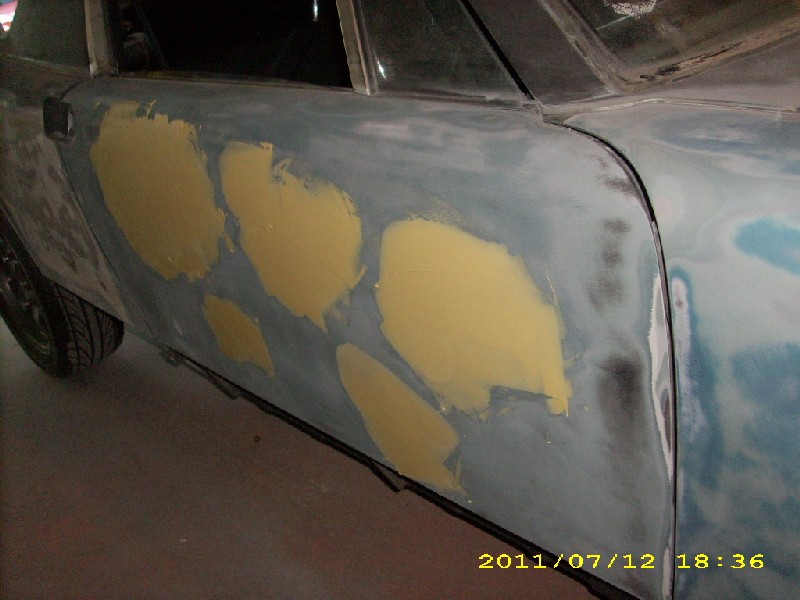
|
|
|
|
| nsr-jamie |
Jul 12 2011, 09:46 PM
Post
#58
|
|
914 guy in Japan Group: Members Posts: 1,182 Joined: 7-November 07 From: Nagoya, Japan Member No.: 8,305 Region Association: None |
Looking good !! (IMG:style_emoticons/default/beer.gif)
|
|
|
|
| malaga_red75 |
Jul 13 2011, 01:04 PM
Post
#59
|
|
'74 2.5L N/A Subie Group: Members Posts: 454 Joined: 5-March 06 From: Menlo Park, CA Member No.: 5,674 Region Association: None |
looks good andrew.
I stopped by the Porsche dealership after work yesterday and they didn't have a paint chip/color strip of the RS green. they just gave me the code, which I already knew. Did you go back to the paint shop and talk to them? They should be able to match to that code (2D8). I would really like to make sure that it is truly that color and not something that they tried to match just because it is such a unique color. Let me know. |
|
|
|
| Andyrew |
Jul 13 2011, 01:07 PM
Post
#60
|
|
Spooling.... Please wait Group: Members Posts: 13,376 Joined: 20-January 03 From: Riverbank, Ca Member No.: 172 Region Association: Northern California |
Havent talked with them yet. However I know the other paint shop in town DID find the code.. I dont know if they would be willing to work with them or not..
What about the paint shop that you know the owner of? Do you think you could look through his books? He'll probably be able to let you borrow that page or maybe the mix ratio? I'll see what I can do on my end. |
|
|
|
|
1 User(s) are reading this topic (1 Guests and 0 Anonymous Users)
0 Members:

|
Lo-Fi Version | Time is now: 4th June 2024 - 04:52 PM |
Invision Power Board
v9.1.4 © 2024 IPS, Inc.