|
|
|
Porsche, and the Porsche crest are registered trademarks of Dr. Ing. h.c. F. Porsche AG.
This site is not affiliated with Porsche in any way. Its only purpose is to provide an online forum for car enthusiasts. All other trademarks are property of their respective owners. |
|
|

  |

| barada |
 Jul 23 2011, 05:08 PM Jul 23 2011, 05:08 PM
Post
#1
|
|
Member  Group: Members Posts: 257 Joined: 5-October 08 From: Atlanta Member No.: 9,613 Region Association: None |
Well Figured I would start a build Thread to share with you guys. With all the cool builds going on I had been thinking about posting.
I bought a 74 914 from this board a few years ago and have really enjoyed it as it arrived. It is a 1.8 and had served as my semi daily driver (weather dependant-not just rain when it is 95 I need AC).As I added a couple more cars this one just sat and sat. All last summer I only drove it 300 miles. At the beginning of the year I started thinking it would be worth putting some time and money into and get it how I wanted to begin with. Car was originally White but had been resprayed Black long ago. When I got it the paint was ok but was starting to lift on the edges and was cracking in certain places. The paint shop who did it just lifted the front trunk and sprayed widly inside there so the quality was terrible. I have a good friend who is a painter for Delta and was a hi-end painter for about 15 yrs for a local shop, but moved to Florida for about 4 years. He moved back and got in my ear about helping me with the 914. He works 3 days a week so he has a lot of free time. So about two months ago my son and I started tearing it down. we found a little rust, I knew the Hell hole was going to need attention as well as the rear passenger floor corner. The body wound up being very straight as we stripped it. Thanks Phillip 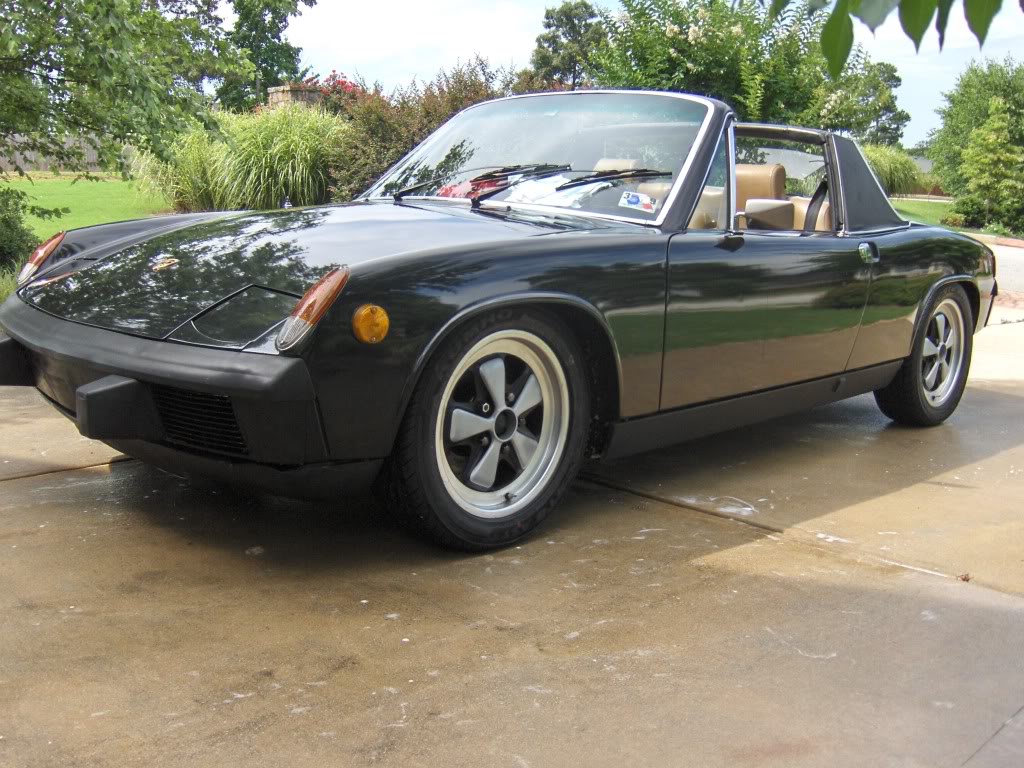  |
   |

 
|
| barada |
Jul 23 2011, 05:22 PM
Post
#2
|
|
Member Group: Members Posts: 257 Joined: 5-October 08 From: Atlanta Member No.: 9,613 Region Association: None |
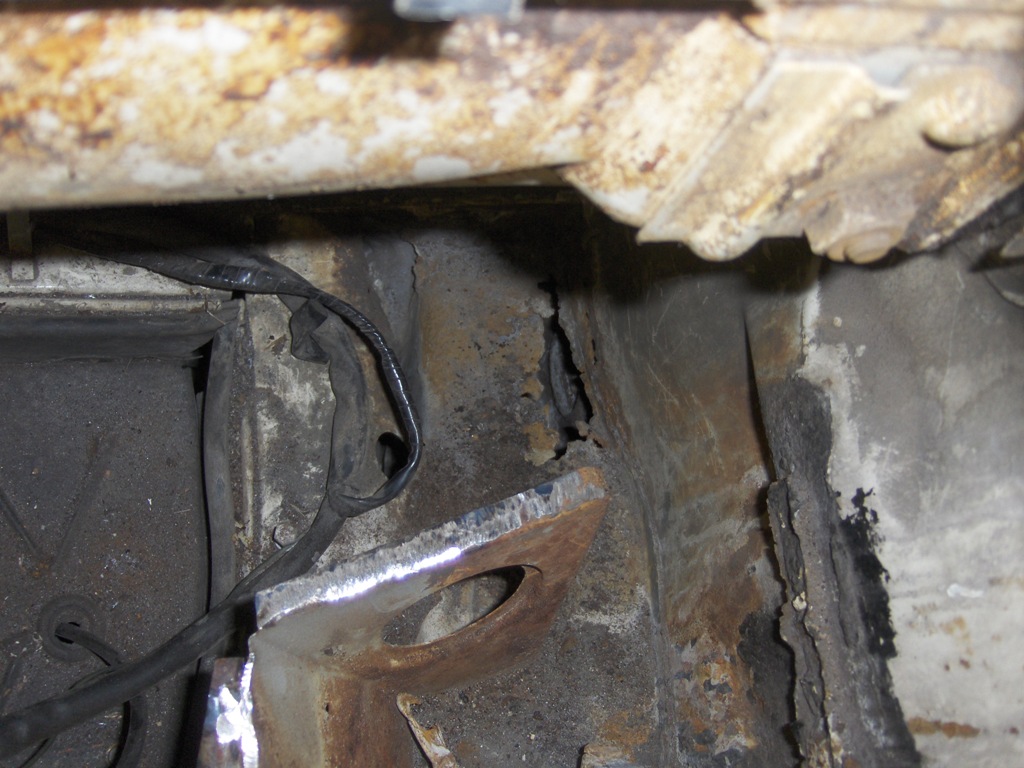
Had to address the rust. Also had to deal with a leaking rear main seal so out comes the engine and in goes some welding in the engine compartment. I am no welder and reached out to Scott H 1968Cayman on here to lend a hand on the welding.
I am not going for a concours build but wanted to fix it and not have to think about it again. I have TONS of pics but will spare you guys on each stage. First is the floor corner. We had to build the inner and outer firewall right here and a very small patch in the Long. 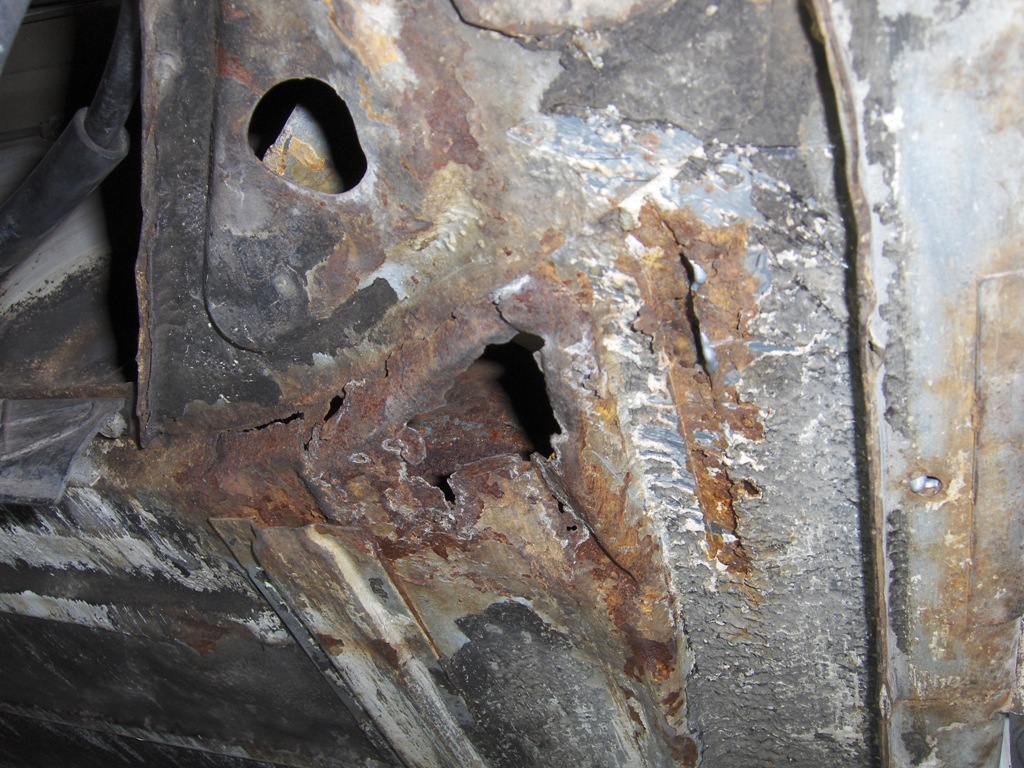 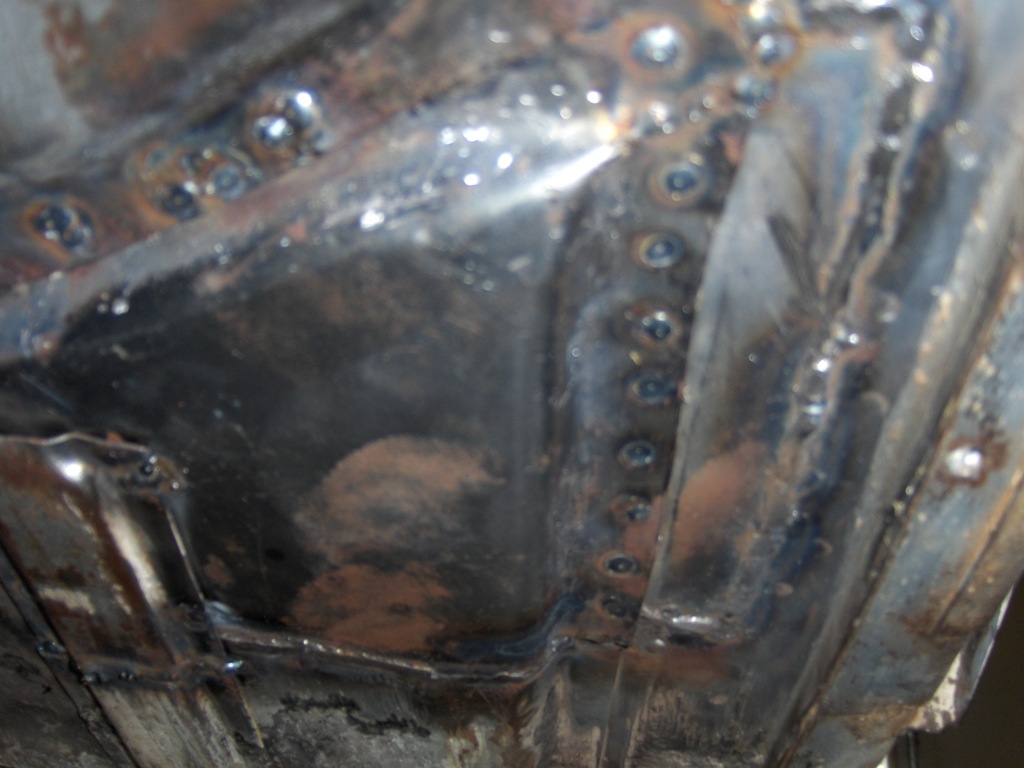 |
|
|
|
| barada |
Jul 23 2011, 05:24 PM
Post
#3
|
|
Member Group: Members Posts: 257 Joined: 5-October 08 From: Atlanta Member No.: 9,613 Region Association: None |
  |
|
|
|
| barada |
Jul 23 2011, 05:26 PM
Post
#4
|
|
Member Group: Members Posts: 257 Joined: 5-October 08 From: Atlanta Member No.: 9,613 Region Association: None |
  |
|
|
|
| barada |
Jul 23 2011, 05:29 PM
Post
#5
|
|
Member Group: Members Posts: 257 Joined: 5-October 08 From: Atlanta Member No.: 9,613 Region Association: None |
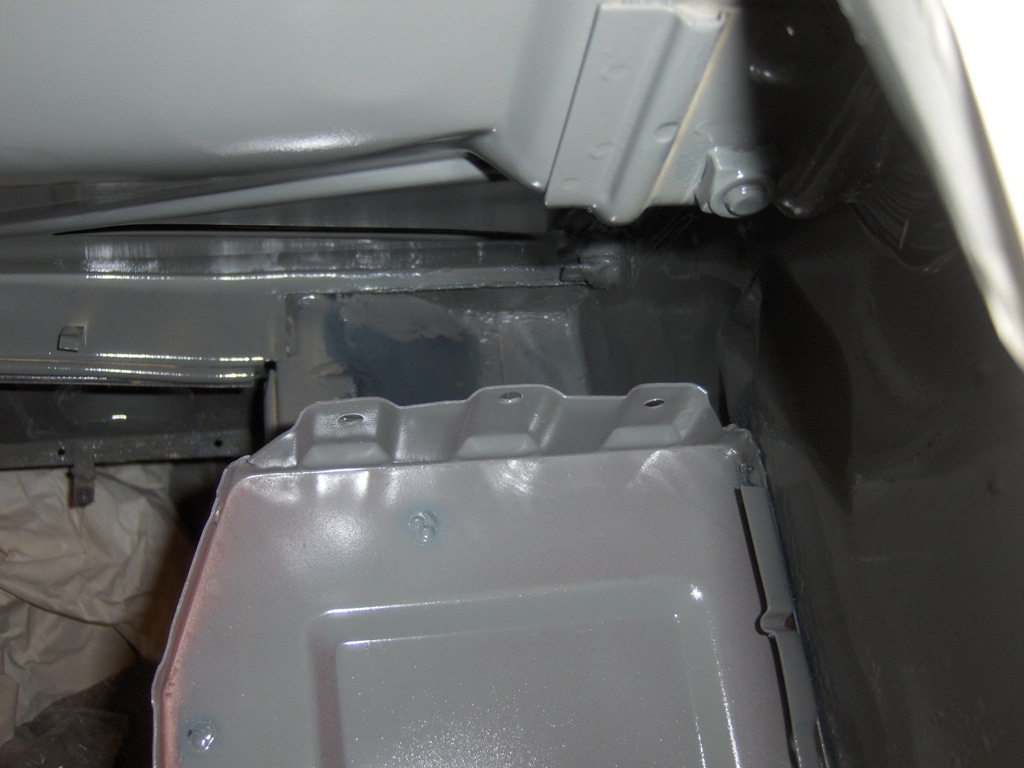
A lot of steps missing. We dug around and addressed all the rust we could find
 Attached image(s) 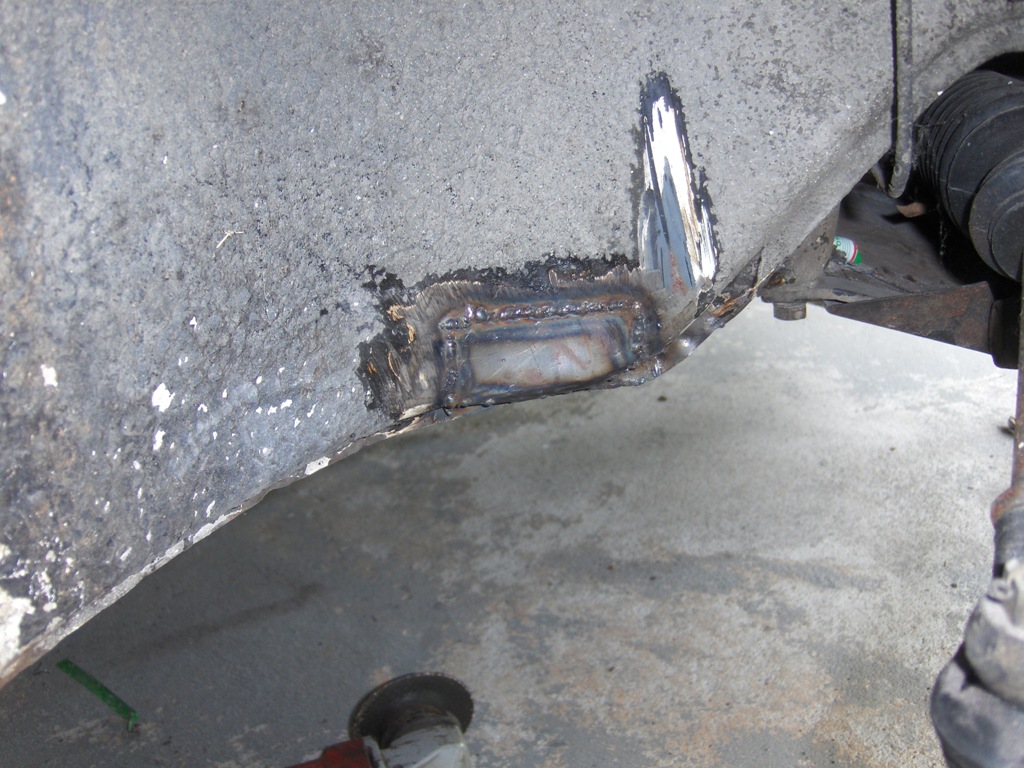
|
|
|
|
| barada |
Jul 23 2011, 05:31 PM
Post
#6
|
|
Member Group: Members Posts: 257 Joined: 5-October 08 From: Atlanta Member No.: 9,613 Region Association: None |
And how it sat last night before the 15 hrs blocking today. I am going to resize so I can fit more pics.
Attached image(s) 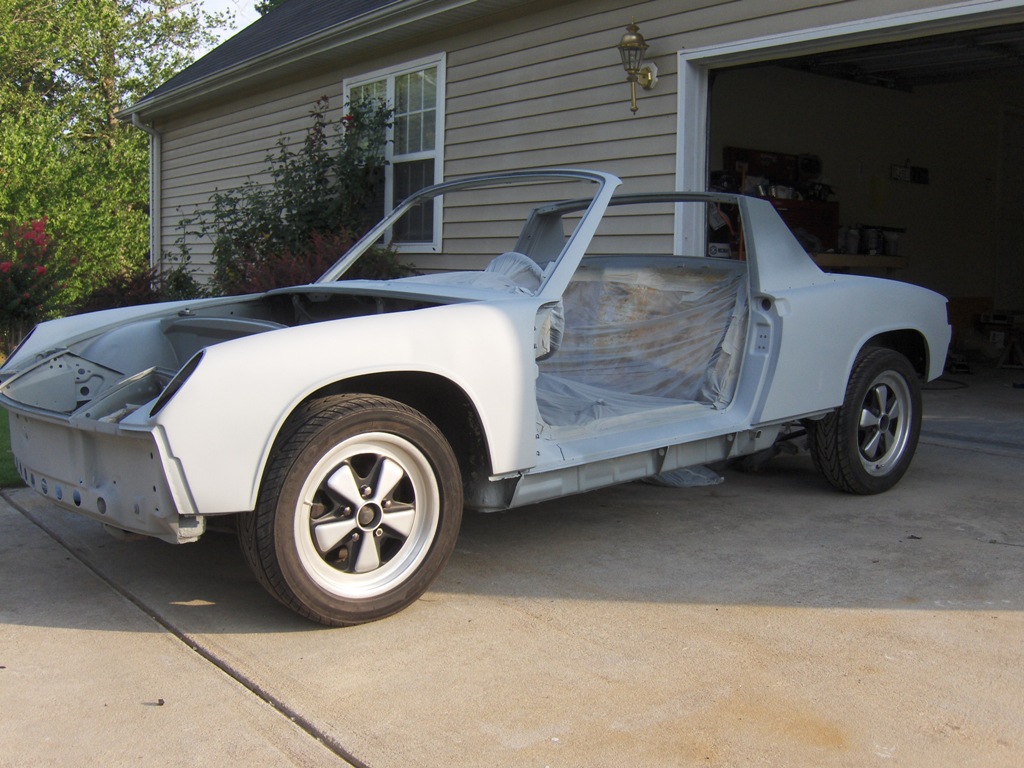
|
|
|
|
| trojanhorsepower |
Jul 23 2011, 06:47 PM
Post
#7
|
|
Senior Member Group: Members Posts: 861 Joined: 21-September 03 From: Marion, NC Member No.: 1,179 Region Association: None |
Look'n good! Charge on.
-Peter |
|
|
|
| barada |
Jul 23 2011, 07:54 PM
Post
#8
|
|
Member Group: Members Posts: 257 Joined: 5-October 08 From: Atlanta Member No.: 9,613 Region Association: None |
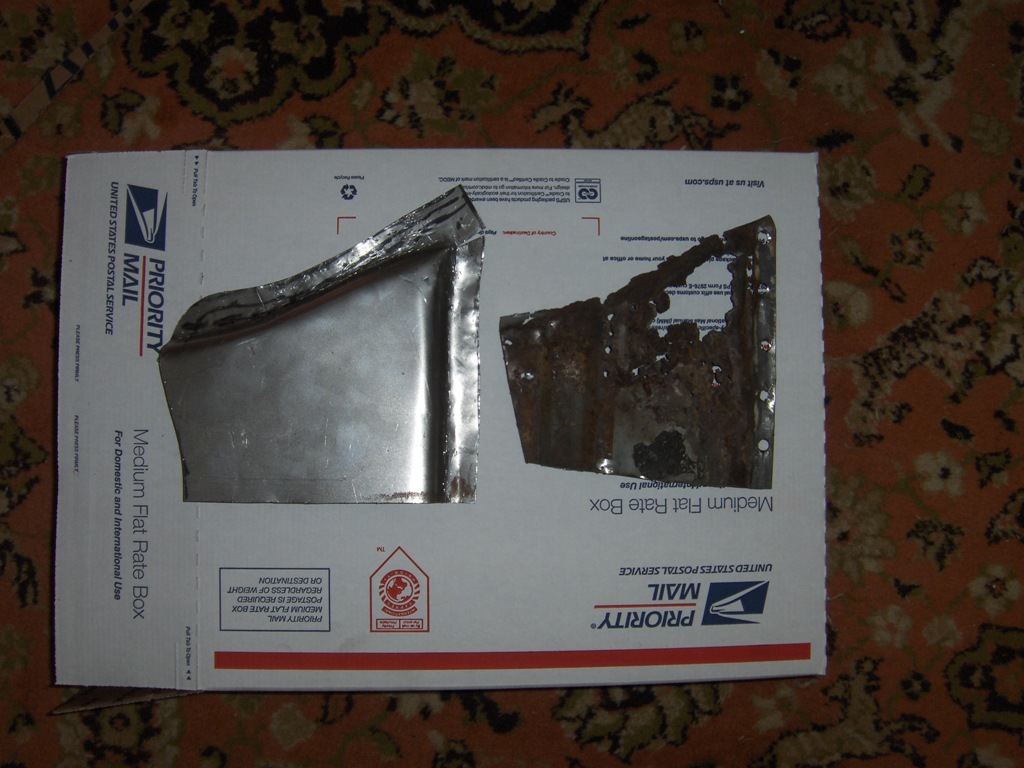
Got some not as big. This shows the process fixing the rust I had from dirt being wedged under the rocker. Pull those rockers and clean guys. This shows the steps we were doing to fix each spot.
Attached image(s)  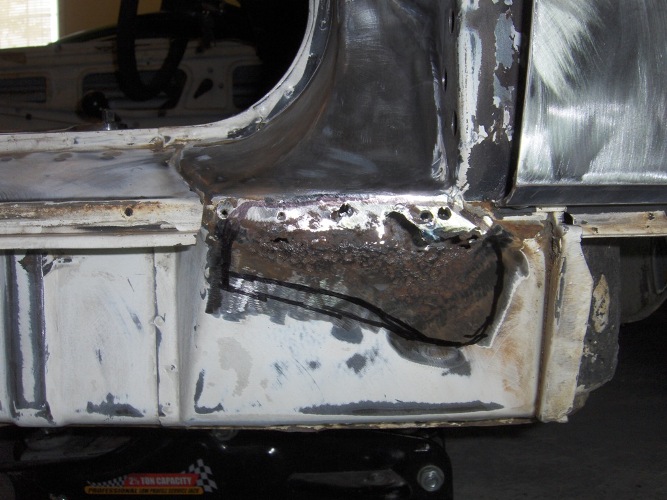 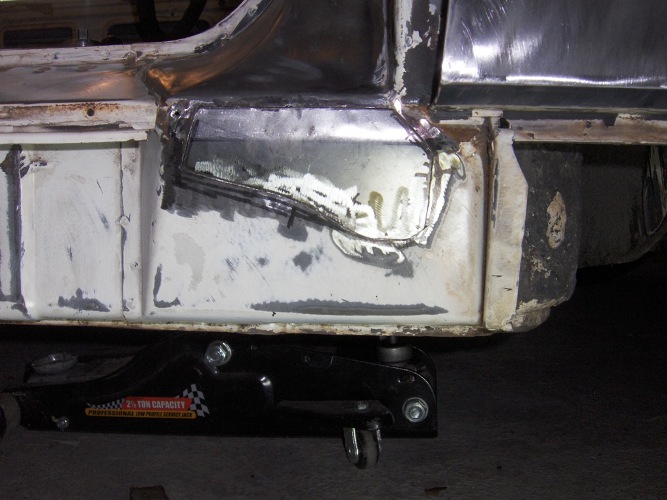 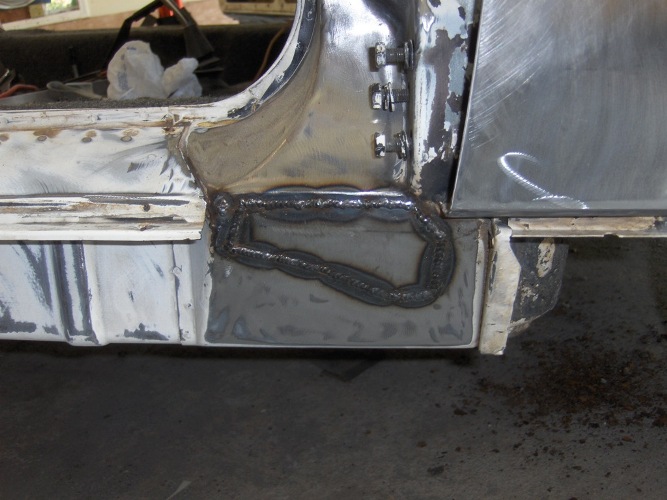
|
|
|
|
| barada |
Jul 23 2011, 07:55 PM
Post
#9
|
|
Member Group: Members Posts: 257 Joined: 5-October 08 From: Atlanta Member No.: 9,613 Region Association: None |
Finished product.
Attached image(s) 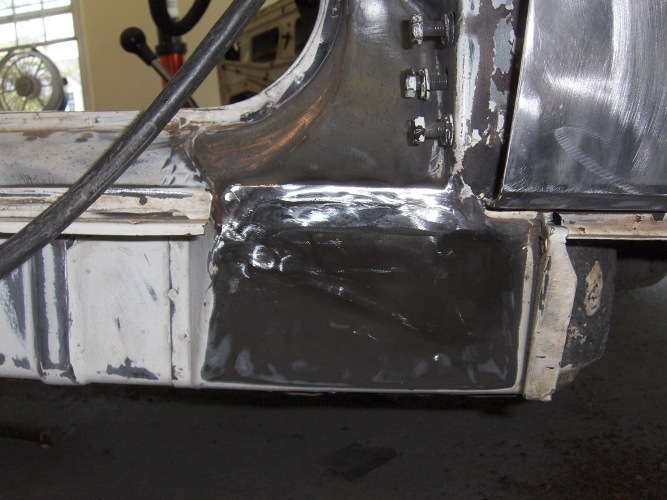 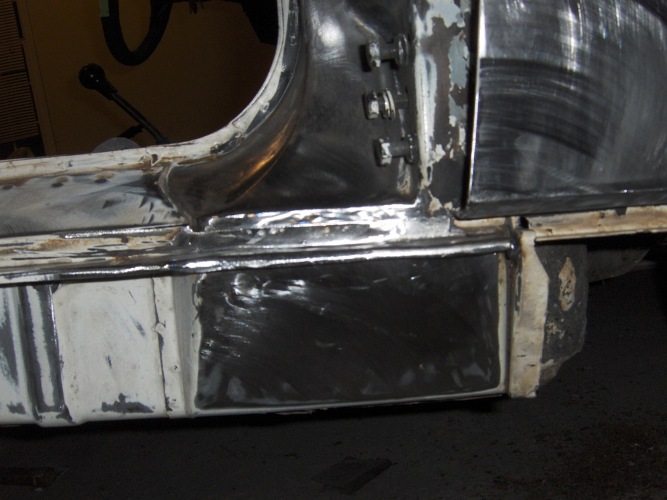
|
|
|
|
| barada |
Jul 23 2011, 07:57 PM
Post
#10
|
|
Member Group: Members Posts: 257 Joined: 5-October 08 From: Atlanta Member No.: 9,613 Region Association: None |
Engine clean up and engine bay clean up. Notice how it has the factory white paint while the car was black.
Attached image(s) 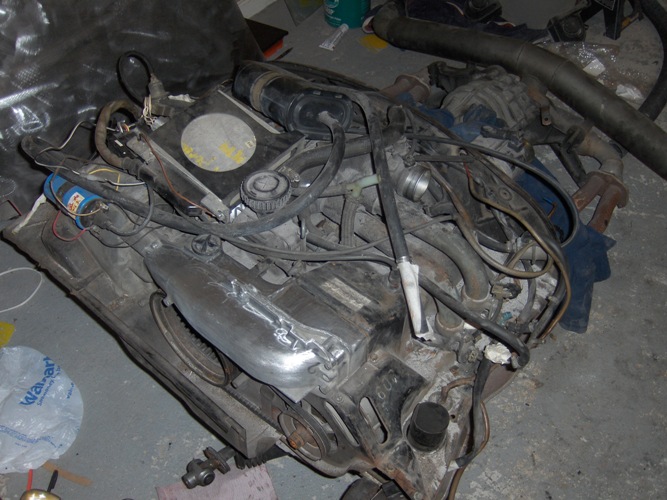 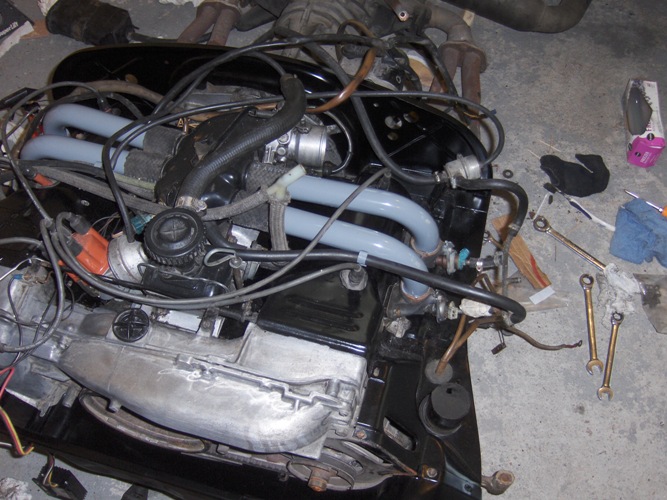 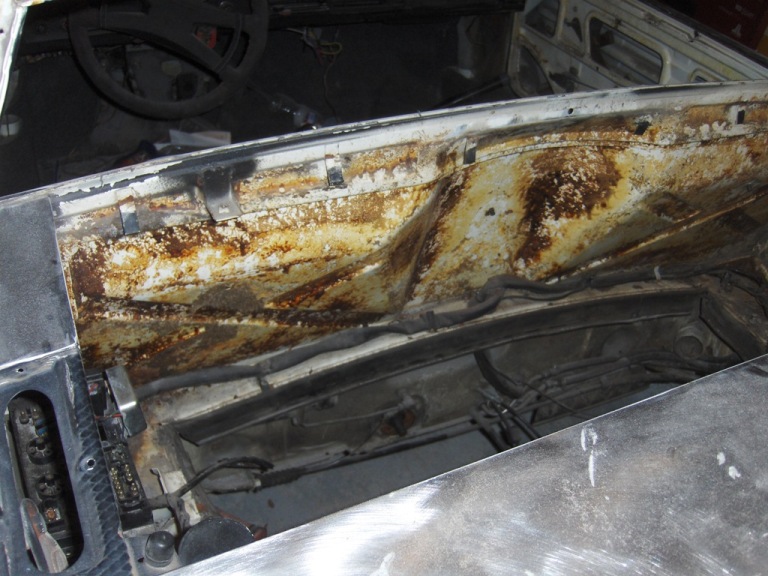
|
|
|
|
| barada |
Jul 23 2011, 07:59 PM
Post
#11
|
|
Member Group: Members Posts: 257 Joined: 5-October 08 From: Atlanta Member No.: 9,613 Region Association: None |
And epoxy sealed.
Attached image(s) 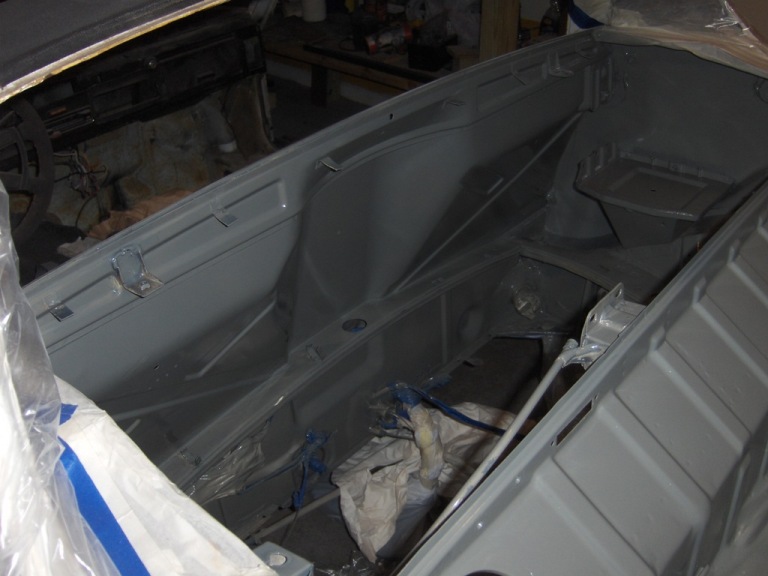 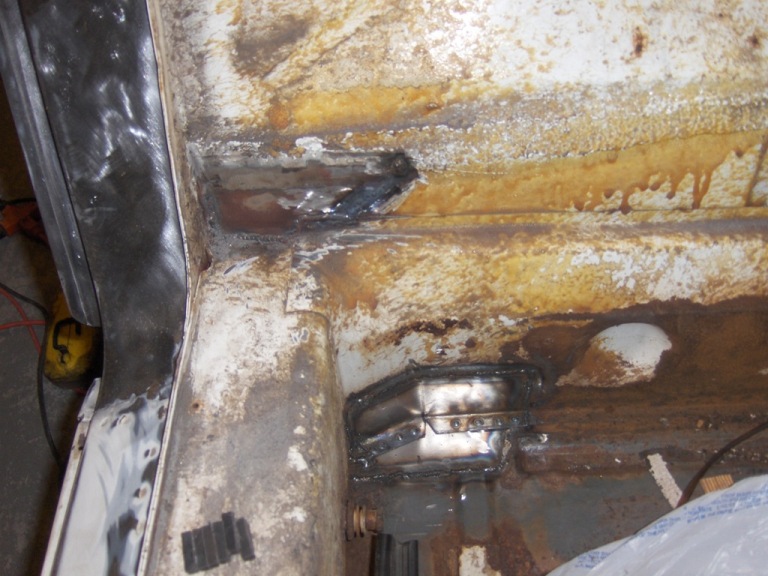 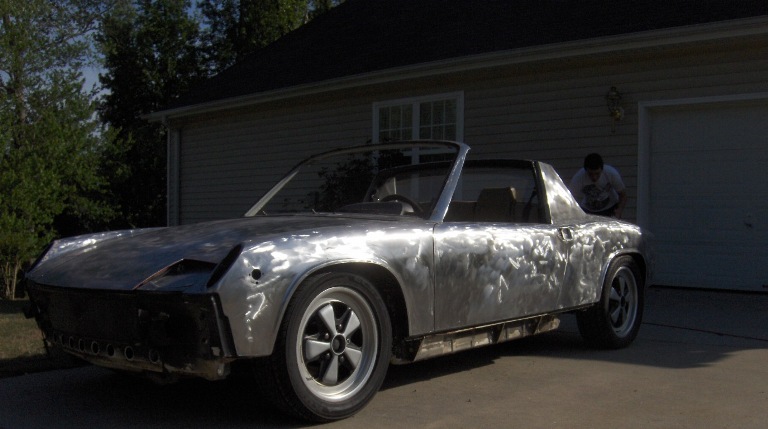
|
|
|
|
| barada |
Jul 23 2011, 08:03 PM
Post
#12
|
|
Member Group: Members Posts: 257 Joined: 5-October 08 From: Atlanta Member No.: 9,613 Region Association: None |
We stripped the entire car to bare metal. The black paint was cracking to the primer so it all had to go. The car is not original since I switched to the 5 lugs and figured it can be the color of my choice so I picked Nepal Orange.
Phillip |
|
|
|
| 3d914 |
Jul 23 2011, 09:23 PM
Post
#13
|
|
Senior Member Group: Members Posts: 1,275 Joined: 24-September 03 From: Benson, AZ Member No.: 1,191 Region Association: Southwest Region |
Excellent job Phillip!
Tell us more about your blocking and priming. What did you use for an epoxy sealer? Trying to get my 74 - SHO V6 back on the rack. Enjoy, |
|
|
|
| nsr-jamie |
Jul 23 2011, 09:46 PM
Post
#14
|
|
914 guy in Japan Group: Members Posts: 1,182 Joined: 7-November 07 From: Nagoya, Japan Member No.: 8,305 Region Association: None |
Looking good!! Are you going to fill in the side markers? Now would be the best time....are you going to keep it narrowed body or go with flares? Good luck with it. Cheers!!
|
|
|
|
| hwgunner |
Jul 23 2011, 10:13 PM
Post
#15
|
|
914 Parts @ Discount Prices 800.321.5432 Group: Members Posts: 1,714 Joined: 11-November 04 From: Santa Maria, Ca Member No.: 3,095 Region Association: None |
Looks great. Keep the pictures comming.
jonathan |
|
|
|
| barada |
Jul 24 2011, 06:19 AM
Post
#16
|
|
Member Group: Members Posts: 257 Joined: 5-October 08 From: Atlanta Member No.: 9,613 Region Association: None |
I am using PPG products. I used DP40 as the epoxy sealer. It will be single stage PPG. I know plenty like two stage and frown on single, but my clone is Viper green in single stage.Plus since it is getting sprayed at home Single stage is more forgiving.
I did remove the side markers. I just have the photo's out of order. So far I have blocked it one time with 320.(15 hours to block the first run as I laid the guide coat on to thick so I spent plenty of time sanding black). Truthfully if it was white we could probably get away with scuffing it on the next run but I plan on blocking it two or three more times. The rear trunk had the most low spots after the first run. The body only had about 6 very small low spots that will probably be gone after my primer coats last night. My goal is to have it back on the Road by November although if we get paint on it in the next month it will be ready much sooner. The body work is done (wasn't much at all) so now it is just block sanding until my fingers fall off. Right now I am having trouble finding good tan interior to upgrade mine. My drivers seat is worn and I have a tear on the back pad. I may leave the backpad but would like to get new door panels and seats. Thanks for the compliments. Phillip |
|
|
|
| barada |
Jul 26 2011, 03:03 PM
Post
#17
|
|
Member Group: Members Posts: 257 Joined: 5-October 08 From: Atlanta Member No.: 9,613 Region Association: None |
Shot some color today. We decided to shoot the front and rear trunks as well as the engine bay today. We will block off the rear qtrs, we were finishing up and had paint and said you know lets just see what it looks like laying over the qtr. We did not even clean that area but it is like a mirror there. I am Sure when it counts we won't be so lucky. We were going to shoot it all at once to avoid tape lines but with us doing it in a garage we knew chasing overspray would be a mess, so we are going to do it in two parts.Car has been blocked 3 times now and looks very straight. we will block it one more time (to clean off our curiosity). All 4 areas we sprayed turned out great. He is using his guns so we are at an advantage their as they are pretty high dollar. We plan on shooting the entire car next Monday.
Phillip Attached image(s) 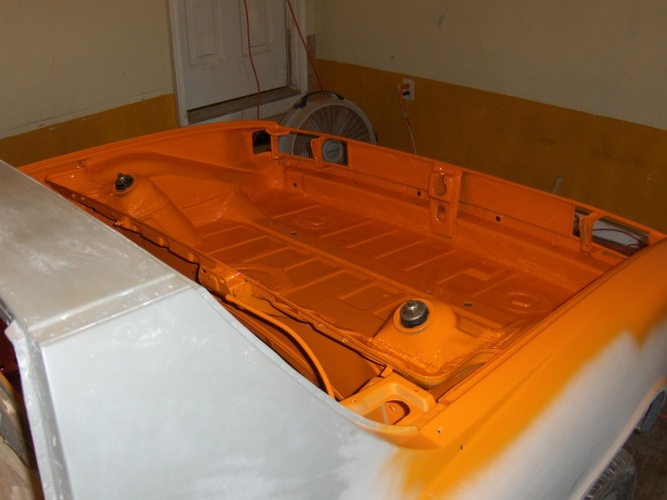 
|
|
|
|
| Valy |
Jul 26 2011, 05:12 PM
Post
#18
|
|
Senior Member Group: Members Posts: 1,675 Joined: 6-April 10 From: Sunnyvale, CA Member No.: 11,573 Region Association: Northern California |
Don't forget under the Targa bar.
|
|
|
|
| barada |
Jul 26 2011, 06:21 PM
Post
#19
|
|
Member Group: Members Posts: 257 Joined: 5-October 08 From: Atlanta Member No.: 9,613 Region Association: None |
QUOTE(Valy @ Jul 26 2011, 07:12 PM)  Don't forget under the Targa bar. Don't worry we won't. The entire car was stripped and everything will be orange except the floors I am going to go black for the floors. |
|
|
|
| barada |
Jul 30 2011, 09:12 PM
Post
#20
|
|
Member Group: Members Posts: 257 Joined: 5-October 08 From: Atlanta Member No.: 9,613 Region Association: None |
Been out of town so getting as much done as I can. Here is a shot of the front outside for the first time since it was sprayed. Very happy with how it turned out.
We have now blocked 3 times and will probably go over one last time Monday. We were shooting for Monday to spray the entire car but i am not sure that will happen. Should be in the next couple of weeks. Here is a shot with the "guide coat" on it. I learned my lesson on going heavy so no need to correct me. I spent plenty of time sanding black paint before getting to the body. Phillip Attached image(s) 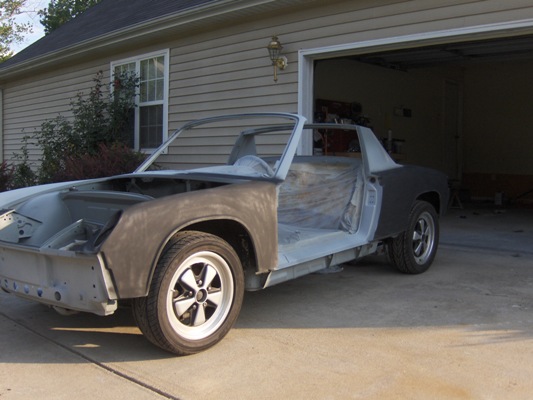 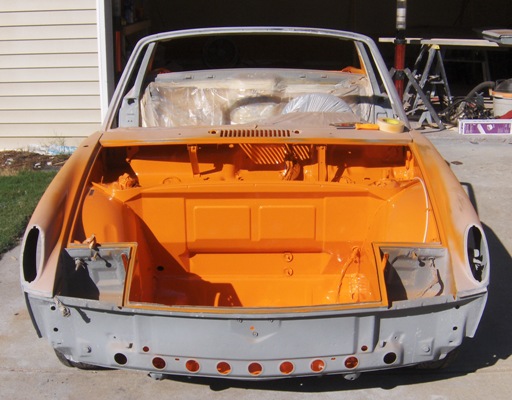
|
|
|
|
|
1 User(s) are reading this topic (1 Guests and 0 Anonymous Users)
0 Members:

|
Lo-Fi Version | Time is now: 14th May 2024 - 08:00 AM |
Invision Power Board
v9.1.4 © 2024 IPS, Inc.