|
|
|
Porsche, and the Porsche crest are registered trademarks of Dr. Ing. h.c. F. Porsche AG.
This site is not affiliated with Porsche in any way. Its only purpose is to provide an online forum for car enthusiasts. All other trademarks are property of their respective owners. |
|
|

  |

| JStroud |
 Nov 3 2011, 01:04 AM Nov 3 2011, 01:04 AM
Post
#1
|
|
Senior Member  Group: Members Posts: 1,463 Joined: 15-January 11 From: Galt, California Member No.: 12,594 Region Association: Northern California |
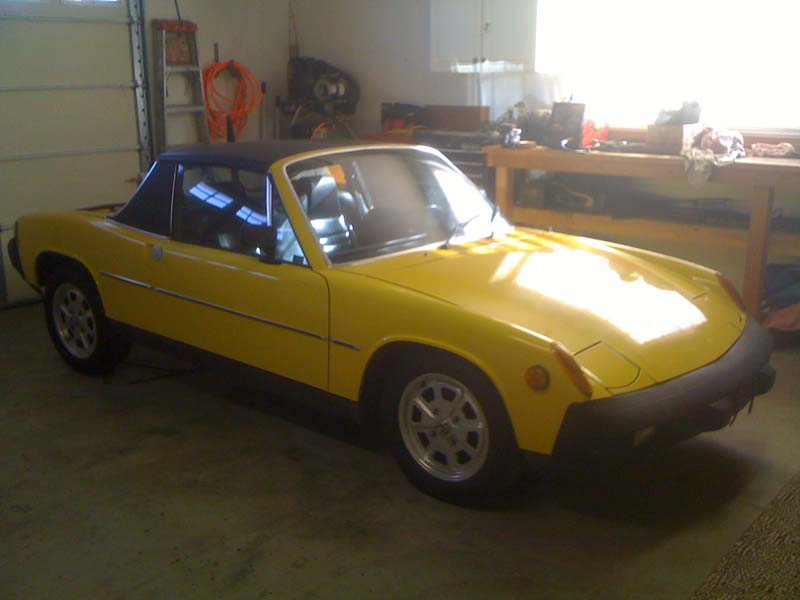
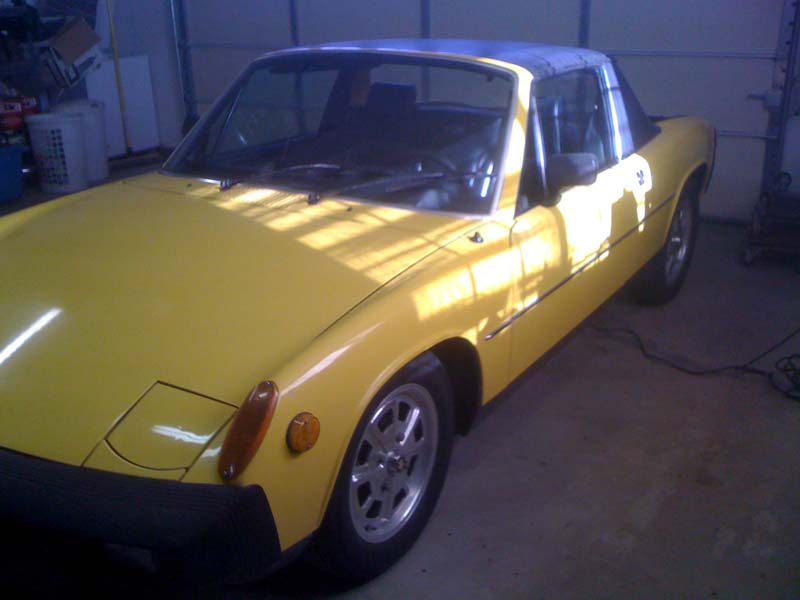
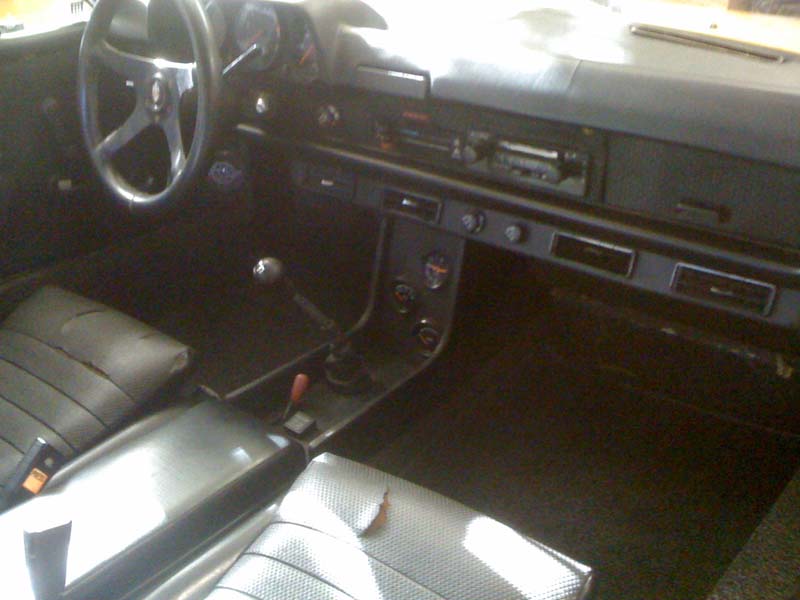
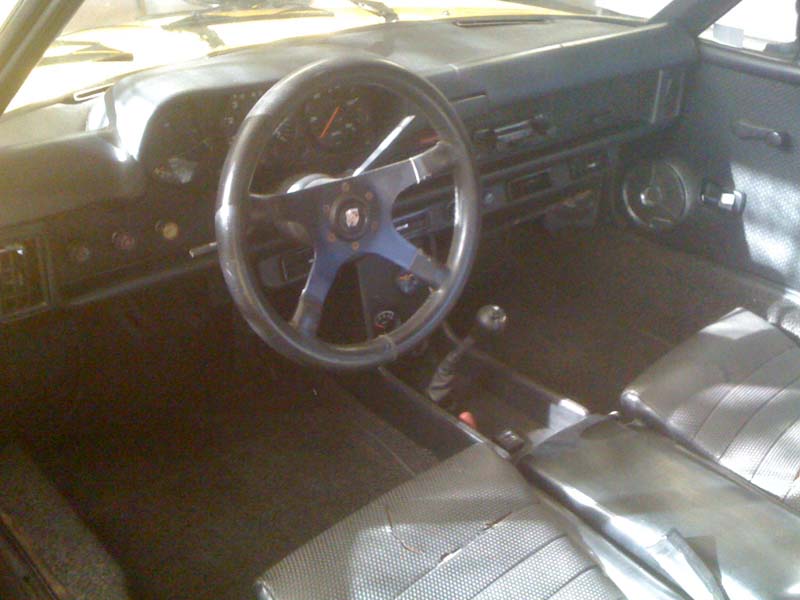
I finally got around to organizing my pictures to document my progress. I bought my car, a 75 914 2.0 in November 2010. It was originaly purchased in Sacramento Ca, the original owner sold it to his son in 1994, the son drove it until "it started running rough", and he parked it. It sat until 2008 when he sold it to his friend who was going to get it running, two years later it was still sitting, but with the engine out and pieces in boxes. So being the smart guy I am, I bought it. Here's some pics of the car when I got it home.
    The PO had pulled the engine with the intent of fixing it, then somewhere along the way he purchased a "running" 73 2.0. So I have a spare motor. 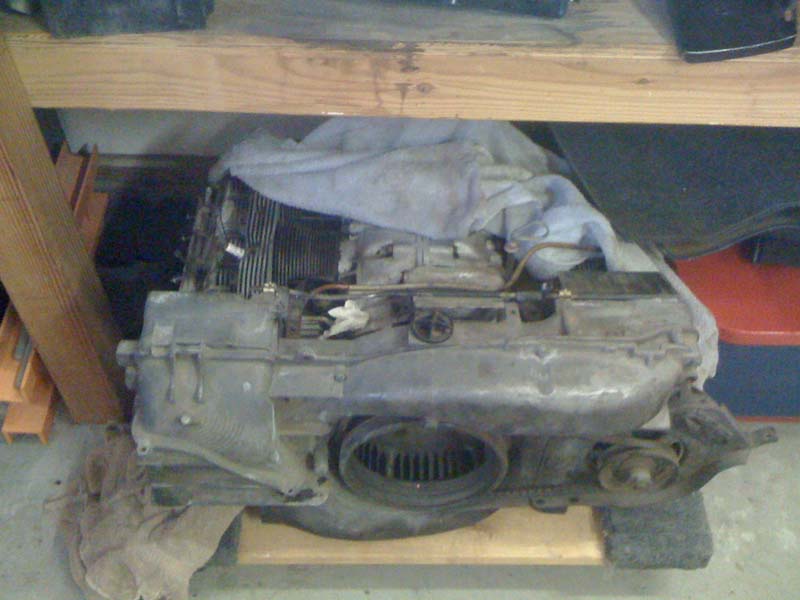 I spent a few months buying books and reading what I could find, (never worked on a 914 before) found this website! I decided to rebuild the original motor... here I go. 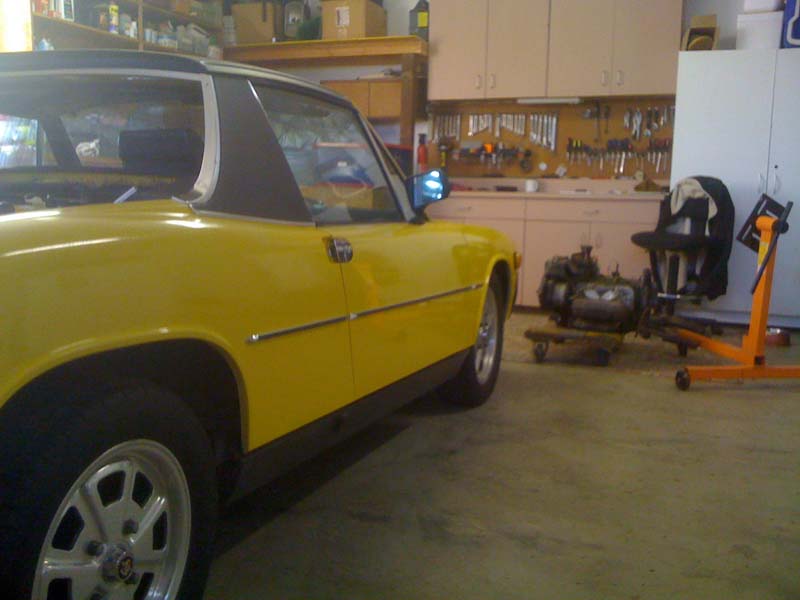 Got the engine stripped down, and the case split.  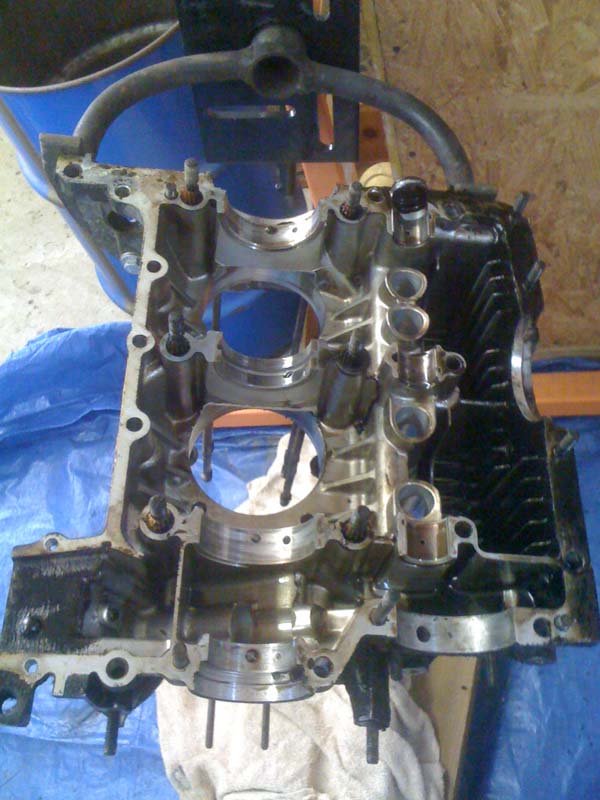 Found out why they parked it, looks like a dropped valve seat. 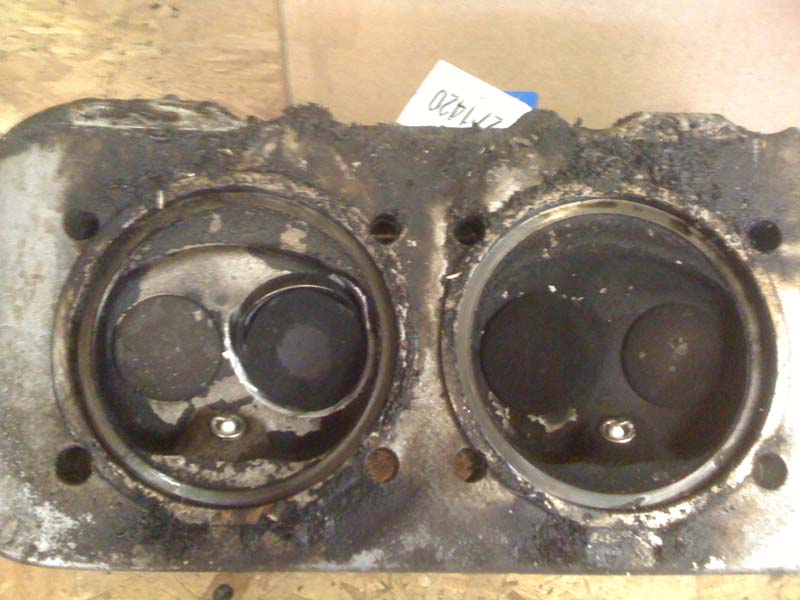 Damaged the top of the piston as well. 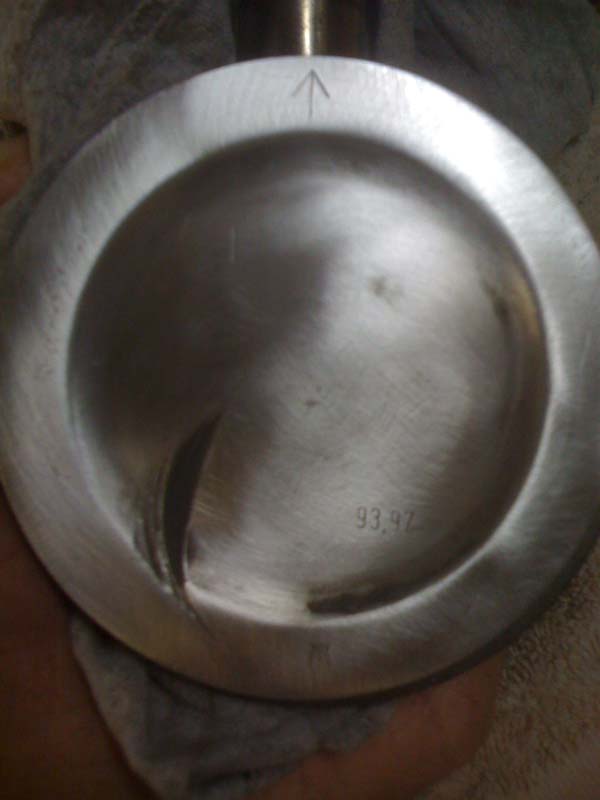 I took the case, heads, crank, and cylinders to the machine shop, Time to start some rust repair. 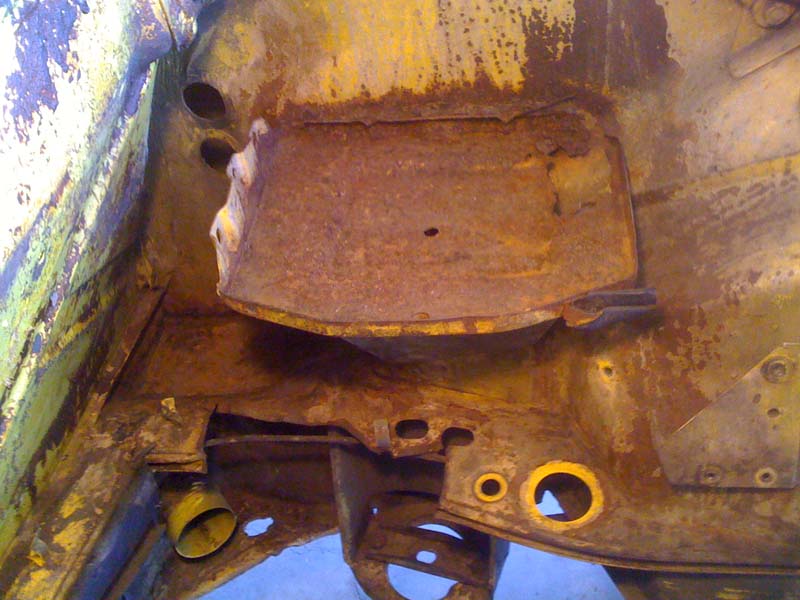 The battery tray was toast, the rest seems to be just surface rust, except the trunk it has a few rusted through pin holes.  After I finished removing the battery tray I pressure washed the engine compartment, trunk, and under the trunk. 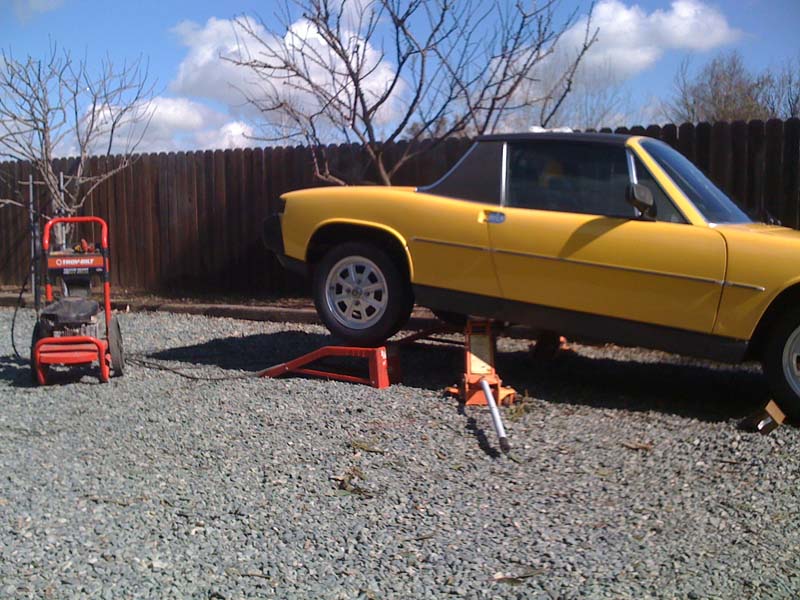 I finished all this by february, but the next step was to sand blast the rust, and EVERY weekend it would be raining, so the car sat in the garage. Then I had a major set back, My Dad was diagnosed with cancer in april, had surgery in May. So April - june are kind of a blurr, He has recovered very well, but progress on the car was slow for a while, had to get caught up on work. I went to Doc's tranny clinic in Discovery Bay in June and rebuilt my transmission. My tranny all apart.  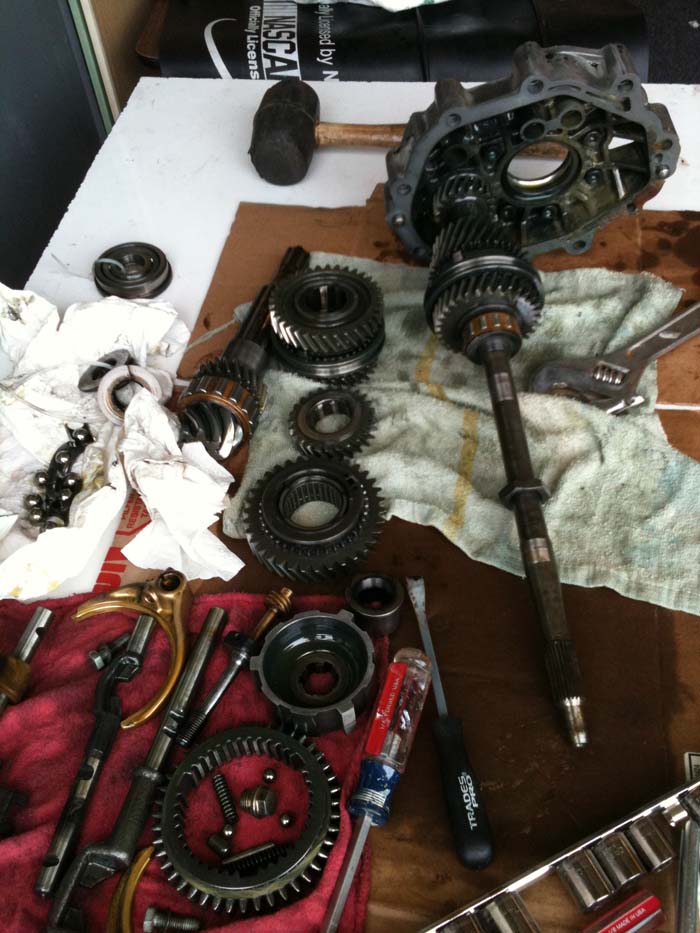 Good thing Doc talked me into going, bearing was in pieces when I took it apart. 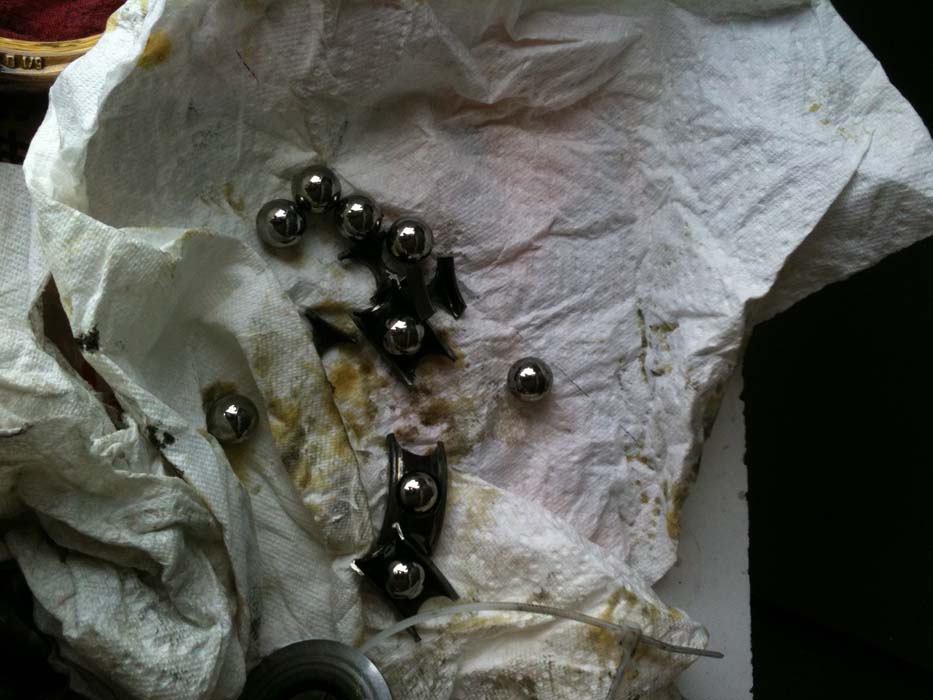 A few familiar faces. 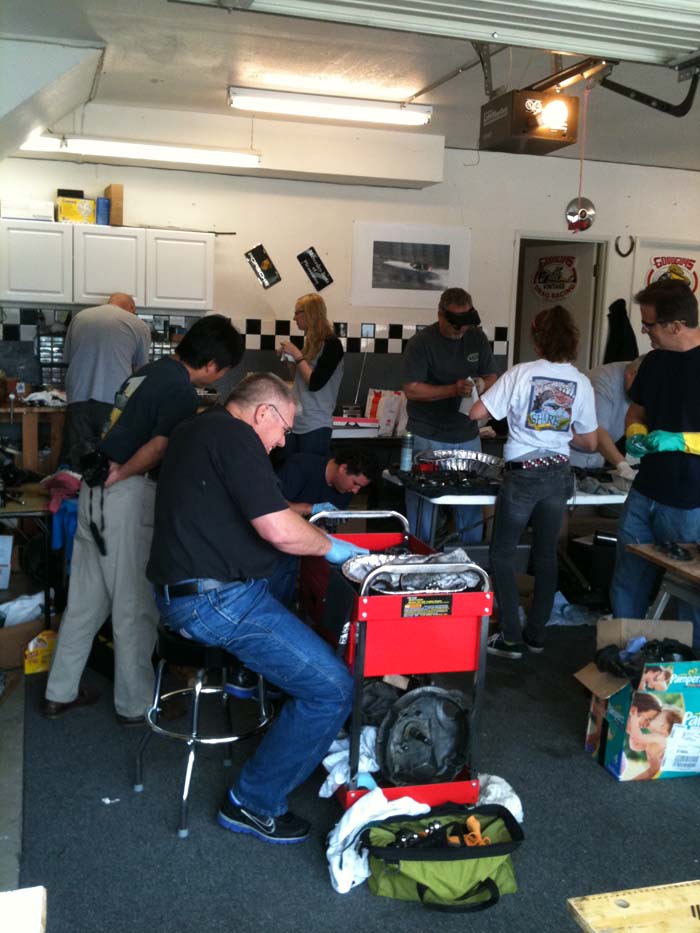 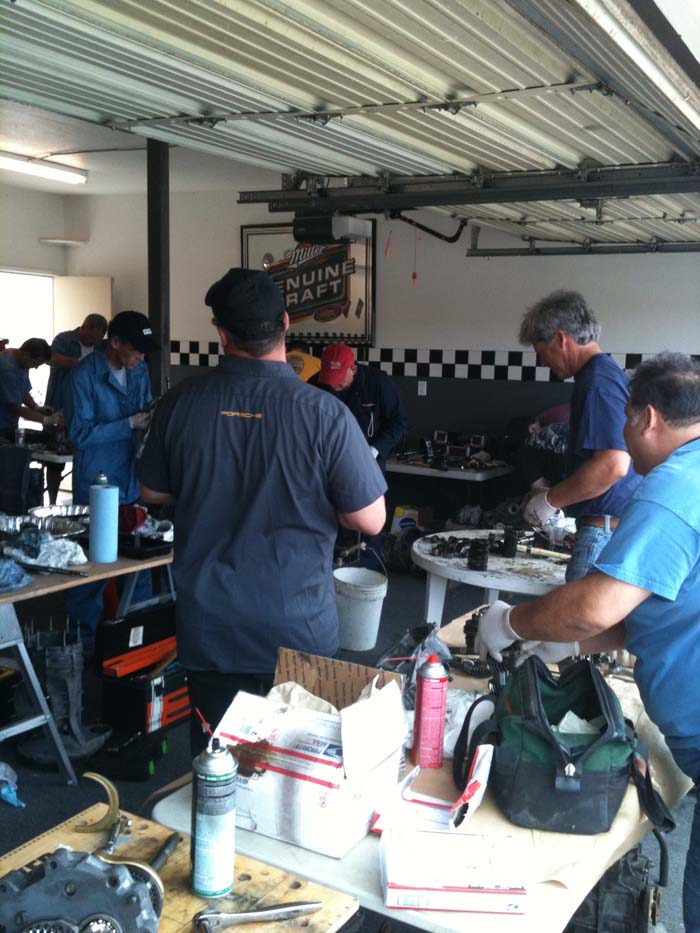 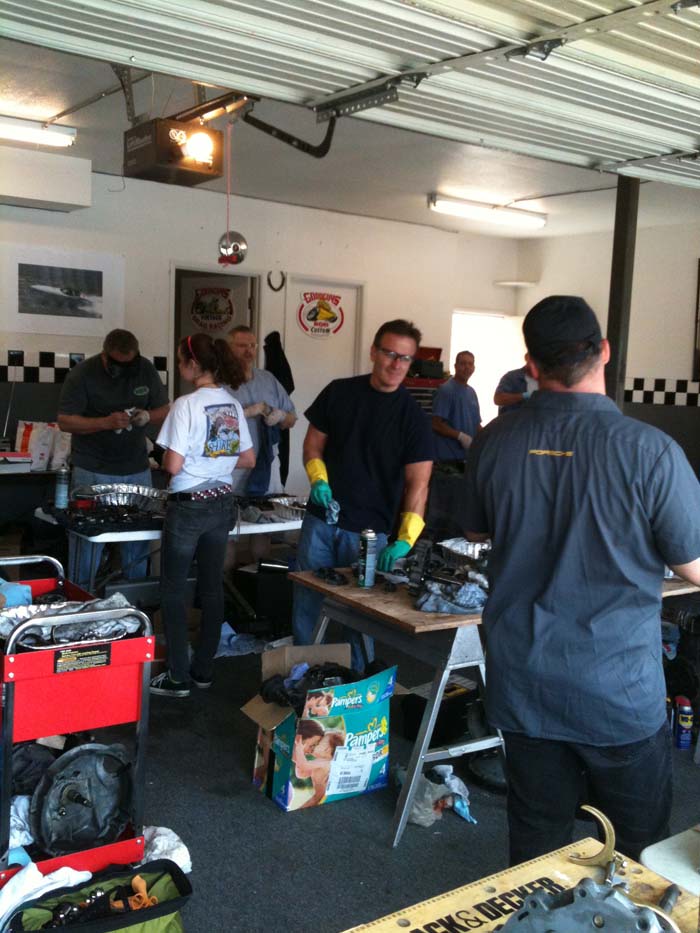 All done ready to install, wish the car was ready... 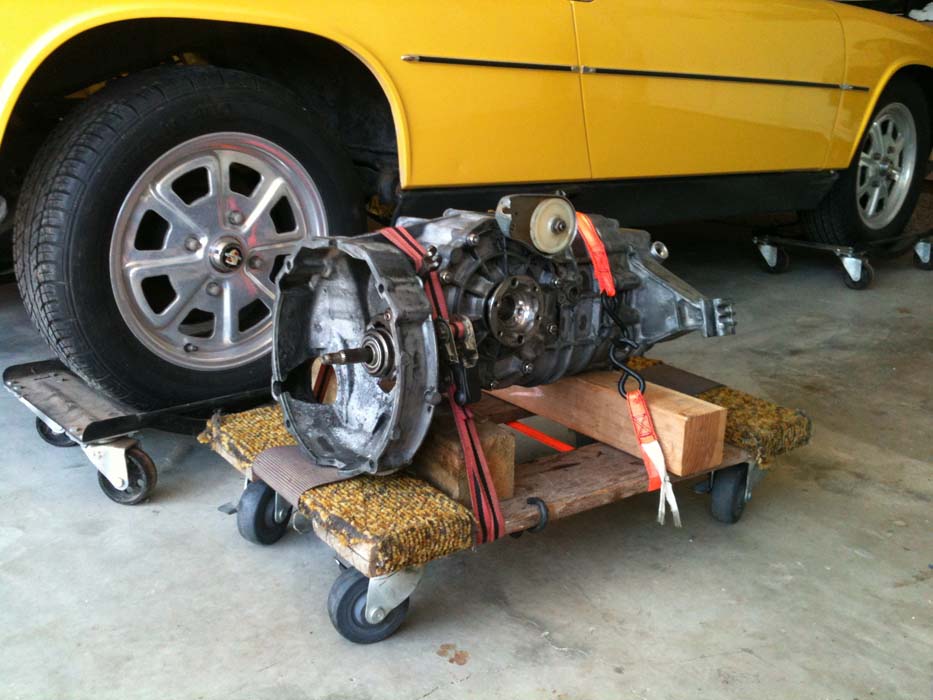 Of course in all the down time I did find time to do a little parts shopping. 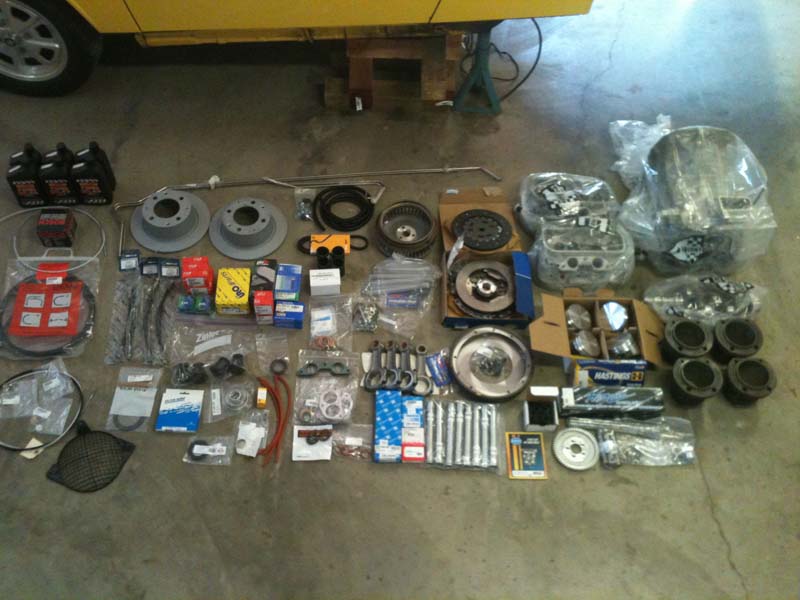  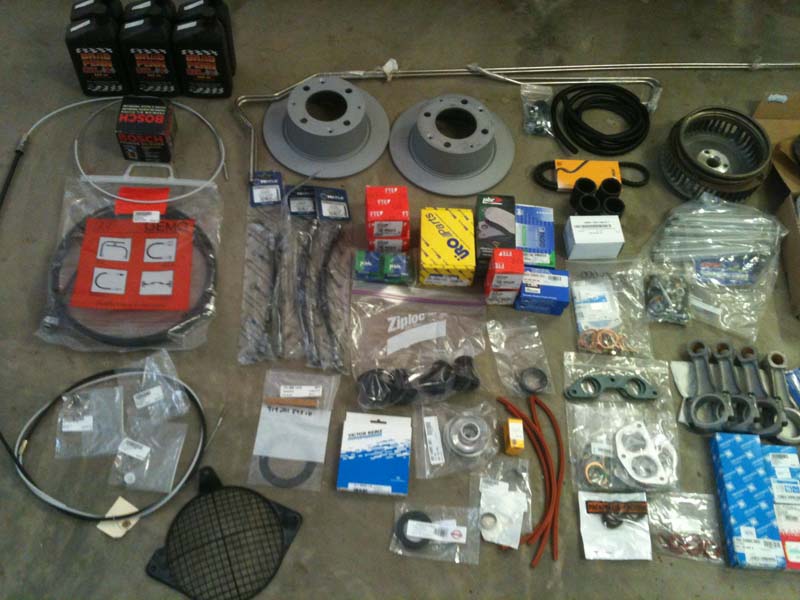 And I decided to build a blast cabinet  Almost done 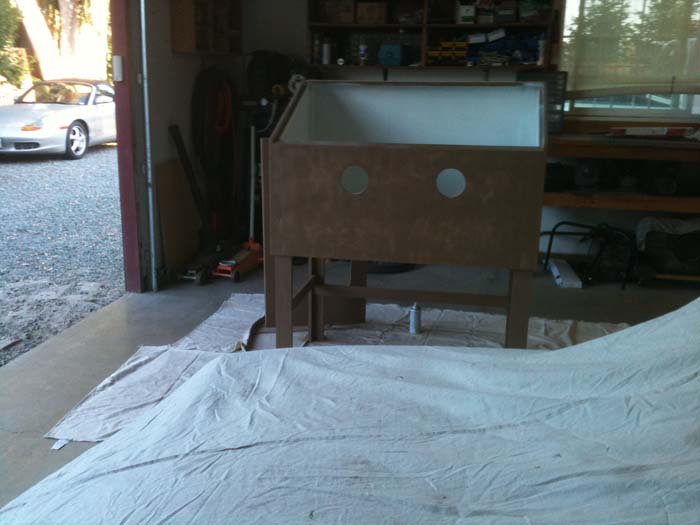 Ready for action. 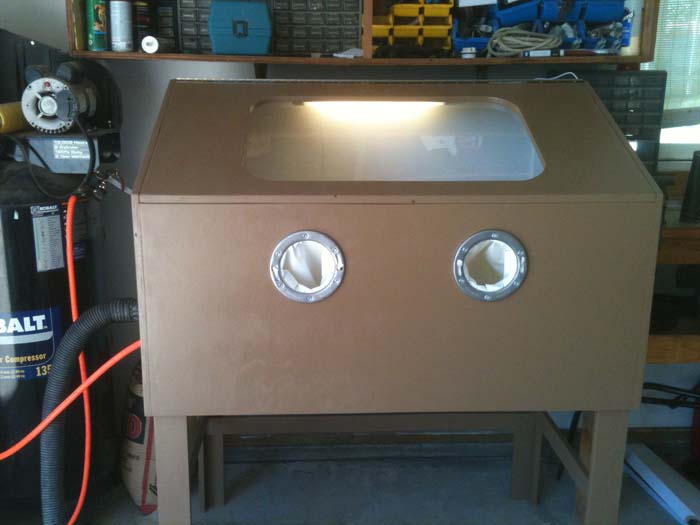 And I did a lot of reorganizing in the garage, this is the first car I've done in 20 years, oh ya, did I mention i'm old. 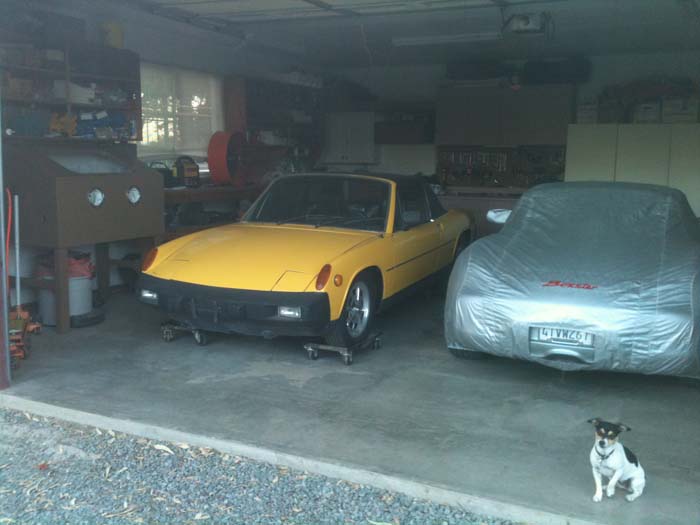 Well the weather finally got nicer, work slowed up a bit and I finally got the car out and sandblasted.  After I finished sandblasting I washed the area down with metal prep, and then back in the garage for painting. 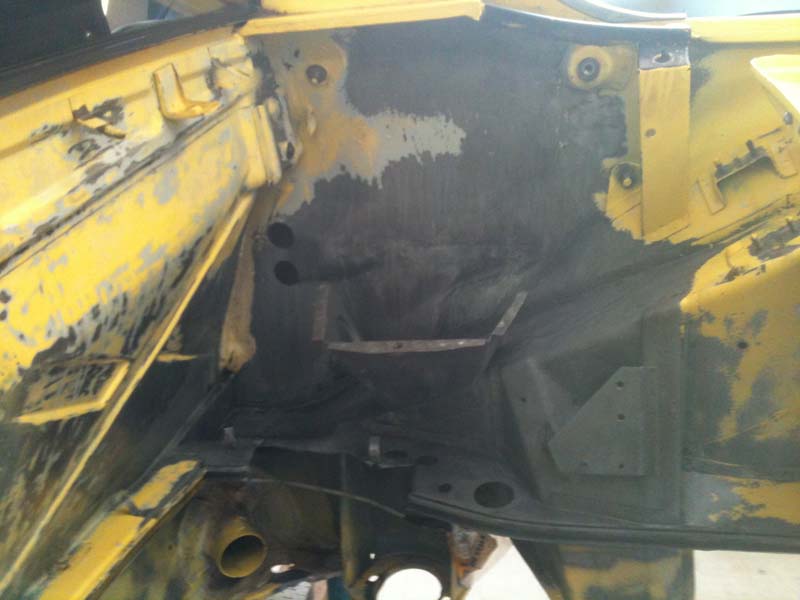 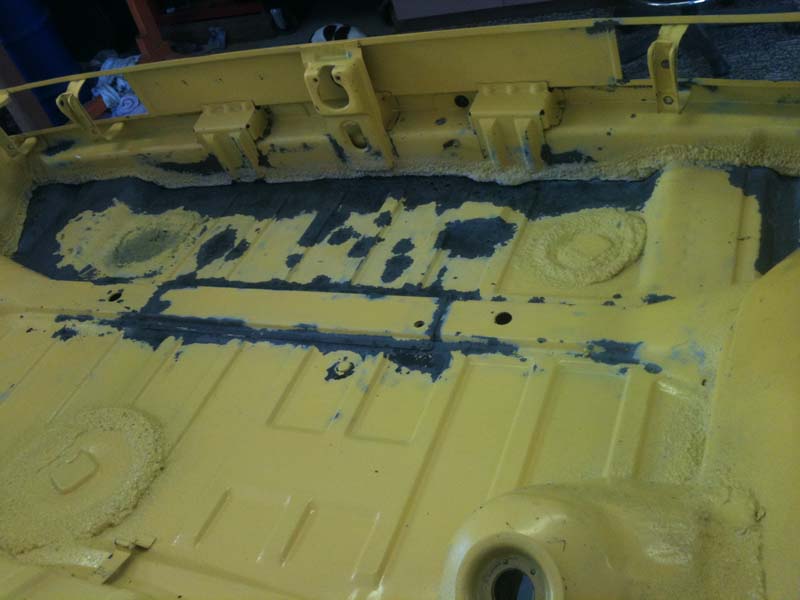 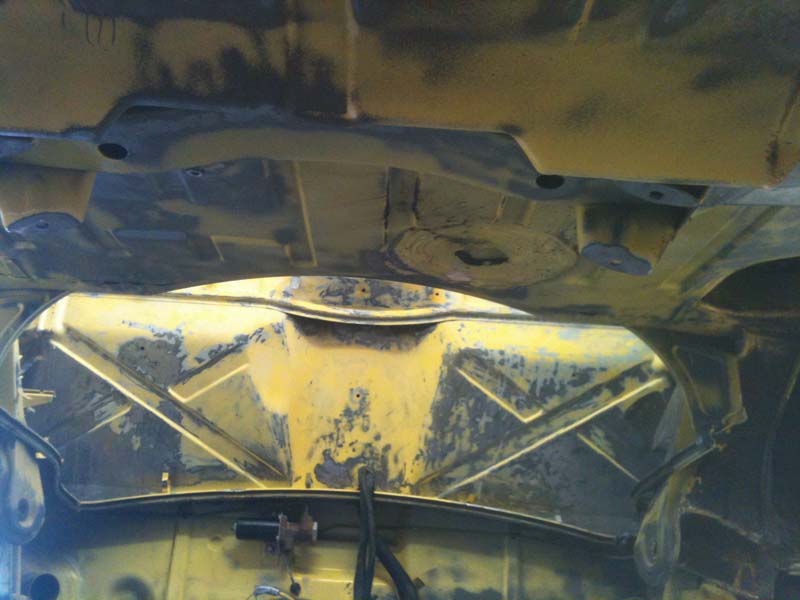 Almost ready to primer 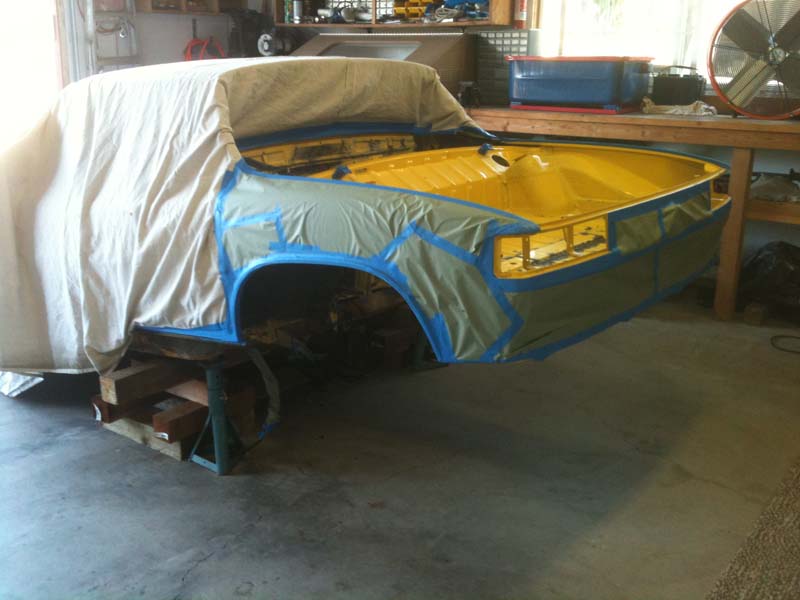 Everything got two coats primer. 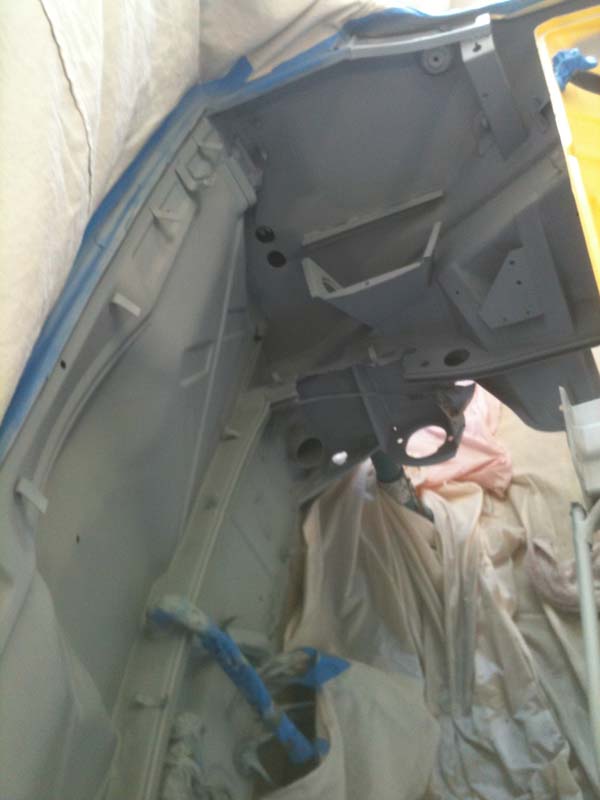 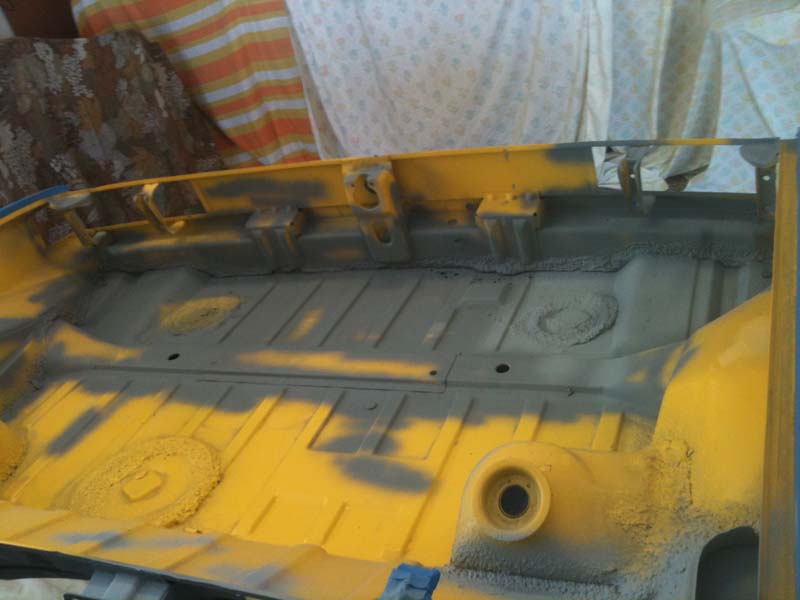 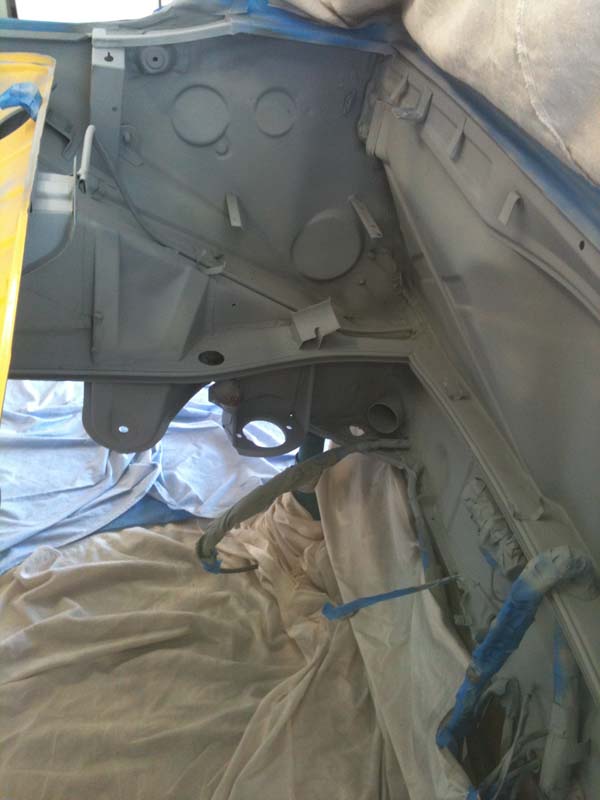 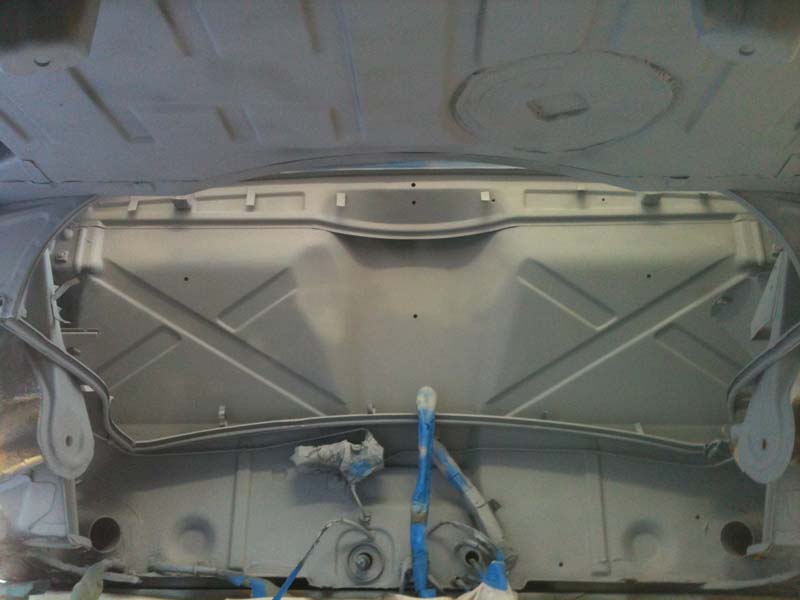 I decided to paint the engine compartment gloss black, and under the trunk and fender wells flat black. 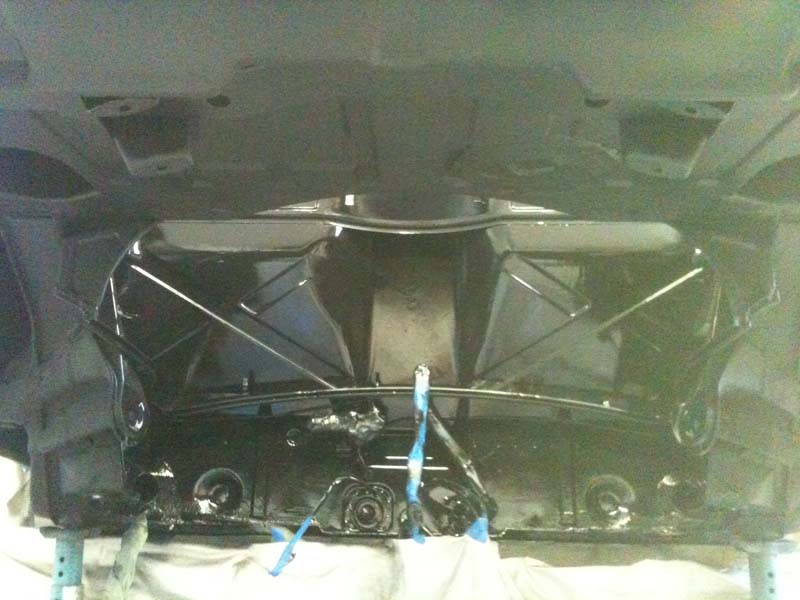 I bought cans of color match paint online to paint the trunk. 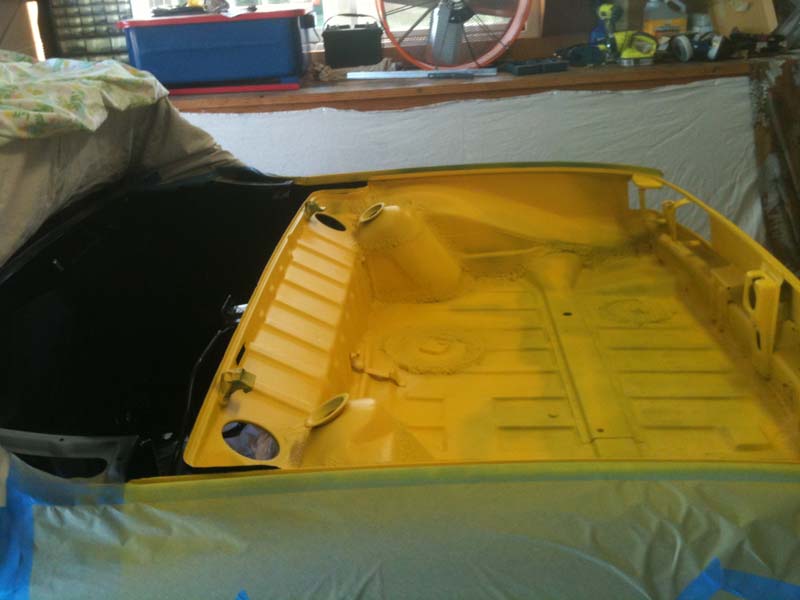 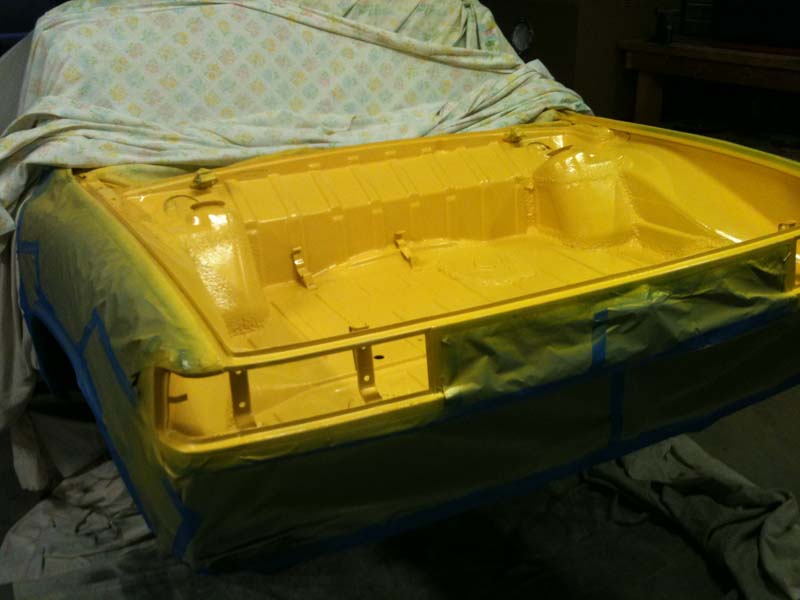 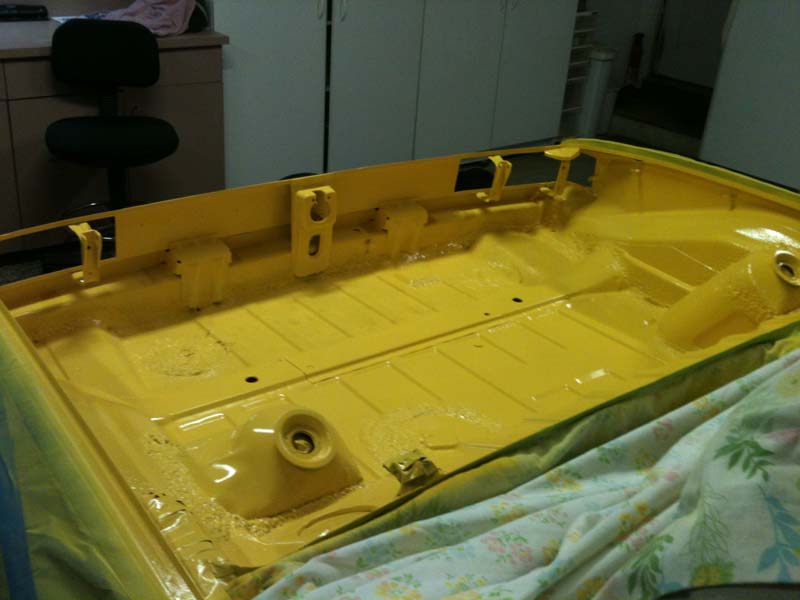 A final coat of clear and the painting is done.. for now. 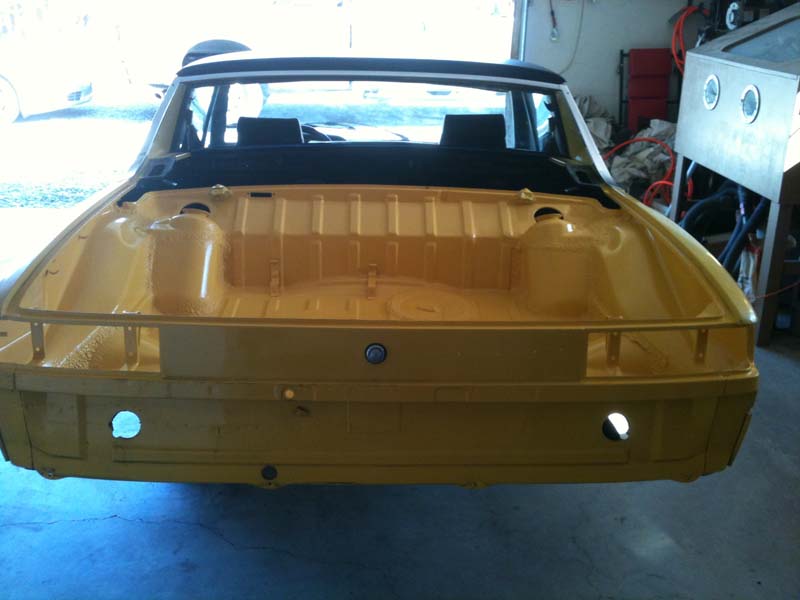 |
   |

 
|
| JStroud |
Nov 3 2011, 01:28 AM
Post
#2
|
|
Senior Member Group: Members Posts: 1,463 Joined: 15-January 11 From: Galt, California Member No.: 12,594 Region Association: Northern California |
Well I finally started putting things back together.
  But... since I took the rear suspension off to paint, I thought why not rebuild the calipers, new wheel bearings, new bushings, and a fresh coat of paint...here we go. 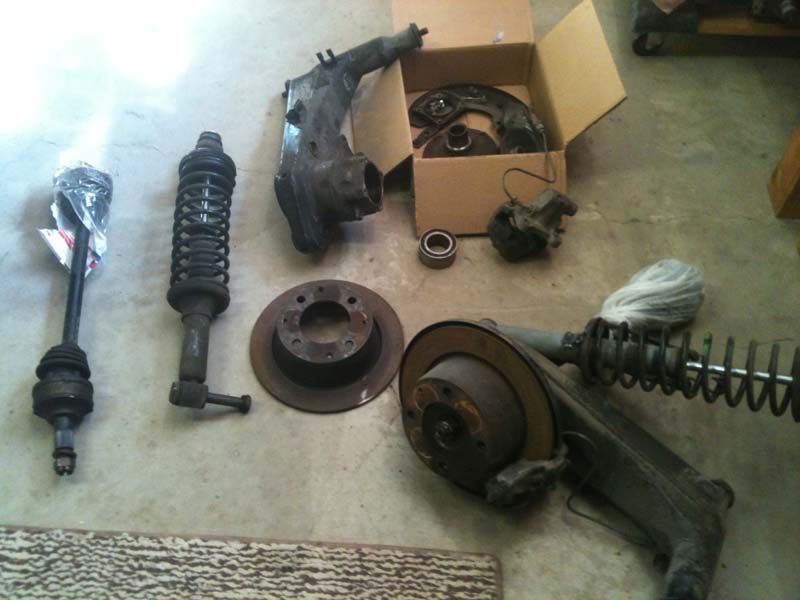 decided to give the blast cabinet a try, blasted my cylinder tin and valve covers. 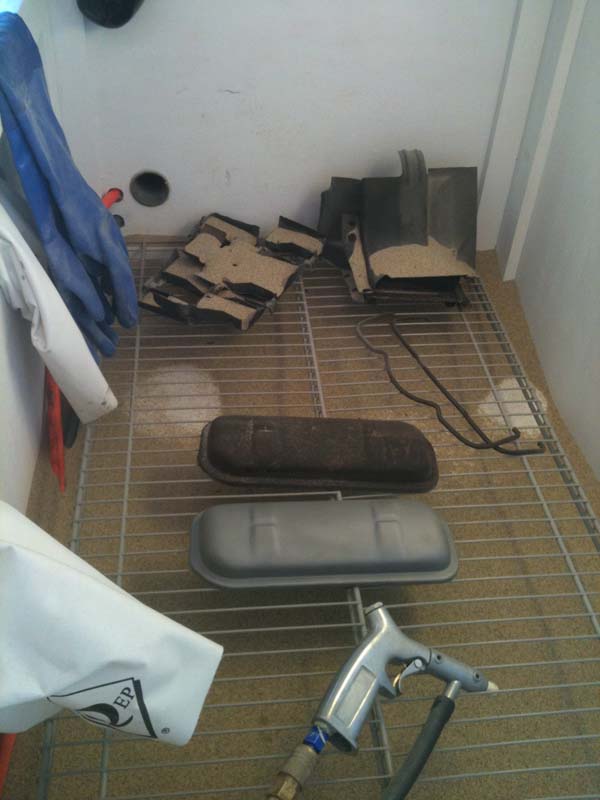 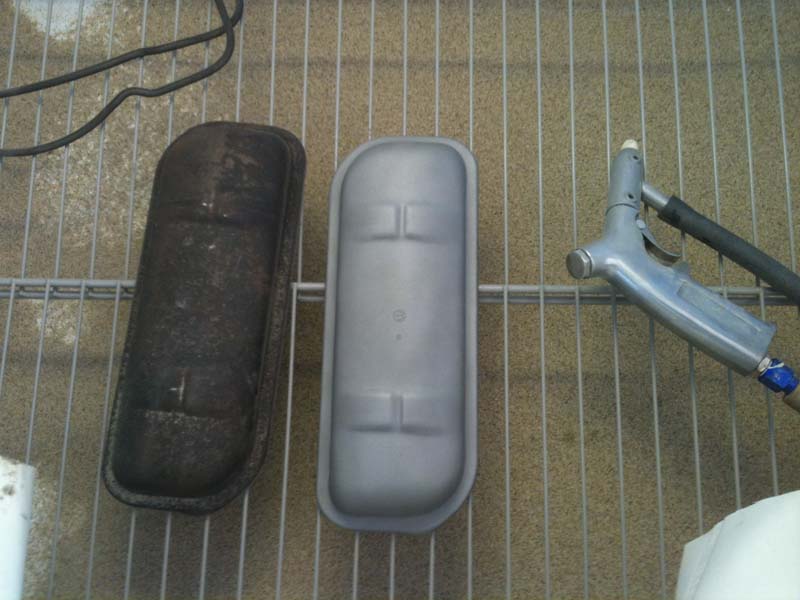 I had full intentions of putting the motor together myself, but with all the other work I still need to do to the car....I decided I want it done faster than I would be able to get it done....so I boxed up all the engine parts and dropped them off at Original Customs and McMark is building my motor (IMG:style_emoticons/default/piratenanner.gif) (IMG:style_emoticons/default/driving.gif) I'm hoping to have everything back together and the car driveable before the end of the year, but you know how that goes. I'm sure the motor will be ready. But at the very least I'm shooting for before 5/12, don't want to hit the 14 yr mark and have the car still sitting. |
|
|
|
| JawjaPorsche |
Nov 3 2011, 04:04 AM
Post
#3
|
|
Advanced Member Group: Members Posts: 3,463 Joined: 23-July 11 From: Clayton, Georgia Member No.: 13,351 Region Association: South East States |
When you said a "little parts shopping" you were not kidding!
Awesome thread, keep us posted. (IMG:style_emoticons/default/beer.gif) QUOTE(jsconst @ Nov 3 2011, 03:28 AM)  Well I finally started putting things back together. But... since I took the rear suspension off to paint, I thought why not rebuild the calipers, new wheel bearings, new bushings, and a fresh coat of paint...here we go. decided to give the blast cabinet a try, blasted my cylinder tin and valve covers. I had full intentions of putting the motor together myself, but with all the other work I still need to do to the car....I decided I want it done faster than I would be able to get it done....so I boxed up all the engine parts and dropped them off at Original Customs and McMark is building my motor (IMG:style_emoticons/default/piratenanner.gif) (IMG:style_emoticons/default/driving.gif) I'm hoping to have everything back together and the car driveable before the end of the year, but you know how that goes. I'm sure the motor will be ready. But at the very least I'm shooting for before 5/12, don't want to hit the 14 yr mark and have the car still sitting. |
|
|
|
| Cairo94507 |
Nov 3 2011, 06:54 AM
Post
#4
|
|
Michael Group: Members Posts: 9,733 Joined: 1-November 08 From: Auburn, CA Member No.: 9,712 Region Association: Northern California |
Terrific job of getting this car back together correctly and on the road soon. Keep the progress pictures coming too. Nice work.
|
 |
|
| JStroud |
Nov 3 2011, 08:48 AM
Post
#5
|
|
Senior Member Group: Members Posts: 1,463 Joined: 15-January 11 From: Galt, California Member No.: 12,594 Region Association: Northern California |
Well I figured if I can't work on it might as well buy parts for it, now I just need the time to install them all
Jeff QUOTE(JawjaPorsche @ Nov 3 2011, 03:04 AM) When you said a "little parts shopping" you were not kidding! Awesome thread, keep us posted. (IMG:style_emoticons/default/beer.gif) |
|
|
|
| JStroud |
Nov 3 2011, 08:53 AM
Post
#6
|
|
Senior Member Group: Members Posts: 1,463 Joined: 15-January 11 From: Galt, California Member No.: 12,594 Region Association: Northern California |
Thanks Michael, it seems like it's taking forever, since my original goal was 5/11. But that's my fault, too much "while I'm in there" going on. But... That's how I am. Jeff QUOTE(Cairo94507 @ Nov 3 2011, 05:54 AM) Terrific job of getting this car back together correctly and on the road soon. Keep the progress pictures coming too. Nice work. |
|
|
|
| pt_700 |
Nov 3 2011, 09:55 AM
Post
#7
|
|
Senior Member Group: Members Posts: 1,090 Joined: 4-March 10 From: san jose, ca Member No.: 11,430 Region Association: Northern California |
is anyone else impressed at how much jeff put on 1 post?! that, besides the nice work on a deserving teener.
thanks for taking the time to share this with us. looking forward to seeing more progress. now i'm going to go kick myself for missing that clinic... |
|
|
|
| StratPlayer |
Nov 3 2011, 10:22 AM
Post
#8
|
|
StratPlayer Group: Members Posts: 3,270 Joined: 27-December 02 From: SLC, Utah Member No.: 27 Region Association: Rocky Mountains |
Impressive (IMG:style_emoticons/default/first.gif)
|
|
|
|
| Cap'n Krusty |
Nov 3 2011, 10:51 AM
Post
#9
|
|
Cap'n Krusty Group: Members Posts: 10,794 Joined: 24-June 04 From: Santa Maria, CA Member No.: 2,246 Region Association: Central California |
Nice!
Whatever is in the bright yellow box that's labeled "URO", I'd pass on and look for a name brand. Their products don't have a very good track record. The Cap'n |
|
|
|
| Tom |
Nov 3 2011, 06:00 PM
Post
#10
|
|
Advanced Member Group: Members Posts: 2,139 Joined: 21-August 05 From: Port Orchard, WA 98367 Member No.: 4,626 Region Association: None |
Great work, (IMG:style_emoticons/default/smilie_pokal.gif) keep it going and you will have a very nice car. I wish I had the motivation to do what you are doing. Really great job!
Tom |
|
|
|
| ConeDodger |
Nov 3 2011, 06:25 PM
Post
#11
|
|
Apex killer! Group: Members Posts: 23,576 Joined: 31-December 04 From: Tahoe Area Member No.: 3,380 Region Association: Northern California |
I've seen this car in person and it is going to be very nice. I suspect I was a bit of an influence for getting Jeff to drop off the engine with McMark.
Jeff, I am going to be down at Original Customs Sunday for some tuning... You should come on down. Are you building a stock engine? The 2056 is a nice little pop in horsepower and torque and when done right can even use the stock EFI. Cool thread! I will be following this one. (IMG:style_emoticons/default/biggrin.gif) |
|
|
|
| Drums66 |
Nov 3 2011, 07:10 PM
Post
#12
|
|
914 Rudiments Group: Members Posts: 5,321 Joined: 15-January 03 From: Coronado,Cali Member No.: 151 Region Association: Southwest Region |
....Yeah, cool story....keep on! (IMG:style_emoticons/default/flag.gif) (IMG:style_emoticons/default/shades.gif)
(IMG:style_emoticons/default/bye1.gif) (IMG:style_emoticons/default/smoke.gif) |
|
|
|
| JStroud |
Nov 3 2011, 08:14 PM
Post
#13
|
|
Senior Member Group: Members Posts: 1,463 Joined: 15-January 11 From: Galt, California Member No.: 12,594 Region Association: Northern California |
Cap'n, those are the front rubber control arm bushings, I also bought the polyurethane rear bushings, both from PMB performance. Are those not the best choice for these cars?
Thanks, Jeff QUOTE(Cap'n Krusty @ Nov 3 2011, 09:51 AM) Nice! Whatever is in the bright yellow box that's labeled "URO", I'd pass on and look for a name brand. Their products don't have a very good track record. The Cap'n 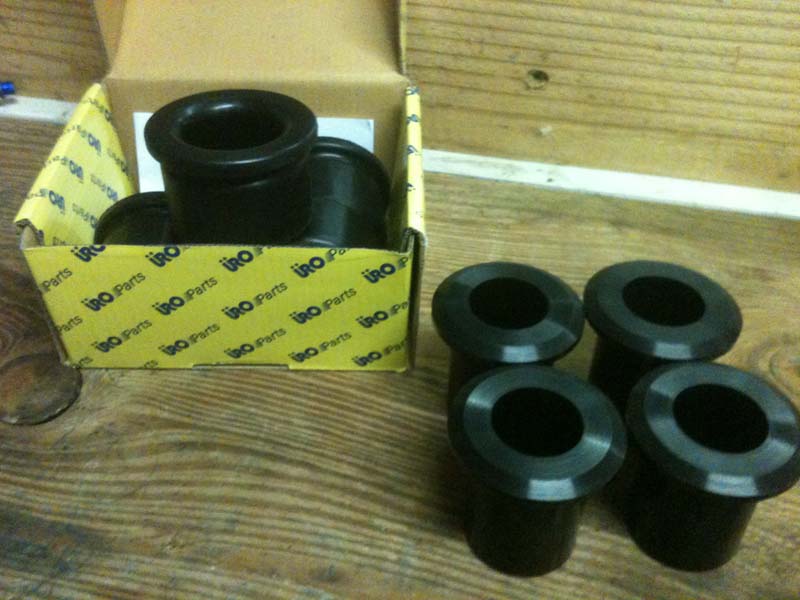 |
|
|
|
| JStroud |
Nov 3 2011, 08:30 PM
Post
#14
|
|
Senior Member Group: Members Posts: 1,463 Joined: 15-January 11 From: Galt, California Member No.: 12,594 Region Association: Northern California |
Thanks everyone, and Rob no its not a stock rebuild. I bought the keith black pistons and 9550 super cam kit from Jake for a 2056 build. My heads are rebuilt with new valve seats, new ss valves, new guides ect. I had my stock cylinders bored, and the case checked, registers milled. Crank had to be ground and polished.
Rods reconditioned, new ARP rod bolts and head bolts. Then all the rotating parts were balanced. And now Marks building it......can't wait to drive it. Keeping the stock d-jet. Might make it to Marks on Sunday, love to hear your car run...and visit my engine. One more pic of all those engine parts! (IMG:style_emoticons/default/piratenanner.gif) Jeff QUOTE(ConeDodger @ Nov 3 2011, 05:25 PM) I've seen this car in person and it is going to be very nice. I suspect I was a bit of an influence for getting Jeff to drop off the engine with McMark. Jeff, I am going to be down at Original Customs Sunday for some tuning... You should come on down. Are you building a stock engine? The 2056 is a nice little pop in horsepower and torque and when done right can even use the stock EFI. Cool thread! I will be following this one. (IMG:style_emoticons/default/biggrin.gif) 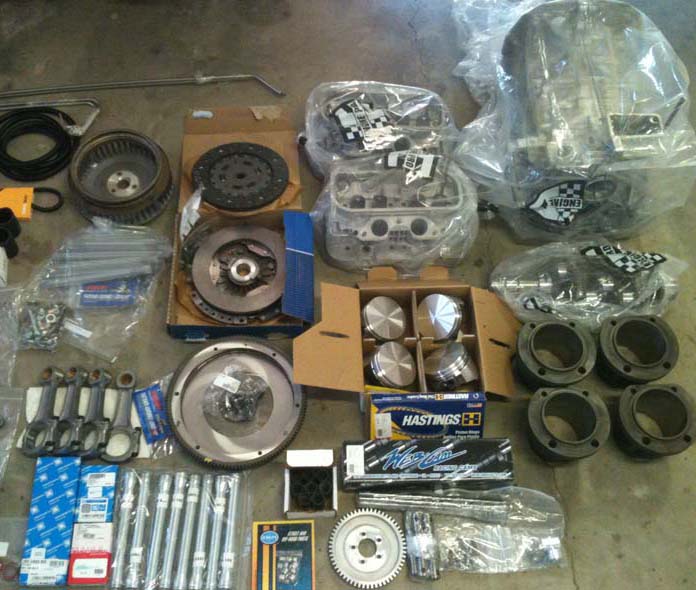 |
|
|
|
| JStroud |
Nov 5 2011, 12:39 PM
Post
#15
|
|
Senior Member Group: Members Posts: 1,463 Joined: 15-January 11 From: Galt, California Member No.: 12,594 Region Association: Northern California |
I didn't get a chance to get these pictures resized to include with my original post,
but before I took my motor to Original Customs for McMark to build it, I drilled and tapped my galley plugs. I had already bought the drill bits and taps, so why not. I decided to take alot of pictures and try to be thorough for anyone yet to attempt this. First, there are twelve press in galley plugs, here are their locations. 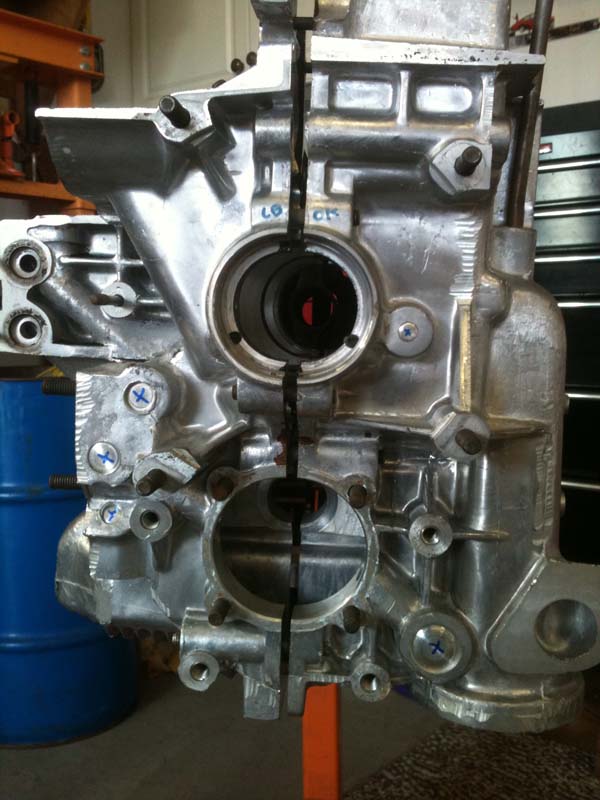 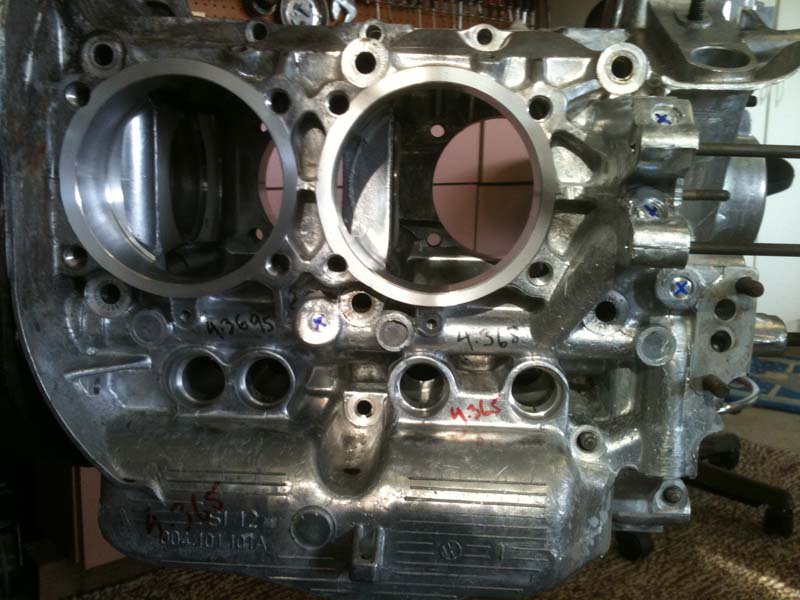 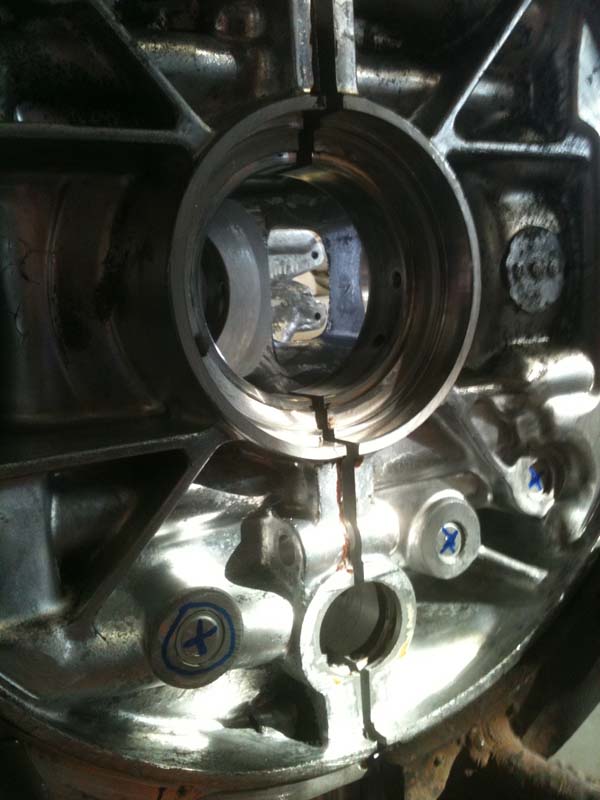 In the last picture the circled plug looks like its ready to pop. The small one in the picture below also. This is why I decided to do all twelve. 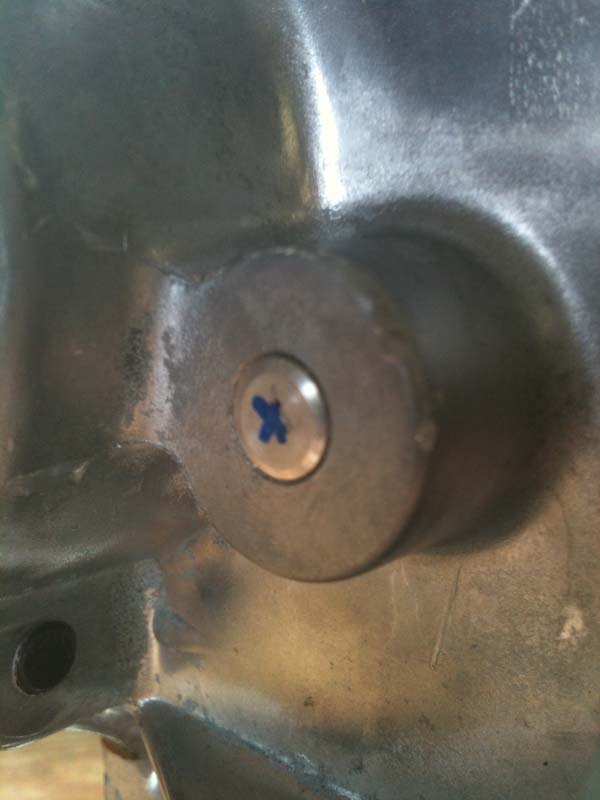 I drilled a small hole in the center of the plugs and screwed in a screw with a large head on it. 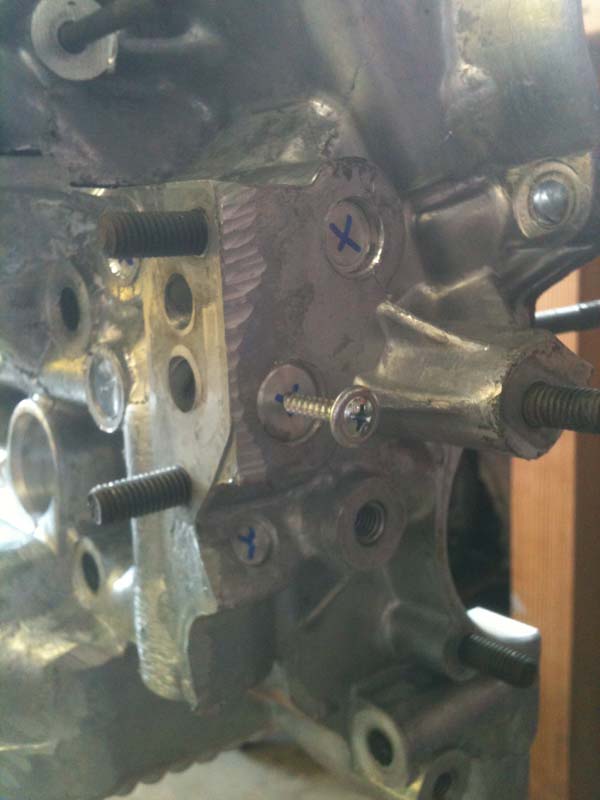 Then attached a slide hammer to the screw to pull the plugs out. Most of the plugs came out very easy, one to two TAPS with the slide hammer. Only one was a little difficult. Kinda scary how easy they popped out. But kudos to my machine shop, not one speck of dirt behind any plugs. 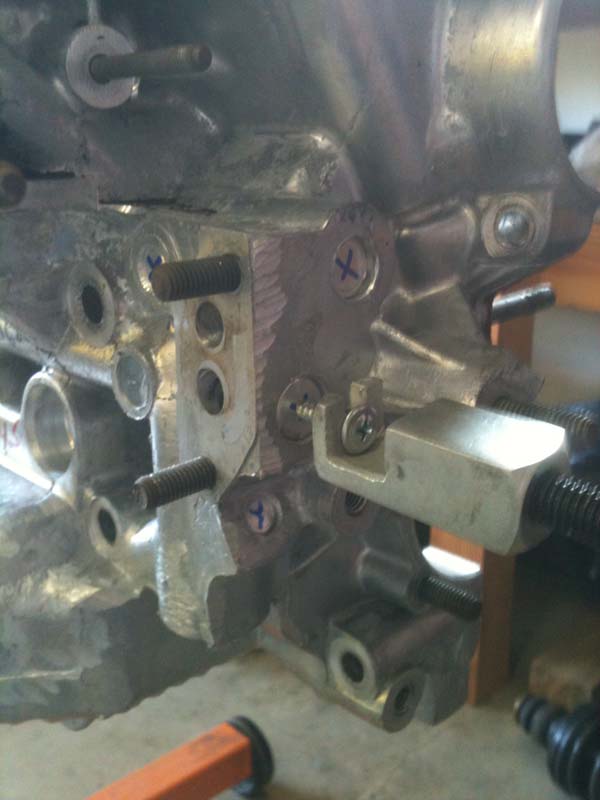 Below you can see the plug out of the hole, this plug, (can you see the second plug in the hole), is really the only hole you need to be really careful not to drill too deep, and you need the second tap ground down to get full threads. 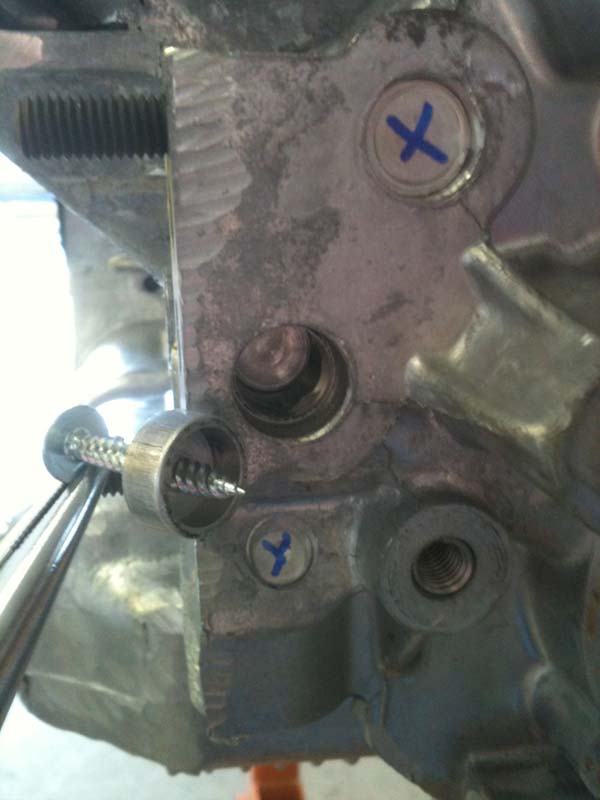 From my research( I'm somewhat search challanged) I thought you need this for all the holes, since I had already bought two of each tap, and ground one, I double tapped all of mine anyway. 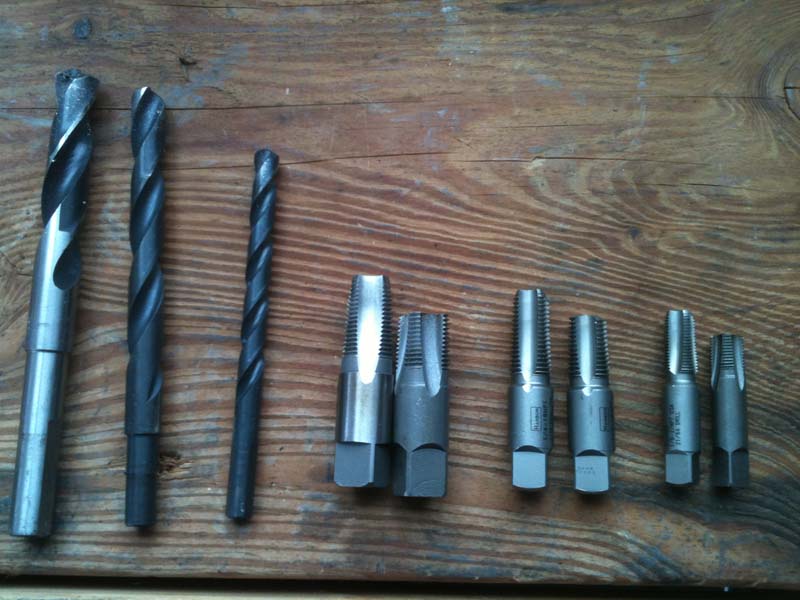 All the plugs out, anyone want to buy a NLA press in plug set, slightly used, only one small hole in the middle. (IMG:style_emoticons/default/lol-2.gif) 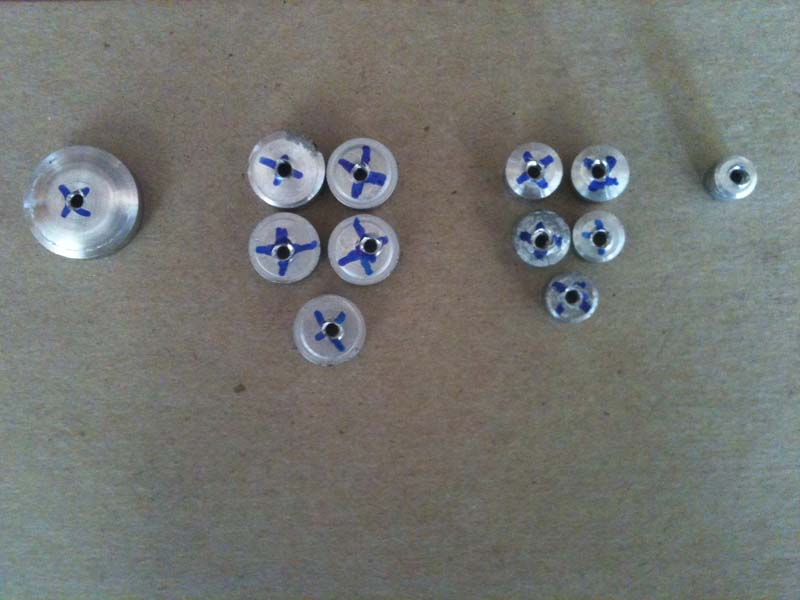 I had bought a "plug kit" from a vender I won't mention. But unfortunately they don't have a clue what plugs our engines need. So I had to order new ones from Jegs. 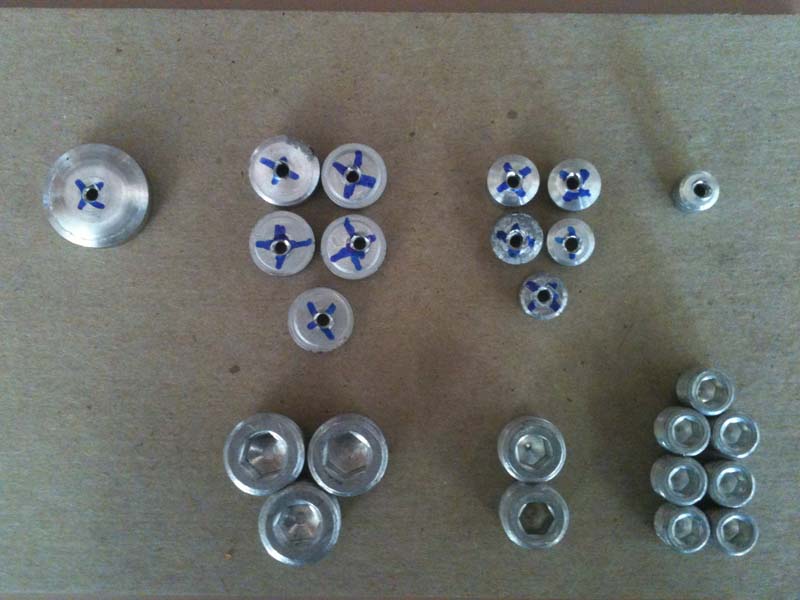 Also in my research I found mentioned having to modify the tap handle or problems with clearance issues tapping some of the holes. I solved this by using a socket and extention with a rachet wrench to tap those holes, worked great. 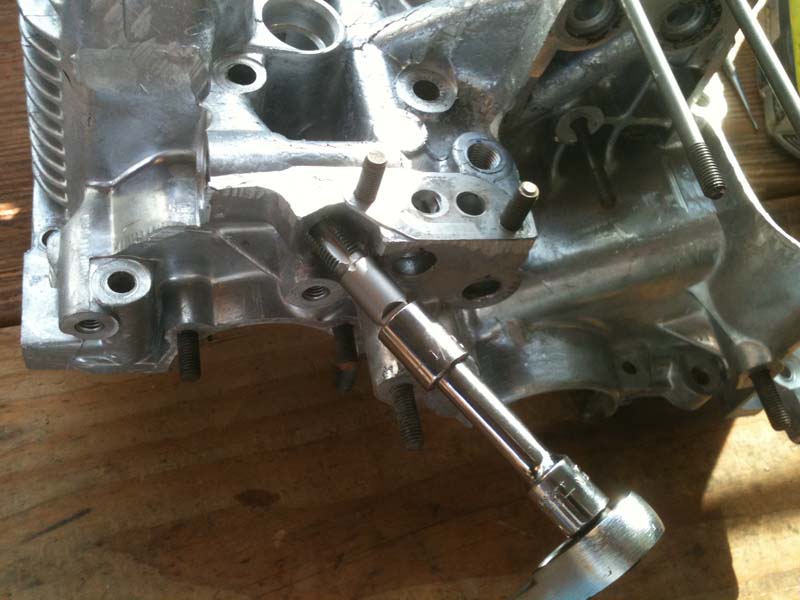 Thats basically it, be careful to drill straight, and not damage the second plug in the one hole. Clean up is very important, and don't close off any passage ways with a plug too deep. ( I just put mine in a couple of threads), I'll let McMark have the fun of actually installing them. Here are the new plugs, black anodized aluminum. 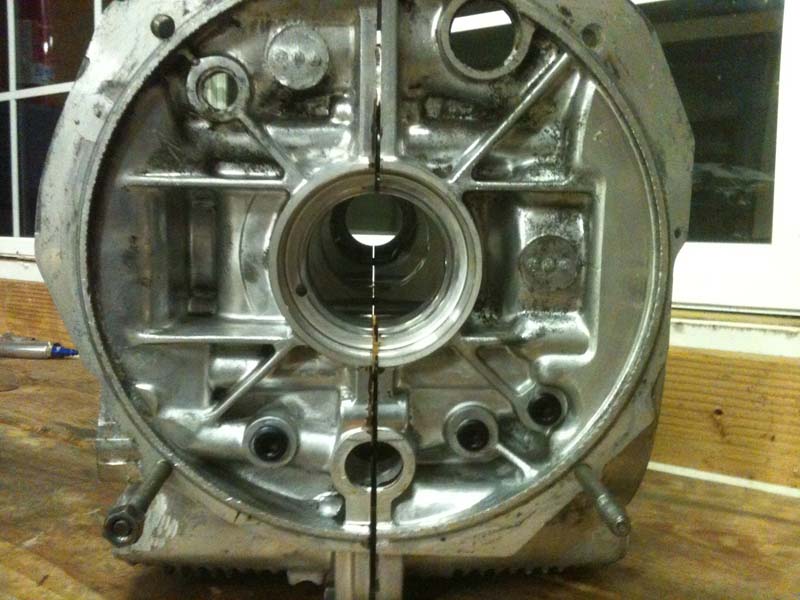 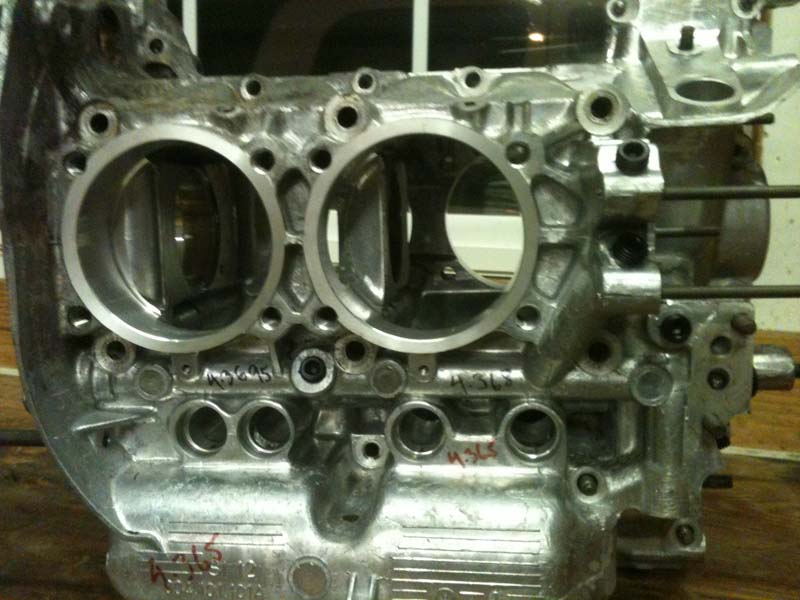 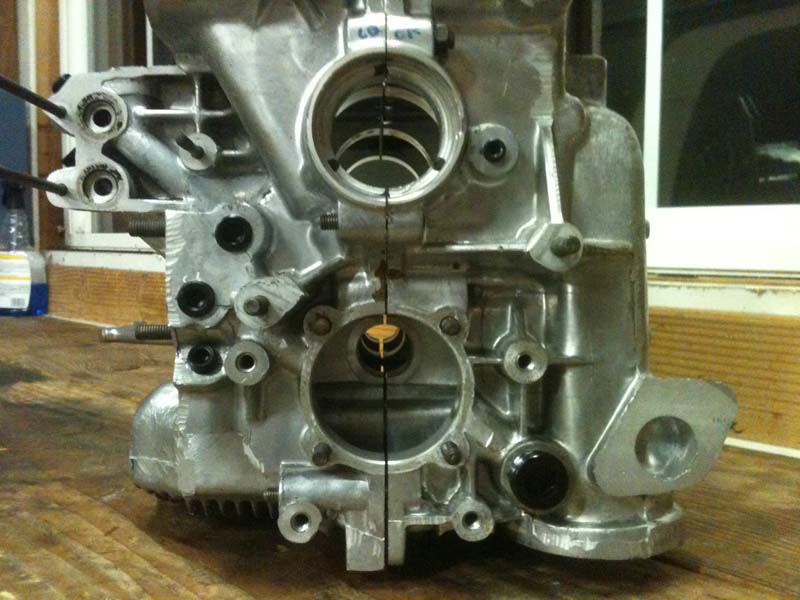 Hope that helps someone. This weekend I hope to get the other trailing arm apart, and start getting the parts cleaned up and repainted, then the calipers. Jeff |
|
|
|
| JStroud |
Nov 6 2011, 09:06 AM
Post
#16
|
|
Senior Member Group: Members Posts: 1,463 Joined: 15-January 11 From: Galt, California Member No.: 12,594 Region Association: Northern California |
My son came over yesterday while I was taking the rear trailing arms apart, and showed me a cool trick, he's a mechanic in Oakland. I was trying to get the shaft out of the hub, first one came out no problem. The second wouldn't budge even with a bigger hammer. Some of you already know this I'm sure. He showed up as I was beating on it and said no no no, you need an air hammer, that's what we use at work.
I don't have an air hammer, but I do have a demolition hammer drill with a hammer only setting. Put in a pointed chisel, put it in the end of the shaft and literally 20 seconds and it popped out! Now I'm trying to think of other applications, may never beat with a hammer again (IMG:style_emoticons/default/smash.gif) guess your never to old to learn something new. Jeff |
|
|
|
| JStroud |
Dec 8 2011, 01:43 PM
Post
#17
|
|
Senior Member Group: Members Posts: 1,463 Joined: 15-January 11 From: Galt, California Member No.: 12,594 Region Association: Northern California |
Well progress slowed up a bit on the 75, mainly because....I bought another 914!!
(IMG:style_emoticons/default/piratenanner.gif) And this one actually runs! (IMG:style_emoticons/default/driving.gif)  The new car is a 74 2.0, Ran rough when I got it home, worked on it a little and got it running well enough to be driveable, but the brakes are shot, so after a few short drives, it's in the garage, up on jackstands, for a complete brake overhaul. 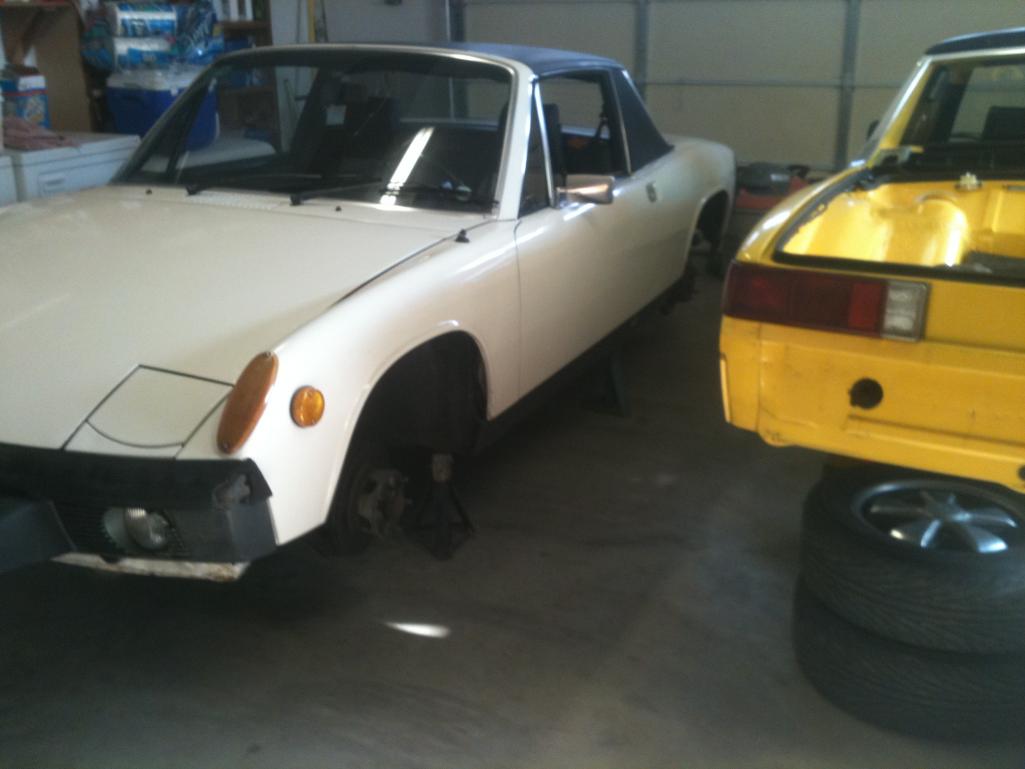 Oh boy two 914's on jackstands. Had a nice talk with Eric Shea yesterday, gave me a lot of great information, and got the rest of my brake parts ordered. Thanks again Eric, I appreciate all your time answering all my questions over the past week or so. ( I'm going to rebuild my calipers myself) (IMG:style_emoticons/default/smash.gif) (IMG:style_emoticons/default/sawzall-smiley.gif) So I took all the calipers off both cars, and today I'm going to finish taking them apart to take into the plater, found one 20 min from my house. 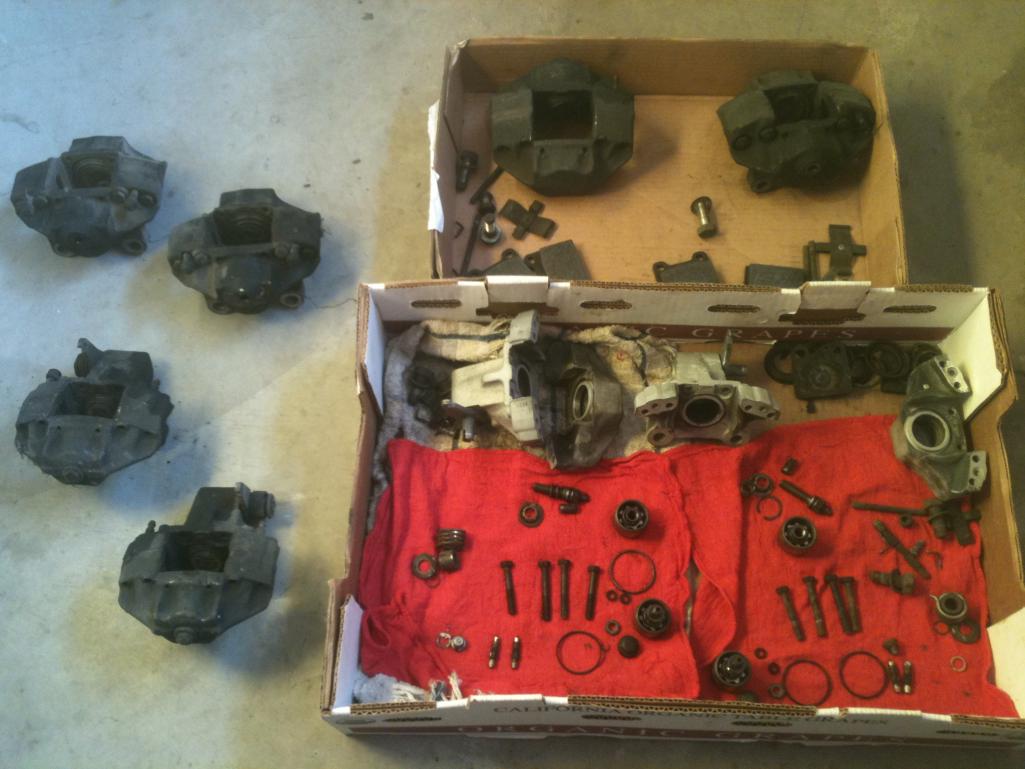 But now for the real progress, as you know I dropped all my engine parts off at Original Customs in Sonoma for Mark to build my new motor. I talked to him yesterday it's almost done (IMG:style_emoticons/default/beer.gif) and here are some pictures he sent me.  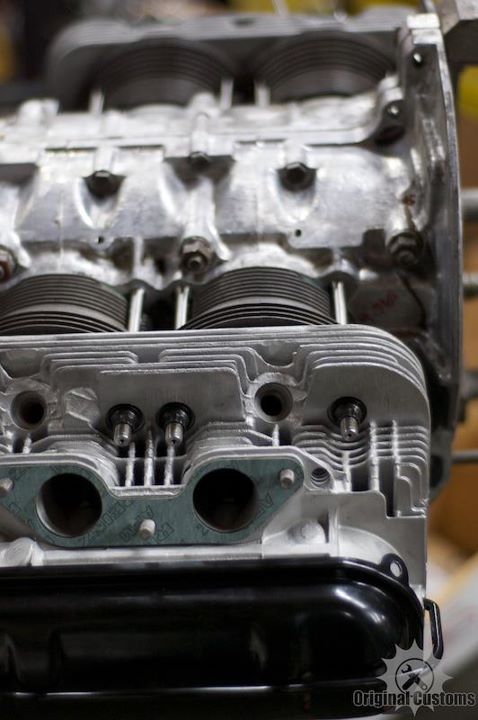 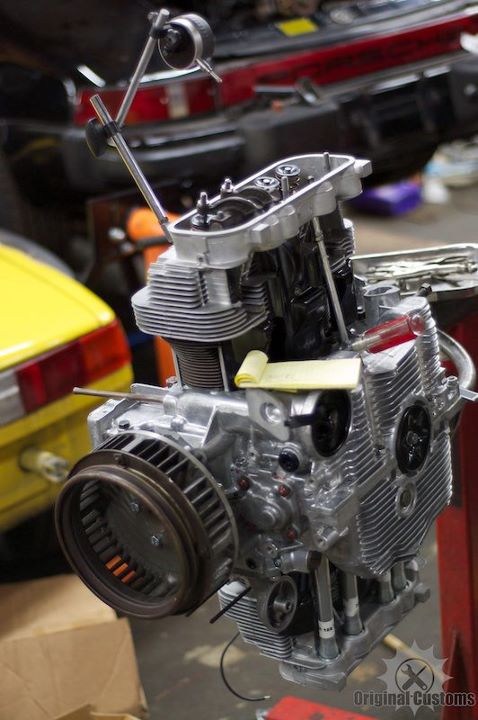 Looks like he's got it almost ready to run. I'm sure he'll post a video of the break in. Isn't that a pretty sight! Thanks for the pictures Mark can't wait to hear it run (IMG:style_emoticons/default/aktion035.gif) Jeff |
|
|
|
| underdog |
Dec 8 2011, 03:31 PM
Post
#18
|
|
Member Group: Members Posts: 82 Joined: 20-September 11 From: Mountain Home, AR Member No.: 13,579 Region Association: None |
Looks really great. I see from the photo your 75 has factory fog lights. If you ever have occasion to look at the wiring to the dash switch I sure would like to know what 2 wires, along with ground is run to that switch. Thanks, Underdog
|
|
|
|
| PBC914 |
Dec 8 2011, 03:40 PM
Post
#19
|
|
Member Group: Members Posts: 192 Joined: 30-December 10 From: Minneapolis Member No.: 12,545 Region Association: Upper MidWest |
QUOTE(underdog @ Dec 8 2011, 03:31 PM) Looks really great. I see from the photo your 75 has factory fog lights. If you ever have occasion to look at the wiring to the dash switch I sure would like to know what 2 wires, along with ground is run to that switch. Thanks, Underdog I believe it is solid white and the other wire is solid yellow with white stripe. PM me and I can send a wiring diagram. |
|
|
|
| JStroud |
Dec 8 2011, 04:48 PM
Post
#20
|
|
Senior Member Group: Members Posts: 1,463 Joined: 15-January 11 From: Galt, California Member No.: 12,594 Region Association: Northern California |
QUOTE(PBC914 @ Dec 8 2011, 01:40 PM) QUOTE(underdog @ Dec 8 2011, 03:31 PM) Looks really great. I see from the photo your 75 has factory fog lights. If you ever have occasion to look at the wiring to the dash switch I sure would like to know what 2 wires, along with ground is run to that switch. Thanks, Underdog I believe it is solid white and the other wire is solid yellow with white stripe. PM me and I can send a wiring diagram. Actually there is a brown wire a black wire and a greyish(maybe white) with a red stripe. But a picture is worth a thousand words, hope this helps. Jeff 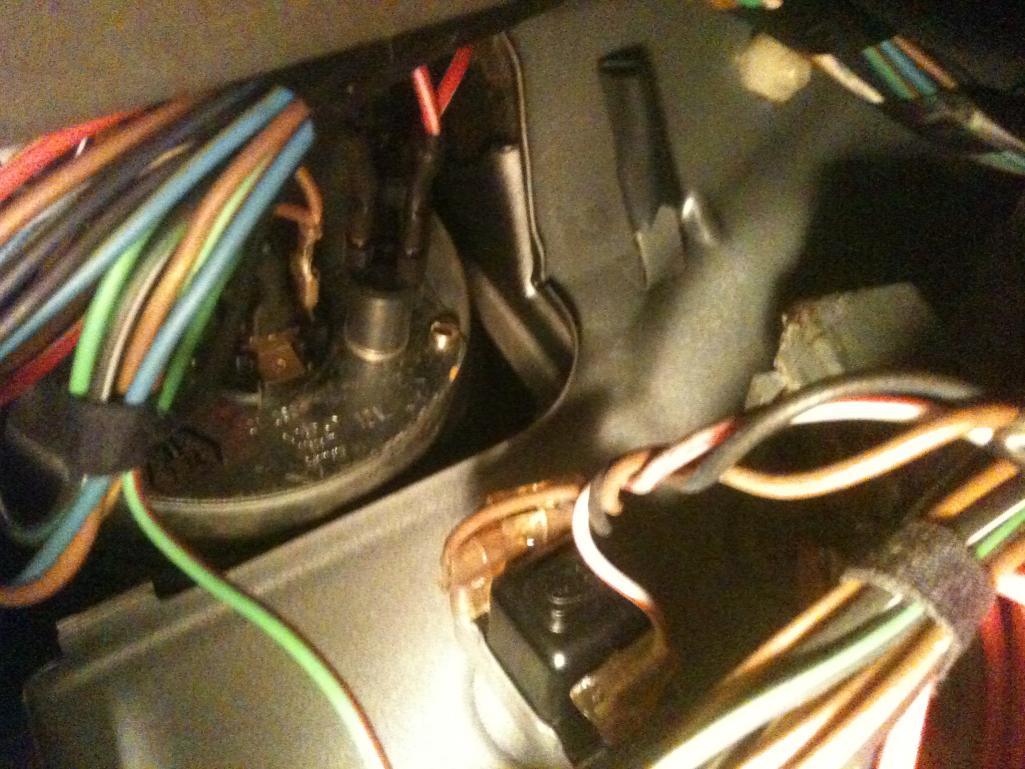 |
|
|
|
|
1 User(s) are reading this topic (1 Guests and 0 Anonymous Users)
0 Members:

|
Lo-Fi Version | Time is now: 5th May 2024 - 02:47 PM |
Invision Power Board
v9.1.4 © 2024 IPS, Inc.