|
|
|
Porsche, and the Porsche crest are registered trademarks of Dr. Ing. h.c. F. Porsche AG.
This site is not affiliated with Porsche in any way. Its only purpose is to provide an online forum for car enthusiasts. All other trademarks are property of their respective owners. |
|
|


| JStroud |
 Nov 3 2011, 01:04 AM Nov 3 2011, 01:04 AM
Post
#1
|
|
Senior Member  Group: Members Posts: 1,463 Joined: 15-January 11 From: Galt, California Member No.: 12,594 Region Association: Northern California |
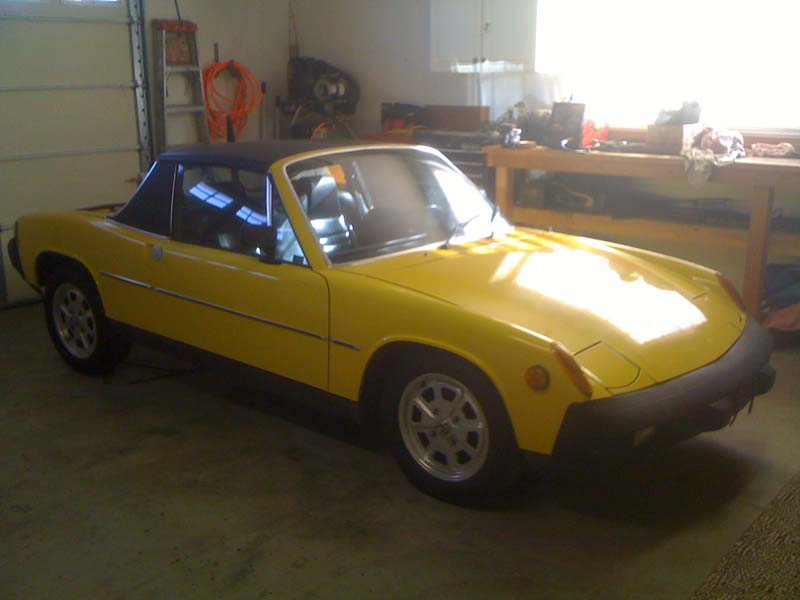
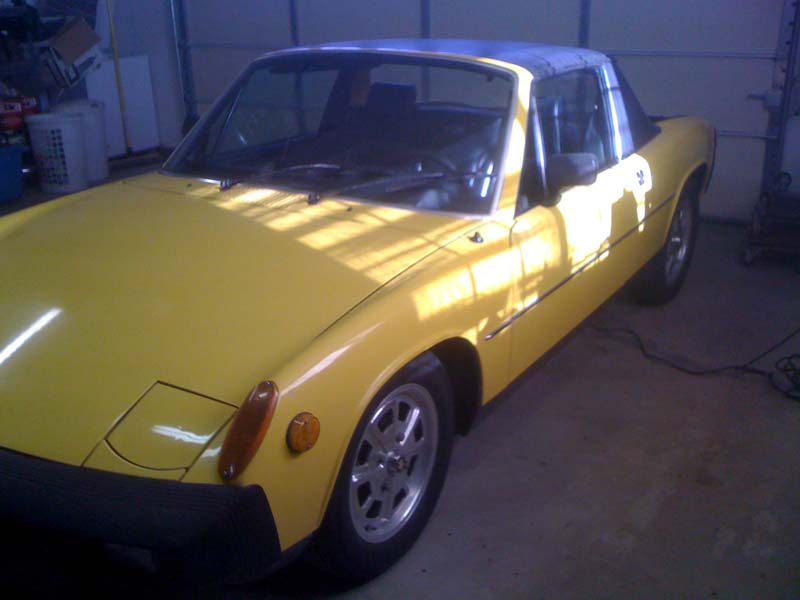
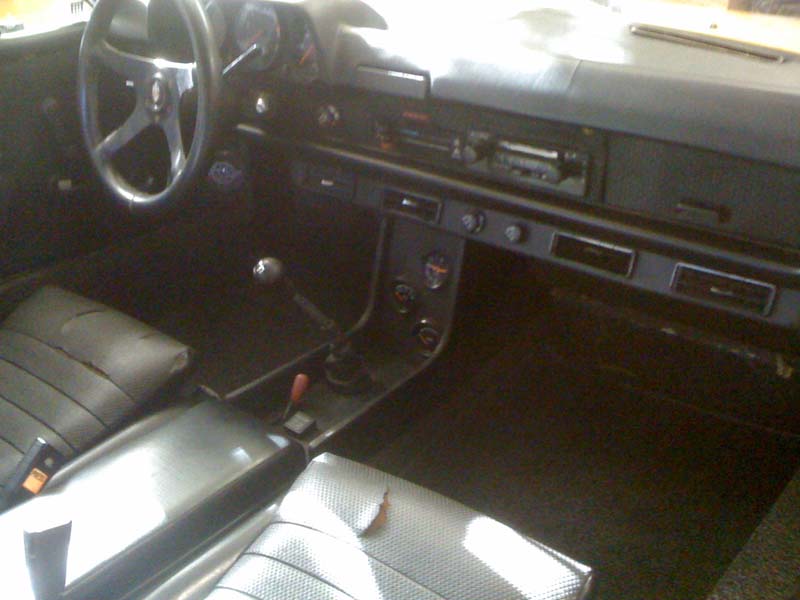
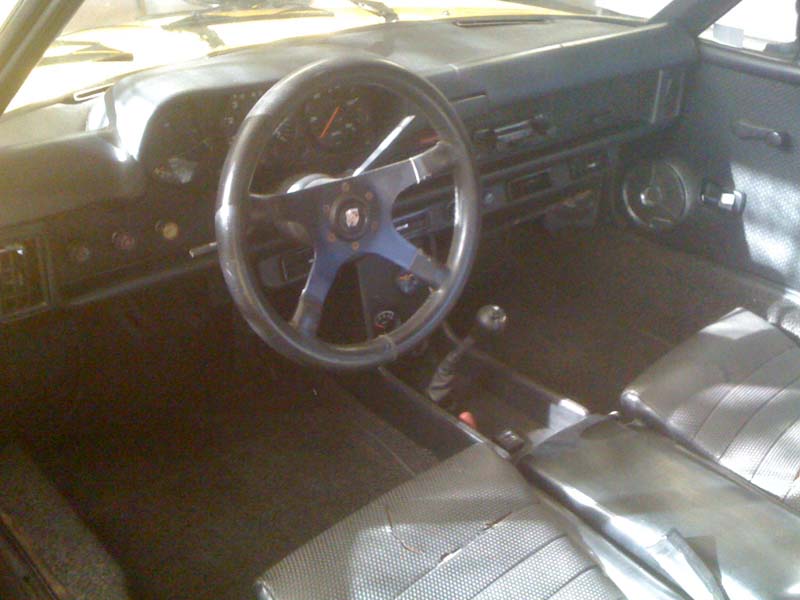
I finally got around to organizing my pictures to document my progress. I bought my car, a 75 914 2.0 in November 2010. It was originaly purchased in Sacramento Ca, the original owner sold it to his son in 1994, the son drove it until "it started running rough", and he parked it. It sat until 2008 when he sold it to his friend who was going to get it running, two years later it was still sitting, but with the engine out and pieces in boxes. So being the smart guy I am, I bought it. Here's some pics of the car when I got it home.
    The PO had pulled the engine with the intent of fixing it, then somewhere along the way he purchased a "running" 73 2.0. So I have a spare motor. 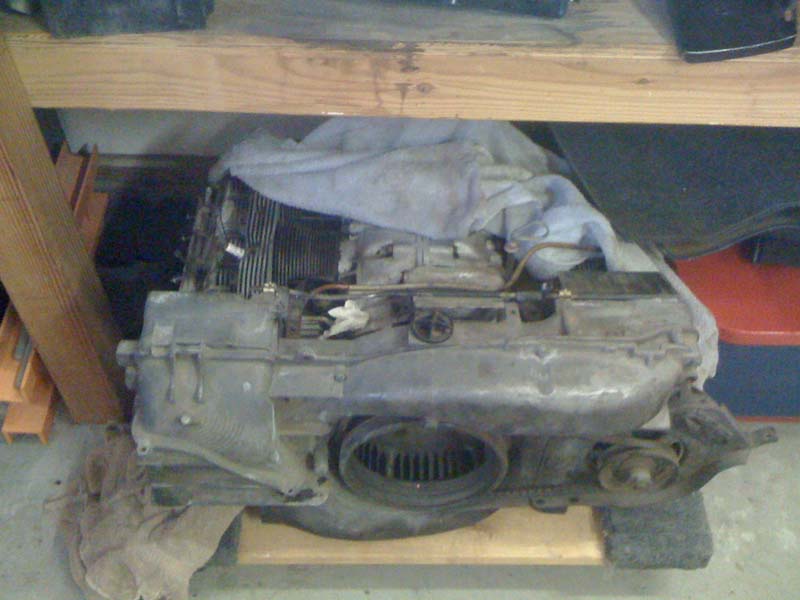 I spent a few months buying books and reading what I could find, (never worked on a 914 before) found this website! I decided to rebuild the original motor... here I go. 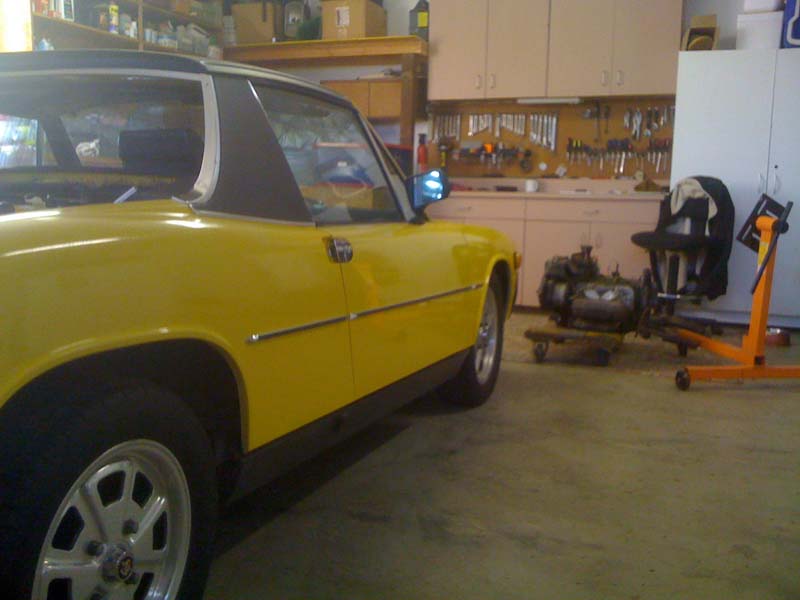 Got the engine stripped down, and the case split.  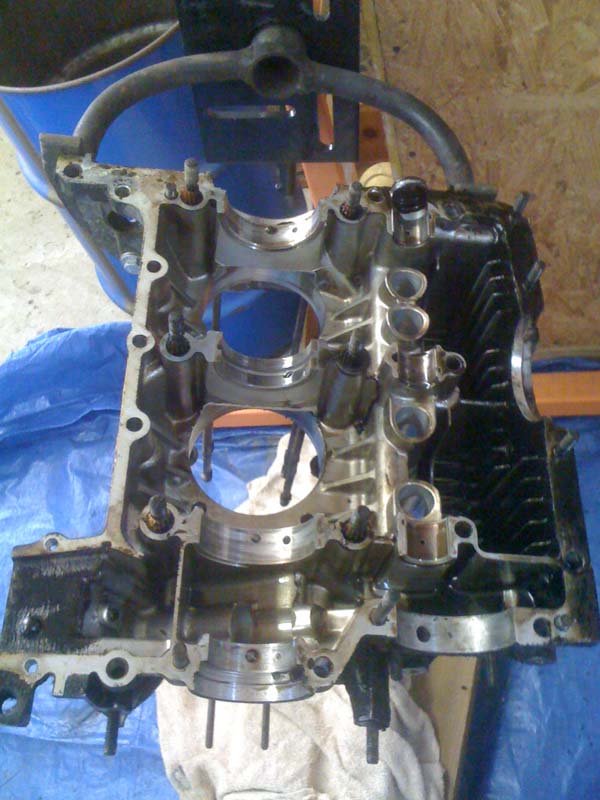 Found out why they parked it, looks like a dropped valve seat. 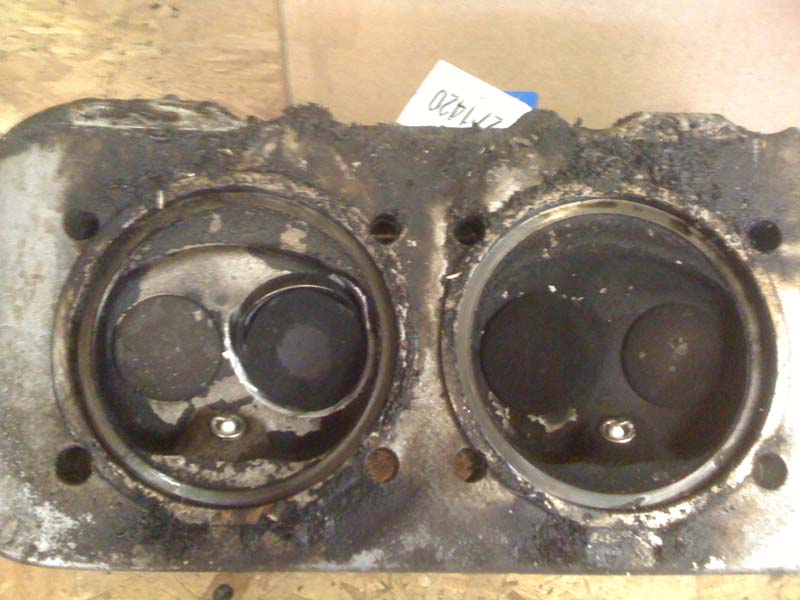 Damaged the top of the piston as well. 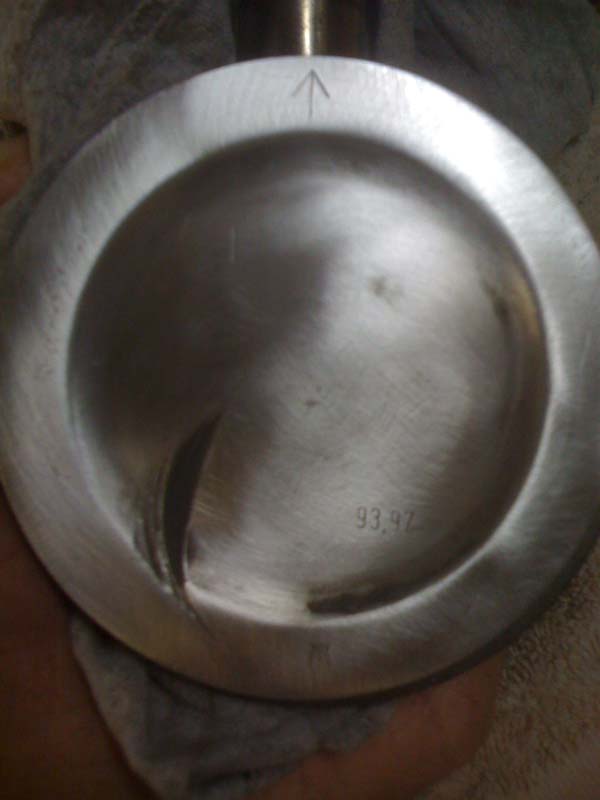 I took the case, heads, crank, and cylinders to the machine shop, Time to start some rust repair. 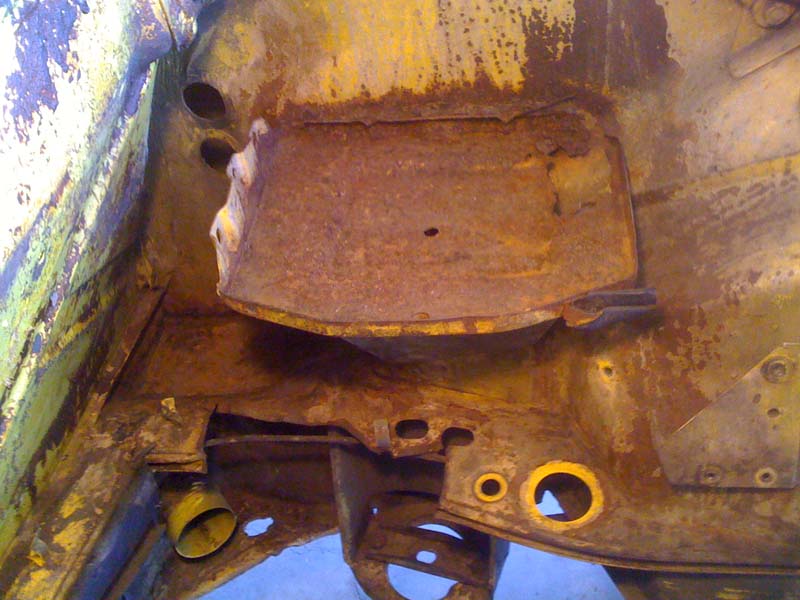 The battery tray was toast, the rest seems to be just surface rust, except the trunk it has a few rusted through pin holes.  After I finished removing the battery tray I pressure washed the engine compartment, trunk, and under the trunk. 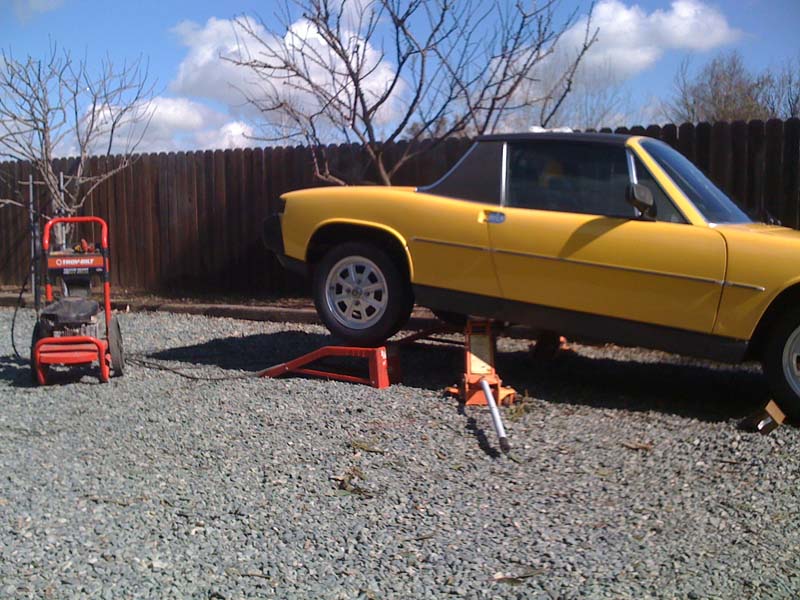 I finished all this by february, but the next step was to sand blast the rust, and EVERY weekend it would be raining, so the car sat in the garage. Then I had a major set back, My Dad was diagnosed with cancer in april, had surgery in May. So April - june are kind of a blurr, He has recovered very well, but progress on the car was slow for a while, had to get caught up on work. I went to Doc's tranny clinic in Discovery Bay in June and rebuilt my transmission. My tranny all apart.  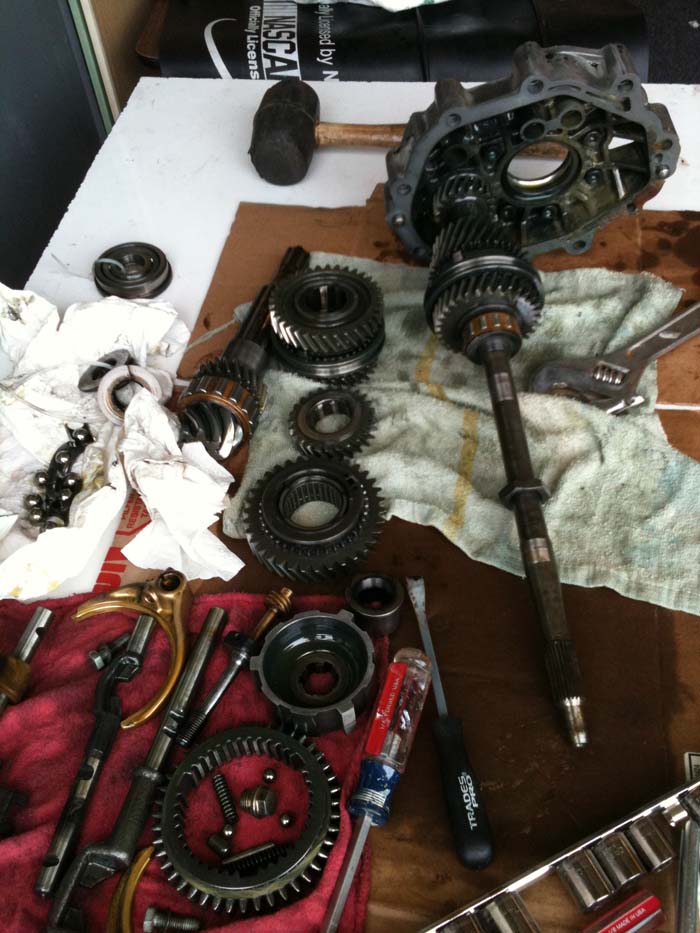 Good thing Doc talked me into going, bearing was in pieces when I took it apart. 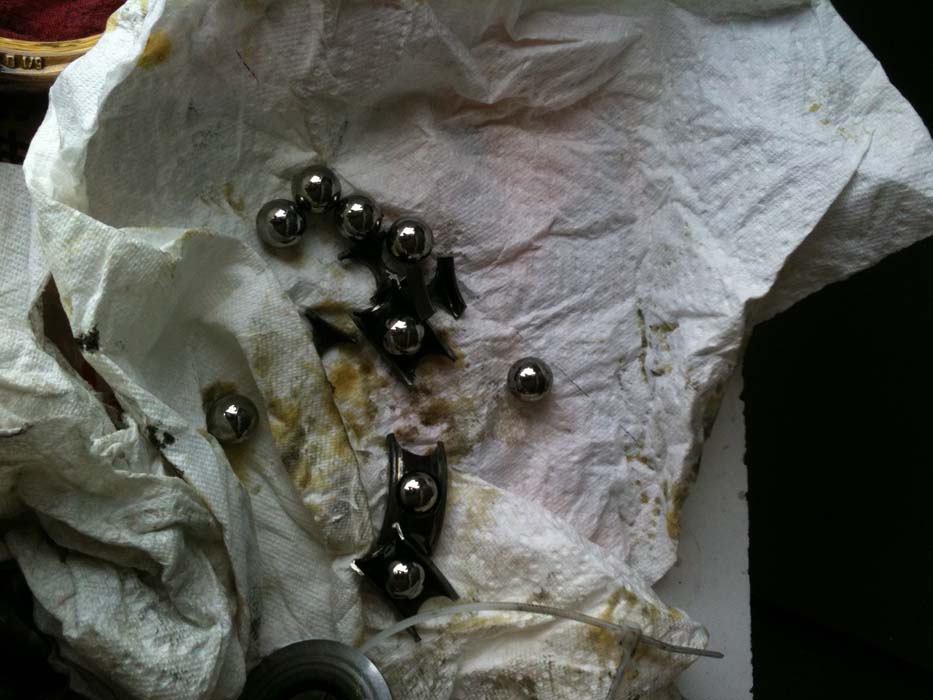 A few familiar faces. 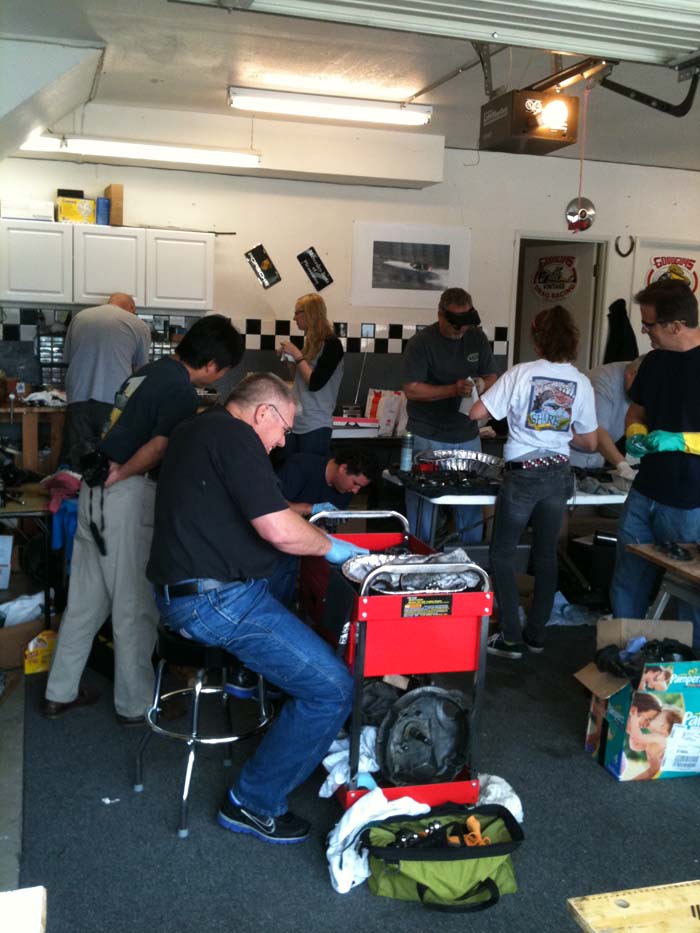 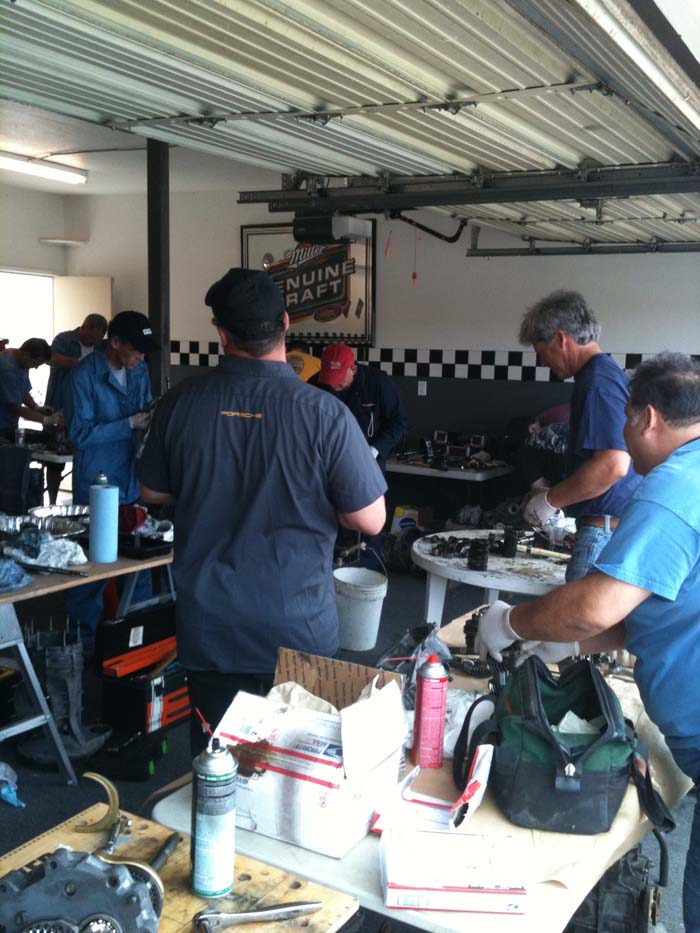 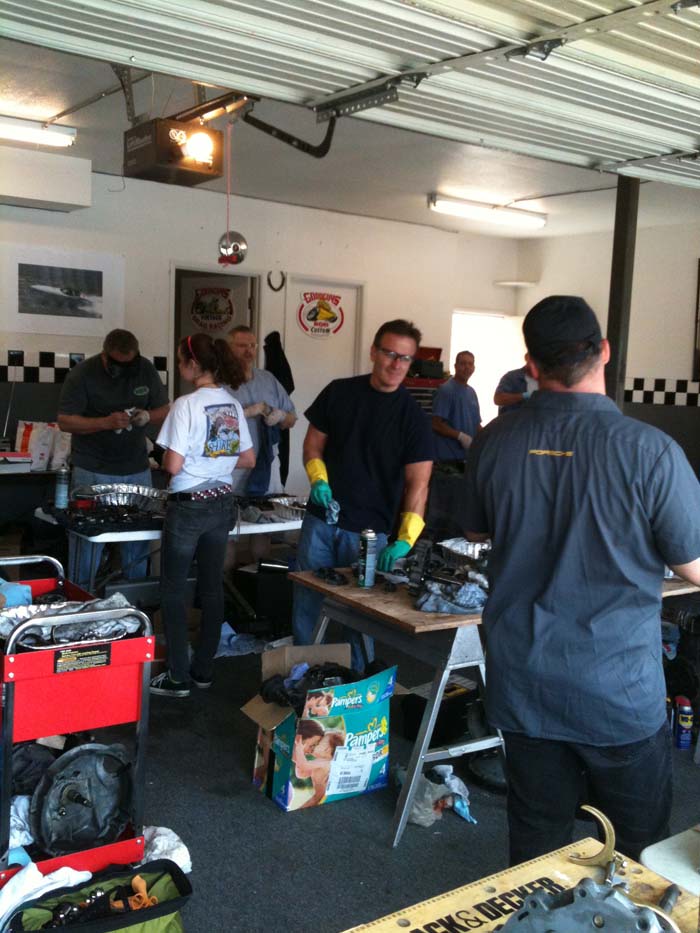 All done ready to install, wish the car was ready... 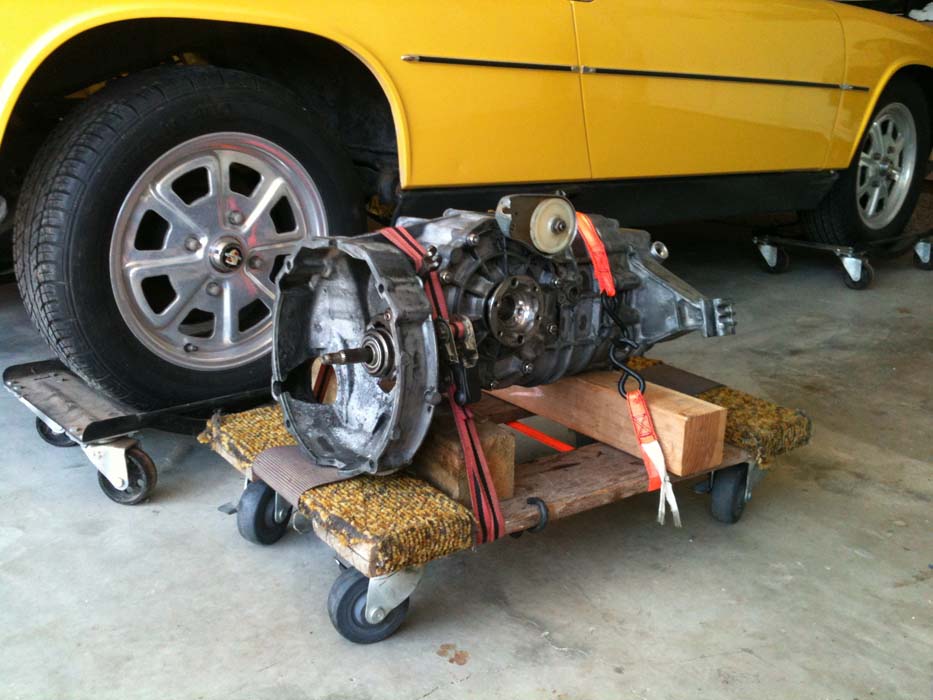 Of course in all the down time I did find time to do a little parts shopping. 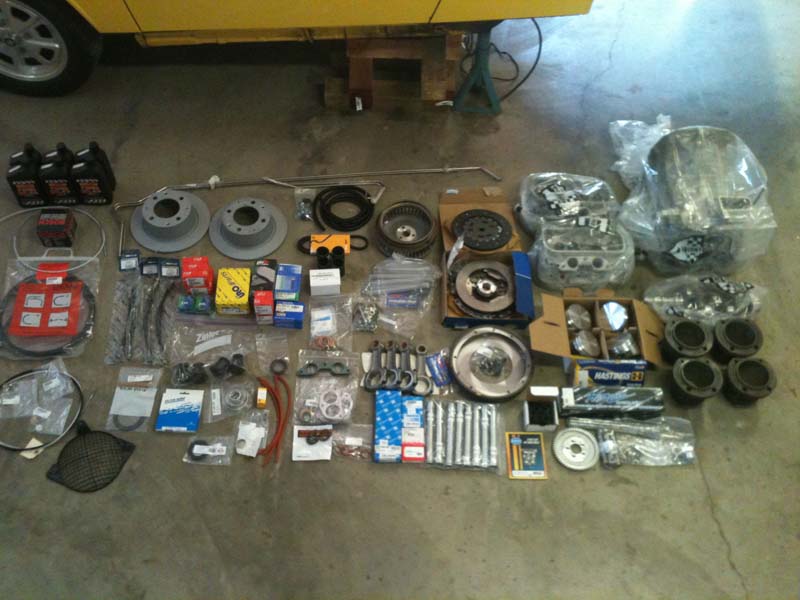  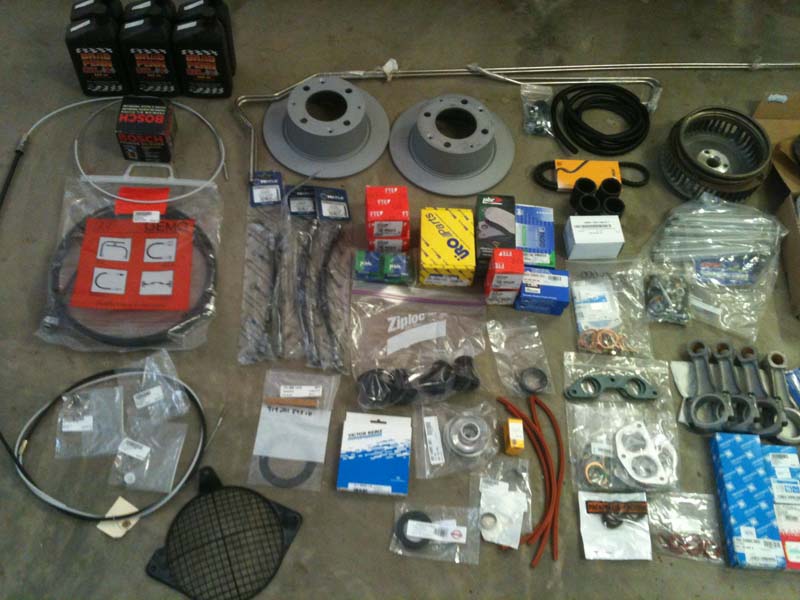 And I decided to build a blast cabinet  Almost done 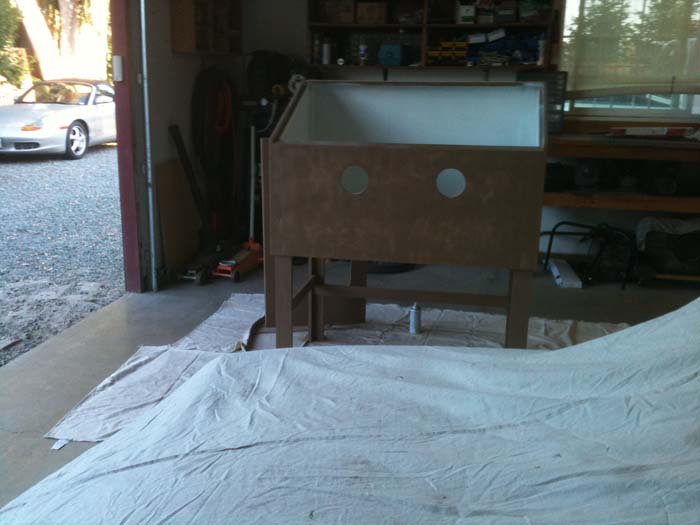 Ready for action. 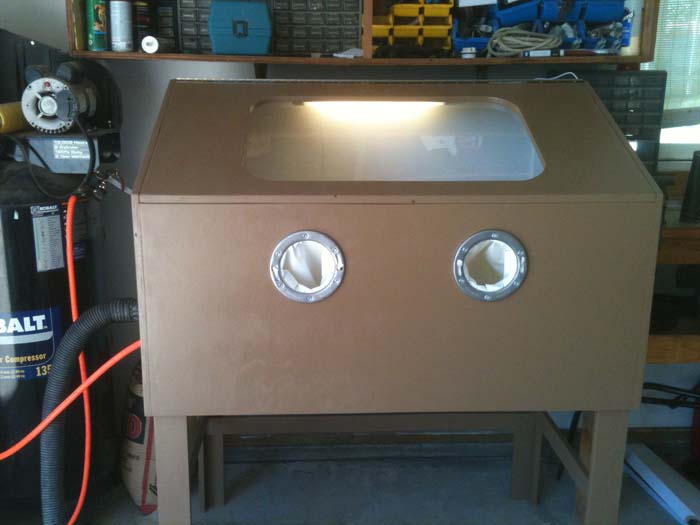 And I did a lot of reorganizing in the garage, this is the first car I've done in 20 years, oh ya, did I mention i'm old. 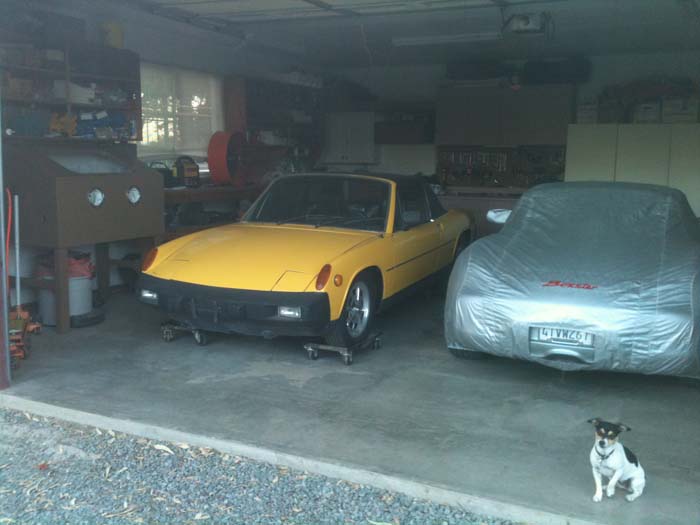 Well the weather finally got nicer, work slowed up a bit and I finally got the car out and sandblasted. 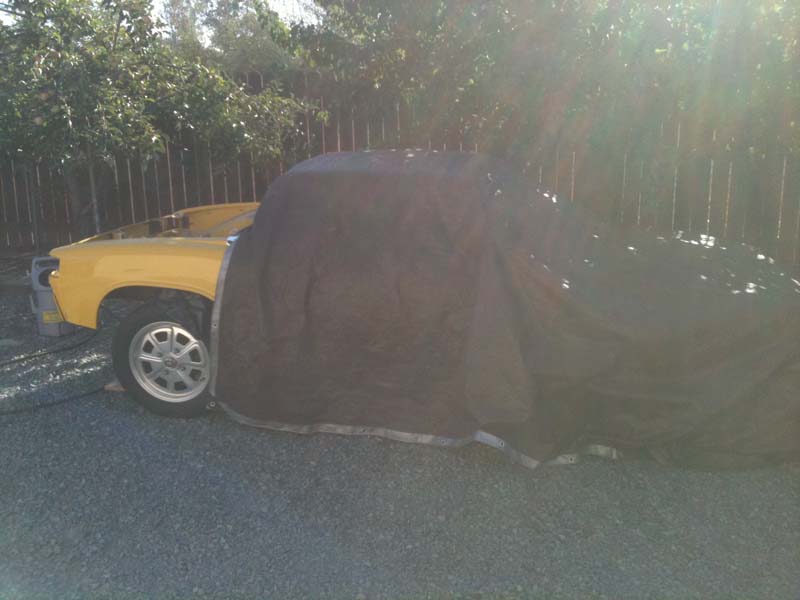 After I finished sandblasting I washed the area down with metal prep, and then back in the garage for painting. 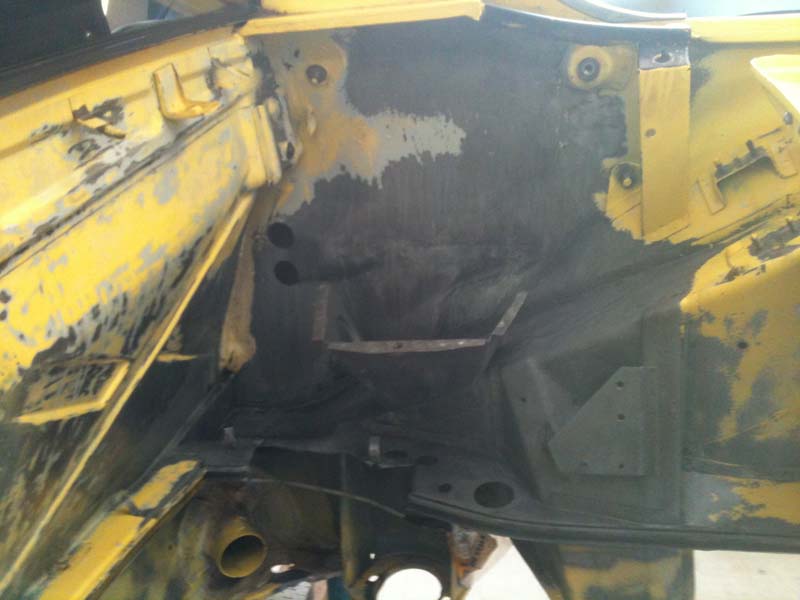 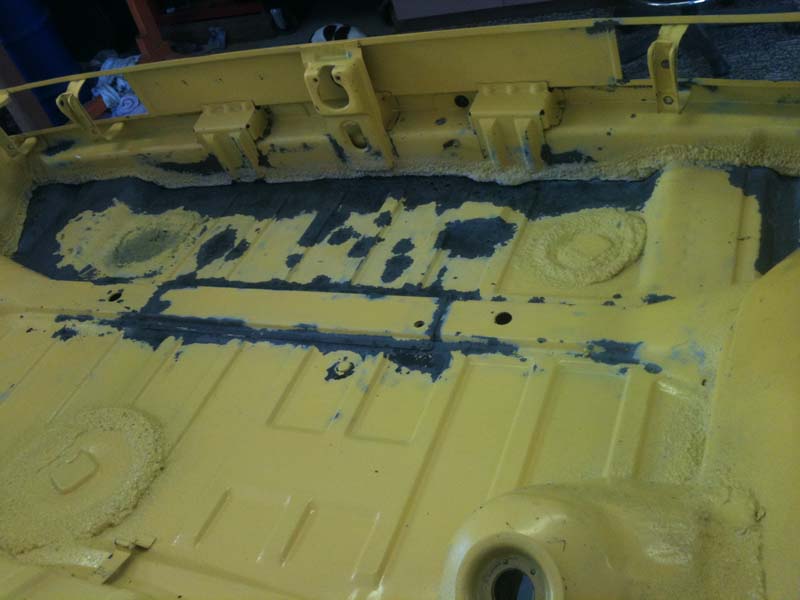 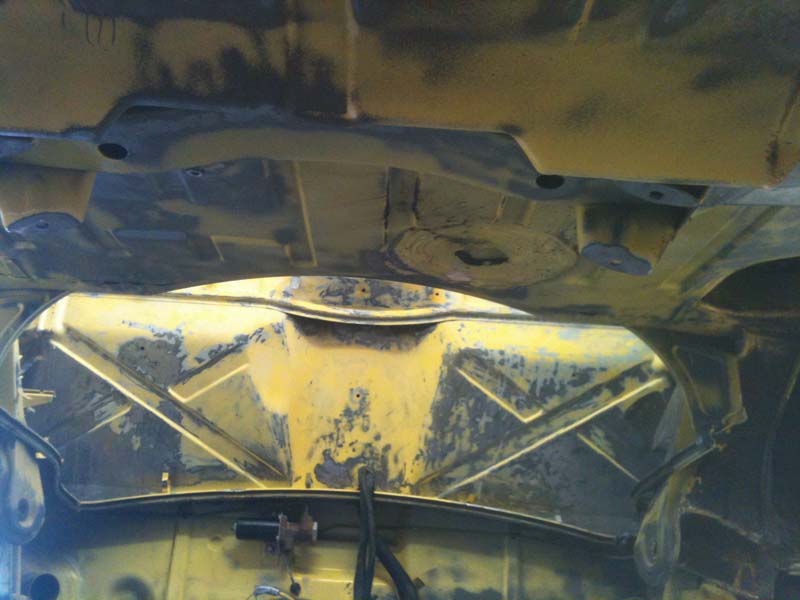 Almost ready to primer 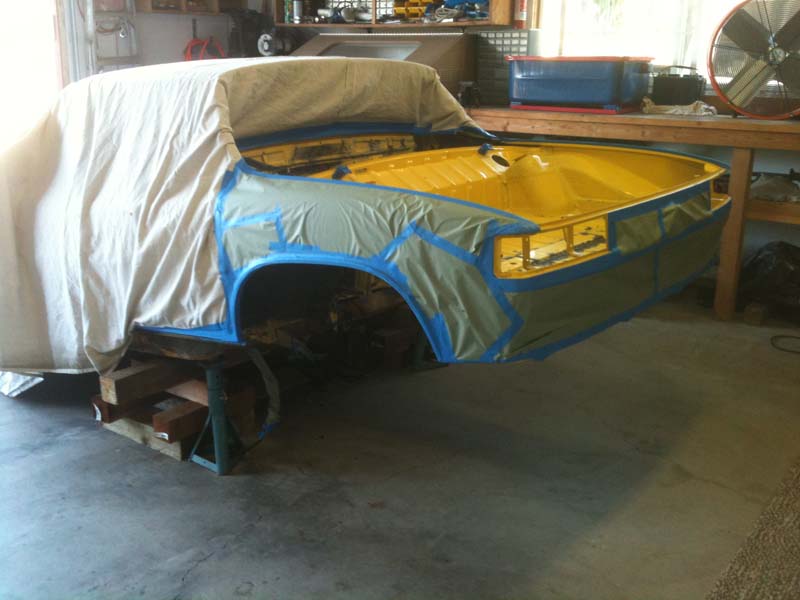 Everything got two coats primer. 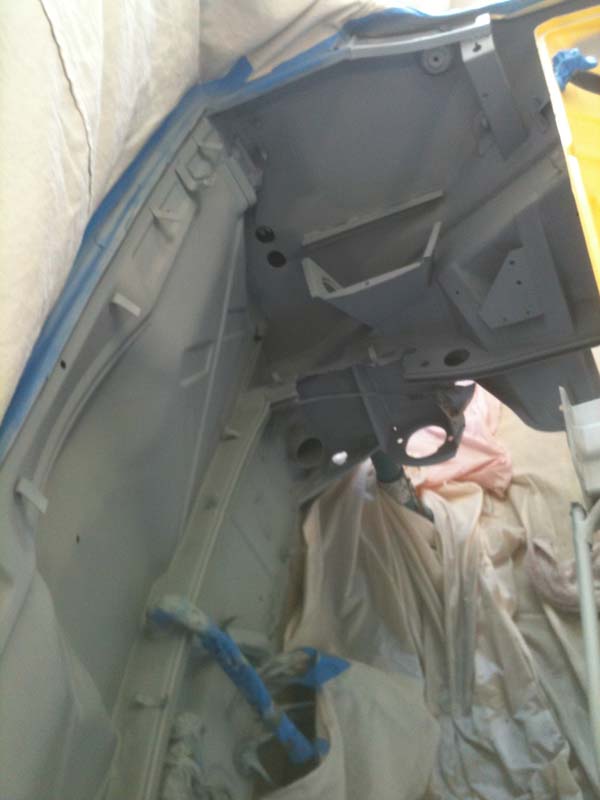 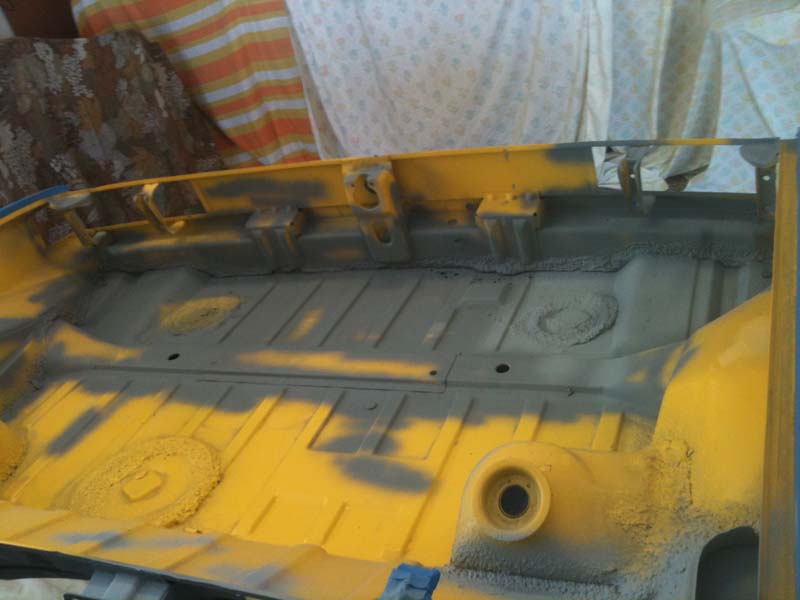 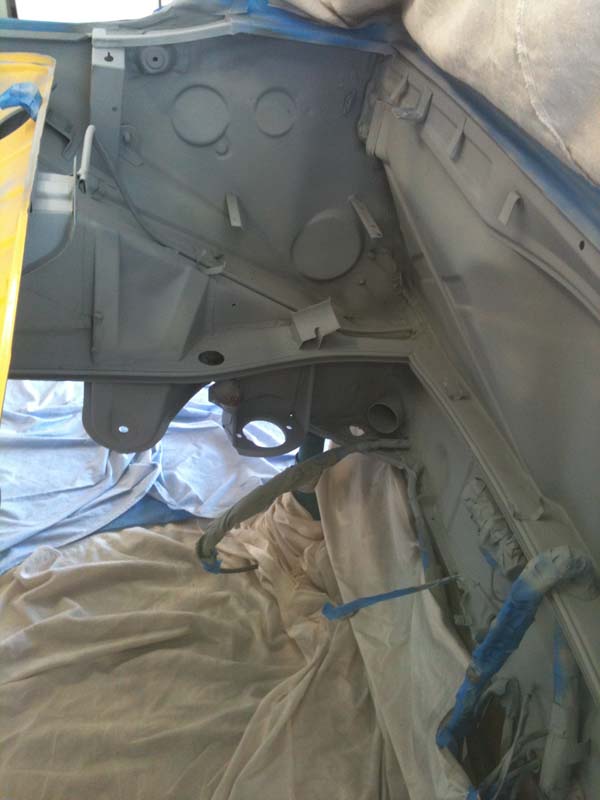 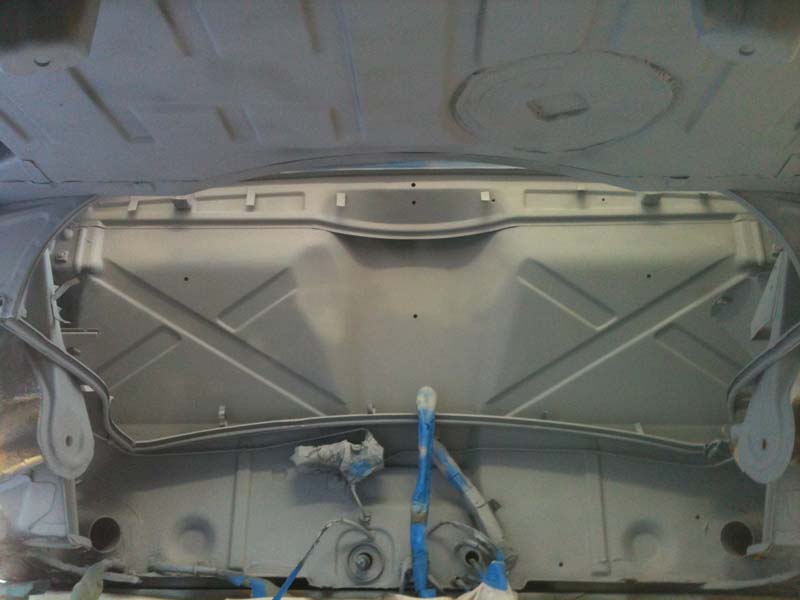 I decided to paint the engine compartment gloss black, and under the trunk and fender wells flat black. 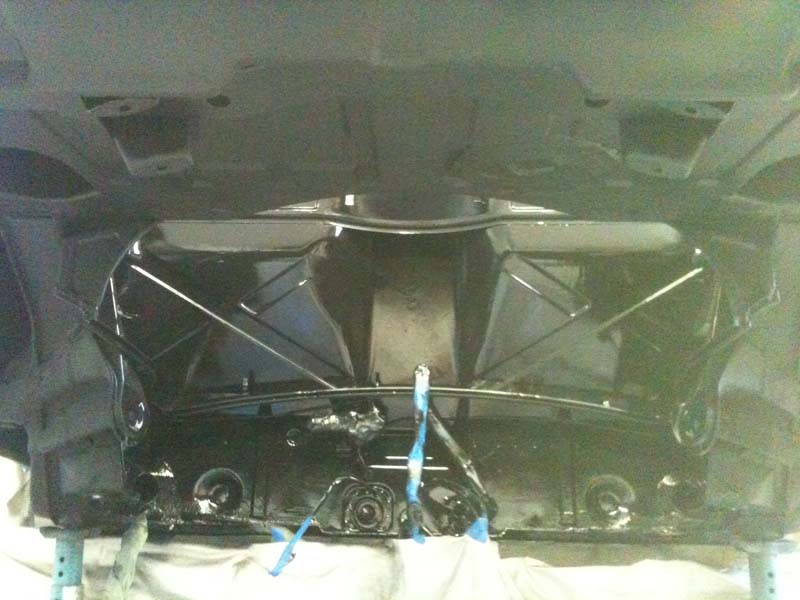 I bought cans of color match paint online to paint the trunk. 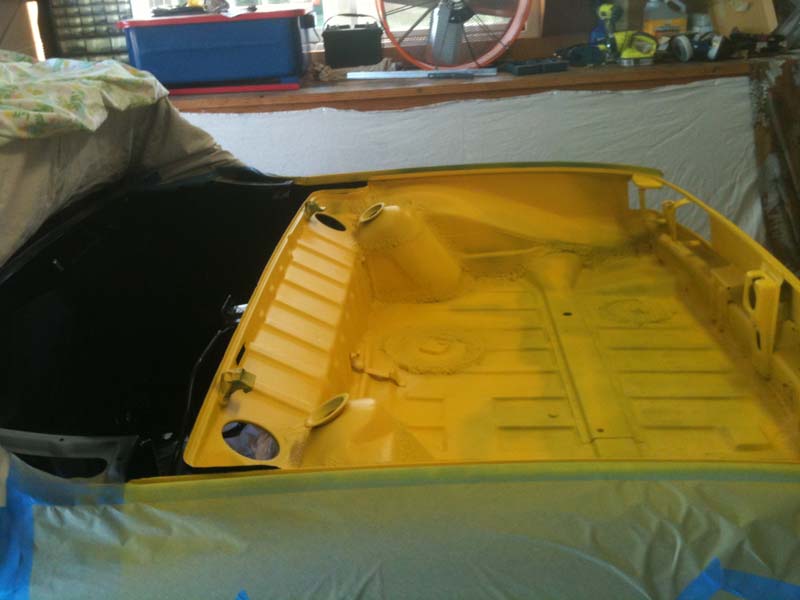 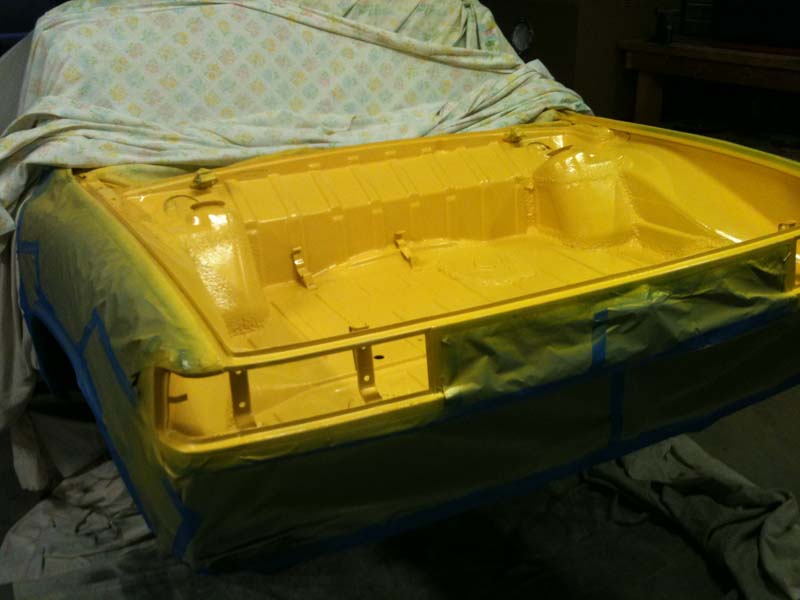 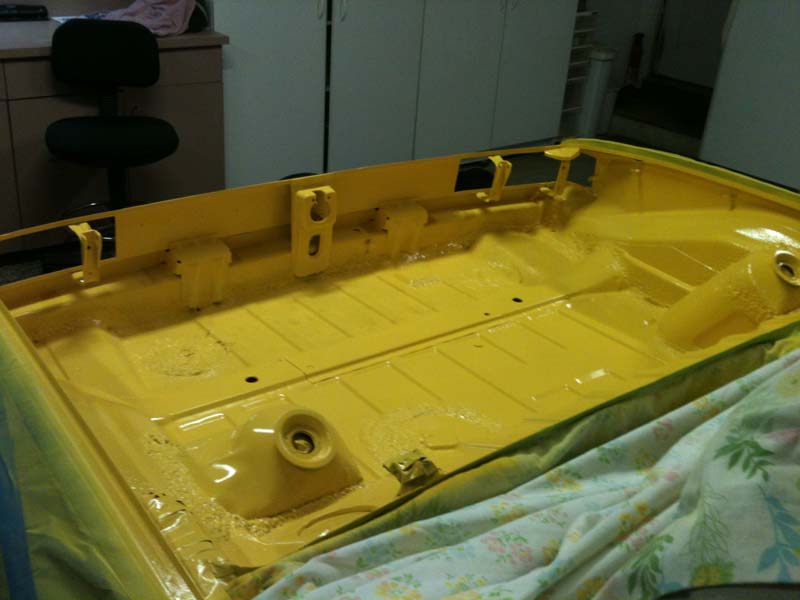 A final coat of clear and the painting is done.. for now. 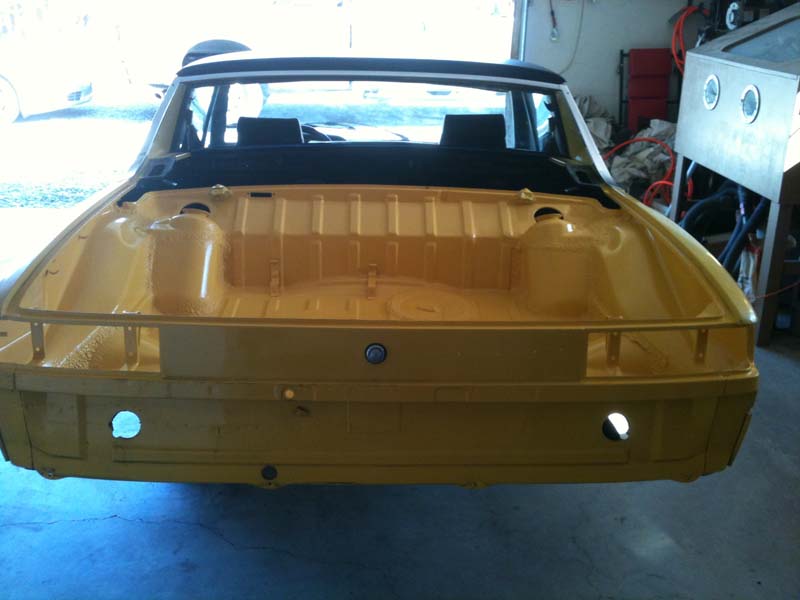 |
   |

 
|
  |
Replies(20 - 39)
| bohalrantipol |
Dec 9 2011, 10:47 AM
Post
#21
|
|
Member Group: Members Posts: 53 Joined: 11-December 06 From: Richmond, VA Member No.: 7,353 |
Did you pick up those ARP head bolts from LN engineering? how much did you drop on those?
|
|
|
|
| JStroud |
Dec 9 2011, 03:17 PM
Post
#22
|
|
Senior Member Group: Members Posts: 1,463 Joined: 15-January 11 From: Galt, California Member No.: 12,594 Region Association: Northern California |
QUOTE(bohalrantipol @ Dec 9 2011, 08:47 AM)  Did you pick up those ARP head bolts from LN engineering? how much did you drop on those? Couldn't find the invoice, but I think it was LN, I do remember they were around $325.00, not cheap. Hopefully worth it though. Jeff |
|
|
|
| bohalrantipol |
Dec 9 2011, 05:34 PM
Post
#23
|
|
Member Group: Members Posts: 53 Joined: 11-December 06 From: Richmond, VA Member No.: 7,353 |
What was your logic in using them? Did you run a much higher compression ratio? I only ask as I am thinking of going down the same road, but the standard convention (thus spoke jake raby) is that it is not necessary unless you run Nickies or have a much higher compression ratio. I am thinking of doing 11:1....plus I like having much more heavy duty hardware....
QUOTE(jsconst @ Dec 9 2011, 04:17 PM) QUOTE(bohalrantipol @ Dec 9 2011, 08:47 AM) Did you pick up those ARP head bolts from LN engineering? how much did you drop on those? Couldn't find the invoice, but I think it was LN, I do remember they were around $325.00, not cheap. Hopefully worth it though. Jeff |
|
|
|
| JStroud |
Dec 9 2011, 08:02 PM
Post
#24
|
|
Senior Member Group: Members Posts: 1,463 Joined: 15-January 11 From: Galt, California Member No.: 12,594 Region Association: Northern California |
While researching my engine combination they were something I thought I needed, I probably would have been fine with the stock ones for my engine, but I had already bought them and never mind something being better than it needs to be. I also used the ARP rod bolts.
Jeff QUOTE(bohalrantipol @ Dec 9 2011, 03:34 PM) What was your logic in using them? Did you run a much higher compression ratio? I only ask as I am thinking of going down the same road, but the standard convention (thus spoke jake raby) is that it is not necessary unless you run Nickies or have a much higher compression ratio. I am thinking of doing 11:1....plus I like having much more heavy duty hardware.... QUOTE(jsconst @ Dec 9 2011, 04:17 PM) QUOTE(bohalrantipol @ Dec 9 2011, 08:47 AM) Did you pick up those ARP head bolts from LN engineering? how much did you drop on those? Couldn't find the invoice, but I think it was LN, I do remember they were around $325.00, not cheap. Hopefully worth it though. Jeff |
|
|
|
| Lennies914 |
Dec 9 2011, 10:30 PM
Post
#25
|
|
Slacker Group: Members Posts: 828 Joined: 9-January 10 From: NorCal Member No.: 11,216 Region Association: Northern California |
Looking great Jeff. You've been busy.
My son totaled my '74 last month (IMG:style_emoticons/default/headbang.gif) so I'm starting a new one this month. |
|
|
|
| JStroud |
Dec 9 2011, 11:01 PM
Post
#26
|
|
Senior Member Group: Members Posts: 1,463 Joined: 15-January 11 From: Galt, California Member No.: 12,594 Region Association: Northern California |
Thanks Lennie, Mark has made more progress on my project than I have lately, but progress is progress. Sorry to hear about your 74, but new projects are always fun especially if they're financed by insurance. Jeff QUOTE(Lennies914 @ Dec 9 2011, 08:30 PM) Looking great Jeff. You've been busy. My son totaled my '74 last month (IMG:style_emoticons/default/headbang.gif) so I'm starting a new one this month. |
|
|
|
| mrbubblehead |
Dec 11 2011, 12:33 AM
Post
#27
|
|
Twodollardoug Group: Members Posts: 1,155 Joined: 17-December 10 From: calimesa ca. Member No.: 12,492 Region Association: Southern California |
great thread jeff, do you happen to remember what size drill bits and taps you used for you oil galleys? what size plugs and how many of each? i am just about to tear down my engine and this info would be real helpful.
|
|
|
|
| Mike Bellis |
Dec 11 2011, 01:11 AM
Post
#28
|
|
Resident Electrician Group: Members Posts: 8,345 Joined: 22-June 09 From: Midlothian TX Member No.: 10,496 Region Association: None |
QUOTE(Lennies914 @ Dec 9 2011, 09:30 PM) Looking great Jeff. You've been busy. My son totaled my '74 last month (IMG:style_emoticons/default/headbang.gif) so I'm starting a new one this month. WHAT!!!! Mental note... My Son will never drive my 914... (IMG:style_emoticons/default/biggrin.gif) Do you still have that roller? |
|
|
|
| JStroud |
Dec 11 2011, 01:34 AM
Post
#29
|
|
Senior Member Group: Members Posts: 1,463 Joined: 15-January 11 From: Galt, California Member No.: 12,594 Region Association: Northern California |
5 - 3/8" plugs tap size 3/8 - 18 NPT drill 37/64
5 - 1/4" plugs tap size 1/4 - 18 NPT drill 7/16 1 - 1/8" plug tap size. 1/8 - 27 NPT drill 21/64 The large plug near the oil pump seems to vary by case or maybe year I've read some using 1/2 NPT plugs, mine was larger I had to use a 3/4 NPT I borrowed that tap and the 59/64 drill bit from my machinist for that one. But that's if you do them all, seems most only do the main 3/8" plugs. Hope this helps. Jeff QUOTE(mrbubblehead @ Dec 10 2011, 10:33 PM) great thread jeff, do you happen to remember what size drill bits and taps you used for you oil galleys? what size plugs and how many of each? i am just about to tear down my engine and this info would be real helpful. |
|
|
|
| JStroud |
Dec 15 2011, 11:29 PM
Post
#30
|
|
Senior Member Group: Members Posts: 1,463 Joined: 15-January 11 From: Galt, California Member No.: 12,594 Region Association: Northern California |
I went to Sonoma today and picked up my new motor from Original Customs.
McMark got it all put together and broke in. All the black parts he powder coated, sure looks pretty. (IMG:style_emoticons/default/piratenanner.gif) Now I need to get busy and finish cleaning and painting the rest of the parts so I can get it installed in the car. (IMG:style_emoticons/default/driving.gif) From a pile of parts on my garage floor....to this...Thanks McMark!!! 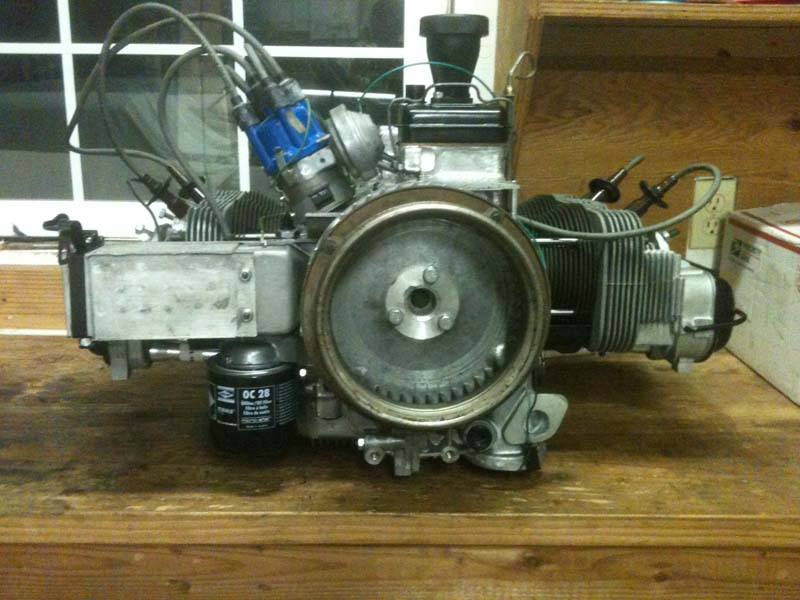 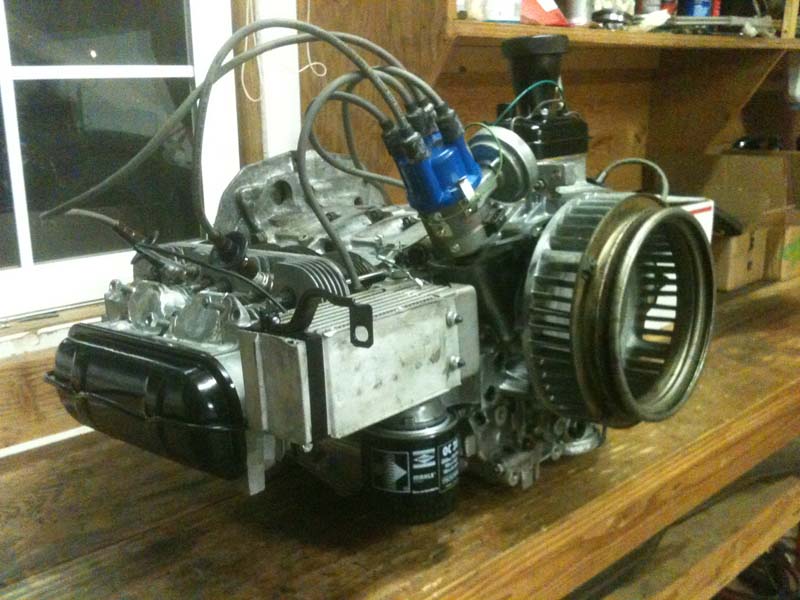 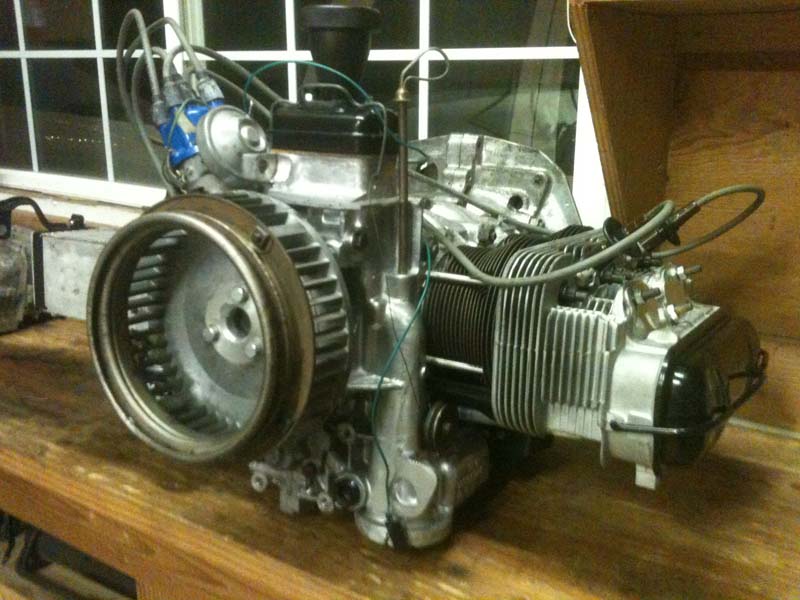 Can't wait to feel the difference from my tired stock 2.0 in my 74, to the new 2056 in the 75 when it gets finished. Jeff |
|
|
|
| ConeDodger |
Dec 15 2011, 11:34 PM
Post
#31
|
|
Apex killer! Group: Members Posts: 23,589 Joined: 31-December 04 From: Tahoe Area Member No.: 3,380 Region Association: Northern California |
Judging from his posts on Facebook Jeff, Mark is just as excited about the completion of his new addition. I'm really glad you two found each other!
Get that thing in and drive!!! (IMG:style_emoticons/default/biggrin.gif) |
|
|
|
| JStroud |
Dec 15 2011, 11:49 PM
Post
#32
|
|
Senior Member Group: Members Posts: 1,463 Joined: 15-January 11 From: Galt, California Member No.: 12,594 Region Association: Northern California |
QUOTE(ConeDodger @ Dec 15 2011, 09:34 PM) Judging from his posts on Facebook Jeff, Mark is just as excited about the completion of his new addition. I'm really glad you two found each other! Get that thing in and drive!!! (IMG:style_emoticons/default/biggrin.gif) Thanks to you Rob. Glad you pushed me to drive out and talk with Mark, he's a great guy, and does great work. But unfortunately my parts broke his new cleaning machine, dropped off some parts yesterday, half way through the machine died. (IMG:style_emoticons/default/barf.gif) Guess its back to hand cleaning. Jeff |
|
|
|
| McMark |
Dec 16 2011, 09:04 PM
Post
#33
|
|
914 Freak! Group: Retired Admin Posts: 20,179 Joined: 13-March 03 From: Grand Rapids, MI Member No.: 419 Region Association: None |
Yeah, Jeff broke my parts washer. (IMG:style_emoticons/default/tongue.gif) Just kidding.
The motor went together relatively smoothly and ran GREAT on the test stand. The 'test-stand-feel' seemed slightly stronger than the usual 2056. Can't wait to get a ride! (IMG:style_emoticons/default/driving.gif) Oh, and Rich says Certificates of Authenticity are on 'sale'. Read about it here.s |
|
|
|
| JStroud |
Dec 17 2011, 07:46 PM
Post
#34
|
|
Senior Member Group: Members Posts: 1,463 Joined: 15-January 11 From: Galt, California Member No.: 12,594 Region Association: Northern California |
QUOTE(McMark @ Dec 16 2011, 07:04 PM) The motor went together relatively smoothly and ran GREAT on the test stand. The 'test-stand-feel' seemed slightly stronger than the usual 2056. Can't wait to get a ride! (IMG:style_emoticons/default/driving.gif) It's tempting to just hurry and get the motor in and drive it, especially now that it's sitting on my workbench staring at me. But I still have things I need(want) to do first. Need to get the 74 back drivable to satisfy my (IMG:style_emoticons/default/driving.gif) urges for now. Once it's in, Sonoma will be the first place I go, to get it dialed in. And after seeing the video of you driving robs car, I think I'll let you take me for a ride! Jeff |
|
|
|
| JStroud |
Feb 25 2012, 08:30 PM
Post
#35
|
|
Senior Member Group: Members Posts: 1,463 Joined: 15-January 11 From: Galt, California Member No.: 12,594 Region Association: Northern California |
Its been a while since I updated this, but I have been working. I got my trailing arms all sandblasted, primed and painted over the holidays.
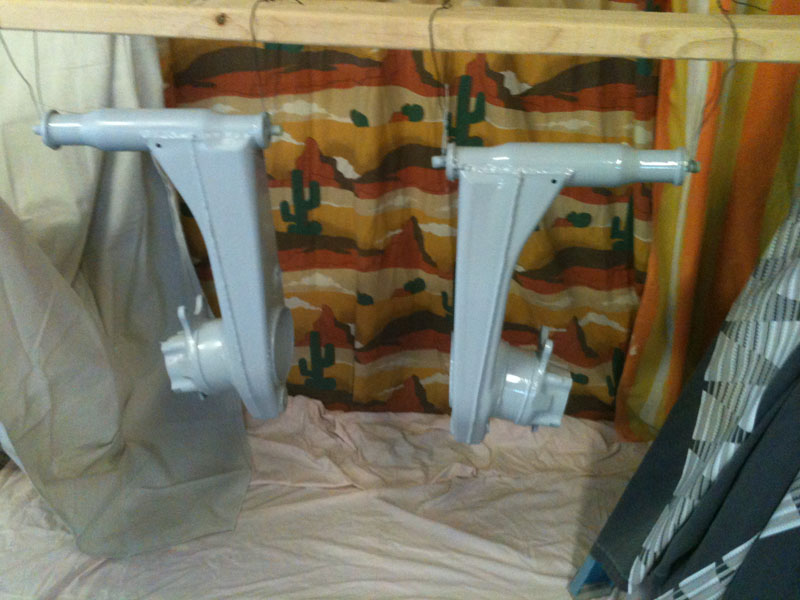 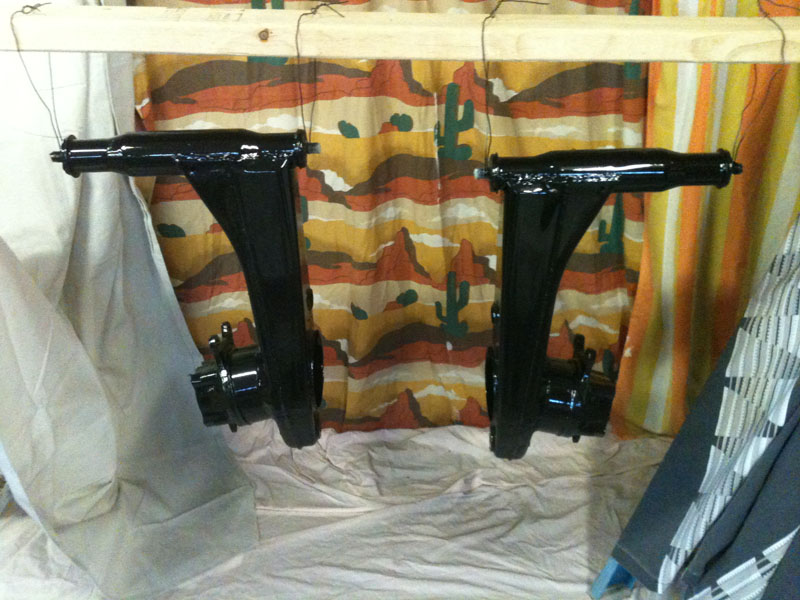 The rest of the suspension parts got sandblasted, primed and painted. 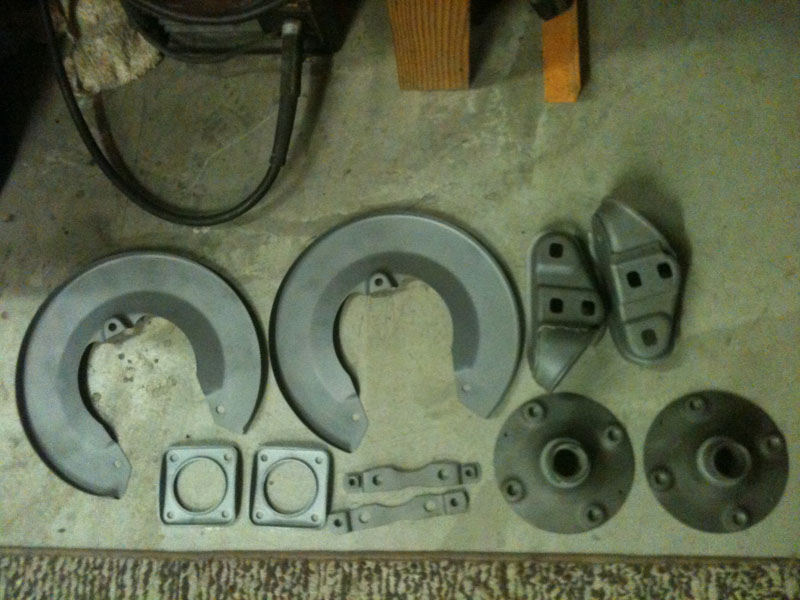 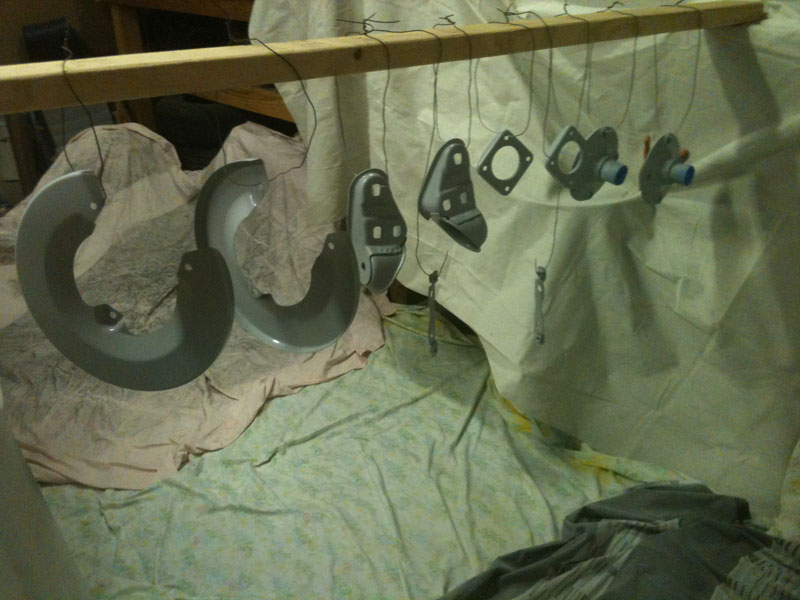 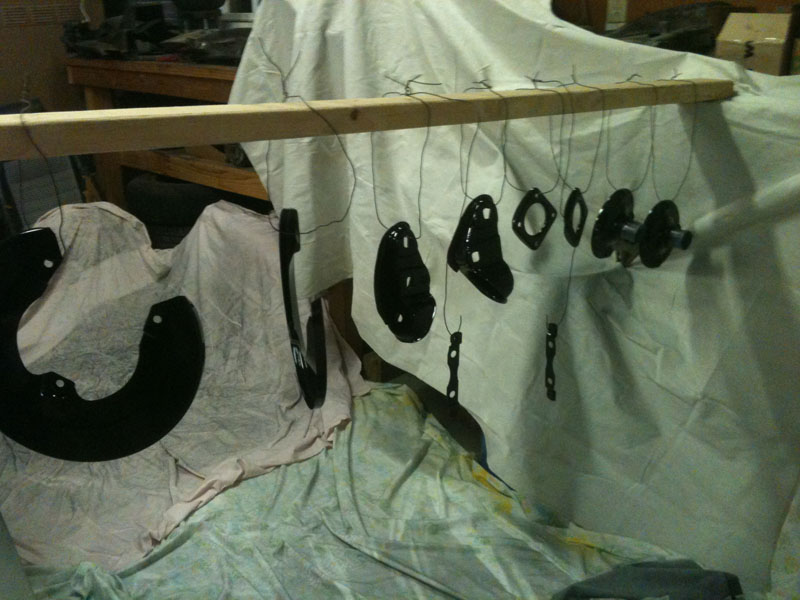 Then a couple of weeks ago I finished sandblasting, priming, and painting the engine tin. 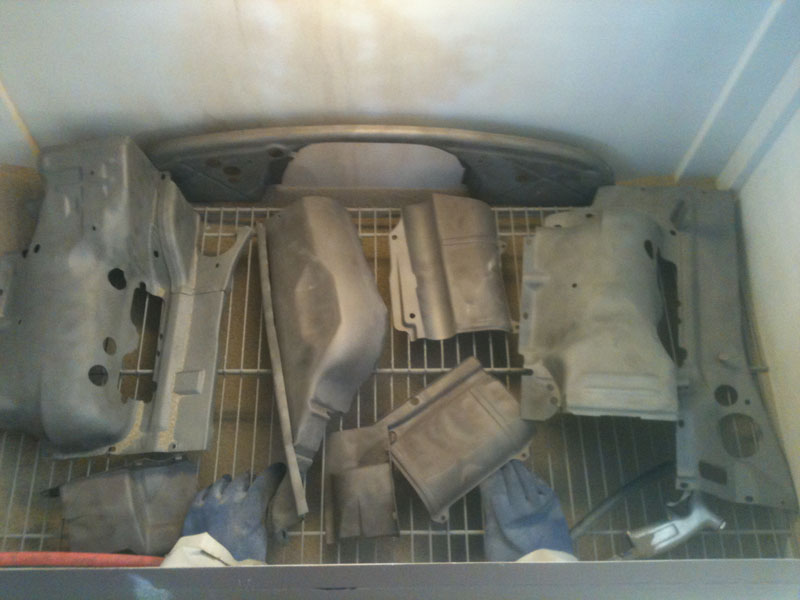 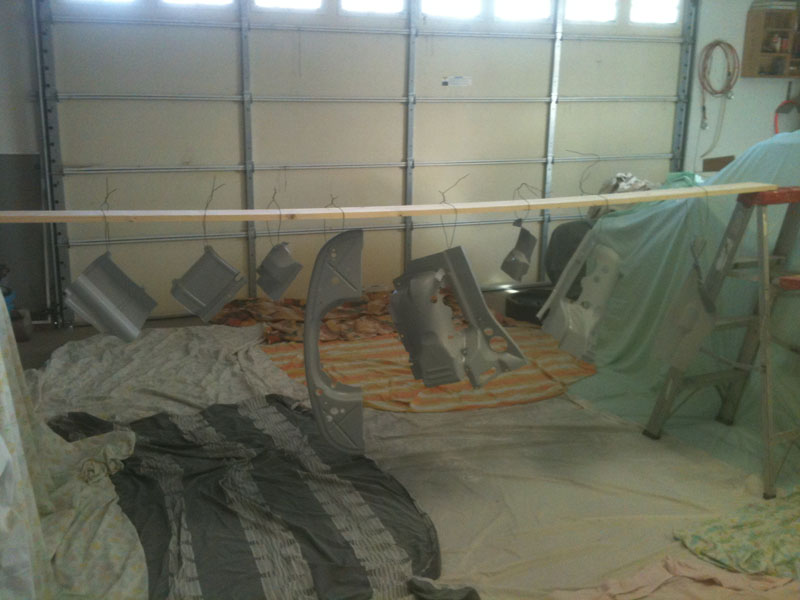 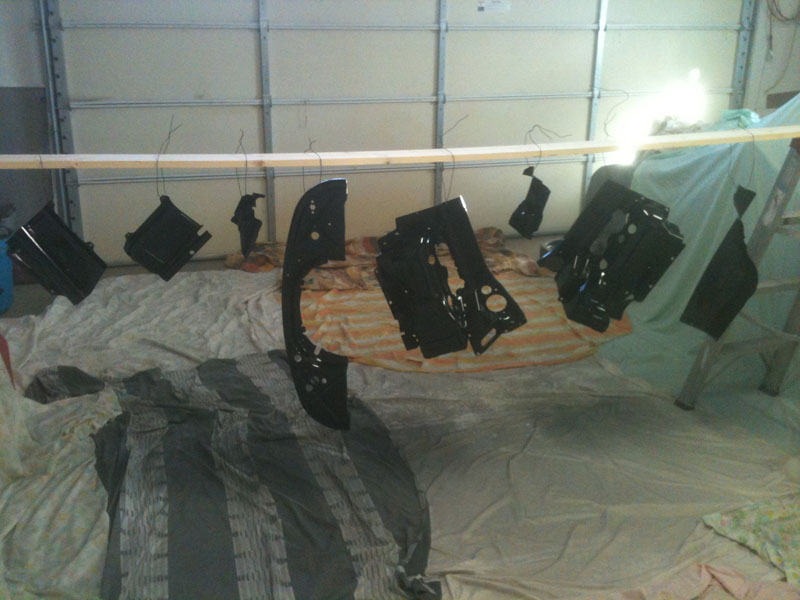 Today I went to the Breakfast in San Ramon, 13 914s showed up, fun morning. I got home and decided to work on the car, but I need a break from cleaning, and sandblasting. So I decided to work on my battery tray, I wanted to install my new battery tray so it was removable. Heres how I did it. I welded a piece of angle iron to the inside fender to sit just under the back edge of the tray. Then I welded a piece of flat stock on the bottom of the tray to create a slot for the angle iron to slip into. On the front of the tray I drilled four holes that lined up with the tray support bracket, I threaded the holes and threaded a screw in with the head cut off, then spot welded the top side. A little grinding to flatten out the welds and we have four studs sticking out the bottom. After a few adjustments it fit snug and goes in and out easily.  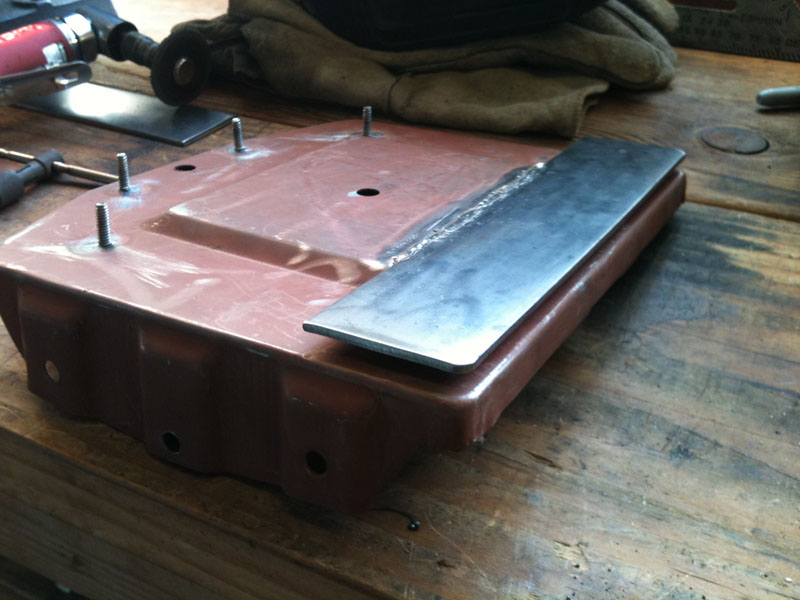   I touched up the paint on the angle iron piece and the tray support with black rubberized undercoating paint, thought it might add cushion and maybe avoid a rattle, probably have enough rattles already. One more coat of paint on the battery tray tonight, then one more item off the list. Jeff |
|
|
|
| Socalandy |
Feb 25 2012, 08:33 PM
Post
#36
|
|
Its got to be Yellow!!! Group: Members Posts: 2,432 Joined: 29-August 09 From: Orange Member No.: 10,742 Region Association: Southern California |
Nice work!!!
|
|
|
|
| rfuerst911sc |
Feb 26 2012, 05:07 AM
Post
#37
|
|
Advanced Member Group: Members Posts: 2,158 Joined: 4-May 06 From: Dahlonega , Georgia Member No.: 5,980 Region Association: South East States |
If you could outline the general spec's on the home made blast cabinet I would be interested. Nice progress on the car.
|
|
|
|
| Lennies914 |
Feb 26 2012, 09:36 AM
Post
#38
|
|
Slacker Group: Members Posts: 828 Joined: 9-January 10 From: NorCal Member No.: 11,216 Region Association: Northern California |
I think those little meet-n-greets give everybody involved a little boost of motivation!
Nice work on the battery tray. |
|
|
|
| Prospectfarms |
Feb 26 2012, 09:44 AM
Post
#39
|
|
Member Group: Members Posts: 495 Joined: 7-March 11 From: Louisville, KY Member No.: 12,801 Region Association: Upper MidWest |
QUOTE Nice work on the battery tray. (IMG:style_emoticons/default/agree.gif) Interesting thread with some helpful ideas, nice photo's and articulate narrative. Thank you very much and good luck. |
|
|
|
| JStroud |
Feb 26 2012, 11:08 AM
Post
#40
|
|
Senior Member Group: Members Posts: 1,463 Joined: 15-January 11 From: Galt, California Member No.: 12,594 Region Association: Northern California |
Thanks everyone, seeing other 914s, and talking about them is always a good motivator.
I've had a few inquires about the blast cabinet I built, so I guess I'll put together a how to thread on it... Coming soon. Now I can't decide... Go for a (IMG:style_emoticons/default/driving.gif) ....or more cleaning and blasting, still have the fan housing and injection components to go. Thanks again everyone Jeff |
|
|
|
|
1 User(s) are reading this topic (1 Guests and 0 Anonymous Users)
0 Members:

|
Lo-Fi Version | Time is now: 18th May 2024 - 02:23 PM |
Invision Power Board
v9.1.4 © 2024 IPS, Inc.