|
|
|
Porsche, and the Porsche crest are registered trademarks of Dr. Ing. h.c. F. Porsche AG.
This site is not affiliated with Porsche in any way. Its only purpose is to provide an online forum for car enthusiasts. All other trademarks are property of their respective owners. |
|
|

  |

| majkos1 |
 May 20 2018, 03:00 PM May 20 2018, 03:00 PM
Post
#10541
|
|
Member  Group: Members Posts: 227 Joined: 11-August 17 From: Mile High 914 Member No.: 21,338 Region Association: Rocky Mountains |
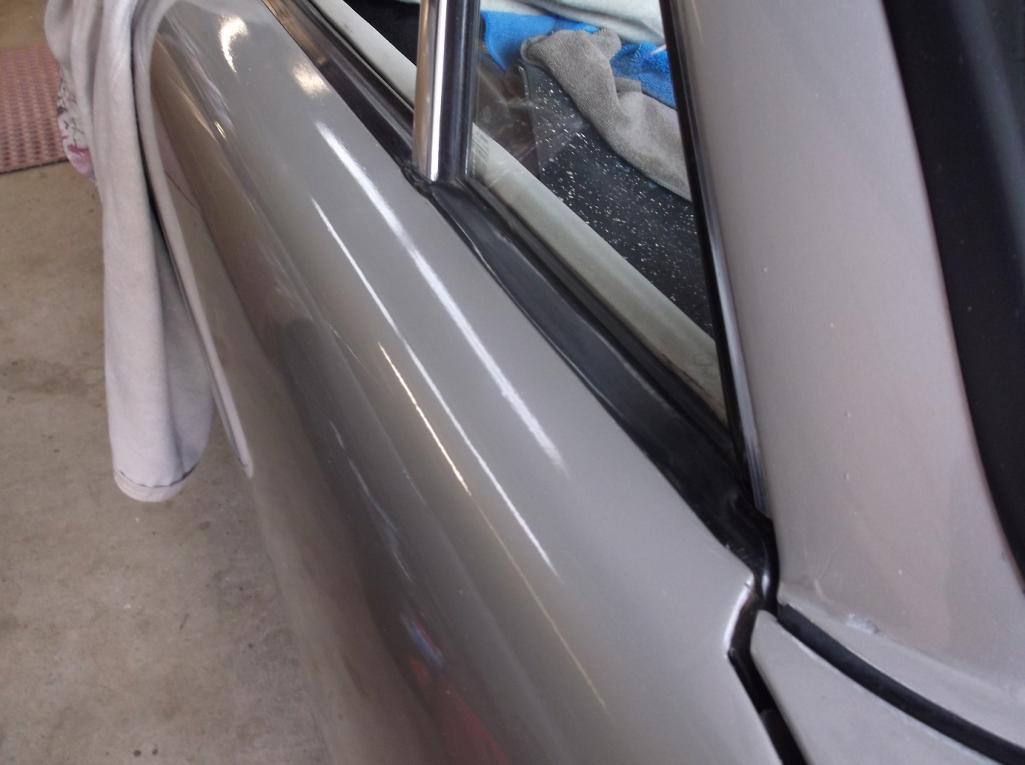
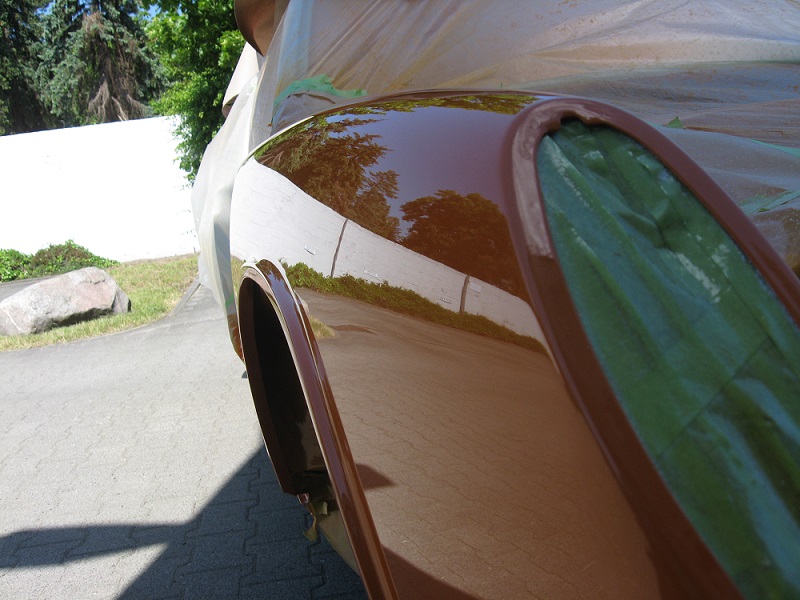
went from this to .....
 |
   |

 
|
| majkos1 |
May 20 2018, 03:02 PM
Post
#10542
|
|
Member Group: Members Posts: 227 Joined: 11-August 17 From: Mile High 914 Member No.: 21,338 Region Association: Rocky Mountains |
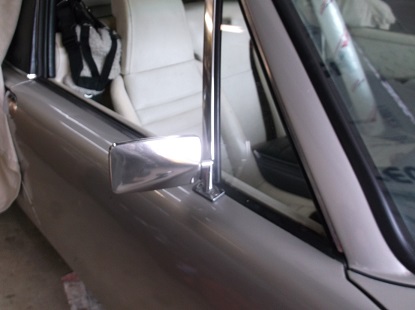
To this! (IMG:style_emoticons/default/smash.gif) (IMG:style_emoticons/default/w00t.gif) (IMG:style_emoticons/default/shades.gif)
 |
|
|
|
| majkos1 |
May 20 2018, 03:05 PM
Post
#10543
|
|
Member Group: Members Posts: 227 Joined: 11-August 17 From: Mile High 914 Member No.: 21,338 Region Association: Rocky Mountains |
I've practice on five doors before doing this....
 |
|
|
|
| majkos1 |
May 20 2018, 03:18 PM
Post
#10544
|
|
Member Group: Members Posts: 227 Joined: 11-August 17 From: Mile High 914 Member No.: 21,338 Region Association: Rocky Mountains |
In a nut shell, here's the dimensions to finding the holes from outside.
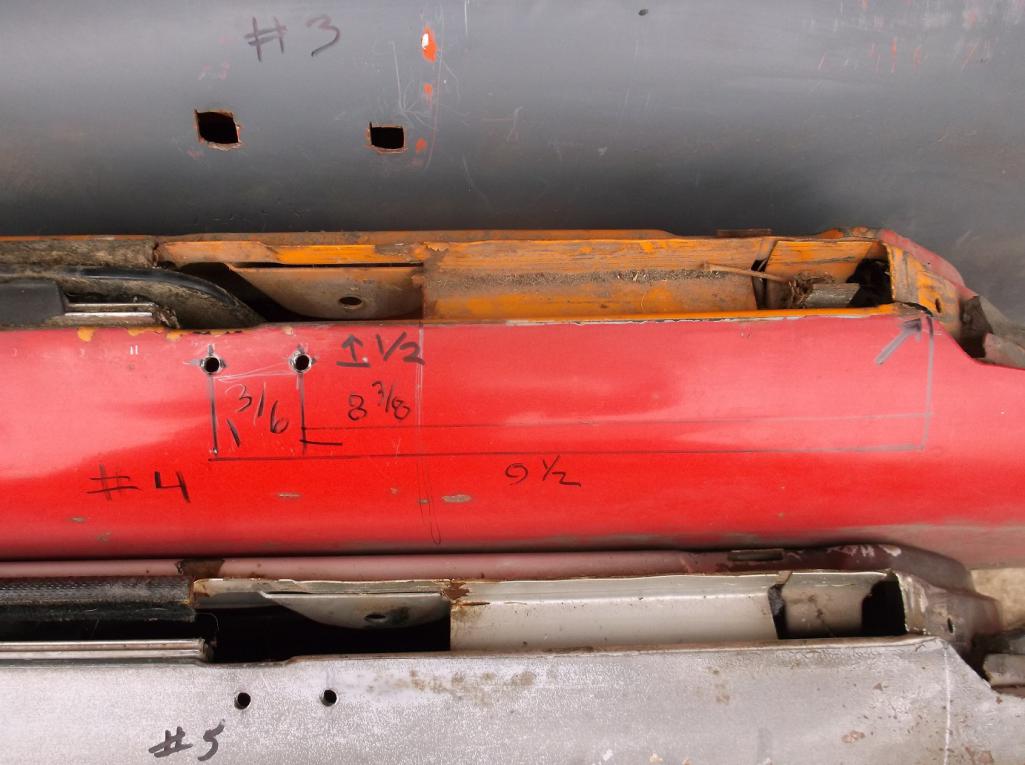 I've taken pics of doing the first five doors Got the hang of it, Can do under 10 minutes. I will put together step by step what's involve.... (IMG:style_emoticons/default/smash.gif) |
|
|
|
| SKL1 |
May 20 2018, 03:29 PM
Post
#10545
|
|
Senior Member Group: Members Posts: 1,736 Joined: 19-February 11 From: north Scottsdale Member No.: 12,732 Region Association: Upper MidWest |
Red white and blue for Memorial Day....
  |
|
|
|
| ndfrigi |
May 20 2018, 03:59 PM
Post
#10546
|
|
Advanced Member Group: Members Posts: 2,969 Joined: 21-August 11 From: Orange County Member No.: 13,474 Region Association: Southern California |
QUOTE(majkos1 @ May 20 2018, 02:05 PM)  I've practice on five doors before doing this.... I believed inside the door has a factory welded screw and just need to drill it if you wanted to add right door side mirror. |
|
|
|
| marksteinhilber |
May 20 2018, 04:07 PM
Post
#10547
|
|
Member Group: Members Posts: 229 Joined: 18-October 12 From: Foothill Ranch, CA 92610 Member No.: 15,057 Region Association: Southern California |
QUOTE(ndfrigi @ May 20 2018, 02:59 PM) QUOTE(majkos1 @ May 20 2018, 02:05 PM) I've practice on five doors before doing this.... I believed inside the door has a factory welded screw and just need to drill it if you wanted to add right door side mirror. True, two easy ways. Drill up thru welded nut inside the door with a small drill to mak a pilot hole. Choose a size just smaller than the I’d of the threads. Then drill your clearance hole from a be outside. Second way is to use an ice pick from the inside to make a small center punch mark from the inside. Then centerpunch from the outside and drill the clearance hole till you just reach the nut. Viola! |
|
|
|
| TravisNeff |
May 20 2018, 04:10 PM
Post
#10548
|
|
914 Guru Group: Members Posts: 5,082 Joined: 20-March 03 From: Mesa, AZ Member No.: 447 Region Association: Southwest Region |
Welded up patches in the rear tail panel. Let me say I am going to be a real good grinder by the time I am done with this welding stuff. (IMG:style_emoticons/default/barf.gif)
|
|
|
|
| marksteinhilber |
May 20 2018, 04:18 PM
Post
#10549
|
|
Member Group: Members Posts: 229 Joined: 18-October 12 From: Foothill Ranch, CA 92610 Member No.: 15,057 Region Association: Southern California |
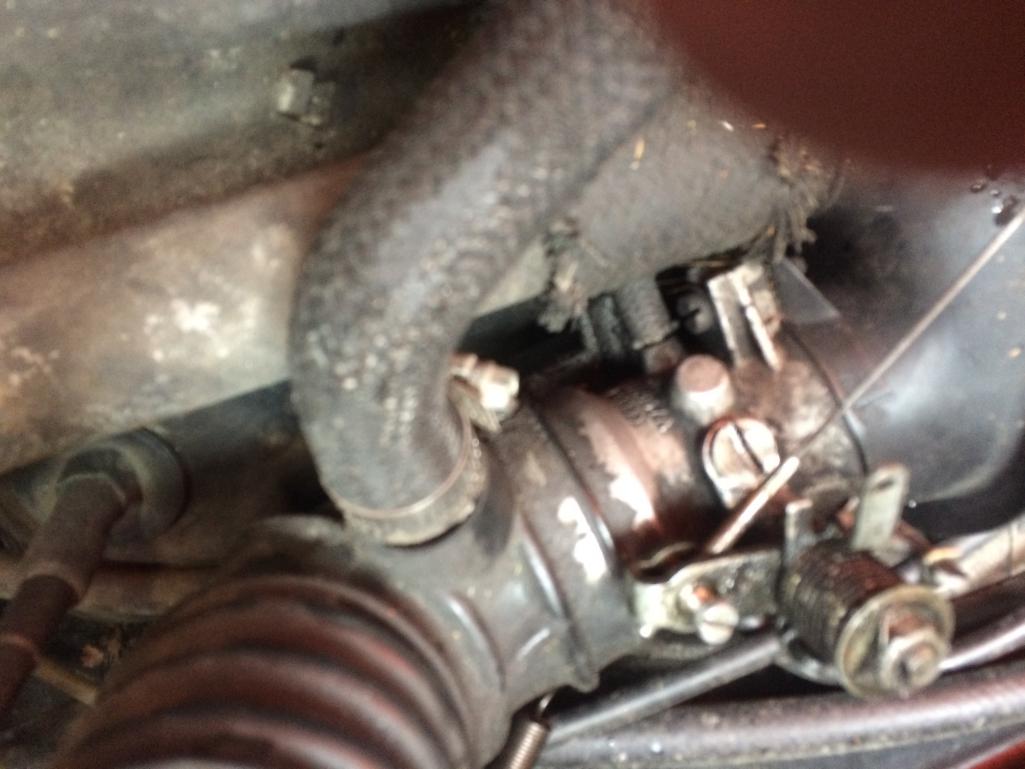
I fixed an engine oil leak. Oil pressure switch on top of engine was leaking where center plastic is crimped inside the aluminum body. Took out the old one with a 1 inch deep socket and long needle nose pliers. Put new one in with a smear of thread sealant and a 22mm deep socket. Had to lower it down into place and start the threads using the long reach needle nose pliers. Also investigated the cursed L jet sticky throttle. Seems to need a shim washer now to center the throttle plate in the bore. Also suspect the extra spring causes the shaft to wear in the TB. May get it rebuilt with the ball bearings.
 |
|
|
|
| majkos1 |
May 20 2018, 04:18 PM
Post
#10550
|
|
Member Group: Members Posts: 227 Joined: 11-August 17 From: Mile High 914 Member No.: 21,338 Region Association: Rocky Mountains |
you are correct
those drill holes are exploratory drilling, 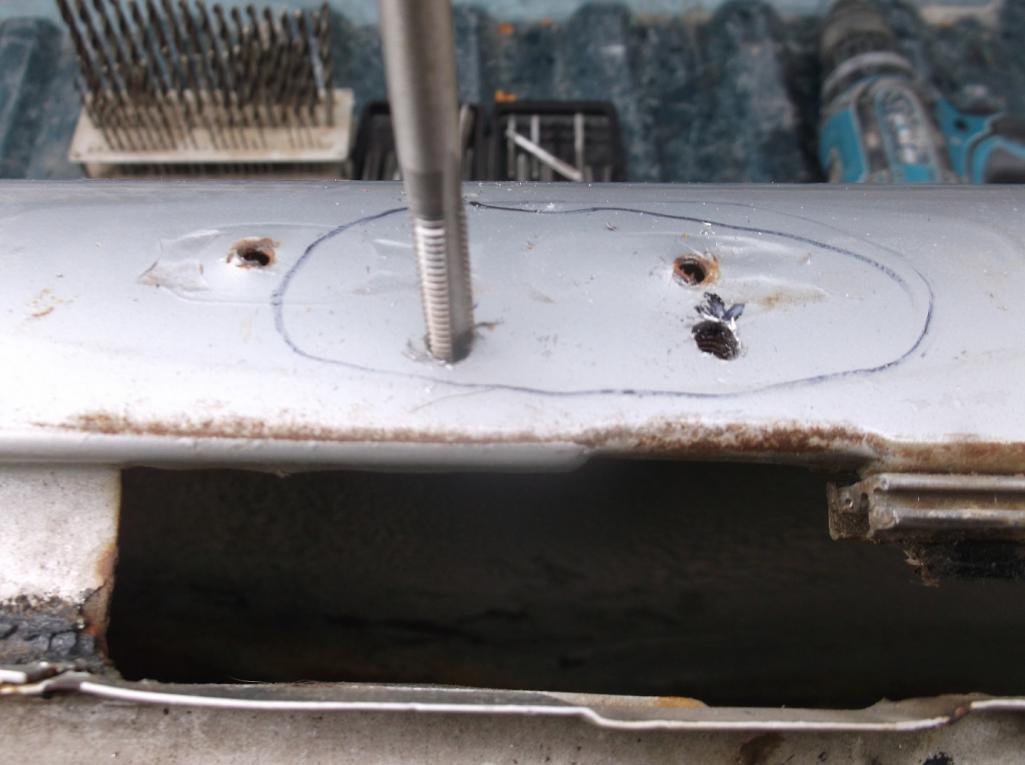 I then drill holes a bit bigger then tap |
|
|
|
| majkos1 |
May 20 2018, 04:22 PM
Post
#10551
|
|
Member Group: Members Posts: 227 Joined: 11-August 17 From: Mile High 914 Member No.: 21,338 Region Association: Rocky Mountains |
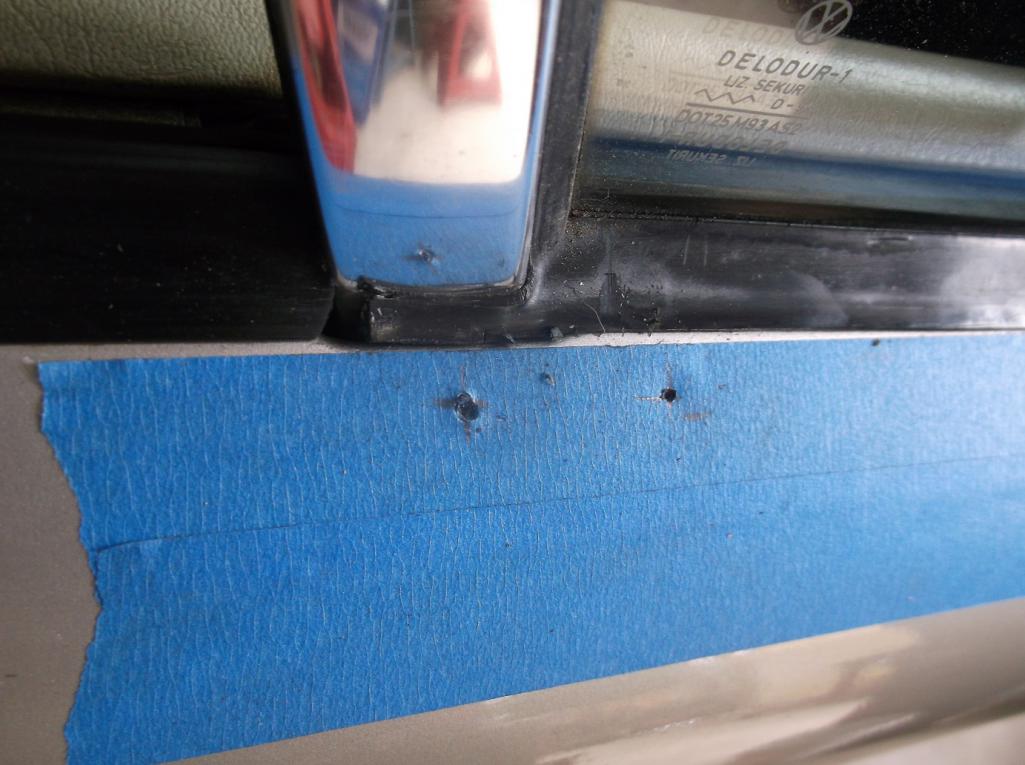
QUOTE(marksteinhilber @ May 20 2018, 04:07 PM) QUOTE(ndfrigi @ May 20 2018, 02:59 PM) QUOTE(majkos1 @ May 20 2018, 02:05 PM) I've practice on five doors before doing this.... I believed inside the door has a factory welded screw and just need to drill it if you wanted to add right door side mirror. True, two easy ways. Drill up thru welded nut inside the door with a small drill to mak a pilot hole. Choose a size just smaller than the I’d of the threads. Then drill your clearance hole from a be outside. Second way is to use an ice pick from the inside to make a small center punch mark from the inside. Then centerpunch from the outside and drill the clearance hole till you just reach the nut. Viola! That's what I did on first door. Drill from inside. Key trick is Center punch! The door skin is thinner than the welded plate underneath. If you locate the hole just right,creates a dimple. Hence my pic. |
|
|
|
| majkos1 |
May 20 2018, 04:26 PM
Post
#10552
|
|
Member Group: Members Posts: 227 Joined: 11-August 17 From: Mile High 914 Member No.: 21,338 Region Association: Rocky Mountains |
First door,
drilling out the holes, I like the center punch idea from here too! 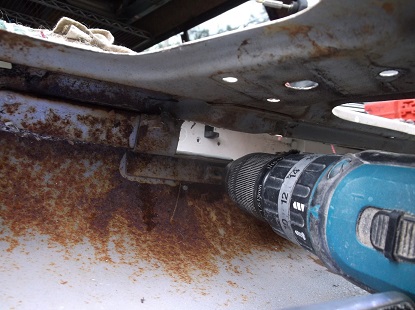 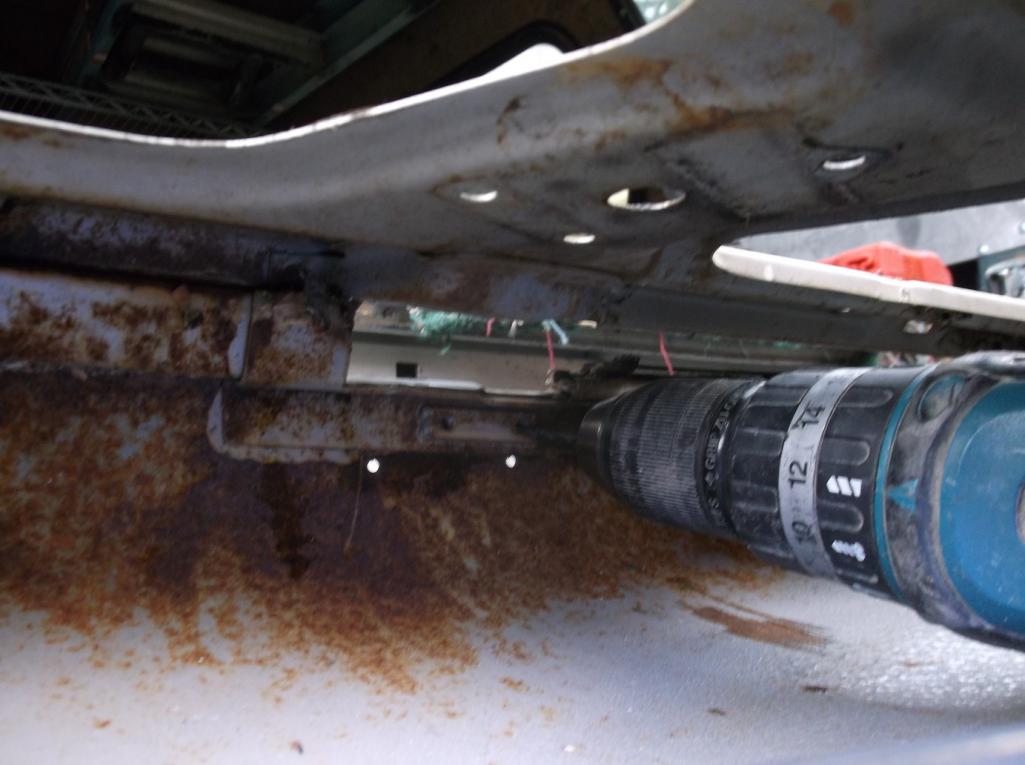 |
|
|
|
| 914 Ranch |
May 20 2018, 05:41 PM
Post
#10553
|
|
Team Sharp where the 914 grow wings Group: Members Posts: 1,506 Joined: 29-January 16 From: TheNorth Shore Retreat. Deland Member No.: 19,611 Region Association: South East States |
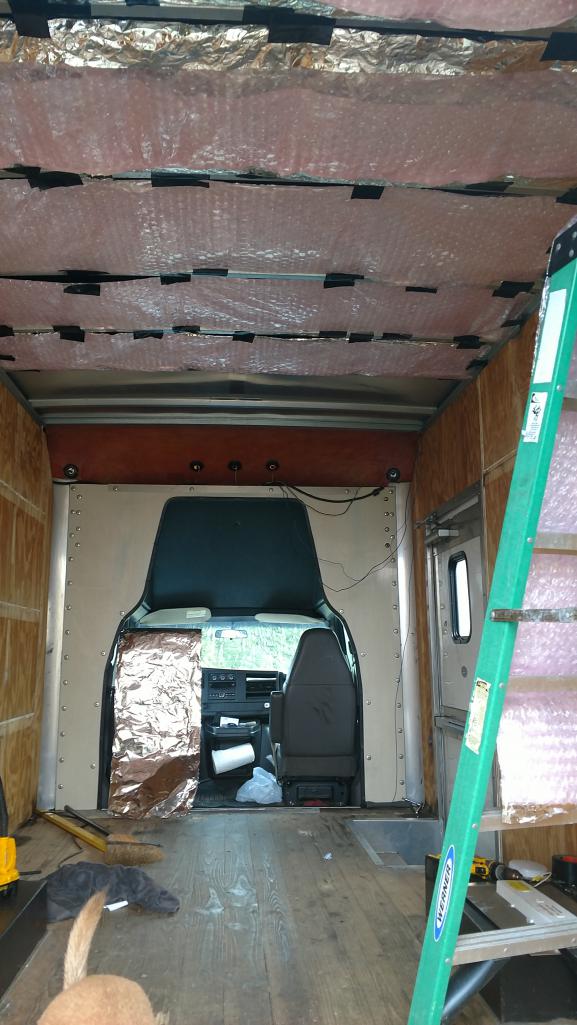
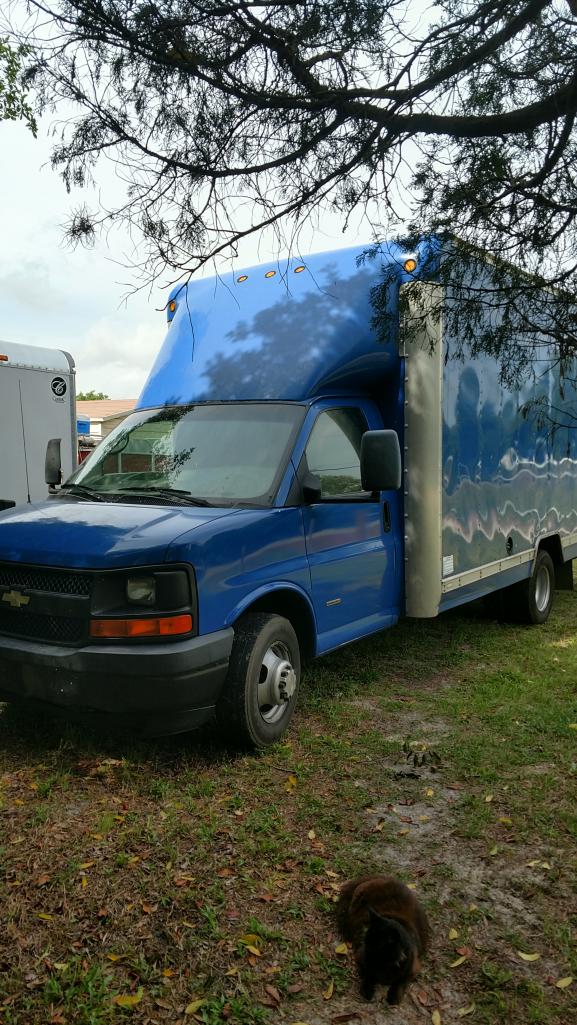
Working on her tow vehicle. Putting insulation in and getting it street ready.
 |
|
|
|
| 914 Ranch |
May 20 2018, 05:43 PM
Post
#10554
|
|
Team Sharp where the 914 grow wings Group: Members Posts: 1,506 Joined: 29-January 16 From: TheNorth Shore Retreat. Deland Member No.: 19,611 Region Association: South East States |
Big Blu...The Elephantah...
 |
|
|
|
| Mueller |
May 21 2018, 10:00 AM
Post
#10555
|
|
914 Freak! Group: Members Posts: 17,155 Joined: 4-January 03 From: Antioch, CA Member No.: 87 Region Association: None |
On Sunday we drove up to Vacaville, CA for a Cars & Coffee and hang out with Dominic, he brought his original signal orange 914-6 and his 550 Spyder replica/tribute.
Afterwards we (my twins and I) headed to his house and then I got to a chance to drive the 550 for about 10 minutes up some twisties and along some nice country back roads. Super fun car. Getting in and out of it sure is a challenge. Thanks again Dominic. 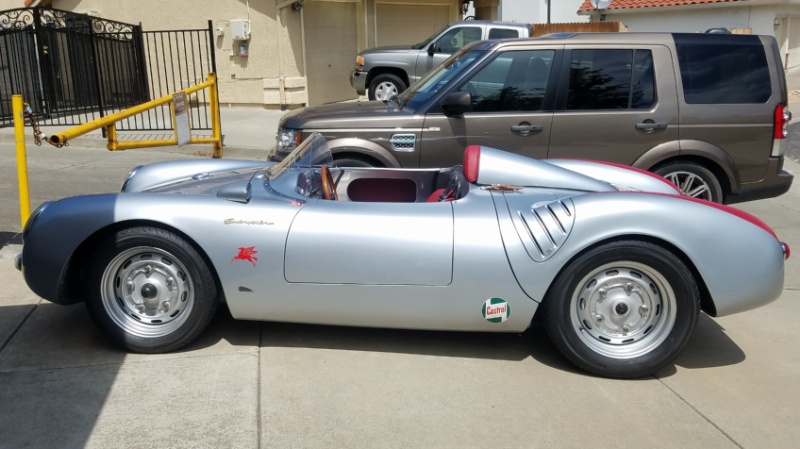 |
|
|
|
| ndfrigi |
May 21 2018, 10:06 AM
Post
#10556
|
|
Advanced Member Group: Members Posts: 2,969 Joined: 21-August 11 From: Orange County Member No.: 13,474 Region Association: Southern California |
QUOTE(914 Ranch @ May 20 2018, 04:41 PM) Working on her tow vehicle. Putting insulation in and getting it street ready. Sir Joe, the view from rear facing your front cockpit of your trailer looks like a 914 seat. Is that intentional designing it? 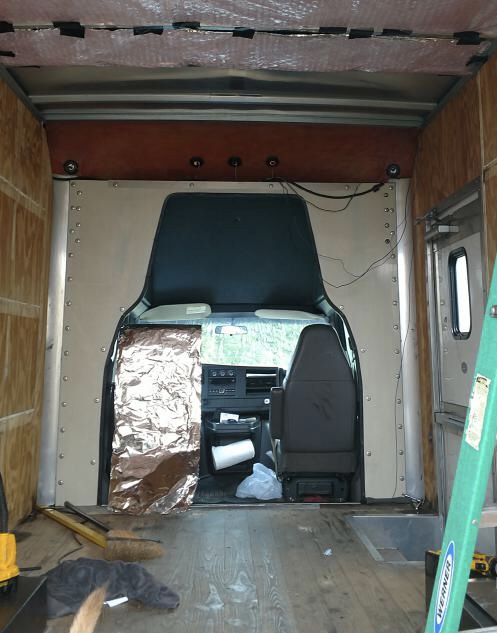 |
|
|
|
| 914fahrer |
May 21 2018, 11:19 AM
Post
#10557
|
|
Member Group: Members Posts: 103 Joined: 12-November 14 From: Berlin/Germany Member No.: 18,115 Region Association: Germany |
|
|
|
|
| ValcoOscar |
May 21 2018, 11:33 AM
Post
#10558
|
|
Garage Life Group: Members Posts: 2,541 Joined: 19-November 13 From: SoCal Member No.: 16,669 Region Association: Southern California |
I received 4 more 914 models from member ChicagoPete.
All 1/43 scale GT's (IMG:style_emoticons/default/piratenanner.gif) Thank you... 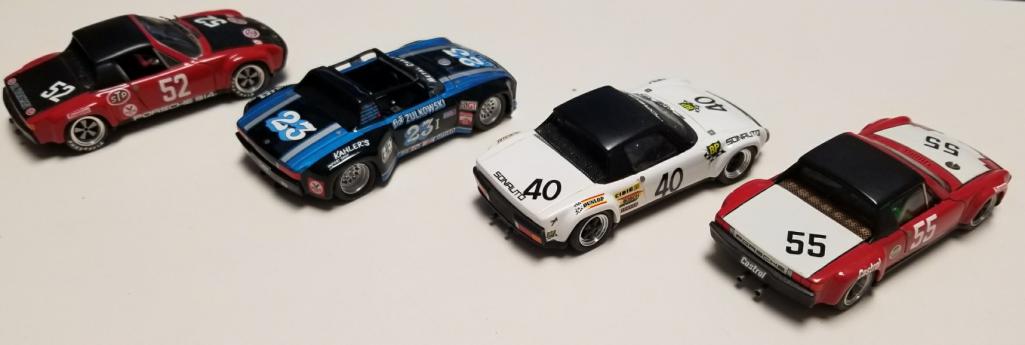 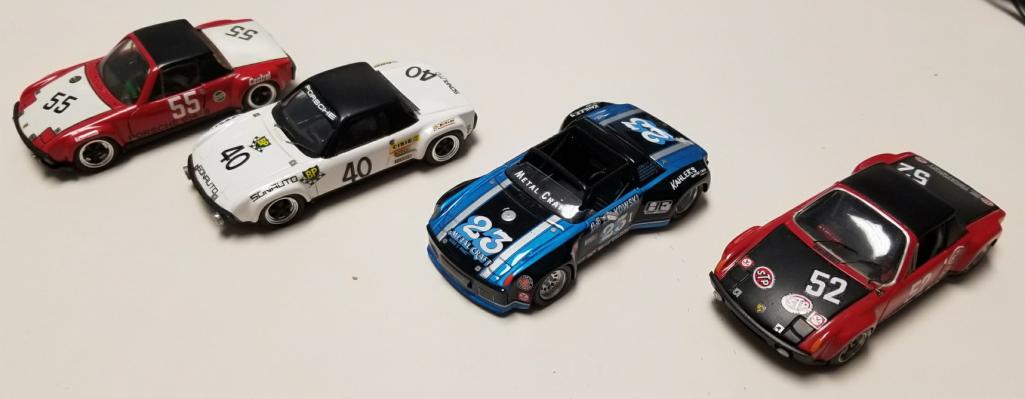 |
|
|
|
| JFG |
May 21 2018, 01:21 PM
Post
#10559
|
|
Senior Member Group: Members Posts: 686 Joined: 7-April 16 From: Wales Member No.: 19,869 Region Association: None |
For some reason the fuel pipe union at the tank started seeping. I was using an aluminium washer at that point. I bought some copper crush washers but one size was too small for the tank hole, the other size was right for the tank hole but too big for the pipe and would not tighten squarely. Third option was a teflon washer. This has worked but when slipping the rubber fuel hose on i loosened the nut!! After a cool down i got back to it and managed to get an adjustable spanner in to retighten. Fingers crossed it's fine tomorrow.
It's time to get started on the door cards. They were cut roughly for speakers and had been wet in the past which distorted them, the worst being around the speaker holes. I filled the holes with hardboard and fibreglass on the weekend which enabled me to get the foam padding stuck down. Then it rained and i packed up for the night. |
|
|
|
| forrestkhaag |
May 21 2018, 05:25 PM
Post
#10560
|
|
Senior Member Group: Members Posts: 935 Joined: 21-April 14 From: Scottsdale, Arizona Member No.: 17,273 Region Association: Southwest Region |
what did I do with the 914 today?........ NOTHING! (IMG:style_emoticons/default/hissyfit.gif)
i dropped off my carbs to the local Weber Guru and will await their return with corrected butterfly's, secondary venturi's and a few other slight modification in an attempt to get a reliable idle from warm to hot engine conditions. General interest pictures......... (IMG:style_emoticons/default/beerchug.gif) Attached thumbnail(s) 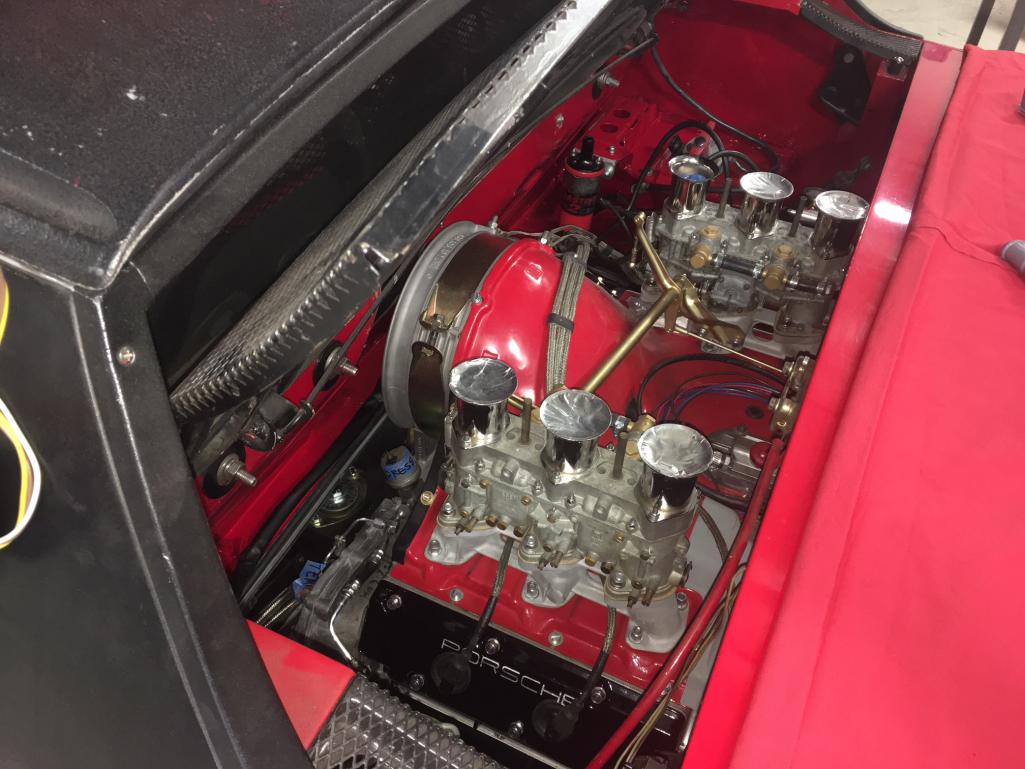 Attached image(s) 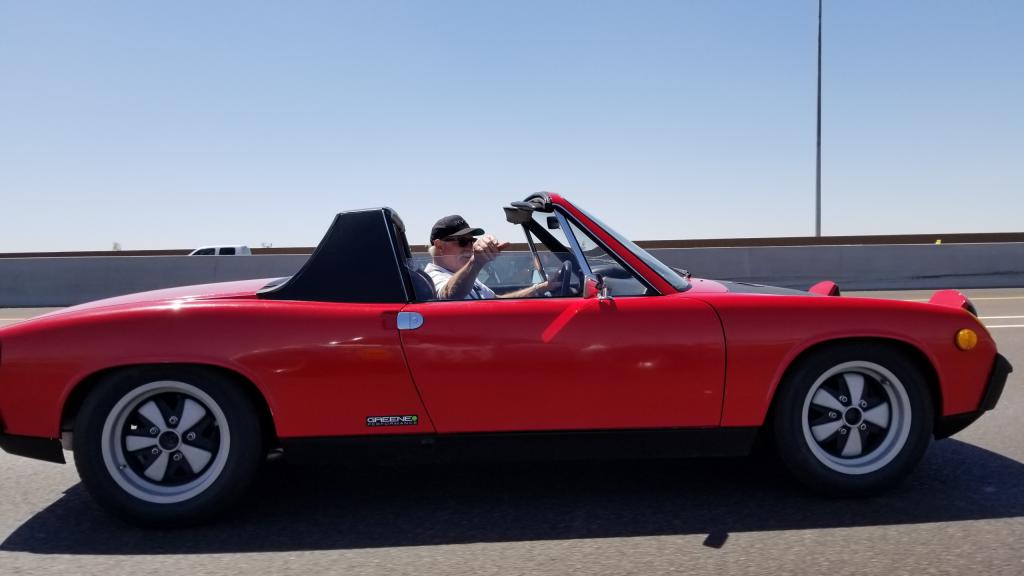
|
|
|
|
|
478 User(s) are reading this topic (476 Guests and 0 Anonymous Users)
2 Members: Maltese Falcon, TRP

|
Lo-Fi Version | Time is now: 17th November 2025 - 12:09 AM |
Invision Power Board
v9.1.4 © 2025 IPS, Inc.