|
|
|
Porsche, and the Porsche crest are registered trademarks of Dr. Ing. h.c. F. Porsche AG.
This site is not affiliated with Porsche in any way. Its only purpose is to provide an online forum for car enthusiasts. All other trademarks are property of their respective owners. |
|
|

  |

| Luke M |
 Jun 4 2018, 08:50 AM Jun 4 2018, 08:50 AM
Post
#10601
|
|
Senior Member  Group: Members Posts: 1,439 Joined: 8-February 05 From: WNY Member No.: 3,574 Region Association: North East States |
QUOTE(eric9144 @ Jun 4 2018, 07:20 AM)  QUOTE(falcor75 @ Jun 3 2018, 11:41 PM) What type of leds are you running in the foglights? They were hard to find, I only wanted “plug and play” and no one makes that bulb type except for a vintage led guy in Australia (would have to dig to find his info) Here are the bulbs: Those led fog lights look great. I'd like to know more info on these too. Please and thank you. |
   |

 
|
| Shadowfax |
Jun 4 2018, 09:01 AM
Post
#10602
|
|
Show us the meaning of haste Group: Members Posts: 509 Joined: 19-January 15 Member No.: 18,340 Region Association: South East States |
|
|
|
|
| eric9144 |
Jun 4 2018, 10:12 AM
Post
#10603
|
|
Advanced Member Group: Members Posts: 2,780 Joined: 30-March 11 From: San Diego, CA Member No.: 12,876 Region Association: Southern California |
QUOTE(Luke M @ Jun 4 2018, 07:50 AM) QUOTE(falcor75 @ Jun 3 2018, 11:41 PM) What type of leds are you running in the foglights? I'd like to know more info on these too. Please and thank you. This was the only vendor I could find supplying the BA20s type in an LED http://www.classicandvintagebulbs.com/ Note that the light from the LED's is a much different spread than the traditional bulb and is a bit more scattered, that bulb 'blade' has an LED on both sides so I might be able to alter the position and make them even better, but the light is much more scattered with the LEDs much brighter in general, a bit more like a driving light. |
|
|
|
| JFG |
Jun 4 2018, 12:47 PM
Post
#10604
|
|
Senior Member Group: Members Posts: 686 Joined: 7-April 16 From: Wales Member No.: 19,869 Region Association: None |
I repaired the final (hopefully) blemishes in the paint work. Some fine surface filler needed.
I also cleaned and primed the 2nd bumper grill. Looking good so that will have a colour coat tomorrow. |
|
|
|
| Nogoodwithusernames |
Jun 4 2018, 02:11 PM
Post
#10605
|
|
Member Group: Members Posts: 292 Joined: 31-May 16 From: Sutter, CA Member No.: 20,051 Region Association: None |
Not "Today" but over the weekend finally used the rear window kit from Mark that I bought a year ago and never touched... (IMG:style_emoticons/default/poke.gif) No test drives to hear the lack-of-rattle yet but it sure looks nicer.
Fell victim to "whileIwasthere-itis" and bought a new roll bar pad since I had to take the old one out to do the window. Excited to get that on Wednesday so I'll finish the rear window project this weekend! It was good to have some time in the garage again, haven't been able to really work on anything since buying my first house last summer. |
|
|
|
| TravisNeff |
Jun 4 2018, 06:04 PM
Post
#10606
|
|
914 Guru Group: Members Posts: 5,082 Joined: 20-March 03 From: Mesa, AZ Member No.: 447 Region Association: Southwest Region |
Over the weekend I patched the side wall. I finished the patch for the top of the long today. I'll do the plug welds tomorrow and move onto the side wall for the battery tray.
Attached thumbnail(s) 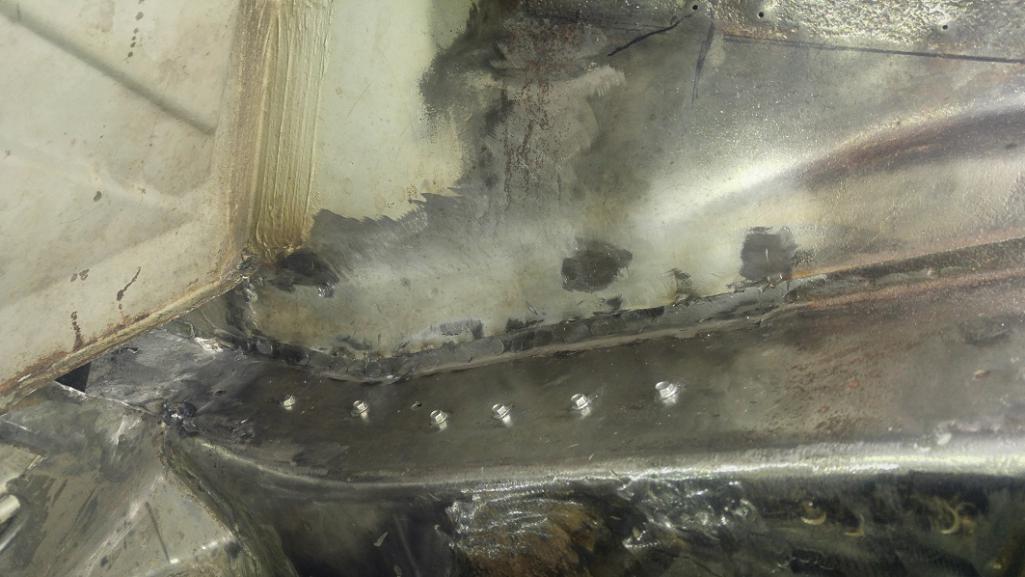
|
|
|
|
| SirAndy |
Jun 4 2018, 07:47 PM
Post
#10607
|
|
Resident German Group: Admin Posts: 42,364 Joined: 21-January 03 From: Oakland, Kalifornia Member No.: 179 Region Association: Northern California |
|
|
|
|
| burton73 |
Jun 5 2018, 05:09 PM
Post
#10608
|
|
Senior member, and old dude Group: Members Posts: 3,907 Joined: 2-January 07 From: Los Angeles Member No.: 7,414 Region Association: Southern California |
Working on my Rat Rod? 1970 914-4 140,000 miles? Sat from 1985 on in a home garage in the San Fernando Valley. PO was a guy in Production at GM plant in the Valley on Van Nuys Blvd that made Chevrolet Camaros and Pontiac Firebird’s,
Window is stuck down on driver’s door so it was easy to remove and I will fix it on a bench. Next is removal of rockers and chrome 1970 bumpers to get re chromed and straightened out After the rockers covers come off I think I will find a clean area that is not all rusted but hell, got to see. This car was 2 hours from having a wrecker junk it. Now what to do. I have a very nice used tan early interior from Garold and just not sure what I want to use for its power plant. The PO said he was just tired of driving it and bought a new Cougar. It went to the Junker as I got there. More pictures coming. Bob B Attached thumbnail(s) 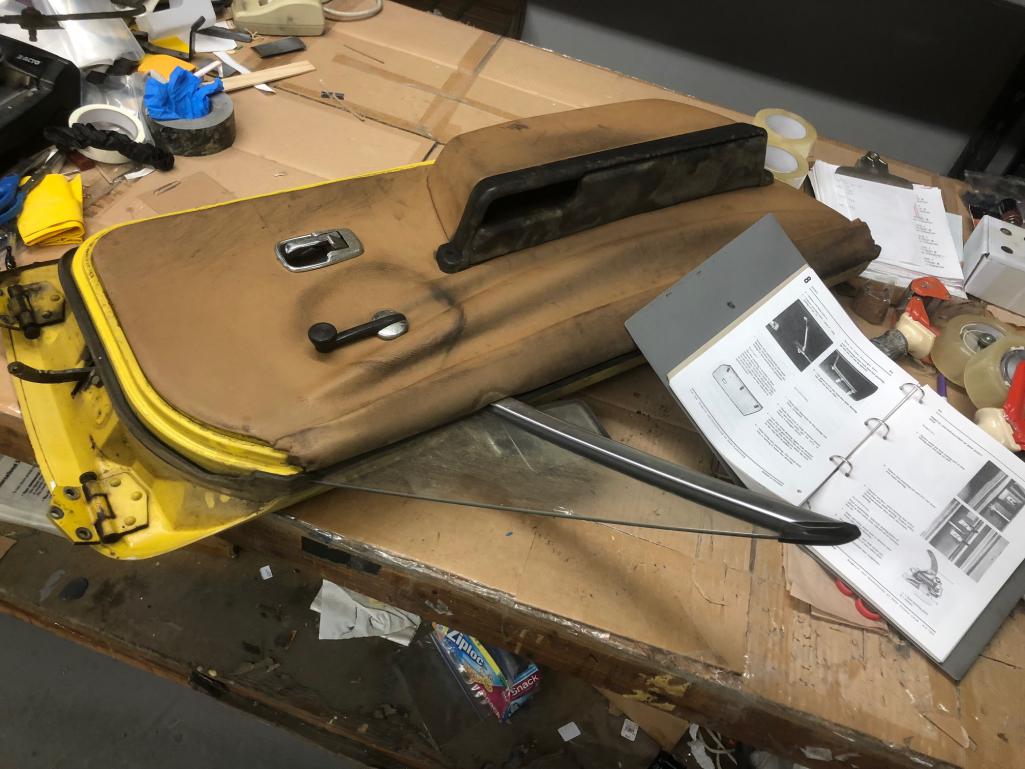  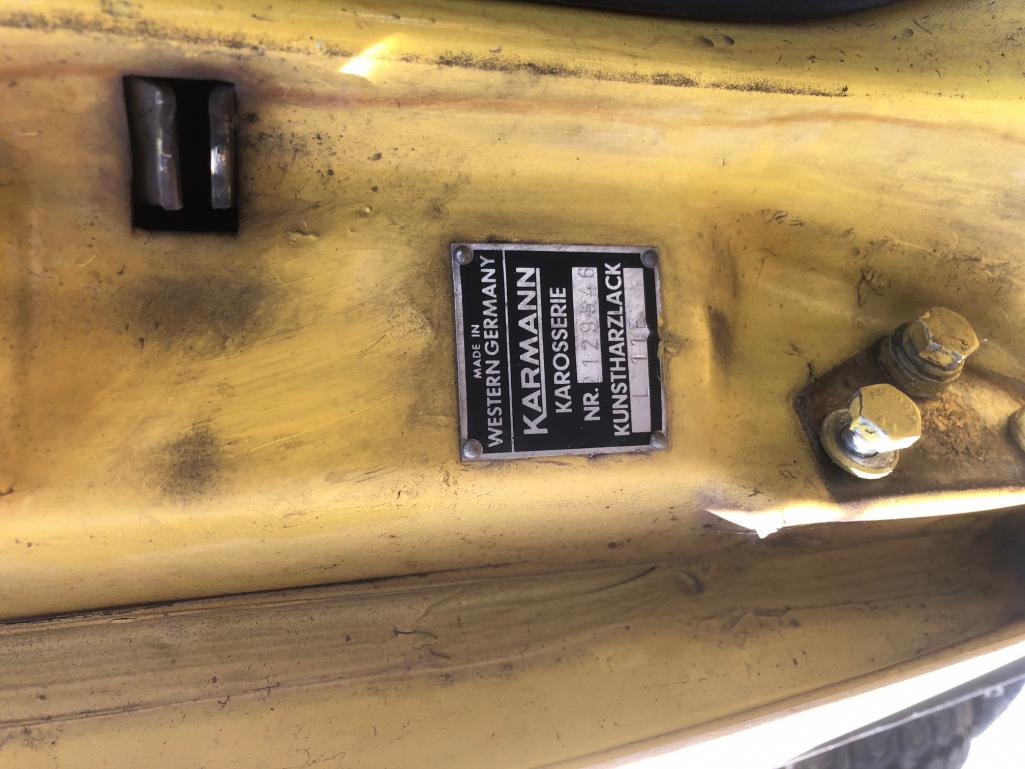  
|
|
|
|
| burton73 |
Jun 5 2018, 05:11 PM
Post
#10609
|
|
Senior member, and old dude Group: Members Posts: 3,907 Joined: 2-January 07 From: Los Angeles Member No.: 7,414 Region Association: Southern California |
More pictures
Bob B 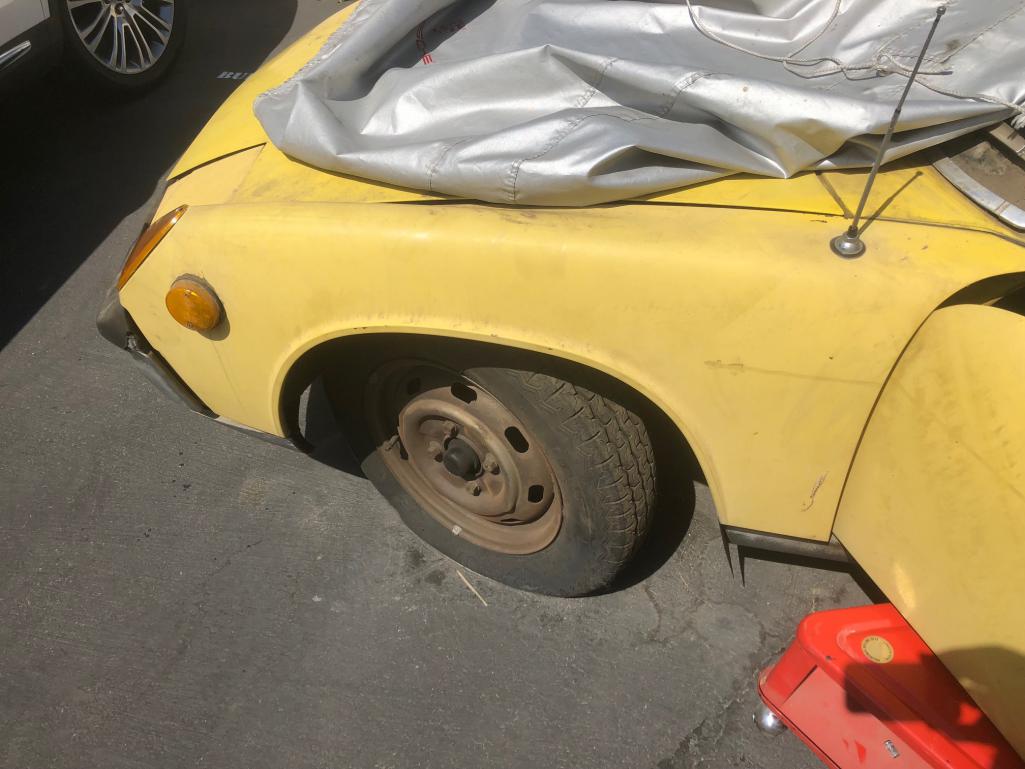 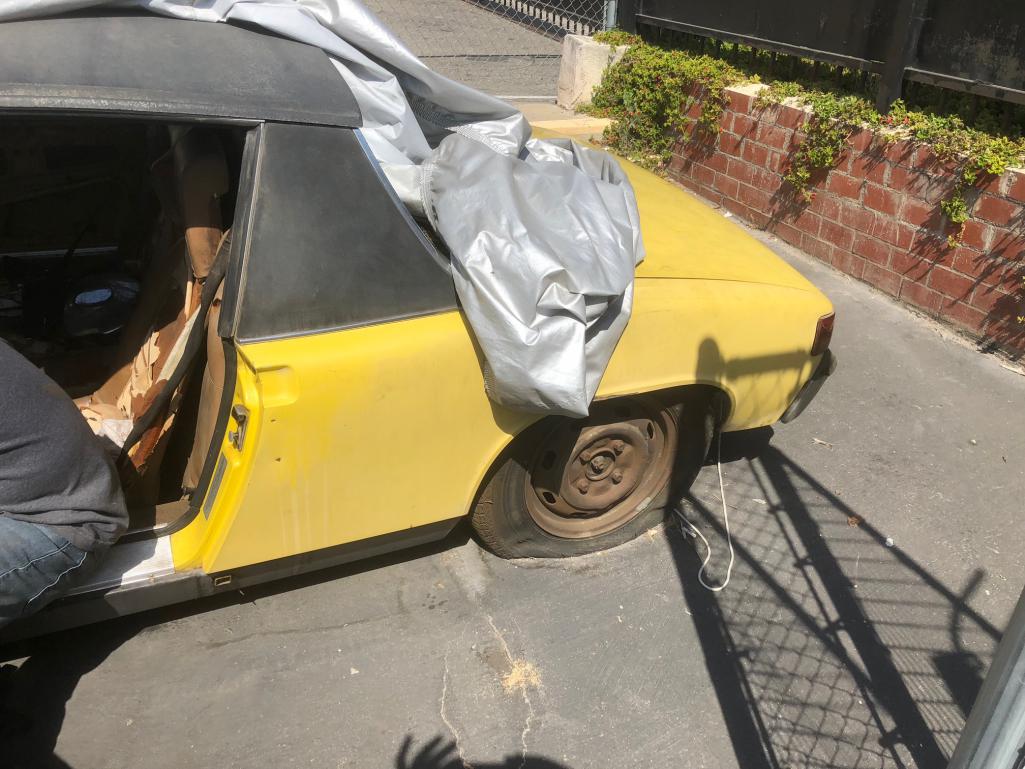 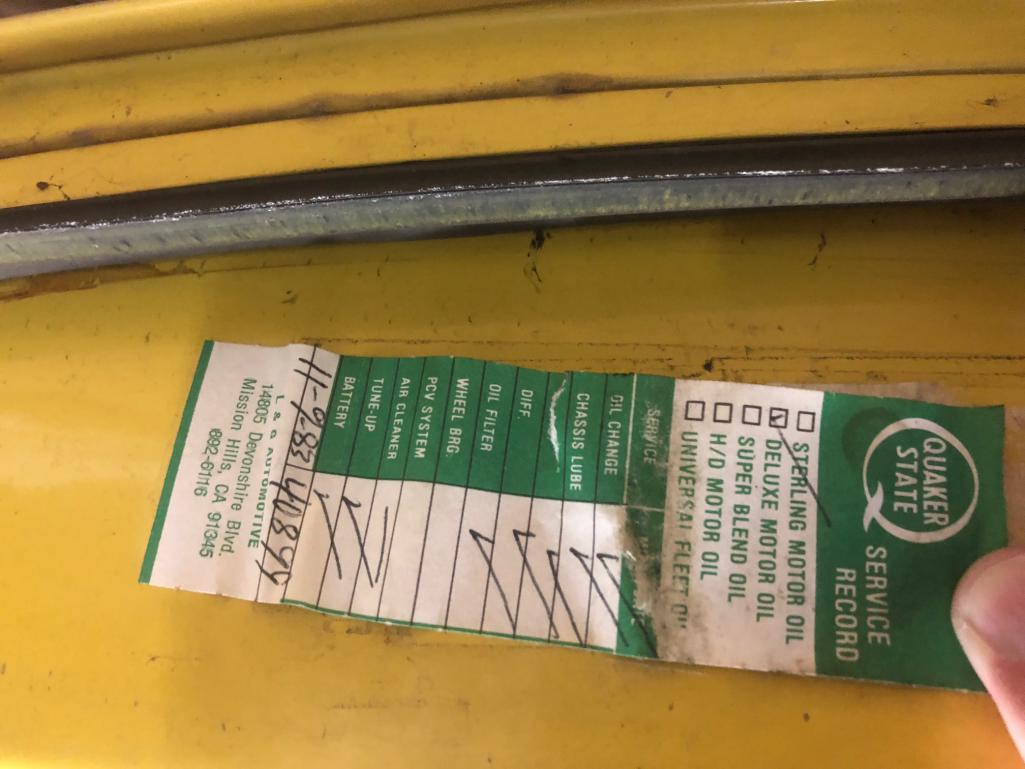 |
|
|
|
| Porschef |
Jun 5 2018, 06:14 PM
Post
#10610
|
|
How you doin' Group: Members Posts: 2,180 Joined: 7-September 10 From: LawnGuyland Member No.: 12,152 Region Association: North East States |
2 hours from being junked? Looks like 2 hrs with some polishing compound and an air compressor and you might drive it away. Nice score.
The Valley... (IMG:style_emoticons/default/rolleyes.gif) |
|
|
|
| SirAndy |
Jun 5 2018, 06:22 PM
Post
#10611
|
|
Resident German Group: Admin Posts: 42,364 Joined: 21-January 03 From: Oakland, Kalifornia Member No.: 179 Region Association: Northern California |
Got her some new shoes for the trip up to Portland this weekend ...
(IMG:style_emoticons/default/driving.gif) Attached thumbnail(s) 
|
|
|
|
| Luke M |
Jun 5 2018, 07:16 PM
Post
#10612
|
|
Senior Member Group: Members Posts: 1,439 Joined: 8-February 05 From: WNY Member No.: 3,574 Region Association: North East States |
QUOTE(SirAndy @ Jun 5 2018, 05:22 PM) Got her some new shoes for the trip up to Portland this weekend ... (IMG:style_emoticons/default/driving.gif) Hey Andy, Check your tires rotation arrows. They seam to be mounted backwards. You want to channel water away from center not draw it into it. Looks like you need to just swap the wheels from R-side to L-side and you should be good. |
|
|
|
| Michael N |
Jun 6 2018, 02:35 PM
Post
#10613
|
|
Certifiable Group: Members Posts: 1,432 Joined: 6-June 04 From: San Jose, Ca Member No.: 2,164 Region Association: Northern California |
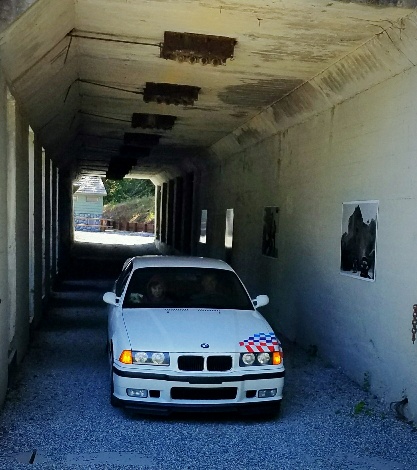
Alice’s for breakfast after a good morning run on Skyline being chased by my friend in his 95 M3 Lightweight. (IMG:style_emoticons/default/driving.gif) (IMG:style_emoticons/default/chowtime.gif) (IMG:style_emoticons/default/driving.gif)
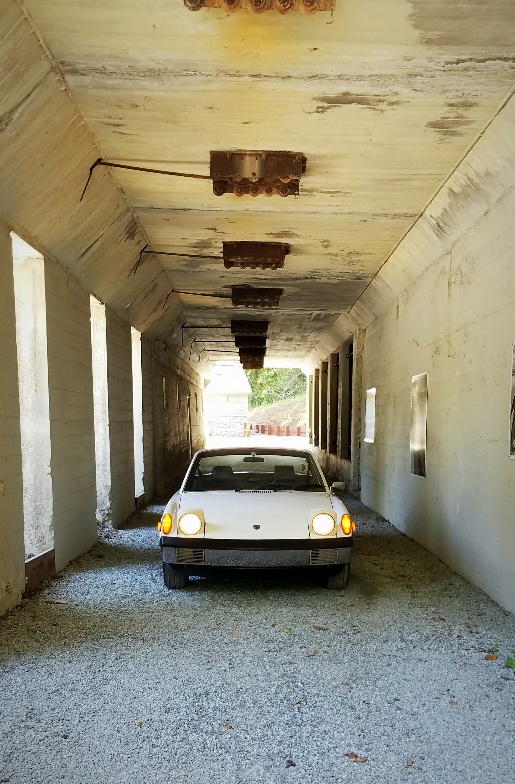  And then I also received this plate that matches a drawing from a 1981 Panorama article. It will take a lot to ruin the rest of my day. 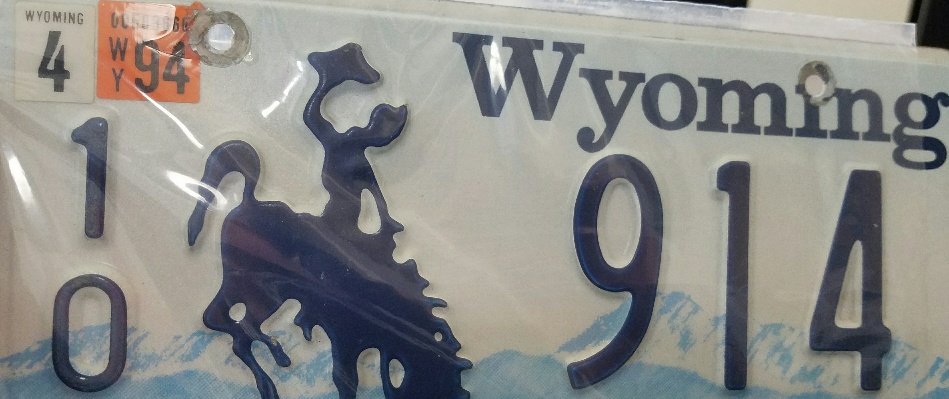 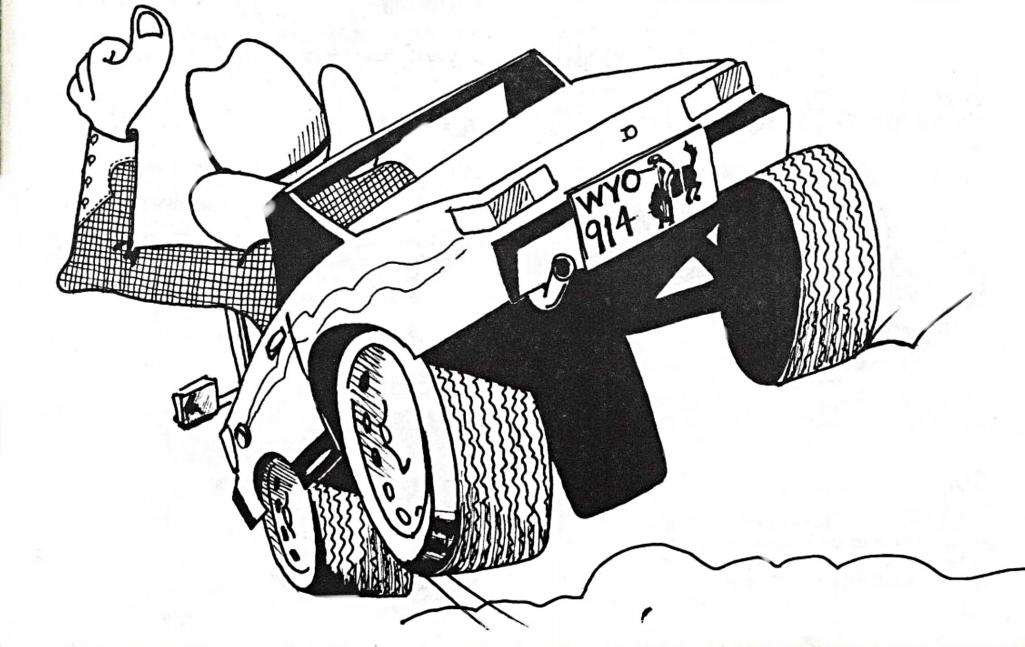 |
|
|
|
| SirAndy |
Jun 6 2018, 02:48 PM
Post
#10614
|
|
Resident German Group: Admin Posts: 42,364 Joined: 21-January 03 From: Oakland, Kalifornia Member No.: 179 Region Association: Northern California |
QUOTE(Luke M @ Jun 5 2018, 06:16 PM) QUOTE(SirAndy @ Jun 5 2018, 05:22 PM) Got her some new shoes for the trip up to Portland this weekend ... (IMG:style_emoticons/default/driving.gif) Hey Andy, Check your tires rotation arrows. They seam to be mounted backwards. You want to channel water away from center not draw it into it. Looks like you need to just swap the wheels from R-side to L-side and you should be good. Nope, the R888R tires don't have a left/right, only a outside/inside. Swapping the wheels will result in the exact same pattern. According to Toyo, the tires are specifically engineered to handle (water) just the same with one side of the car running the pattern backwards. (IMG:style_emoticons/default/driving.gif) |
|
|
|
| 914Toy |
Jun 6 2018, 04:07 PM
Post
#10615
|
|
Senior Member Group: Members Posts: 746 Joined: 12-November 17 From: Laguna beach Member No.: 21,596 Region Association: Southern California |
I agree with Luke M
|
|
|
|
| SirAndy |
Jun 6 2018, 04:19 PM
Post
#10616
|
|
Resident German Group: Admin Posts: 42,364 Joined: 21-January 03 From: Oakland, Kalifornia Member No.: 179 Region Association: Northern California |
QUOTE(914Toy @ Jun 6 2018, 03:07 PM) I agree with Luke M As i said, Toyo says otherwise and flipping the tires will result in the same pattern anyways since they don't have a left/right. One side will always be different than the other. (IMG:style_emoticons/default/shades.gif) |
|
|
|
| burton73 |
Jun 7 2018, 01:40 PM
Post
#10617
|
|
Senior member, and old dude Group: Members Posts: 3,907 Joined: 2-January 07 From: Los Angeles Member No.: 7,414 Region Association: Southern California |
Working the driver’s door today. Broken door opener broken glass and a bit of polishing on door. Shines right up.
I could buff the shit out of it in different areas to metal and spray a rust finish on it and stray a clear coat on it for a rat rod look? Bob B    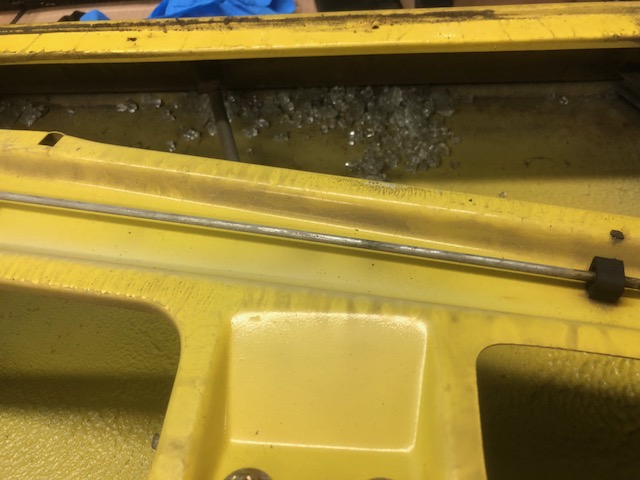 [attachmentid=653 [attachmentid=653903] Attached image(s) 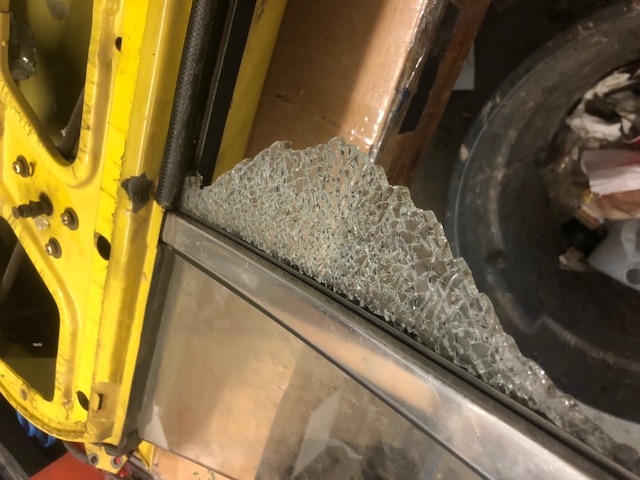
|
|
|
|
| marksteinhilber |
Jun 7 2018, 03:28 PM
Post
#10618
|
|
Member Group: Members Posts: 229 Joined: 18-October 12 From: Foothill Ranch, CA 92610 Member No.: 15,057 Region Association: Southern California |
Swapped out the Ljet Throttle Body with a beautiful rebuilt part from Whip619 member vendor. Steps followed:
1. Remove intake "snorkel" and other breather and vacuum hoses. I had already swapped out the intake snorkel with a new one from 914rubber since it had age cracks. There were some really big cracks hidden under the hose clamps, but I wasn't suffering vacuum leaks that I know of. I do have exhaust backfires from quick lifts off the throttle. I had also replaced the large J braided breather hose with some rubber washing machine hose I had layin around the previous night in preparation of the TB swap. 2. Remove the secondary spring that goes to the rear engine tin, throttle cable clamp, and the two machine screws that mount the TB to the metal plenum. 3. Move TB up to see the electrical connector for the Throttle Switch. I had to figure out how to release electrical connector from the throttle switch. It has a U shaped wire spring that can be pulled up on one side and then removed so the connector can be disconnected. 4. Lift out the greasy dirty TB and pull off the old TB conical gasket from the metal plenum in the car to also replace. 5. Clean the old TB in order to remove and re-use the throttle switch. Remove the plastic cover and continue cleaning. Remove the two TS mounting screws and the circular spring clip on plastic rotating part on shaft. Move assembly onto new TB shaft. Spring clip is very tricky. Used a flat screwdriver to have it spread open and then forced into place. Install mounting screws and put plastic cover back on. 6. Install the new Throttle Body in reverse order. The wire connection, connecting the small vacuum hoses, keeping the TB gasket in place while aligning the new TB, and starting the mounting screws in tight confines are all tricky. SUCCESS! (IMG:style_emoticons/default/smilie_pokal.gif) The car started right up and needed no adjustment to idle. The sticky throttle appears to be solved. I will drive tonight for BD - Butt Dyno (IMG:style_emoticons/default/bootyshake.gif) to determine if clean 47mm bored Throttle Body has noticeable performance improvement as others claim. (IMG:style_emoticons/default/driving.gif) 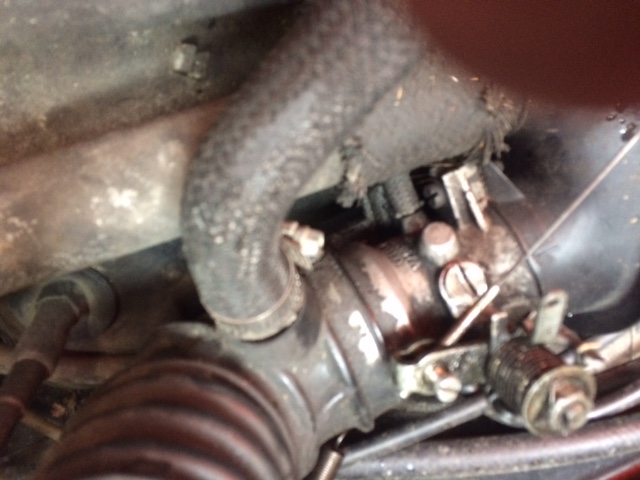 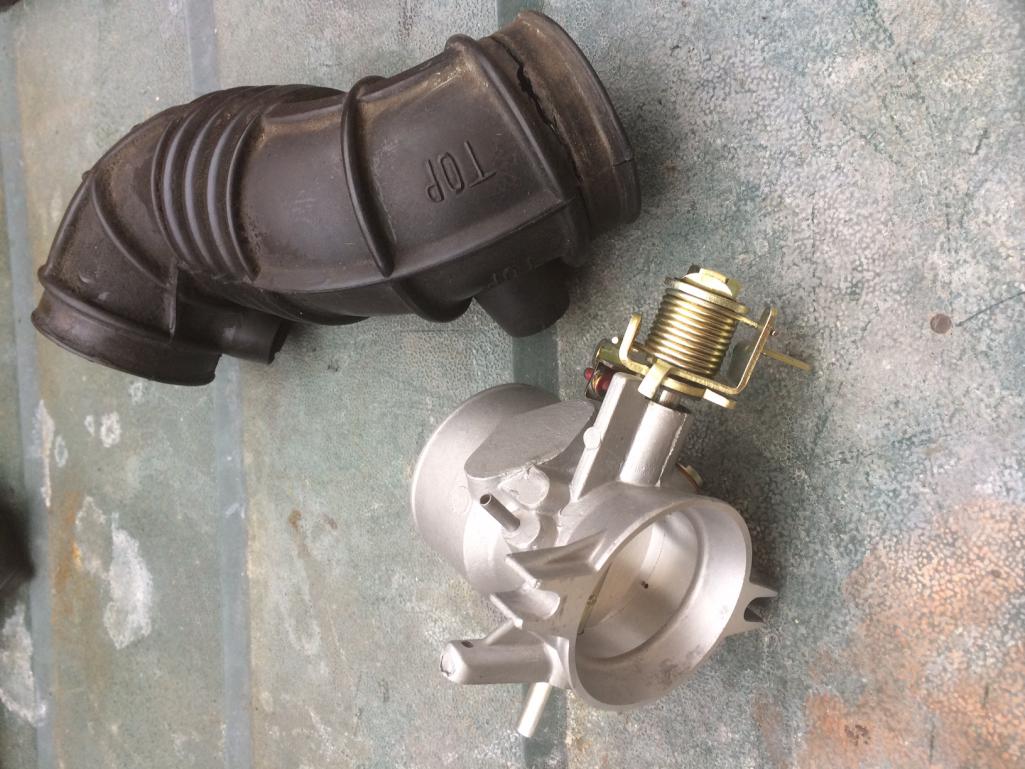  |
|
|
|
| 914Toy |
Jun 7 2018, 04:28 PM
Post
#10619
|
|
Senior Member Group: Members Posts: 746 Joined: 12-November 17 From: Laguna beach Member No.: 21,596 Region Association: Southern California |
QUOTE(SirAndy @ Jun 6 2018, 03:19 PM) QUOTE(914Toy @ Jun 6 2018, 03:07 PM) I agree with Luke M As i said, Toyo says otherwise and flipping the tires will result in the same pattern anyways since they don't have a left/right. One side will always be different than the other. (IMG:style_emoticons/default/shades.gif) Then these are probably not good wet road tires (IMG:style_emoticons/default/idea.gif) |
|
|
|
| anderssj |
Jun 7 2018, 08:19 PM
Post
#10620
|
|
Dog is my copilot... Group: Members Posts: 1,763 Joined: 28-January 03 From: VA Member No.: 207 Region Association: MidAtlantic Region |
Mounted new Goodyear Eagle Sport All-Seasons (195/65VR15) on the Pedrinis I refinished, then installed them on the car. Pretty happy with how they turned out:
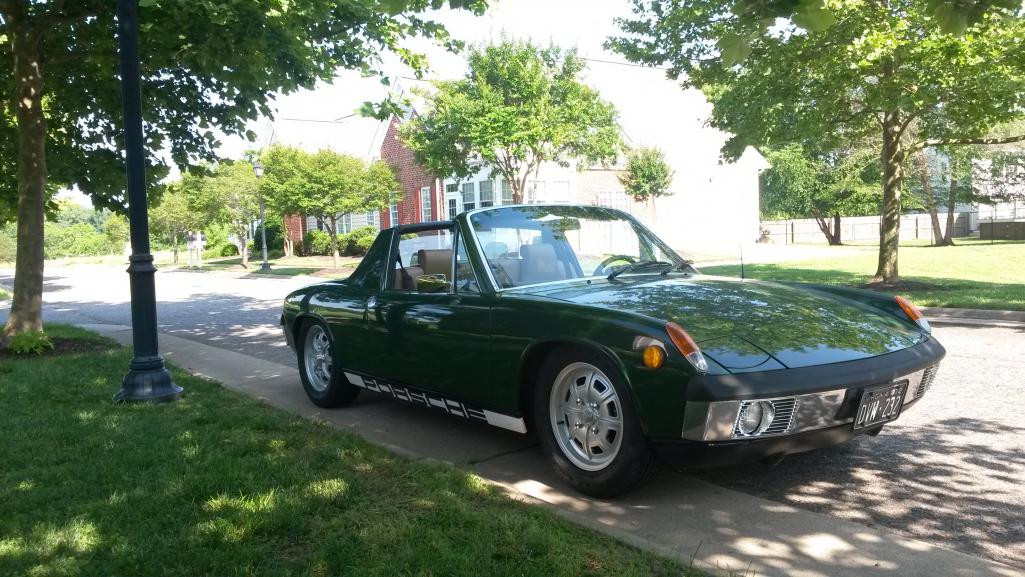 Then drove it (twice) (IMG:style_emoticons/default/driving-girl.gif) (IMG:style_emoticons/default/driving-girl.gif) FWIW, I was kind of surprised at how different the car felt with the 195/65 tires as compared to the old school 165HR15s that were on it...more planted, more "modern," but a little less agile/directly connected to the steering. I guess that's to be expected with tires that are 30mm wider (section width). Must be time to install the turbo tie rods (IMG:style_emoticons/default/biggrin.gif) |
|
|
|
|
405 User(s) are reading this topic (404 Guests and 0 Anonymous Users)
1 Members: black73

|
Lo-Fi Version | Time is now: 17th November 2025 - 03:47 AM |
Invision Power Board
v9.1.4 © 2025 IPS, Inc.