|
|
|
Porsche, and the Porsche crest are registered trademarks of Dr. Ing. h.c. F. Porsche AG.
This site is not affiliated with Porsche in any way. Its only purpose is to provide an online forum for car enthusiasts. All other trademarks are property of their respective owners. |
|
|

  |

| brcacti |
 Mar 31 2020, 06:16 PM Mar 31 2020, 06:16 PM
Post
#12761
|
|
1974 914 1.8  Group: Members Posts: 674 Joined: 17-July 19 From: PHX AZ 60 miles south Member No.: 23,302 Region Association: Southwest Region |
How hard is it to replace the throttle cable? When starting up for the first time daily it seems a little stuck
|
   |

 
|
| ndfrigi |
Mar 31 2020, 06:29 PM
Post
#12762
|
|
Advanced Member Group: Members Posts: 2,983 Joined: 21-August 11 From: Orange County Member No.: 13,474 Region Association: Southern California |
QUOTE(brcacti @ Mar 31 2020, 05:16 PM)  How hard is it to replace the throttle cable? When starting up for the first time daily it seems a little stuck newbie DIY guy can do it. It goes out to the rear by the firewall. |
|
|
|
| Mueller |
Mar 31 2020, 07:11 PM
Post
#12763
|
|
914 Freak! Group: Members Posts: 17,155 Joined: 4-January 03 From: Antioch, CA Member No.: 87 Region Association: None |
QUOTE(brcacti @ Mar 31 2020, 05:16 PM) How hard is it to replace the throttle cable? When starting up for the first time daily it seems a little stuck Not bad, in a nutshell you: pop off cable from pedal pivot>remove ball socket and retaining nut>optional to tie small string to old cable while still in car>disconnect cable from FI or carbs>pull out near bottom of engine firewall>Installation reverse order more or less. |
|
|
|
| 914-300Hemi |
Mar 31 2020, 07:40 PM
Post
#12764
|
|
Senior Member Group: Members Posts: 1,391 Joined: 7-September 06 From: San Dimas, CA Member No.: 6,794 Region Association: Southern California |
QUOTE(euro911 @ Mar 31 2020, 02:12 AM) Congrats, Ravi! ... you're gonna love it. It took me 3 years to get my first 4-post lift assembled at the shop (IMG:style_emoticons/default/screwy.gif) ... but it was due to extenuating circumstances (recovery from a few surgeries took a long time) (IMG:style_emoticons/default/dry.gif) Jaime ( @oldschool ) shot some footage of the lift assembly portion of the August 2012 event, https://www.youtube.com/watch?v=/C1WYx5iTMd8 ... and here's the carb clinic footage: https://vimeo.com/48278551 Marc, I remember that event fondly. That is where is truly understood how great the 914 community is to help each other. |
|
|
|
| Bucci |
Mar 31 2020, 07:59 PM
Post
#12765
|
|
Bucci Group: Members Posts: 108 Joined: 11-August 08 From: Carlsbad,Ca Member No.: 9,407 Region Association: Southern California |
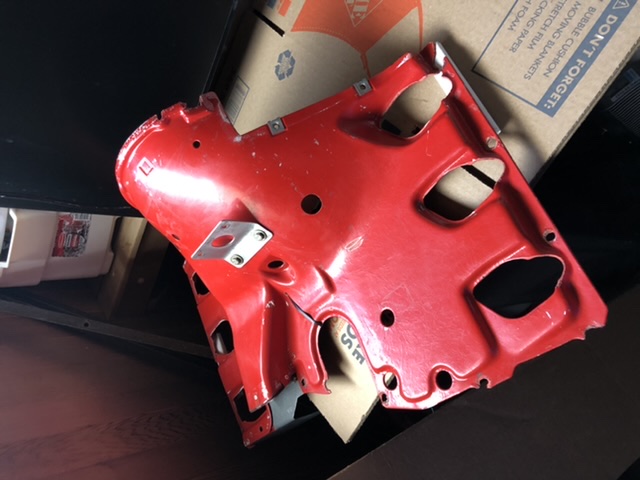
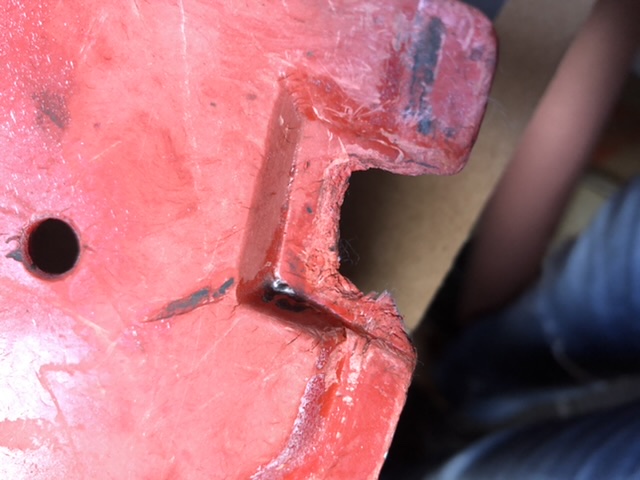
Worked on an old fan shroud for a six cylinder motor. Need to repair the German phenolic plastic shroud. I’m in a quandary what’s the best repair, do I use Fiberglass.?
   |
|
|
|
| mepstein |
Mar 31 2020, 08:09 PM
Post
#12766
|
|
914-6 GT in waiting Group: Members Posts: 20,721 Joined: 19-September 09 From: Landenberg, PA/Wilmington, DE Member No.: 10,825 Region Association: MidAtlantic Region |
QUOTE(Bucci @ Mar 31 2020, 09:59 PM) Worked on an old fan shroud for a six cylinder motor. Need to repair the German phenolic plastic shroud. I’m in a quandary what’s the best repair, do I use Fiberglass.? I didn't watch the guys at our shop do the work but I believe many times they would glass in a small piece of flat sheet steel with the appropriate shape and build it up with a bit of glass to make it invisible. |
 |
|
| Bucci |
Mar 31 2020, 08:10 PM
Post
#12767
|
|
Bucci Group: Members Posts: 108 Joined: 11-August 08 From: Carlsbad,Ca Member No.: 9,407 Region Association: Southern California |
Chris, I believe those bushings should be put in dry no grease or very little they get destroyed that way if I remember correctly...!
Marc QUOTE(campbellcj @ Mar 16 2020, 04:57 AM) Well I haven't done squat with my 914 in quite some time other than gingerly drive it to a few local events. I'm trying to get back into gear (pun intended) and make further progress before summer. During my last couple track events I had tremendous difficulty with shifting, mainly 2-3 but it was not consistent. Now I know why. First I found a seal/bushing in the base of my ancient 1st-gen Rennshift had slipped out of place and partly jammed the shift lever itself. I've had several issues with this Rennshift unit so it's not going back in the car, can't trust it. Then I found a totally destroyed bushing at the trans end. Chunks fell out when I removed the cover. Luckily the firewall and other rear bushing are good/newer. |
|
|
|
| Bucci |
Mar 31 2020, 08:13 PM
Post
#12768
|
|
Bucci Group: Members Posts: 108 Joined: 11-August 08 From: Carlsbad,Ca Member No.: 9,407 Region Association: Southern California |
QUOTE(mepstein @ Mar 31 2020, 06:09 PM) QUOTE(Bucci @ Mar 31 2020, 09:59 PM) Worked on an old fan shroud for a six cylinder motor. Need to repair the German phenolic plastic shroud. I’m in a quandary what’s the best repair, do I use Fiberglass.? I didn't watch the guys at our shop do the work but I believe many times they would glass in a small piece of flat sheet steel with the appropriate shape and build it up with a bit of glass to make it invisible. Thanks for the info, I was going to use Fiberglass probably rough it up with 80 grit and try not to make too hot of a batch. Marc |
|
|
|
| 76-914 |
Apr 1 2020, 01:48 PM
Post
#12769
|
|
Repeat Offender & Resident Subaru Antagonist Group: Members Posts: 13,889 Joined: 23-January 09 From: Temecula, CA Member No.: 9,964 Region Association: Southern California |
QUOTE(914-300Hemi @ Mar 30 2020, 08:55 PM) Finally got the 914 in the air. After a full year after purchasing a Max Jax lift I finally got it installed and ready to lift the 914 and the 911. (IMG:style_emoticons/default/piratenanner.gif) Congratulations Ravi. You're going to have a lot of new friends showing up. (IMG:style_emoticons/default/rolleyes.gif) |
|
|
|
| 63acornwall |
Apr 2 2020, 10:27 AM
Post
#12770
|
|
Member Group: Members Posts: 53 Joined: 24-January 19 From: London , UK Member No.: 22,823 Region Association: None |
I fitted a seat adjuster handle to the passenger seat to replace the original factory one that had been moved to the driver seat ( the one that breaks because it is used more ! )
Here's the part supplied by Sierra Madre , its pretty chunky weighs quarter pound , and has chunky 6.5mm bolts to secure it . I googled how to get the (passenger) seat out for a '75 car .....you need to know about the retaining spring plate....and after it was out I had to drill bigger holes in the metal channel that the seat adjuster handle bolts to , existing holes are about 4mm wide . All went together and good to go ! 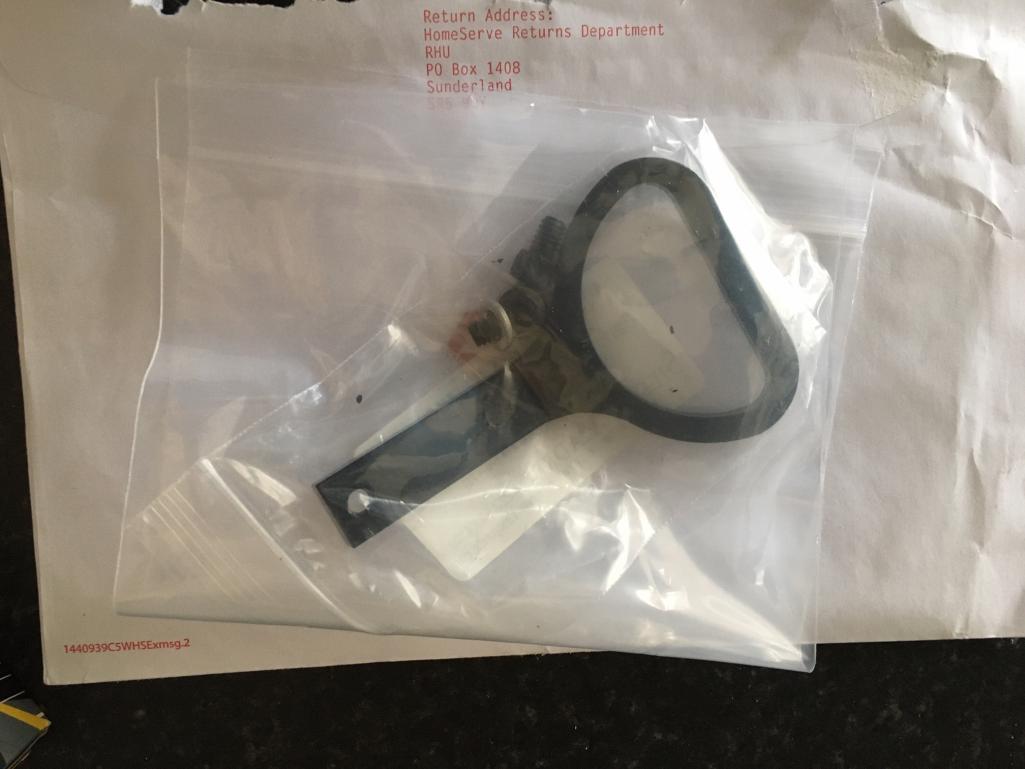 |
|
|
|
| PatrickB |
Apr 2 2020, 01:36 PM
Post
#12771
|
|
Member Group: Members Posts: 249 Joined: 26-March 17 From: sw ontario Member No.: 20,960 Region Association: Canada |
Pulled the engine to replace a timing belt and water pump, tidy up a couple small leaks... Still debating a smaller turbo for autocross. (IMG:style_emoticons/default/biggrin.gif)
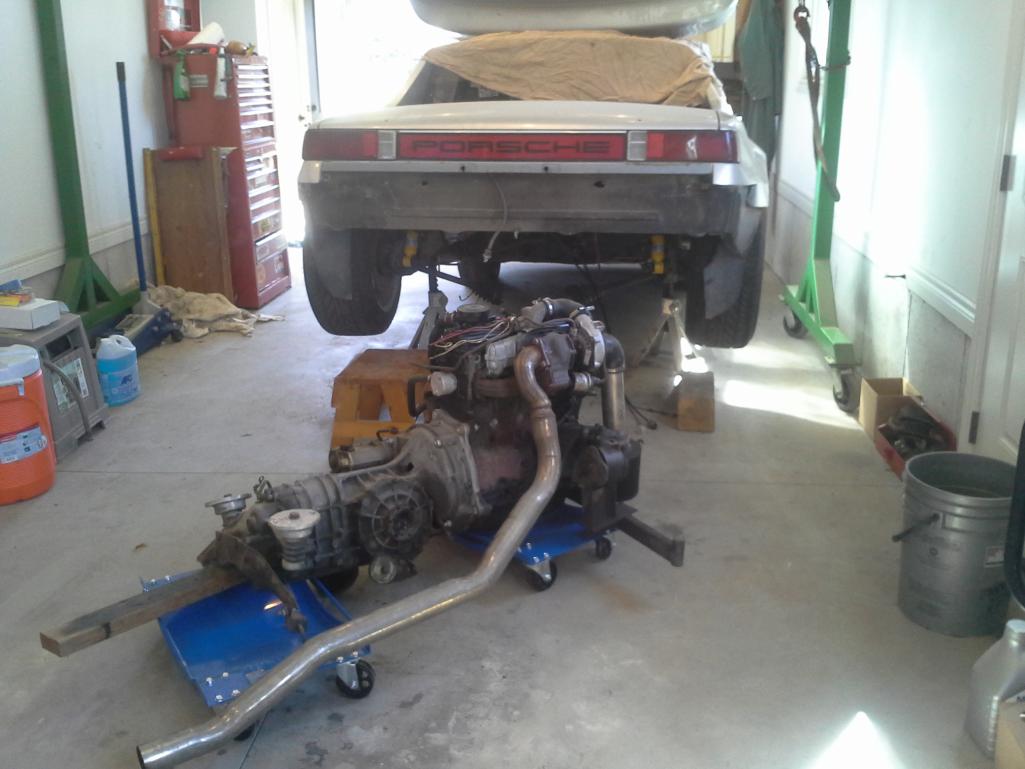 Engine actually sits over on a lot more of an angle in the car. single mount on the front right of engine allows it to pivot when sitting down. |
|
|
|
| ValcoOscar |
Apr 2 2020, 04:27 PM
Post
#12772
|
|
Garage Life Group: Members Posts: 2,623 Joined: 19-November 13 From: SoCal Member No.: 16,669 Region Association: Southern California |
delete
|
|
|
|
| brcacti |
Apr 3 2020, 04:47 PM
Post
#12773
|
|
1974 914 1.8 Group: Members Posts: 674 Joined: 17-July 19 From: PHX AZ 60 miles south Member No.: 23,302 Region Association: Southwest Region |
Drove it to work and walmart, parked near 2 Corvettes and fancy Camaro far from the store
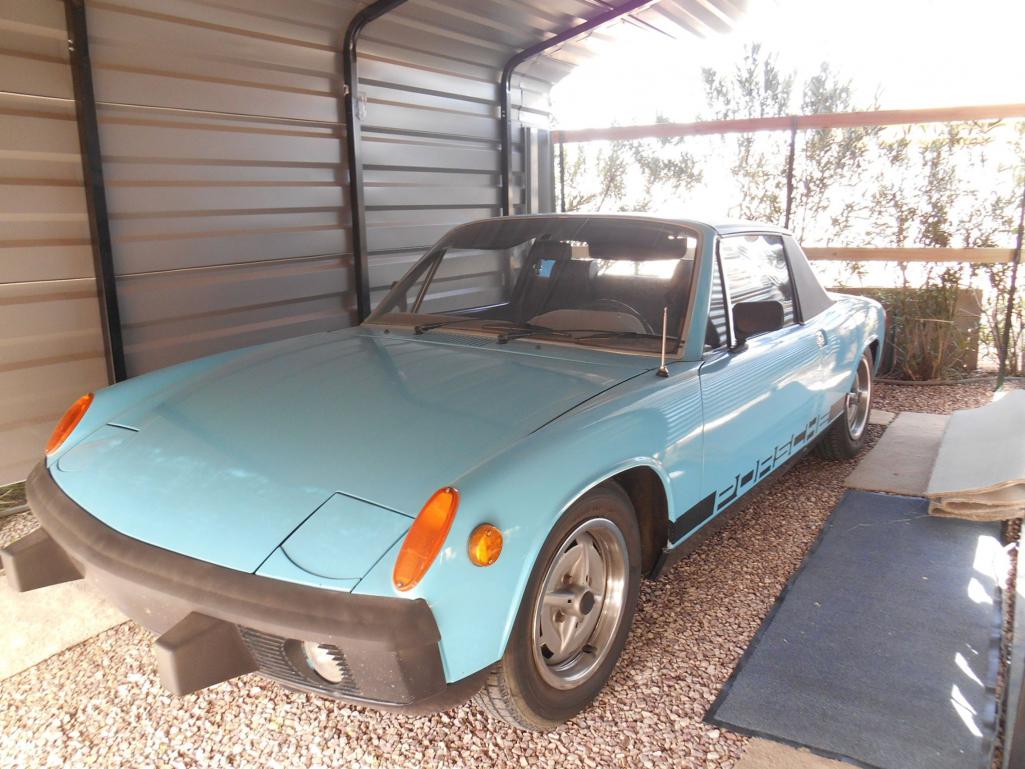 (IMG:style_emoticons/default/driving.gif) (IMG:style_emoticons/default/driving.gif) |
|
|
|
| Gatornapper |
Apr 3 2020, 05:04 PM
Post
#12774
|
|
Senior Member Group: Members Posts: 1,290 Joined: 22-September 17 From: Woods west of Richmond, VA Member No.: 21,449 Region Association: South East States |
Your timing my friend, is impecable. My son just broke the handle a week ago on my drivers seat - I pulled the seat and fashioned one out of #4 bare Cu. wire that is working fine, but was wondering where I'd ever find a replacement as they are riveted to the steel rail hinged on the seat rail.
Ordering mine from Sierra Madre soon - I'm a past customer..... GN QUOTE(63acornwall @ Apr 2 2020, 10:27 AM) I fitted a seat adjuster handle to the passenger seat to replace the original factory one that had been moved to the driver seat ( the one that breaks because it is used more ! ) Here's the part supplied by Sierra Madre , its pretty chunky weighs quarter pound , and has chunky 6.5mm bolts to secure it . I googled how to get the (passenger) seat out for a '75 car .....you need to know about the retaining spring plate....and after it was out I had to drill bigger holes in the metal channel that the seat adjuster handle bolts to , existing holes are about 4mm wide . All went together and good to go ! |
|
|
|
| Gatornapper |
Apr 3 2020, 05:36 PM
Post
#12775
|
|
Senior Member Group: Members Posts: 1,290 Joined: 22-September 17 From: Woods west of Richmond, VA Member No.: 21,449 Region Association: South East States |
Put in "new to me" 050 distributor to replace my old 231 178 009 with the flat spot - but cannot set spark at TDC and get engine to run......so I posted a detailed request for help on its own thread........
Can't wait to get the 050 working and seeing how much better my 2.0 will run..... GN |
|
|
|
| Mueller |
Apr 3 2020, 05:55 PM
Post
#12776
|
|
914 Freak! Group: Members Posts: 17,155 Joined: 4-January 03 From: Antioch, CA Member No.: 87 Region Association: None |
I was going to put a new master cylinder in it.
The hardline going to the front passenger caliper refused to come off at the MC so I had to cut the line, luckily I bought a set of new brake lines. Then when I finally removed the partial line from the bango fitting a bunch of the steel threads decided to stay inside the brass part. I tried to remove them with no luck so I put an ad.in the classifieds.  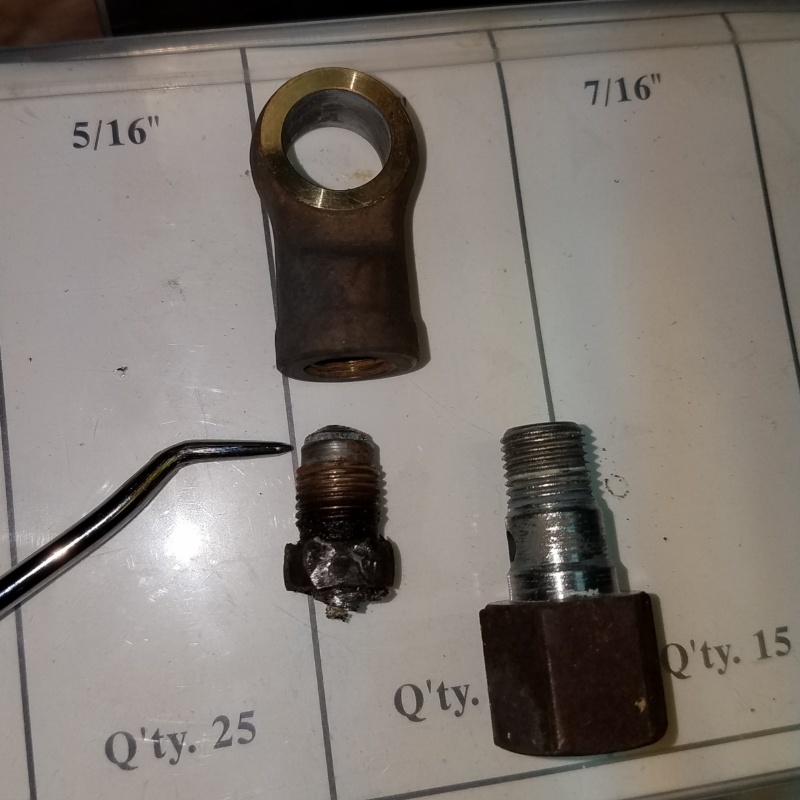 |
|
|
|
| mb911 |
Apr 3 2020, 06:11 PM
Post
#12777
|
|
914 Guru Group: Members Posts: 7,767 Joined: 2-January 09 From: Burlington wi Member No.: 9,892 Region Association: Upper MidWest |
|
|
|
|
| DRPHIL914 |
Apr 3 2020, 09:11 PM
Post
#12778
|
|
Dr. Phil Group: Members Posts: 5,939 Joined: 9-December 09 From: Kennesaw, GA Member No.: 11,106 Region Association: South East States |
spent a few hours tidying up the engine compartment, installed the new AAR with new hoses and tool a closer look and inspected all the other vac hoses, had to recheck decel valve hose connections, tightened up hose clamps, eliminated a couple small vac leaks then rechecked timing and did a final tune adjustment to MPS i rebuilt, went for test drive,. i am really close, WOT is perfect , part load is just a bit lean i think, so this may go just a bit more rich. it idle is about perfect, no more bucking. it’s ready for a road trip but this shelter at home thing sucks. i just found out i will be on admin leave for 2 weeks, out till now we’ve been working.
next up fix the issue with the relay/LED lights problem. |
|
|
|
| kroelofsen |
Apr 4 2020, 12:59 PM
Post
#12779
|
|
Member Group: Members Posts: 102 Joined: 27-June 19 From: The Netherlands Member No.: 23,255 Region Association: Europe |
Today shot the rear end of my 914 in epoxy primer after applying filler and sanding for many days, major step forward... (IMG:style_emoticons/default/piratenanner.gif)
The rear panel and rear part of the floor have been replaced. 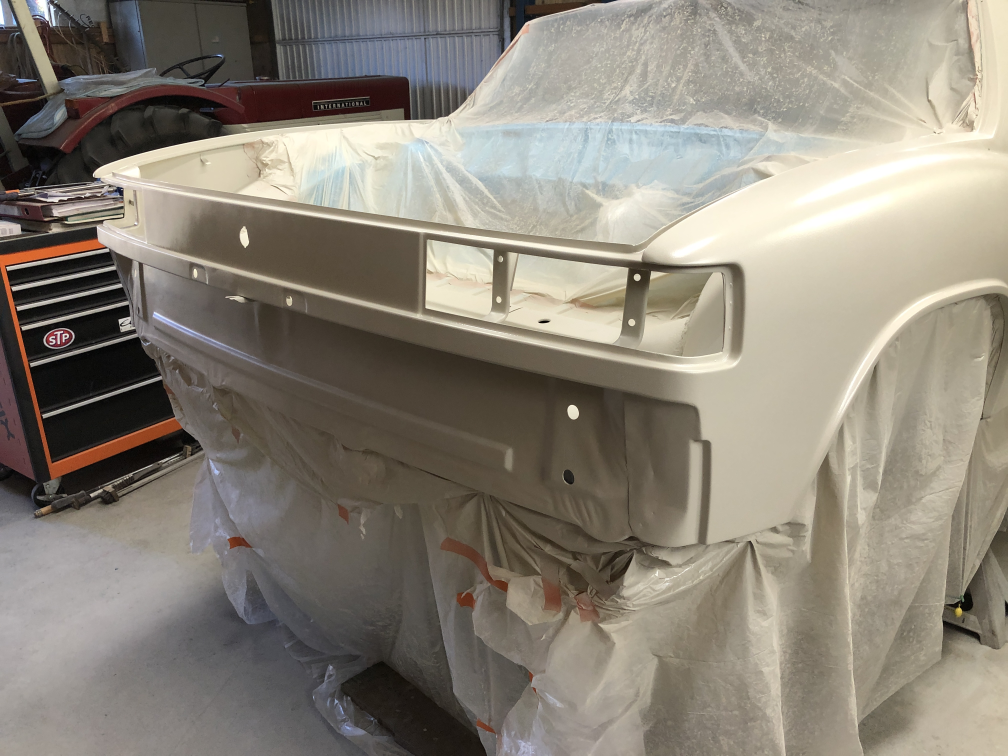 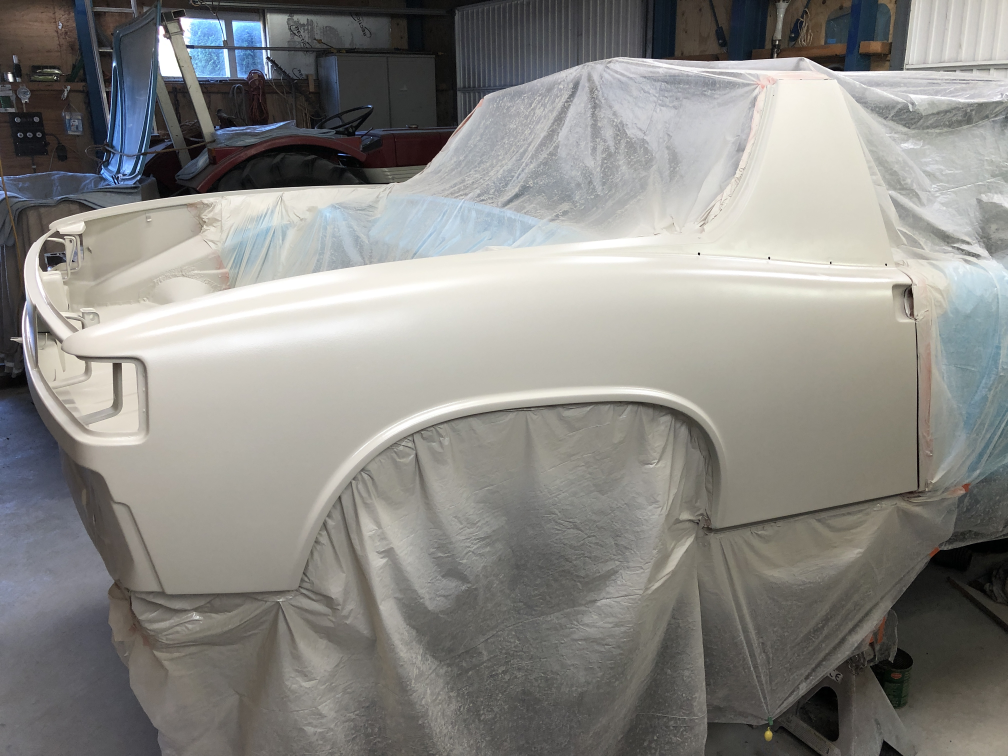 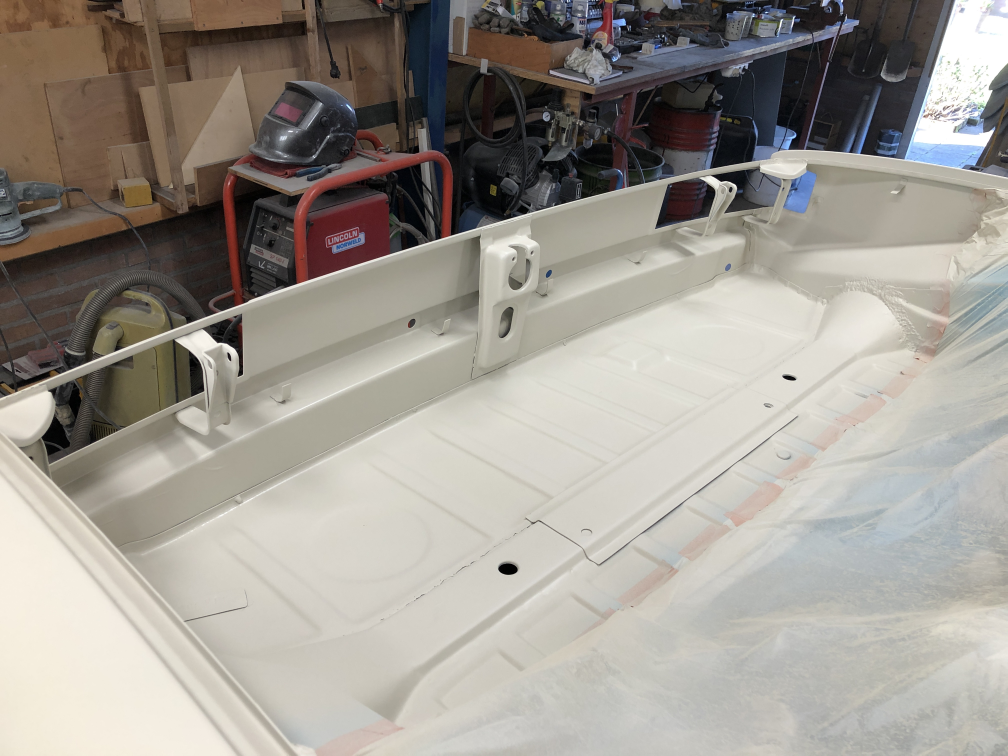 |
|
|
|
| DRPHIL914 |
Apr 4 2020, 07:24 PM
Post
#12780
|
|
Dr. Phil Group: Members Posts: 5,939 Joined: 9-December 09 From: Kennesaw, GA Member No.: 11,106 Region Association: South East States |
QUOTE(DRPHIL914 @ Apr 3 2020, 11:11 PM) spent a few hours tidying up the engine compartment, installed the new AAR with new hoses and tool a closer look and inspected all the other vac hoses, had to recheck decel valve hose connections, tightened up hose clamps, eliminated a couple small vac leaks then rechecked timing and did a final tune adjustment to MPS i rebuilt, went for test drive,. i am really close, WOT is perfect , part load is just a bit lean i think, so this may go just a bit more rich. it idle is about perfect, no more bucking. it’s ready for a road trip but this shelter at home thing sucks. i just found out i will be on admin leave for 2 weeks, out till now we’ve been working. next up fix the issue with the relay/LED lights problem. moved the ground wire for the fog light relay to isolate it from headlight switch circuit and in doing so eliminated the issue with LED headlights staying on high beam when fogs were on. pretty easy fix! Still tuning my MPS, a bit on the lean side. |
|
|
|
|
3 User(s) are reading this topic (1 Guests and 0 Anonymous Users)
2 Members: yellowporky, Cairo94507

|
Lo-Fi Version | Time is now: 30th May 2026 - 04:35 PM |
Invision Power Board
v9.1.4 © 2026 IPS, Inc.