|
|
|
Porsche, and the Porsche crest are registered trademarks of Dr. Ing. h.c. F. Porsche AG.
This site is not affiliated with Porsche in any way. Its only purpose is to provide an online forum for car enthusiasts. All other trademarks are property of their respective owners. |
|
|

  |

| nsr-jamie |
 Feb 16 2012, 02:19 AM Feb 16 2012, 02:19 AM
Post
#1
|
|
914 guy in Japan  Group: Members Posts: 1,182 Joined: 7-November 07 From: Nagoya, Japan Member No.: 8,305 Region Association: None |
Well, got my tank out and I have one of the Tangerine Racing fuel lines in stainless (just one line as my car has carbs) and I can not seem to find the instructions or have just misplaced them. I bought the line from Chris about 2 years ago.I have done a search but can't seem to find any threads about others installing them.
Just wanted to ask how much work it is and how hard and if anybody has some tips to share or even add some pictures. I hope I can do this myself this weekend. Do I need to pull out the carpet in the center tunnel area? Thank you |
   |

 
|
| TheCabinetmaker |
Feb 16 2012, 07:33 AM
Post
#2
|
|
I drive my car everyday Group: Members Posts: 8,373 Joined: 8-May 03 From: Tulsa, Ok. Member No.: 666 |
How hard its gonna be depends on your mechanical ability. As far as instructions, Contact Chris. You will need access to the tunnel at front and rear IIRC. Console and carpet needs to be gone. Making the connections at the tank is the hardest part.
|
|
|
|
| type47 |
Feb 16 2012, 07:50 AM
Post
#3
|
|
Viermeister Group: Members Posts: 4,254 Joined: 7-August 03 From: Vienna, VA Member No.: 994 Region Association: MidAtlantic Region |
Really, very easy but I had the engine/trans and the tank out and the shift rod through the tunnel. Took, like, 20 min for both. I lost my install instructions too and emailed Chris and he sent electronic copies. If you still need them, I'll scan and send ...
|
|
|
|
| rick 918-S |
Feb 16 2012, 07:54 AM
Post
#4
|
|
Hey nice rack! -Celette Group: Members Posts: 21,239 Joined: 30-December 02 From: Now in Superior WI Member No.: 43 Region Association: Northstar Region |
The only diffeculty for me was getting them through the rubber block in the front. I was working by myself so it was automatically harder. I had the engine and shift rod and shifter out as well as the tank though.
You want to be careful not to get the cables on the wrong side of the lines too. I hooked a cable the first time in. |
|
|
|
| 914itis |
Feb 16 2012, 08:18 AM
Post
#5
|
|
Advanced Member Group: Members Posts: 2,892 Joined: 9-October 10 From: New York City Member No.: 12,256 Region Association: North East States |
It was Easy for me with the tank out and engine off the car, I assume that the engine is on in your case, maybe a bit more difficult.
It took me about 20 minutes with one person help. he was pushing it thru while I guided the tubes thru the tunnel. Good luck. |
|
|
|
| AZ914 |
Feb 16 2012, 08:38 AM
Post
#6
|
|
914 Dumbass Group: Members Posts: 1,469 Joined: 6-January 03 From: Sunny Tucson Member No.: 98 Region Association: Southwest Region |
Jamie,
There is a video on YouTube by the other guy that does the lines, Rotary14 (I think).. it should be searchable. Its not that hard. If you have the access hole behind your shifter open, it can even be easier. |
|
|
|
| ChrisFoley |
Feb 16 2012, 08:42 AM
Post
#7
|
|
I am Tangerine Racing Group: Members Posts: 8,019 Joined: 29-January 03 From: Bolton, CT Member No.: 209 Region Association: None |
Email with a copy of the instructions sent. (IMG:style_emoticons/default/smile.gif)
|
|
|
|
| jonferns |
Feb 16 2012, 08:52 AM
Post
#8
|
|
Advanced Member Group: Members Posts: 2,081 Joined: 29-March 07 From: New Jersey Member No.: 7,631 Region Association: North East States |
I took care of mine with the engine in, and the rear up on jackstands. Lift the tunnel carpeting, and remove the front access plate so you could access the rubber grommet that the lines pass through under the fuel tank. I dont remember if I removed the shifter for more access, but remove it if you see the need. Other than that, after your old lines are disconnected, you can pull them out from the back (under the car). Make sure the grommets at the rear firewall are present (and in good shape) before pushing the new SS line through. Im sure this.would've been easier with 2 people, one under the car pushing the lines in, and another inside guiding it through the tunnel, but I was able to do it without any help, so its definitely doable.
|
|
|
|
| ww914 |
Feb 16 2012, 09:27 AM
Post
#9
|
|
914 Convert Group: Members Posts: 435 Joined: 29-September 11 From: Central Coast, CA Member No.: 13,621 Region Association: Central California |
You have to remove the fuel tank. I already had the engine out, so it was pretty easy. Here are a few photos:
When I removed the gear shift mechanism, I found the whole tunnel full of rust. 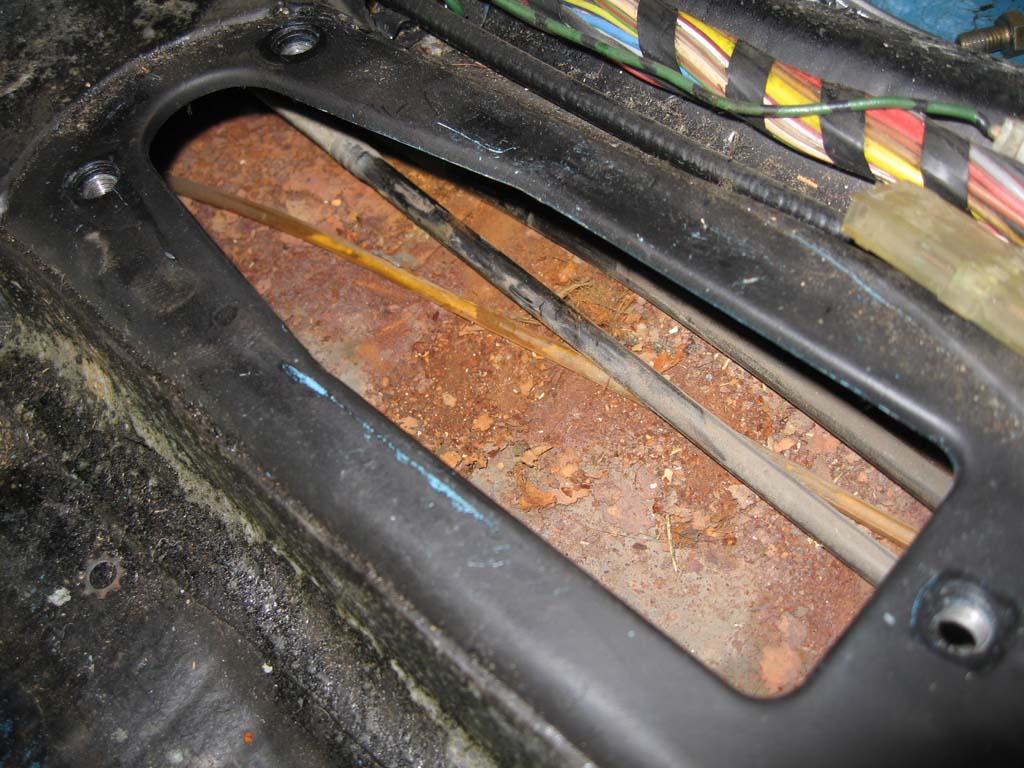 So, I applied Rust Destroyer the whole length of the tunnel with a bottle brush after I removed the old lines. I added a couple of holes to assist in this process. 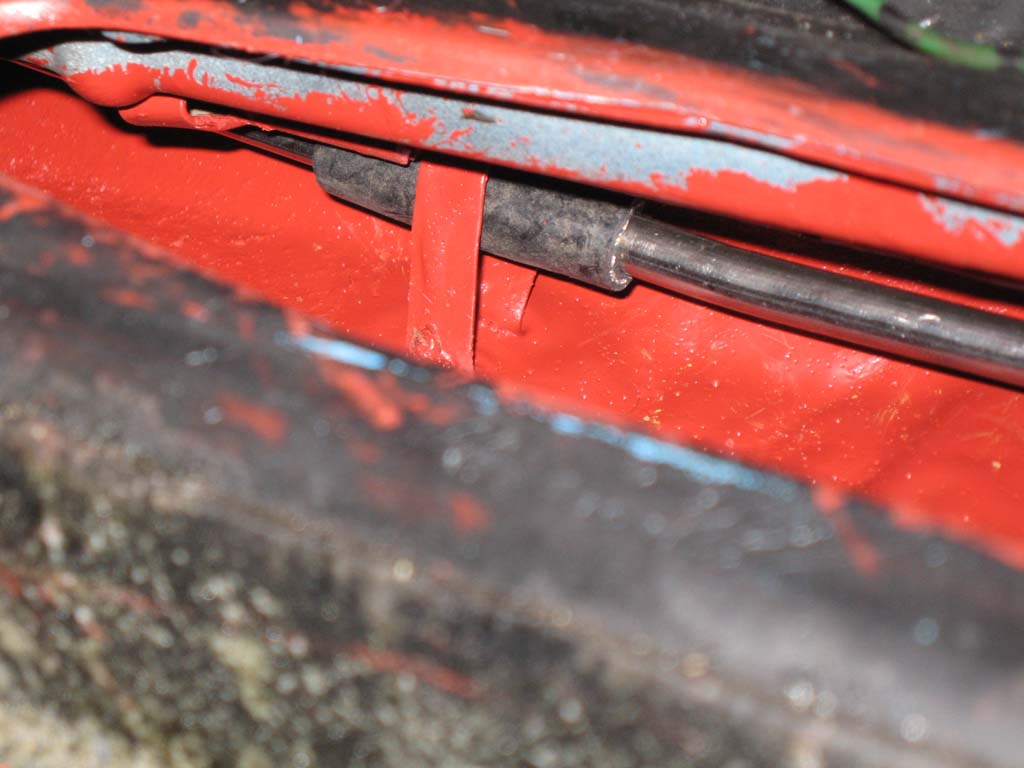 With the help of my Master Mechanic pushing the lines, we got them feed through. It was quite easy with a little help. 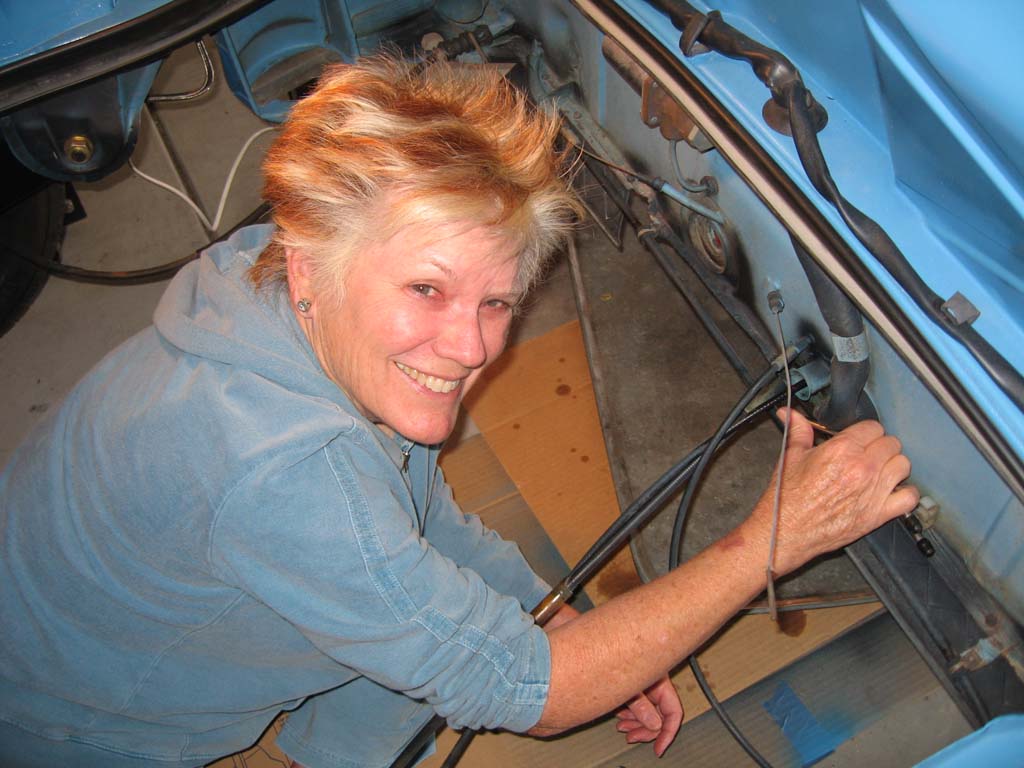 New lines under fuel tank. 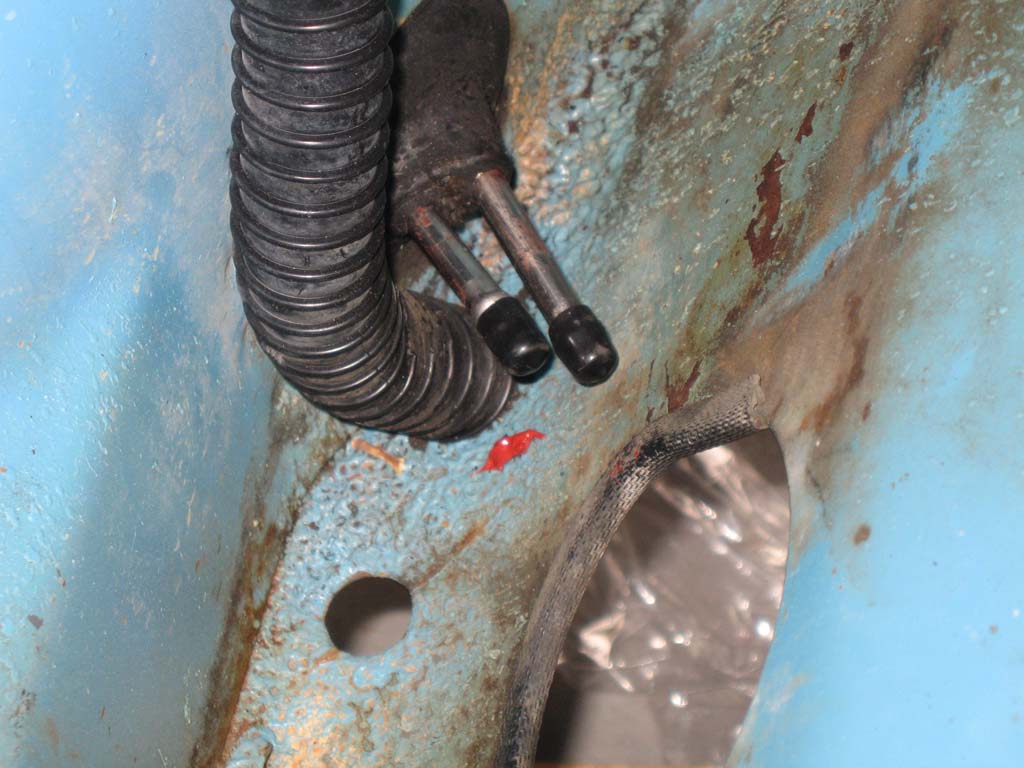 New lines in engine compartment. 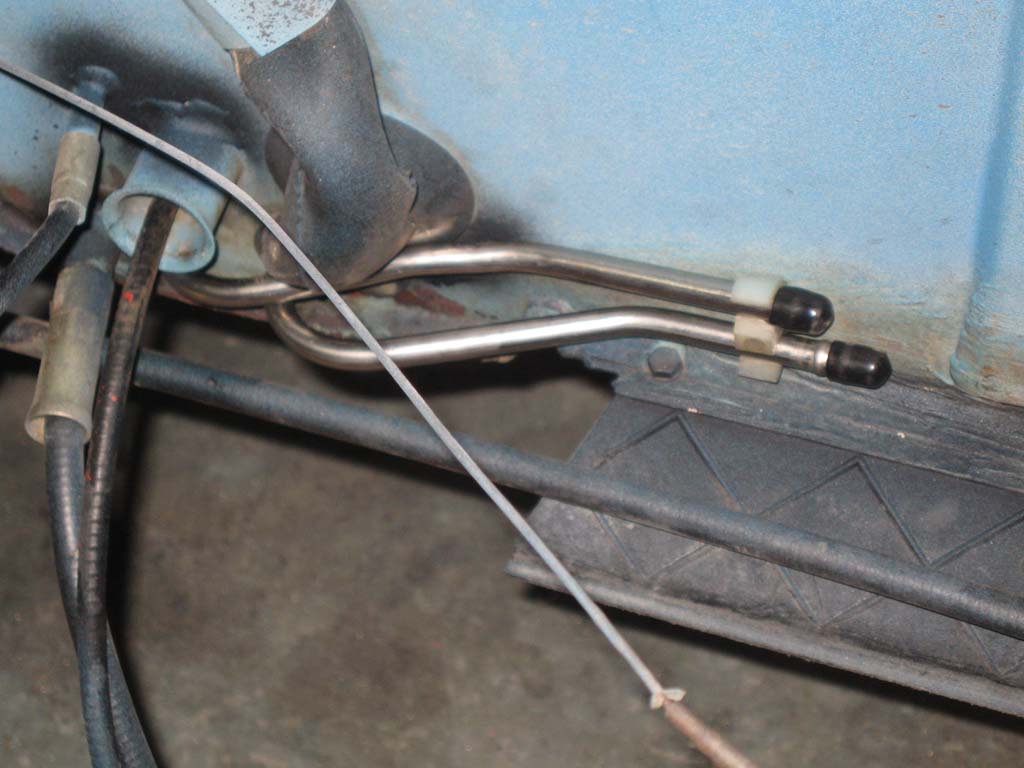 This part was pretty clear. I only had to call Chris about the placement of the short line that came with the kit. The photo on his website shows that placement. Hope this helps. |
|
|
|
| JmuRiz |
Feb 16 2012, 09:31 AM
Post
#10
|
|
914 Guru Group: Members Posts: 5,623 Joined: 30-December 02 From: NoVA Member No.: 50 Region Association: MidAtlantic Region |
QUOTE(type47 @ Feb 16 2012, 05:50 AM)  Really, very easy but I had the engine/trans and the tank out and the shift rod through the tunnel. Took, like, 20 min for both. I lost my install instructions too and emailed Chris and he sent electronic copies. If you still need them, I'll scan and send ... Oooo, I didn't know you did them, I'll ask you for help when I order mine and need to install. Probably a good time to remove the tank and clean it out too! |
|
|
|
| nsr-jamie |
Feb 16 2012, 10:25 AM
Post
#11
|
|
914 guy in Japan Group: Members Posts: 1,182 Joined: 7-November 07 From: Nagoya, Japan Member No.: 8,305 Region Association: None |
QUOTE(Racer Chris @ Feb 16 2012, 11:42 PM) THANK YOU !!! Chris !!! Perfect timing !! I will start to install these on Saturday with some friends. The tank is out and we are doing the entire suspension as well...lots of rust in the tank but not for long...its being treated as I write this now. I was hoping I didn't have to remove the center tunnel carpeting as I just installed new ones from A and P and also glued them in which now looks to have been a big mistake (IMG:style_emoticons/default/sad.gif) I am afraid the carpet may get damaged if I try to remove it.... (IMG:http://www.914world.com/bbs2/uploads_offsite/www.dreamgate.ne.jp-8305-1329409517.1.jpg) |
|
|
|
| ww914 |
Feb 16 2012, 12:33 PM
Post
#12
|
|
914 Convert Group: Members Posts: 435 Joined: 29-September 11 From: Central Coast, CA Member No.: 13,621 Region Association: Central California |
[/quote]
THANK YOU !!! Chris !!! Perfect timing !! I will start to install these on Saturday with some friends. The tank is out and we are doing the entire suspension as well...lots of rust in the tank but not for long...its being treated as I write this now. I was hoping I didn't have to remove the center tunnel carpeting as I just installed new ones from A and P and also glued them in which now looks to have been a big mistake (IMG:style_emoticons/default/sad.gif) I am afraid the carpet may get damaged if I try to remove it.... [/quote] Look at the photo I posted. There are two sets of tabs that you must bend back before you can get the old lines out. You should put little pieces of rubber fuel line back where those tabs are on the new ones. Bottom line, you need to remove the carpet to do this. Some say to put shrink wrap on the entire length of the new line in the tunnel. I don't think this is necessary, but you must protect the lines where the tabs are located as that is metal against metal. |
|
|
|
| pete000 |
Feb 16 2012, 01:18 PM
Post
#13
|
|
Senior Member Group: Members Posts: 1,887 Joined: 23-August 10 From: Bradenton Florida Member No.: 12,094 Region Association: South East States |
I did not know about the tabs up in there holding the lines. I pulled out the plastic ones with out much resistance. I will now have to go back in and pull the shifter and see if I put in the stainless ones through that tab correctly and insulate them with rubber.
|
|
|
|
| bigkensteele |
Feb 16 2012, 05:55 PM
Post
#14
|
|
Major Member Group: Members Posts: 2,200 Joined: 30-August 04 From: Cincinnati, OH Member No.: 2,660 Region Association: South East States |
What the others said AND WD40 your grommets, especially the front one, and the lines will go through MUCH easier.
|
|
|
|
| nathansnathan |
Feb 17 2012, 09:22 AM
Post
#15
|
|
Senior Member Group: Members Posts: 1,052 Joined: 31-May 10 From: Laguna Beach, CA Member No.: 11,782 Region Association: None |
QUOTE(bigkensteele @ Feb 16 2012, 03:55 PM) What the others said AND WD40 your grommets, especially the front one, and the lines will go through MUCH easier. Is there something readily available to lubricate the grommets without using a petroleum product that will harm them? I see some rubber lubricant products online, but anything at the hardware store? |
|
|
|
| John |
Feb 17 2012, 09:21 PM
Post
#16
|
|
member? what's a member? Group: Members Posts: 3,393 Joined: 30-January 04 From: Evansville, IN (SIRPCA) Member No.: 1,615 Region Association: None |
QUOTE(nathansnathan @ Feb 17 2012, 07:22 AM) QUOTE(bigkensteele @ Feb 16 2012, 03:55 PM) What the others said AND WD40 your grommets, especially the front one, and the lines will go through MUCH easier. Is there something readily available to lubricate the grommets without using a petroleum product that will harm them? I see some rubber lubricant products online, but anything at the hardware store? In a pinch, one of the liquid dish washing detergents and a little water can make rubber very slippery. |
|
|
|
| JeffBowlsby |
Feb 18 2012, 10:13 AM
Post
#17
|
|
914 Wiring Harnesses & Beekeeper Group: Members Posts: 9,222 Joined: 7-January 03 From: San Ramon CA Member No.: 104 Region Association: None |
Glycerine from the pharmacy will lube the rubber too.
|
 |
|
| jmill |
Feb 18 2012, 11:31 AM
Post
#18
|
|
Green Hornet Group: Members Posts: 2,449 Joined: 9-May 08 From: Racine, Wisconsin Member No.: 9,038 Region Association: Upper MidWest |
QUOTE(nathansnathan @ Feb 17 2012, 09:22 AM) Is there something readily available to lubricate the grommets without using a petroleum product that will harm them? I see some rubber lubricant products online, but anything at the hardware store? KY? Be careful, I hear that stuff blows your hair back |
|
|
|
| 02loftsmoor |
Feb 18 2012, 11:50 AM
Post
#19
|
|
Senior Member Group: Members Posts: 577 Joined: 26-June 11 From: Ft. Worth TX Member No.: 13,243 Region Association: Southwest Region |
liquid soap, or silicone lube
QUOTE(jmill @ Feb 18 2012, 11:31 AM) QUOTE(nathansnathan @ Feb 17 2012, 09:22 AM) Is there something readily available to lubricate the grommets without using a petroleum product that will harm them? I see some rubber lubricant products online, but anything at the hardware store? KY? Be careful, I hear that stuff blows your hair back |
|
|
|
| nsr-jamie |
Feb 18 2012, 11:58 AM
Post
#20
|
|
914 guy in Japan Group: Members Posts: 1,182 Joined: 7-November 07 From: Nagoya, Japan Member No.: 8,305 Region Association: None |
Good news !! The fuel line is already installed. It took some work but went well. I had to remove the carpet on the center tunnel which was a lot of work cause it was glued down so much. Eventually got it removed cleanly, removed the shifter and found lots of rust too....a little cleaning and some minor work and cleaned it up and treated the rust as much as I could with the little amount of time I had and in these conditions. All the old fuel lines were pulled out and thrown in the garbage. All new lines were replaced with brand new ones for safety and I also added a fire extinguisher just in case......
|
|
|
|
|
1 User(s) are reading this topic (1 Guests and 0 Anonymous Users)
0 Members:

|
Lo-Fi Version | Time is now: 2nd April 2026 - 11:07 AM |
Invision Power Board
v9.1.4 © 2026 IPS, Inc.