|
|
|
Porsche, and the Porsche crest are registered trademarks of Dr. Ing. h.c. F. Porsche AG.
This site is not affiliated with Porsche in any way. Its only purpose is to provide an online forum for car enthusiasts. All other trademarks are property of their respective owners. |
|
|

  |

| bondo |
 Oct 5 2004, 04:01 PM Oct 5 2004, 04:01 PM
Post
#1
|
|
Practicing my perpendicular parking  Group: Members Posts: 4,277 Joined: 19-April 03 From: Los Osos, CA Member No.: 587 Region Association: Central California |
I just took apart my last transmission, and I carefully documented the disassembly with notes and pictures. I did it so I could put one back together, but I might as well post it here for all to benefit from. It is not intened to replace Red-Beard's article, more to supplement it. The parts diagrams and Red-beard's article are not enough to turn a pile of parts into a transmission. (There are three similar tapered washers that are all different thicknesses, for example) You either have to just know where everything goes, or take very good notes while disassembling. I did not fully disassemble the transmission, just the most confusing parts that usually have to come off. I left a bearing race on the input shaft, and a bearing on the pinion shaft. I did not remove the differential. Without further adoo, (I don't even try to spell french) here's step one:
1. Drain the gear lube! Very important! Here's what happens when you don't: Attached image(s) 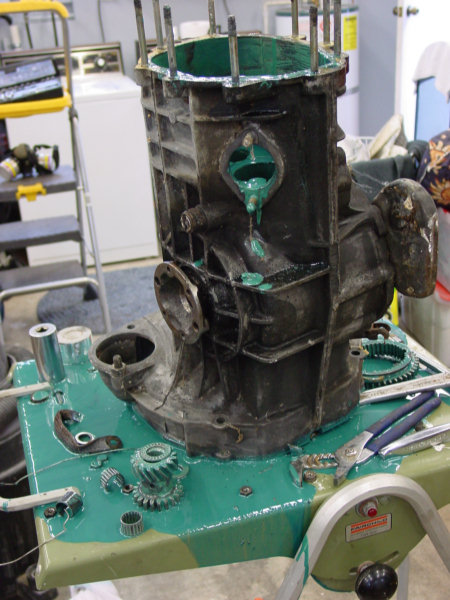
|
   |

 
|
| bondo |
Oct 5 2004, 04:03 PM
Post
#2
|
|
Practicing my perpendicular parking Group: Members Posts: 4,277 Joined: 19-April 03 From: Los Osos, CA Member No.: 587 Region Association: Central California |
2. Remove shifter: (2 13mm nuts with washers)
Attached image(s) 
|
|
|
|
| bondo |
Oct 5 2004, 04:04 PM
Post
#3
|
|
Practicing my perpendicular parking Group: Members Posts: 4,277 Joined: 19-April 03 From: Los Osos, CA Member No.: 587 Region Association: Central California |
3. Remove tail cover nuts: (nine 13mm nuts with washers)
Attached image(s) 
|
|
|
|
| bondo |
Oct 5 2004, 04:06 PM
Post
#4
|
|
Practicing my perpendicular parking Group: Members Posts: 4,277 Joined: 19-April 03 From: Los Osos, CA Member No.: 587 Region Association: Central California |
4. lightly tap tail cover "ears" with a rubber mallet. Don't worry if the intermediate plate separates first, just hold it in place and keep tapping on the ears, the cover will eventually separate.
Attached image(s) 
|
|
|
|
| bondo |
Oct 5 2004, 04:09 PM
Post
#5
|
|
Practicing my perpendicular parking Group: Members Posts: 4,277 Joined: 19-April 03 From: Los Osos, CA Member No.: 587 Region Association: Central California |
5. Remove the tail cover once it comes loose. Reverse bits will fall off of the shaft that is part of the tail cover, but I'll show you how they go. In this pic, the roller bearings with the spacer are shown on the shaft of the tail cover.
Attached image(s) 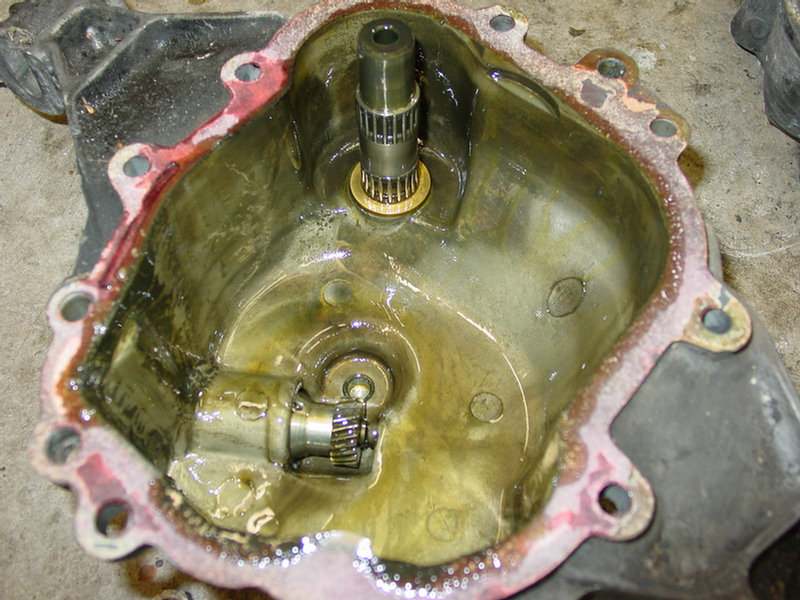
|
|
|
|
| bondo |
Oct 5 2004, 04:12 PM
Post
#6
|
|
Practicing my perpendicular parking Group: Members Posts: 4,277 Joined: 19-April 03 From: Los Osos, CA Member No.: 587 Region Association: Central California |
The gear that actually does the reversing goes over the bearings as shown here:
Attached image(s) 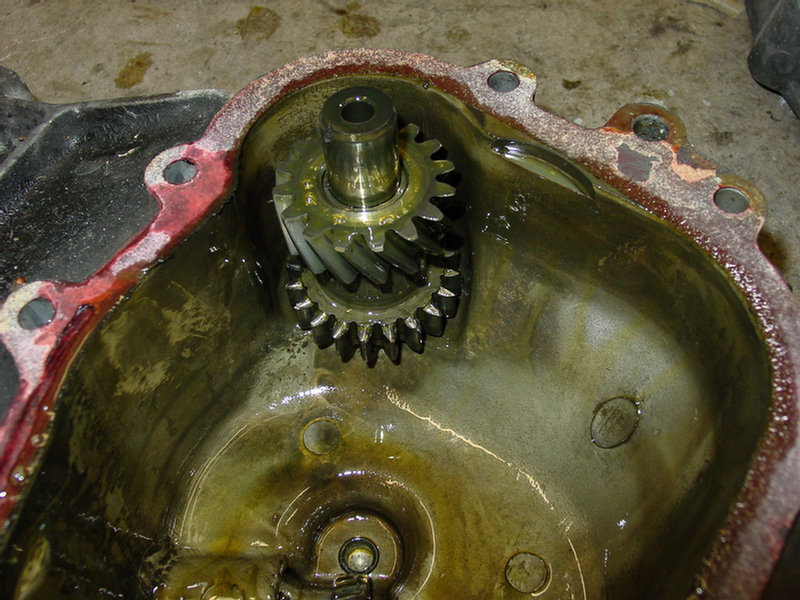
|
|
|
|
| bondo |
Oct 5 2004, 04:14 PM
Post
#7
|
|
Practicing my perpendicular parking Group: Members Posts: 4,277 Joined: 19-April 03 From: Los Osos, CA Member No.: 587 Region Association: Central California |
The roller/thrust bearing goes over the reverse gear:
Attached image(s) 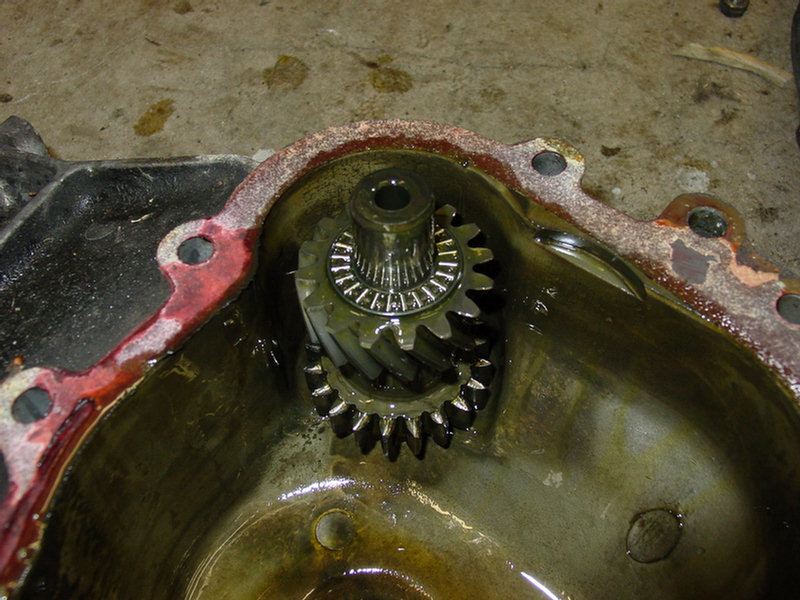
|
|
|
|
| bondo |
Oct 5 2004, 04:16 PM
Post
#8
|
|
Practicing my perpendicular parking Group: Members Posts: 4,277 Joined: 19-April 03 From: Los Osos, CA Member No.: 587 Region Association: Central California |
And the washer with the notch goes on top of the bearing like this: (the notch is for clearance of the intermediate plate bearing support assembly, which sticks out of the intermediate plate)
Make sure you find all these parts before proceeding. Attached image(s) 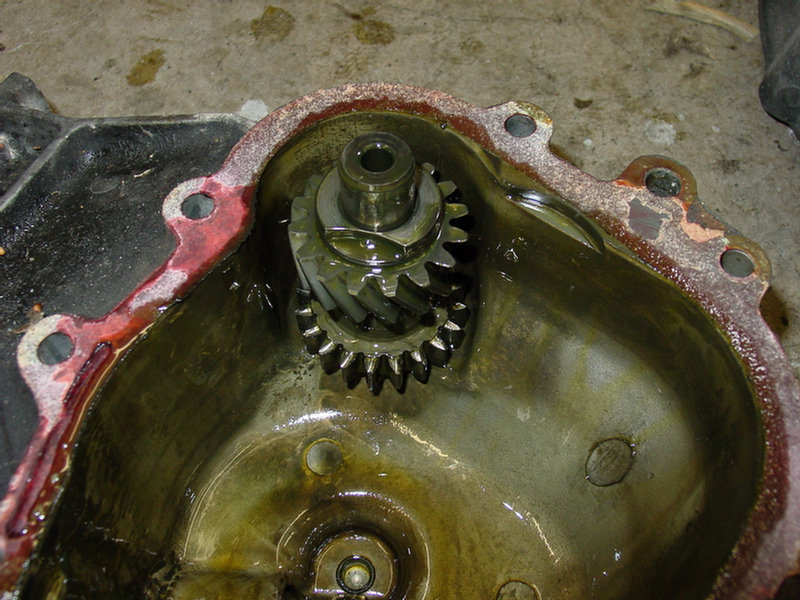
|
|
|
|
| bondo |
Oct 5 2004, 04:23 PM
Post
#9
|
|
Practicing my perpendicular parking Group: Members Posts: 4,277 Joined: 19-April 03 From: Los Osos, CA Member No.: 587 Region Association: Central California |
Now tap the 2/3 and 4/5 shift rods into the transmission. Those are the shift rods that only stick out of the intermediate plate about 1cm. The one closest to the 1/reverse shift rod won't budge unless the 1/reverse shift rod is in the neutral position due to the way the detents work. Tapping the two shift rods engages 3rd and 5th, at the same time, locking the transmission.
Attached image(s) 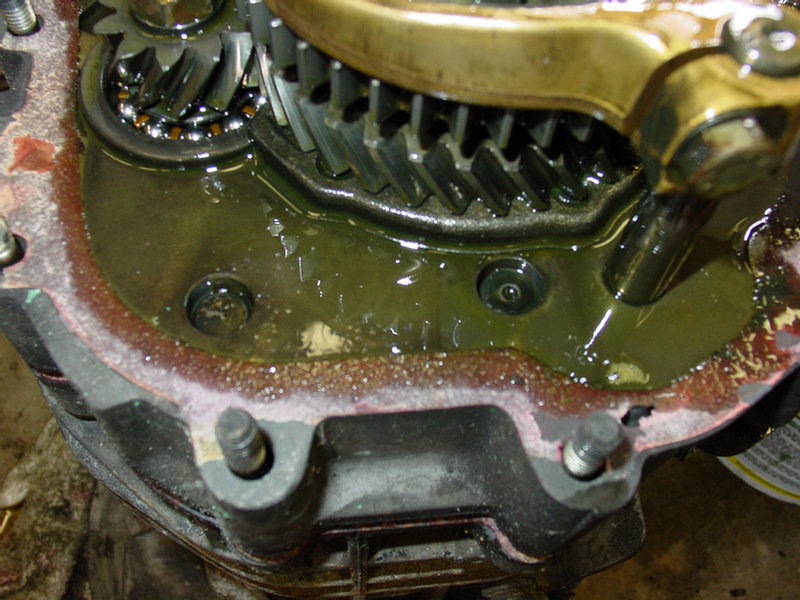
|
|
|
|
| bondo |
Oct 5 2004, 04:28 PM
Post
#10
|
|
Practicing my perpendicular parking Group: Members Posts: 4,277 Joined: 19-April 03 From: Los Osos, CA Member No.: 587 Region Association: Central California |
With the transmission locked, you can now remove the pinion shaft stretch bolt (you will need a 30mm deep socket to clear the speedometer drive, and perhaps a hammer). After that, drive the pin out of the castle nut on the input shaft, and loosen it (but don't take it off yet)
Attached image(s) 
|
|
|
|
| bondo |
Oct 5 2004, 04:31 PM
Post
#11
|
|
Practicing my perpendicular parking Group: Members Posts: 4,277 Joined: 19-April 03 From: Los Osos, CA Member No.: 587 Region Association: Central California |
Now remove the 1/reverse shift fork bolt completely, and then pull the shift fork and 1/reverse slider off
Attached image(s) 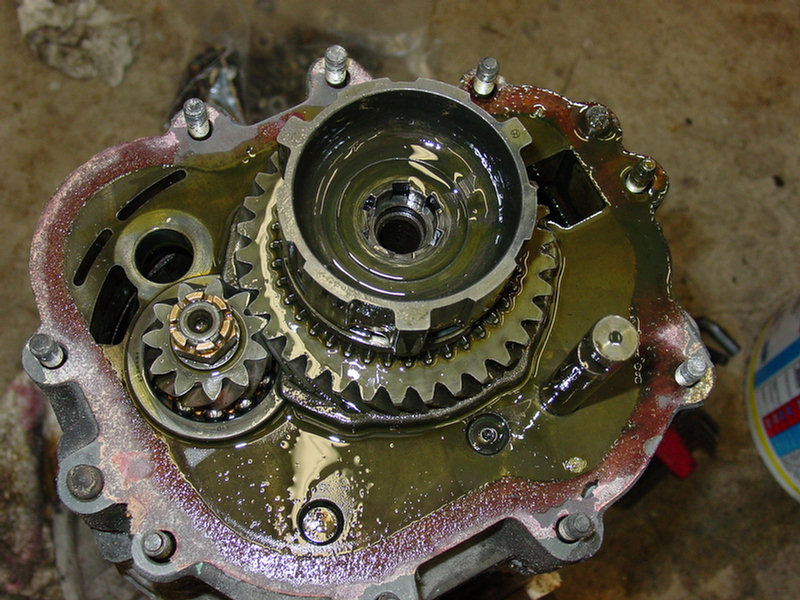
|
|
|
|
| bondo |
Oct 5 2004, 04:32 PM
Post
#12
|
|
Practicing my perpendicular parking Group: Members Posts: 4,277 Joined: 19-April 03 From: Los Osos, CA Member No.: 587 Region Association: Central California |
Then remove the 1/reverse slider hub and first gear:
Attached image(s) 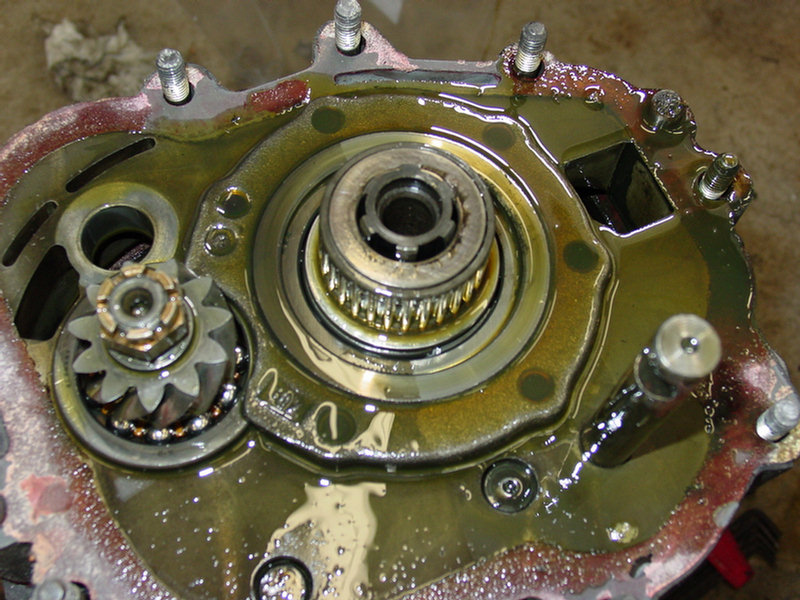
|
|
|
|
| bondo |
Oct 5 2004, 04:37 PM
Post
#13
|
|
Practicing my perpendicular parking Group: Members Posts: 4,277 Joined: 19-April 03 From: Los Osos, CA Member No.: 587 Region Association: Central California |
Next the 1st gear roller bearing and its inner race come off (the inner race of 1st gear is different from the other gears (thicker)
Attached image(s) 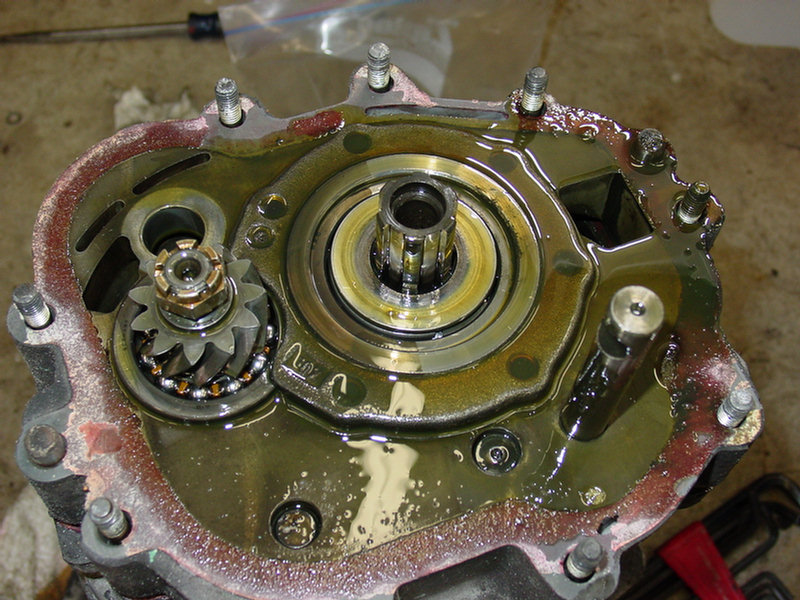
|
|
|
|
| bondo |
Oct 5 2004, 04:39 PM
Post
#14
|
|
Practicing my perpendicular parking Group: Members Posts: 4,277 Joined: 19-April 03 From: Los Osos, CA Member No.: 587 Region Association: Central California |
Now the first tapered washer comes off. It is about 3.3 mm thick at its thickest point, and the flat side goes against 1st gear.
Attached image(s) 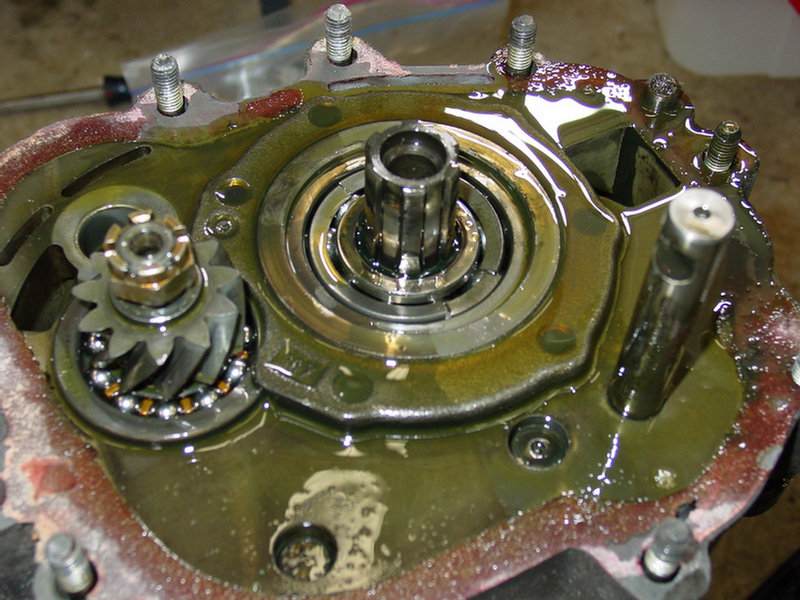
|
|
|
|
| bondo |
Oct 5 2004, 04:42 PM
Post
#15
|
|
Practicing my perpendicular parking Group: Members Posts: 4,277 Joined: 19-April 03 From: Los Osos, CA Member No.: 587 Region Association: Central California |
Now you can grip the intermediate plate and pull the gear stacks out of the case. Take it out and set it on a workbench you don't mind getting dirty. I put the shift rods back to neutral, so you can see how things are supposed to line up.
Attached image(s) 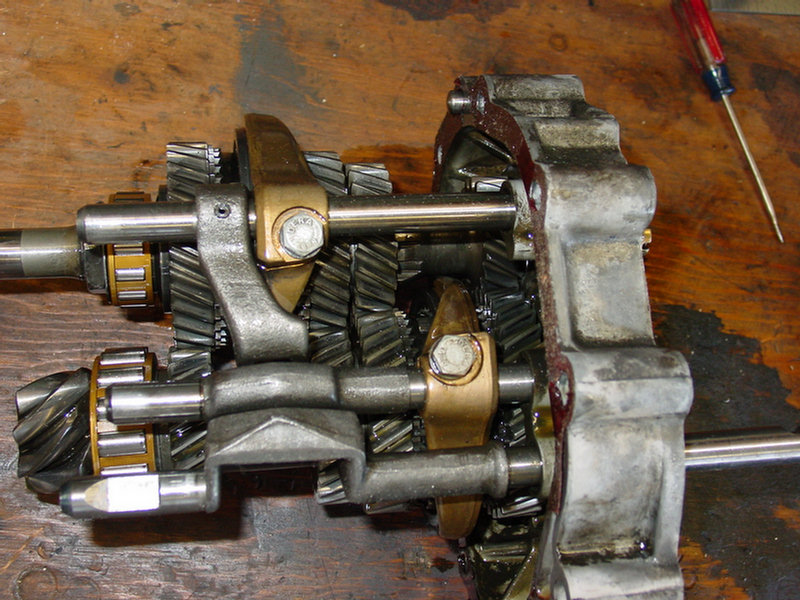
|
|
|
|
| bondo |
Oct 5 2004, 04:44 PM
Post
#16
|
|
Practicing my perpendicular parking Group: Members Posts: 4,277 Joined: 19-April 03 From: Los Osos, CA Member No.: 587 Region Association: Central California |
Here you can see the notches in all the shift rods line up when everything is in the neutral position. This is where the shifter selects which shift rod to move.
Attached image(s) 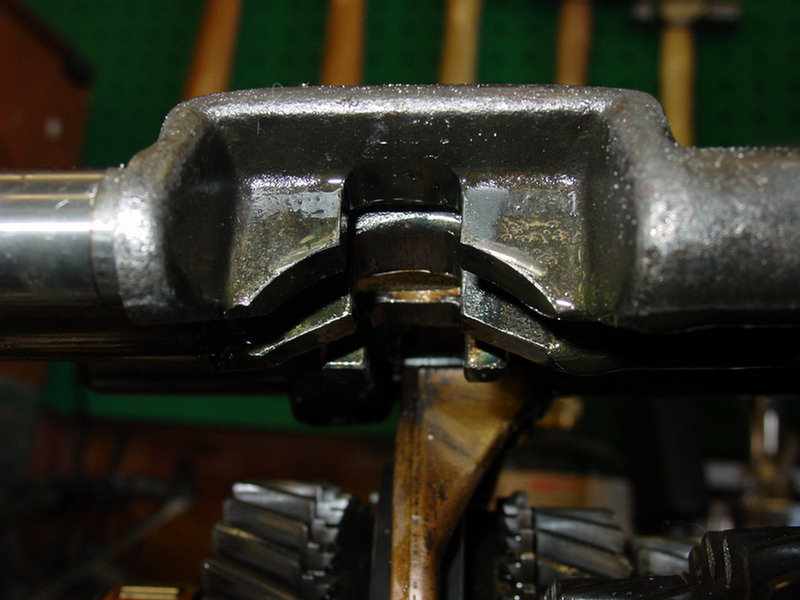
|
|
|
|
| bondo |
Oct 5 2004, 04:45 PM
Post
#17
|
|
Practicing my perpendicular parking Group: Members Posts: 4,277 Joined: 19-April 03 From: Los Osos, CA Member No.: 587 Region Association: Central California |
Now remove the plug from the bottom of the intermediate plate, and extract the short spring and ball from the hole.
Attached image(s) 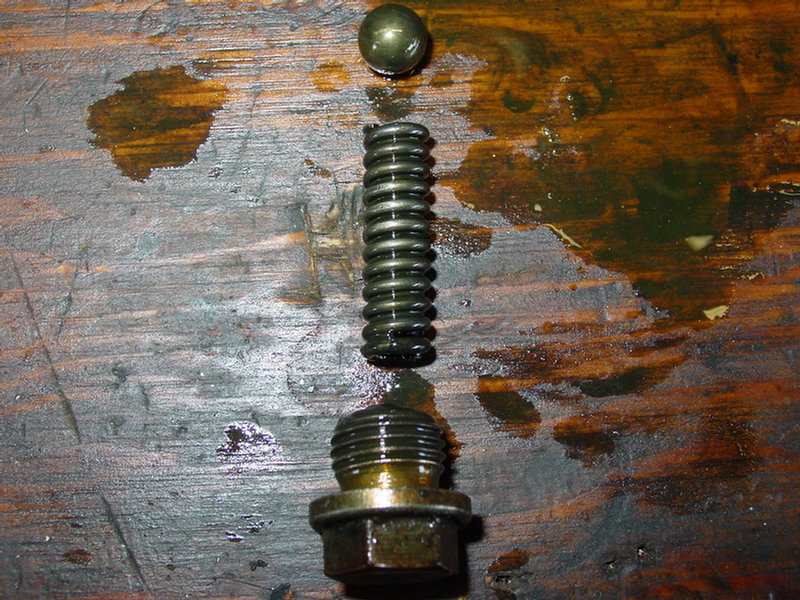
|
|
|
|
| bondo |
Oct 5 2004, 04:59 PM
Post
#18
|
|
Practicing my perpendicular parking Group: Members Posts: 4,277 Joined: 19-April 03 From: Los Osos, CA Member No.: 587 Region Association: Central California |
Now you can remove the 1/reverse shift rod (make sure the 2/3 shift rod is in the neutral position or it won't come out). Once you remove the 1/reverse shift rod, a little metal pill looking thingie will come out of the intermediate plate. Next remove the bolt from the 2/3 shift fork, slide the shift rod out, and remove the shift fork. After that another ball, a longer spring with a rod in it, and yet another ball will come out of the intermediate plate. Now remove the 4/5 shift rod and fork, in the same way as 2/3. Heres a picture of the shift rods, and how they interact with the detents and springs:
Attached image(s) 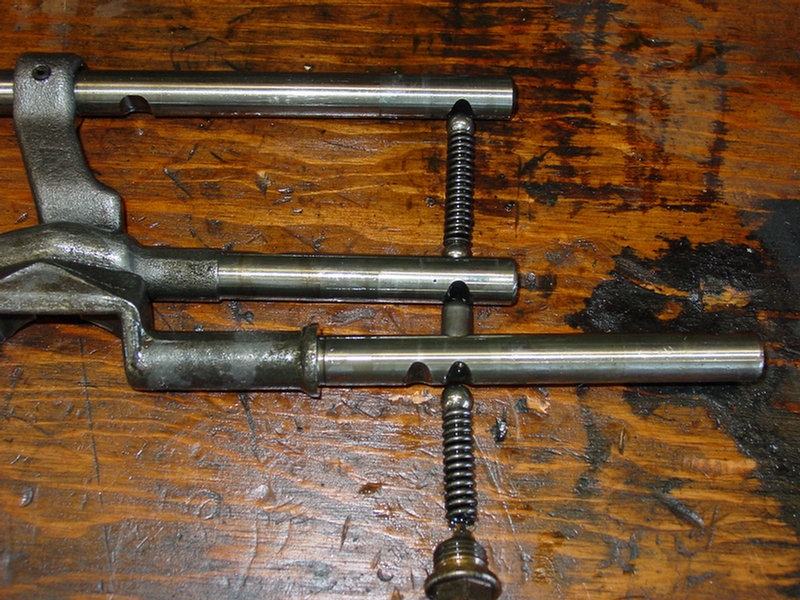
|
|
|
|
| bondo |
Oct 5 2004, 05:02 PM
Post
#19
|
|
Practicing my perpendicular parking Group: Members Posts: 4,277 Joined: 19-April 03 From: Los Osos, CA Member No.: 587 Region Association: Central California |
Next, remove the castle nut and washer from the input shaft, and put the nut back on upside down, flush with the end of the shaft.
Attached image(s) 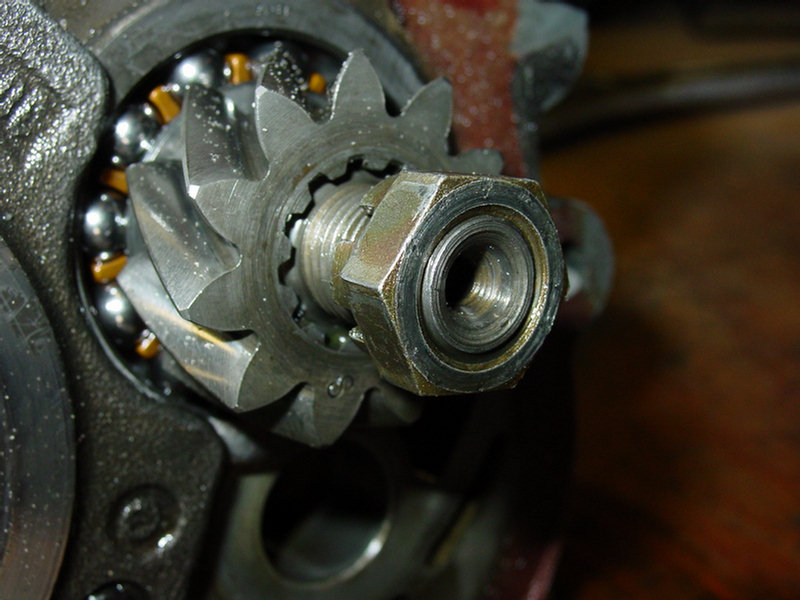
|
|
|
|
| bondo |
Oct 5 2004, 05:06 PM
Post
#20
|
|
Practicing my perpendicular parking Group: Members Posts: 4,277 Joined: 19-April 03 From: Los Osos, CA Member No.: 587 Region Association: Central California |
Alternate tapping the two shafts with a brass hammer, trying to get them to move together. When the nut hits the small side of first gear, stop, remove the nut, and remove the gear (a gear puller can help here, but you probably won't need it). Put the nut back on flush, and contunue.
Attached image(s) 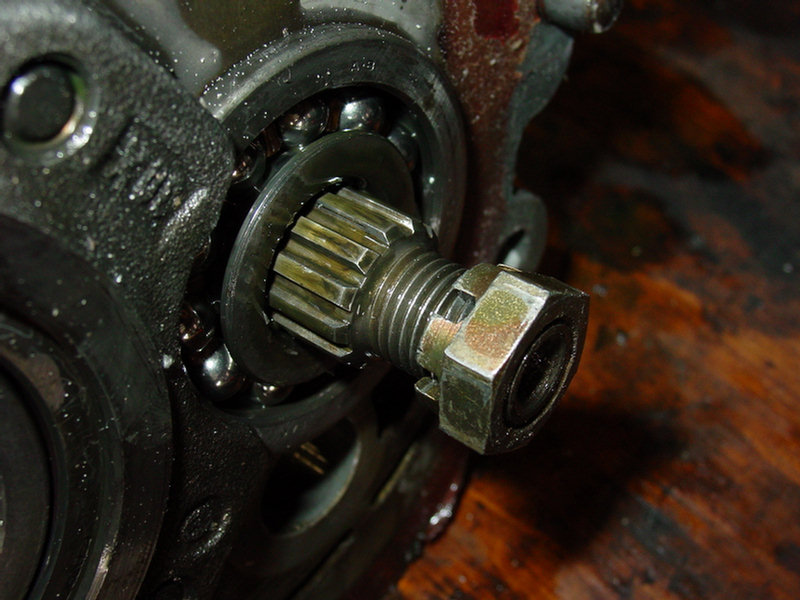
|
|
|
|
|
2 User(s) are reading this topic (2 Guests and 0 Anonymous Users)
0 Members:

|
Lo-Fi Version | Time is now: 20th July 2026 - 02:04 AM |
Invision Power Board
v9.1.4 © 2026 IPS, Inc.