|
|
|
Porsche, and the Porsche crest are registered trademarks of Dr. Ing. h.c. F. Porsche AG.
This site is not affiliated with Porsche in any way. Its only purpose is to provide an online forum for car enthusiasts. All other trademarks are property of their respective owners. |
|
|

  |

| watsonrx13 |
 Oct 11 2004, 02:38 PM Oct 11 2004, 02:38 PM
Post
#1
|
|
Advanced Member  Group: Members Posts: 2,734 Joined: 18-February 03 From: Plant City, FL Member No.: 312 Region Association: South East States |
After replacing the suspension ear, I'm ready to install the engine shelf.
Can I just tack weld the shelf in, then body putty the seams? Also, would you recommend that I use the .023" wire because of the thickness of the shelf, instead of the .030" I used with the ear? Attached image(s) 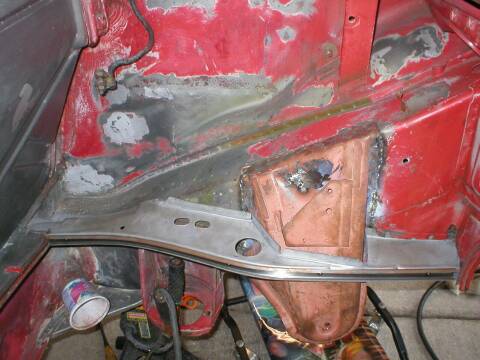
|
   |

 
|
| SirAndy |
Oct 11 2004, 04:06 PM
Post
#2
|
|
Resident German Group: Admin Posts: 41,640 Joined: 21-January 03 From: Oakland, Kalifornia Member No.: 179 Region Association: Northern California |
yeah, just tack it in, no real load on it. the factory used seam-sealer to cover the joints. you could drill small holes and do a few spot-welds tho, probably cleaner that way ...
(IMG:style_emoticons/default/welder.gif) Andy |
|
|
|
| watsonrx13 |
Oct 11 2004, 05:17 PM
Post
#3
|
|
Advanced Member Group: Members Posts: 2,734 Joined: 18-February 03 From: Plant City, FL Member No.: 312 Region Association: South East States |
Maybe some spot-welds on the tabs around the ear?
Thanks Andy, when no one else want's to contribute, or are too busy to check, you're always there with an answer... (IMG:style_emoticons/default/aktion035.gif) |
|
|
|
| lagunero |
Oct 11 2004, 05:27 PM
Post
#4
|
|
Donkey Member Group: Benefactors Posts: 1,042 Joined: 8-January 04 From: orange county,ca Member No.: 1,531 |
Hey Rob, all I could think of is that the color scheme on that Dixie cup is too '80's. I 'd go with a period correct color or totally Carbon Fiber (IMG:style_emoticons/default/lol2.gif)
|
|
|
|
| watsonrx13 |
Oct 11 2004, 05:36 PM
Post
#5
|
|
Advanced Member Group: Members Posts: 2,734 Joined: 18-February 03 From: Plant City, FL Member No.: 312 Region Association: South East States |
Alberto, I never noticed that the cup might be mistaken for a Dixie cup, it's actually a yogart cup, yea, I try to eat healthly.... (IMG:style_emoticons/default/w00t.gif)
BTW, this is my 500th post... new milestone for me... (IMG:style_emoticons/default/smilie_pokal.gif) |
|
|
|
| lagunero |
Oct 11 2004, 05:50 PM
Post
#6
|
|
Donkey Member Group: Benefactors Posts: 1,042 Joined: 8-January 04 From: orange county,ca Member No.: 1,531 |
reason number one I don't offer help, I can't tell the difference between a Dixie cup and a yogurt cup!
BTW this is my 300th post (IMG:style_emoticons/default/smilie_pokal.gif) |
|
|
|
| watsonrx13 |
Oct 12 2004, 05:10 PM
Post
#7
|
|
Advanced Member Group: Members Posts: 2,734 Joined: 18-February 03 From: Plant City, FL Member No.: 312 Region Association: South East States |
Well, I have tack-welded and spot-welded the engine shelf in. I still need to grind down the welds, then apply the seam sealer.
Here's a shot of the 'hell' hole, nice and clean. 1 of 3 Attached image(s) 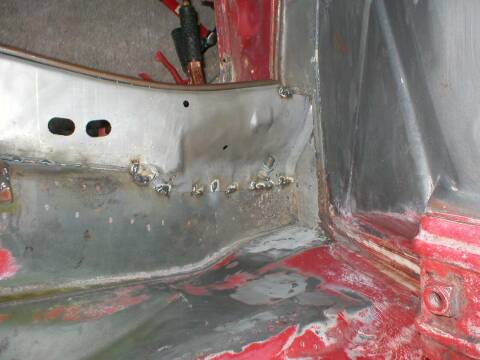
|
|
|
|
| watsonrx13 |
Oct 12 2004, 05:11 PM
Post
#8
|
|
Advanced Member Group: Members Posts: 2,734 Joined: 18-February 03 From: Plant City, FL Member No.: 312 Region Association: South East States |
Here's a shot of the shelf attached at the rear.
2 of 3 Attached image(s) 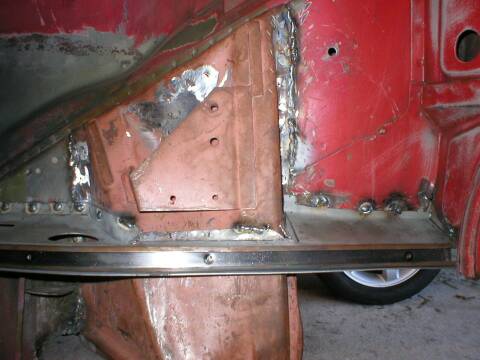
|
|
|
|
| watsonrx13 |
Oct 12 2004, 05:11 PM
Post
#9
|
|
Advanced Member Group: Members Posts: 2,734 Joined: 18-February 03 From: Plant City, FL Member No.: 312 Region Association: South East States |
Here's how I held the engine shelf to the side rail. I used a coat-hanger, wrapped around a large bolt, then passed the wire through the drain hole, wrapped around the bottom piece. When I was ready to weld, I grabbed the wire with a pair of pliers to tighten the engine shelf. Hope this helps everyone.
3 of 3 Attached image(s) 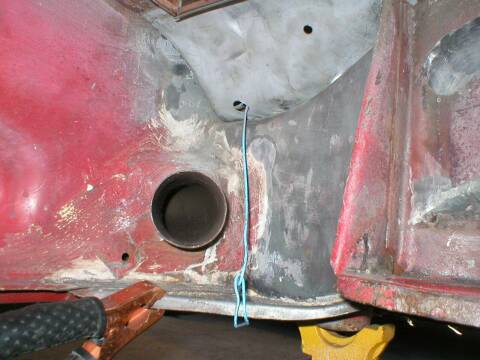
|
|
|
|
| i love porsche |
Oct 13 2004, 06:05 AM
Post
#10
|
|
Senior Member Group: Members Posts: 1,547 Joined: 6-May 04 From: Nutley, NJ Member No.: 2,030 Region Association: North East States |
how easily did your new engine shelf fit?
because im having a hell of a time trying to get mine to go in..it seems too long, did you have to trim yours at all? please help! |
|
|
|
| watsonrx13 |
Oct 13 2004, 03:58 PM
Post
#11
|
|
Advanced Member Group: Members Posts: 2,734 Joined: 18-February 03 From: Plant City, FL Member No.: 312 Region Association: South East States |
I didn't have any problems with the length, except at the rear, which I'll cut about 1/4".
I did have to flatten the tabs, around the suspension ear, and extend then about 1/4" to make them closer, ie, there was a 1/4" gap between the engine shelf and the ear. (Does this make sense?). In the hell hole, I had to bend and/or flatten the shelf to make it fit. That's why I used the coat-hanger to held hold the shelf down while I welded. I think the critical sections are fitting the front and rear sections, then making sure the hell hole area has something to attach to and then bending the metal around the ear. Remember, fit, bend, test, fit, bend, test... until you feel you can feel comfortable with welding it in. I worked on fitting the shelf between 4-5 hrs and took about 20-30 minutes to weld. Also, I worked on the fitting over 2 days. This gave me a chance to pause and check the next day that I had it correct, which I didn't. Again, take your time, if you get frustrated, put it down and walk away, you'll be glad you did. Good luck and if you need any pics, let me know and I'll post tomorrow. Also, when you get your's welded in, add it to this post. (IMG:style_emoticons/default/smilie_pokal.gif) |
|
|
|
| i love porsche |
Oct 13 2004, 04:13 PM
Post
#12
|
|
Senior Member Group: Members Posts: 1,547 Joined: 6-May 04 From: Nutley, NJ Member No.: 2,030 Region Association: North East States |
yeah id appreciate some pics...i need all the help i can get with this, i want to do it right, and ill be sure to post pictures =]
thanks a bunch |
|
|
|
| watsonrx13 |
Oct 13 2004, 04:21 PM
Post
#13
|
|
Advanced Member Group: Members Posts: 2,734 Joined: 18-February 03 From: Plant City, FL Member No.: 312 Region Association: South East States |
Can you take a pic of your shelf and show me where you're having trouble?
With the pic I, or someone else here, can give you some specific direction. |
|
|
|
| i love porsche |
Oct 13 2004, 07:18 PM
Post
#14
|
|
Senior Member Group: Members Posts: 1,547 Joined: 6-May 04 From: Nutley, NJ Member No.: 2,030 Region Association: North East States |
ok, ill post some tomorrow, thanks =]
|
|
|
|
| i love porsche |
Oct 14 2004, 06:19 AM
Post
#15
|
|
Senior Member Group: Members Posts: 1,547 Joined: 6-May 04 From: Nutley, NJ Member No.: 2,030 Region Association: North East States |
heres pictures of how everything doesnt fit
i know that i have to remove the piece of metal on the right of the suspension console..but thats not where im having the problem Attached image(s) 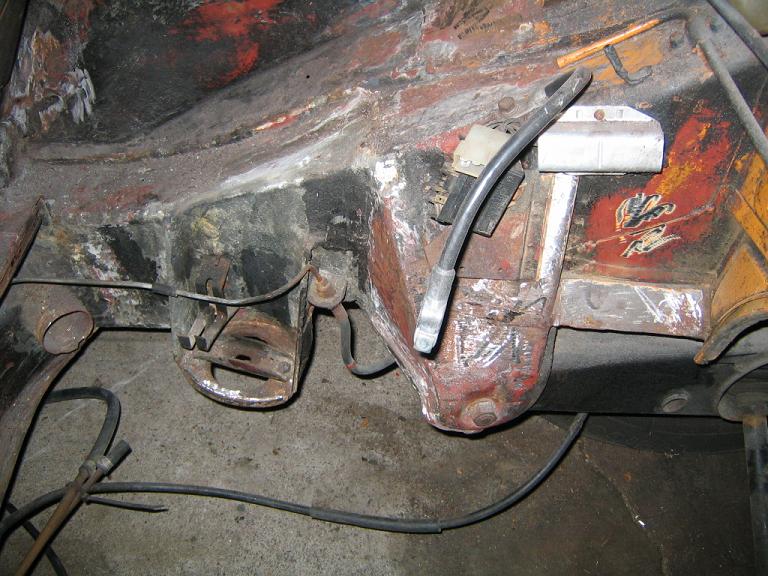
|
|
|
|
| i love porsche |
Oct 14 2004, 06:21 AM
Post
#16
|
|
Senior Member Group: Members Posts: 1,547 Joined: 6-May 04 From: Nutley, NJ Member No.: 2,030 Region Association: North East States |
Attached image(s) 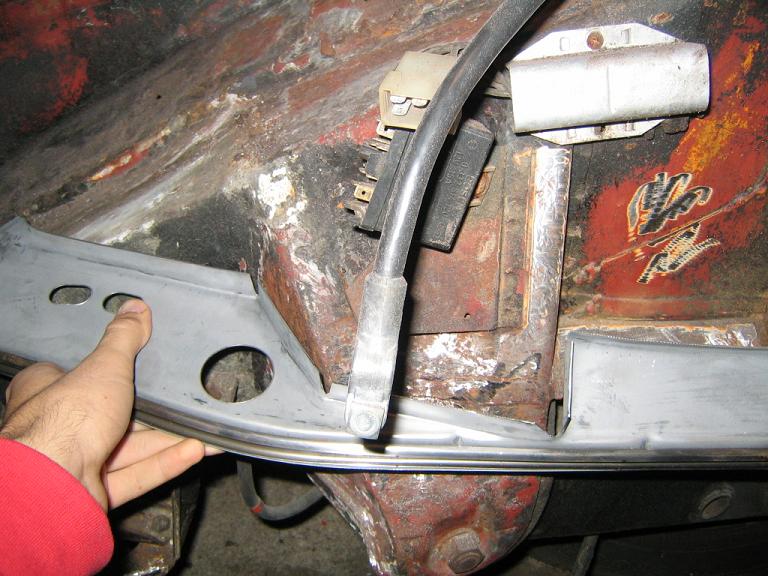
|
|
|
|
| i love porsche |
Oct 14 2004, 06:22 AM
Post
#17
|
|
Senior Member Group: Members Posts: 1,547 Joined: 6-May 04 From: Nutley, NJ Member No.: 2,030 Region Association: North East States |
Attached image(s) 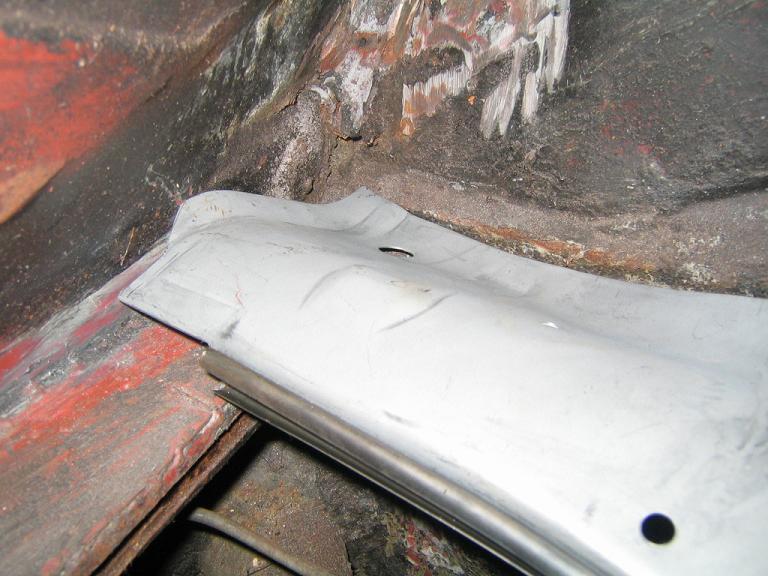
|
|
|
|
| i love porsche |
Oct 14 2004, 06:23 AM
Post
#18
|
|
Senior Member Group: Members Posts: 1,547 Joined: 6-May 04 From: Nutley, NJ Member No.: 2,030 Region Association: North East States |
Attached image(s) 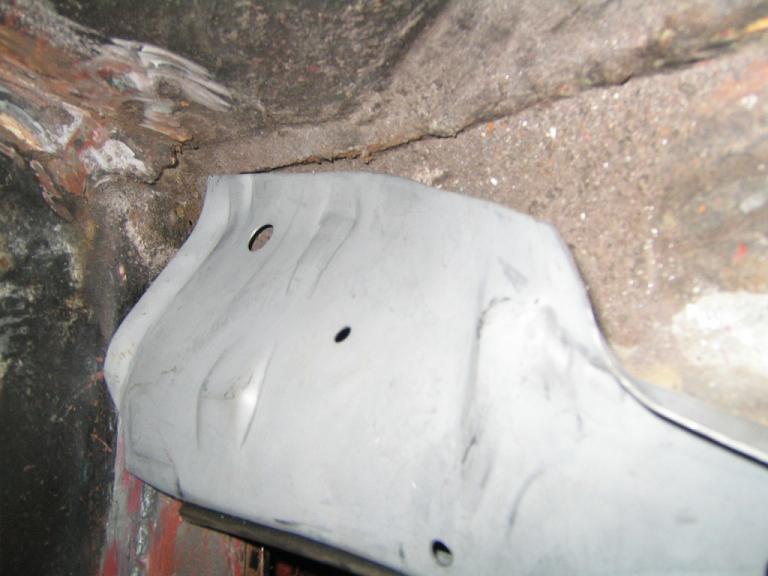
|
|
|
|
| i love porsche |
Oct 14 2004, 06:24 AM
Post
#19
|
|
Senior Member Group: Members Posts: 1,547 Joined: 6-May 04 From: Nutley, NJ Member No.: 2,030 Region Association: North East States |
Attached image(s) 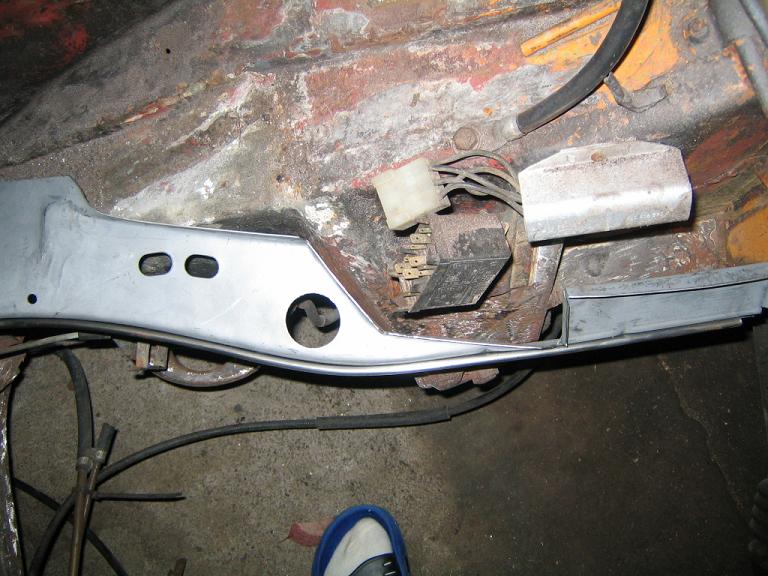
|
|
|
|
| i love porsche |
Oct 14 2004, 06:24 AM
Post
#20
|
|
Senior Member Group: Members Posts: 1,547 Joined: 6-May 04 From: Nutley, NJ Member No.: 2,030 Region Association: North East States |
Attached image(s) 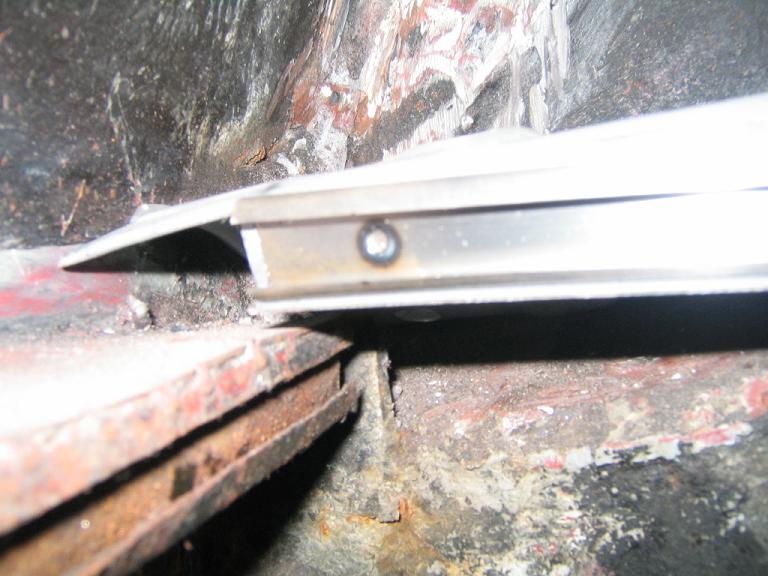
|
|
|
|
|
1 User(s) are reading this topic (1 Guests and 0 Anonymous Users)
0 Members:

|
Lo-Fi Version | Time is now: 17th May 2024 - 05:41 PM |
Invision Power Board
v9.1.4 © 2024 IPS, Inc.