|
|
|
Porsche, and the Porsche crest are registered trademarks of Dr. Ing. h.c. F. Porsche AG.
This site is not affiliated with Porsche in any way. Its only purpose is to provide an online forum for car enthusiasts. All other trademarks are property of their respective owners. |
|
|

  |

| cary |
 Jan 28 2013, 11:02 PM Jan 28 2013, 11:02 PM
Post
#141
|
|
Advanced Member  Group: Members Posts: 3,900 Joined: 26-January 04 From: Sherwood Oregon Member No.: 1,608 Region Association: Pacific Northwest |
Next will be to remove the floorpan portion left on the cut out long.
 Drilled the pilot hole completely thru. That way I wouldn't miss the location on the inside of the seam. Worked great. 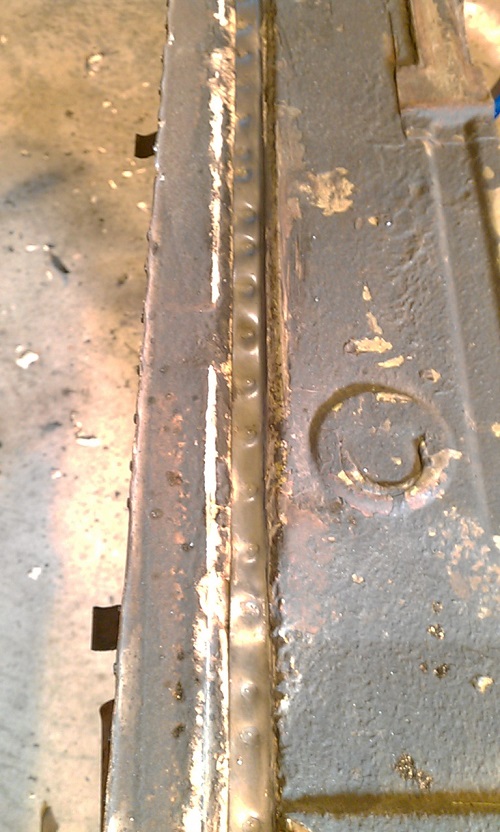 That went real smooth .................easy deal. Still using the second 3/8" Rotacut spot weld cutter. (IMG:style_emoticons/default/cheer.gif) (IMG:style_emoticons/default/cheer.gif) |
   |

 
|
| cary |
Jan 28 2013, 11:03 PM
Post
#142
|
|
Advanced Member Group: Members Posts: 3,900 Joined: 26-January 04 From: Sherwood Oregon Member No.: 1,608 Region Association: Pacific Northwest |
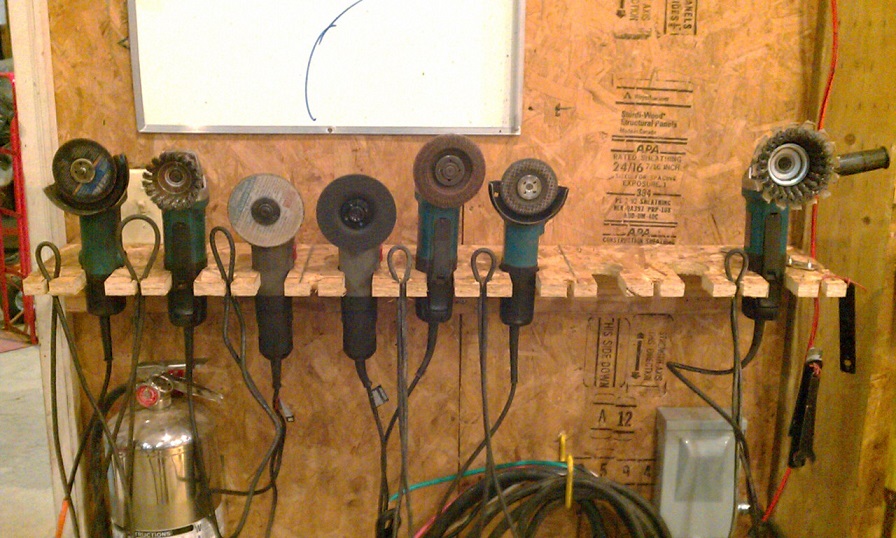
New weapon rack .................
 |
|
|
|
| cary |
Jan 28 2013, 11:09 PM
Post
#143
|
|
Advanced Member Group: Members Posts: 3,900 Joined: 26-January 04 From: Sherwood Oregon Member No.: 1,608 Region Association: Pacific Northwest |
I've got it almost trimmed down to were I can start to measure it up for installation.
   |
|
|
|
| cary |
Jan 28 2013, 11:15 PM
Post
#144
|
|
Advanced Member Group: Members Posts: 3,900 Joined: 26-January 04 From: Sherwood Oregon Member No.: 1,608 Region Association: Pacific Northwest |
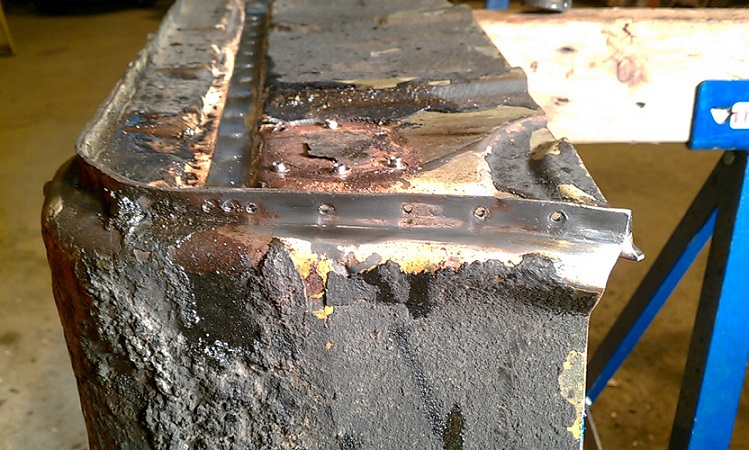
Now that I have it trimmed out.
Looks like I'll need a little patch under where the jack point was located. Plus there's a small one inch crack right by the e-brake indentation. All in all, she looks pretty good. But won't totally know until I can get it sand blasted. Hopefully that will be next week. |
|
|
|
| IronHillRestorations |
Jan 29 2013, 08:35 AM
Post
#145
|
|
I. I. R. C. Group: Members Posts: 6,899 Joined: 18-March 03 From: West TN Member No.: 439 Region Association: None |
I've seen several cars with the crack at the parking brake indent. I'm guessing that would be a good place to reinforce ala inner long stiffening kit. Good to hear you are happy with the long. Isn't that Blair tool the shizzle?
|
|
|
|
| cary |
Jan 29 2013, 07:53 PM
Post
#146
|
|
Advanced Member Group: Members Posts: 3,900 Joined: 26-January 04 From: Sherwood Oregon Member No.: 1,608 Region Association: Pacific Northwest |
QUOTE(9146986 @ Jan 29 2013, 06:35 AM)  I've seen several cars with the crack at the parking brake indent. I'm guessing that would be a good place to reinforce ala inner long stiffening kit. Good to hear you are happy with the long. Isn't that Blair tool the shizzle? Just about the time I think I'll change it. I start a new hole and it goes right to work. |
|
|
|
| cary |
Feb 3 2013, 11:29 AM
Post
#147
|
|
Advanced Member Group: Members Posts: 3,900 Joined: 26-January 04 From: Sherwood Oregon Member No.: 1,608 Region Association: Pacific Northwest |
Here's what I hope the final result will be.
The question being, will I leave the trim chrome or powder coat it black? 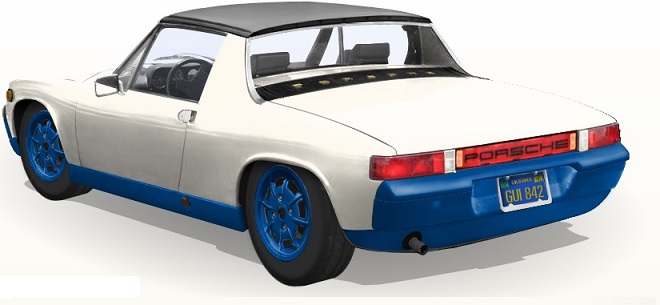 |
|
|
|
| jersey914 |
Feb 3 2013, 01:08 PM
Post
#148
|
|
Member Group: Members Posts: 161 Joined: 6-September 12 From: Marlton, NJ Member No.: 14,895 Region Association: North East States |
QUOTE(cary @ Feb 3 2013, 12:29 PM) Here's what I hope the final result will be. The question being, will I leave the trim chrome or powder coat it black? Aahhhh, decisions, decisions. Your decision is one I wish i had to make. Keep up the work Cary, this puppy will be beautiful either way! (IMG:style_emoticons/default/beerchug.gif) |
|
|
|
| cary |
Feb 4 2013, 09:44 AM
Post
#149
|
|
Advanced Member Group: Members Posts: 3,900 Joined: 26-January 04 From: Sherwood Oregon Member No.: 1,608 Region Association: Pacific Northwest |
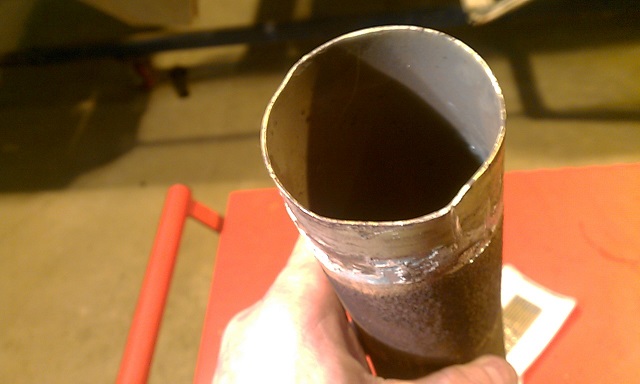
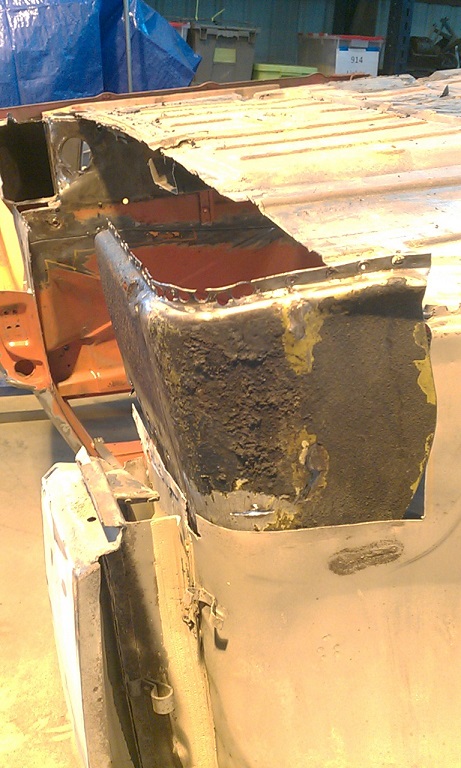
Looking for some help.............
Went back and re-read Jeff Hail's Dead thread. When I tie in the new to me part that is double walled. How/can you cut back the existing inner wall without damaging it? I want to build a new inner box to tie the two parts together. 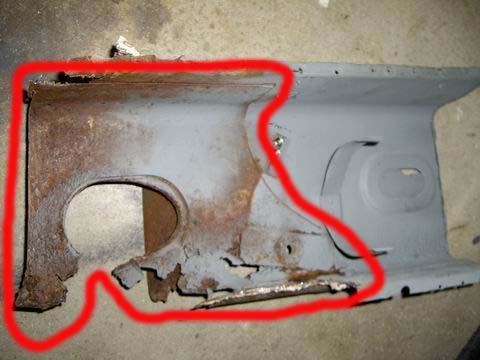 Picture from Jeff's thread. |
|
|
|
| cary |
Feb 4 2013, 09:53 AM
Post
#150
|
|
Advanced Member Group: Members Posts: 3,900 Joined: 26-January 04 From: Sherwood Oregon Member No.: 1,608 Region Association: Pacific Northwest |
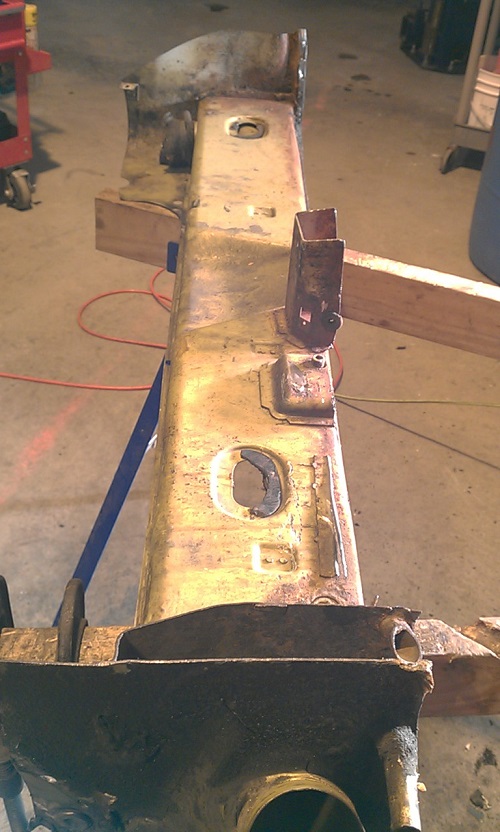
Going to remove the front inner fender from the new long.
That should make the long alignment much easier. So I hope to remove the front inner fender, and the misc ebrake and center support pieces today. Then hopefully I'll drag out the sand blaster and get the long all tidied up. 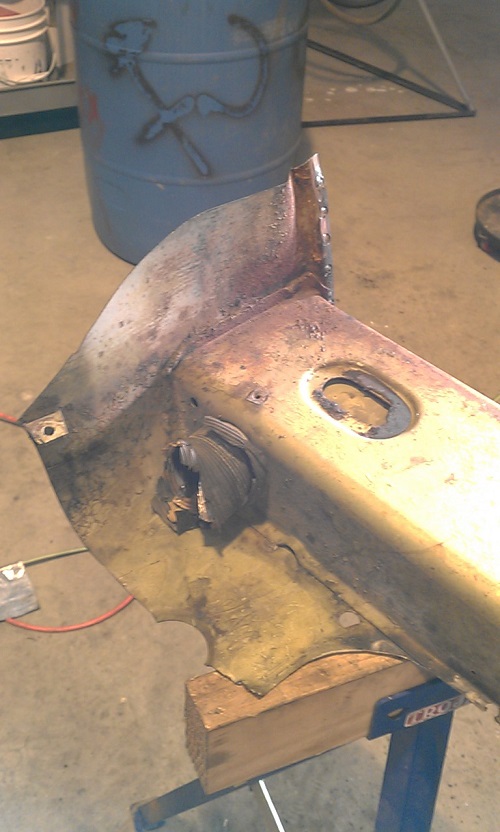 Haven't decided how I'm going to use the the back jtube corner yet. I tore mine up pretty bad when removing the old long. |
|
|
|
| cary |
Feb 4 2013, 10:00 AM
Post
#151
|
|
Advanced Member Group: Members Posts: 3,900 Joined: 26-January 04 From: Sherwood Oregon Member No.: 1,608 Region Association: Pacific Northwest |
This will be my electric car when the batteries get down to a responsible price. So I want to build it strong enough to hold the weight of the batteries.
I plan this to be my forever daily driver/commuter car. |
|
|
|
| wingnut86 |
Feb 4 2013, 10:06 AM
Post
#152
|
|
...boola la boo boola boo... Group: Members Posts: 1,054 Joined: 22-April 10 From: South Carolina Member No.: 11,645 Region Association: South East States |
Awesome idea Cary.
That was why I purchased my black 70', for an EV project. My wife's Prius needs just a few more miles on it;-} |
|
|
|
| cary |
Feb 4 2013, 08:22 PM
Post
#153
|
|
Advanced Member Group: Members Posts: 3,900 Joined: 26-January 04 From: Sherwood Oregon Member No.: 1,608 Region Association: Pacific Northwest |
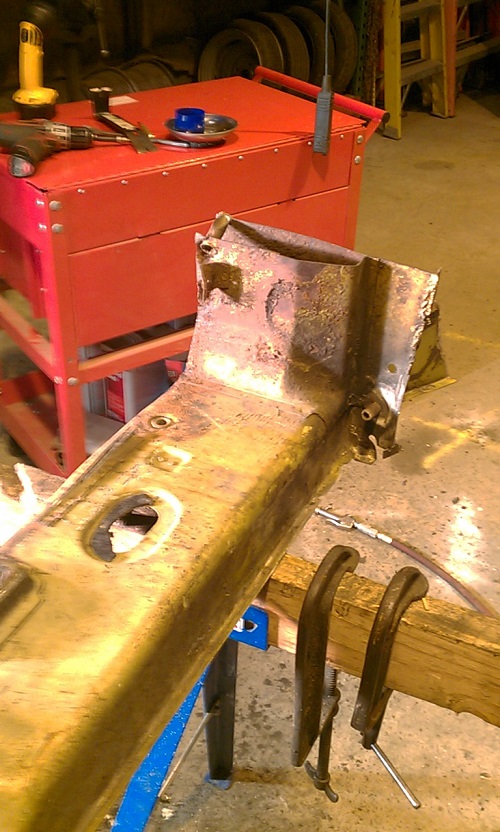
Back to it .............
Going to remove the remnant of the rear inner firewall. Plan to leave to back one and the corner to see if I can reuse the corner. 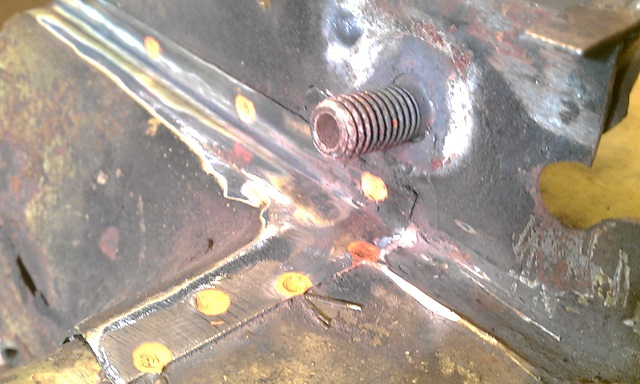 First thing is to remove the rear engine lid cable tube. 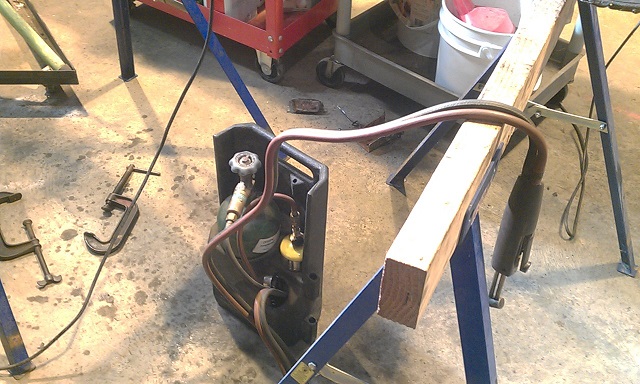 Weapon of choice. Mapp gas torch. 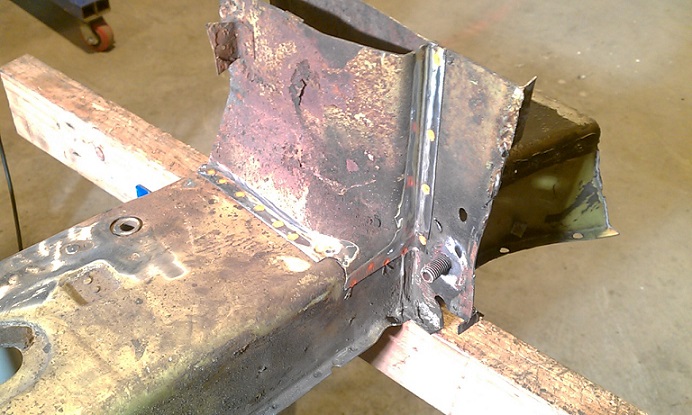 Spot welds are marked and ready to be drilled out. Still using Rotacut spot welder cut #2 (IMG:style_emoticons/default/cheer.gif) (IMG:style_emoticons/default/cheer.gif) |
|
|
|
| cary |
Feb 4 2013, 08:34 PM
Post
#154
|
|
Advanced Member Group: Members Posts: 3,900 Joined: 26-January 04 From: Sherwood Oregon Member No.: 1,608 Region Association: Pacific Northwest |
Removed the j-pipe. The red arrows show you were the 2 tack welds are. I've now removed two. Both pipes have had the tack welds in the same place. The problem being is the 3 lb's of seam sealer spread over the entire area. Makes it very hard to find the tack welds.
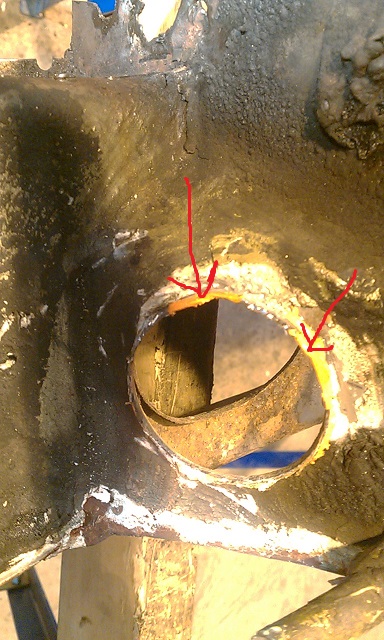  Here's the tore up corner that is on the car .............. 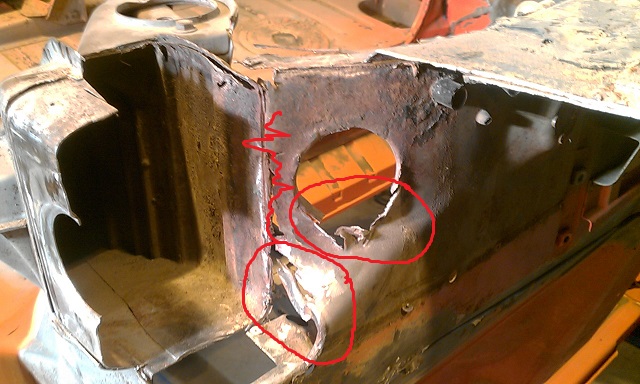 |
|
|
|
| cary |
Feb 4 2013, 08:42 PM
Post
#155
|
|
Advanced Member Group: Members Posts: 3,900 Joined: 26-January 04 From: Sherwood Oregon Member No.: 1,608 Region Association: Pacific Northwest |
Now to remove the front inner fender .............
 Tack welds were attacked with big and little cutting disks. 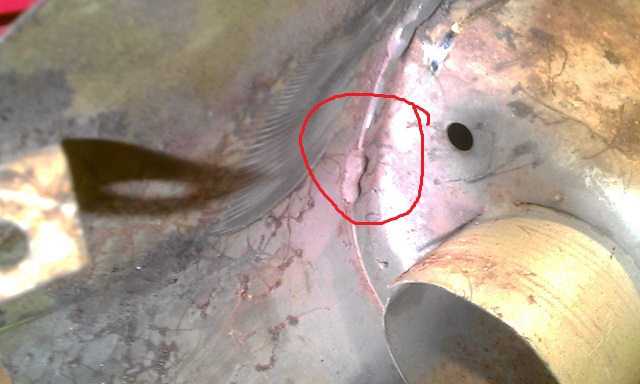 No way to get at this tack weld. So I cut it out from the back side with the small cutting disk. Hit it dead on...... (IMG:style_emoticons/default/smile.gif) (IMG:style_emoticons/default/smile.gif) 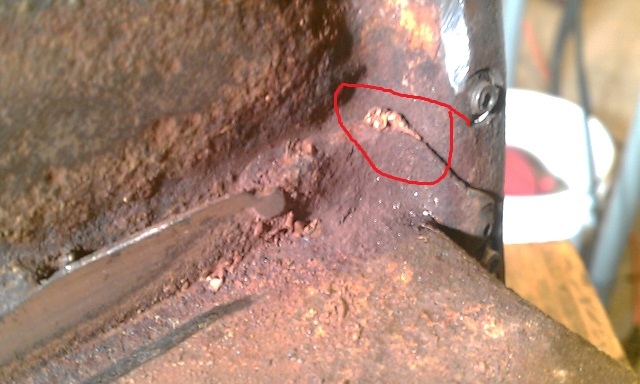 Another tough spot ..............finished with cold chisel. |
|
|
|
| cary |
Feb 4 2013, 08:44 PM
Post
#156
|
|
Advanced Member Group: Members Posts: 3,900 Joined: 26-January 04 From: Sherwood Oregon Member No.: 1,608 Region Association: Pacific Northwest |
Here she is sitting in her soon to be new home..................
 |
|
|
|
| cary |
Feb 4 2013, 08:51 PM
Post
#157
|
|
Advanced Member Group: Members Posts: 3,900 Joined: 26-January 04 From: Sherwood Oregon Member No.: 1,608 Region Association: Pacific Northwest |
Here's the long after a couple hours of sand blasting ..................
Paint : very easy Rust : a little more work Seam Sealer : PIA ........... 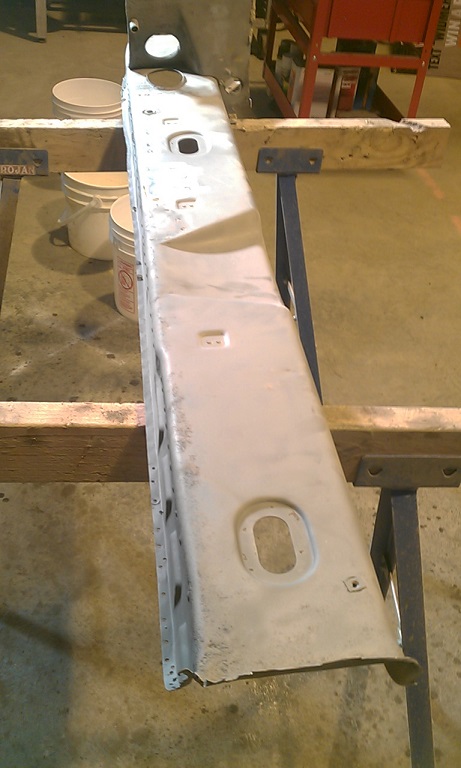 All in all a pretty good day. It will still need a patch at the bottom of what was the jack point location. Inner box needs a little work too ................ I'm going to repost my inner box question in its own thread. |
|
|
|
| cary |
Feb 12 2013, 07:07 AM
Post
#158
|
|
Advanced Member Group: Members Posts: 3,900 Joined: 26-January 04 From: Sherwood Oregon Member No.: 1,608 Region Association: Pacific Northwest |
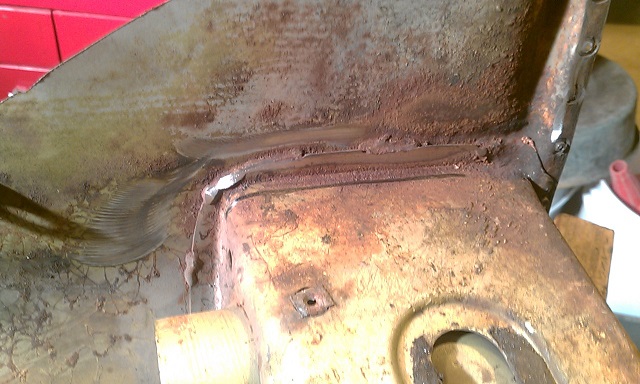
Another work day...............
I got the inner reinforcement out of the drivers wheelhouse long. So that when I install the new inner long it will be ready for the new inner box. No real way to find or drill out the spot welds. So I just kind of pried it out of there. Using Rick's BA screwdriver method, a little chisel action. Both hand and air. Cut the inside edge with a Dremel disk. Took a few. But it got the job done. Turned out pretty good.  |
|
|
|
| cary |
Feb 12 2013, 07:10 AM
Post
#159
|
|
Advanced Member Group: Members Posts: 3,900 Joined: 26-January 04 From: Sherwood Oregon Member No.: 1,608 Region Association: Pacific Northwest |
Duplicate Post
|
|
|
|
| worn |
Feb 12 2013, 11:34 AM
Post
#160
|
|
Winner of the Utah Twisted Joint Award Group: Members Posts: 3,518 Joined: 3-June 11 From: Madison, WI Member No.: 13,152 Region Association: Upper MidWest |
QUOTE(cary @ Feb 12 2013, 05:10 AM) Super In Law finished tearing the inner layer out of the long. He loves tearing things up, LOL. 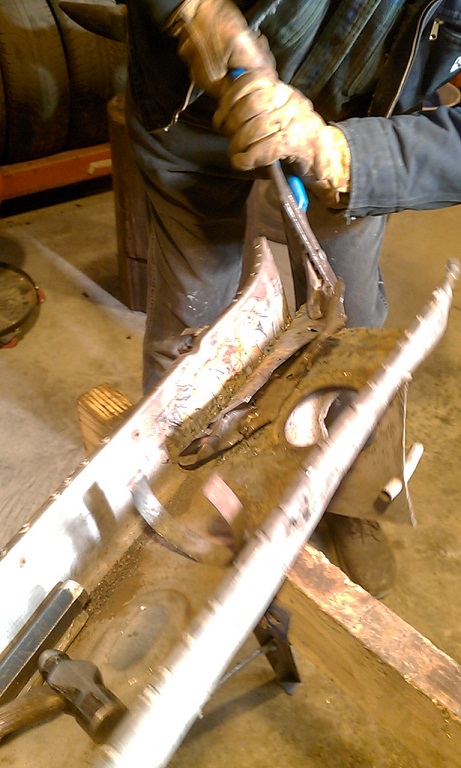 Hi Cary, The engine mounts are coming to you UPS. Sorry it took months. Progress looks fantastic. |
|
|
|
|
1 User(s) are reading this topic (1 Guests and 0 Anonymous Users)
0 Members:

|
Lo-Fi Version | Time is now: 19th December 2025 - 01:00 PM |
Invision Power Board
v9.1.4 © 2025 IPS, Inc.