|
|
|
Porsche, and the Porsche crest are registered trademarks of Dr. Ing. h.c. F. Porsche AG.
This site is not affiliated with Porsche in any way. Its only purpose is to provide an online forum for car enthusiasts. All other trademarks are property of their respective owners. |
|
|

  |

| worn |
 Mar 26 2013, 08:32 AM Mar 26 2013, 08:32 AM
Post
#181
|
|
Winner of the Utah Twisted Joint Award  Group: Members Posts: 3,518 Joined: 3-June 11 From: Madison, WI Member No.: 13,152 Region Association: Upper MidWest |
QUOTE(cary @ Mar 25 2013, 06:49 PM)  Laying out the next project.............. Complete passenger side wheelhouse replacement. It's going to nice working with new metal. Uhhmmm, Cary. Does the super in law do house calls? You are one lucky guy. Nice work. Trying to follow close behind with my 6 conversion. Thanks for keeping your 914 from the scrap heap. |
   |

 
|
| cary |
Mar 26 2013, 11:09 PM
Post
#182
|
|
Advanced Member Group: Members Posts: 3,900 Joined: 26-January 04 From: Sherwood Oregon Member No.: 1,608 Region Association: Pacific Northwest |
I'm thinking that Super In Law isn't wire brushing between welds.
Along with having too much wire out form tip. Nathan, I usually hit it with the grinder. Probably a bit harsh. I think I'll pick up a few 80 grit Rolocs. Thanks for the heads up. |
|
|
|
| cary |
Mar 26 2013, 11:13 PM
Post
#183
|
|
Advanced Member Group: Members Posts: 3,900 Joined: 26-January 04 From: Sherwood Oregon Member No.: 1,608 Region Association: Pacific Northwest |
Switching days off.
We'll be back at it tomorrow. Stopping at a cute little cafe for breakfast. We've been driving by it for 3 years. |
|
|
|
| cary |
Mar 27 2013, 09:50 PM
Post
#184
|
|
Advanced Member Group: Members Posts: 3,900 Joined: 26-January 04 From: Sherwood Oregon Member No.: 1,608 Region Association: Pacific Northwest |
Super in Law is working on the insert sleeve.
Took 2 shots at it. Not quite tight enough. So we'll try it again. 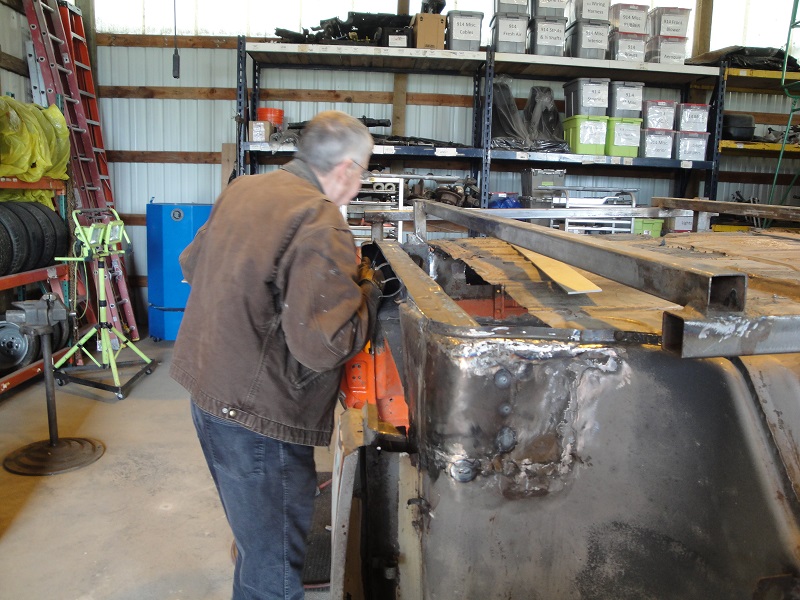 |
|
|
|
| cary |
Mar 27 2013, 09:54 PM
Post
#185
|
|
Advanced Member Group: Members Posts: 3,900 Joined: 26-January 04 From: Sherwood Oregon Member No.: 1,608 Region Association: Pacific Northwest |
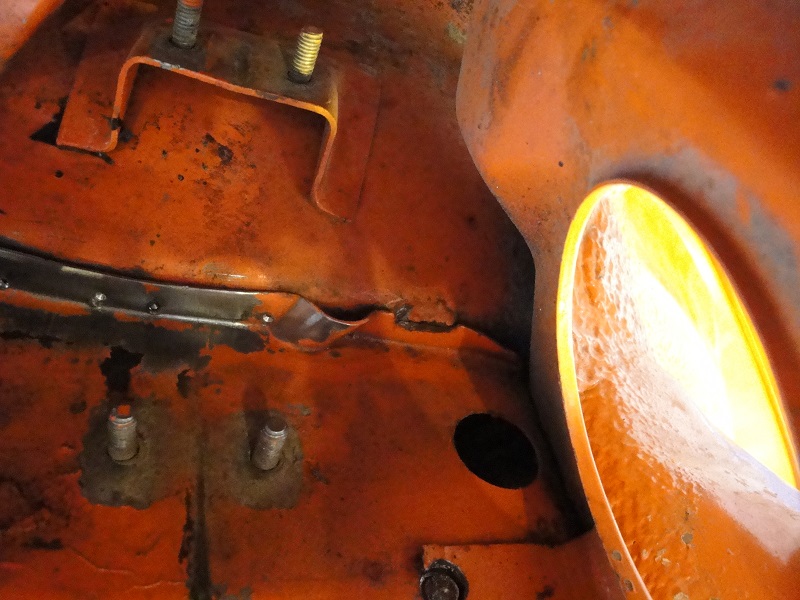
While he was working on the insert pattern.
I thought I'd look at the seam sealer behind the door latch plate. There is quite a pile of seam sealer in there. 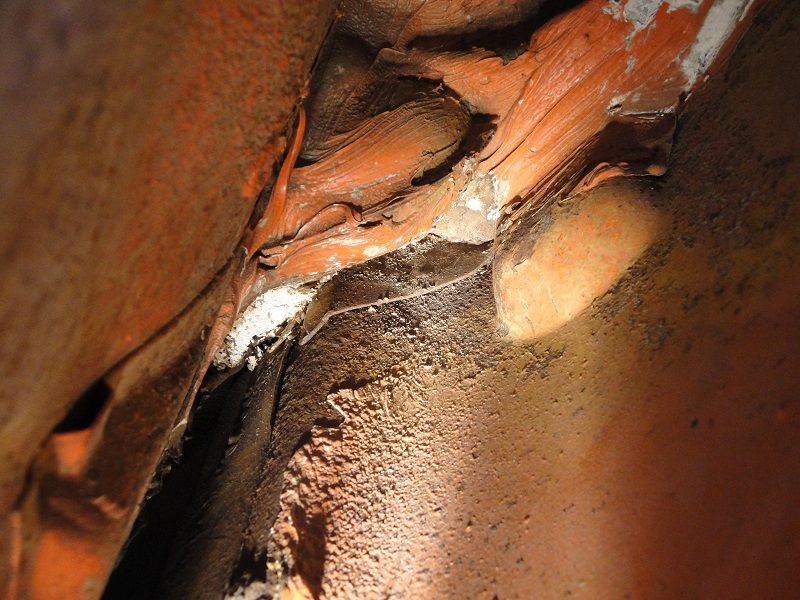 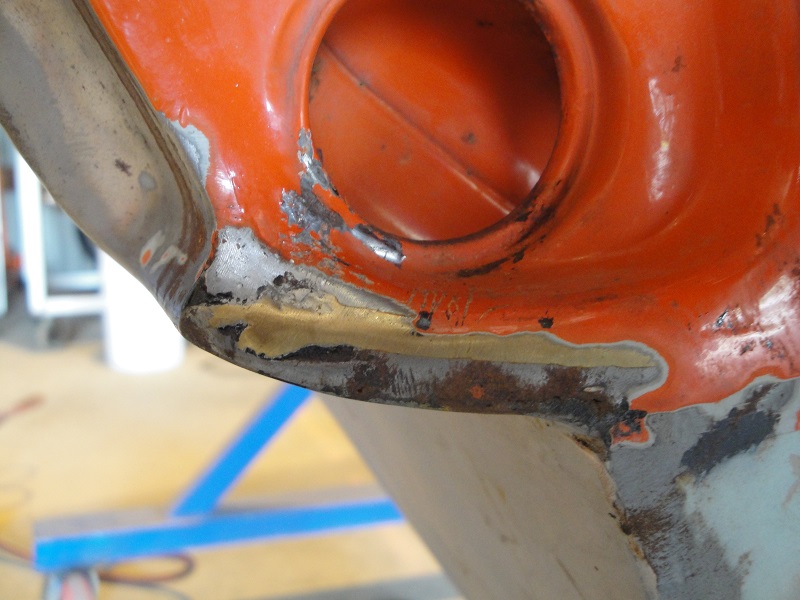 Right behind the door handle too. |
|
|
|
| cary |
Mar 27 2013, 09:57 PM
Post
#186
|
|
Advanced Member Group: Members Posts: 3,900 Joined: 26-January 04 From: Sherwood Oregon Member No.: 1,608 Region Association: Pacific Northwest |
How does this deal work?
There is a light metal frame right at the base of the sail panel. Just tacked in there with 4 wimpy welds, then a pile of seam sealer. 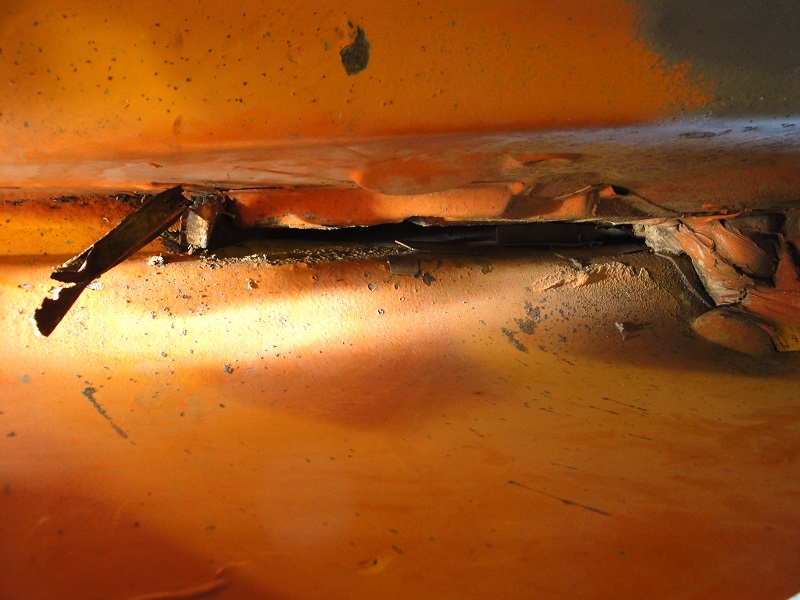 |
|
|
|
| cary |
Mar 27 2013, 10:10 PM
Post
#187
|
|
Advanced Member Group: Members Posts: 3,900 Joined: 26-January 04 From: Sherwood Oregon Member No.: 1,608 Region Association: Pacific Northwest |
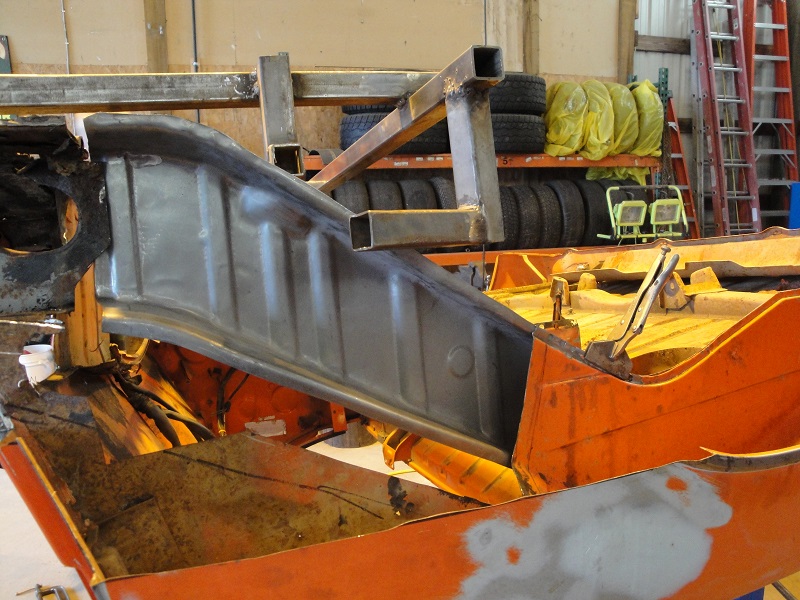
So decided that I would start tearing into the passenger side wheelhouse.
 Start drilling out spot welds............... (IMG:style_emoticons/default/biggrin.gif) (IMG:style_emoticons/default/biggrin.gif) 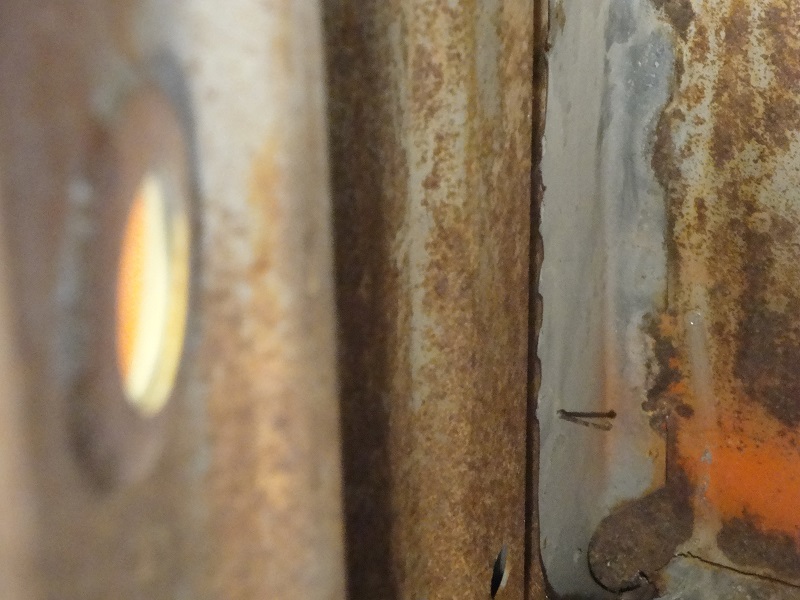 Just when I think I can remove the inner wheelhouse longitudinal. I find these tack welds way up at the end of the wheelhouse. Not good............ I tried chiseling them out. (IMG:style_emoticons/default/evilgrin.gif) (IMG:style_emoticons/default/evilgrin.gif) Poked a couple holes with the chisel. |
|
|
|
| cary |
Mar 27 2013, 10:14 PM
Post
#188
|
|
Advanced Member Group: Members Posts: 3,900 Joined: 26-January 04 From: Sherwood Oregon Member No.: 1,608 Region Association: Pacific Northwest |
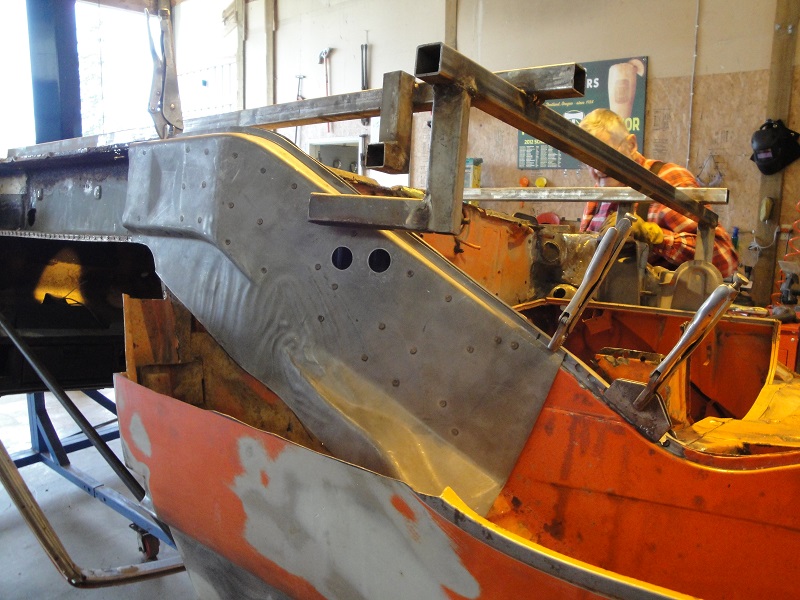
Got it out. Cut it into three pieces to get it out.
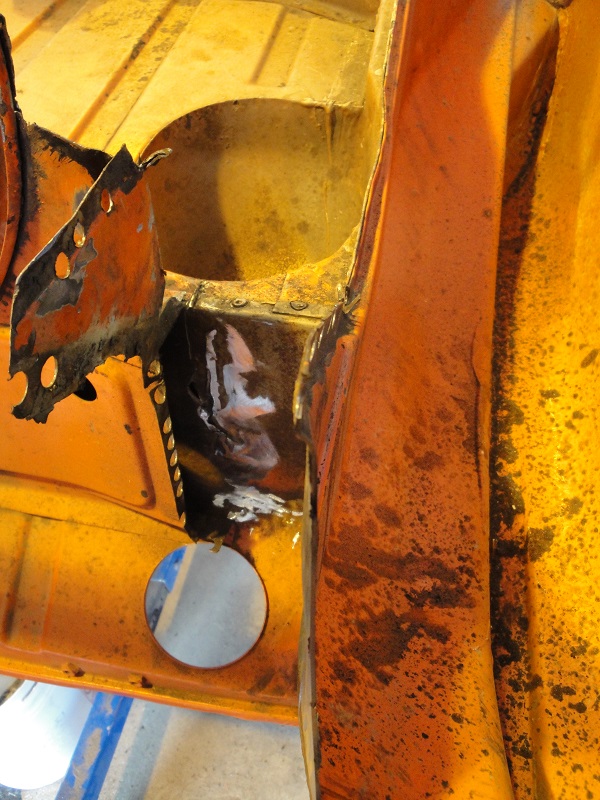  Made a mess .............I'm thinking I went thru 6 cutting disks. |
|
|
|
| cary |
Mar 27 2013, 10:17 PM
Post
#189
|
|
Advanced Member Group: Members Posts: 3,900 Joined: 26-January 04 From: Sherwood Oregon Member No.: 1,608 Region Association: Pacific Northwest |
Test fitting a couple pieces. Inner needs some trimming to get it to fit against the trunk wall.
  |
|
|
|
| cary |
Mar 27 2013, 10:20 PM
Post
#190
|
|
Advanced Member Group: Members Posts: 3,900 Joined: 26-January 04 From: Sherwood Oregon Member No.: 1,608 Region Association: Pacific Northwest |
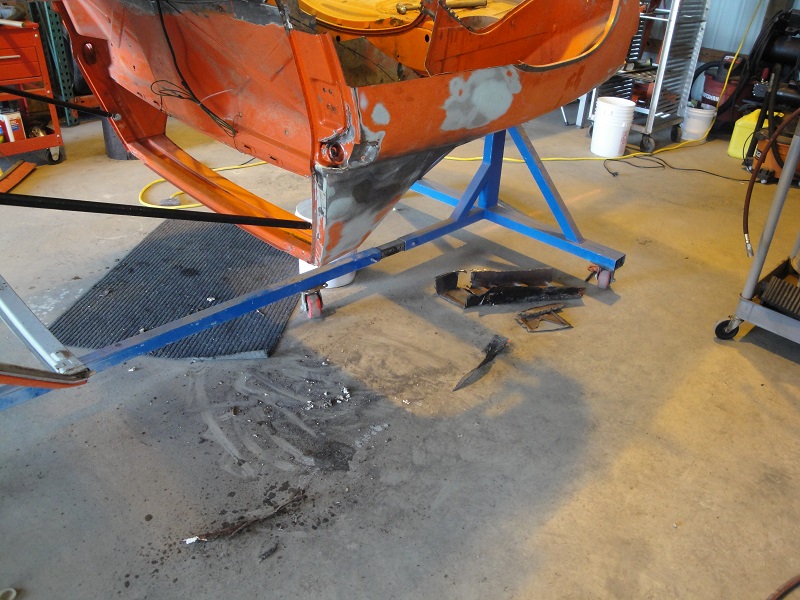
Now in lies the big question. How do weld back in the top of the
inner wheelhouse long against the rear trunk. I'm thinking arc welder turning way down with a small rod?  |
|
|
|
| cary |
Mar 28 2013, 06:02 AM
Post
#191
|
|
Advanced Member Group: Members Posts: 3,900 Joined: 26-January 04 From: Sherwood Oregon Member No.: 1,608 Region Association: Pacific Northwest |
QUOTE Uhhmmm, Cary. Does the super in law do house calls? You are one lucky guy. In answer to your first question. Yes. He's heading out this am to help lay a Pergo floor. I hate to think of the day when he wont be out there helping me. (IMG:style_emoticons/default/sad.gif) |
|
|
|
| worn |
Mar 28 2013, 09:33 AM
Post
#192
|
|
Winner of the Utah Twisted Joint Award Group: Members Posts: 3,518 Joined: 3-June 11 From: Madison, WI Member No.: 13,152 Region Association: Upper MidWest |
QUOTE(cary @ Mar 27 2013, 08:20 PM) Now in lies the big question. How do weld back in the top of the inner wheelhouse long against the rear trunk. I'm thinking arc welder turning way down with a small rod? I would turn the mig up high and then make sure that you concentrate the heat at the larger metal. That's the problem with mig welding, because heat and fill are hard to separate. Stick is pretty similar in that regard. It sounds like you are worried about penetration at the long. Try a test piece of the same thickness. With your new torch I bet it works. |
|
|
|
| sixnotfour |
Mar 28 2013, 03:11 PM
Post
#193
|
|
914 Wizard Group: Members Posts: 11,070 Joined: 12-September 04 From: Life Elevated..planet UT. Member No.: 2,744 Region Association: Rocky Mountains |
plug weld from the shock tower side
|
|
|
|
| cary |
Mar 28 2013, 09:09 PM
Post
#194
|
|
Advanced Member Group: Members Posts: 3,900 Joined: 26-January 04 From: Sherwood Oregon Member No.: 1,608 Region Association: Pacific Northwest |
QUOTE I would turn the mig up high and then make sure that you concentrate the heat at the larger metal. That's the problem with mig welding, because heat and fill are hard to separate. Stick is pretty similar in that regard. It sounds like you are worried about penetration at the long. Try a test piece of the same thickness. With your new torch I bet it works. I don't think I can reach in there .................... But I haven't tried. |
|
|
|
| cary |
Mar 28 2013, 09:12 PM
Post
#195
|
|
Advanced Member Group: Members Posts: 3,900 Joined: 26-January 04 From: Sherwood Oregon Member No.: 1,608 Region Association: Pacific Northwest |
QUOTE(sixnotfour @ Mar 28 2013, 02:11 PM) plug weld from the shock tower side No access. Its backs up to a closed in cavity. The shock tower hole. |
|
|
|
| cary |
Apr 1 2013, 06:07 AM
Post
#196
|
|
Advanced Member Group: Members Posts: 3,900 Joined: 26-January 04 From: Sherwood Oregon Member No.: 1,608 Region Association: Pacific Northwest |
TIME OUT
Oldest son came up from Eugene for Easter. The coolant leak we've been chasing finally let go. (IMG:style_emoticons/default/sad.gif) (IMG:style_emoticons/default/sad.gif) Its on a 2002 A6 2.7T. At first glance I'm hoping its a hose. But it's probably the gasket on the water pump. It has about 60k on it. I got lucky. He and my daughter in law just drove to SF for spring break. Took about 16oz on the way down. And about 16oz on the way back. I was still thinking it was a weeping hose connection. It let go right here at the house. I did the timing belt service myself about 60k ago. We'll see if it was my workmanship or a failed component. I'm going to the shop after work to pick up the leak detector lamp kit and the HF camera. |
|
|
|
| cary |
Apr 3 2013, 09:34 PM
Post
#197
|
|
Advanced Member Group: Members Posts: 3,900 Joined: 26-January 04 From: Sherwood Oregon Member No.: 1,608 Region Association: Pacific Northwest |
Water pump gasket let go.
And I can see a hairline crack in the impeller. Might as well throw in a new cam timing belt while I'm in there. We've gone 65k since the last one. 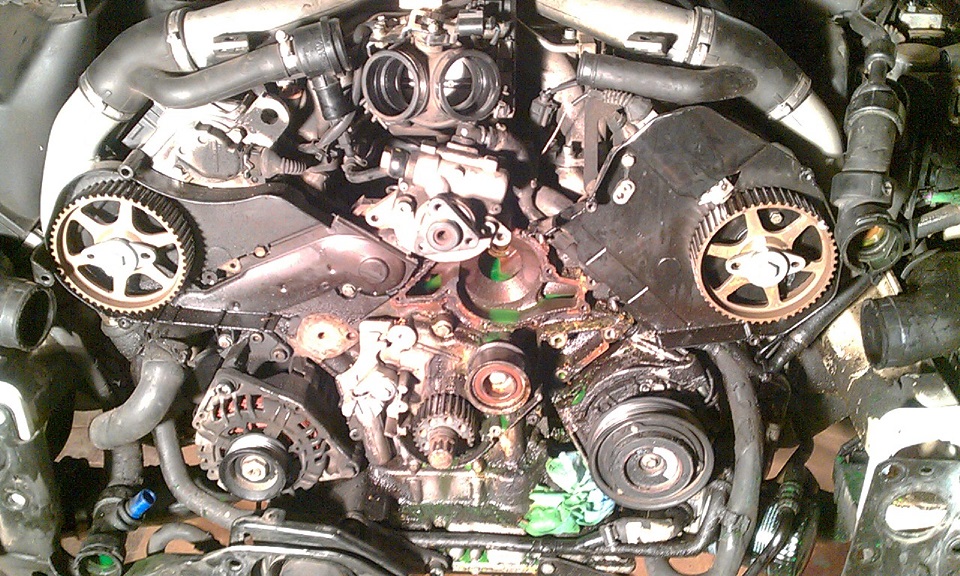 Yippy, skippy ................. At least I'll have Pelican 911 Boards burgers and beer tomorrow night. |
|
|
|
| cary |
Apr 8 2013, 08:36 AM
Post
#198
|
|
Advanced Member Group: Members Posts: 3,900 Joined: 26-January 04 From: Sherwood Oregon Member No.: 1,608 Region Association: Pacific Northwest |
All cleaned up and waiting for a hose from Audi.
One of those while I'm in there. Must be Jeff Gamroth rubbing off on me. 4 hoses, $250. So I'll head out to the shop and get back to work. I'm going to put a new jack point on the white car first. When I pulled the rocker panel I found it packed with sand. (IMG:style_emoticons/default/sad.gif) (IMG:style_emoticons/default/sad.gif) |
|
|
|
| cary |
Apr 8 2013, 08:47 AM
Post
#199
|
|
Advanced Member Group: Members Posts: 3,900 Joined: 26-January 04 From: Sherwood Oregon Member No.: 1,608 Region Association: Pacific Northwest |
Oh yeah.
Workmanship investigation. I used RTV on the gasket. Which was the preferred practice at the time. Now its a no no. Looks like the gasket broke down over time. Water pump impeller had a hair line crack too. So timing was actually good. New preferred method is dry. I just cant bring myself to do that on a water pump. So I discussed it with my 911 Yoda (Steve Weiner). He would use a product called Gasgacinch. That's the direction I'll go. |
|
|
|
| worn |
Apr 8 2013, 11:04 AM
Post
#200
|
|
Winner of the Utah Twisted Joint Award Group: Members Posts: 3,518 Joined: 3-June 11 From: Madison, WI Member No.: 13,152 Region Association: Upper MidWest |
QUOTE(cary @ Apr 8 2013, 06:47 AM) Oh yeah. Workmanship investigation. I used RTV on the gasket. Which was the preferred practice at the time. Now its a no no. Looks like the gasket broke down over time. Water pump impeller had a hair line crack too. So timing was actually good. New preferred method is dry. I just cant bring myself to do that on a water pump. So I discussed it with my 911 Yoda (Steve Weiner). He would use a product called Gasgacinch. That's the direction I'll go. I have always like permatex non hardening. Super sticky and makes a mess that tells you that you have achieved something. Gasgacinch is pretty nice too and far less messy. |
|
|
|
|
1 User(s) are reading this topic (1 Guests and 0 Anonymous Users)
0 Members:

|
Lo-Fi Version | Time is now: 20th December 2025 - 09:36 PM |
Invision Power Board
v9.1.4 © 2025 IPS, Inc.