|
|
|
Porsche, and the Porsche crest are registered trademarks of Dr. Ing. h.c. F. Porsche AG.
This site is not affiliated with Porsche in any way. Its only purpose is to provide an online forum for car enthusiasts. All other trademarks are property of their respective owners. |
|
|

  |

| Larmo63 |
 Mar 26 2015, 07:35 AM Mar 26 2015, 07:35 AM
Post
#381
|
|
Advanced Member  Group: Members Posts: 4,267 Joined: 3-March 14 From: San Clemente, Ca Member No.: 17,068 Region Association: Southern California |
Damn, Granpa Jack is a handy man to have around!
Good meeting you in Corona Del Mar and The swap a few weeks ago. |
   |

 
|
| cary |
May 8 2015, 08:38 AM
Post
#382
|
|
Advanced Member Group: Members Posts: 3,900 Joined: 26-January 04 From: Sherwood Oregon Member No.: 1,608 Region Association: Pacific Northwest |
Well we're finally back to working on the 914 rustoration. 911 is all set to go for the AX season. Seems likes its been a loooonnnggg time. For the PNW folks, I've been involved in the transition from Albertsons to Haggen. Its been a long couple of months.
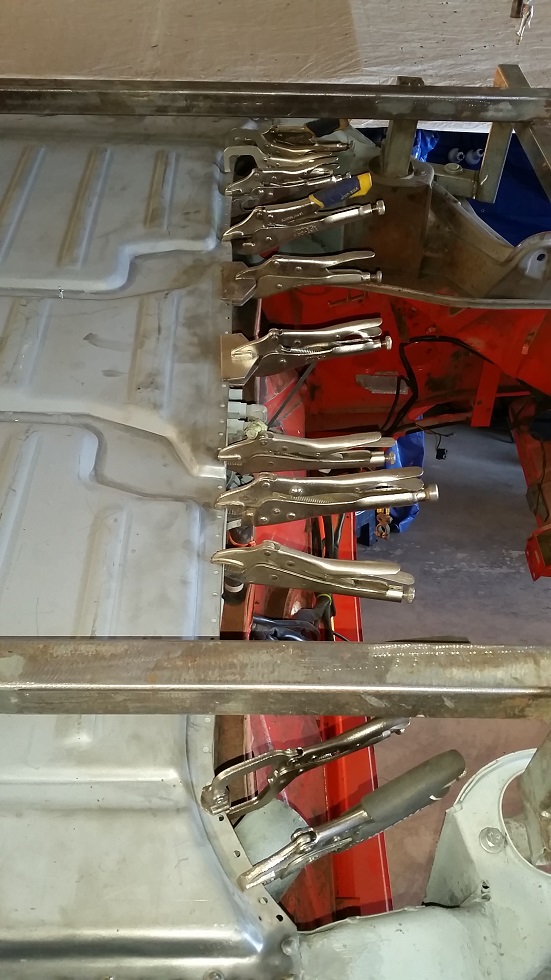
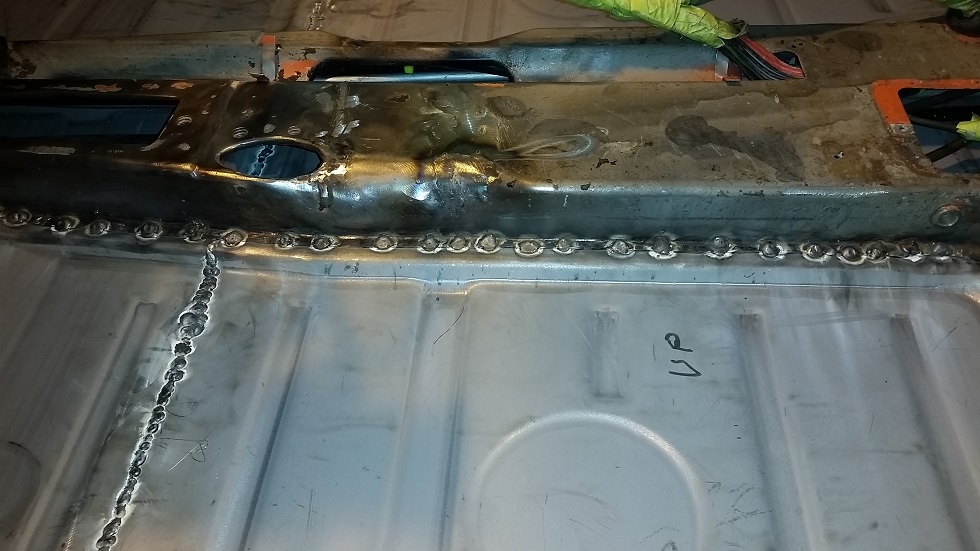
Started the day by tidying up the shop. 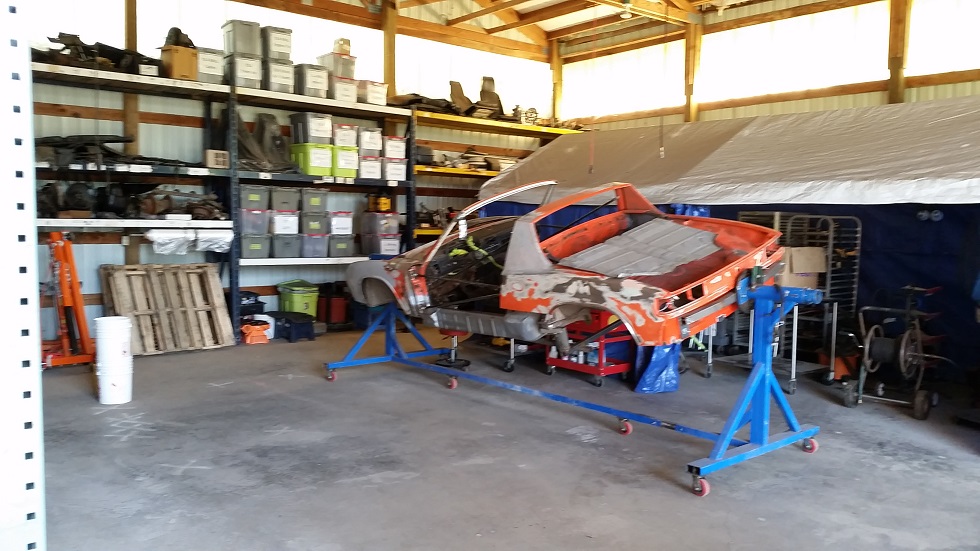 Ended the day with the front edge of the front floor pan welded and tidied up. Quite a bit of fiddling to get it to line up perfectly. Next time suggestion, I would make the cut/seam to the tub be all up on the top/flat surface. Passenger side looks tidy, Drivers side I was down in a dip and couldn't really tidy to the weld as much as I like. As for the fiddling. It was relatively easy work. I never welded more than an inch after I had all my tacks in place. 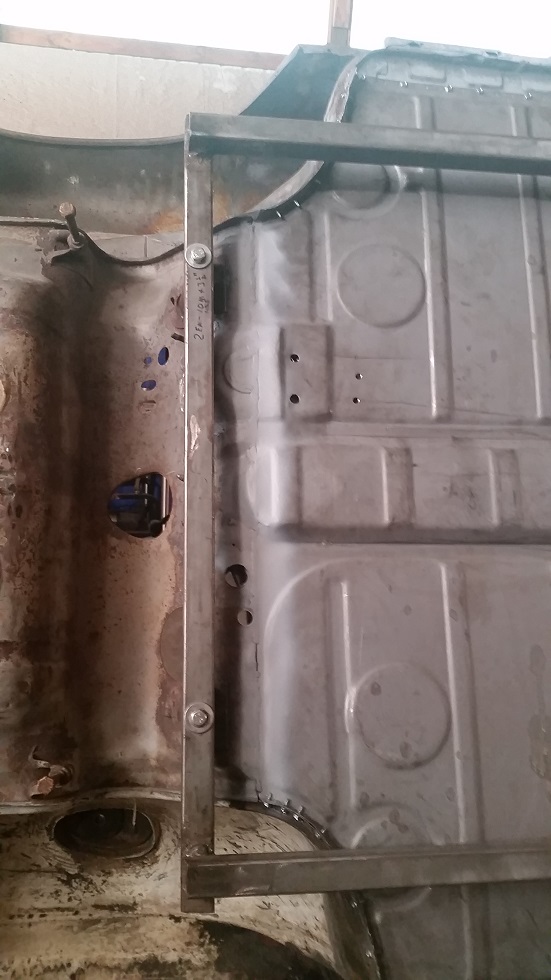 As you can see I have the rest of the pan all screwed into place. Ready to go for tomorrow. I finally feel like we're making progress, man what a feeling. I left the shop with huge smile on my face. Oh yeah, it's really fun welding on NEW RD metal. I only ran into a couple thin spots when mating up to the tub. All it takes is a little bump down in heat, I mean a little. My MillerMatic 180 has settings for metal gauge. So lets say I'm operating at 17.25 on the dial. I'll bump it up to 17.50 -17.65 and puddle the hole closed. But for that front seam I've been running in the mid 17's. But that's not seam welding, its stitch welding. Maybe three puddles max. Man do you want to keep going. But your putting way to much heat in one spot. Take your finger off the trigger. Clarification on the Caryism ........... Down in heat means up in metal gauge on the dial. I'll shoot a picture on the dial tomorrow. I didn't weld in the pedal support yet. I wanted to get the seam welded first. You can see on Adam's RD floor install video you'll need to elongate the hole in the pedal support just a smidgen to get the pedal support to align correctly. Mine was exactly the same. A word of wisdom, when you lay the pedal support on the pan to draw where to drill the holes. Draw the hole about 1/2 the width of the stud towards the fire wall. That compensates for the angle. A Habor Freight step drill bit was real handy for drilling the holes. If you've keep up with the entire thread you can kind of figure out that I'm kind of fixture/tool/gadget whore. We built a jig to hold up the floor because the inner bottom firewall has yet to be installed. Tunnel is still loose. Seems to have worked great. Built two. One for the front, one for the back. It was made out of an old bed frame. 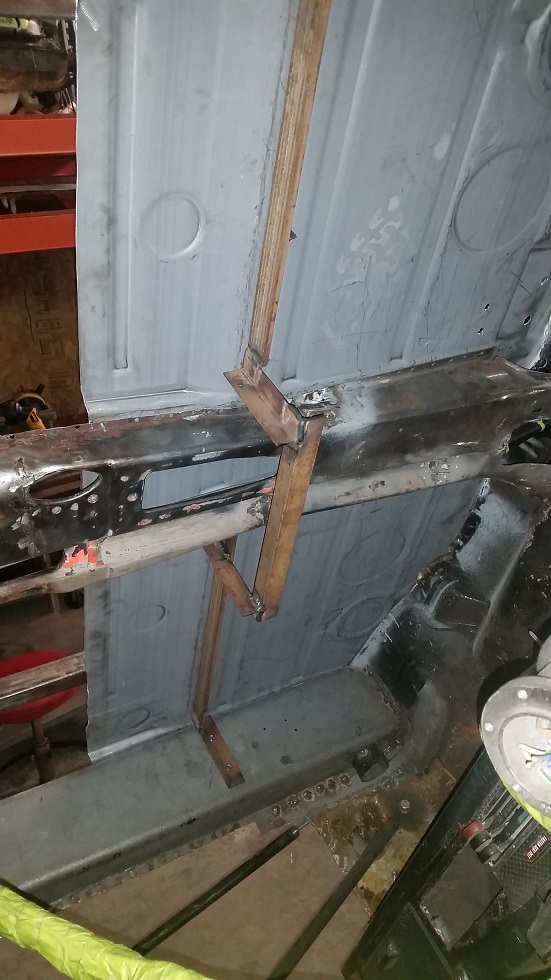 Might stop at the paint store and buy some spray on seam sealer for the other new toy that I've never used. (IMG:style_emoticons/default/biggrin.gif) (IMG:style_emoticons/default/biggrin.gif) (IMG:style_emoticons/default/biggrin.gif) (IMG:style_emoticons/default/biggrin.gif) (IMG:style_emoticons/default/biggrin.gif) (IMG:style_emoticons/default/biggrin.gif) (IMG:style_emoticons/default/biggrin.gif) (IMG:style_emoticons/default/biggrin.gif) This post has been edited by cary: May 8 2015, 09:35 PM |
|
|
|
| cary |
May 8 2015, 08:56 AM
Post
#383
|
|
Advanced Member Group: Members Posts: 3,900 Joined: 26-January 04 From: Sherwood Oregon Member No.: 1,608 Region Association: Pacific Northwest |
Another Tool Whore segment. In Adam's RD video he mentions that he drills the rosette weld holes. That's way too much work. I use my air punch wherever I can. I does have thickness and depth limitations. But it works in most places.
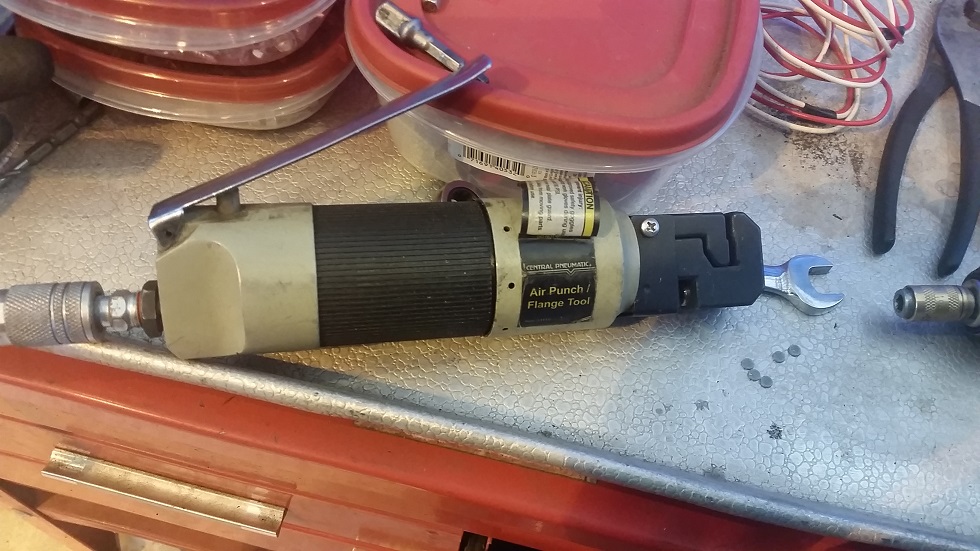  http://www.harborfreight.com/air-punch-flange-tool-1110.html Another Tool Whore word of advice. Don't buy HF air fittings, they SUCK. I use NAPA or Home Depot with nice leak free results. |
|
|
|
| cary |
May 8 2015, 09:33 PM
Post
#384
|
|
Advanced Member Group: Members Posts: 3,900 Joined: 26-January 04 From: Sherwood Oregon Member No.: 1,608 Region Association: Pacific Northwest |
I had to re-cut the center seam again. Had a little too much hanging off the back. (IMG:style_emoticons/default/mad.gif)
All it takes is time. So by the middle of the day I was ready to start welding. Here's the promised shot to the welder dials. 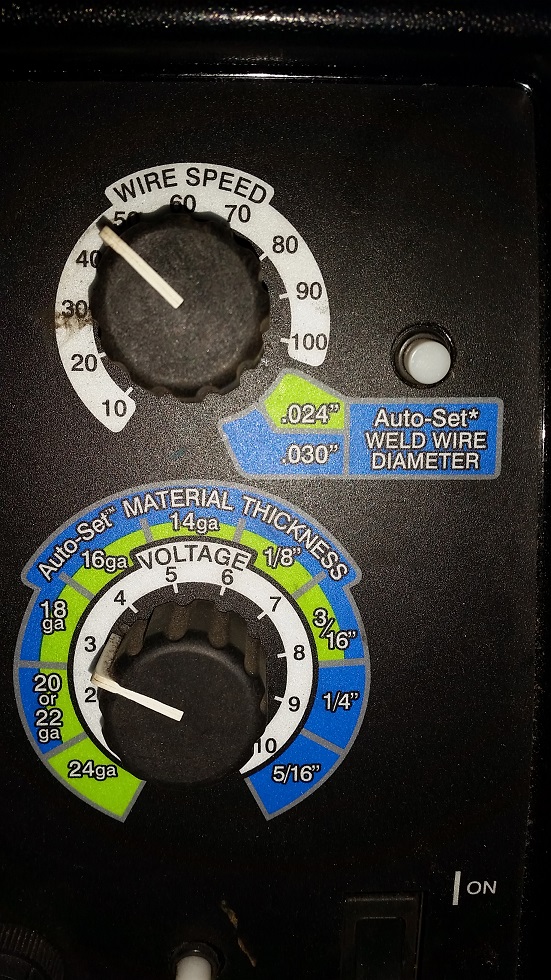 Then I started stitching ............ 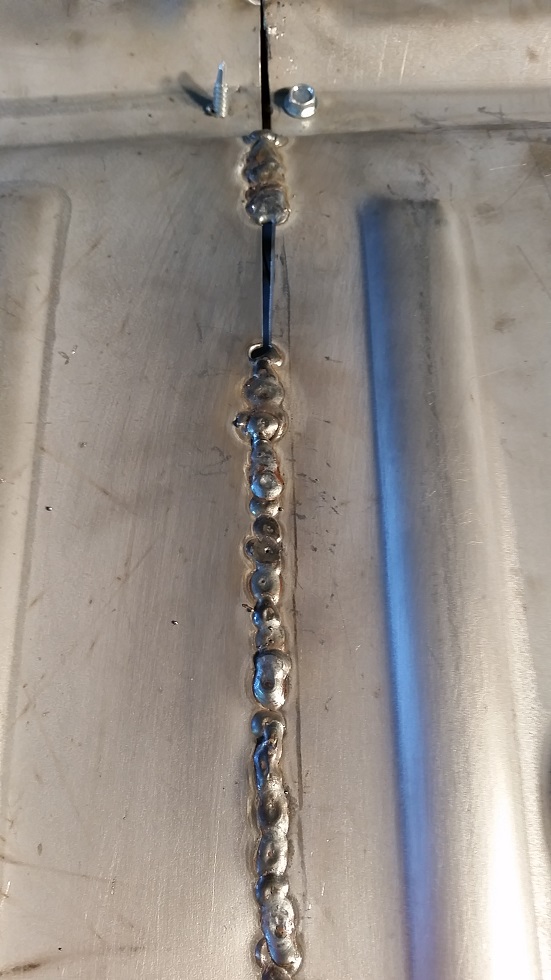 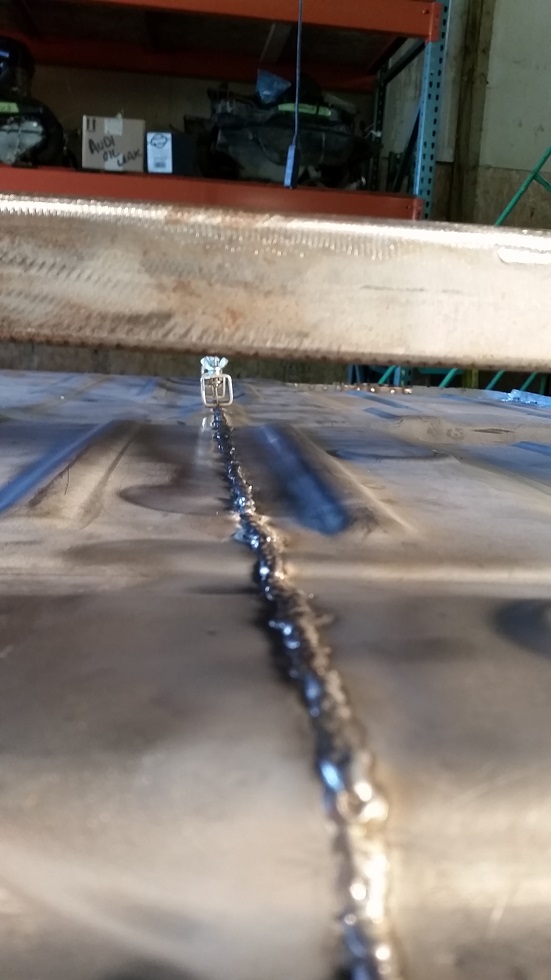 |
|
|
|
| cary |
May 8 2015, 09:43 PM
Post
#385
|
|
Advanced Member Group: Members Posts: 3,900 Joined: 26-January 04 From: Sherwood Oregon Member No.: 1,608 Region Association: Pacific Northwest |
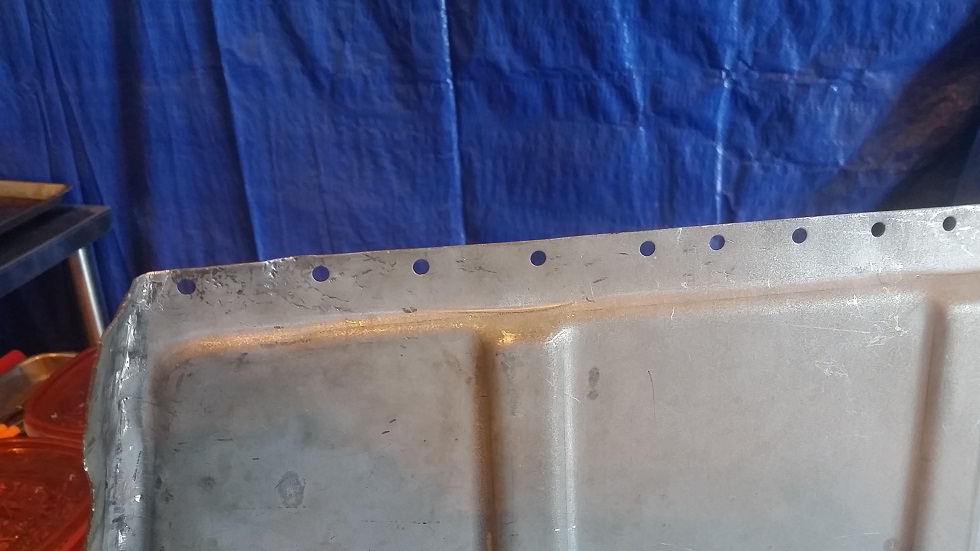
Another lesson today. After watching Adam's RD floor install video. I was thinking it was a waste of time putting a screw into rosette hole. So I did every other hole.
Come to find out there is a method to his madness. The holes punched out without a screw ran though them are a pain in the ass. Your fighting the flash off of the weld thru primer in every weld. The screw holes created a much nicer weld. All you need to do is start the wire on the bottom layer and circle your way out. 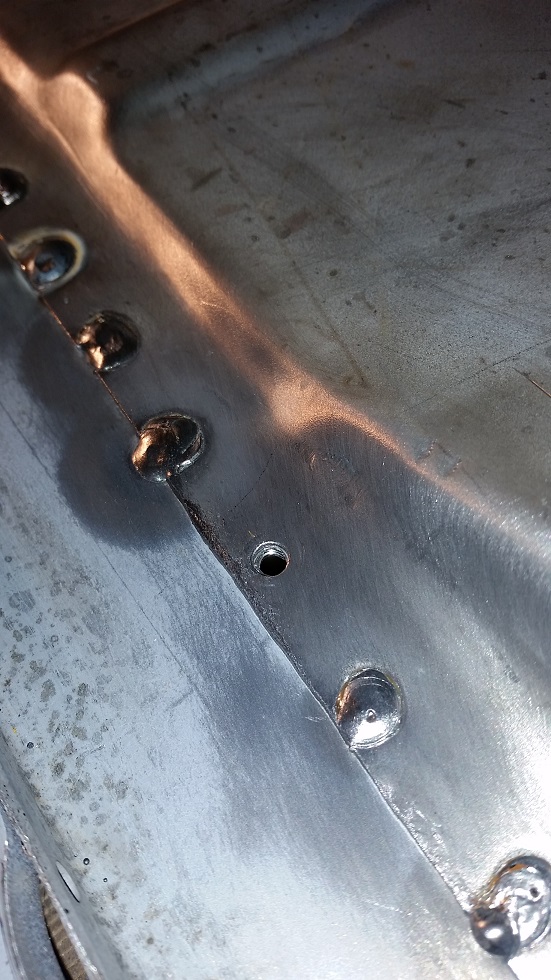 |
|
|
|
| cary |
May 8 2015, 09:48 PM
Post
#386
|
|
Advanced Member Group: Members Posts: 3,900 Joined: 26-January 04 From: Sherwood Oregon Member No.: 1,608 Region Association: Pacific Northwest |
Already to finish up next week. (IMG:style_emoticons/default/biggrin.gif) (IMG:style_emoticons/default/biggrin.gif) (IMG:style_emoticons/default/biggrin.gif)
 I have more Vise Grips than flashlights .............. LOL 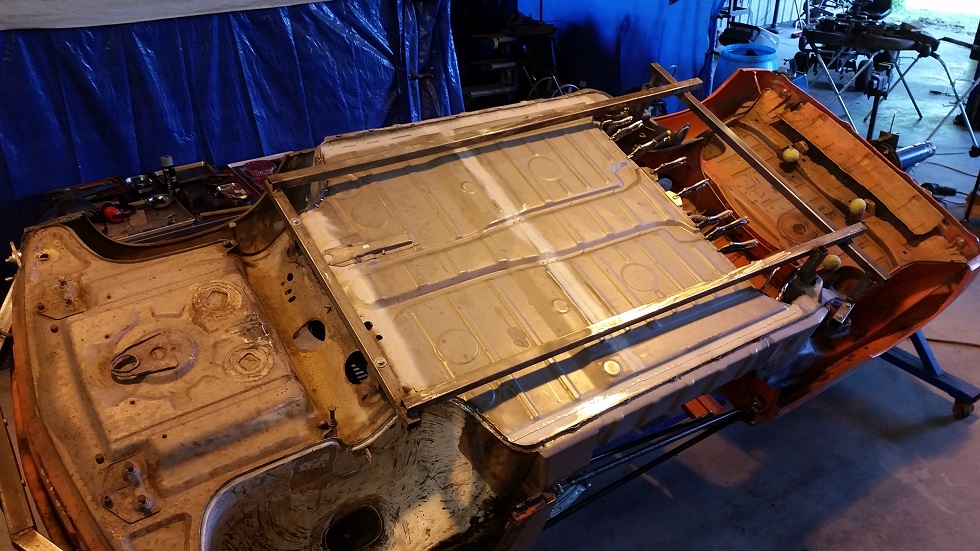 |
|
|
|
| cary |
May 8 2015, 09:52 PM
Post
#387
|
|
Advanced Member Group: Members Posts: 3,900 Joined: 26-January 04 From: Sherwood Oregon Member No.: 1,608 Region Association: Pacific Northwest |
Landlord blew up the lawn mower.
Super In Law spent the day working his magic. I've had the mower for 23 years Mowed 2 acres twice a week in Montana. 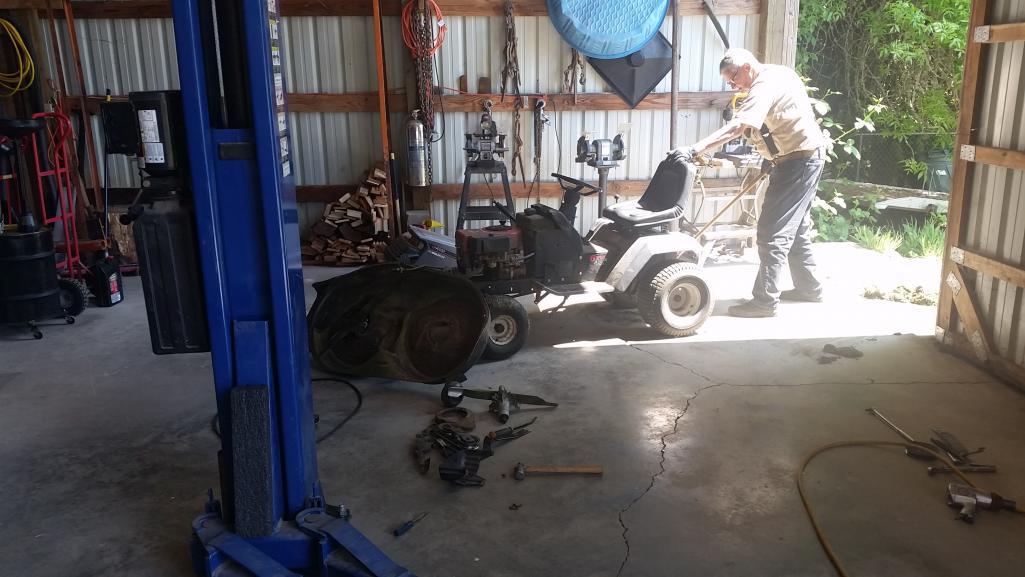 |
|
|
|
| 76-914 |
May 9 2015, 08:17 AM
Post
#388
|
|
Repeat Offender & Resident Subaru Antagonist Group: Members Posts: 13,905 Joined: 23-January 09 From: Temecula, CA Member No.: 9,964 Region Association: Southern California |
Fun! (IMG:style_emoticons/default/beerchug.gif)
|
|
|
|
| cary |
May 10 2015, 07:29 AM
Post
#389
|
|
Advanced Member Group: Members Posts: 3,900 Joined: 26-January 04 From: Sherwood Oregon Member No.: 1,608 Region Association: Pacific Northwest |
As soon as I finish the floor and all its extra parts I'm going to start epoxy primering.
That will make it look and feel like we're getting somewhere. I'm thinking i might stop after that and paint my white car, I have 3 or 4 rust spots to cut and patch. It will need to be stripped first. The car runs like a new car. Its a shame the paint doesn't look as nice as the car runs. |
|
|
|
| cary |
May 13 2015, 09:09 PM
Post
#390
|
|
Advanced Member Group: Members Posts: 3,900 Joined: 26-January 04 From: Sherwood Oregon Member No.: 1,608 Region Association: Pacific Northwest |
Back to work ................
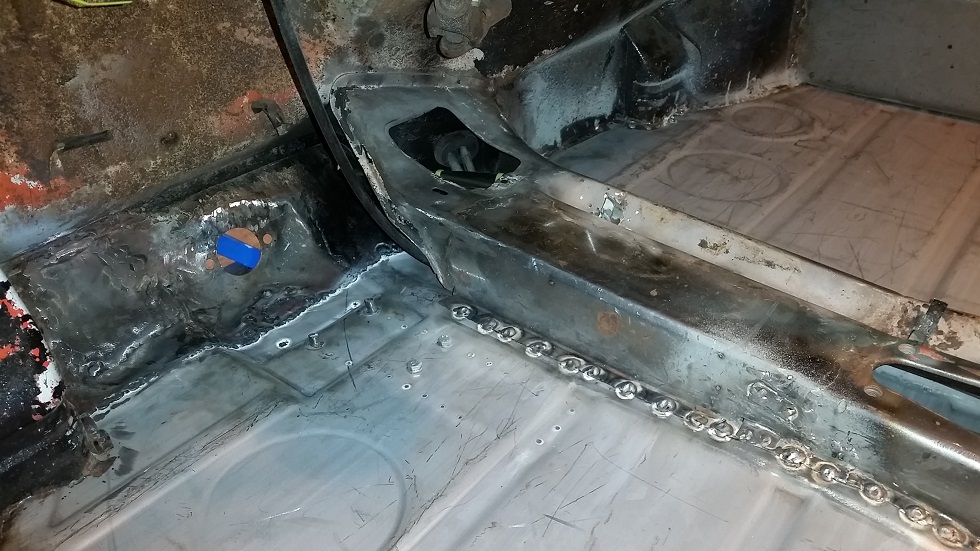
Prepped the tunnel before lunch. 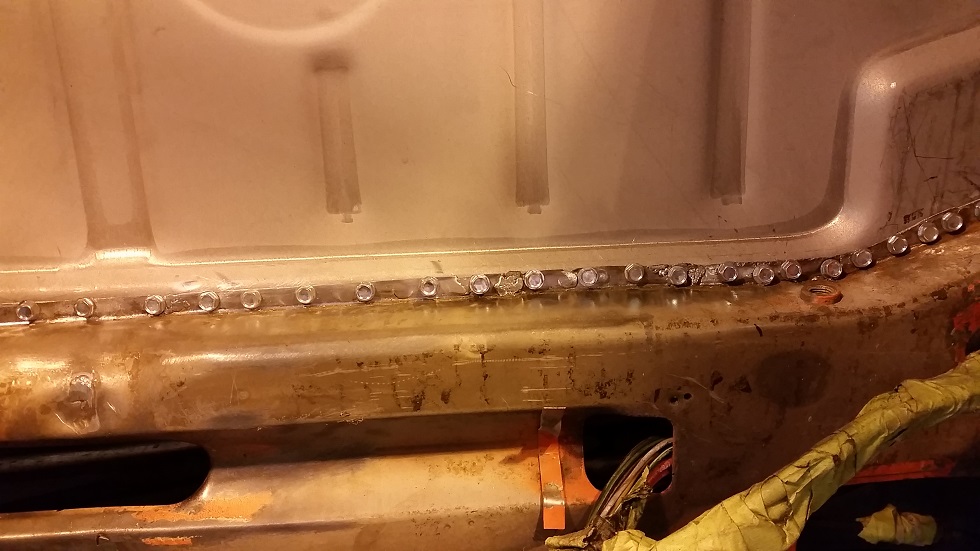 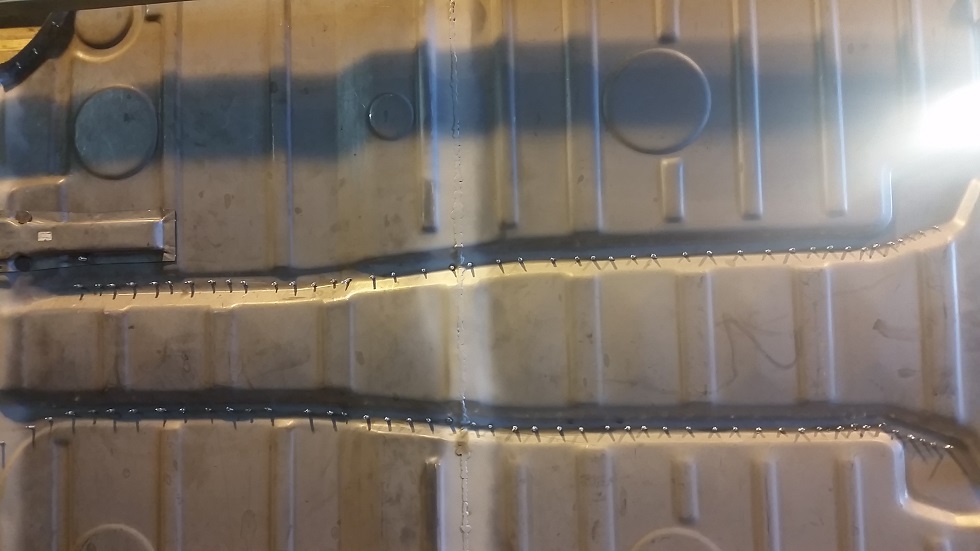 Welded the engine firewall lip after lunch. Some of the punched holes were in a a bad location 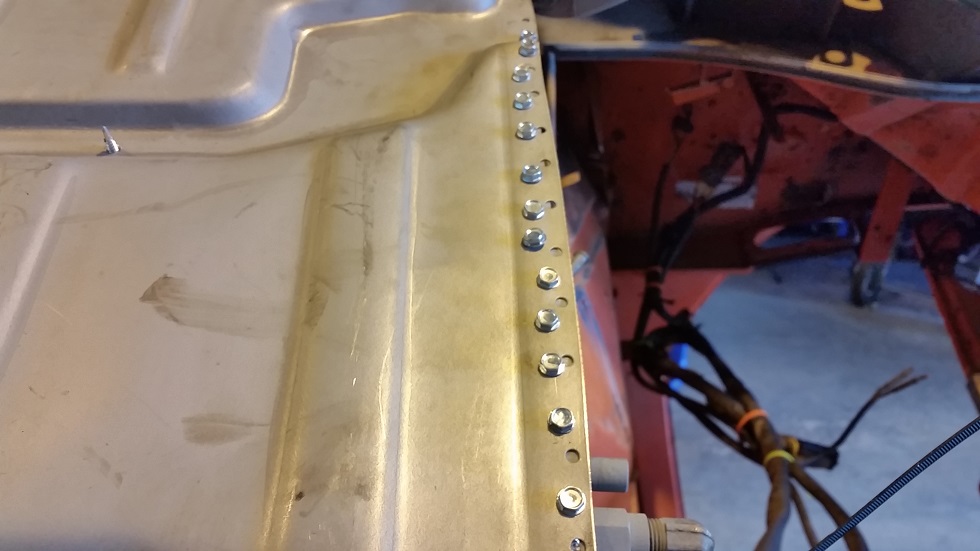 All tidied up. Prepped the jack point. Tomorrow I'll get after the tunnel. Maybe we'll get the Panel Spotter fired up. (IMG:style_emoticons/default/cheer.gif) (IMG:style_emoticons/default/cheer.gif) 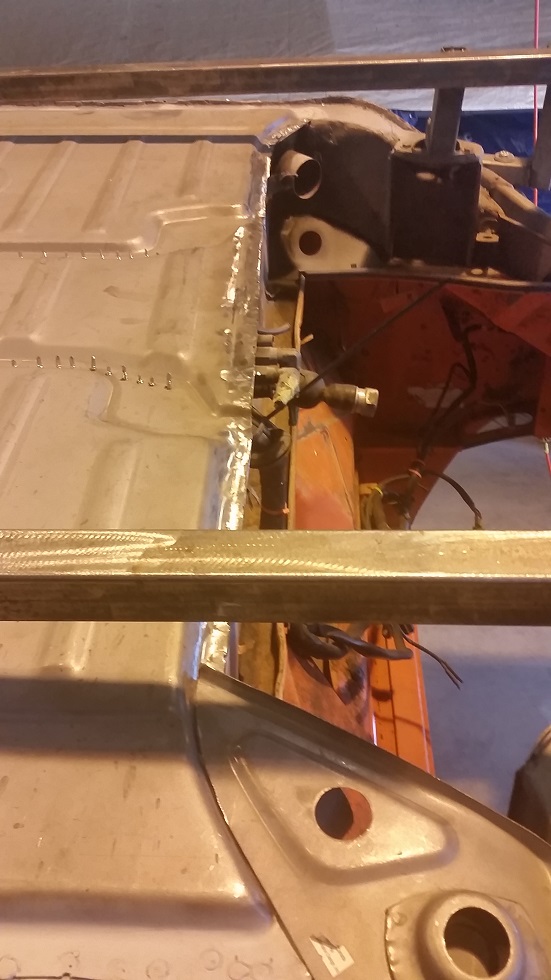 |
|
|
|
| cary |
May 14 2015, 09:46 PM
Post
#391
|
|
Advanced Member Group: Members Posts: 3,900 Joined: 26-January 04 From: Sherwood Oregon Member No.: 1,608 Region Association: Pacific Northwest |
Another Great Day .......................
Started the day by making sure the pedal cluster goes back in without issues before I spot weld in the pedal box stiffener. It's little tight. Elongated the holes a bit. Good too go.  Panel Spotter ready to go. 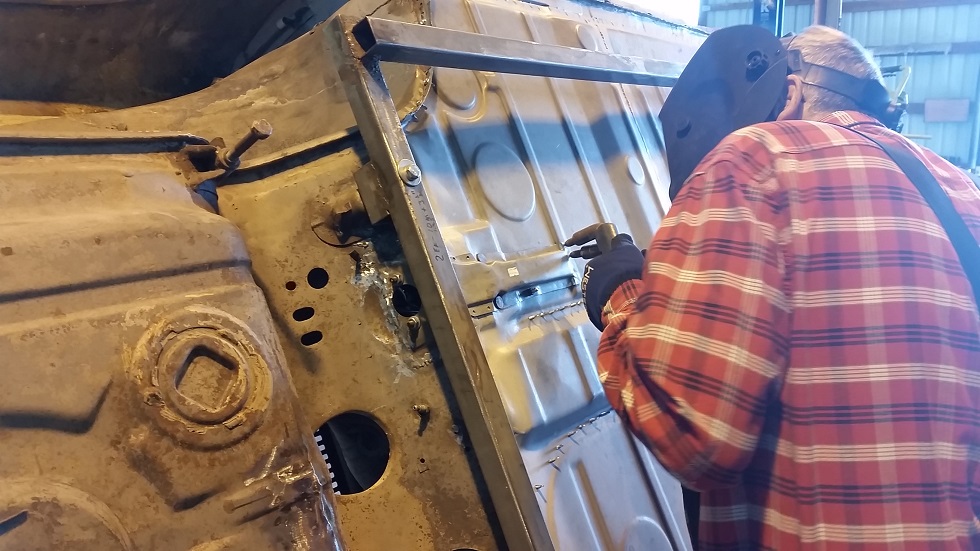 Super In Law gives it a go .................  |
|
|
|
| cary |
May 14 2015, 09:53 PM
Post
#392
|
|
Advanced Member Group: Members Posts: 3,900 Joined: 26-January 04 From: Sherwood Oregon Member No.: 1,608 Region Association: Pacific Northwest |
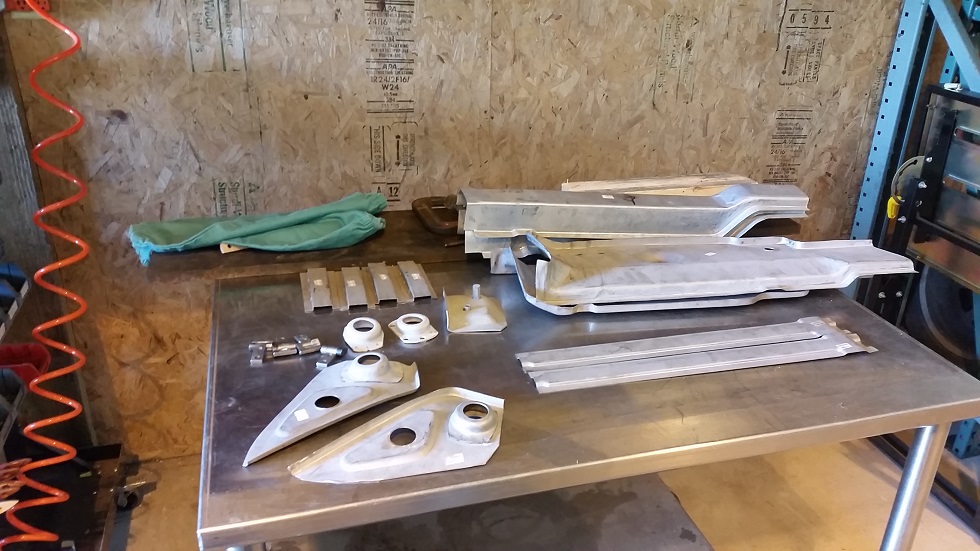
Got the rest of the floor pan parts out and ready to go.
 With the Panel Spotter hooked up and ready to I decide to install the seat stiffeners. 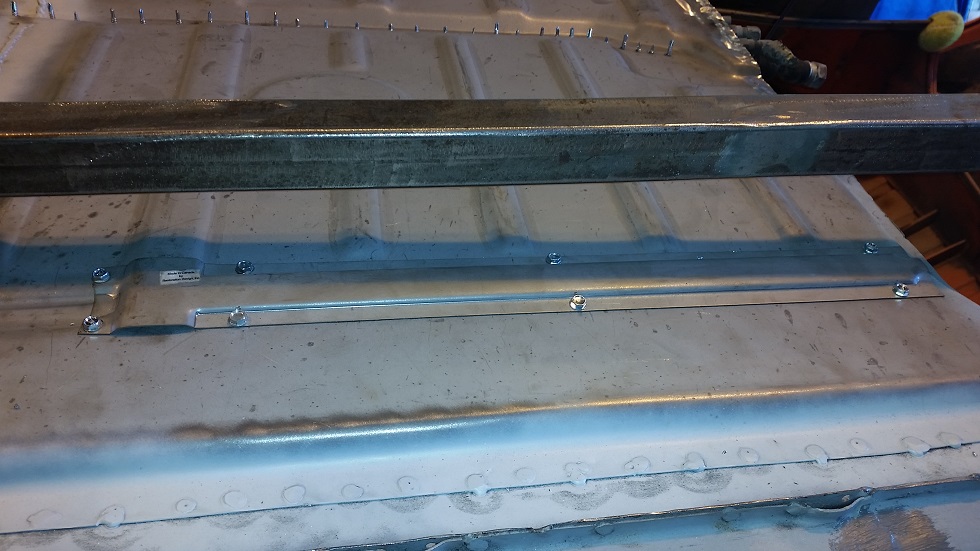 Inside look at the backside of spot welds. (IMG:style_emoticons/default/biggrin.gif) (IMG:style_emoticons/default/biggrin.gif) 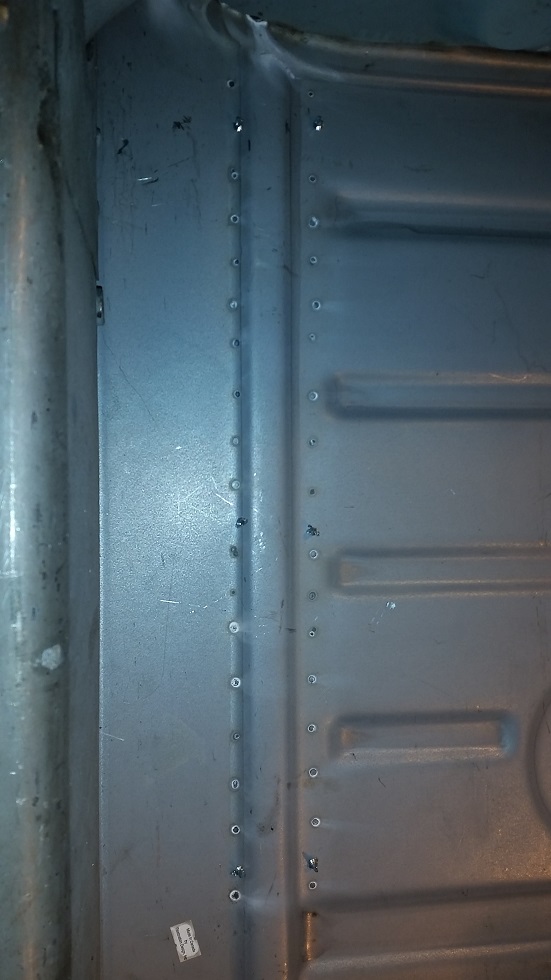 |
|
|
|
| cary |
May 14 2015, 10:02 PM
Post
#393
|
|
Advanced Member Group: Members Posts: 3,900 Joined: 26-January 04 From: Sherwood Oregon Member No.: 1,608 Region Association: Pacific Northwest |
Come back from lunch and I get after the tunnel rosette welds.
  Got some grinder work to do. But man, what a great feeling. (IMG:style_emoticons/default/beer3.gif) (IMG:style_emoticons/default/beer3.gif) Kind of looks like a car again. 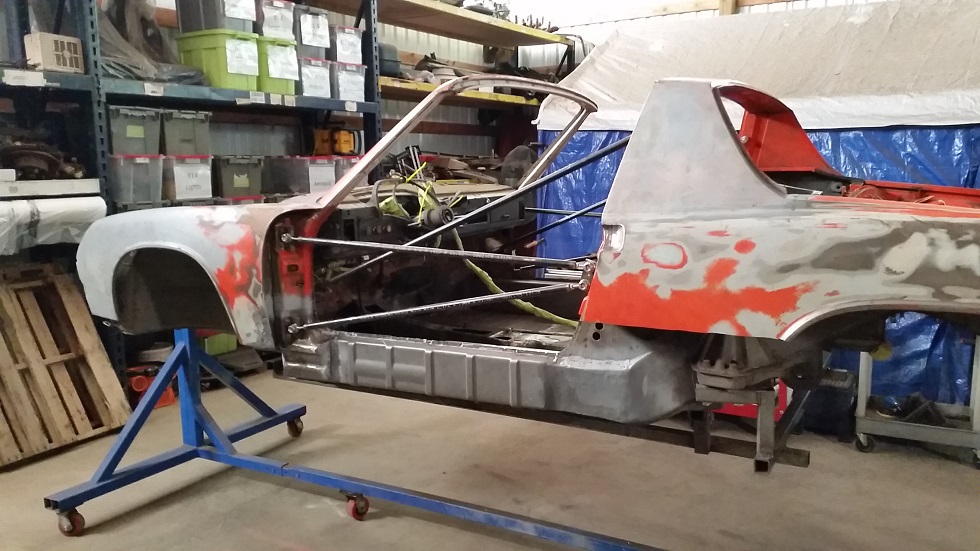 |
|
|
|
| worn |
May 14 2015, 11:28 PM
Post
#394
|
|
Winner of the Utah Twisted Joint Award Group: Members Posts: 3,611 Joined: 3-June 11 From: Madison, WI and North Bend WA Member No.: 13,152 Region Association: Upper MidWest |
QUOTE(cary @ May 14 2015, 09:02 PM)  Come back from lunch and I get after the tunnel rosette welds. Got some grinder work to do. But man, what a great feeling. (IMG:style_emoticons/default/beer3.gif) (IMG:style_emoticons/default/beer3.gif) Kind of looks like a car again. Seasons greetings. The welding sanding and priming season. Nice, very nice work. -warren |
|
|
|
| FourBlades |
May 15 2015, 05:53 AM
Post
#395
|
|
From Wreck to Rockin Group: Members Posts: 2,056 Joined: 3-December 07 From: Brevard, FL Member No.: 8,414 Region Association: South East States |
I think a new floor on is the most satisfying panel to weld on a 914. I have done 2 and they both felt so good to get on. It is easy to do and makes such a big difference. You are on a roll now! John |
|
|
|
| Cairo94507 |
May 15 2015, 06:52 AM
Post
#396
|
|
Michael Group: Members Posts: 10,678 Joined: 1-November 08 From: Auburn, CA Member No.: 9,712 Region Association: Northern California |
Terrific work. I enjoy seeing the progress as the 914 begins to take shape again. Full steam ahead!
|
|
|
|
| cary |
May 15 2015, 07:07 AM
Post
#397
|
|
Advanced Member Group: Members Posts: 3,900 Joined: 26-January 04 From: Sherwood Oregon Member No.: 1,608 Region Association: Pacific Northwest |
Looks like there won't be a time out on the rustoration. Middle son is coming up to Portland to intern at a law firm this summer.
He called last night and asked if the white car was drive able? He knows I like tinkering. New squeegees and fuzzy s came from Mark yesterday. He s going to be living downtown and riding a bike to work. (It's a Portland thing,. The other son is riding to work everyday this month and getting 3 extra days of vacation). I guess he and I will fight over it on the weekends. I just wish the shop was closer and I could put a couple hours in every night. It's a 35 minute drive from home. Super In Law built a couple 4*2*1 wooden crates to put the usable/removable metal that came off the car. One for old. One for unused or trimmed off RD panels. He's going to build another to put all the things I've removed off my 77 Carrera 3.0. Values are starting to escalate. Just in case the kids want to restore it after I'm long gone. I've built it into a 3.0 RS clone. |
|
|
|
| cary |
May 15 2015, 07:14 AM
Post
#398
|
|
Advanced Member Group: Members Posts: 3,900 Joined: 26-January 04 From: Sherwood Oregon Member No.: 1,608 Region Association: Pacific Northwest |
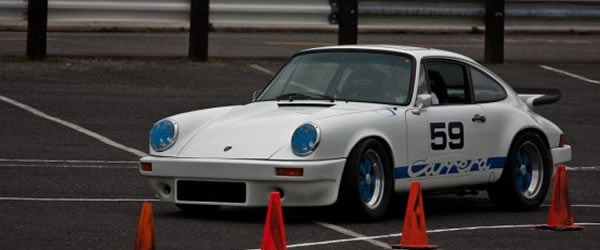 Still needs turbo flares and a single black mirror. That will happen when it gets a total restoration. It's next. That will include $10k in suspension and oiling cooling. Plus a Rothsport engine rebuild. $$$$ ITB's, 964 cams, etc ......... go faster stuff. AXing this weekend. The new A7' s I just put on it are bitching. Moved up about 15 spots in the pecking order. |
|
|
|
| peteyd |
May 15 2015, 09:23 AM
Post
#399
|
|
Senior Member Group: Members Posts: 744 Joined: 27-March 08 From: Elora, Ontario, Canada Member No.: 8,858 Region Association: Canada |
Cary,
Nice work! keep up the good pace. Your rosette welds are looking great too Pete |
|
|
|
| worn |
May 15 2015, 08:07 PM
Post
#400
|
|
Winner of the Utah Twisted Joint Award Group: Members Posts: 3,611 Joined: 3-June 11 From: Madison, WI and North Bend WA Member No.: 13,152 Region Association: Upper MidWest |
QUOTE(cary @ May 15 2015, 06:14 AM) aster stuff. AXing this weekend. The new A7' s I just put on it are bitching. Moved up about 15 spots in the pecking order. Super in law, super sons, super cars, and super work, and I bet super driving. Have fun with the autocross. Reminds us that there is driving to be done. |
|
|
|
|
1 User(s) are reading this topic (1 Guests and 0 Anonymous Users)
0 Members:

|
Lo-Fi Version | Time is now: 24th June 2026 - 08:58 PM |
Invision Power Board
v9.1.4 © 2026 IPS, Inc.