|
|
|
Porsche, and the Porsche crest are registered trademarks of Dr. Ing. h.c. F. Porsche AG.
This site is not affiliated with Porsche in any way. Its only purpose is to provide an online forum for car enthusiasts. All other trademarks are property of their respective owners. |
|
|

  |

| Cairo94507 |
 Sep 1 2015, 07:39 AM Sep 1 2015, 07:39 AM
Post
#521
|
|
Michael  Group: Members Posts: 10,678 Joined: 1-November 08 From: Auburn, CA Member No.: 9,712 Region Association: Northern California |
(IMG:style_emoticons/default/popcorn[1].gif) Lovin' it.
|
   |

 
|
| cary |
Sep 6 2015, 07:49 AM
Post
#522
|
|
Advanced Member Group: Members Posts: 3,900 Joined: 26-January 04 From: Sherwood Oregon Member No.: 1,608 Region Association: Pacific Northwest |
Another episode of Tool Whore
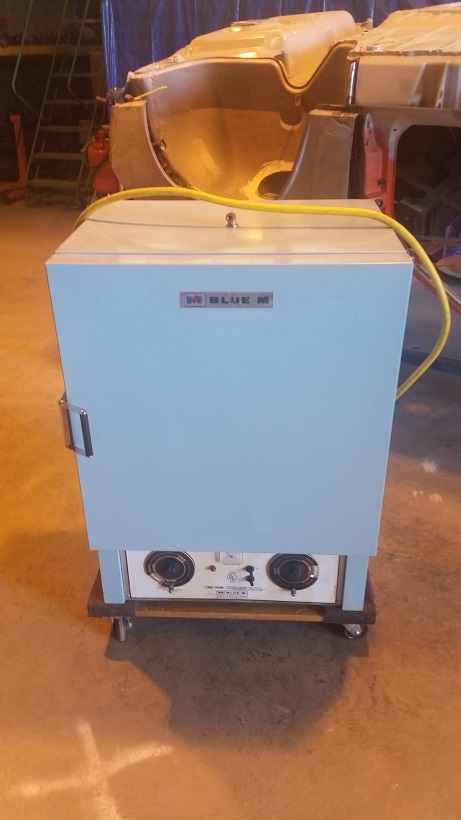 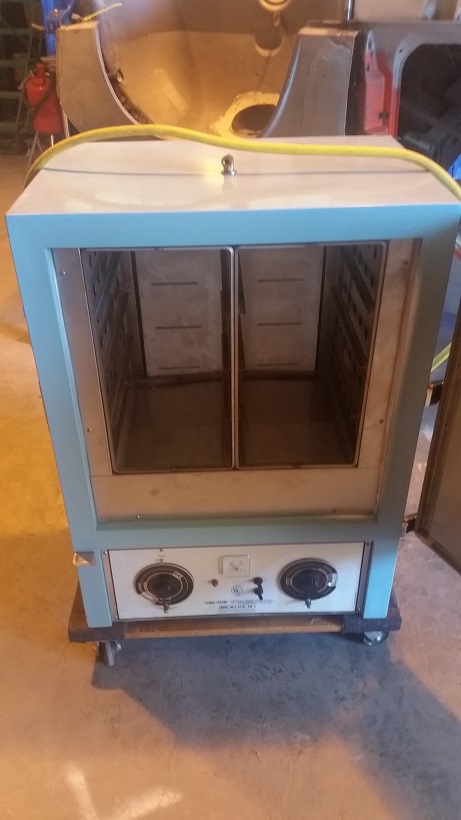 Ran across this manufacturing oven while looking for a frame rack. Building a powder coating oven was one of our next projects. This will give us a good start. Its about the same size as our wall oven here at the house 19*15*18. I still want to get a frame bench before I restore my 911. So I keep an eye out on Craigslist every once in a while. I've conceded the fact that I'll never be able to find or afford a Celette. http://www.ebay.com/itm/USED-CELETTE-SEVEN...512&vxp=mtr I'm most interested in the table and pinch weld mounts. I know I'll have to create my own shock towers for both a 914 and 911. The search continues. I low balled a price on one in Seattle. Pissed the guy off. We'll see if he comes back. |
|
|
|
| cary |
Sep 15 2015, 07:58 PM
Post
#523
|
|
Advanced Member Group: Members Posts: 3,900 Joined: 26-January 04 From: Sherwood Oregon Member No.: 1,608 Region Association: Pacific Northwest |
Left front fender round two. I cut out the section again. Just didn't like it.
A shot of the cut out. Then a shot of the patch all set up and a couple opening tacks. Last grind on the right side was a bit too much. Wish me luck. Plan on backing every tack with a brass backer. 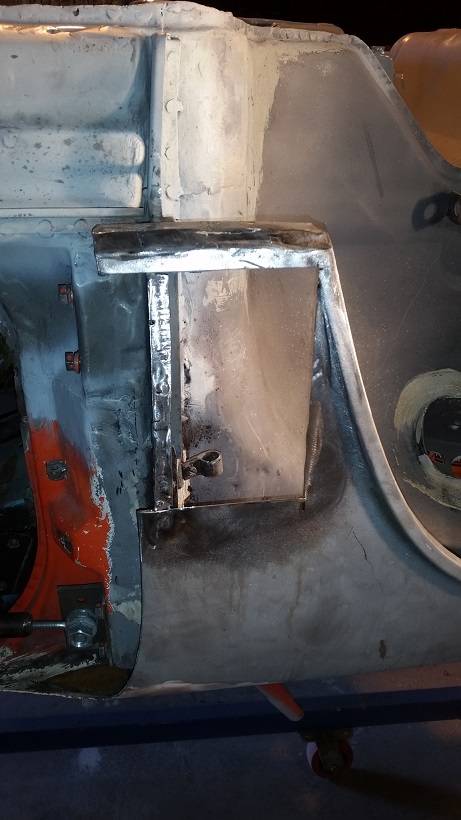 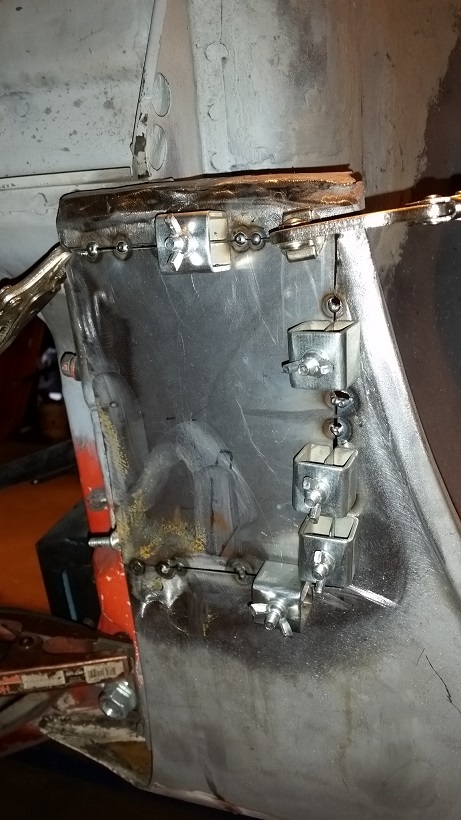 I thought I should go into a little more detail on the patch panel. We used the cut out section as the pattern. Dah. But we needed to create the folded over seam edge for strength. So I decided to use the air flange tool to start the fold. Then moved to the metal brake to bend it. Then we flattened it with a hammer. Then we finished it off with the 12 ton press. Using the blocks that come with the press to sandwich the patch. So next we needed to create the radius in the fender. Once again we used the cut out section as the pattern. Ground the double edge down to match the pattern. Then welded the edge closed. Ground the welds down to bring in back to a finished edge. If needed I'll use All Metal to final finish the edge. That isn't a very good shot of the fender edge. You see the hinge post in the background making it look like I left the welding. Below is the flange tool. http://www.restoration-design.com/store/product/PP207AL |
|
|
|
| cary |
Sep 16 2015, 08:50 PM
Post
#524
|
|
Advanced Member Group: Members Posts: 3,900 Joined: 26-January 04 From: Sherwood Oregon Member No.: 1,608 Region Association: Pacific Northwest |
Slow and steady wins the race....................
  The day went real well. I took my time welding it in stitch by stitch. A couple spots got a little too hot. But in the end it went in relatively flat. 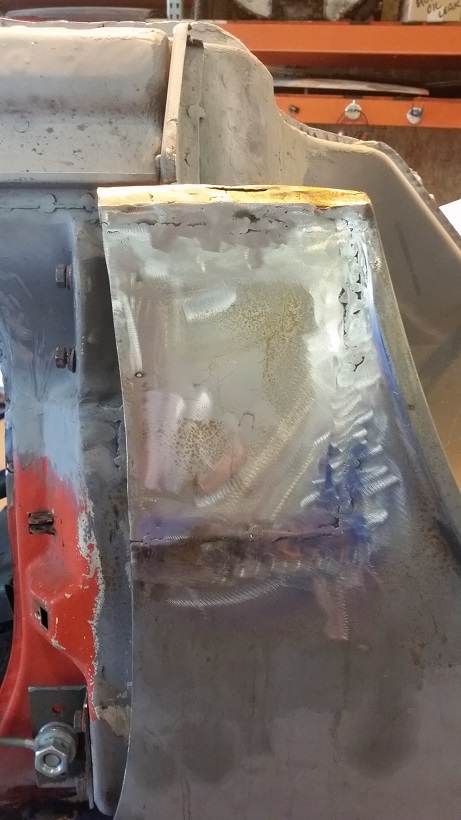 I'm a little paranoid on over grinding. Thins the metal too much. I'll use All Metal to smooth out the imperfections. |
|
|
|
| cary |
Sep 16 2015, 08:58 PM
Post
#525
|
|
Advanced Member Group: Members Posts: 3,900 Joined: 26-January 04 From: Sherwood Oregon Member No.: 1,608 Region Association: Pacific Northwest |
New Episode of Tool Whore .............
Magnetic Welding Backer from TP Tools. Worked great. Keeps the back real tidy. 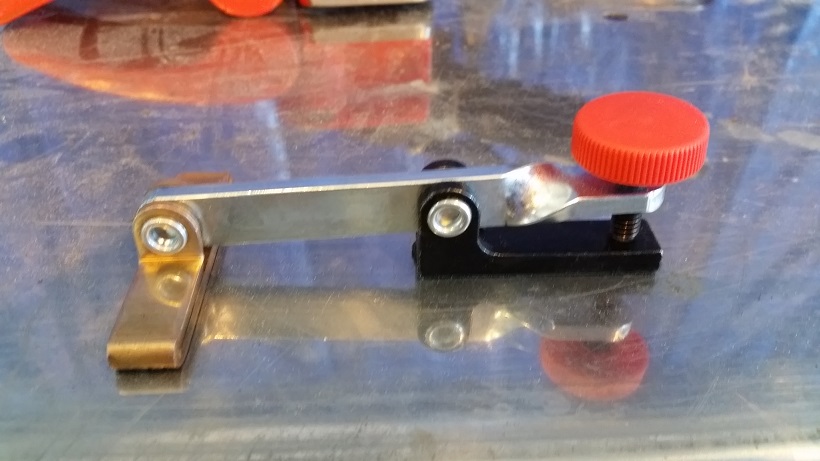 Then I bought a bottle of cooling gel. Its working good too. Not sure how it works. But it does. 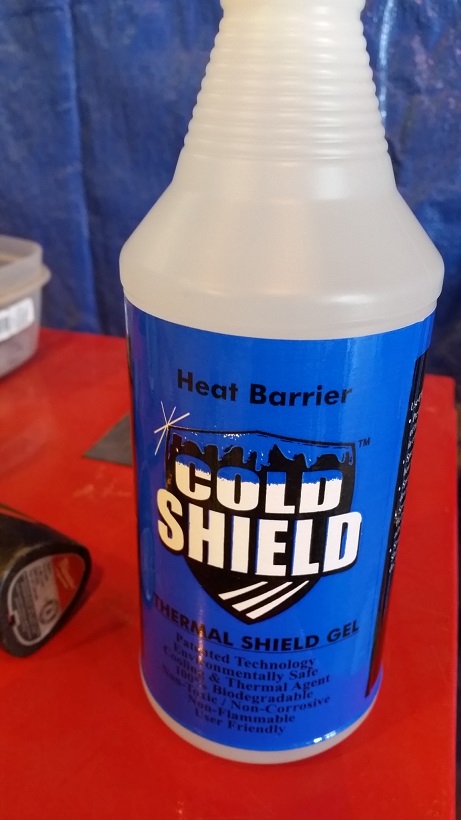 |
|
|
|
| cary |
Sep 16 2015, 09:20 PM
Post
#526
|
|
Advanced Member Group: Members Posts: 3,900 Joined: 26-January 04 From: Sherwood Oregon Member No.: 1,608 Region Association: Pacific Northwest |
Then on to adding the rocker panel channel. I cut off the rotten portion earlier.
 Super In Law created the piece. 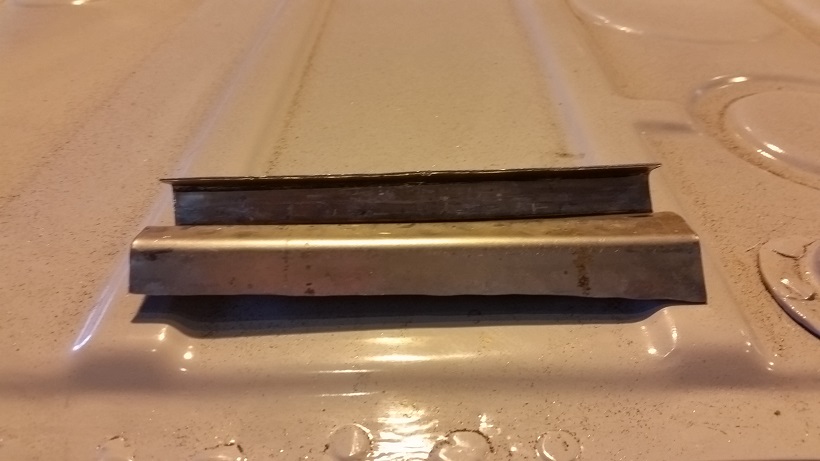 So have cut off wheel will travel. Off came the bottom of the fender. Trimmed the new piece to fit. 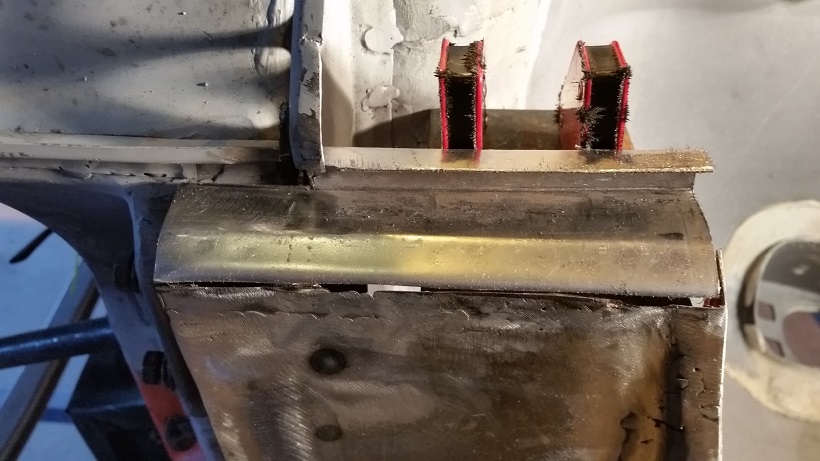 Then back to stitching. Once again took my time. Used the backer to absorb the heat. Used the cooling gel to knock down the temp. 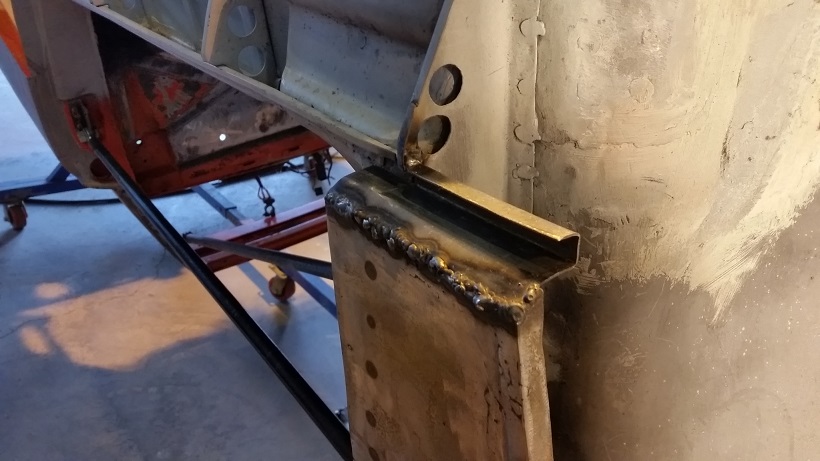 Gave it a couple passes with the DA. 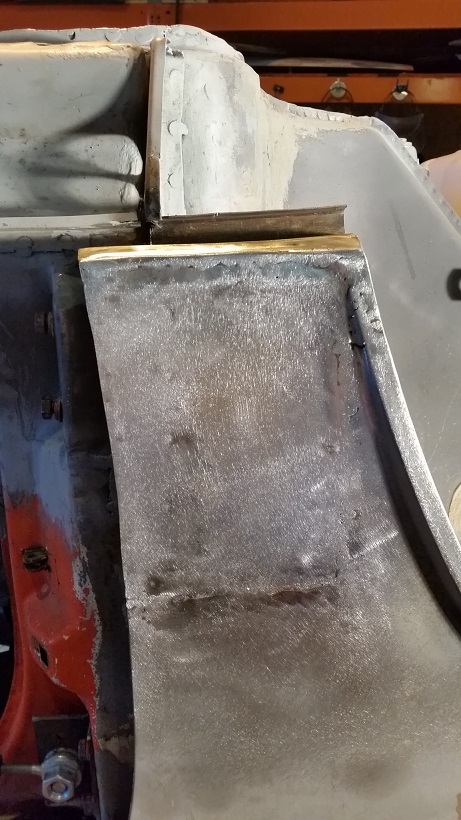 |
|
|
|
| cary |
Sep 17 2015, 09:28 AM
Post
#527
|
|
Advanced Member Group: Members Posts: 3,900 Joined: 26-January 04 From: Sherwood Oregon Member No.: 1,608 Region Association: Pacific Northwest |
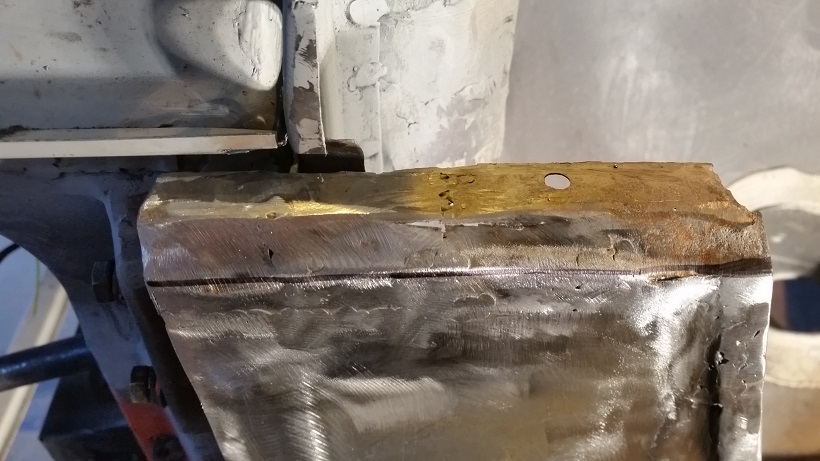
Todays task will be finishing the fender.
Yellow squiggles will get a little bit of All Metal. Looking back I should have flipped it over when I welded the upper line. It's not flat enough. That's the lower line in the picture. There is a good sized dimple in the middle (circle). It's perfectly smooth So I'll try and shrink that out. I knew that it was there when I started. But I didn't to hammer on it. 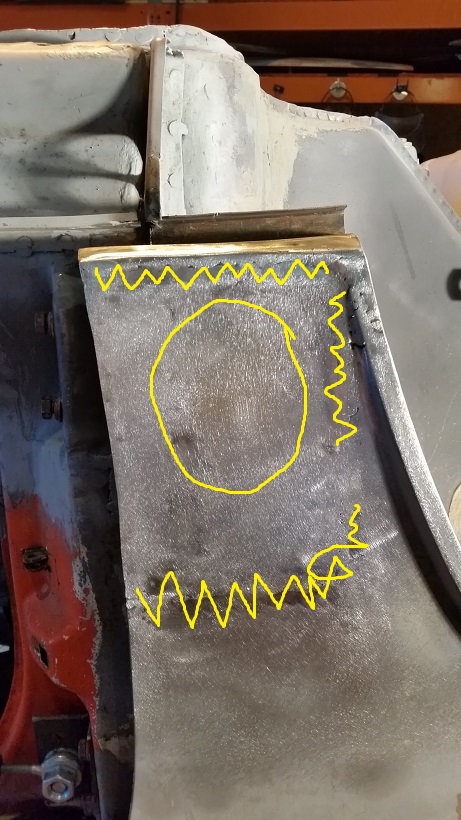 |
|
|
|
| cary |
Sep 17 2015, 10:25 PM
Post
#528
|
|
Advanced Member Group: Members Posts: 3,900 Joined: 26-January 04 From: Sherwood Oregon Member No.: 1,608 Region Association: Pacific Northwest |
Here's where I was at after the guide coat was sanded off. This was done after some reworking with the shrinking disk.
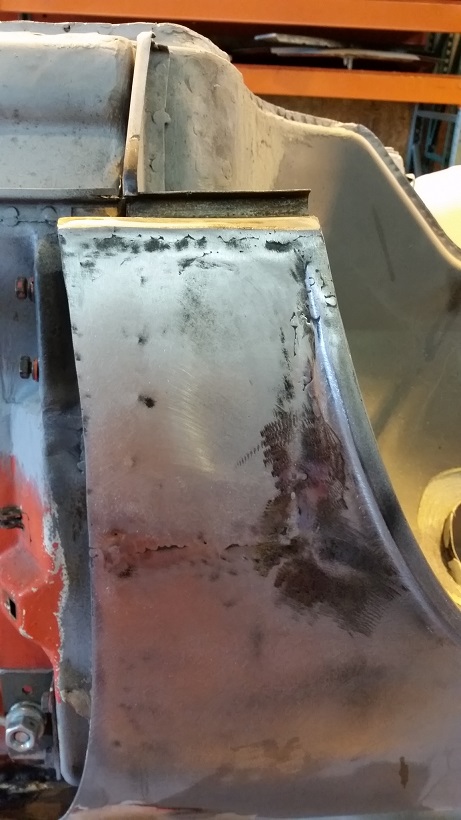 Here's where I ended the day. The circled area is the last low area. What you see is the skim coat at 80 GR. Other than the one low spot. She is silky smooth. 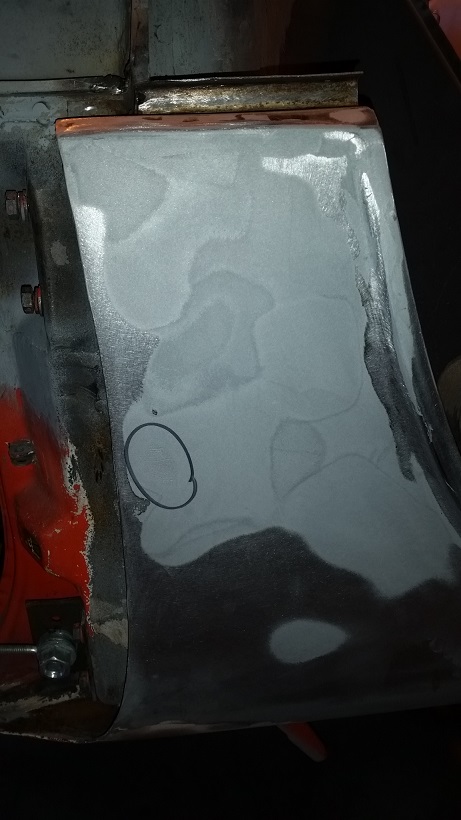 |
|
|
|
| cary |
Sep 17 2015, 10:34 PM
Post
#529
|
|
Advanced Member Group: Members Posts: 3,900 Joined: 26-January 04 From: Sherwood Oregon Member No.: 1,608 Region Association: Pacific Northwest |
Super In Law went to work on the cover for the inner hole on the bottom of the targa bar. This is up inside the fender. We're going way beyond what the factory did.
Below is the opening. 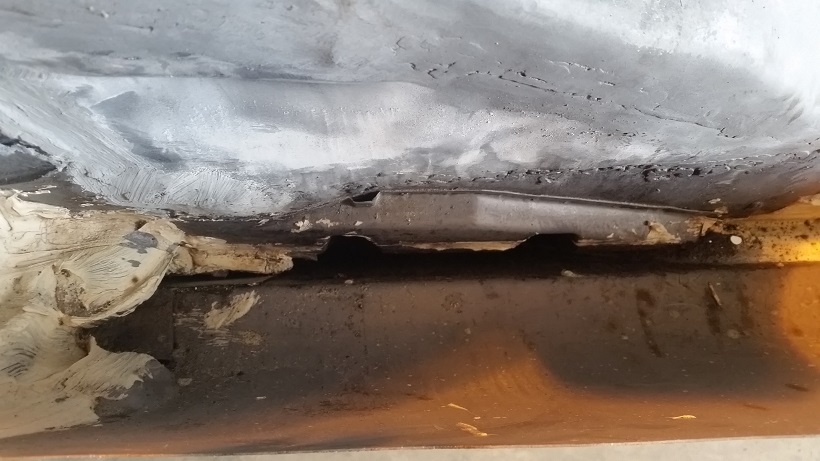 Making the pattern. I think this is version #4. The others are on the floor. 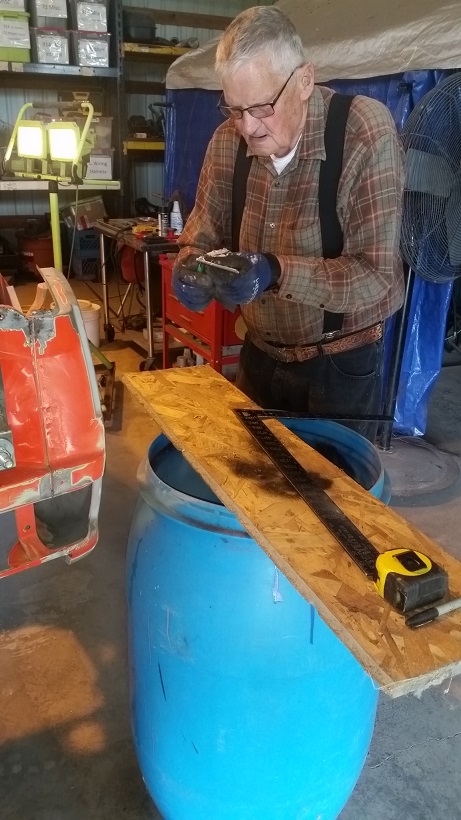 Cardboard pattern installed. We're going to drill drain/vent holes of the metal piece. 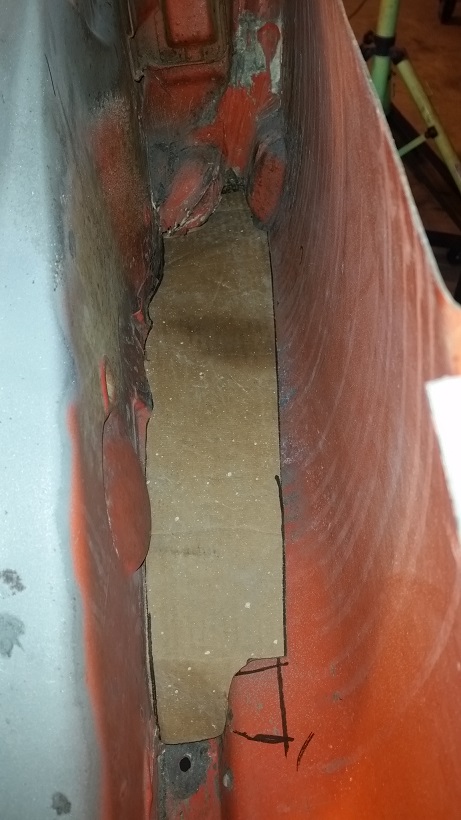 |
|
|
|
| cary |
Sep 18 2015, 08:43 AM
Post
#530
|
|
Advanced Member Group: Members Posts: 3,900 Joined: 26-January 04 From: Sherwood Oregon Member No.: 1,608 Region Association: Pacific Northwest |
Last work day for this vacation. Forecast is for 76 degrees. We'll push it out and do some more bead blasting to get the inner fenders cleaned out. And finish up the rear trunk. I hope get everything epoxy primed before it gets cool.
I'm having an open house with a group of my Pelican 911 buddies tomorrow. If anyone is interested in stopping by PM me. 11am - 2pm. |
|
|
|
| cary |
Sep 19 2015, 08:47 AM
Post
#531
|
|
Advanced Member Group: Members Posts: 3,900 Joined: 26-January 04 From: Sherwood Oregon Member No.: 1,608 Region Association: Pacific Northwest |
Got most everything blasted until I wore out my HF Deadman Valve.
I got the fender almost finished. Once everything was smoothed out I found a high spot dimple from one of the back side welds. Dammit ........ 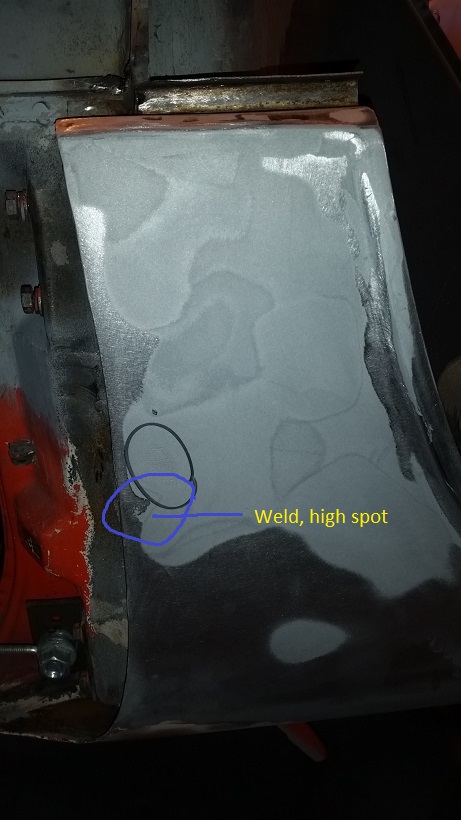 When I was sanding I opened up another thin spot along the rolled edge. (IMG:style_emoticons/default/mad.gif) Pretty scary. It would gone thru the paint in a few years. There's one on other side. I'll shoot a picture today after I open it up with the pick. (IMG:style_emoticons/default/sad.gif) |
|
|
|
| worn |
Sep 19 2015, 08:14 PM
Post
#532
|
|
Winner of the Utah Twisted Joint Award Group: Members Posts: 3,609 Joined: 3-June 11 From: Madison, WI and North Bend WA Member No.: 13,152 Region Association: Upper MidWest |
QUOTE(cary @ Sep 19 2015, 07:47 AM)  Got most everything blasted until I wore out my HF Deadman Valve. I got the fender almost finished. Once everything was smoothed out I found a high spot dimple from one of the back side welds. Dammit ........ When I was sanding I opened up another thin spot along the rolled edge. (IMG:style_emoticons/default/mad.gif) Pretty scary. It would gone thru the paint in a few years. There's one on other side. I'll shoot a picture today after I open it up with the pick. (IMG:style_emoticons/default/sad.gif) Nice work guys! I swear I could give you guys a piece of Swiss cheese and you could make a Porsche from the pattern! I am old enough to be a super in law but lack the skills. Sigh. Quick edit: that incubator /heater is a piece of lab equipment, the twin of which I walk by regularly. Pricy new. |
|
|
|
| cary |
Sep 19 2015, 09:34 PM
Post
#533
|
|
Advanced Member Group: Members Posts: 3,900 Joined: 26-January 04 From: Sherwood Oregon Member No.: 1,608 Region Association: Pacific Northwest |
QUOTE Quick edit: that incubator /heater is a piece of lab equipment, the twin of which I walk by regularly. Pricy new. Quite a few popping up on Craigslist. Should be fun. |
|
|
|
| cary |
Sep 21 2015, 08:06 AM
Post
#534
|
|
Advanced Member Group: Members Posts: 3,900 Joined: 26-January 04 From: Sherwood Oregon Member No.: 1,608 Region Association: Pacific Northwest |
Here' s what I was talking about. Short of a NOS fender I don't know how you'd completely protect yourself from the inside out factor. This is the same thing you see on the bottom edge of the door skins.
I'm going to make an attempt at soaking it with OSPHO for starters. I know starting with a better car would help for starters.  I opened it up with the edge of the die grinder. Forgot to shoot a picture, folks started showing up. I might start a thread just on this subject. |
|
|
|
| cary |
Sep 25 2015, 07:43 PM
Post
#535
|
|
Advanced Member Group: Members Posts: 3,900 Joined: 26-January 04 From: Sherwood Oregon Member No.: 1,608 Region Association: Pacific Northwest |
Another episode of Tool Whore :
Those of you that use Rustoleum for rust protection. You know that the cans Rustoleum uses don't have the noozle clearing feature. Turn the can upside and vent till it blows the paint out of the nozzle. When I remember, I drop the nozzle into a cup of lacquer thinner. Then blow out with air. But I searched the web and found a 10ct bag of replacement nozzles. $10. Much more better. 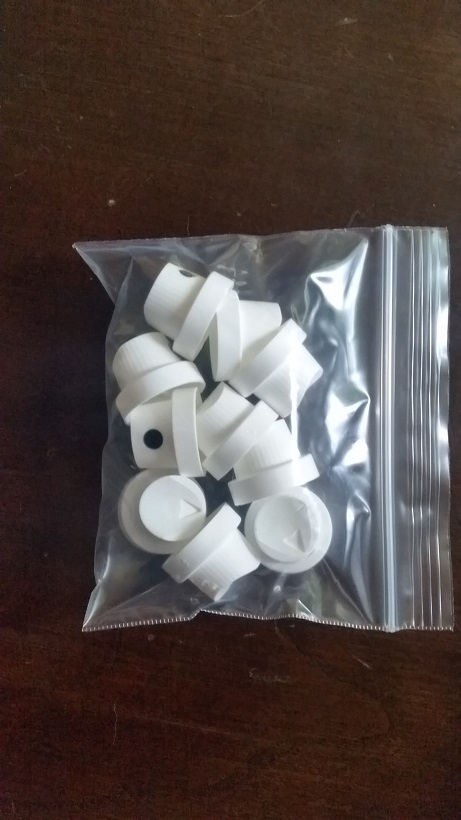 |
|
|
|
| cary |
Sep 28 2015, 10:14 PM
Post
#536
|
|
Advanced Member Group: Members Posts: 3,900 Joined: 26-January 04 From: Sherwood Oregon Member No.: 1,608 Region Association: Pacific Northwest |
Time to catch up on things .............
1. Finished glass bead blasting the paint off the fenders.  2. Blasted the removed rear fender portions. Then I OSPHO'd the front and back. Focusing on the pitted inside. 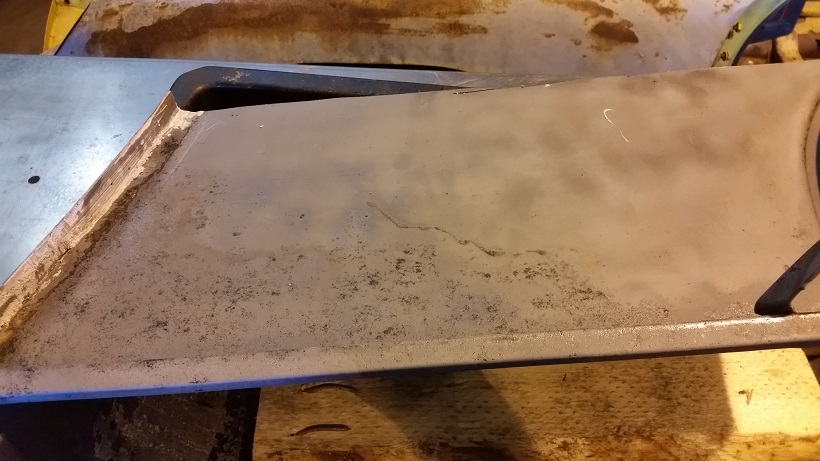 3. It was time to spray some more epoxy primer. (IMG:style_emoticons/default/piratenanner.gif) (IMG:style_emoticons/default/piratenanner.gif) 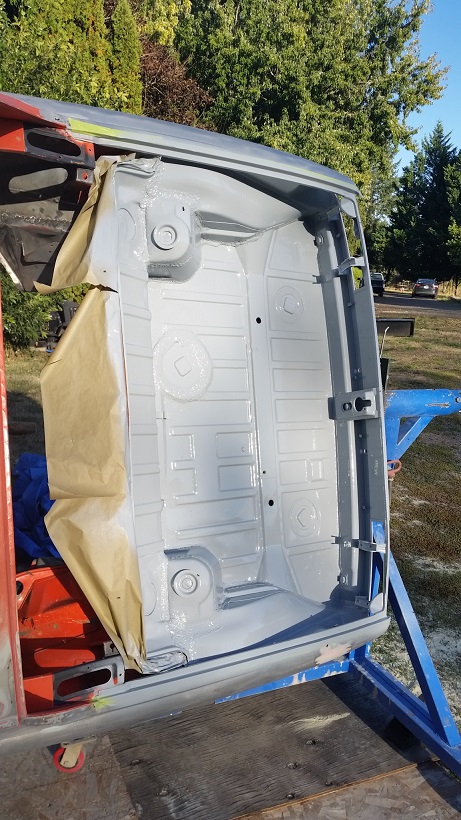 I welded the cut out fender edge. Waiting for one of the horsey people to leave so I could paint. New Lexus ES 350. Picture to follow. Got one the jack points welded in. Picture to follow. |
|
|
|
| cary |
Oct 6 2015, 07:02 AM
Post
#537
|
|
Advanced Member Group: Members Posts: 3,900 Joined: 26-January 04 From: Sherwood Oregon Member No.: 1,608 Region Association: Pacific Northwest |
I'm going to be so busy reading/watching every one else's build off projects work will probably stop on mine. LOL
Seriously, I'm thinking of taking a time out. Switch over to stripping the paint off my 73 2.0. Doing a little rust repair and re paint it in time from WCR. The car runs and drives so well. Its a shame it doesn't look better. Just strip, rust repair, exterior paint, new windshield and a new carpet. |
|
|
|
| cary |
Oct 7 2015, 11:27 PM
Post
#538
|
|
Advanced Member Group: Members Posts: 3,900 Joined: 26-January 04 From: Sherwood Oregon Member No.: 1,608 Region Association: Pacific Northwest |
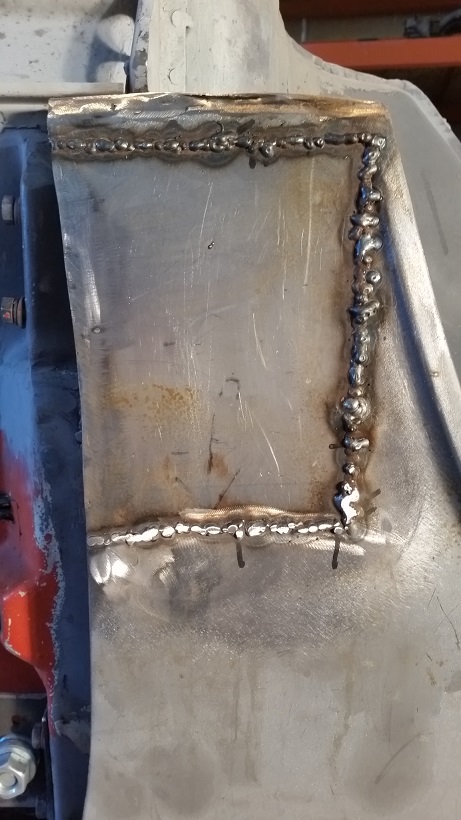
I decided to redo the previous work on the bottom of the right front fender.
Like the left side, I cut out the section that was over worked and rusted. Here's were I was at after I removed all the rusted layers. 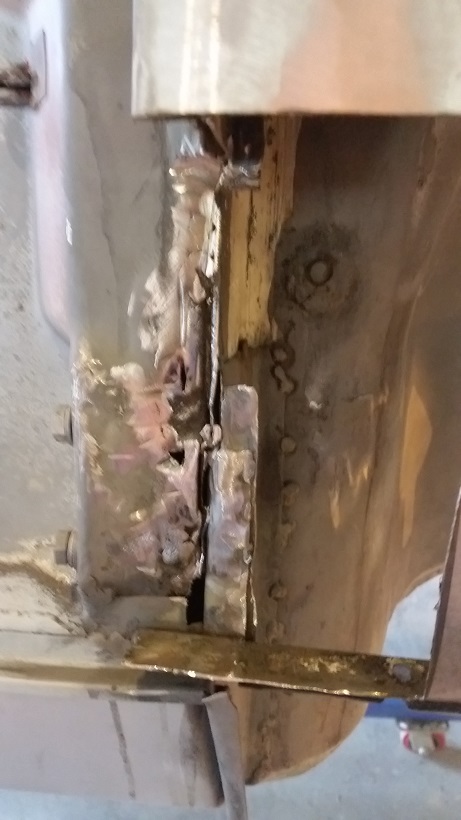 Tried filling in as many of the gaps and bumps that I could. All sealed up. Tough going. Pretty beat up after removing all the old welds. 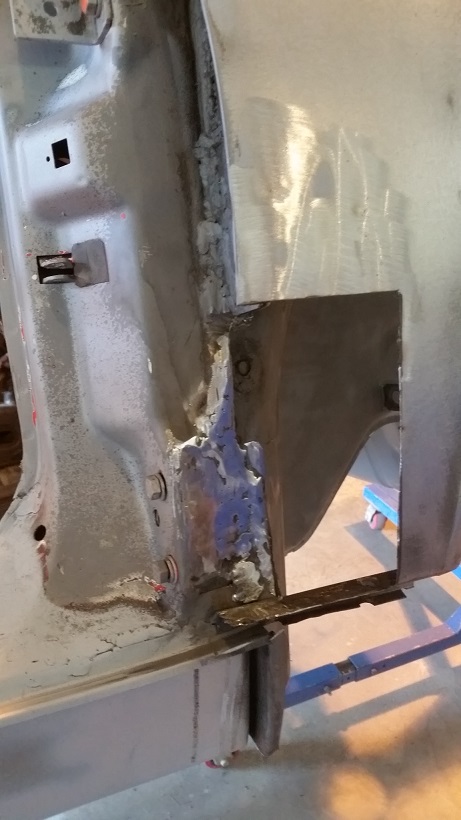 Ended the day spraying a little more epoxy primer.  Stopped by the paint store and ordered some 2 part Fusor seam sealer. Both direct to metal brush on, and a dual tube that is applied after the epoxy primer has been applied. |
|
|
|
| saigon71 |
Oct 8 2015, 07:11 AM
Post
#539
|
|
Advanced Member Group: Members Posts: 2,026 Joined: 1-June 09 From: Dillsburg, PA Member No.: 10,428 Region Association: MidAtlantic Region |
Lookin good! (IMG:style_emoticons/default/beerchug.gif)
|
 |
|
| cary |
Oct 10 2015, 08:03 PM
Post
#540
|
|
Advanced Member Group: Members Posts: 3,900 Joined: 26-January 04 From: Sherwood Oregon Member No.: 1,608 Region Association: Pacific Northwest |
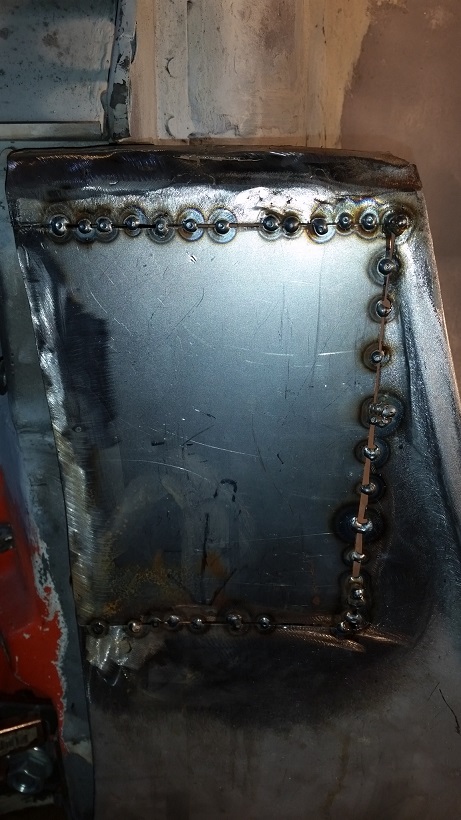
Decided to tackle reinstalling the right fender portion.
Millermatic 180 set on auto .23 Voltage set about 21 gauge/2 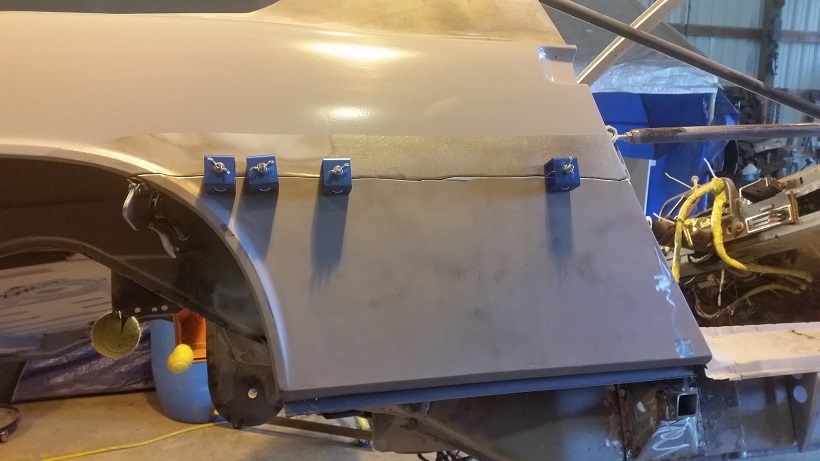 New clamps set up. Pretty cool. They let you level the panels flat. 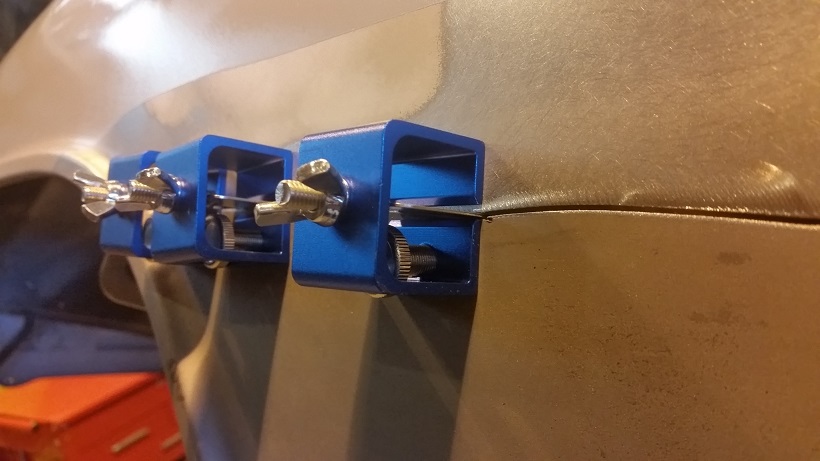 Ready set go ........... Maybe it should have been just a smidgen hotter. 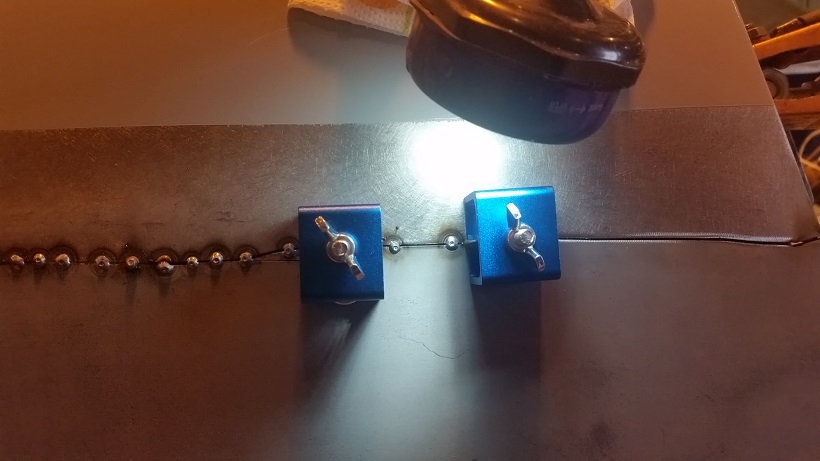 Taking my time. Stitch is real quick, not generating much heat. 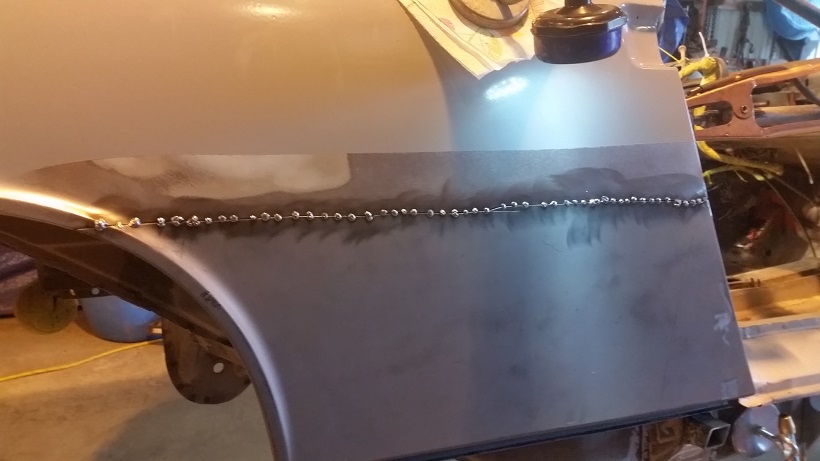 |
|
|
|
|
2 User(s) are reading this topic (2 Guests and 0 Anonymous Users)
0 Members:

|
Lo-Fi Version | Time is now: 24th June 2026 - 02:28 PM |
Invision Power Board
v9.1.4 © 2026 IPS, Inc.