|
|
|
Porsche, and the Porsche crest are registered trademarks of Dr. Ing. h.c. F. Porsche AG.
This site is not affiliated with Porsche in any way. Its only purpose is to provide an online forum for car enthusiasts. All other trademarks are property of their respective owners. |
|
|

  |

| cary |
 Jan 4 2016, 08:14 PM Jan 4 2016, 08:14 PM
Post
#621
|
|
Advanced Member  Group: Members Posts: 3,900 Joined: 26-January 04 From: Sherwood Oregon Member No.: 1,608 Region Association: Pacific Northwest |
Finished up the parts washer filter install. Solvent was coming out crystal clear
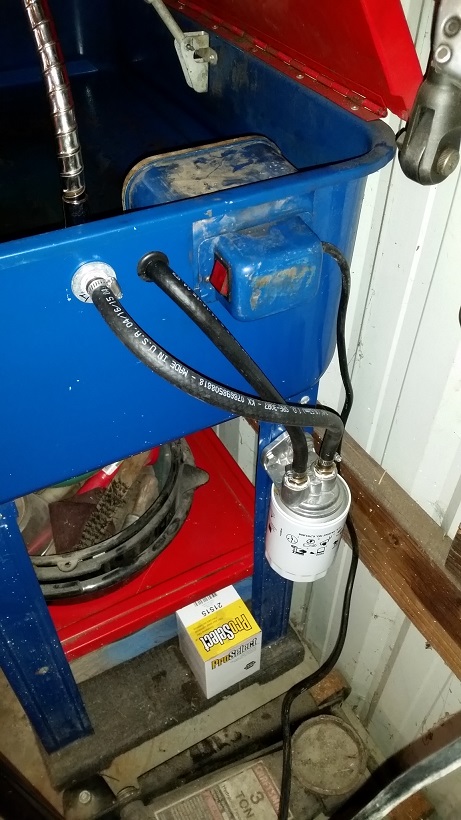 Hose is on a pivot so it can be folded down to be out of the way when the lid is closed. 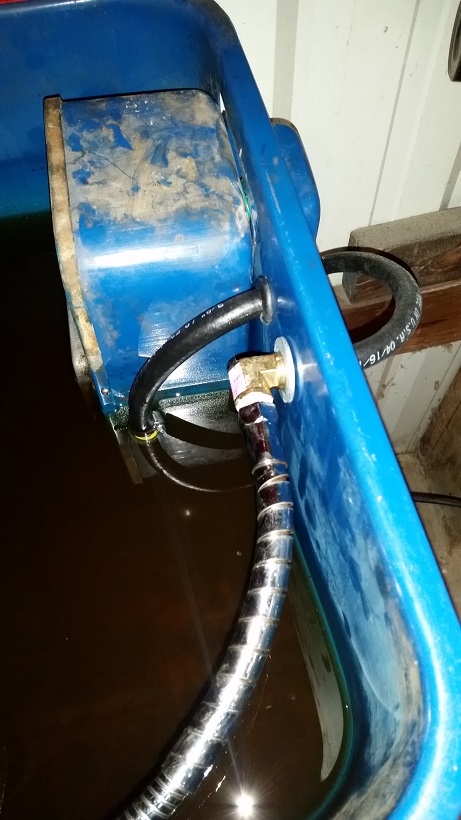 |
   |

 
|
| cary |
Jan 4 2016, 08:20 PM
Post
#622
|
|
Advanced Member Group: Members Posts: 3,900 Joined: 26-January 04 From: Sherwood Oregon Member No.: 1,608 Region Association: Pacific Northwest |
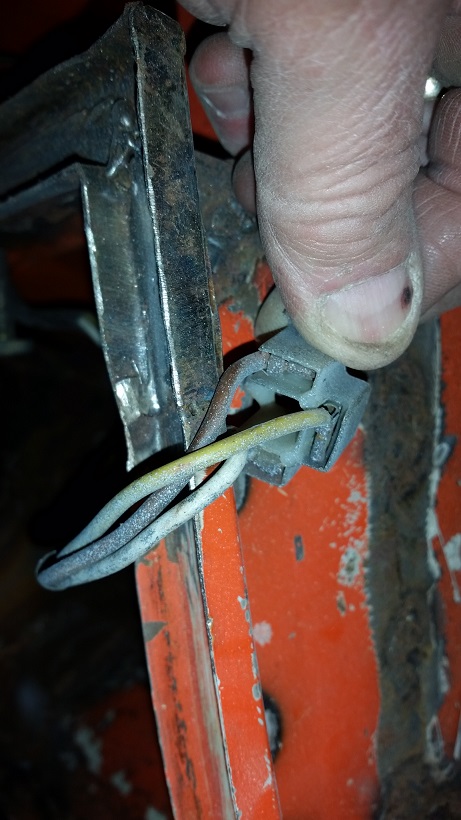
Then went on to extracting my first parts off the $75 parts car.
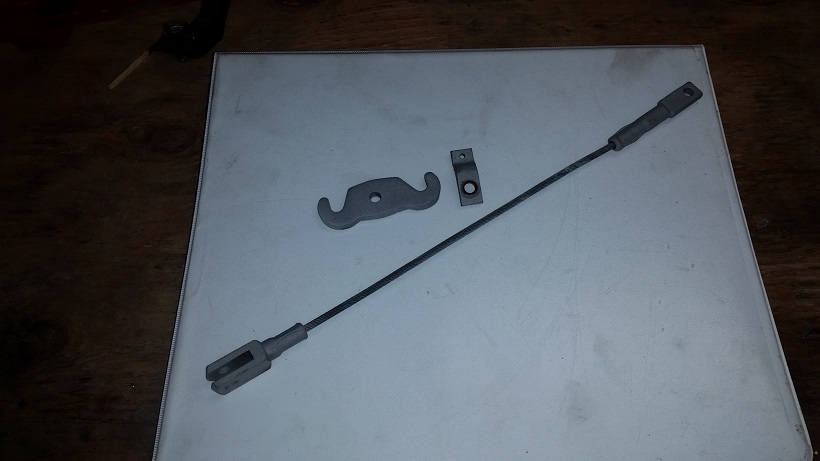 Not bad for a $75 inveestment. Parking brake short cable Part #: 914-424-256-01-OEM http://www.pelicanparts.com/catalog/SuperC...S_pg1.htm#item1 The one off the project had a couple loose wires. |
|
|
|
| cary |
Jan 4 2016, 08:23 PM
Post
#623
|
|
Advanced Member Group: Members Posts: 3,900 Joined: 26-January 04 From: Sherwood Oregon Member No.: 1,608 Region Association: Pacific Northwest |
Then on to pulling the harness from the front trunk. Photo documentation before pulling wires from headlight sockets.
 |
|
|
|
| cary |
Jan 4 2016, 10:16 PM
Post
#624
|
|
Advanced Member Group: Members Posts: 3,900 Joined: 26-January 04 From: Sherwood Oregon Member No.: 1,608 Region Association: Pacific Northwest |
Hand brake handle #2. Out of the parts car
I put a pot of water on to boil. Just as the small bubbles started to form I dipped it once for 10 seconds. No Go Waited about a minute, then gave it another 10 second dip. Water still not boiling Then gave it a twist with a towel. Came right off. 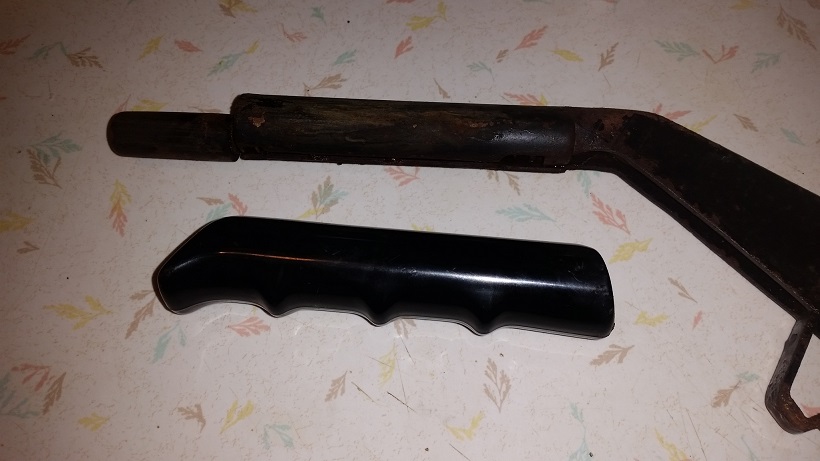 This time just a little discoloration. Could be reused. |
|
|
|
| cary |
Jan 5 2016, 08:49 PM
Post
#625
|
|
Advanced Member Group: Members Posts: 3,900 Joined: 26-January 04 From: Sherwood Oregon Member No.: 1,608 Region Association: Pacific Northwest |
Finally get back to working on the rustoration.
Started off a little chilly ............... 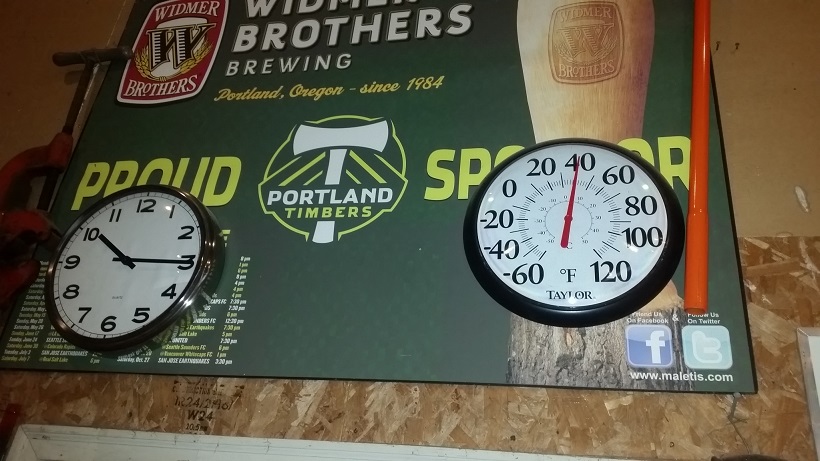 First item was filling the holes in the muffler shield supports. I plan to install blind nuts on the flange so I'll be able to R & R the shield. 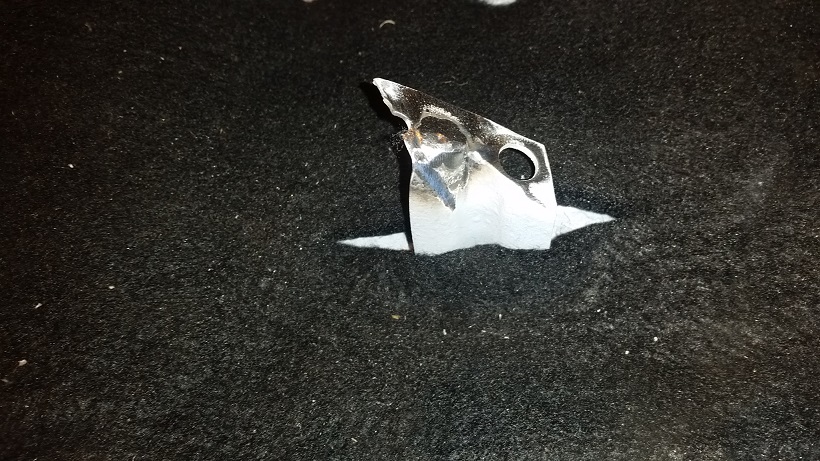 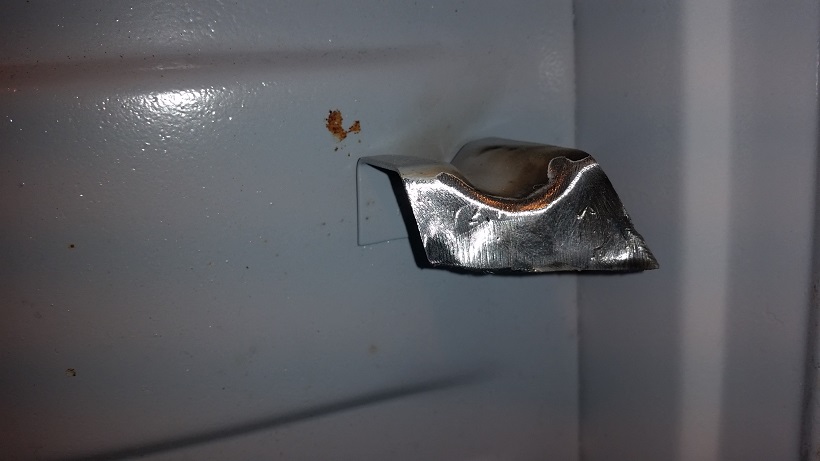 All fixed ................. (IMG:style_emoticons/default/biggrin.gif) 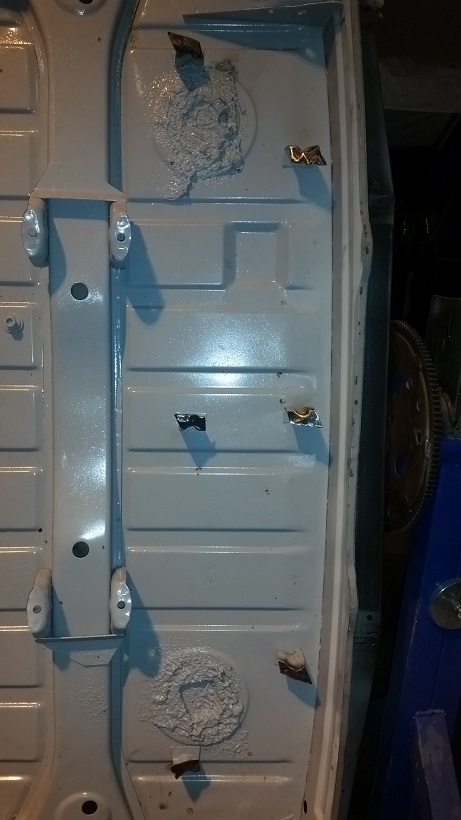 |
|
|
|
| cary |
Jan 5 2016, 09:02 PM
Post
#626
|
|
Advanced Member Group: Members Posts: 3,900 Joined: 26-January 04 From: Sherwood Oregon Member No.: 1,608 Region Association: Pacific Northwest |
Super In Law set about fitting the Tangerine Racing Rear Suspension Ear Reinforcements. Quite a bit of tinkering to get them to fit nice and tight. A couple different hammers and a big drift.
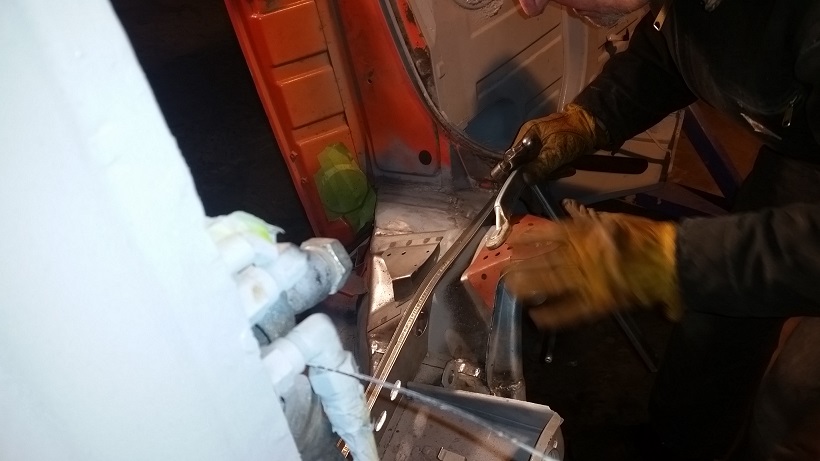 After it was fitted. I welded it in. This is the before grinding shot. 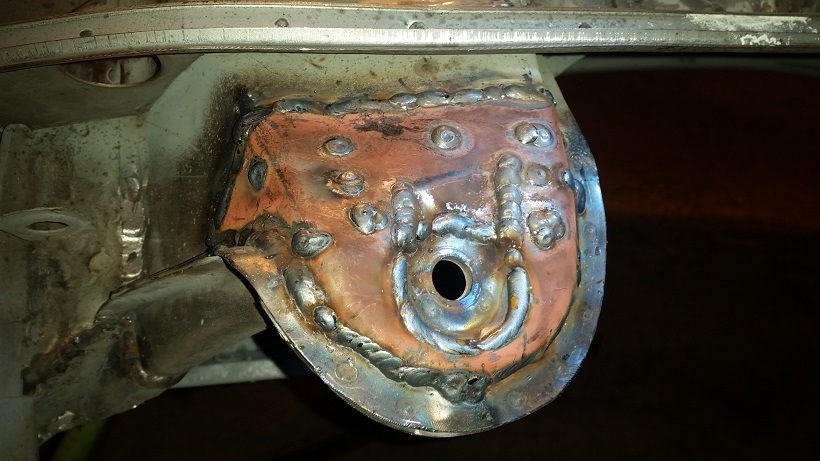 |
|
|
|
| cary |
Jan 5 2016, 09:06 PM
Post
#627
|
|
Advanced Member Group: Members Posts: 3,900 Joined: 26-January 04 From: Sherwood Oregon Member No.: 1,608 Region Association: Pacific Northwest |
I set about pulling the cables in the engine compartment and in the front trunk.
I'm prepping the car for the finishing up of the media blasting. It looks like we'll have 3-4 dry but cold days starting tomorrow. 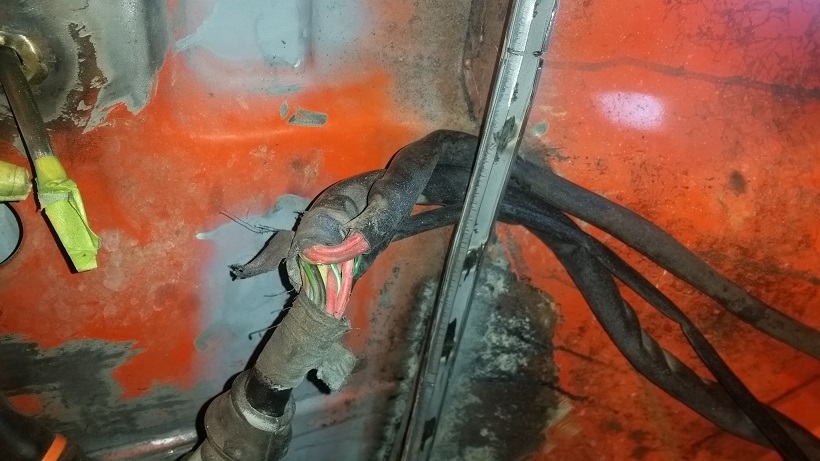 Because of the temp. Cable was pretty stiff. I pulled the entire cable back about 6 inches. Then started pulling the cables thru separately. 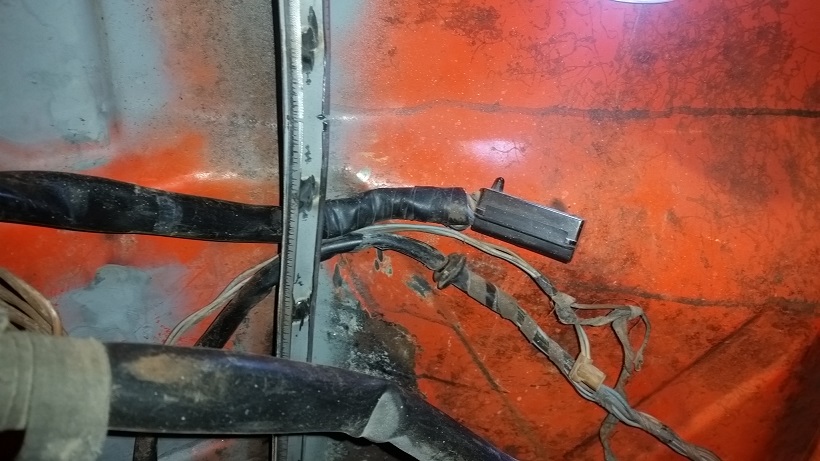 Big relay board connector is the last one to get pulled thru. 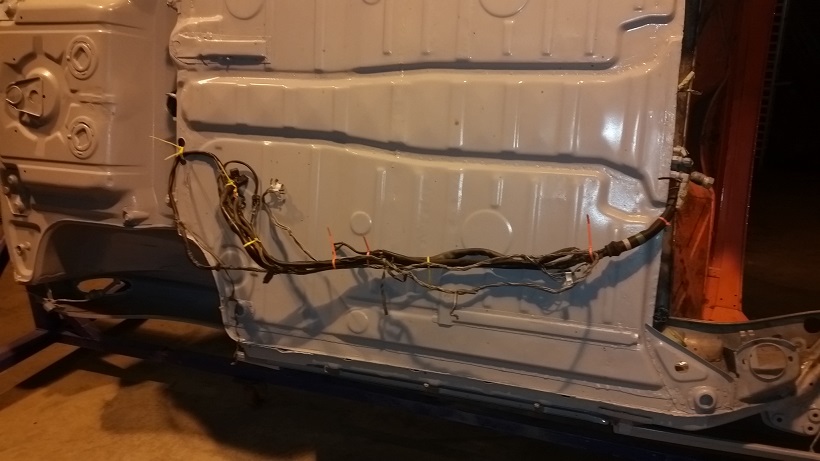 Zip tied out of the way. |
|
|
|
| cary |
Jan 5 2016, 09:16 PM
Post
#628
|
|
Advanced Member Group: Members Posts: 3,900 Joined: 26-January 04 From: Sherwood Oregon Member No.: 1,608 Region Association: Pacific Northwest |
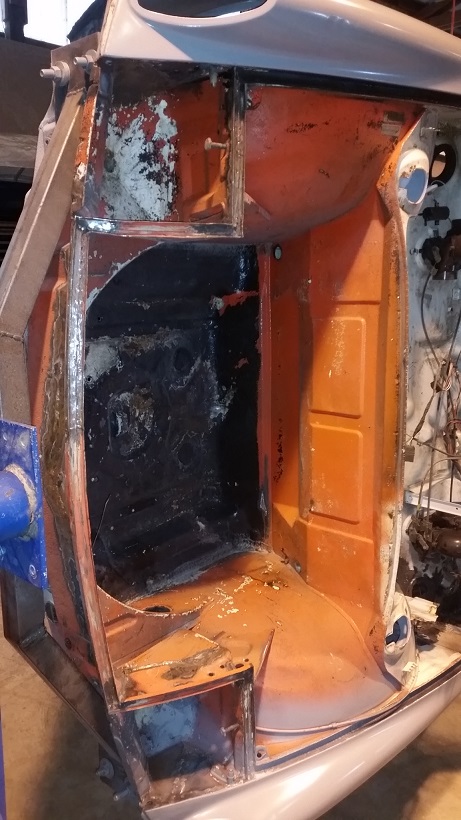
Front trunk ready to go.
 |
|
|
|
| cary |
Jan 5 2016, 09:22 PM
Post
#629
|
|
Advanced Member Group: Members Posts: 3,900 Joined: 26-January 04 From: Sherwood Oregon Member No.: 1,608 Region Association: Pacific Northwest |
Here a some reference shots of the fresh air vent cables.
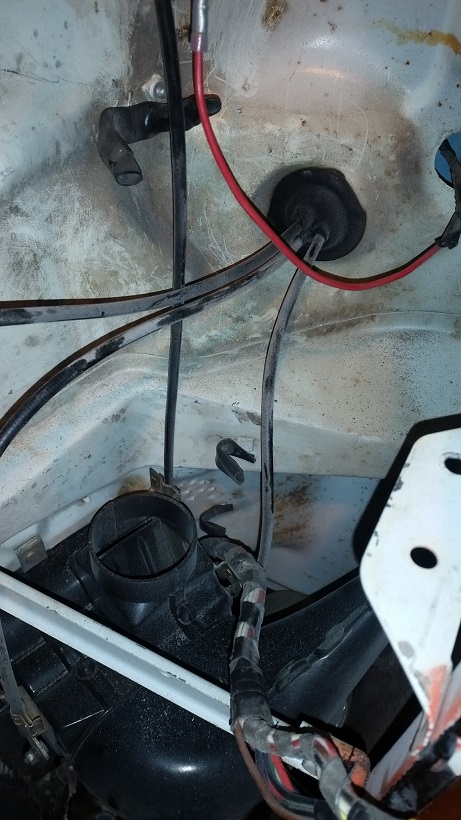 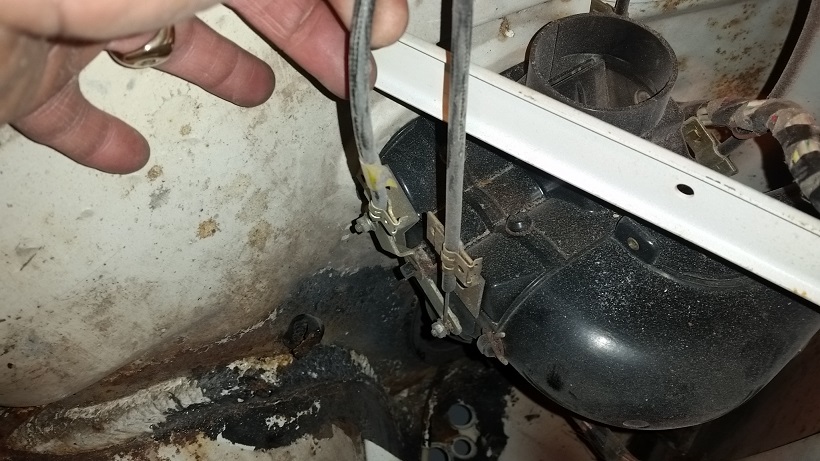 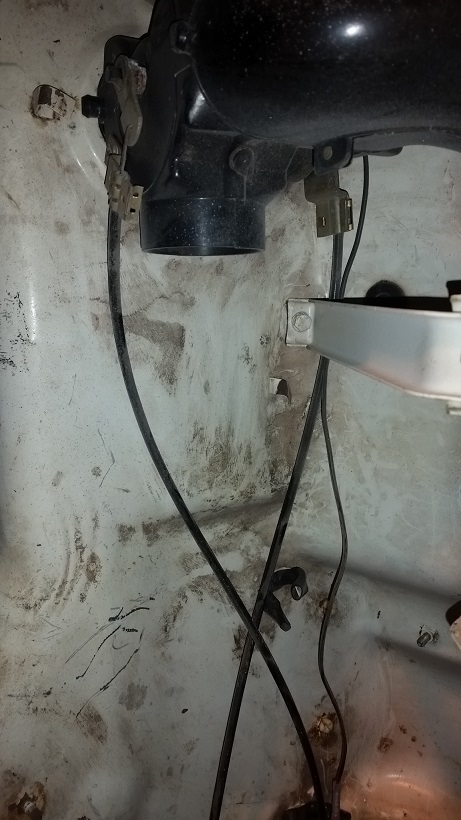 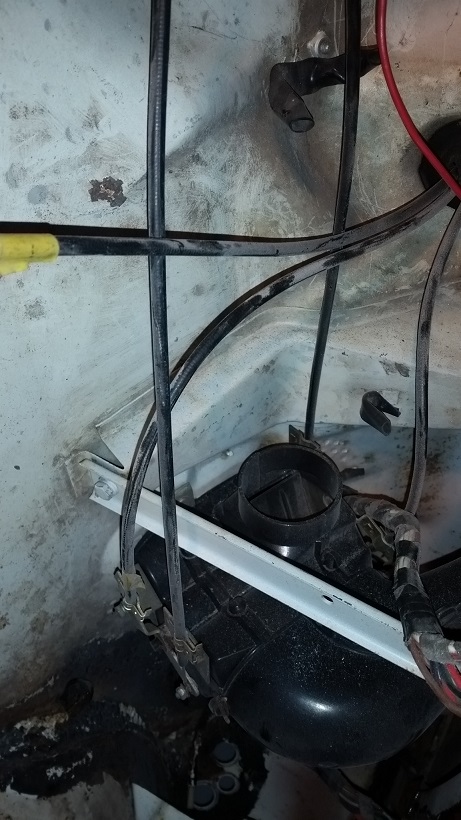 We'll finish up the left suspension ear reinforcement in the am. It's about 1/2 finished. |
|
|
|
| cary |
Jan 6 2016, 09:38 PM
Post
#630
|
|
Advanced Member Group: Members Posts: 3,900 Joined: 26-January 04 From: Sherwood Oregon Member No.: 1,608 Region Association: Pacific Northwest |
We finished up the right suspension ear reinforcement. No need for a picture
Then I get after removing the fresh air vents and cable controls. Control will need to be refurbished Start with drawing a map/diagram of the cables. 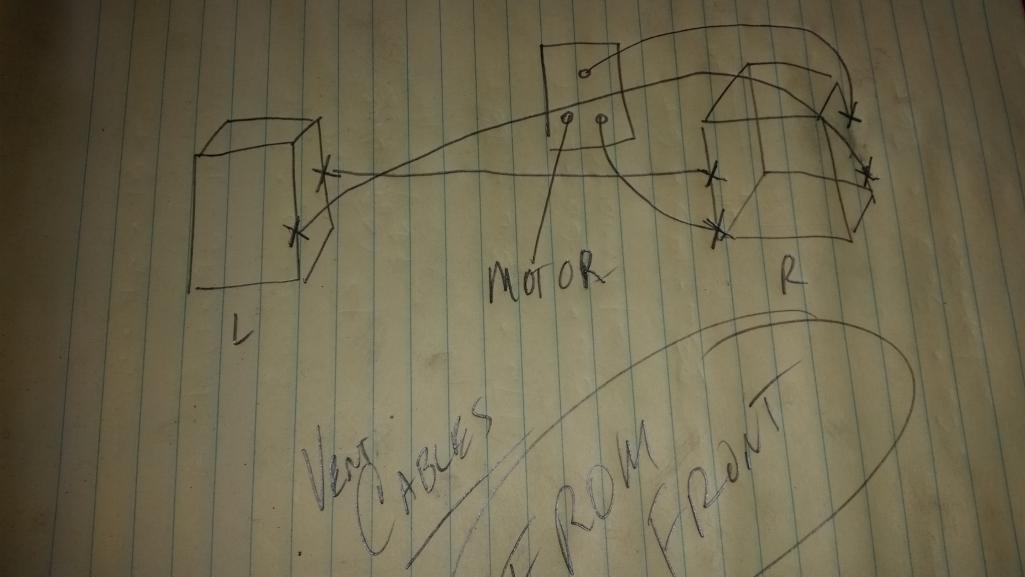 Left & Right are actual, viewed from the front Here's a shot of the bolt that secures the cable controls. 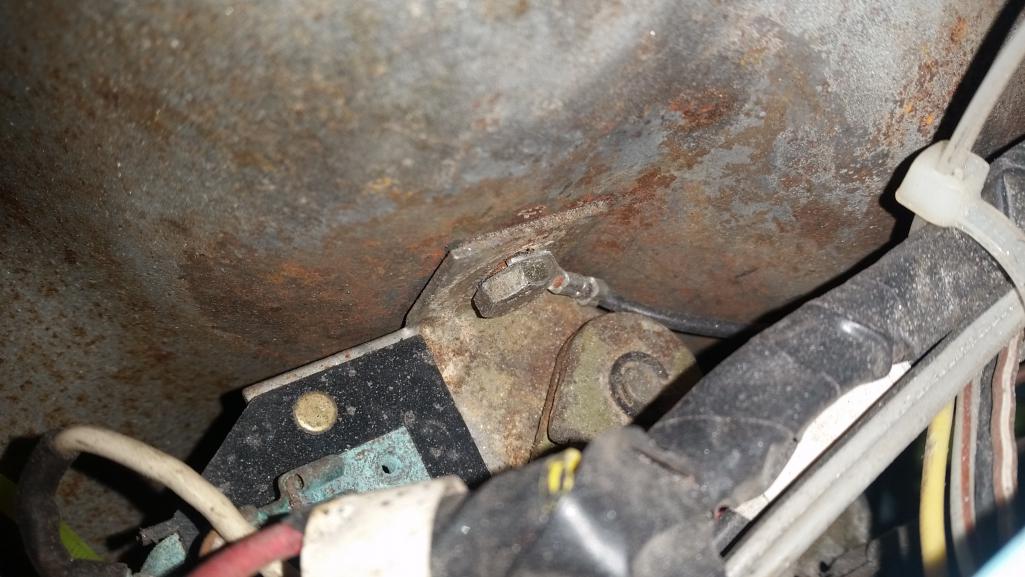 Realize the car is on a rotisserie, car is upside down. Fan control wires are labeled. 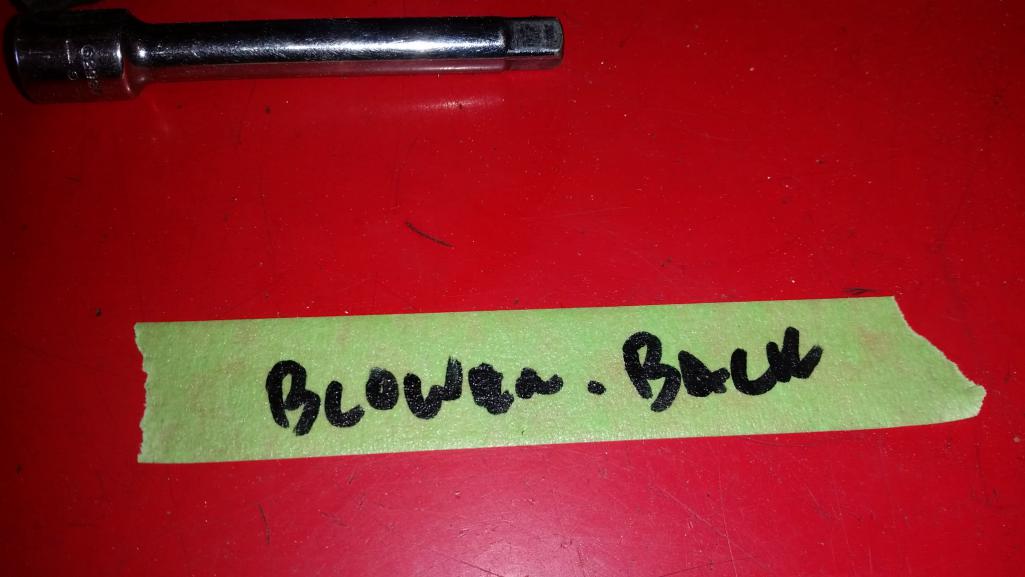 |
|
|
|
| cary |
Jan 6 2016, 10:04 PM
Post
#631
|
|
Advanced Member Group: Members Posts: 3,900 Joined: 26-January 04 From: Sherwood Oregon Member No.: 1,608 Region Association: Pacific Northwest |
So after lunch, even though its only 40 degrees we roll the rotisserie outside and get setup to blast some glass. I've been pondering upgrading the the 100# HF unit. But why bother, my compressor cant keep up any way. (IMG:style_emoticons/default/sad.gif)
Need to add monster compressor to my pre-retirement needs. Cockpit is finally completely stripped. 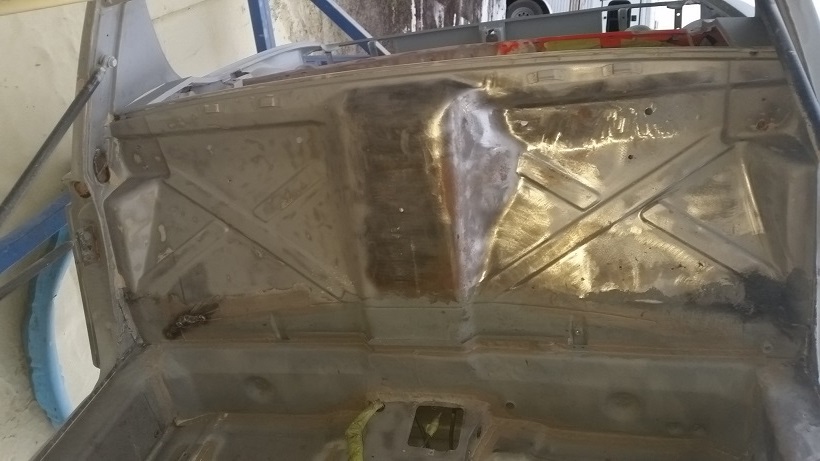 Targa bar stripped, both top and bottom.  Lower engine firewall tidied up. 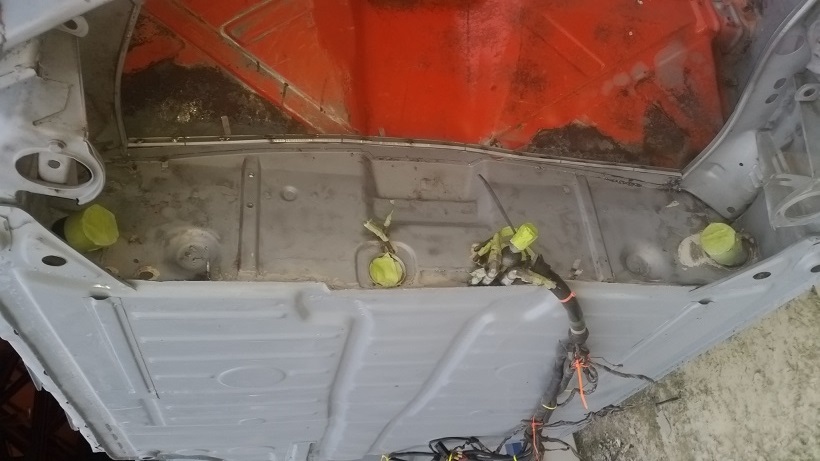 Got drivers side just about completed before we head home. 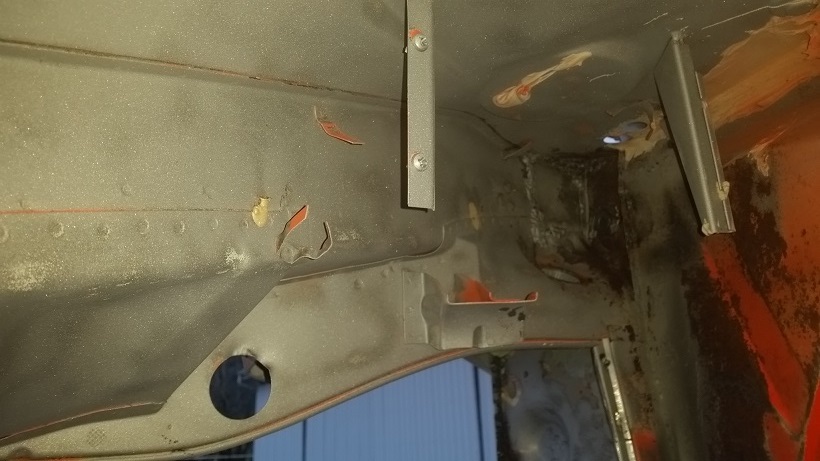 |
|
|
|
| cary |
Jan 6 2016, 10:19 PM
Post
#632
|
|
Advanced Member Group: Members Posts: 3,900 Joined: 26-January 04 From: Sherwood Oregon Member No.: 1,608 Region Association: Pacific Northwest |
If your going to try and blast with a HF blaster. Here's the weak link.
First you have to replace the nozzle with a HF deadman valve. The problem I'm finding is that the shut off plate is too soft. It pretty quickly gets a track cut thru it. 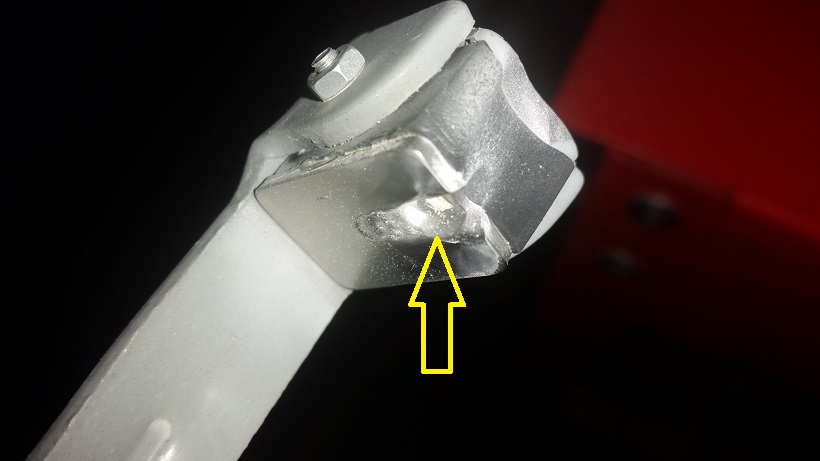 Primarily caused by me not watching the nozzle cone. It wears down and starts to leak media against the plate. (IMG:style_emoticons/default/mad.gif) Tomorrow I plan to check the nozzle on every media refill. 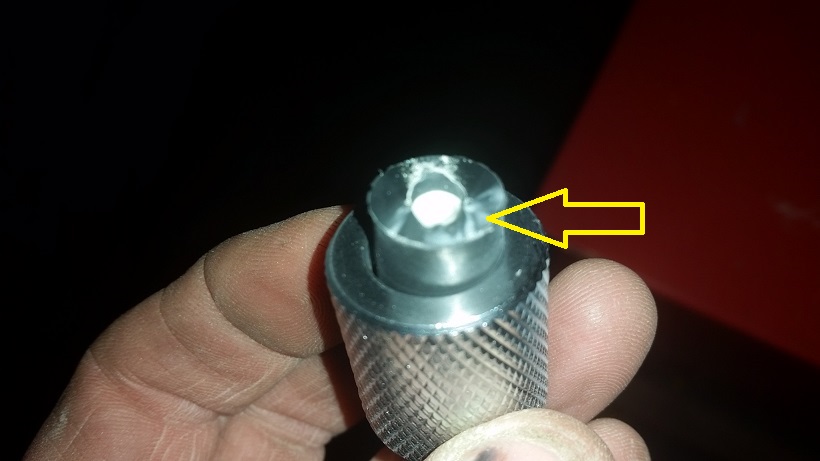 Edited 2/4/16 When you take it out of the package make sure that the nozzle is screwed down enough that it lines up about in the middle of the plate. This will prolong its life immensely. |
|
|
|
| Andyrew |
Jan 6 2016, 11:34 PM
Post
#633
|
|
Spooling.... Please wait Group: Members Posts: 13,380 Joined: 20-January 03 From: Riverbank, Ca Member No.: 172 Region Association: Northern California |
Some great looking progress!
|
|
|
|
| cary |
Jan 7 2016, 08:57 PM
Post
#634
|
|
Advanced Member Group: Members Posts: 3,900 Joined: 26-January 04 From: Sherwood Oregon Member No.: 1,608 Region Association: Pacific Northwest |
First order of the day.
Appointment for Dad's Garage. Princesses Kia needed an oil change. She's really good about it . At 24 this is the second car has she bought all by herself. This car has never gone over 4k between oil changes. 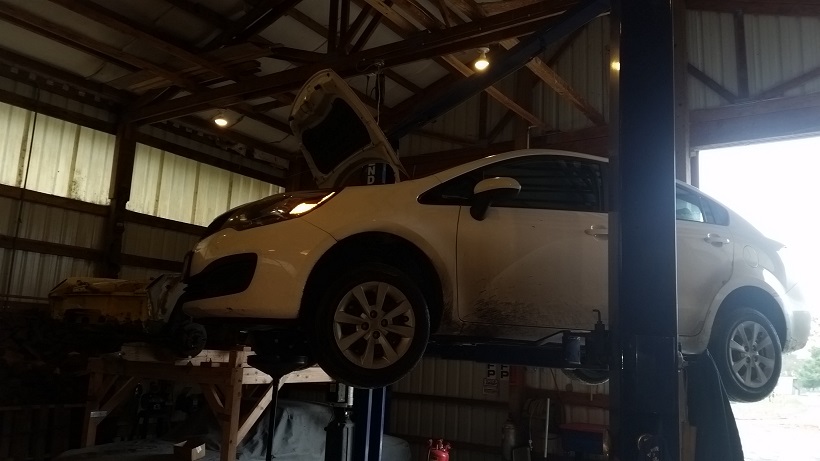 |
|
|
|
| cary |
Jan 7 2016, 10:20 PM
Post
#635
|
|
Advanced Member Group: Members Posts: 3,900 Joined: 26-January 04 From: Sherwood Oregon Member No.: 1,608 Region Association: Pacific Northwest |
After the oil change. I added a +1.50 cheater lens to my welded helmet. Much Better.
After lunch we rolled out the car and started blasting again. 1. Finished up the engine side of the fire wall. 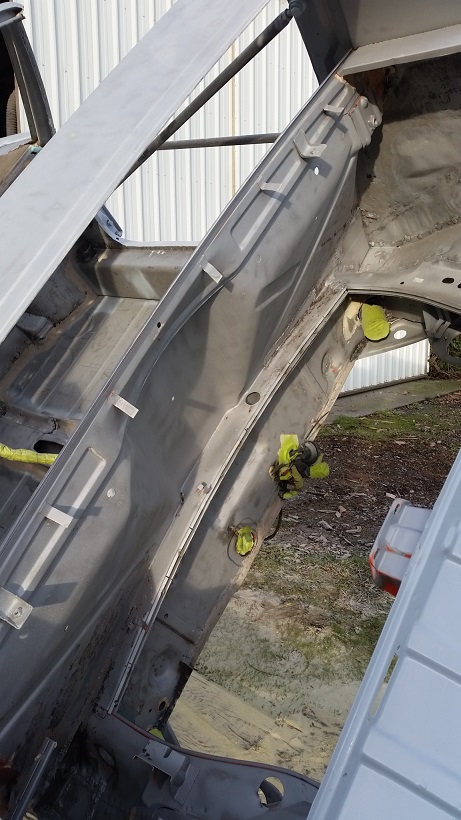 2. Finishing up the firewall did open up one weak spot. (IMG:style_emoticons/default/mad.gif) 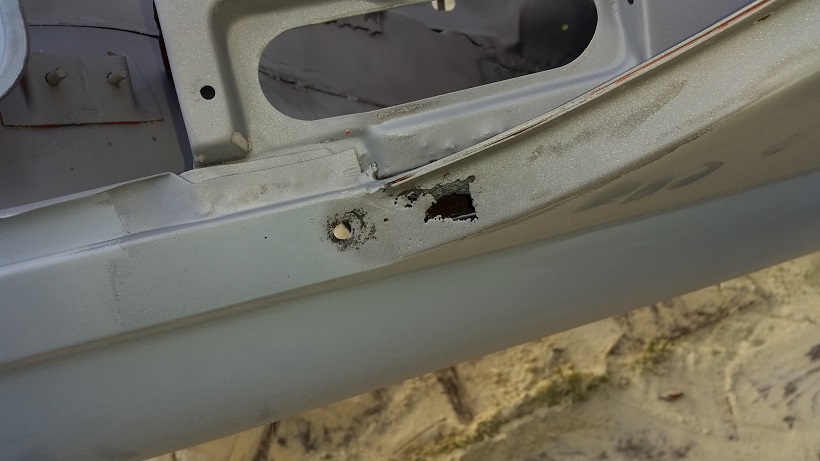 3. Then I went after the windshield frame and the cowl. No real issues, other than narrow. 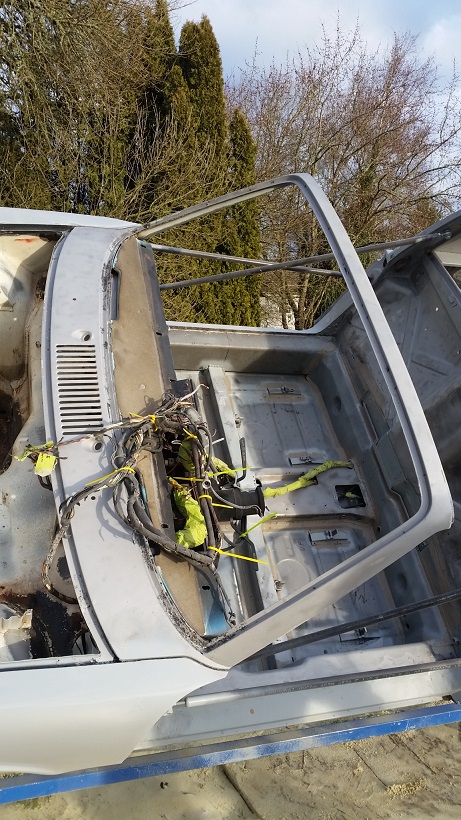 4. Bottom of the windshield frame has a bit of rust issues. I'll probably do some more grinding and wire wheel work. Then smooth it out with JB weld. I'll let that cure for a couple weeks than reshape to the grinder. 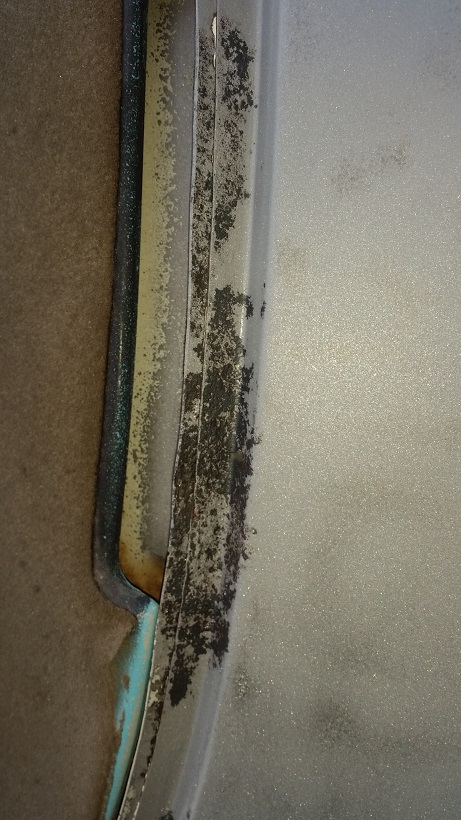 5. I will add a couple Kudo's for POR15. When we put it on the road 15 years ago we added quite a bit of POR15 to the front trunk seal channel. Looks brand new. This channel was completely coated with POR15. I'll finish cleaning it up with a wire wheel. 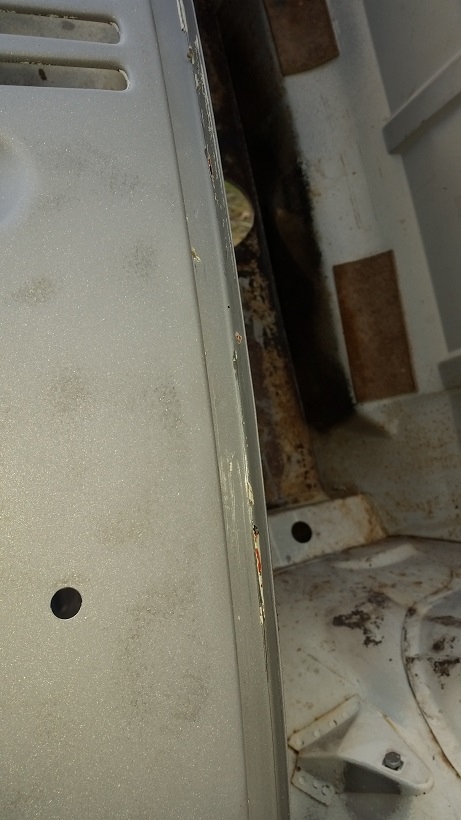 Tomorrow I'll get after the front trunk and gas tank cavity. I did set up the car in the tent again to do another temp test over night. I didn't have any luck finding a heated paint booth to rent. (IMG:style_emoticons/default/sad.gif) I hope things don't come to a stands still because of the outside temperature. |
|
|
|
| cary |
Jan 9 2016, 09:25 AM
Post
#636
|
|
Advanced Member Group: Members Posts: 3,900 Joined: 26-January 04 From: Sherwood Oregon Member No.: 1,608 Region Association: Pacific Northwest |
Friday 01/08
Day started foggy and cold. Once again 40 degrees. Temp test was a bust. Body was only 50 degrees. (IMG:style_emoticons/default/sad.gif) So no primer in the near future So I decided to get after the rust hole in the targa bar. Larger horizontal cuts were made with the 3" die grinder on the mandrel. I think its going to be one of my favorite new tools. 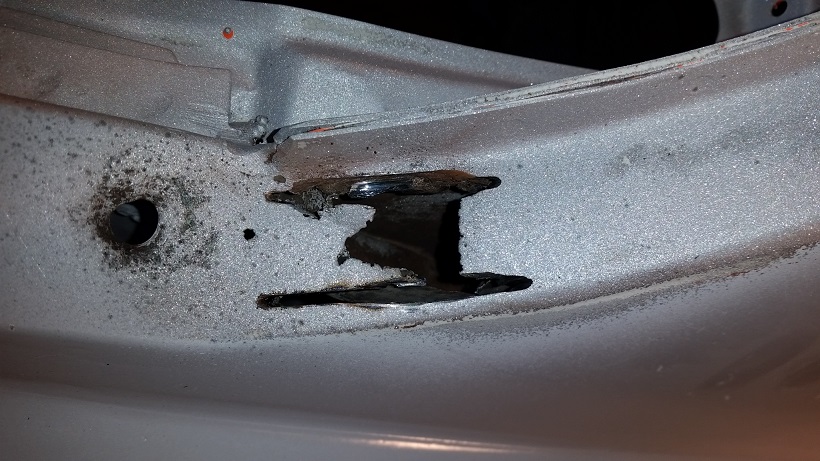 Shorter, vertical cuts from the pictures perspective were made with the Dremel. Only buy the reinforced discs. The thin ones crack like a potato chip. 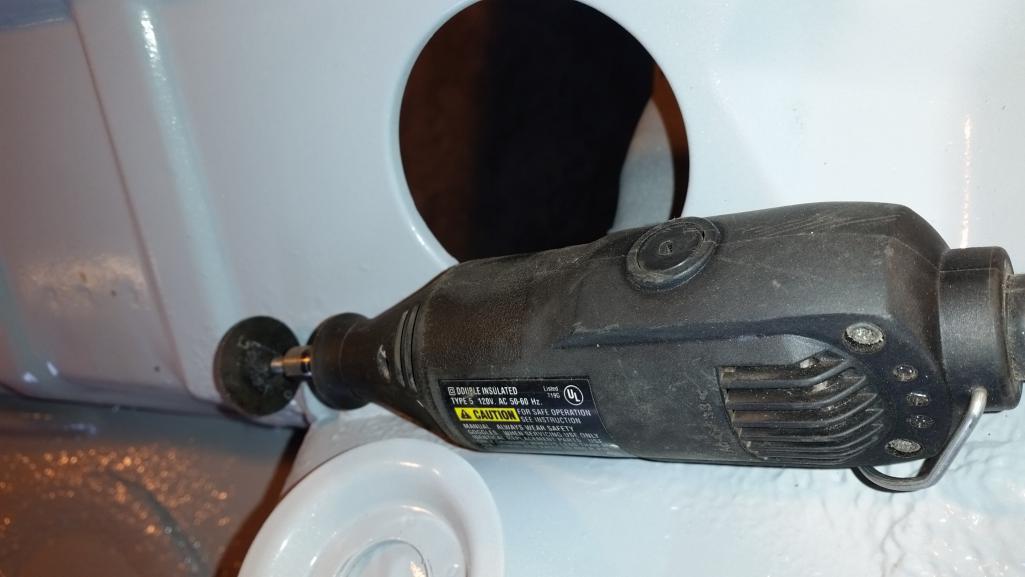 Bad news. Found a rust hole on everyone's favorite targa bar support. I was thinking we need to remove a fairly good one of these and get it to RD. On a CW restoration it would probably need replacing on most cars. It's just spot welded onto the inner fender. Maybe after I fire up the plasma cutter to cut the upper seat belt mounts out of the parts car. For Doug (raynecat). I'll open up the targa and see if I can get a good ones off that car. More value for my $75. LOL. 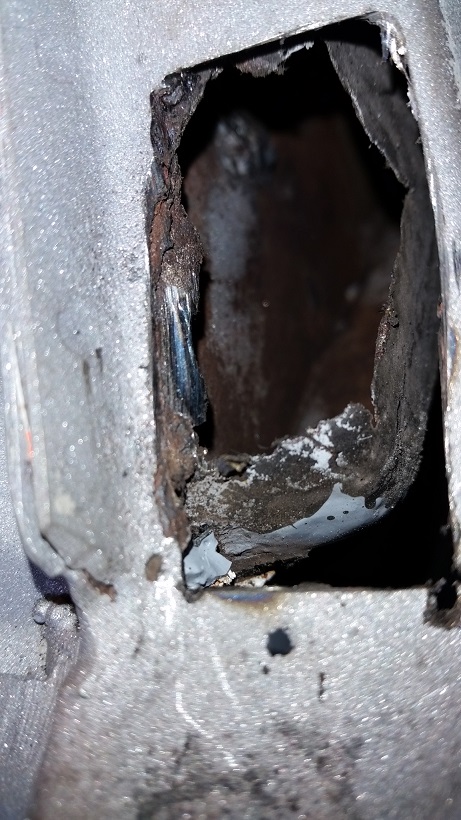 I'm not going to attempt to patch that. 50 years jammed in foam. I'll give it a shot of OSPHO before we cover it up. Post #529, page 14. Here's shot from underneath. 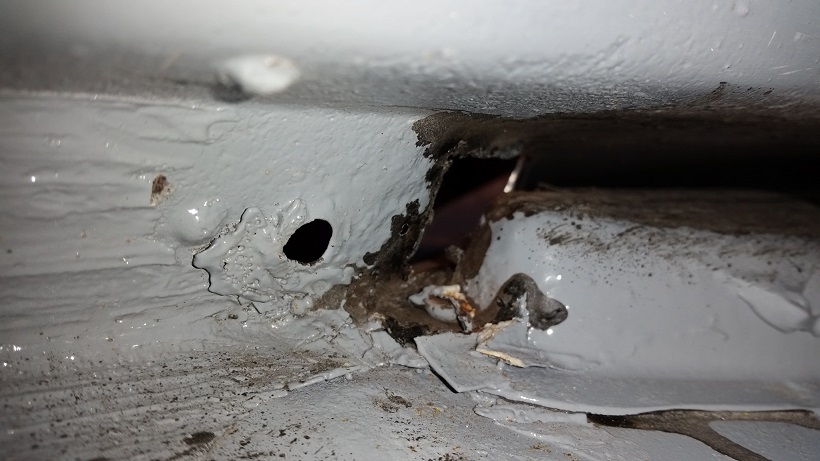 Found just the right magnet to hold the top flush and gave it a couple tacks, Millermatic set at 21 gauge. Then walked around the entire piece taking my time tacking it in, probably took a half hour. Using cooling air here and there. A couple pointers I thought I'd toss out there. When tacking in the patch panel. Start the weld on the new known thickness material. Pull the puddle onto the old. Do it quickly the first tack to test the old metal. That is the left arrow. #2, the right arrow. Super In Law cut the patch just a smidgen too small. I think a metal band saw will be on the tool list after I return to work. This is a little tricky with old metal. You can see that my first attempt blew out the old. With the wide gap it got too hot. I'm melting Wizard of Oz, for us Old Guys. So what I do. 1st, be patient. Heat is the enemy. Go get a refill on the coffee. I blip tack the old edge. You can see the first one on the bottom right. Get those done. Go slow.Go Slow. Go Slow. Once again, heat is the enemy. Cool it completely with the air hose. Now start the weld on the new weld attached to the new metal. Pull the puddle to the old edge. Easy Deal, only took me about 3 years to figure it out. 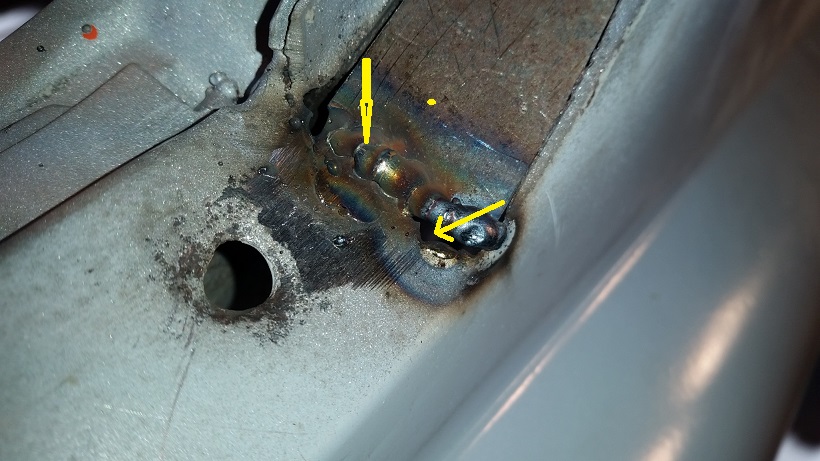 |
|
|
|
| cary |
Jan 9 2016, 09:35 AM
Post
#637
|
|
Advanced Member Group: Members Posts: 3,900 Joined: 26-January 04 From: Sherwood Oregon Member No.: 1,608 Region Association: Pacific Northwest |
Here's what she looked like after it was all tacked in. I'd already started cutting down the bottom edge before I decided to take a picture
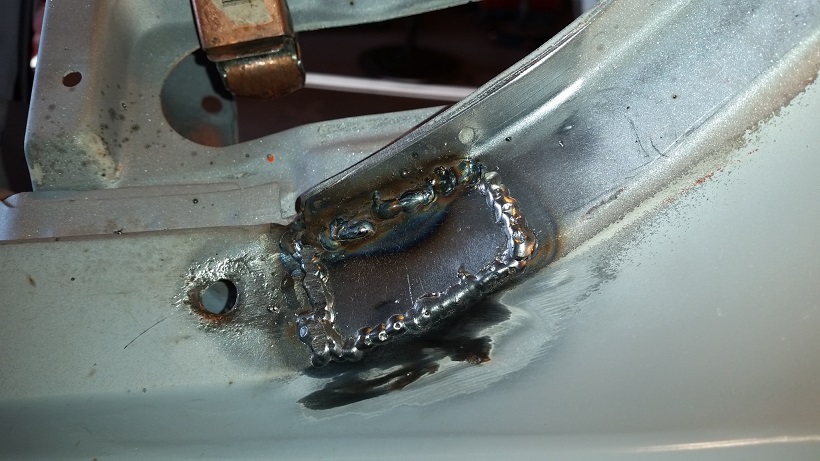 This gives you a good idea how far I take it down before I use a Roloc disc. I wish I'd learned this a long time ago. It would have saved endless hours of reworking. I did fill in a few spots on the upper edge before I finished grinding. 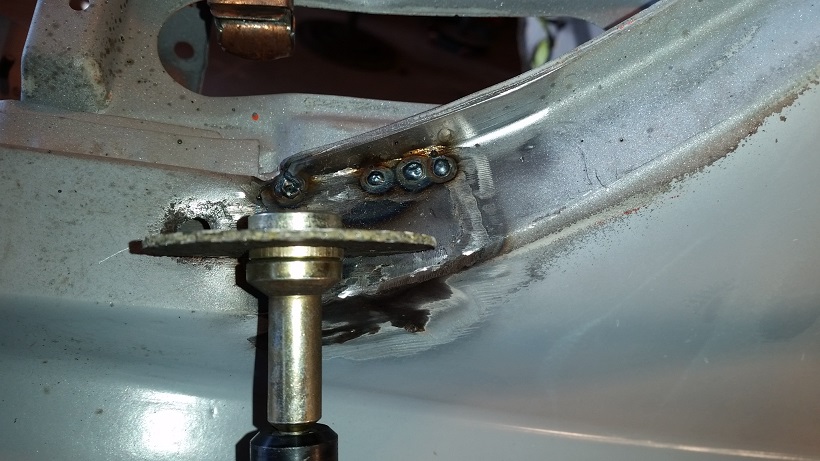 Gooder as new .................... 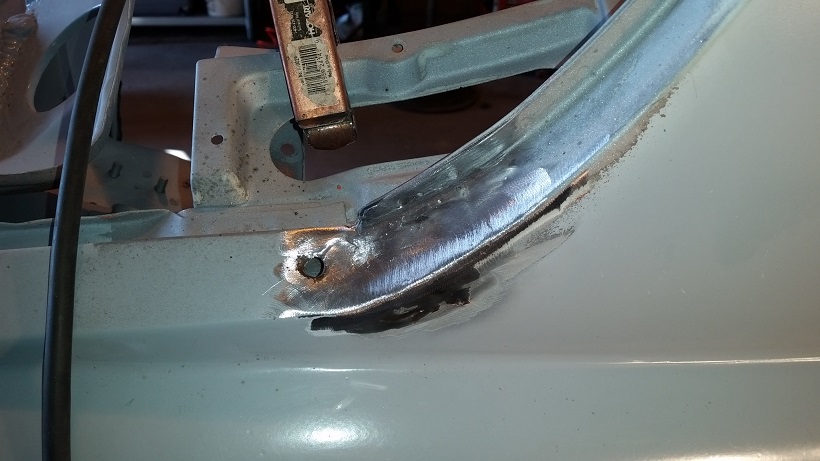 |
|
|
|
| cary |
Jan 9 2016, 10:10 AM
Post
#638
|
|
Advanced Member Group: Members Posts: 3,900 Joined: 26-January 04 From: Sherwood Oregon Member No.: 1,608 Region Association: Pacific Northwest |
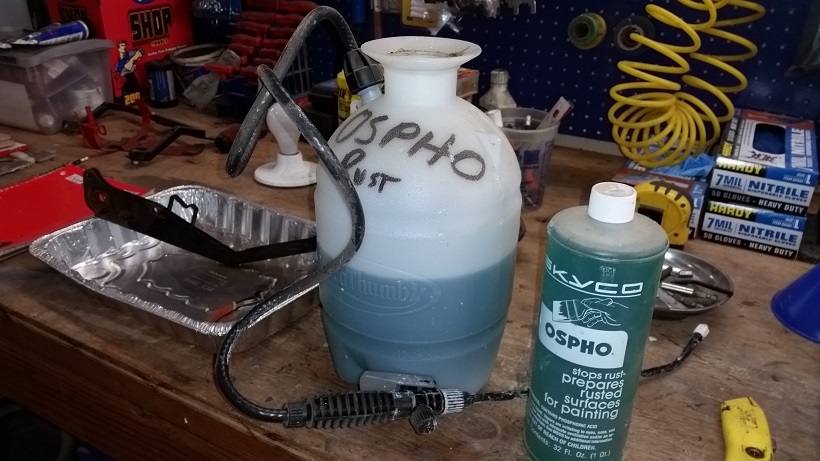
Sun came out around 11am. So I decided with the inability to spray Epoxy we'd spray down the exposed/raw metal with OSPHO. This will keep it from flash rusting. Haven't had a lot of issues. But want NONE. The OSPHO is compatible with the SPI primer.
 After lunch it was time to do some more blasting. Onto the POR15 impregnated trunk. It was slow going. The POR15 sprayed on the seam sealer doesn't budge. Nice thing about the trunk is we can reclaim more that 1/2 of the glass an reuse it. We use a kiddy pool as a collector. Then screen the glass. 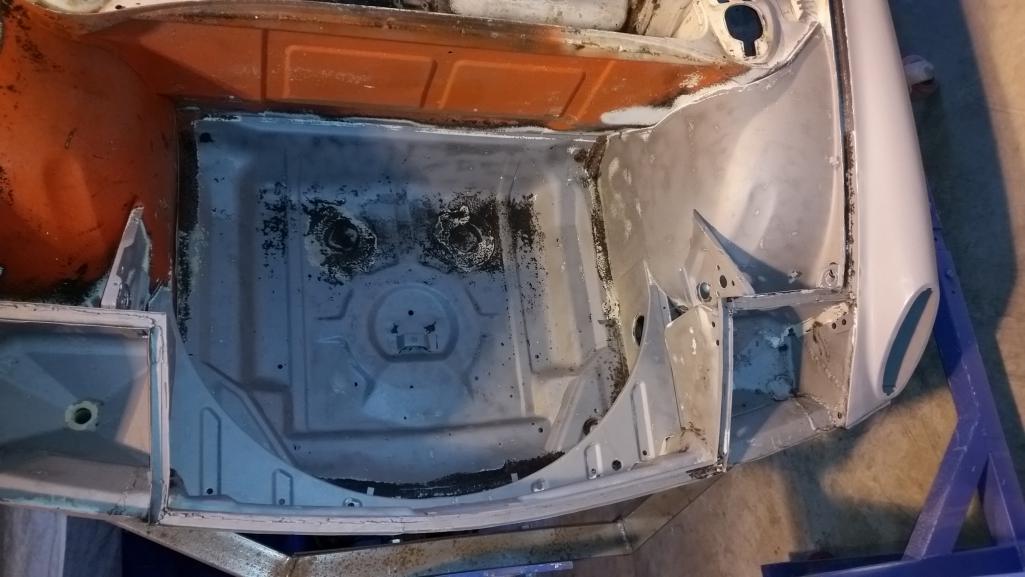 Close up of headlight bucket. 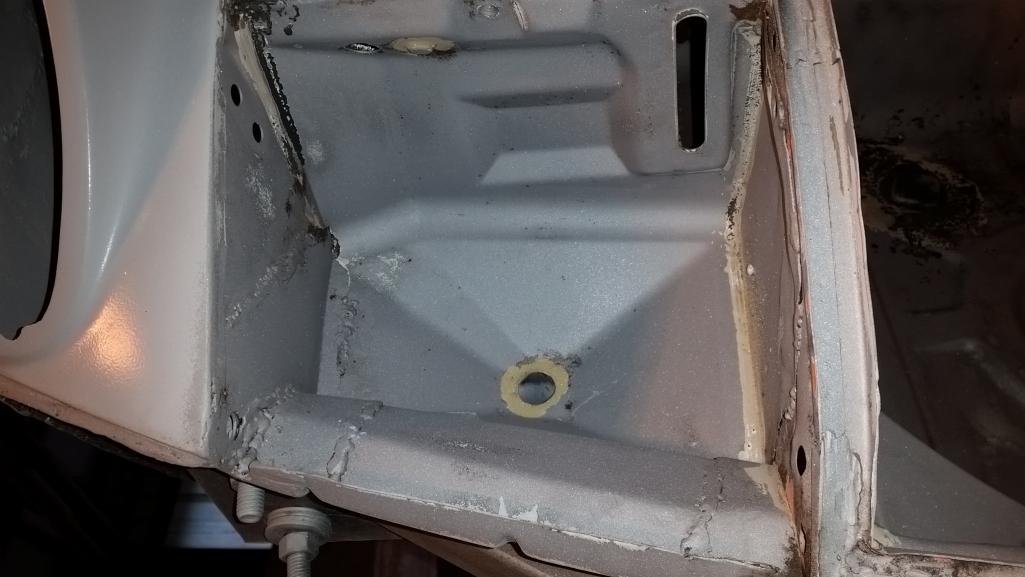 Super In Law is beginning work on our body dolly. We're going to reuse the jig we built for the double long install. Hopefully I'll never have to do that again. 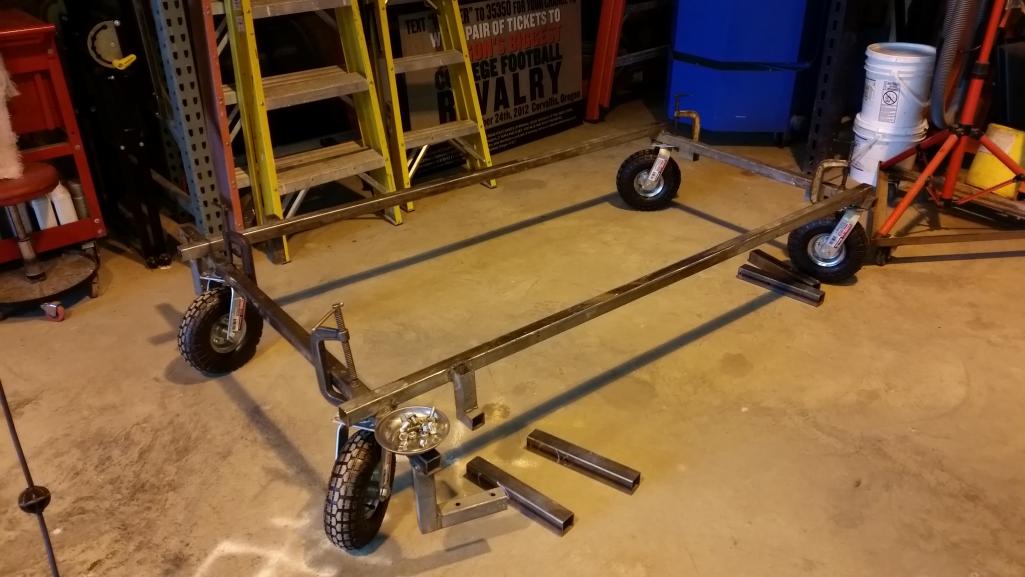 Might take the weekend off. I want to let the OSPHO completely dry out before I do the blasting in the gas tank area. Or maybe I'll go out and start on the doors. Both will need some welding on the notorious inside bottom rolled skin edge. With my improved welding skills and the die grinder on the mandrel it should be much easier. |
|
|
|
| cary |
Jan 11 2016, 11:39 PM
Post
#639
|
|
Advanced Member Group: Members Posts: 3,900 Joined: 26-January 04 From: Sherwood Oregon Member No.: 1,608 Region Association: Pacific Northwest |
Started the day stopping off at the auto paint store, Quality Paint.
He gave me the name of two shops that rent out their paint both. Right here in Hillsboro. (IMG:style_emoticons/default/smile.gif) I'll check in with them in a couple weeks when I'm almost ready. |
|
|
|
| cary |
Jan 11 2016, 11:47 PM
Post
#640
|
|
Advanced Member Group: Members Posts: 3,900 Joined: 26-January 04 From: Sherwood Oregon Member No.: 1,608 Region Association: Pacific Northwest |
Rainy day, so no bead blasting ......... (IMG:style_emoticons/default/mad.gif) (IMG:style_emoticons/default/mad.gif)
So starting digging into the headlight buckets. Back 15 years ago we did some hillbilly repairs. I finished up some welds that were left unfinished. 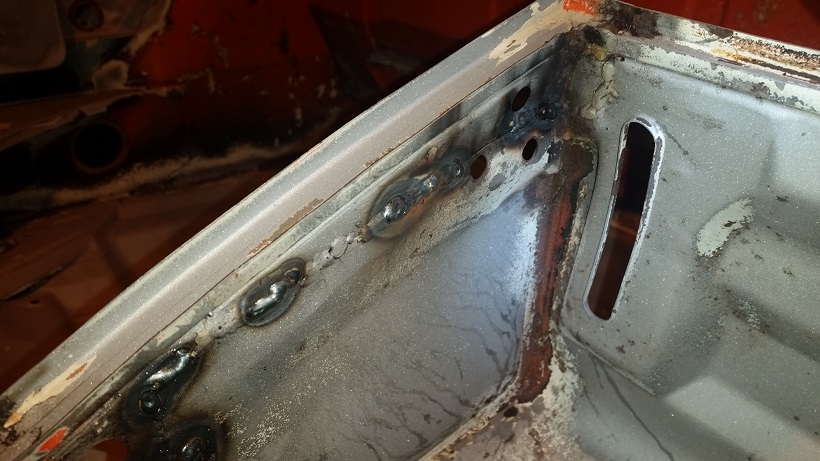  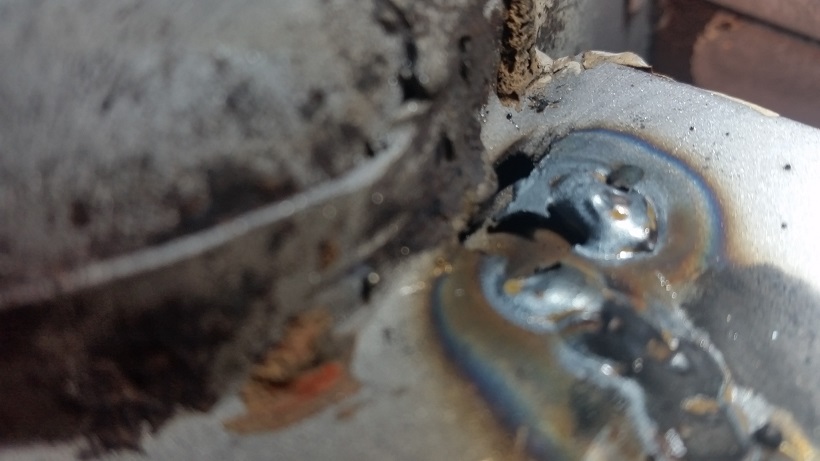 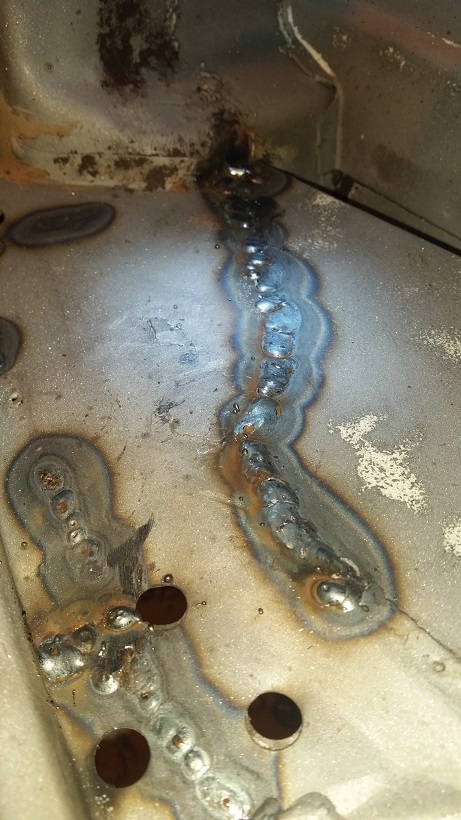 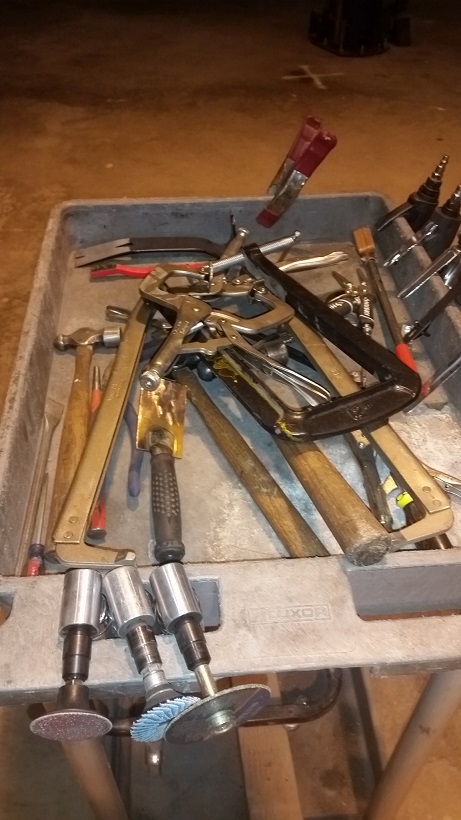 |
|
|
|
|
2 User(s) are reading this topic (2 Guests and 0 Anonymous Users)
0 Members:

|
Lo-Fi Version | Time is now: 24th June 2026 - 11:24 AM |
Invision Power Board
v9.1.4 © 2026 IPS, Inc.