|
|
|
Porsche, and the Porsche crest are registered trademarks of Dr. Ing. h.c. F. Porsche AG.
This site is not affiliated with Porsche in any way. Its only purpose is to provide an online forum for car enthusiasts. All other trademarks are property of their respective owners. |
|
|

  |

| cary |
 Jan 12 2016, 12:19 AM Jan 12 2016, 12:19 AM
Post
#641
|
|
Advanced Member  Group: Members Posts: 3,900 Joined: 26-January 04 From: Sherwood Oregon Member No.: 1,608 Region Association: Pacific Northwest |
While I was working out in the cold. Super In Law was working in the other room. The lap of luxury, wood heat. LOL.
We're looking at a couple weeks of rain in the forecast. (IMG:style_emoticons/default/barf.gif) So we get after the doors. He finishes dismantling the left door. Then he gets after the right door, it's in pretty good shape. Left door has issues in the lower channel. 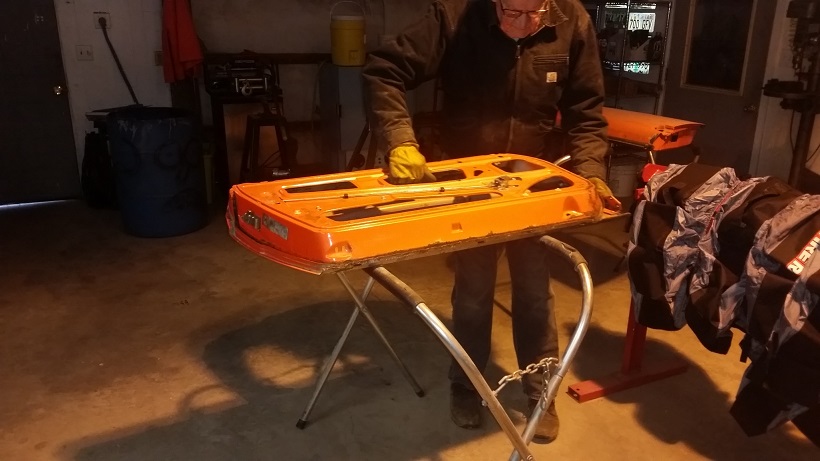 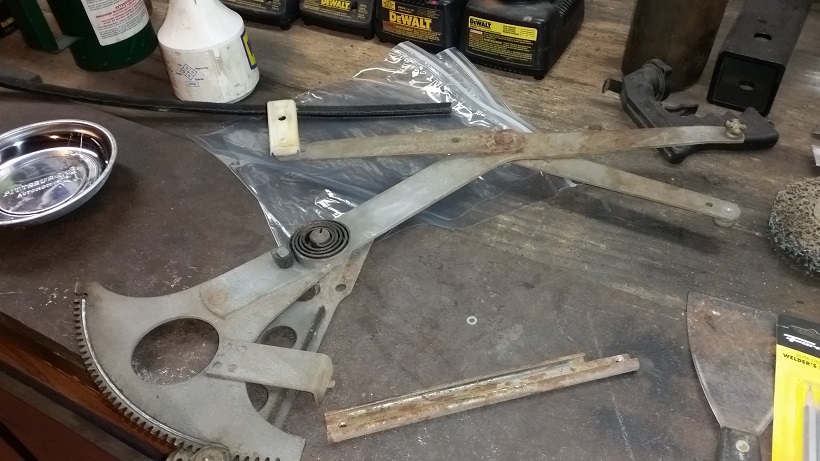 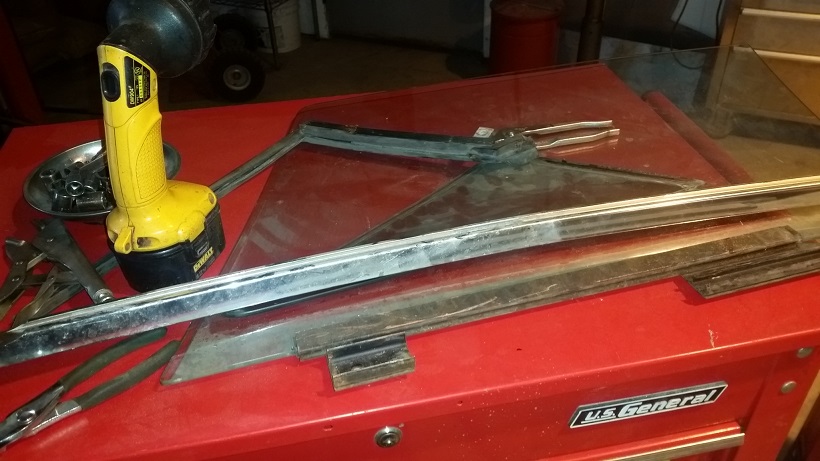 Here's the right channel. It's not too bad. Might need a couple cut and patches. 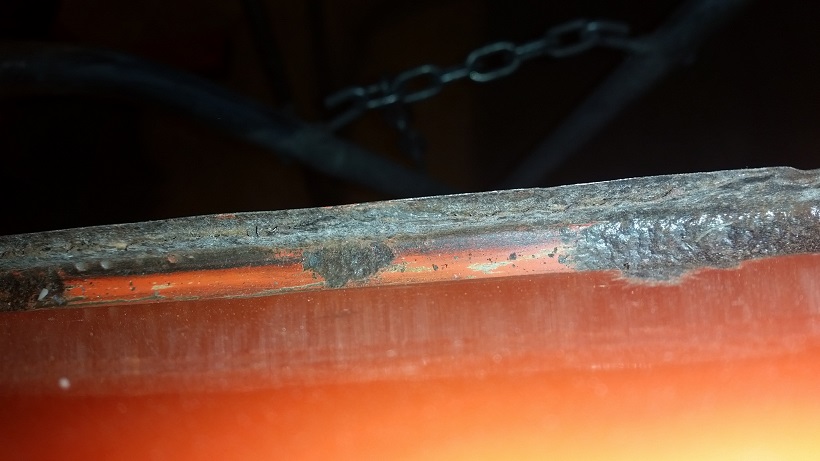 Here's the left channel. Enough said 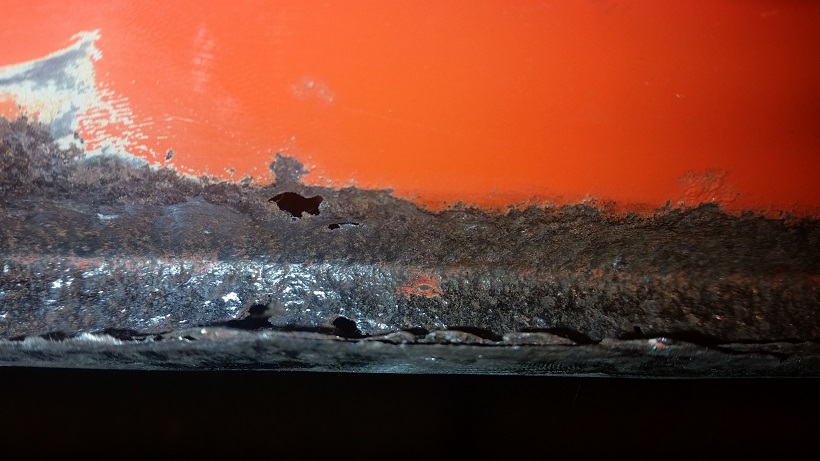 I'm going to go thru my stash and see If I have one that's a little better. If not I'll need to build a U channel. The outer skin is fine. |
   |

 
|
| cary |
Jan 12 2016, 11:20 PM
Post
#642
|
|
Advanced Member Group: Members Posts: 3,900 Joined: 26-January 04 From: Sherwood Oregon Member No.: 1,608 Region Association: Pacific Northwest |
Back out in the cold I go .....................
Finished up the right headlight bucket. Nothing new to show Then I decided to get after the seam sealer in the tire well. Pretty simple. Working in about 6" lengths I heated up the seam sealer with the heat gun. Then chiseled off the seam sealer with the Astro Air Chisel (thank you, Jeff Hail). I think I'll need to order a couple replacement straight chisels in the near future. Then hit it the wire cup brush (Lie Detector, Scotty). Mold plug before 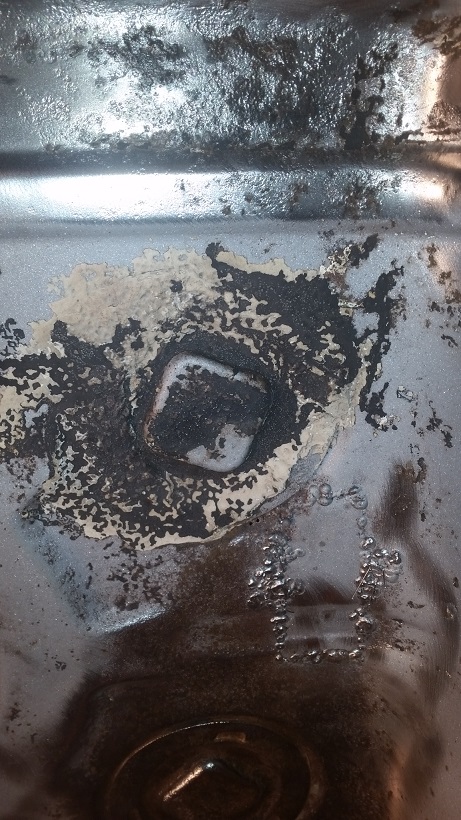 Bottom plug after 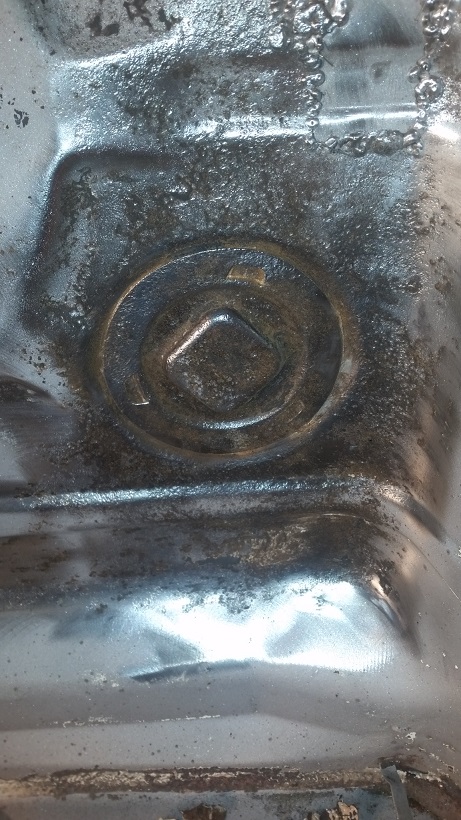 Got it about 2/3rds finished before I moved into the other room to perform surgery 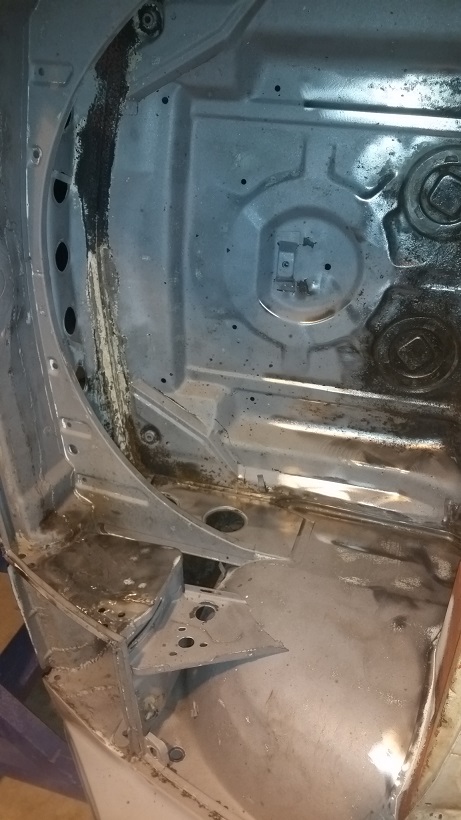 |
|
|
|
| cary |
Jan 12 2016, 11:37 PM
Post
#643
|
|
Advanced Member Group: Members Posts: 3,900 Joined: 26-January 04 From: Sherwood Oregon Member No.: 1,608 Region Association: Pacific Northwest |
We dug thru all the left doors. They all have some degree of rust in the inner door seal track. So we decided we'll fix the one we're working on.
We start tinkering with the brake to see what we could create. 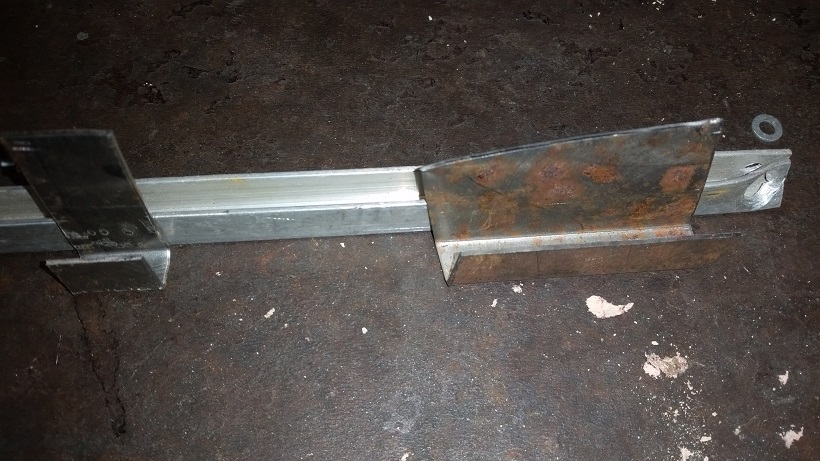 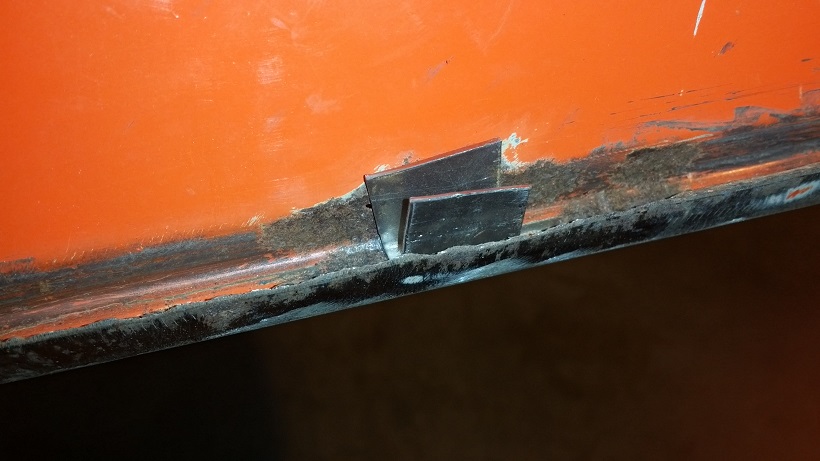 We end up using a piece of 3/8" bar stock as the form. We plan on doing it in two pieces. But we struggled with a piece that was 15"s long. So we finished in the vice. With the replacement piece created it was time for Tool Whore to do some surgery. 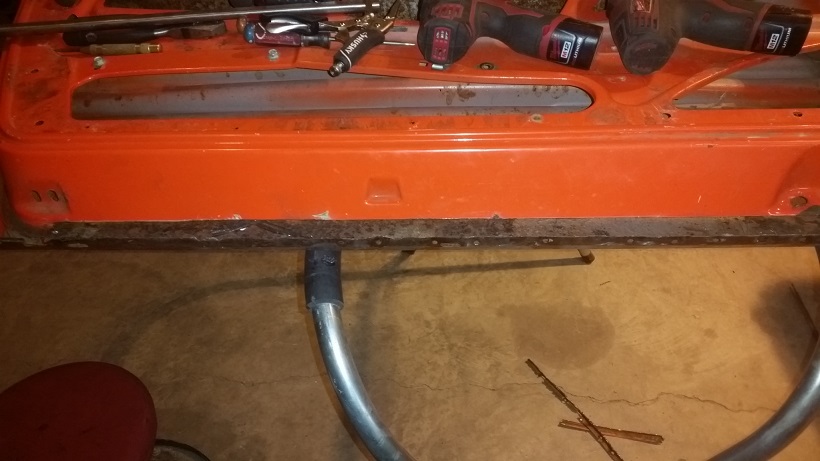 I cut it out in three sections. Top, channel and the spot welded on lip. Don't quite have the spot welded lip all removed. Here's the new piece slid into place. 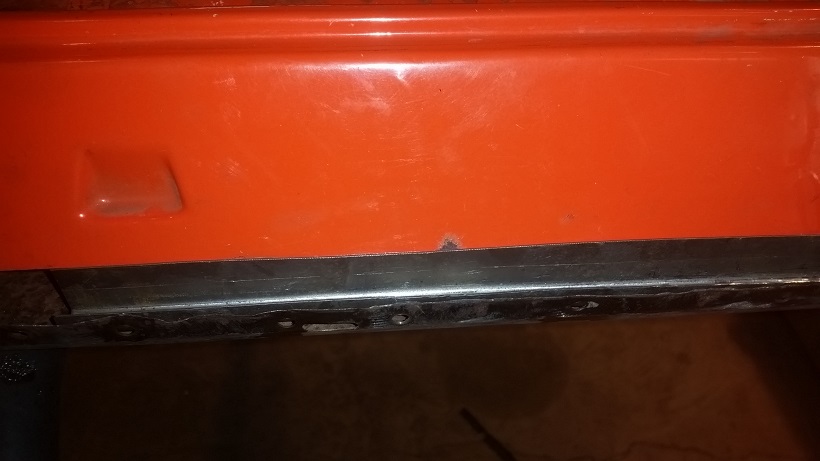 Weapons pile ............... 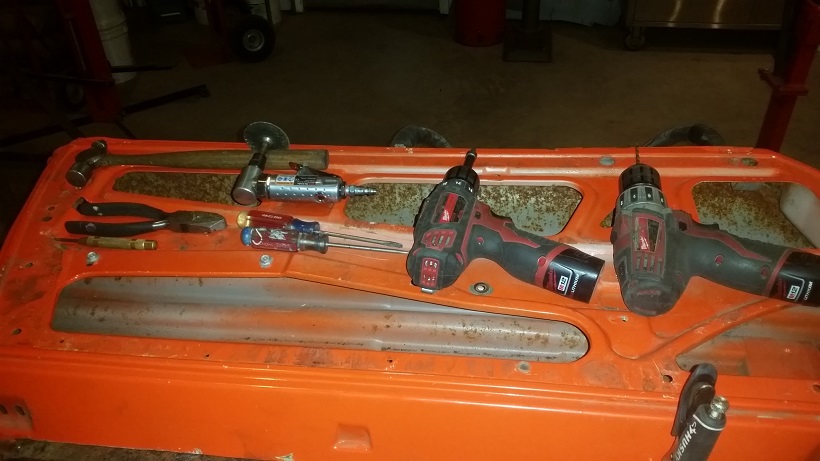 |
|
|
|
| cary |
Jan 12 2016, 11:41 PM
Post
#644
|
|
Advanced Member Group: Members Posts: 3,900 Joined: 26-January 04 From: Sherwood Oregon Member No.: 1,608 Region Association: Pacific Northwest |
The opening should give me enough room to remove the crusty old seam sealer that's in all the doors. Which should allow to prep for cavity wax.
|
|
|
|
| cary |
Jan 15 2016, 10:48 AM
Post
#645
|
|
Advanced Member Group: Members Posts: 3,900 Joined: 26-January 04 From: Sherwood Oregon Member No.: 1,608 Region Association: Pacific Northwest |
Took Wednesday off.
Started Thursday by meeting my Mom at the fabric store. We bought 12 yards of marine upholstery to create dust covers for all my free standing equipment. i.e, lathe, welder with tanks and gauges, plasma cutter, etc. She had a 50% off coupon (IMG:style_emoticons/default/piratenanner.gif) But that will make it a short day. Tonight is my once a month PDX Pelican group get together at the Taproom in NW PDX. Starts at 5. So I jumped back on the door repair. Took quite a bit of time fitting the two pieces together. The key is getting a nice tight fit for a an easier weld. A wide weld can be done. But takes more heat. Which then creates a blowout. And so on and so on. You get the picture. We did leave the top long and recut using the opening that I cut in the door as a guide. In picture #2 you'll see our 5/16 stick of bar stock. I used that to level the two pieces in the center. I tacked the two ends flush with the corner track. Then tacked the middle after I leveled with the bar. You can easily reach behind and hold it with your hand. 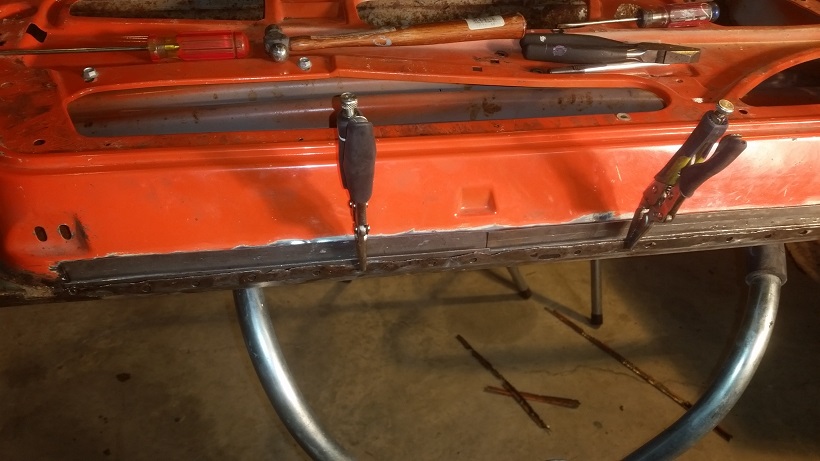 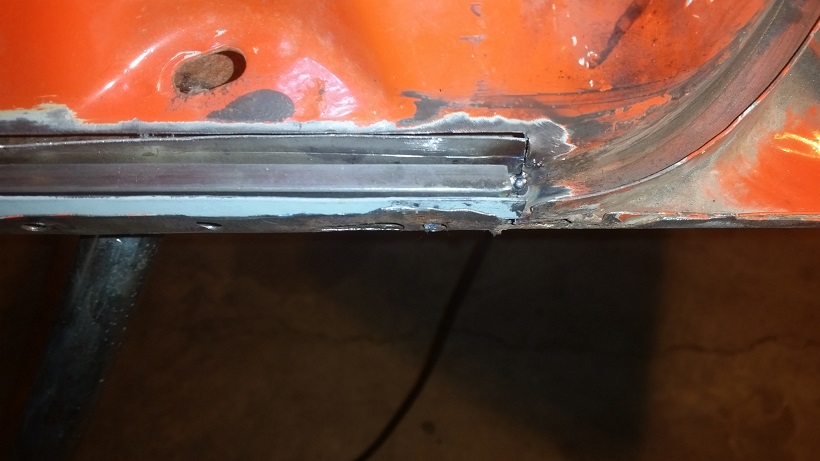 Here's where I ended the day on Thursday. All tacked up and ready to to finished. 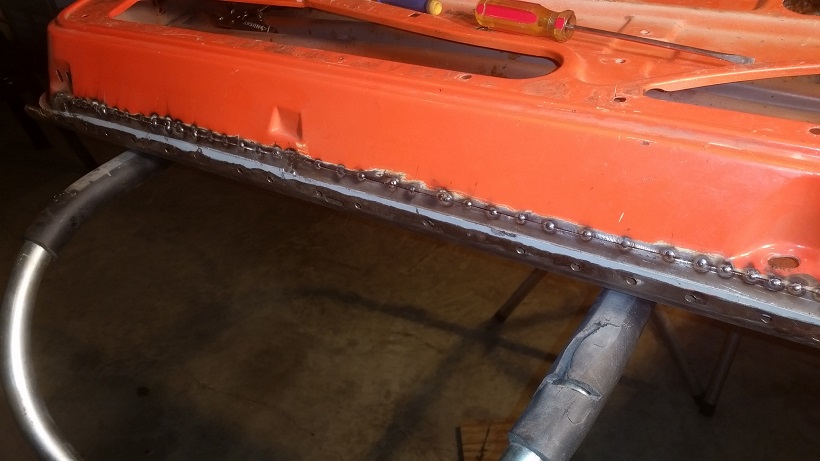 I used a micro flat bladed screw driver from $ Store or HF to level the two upper edges as I welded. |
|
|
|
| cary |
Jan 15 2016, 10:35 PM
Post
#646
|
|
Advanced Member Group: Members Posts: 3,900 Joined: 26-January 04 From: Sherwood Oregon Member No.: 1,608 Region Association: Pacific Northwest |
Was hoping that we'd get a break in the rain. But it wasn't too be. Kind of drizzled all day. So back to the door repairs.
I start with tweaking the shorter outer flange of our new channel. Didn't need much, just a smidgeon. 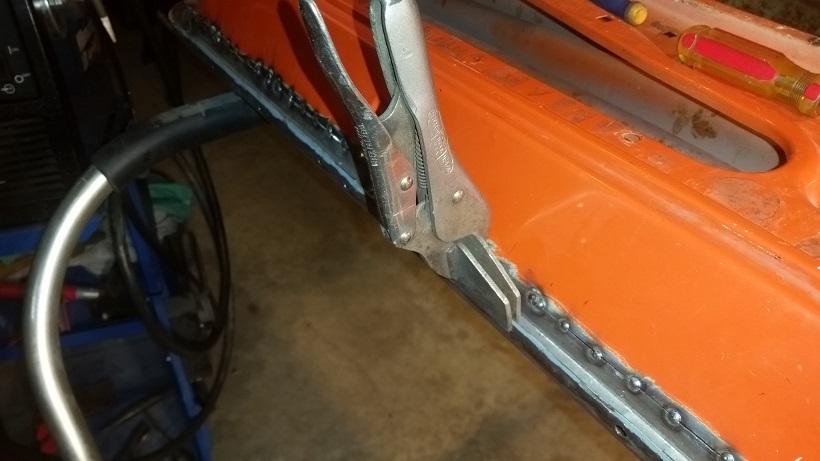 But after I tilt the door up a little I see rust hole I missed. Damn ............ (IMG:style_emoticons/default/mad.gif) 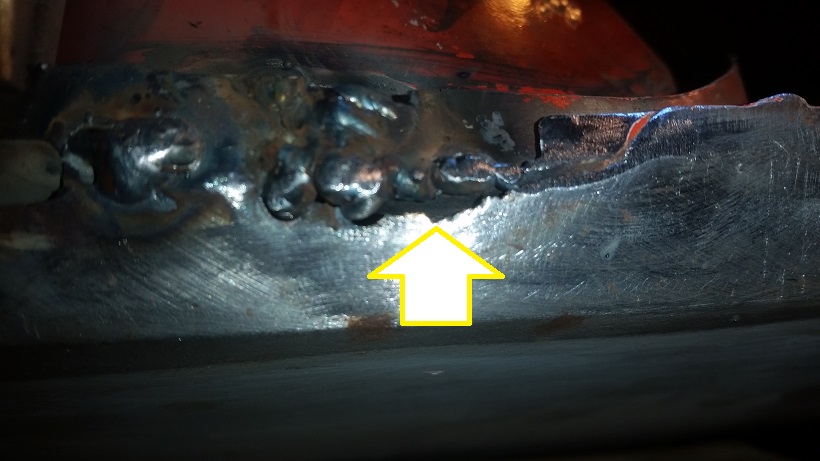 This is where EXTREME patience is need. That crooked edge is almost paper thin. It's going to blow out. The only question is, how much. So the trick is to turn down the welder till your just getting a weld, not a cold blob. As the hole enlarges be patient. Use air and time to let it cool. You don't make the next weld until you can touch it with your bare hand. It' takes time. Basically you want to build a solid ring around the outer edge of the blown out hole. Then with same patience you fill in the hole. Make sure you try and start with the inside bottom edge. This helps with not creating air pockets in the short blip welds. 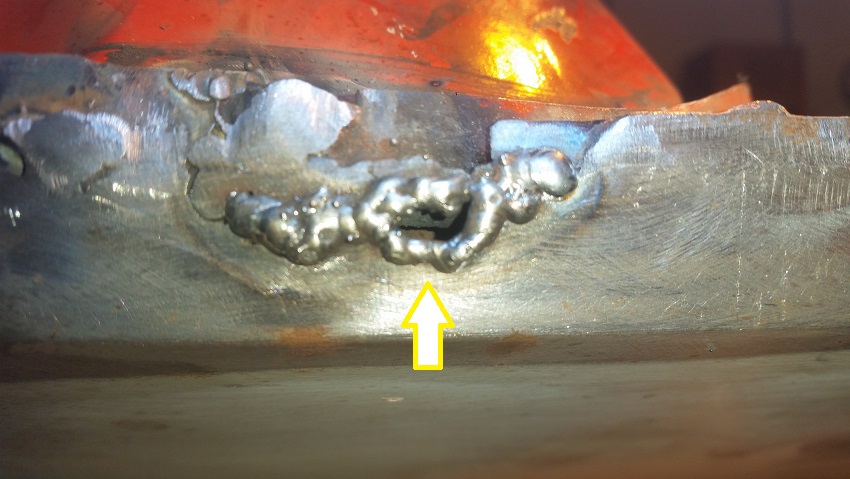 Another tip. Always start the weld with a clean wire tip. Don't be lazy (IMG:style_emoticons/default/welder.gif)  Work Station : 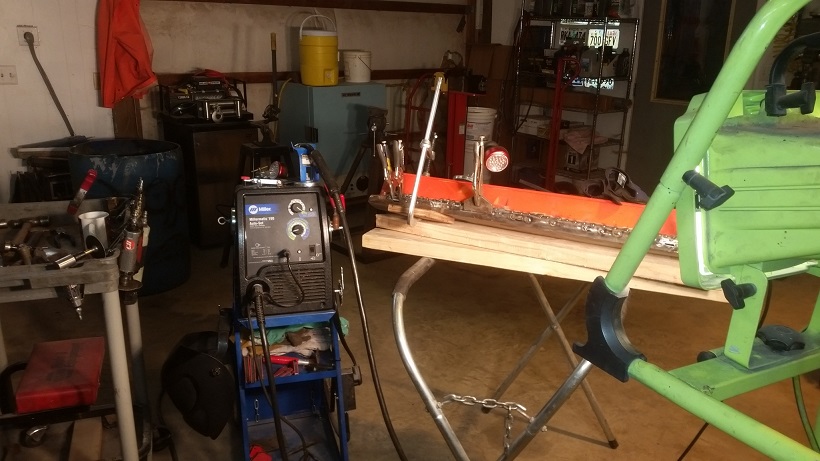 |
|
|
|
| cary |
Jan 15 2016, 10:47 PM
Post
#647
|
|
Advanced Member Group: Members Posts: 3,900 Joined: 26-January 04 From: Sherwood Oregon Member No.: 1,608 Region Association: Pacific Northwest |
Now on to welding in the spot weld cutter holes with rosette welds.
It starts by making sure every hole is clamped tight to the channel flange. Then tap the edge of the hole with the pick end of your body hammer. Now your ready to weld.  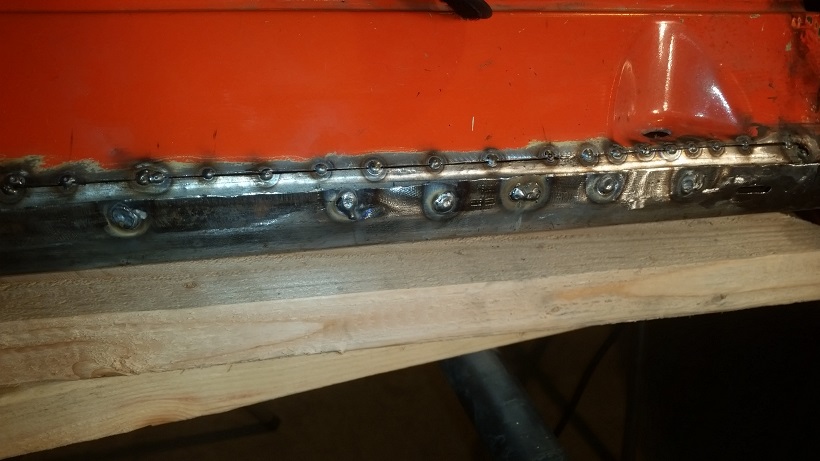 On the upper flange weld I ran into a couple spots that blew out a bit. But that's to be expected. Go slow. And take your finger off the trigger. News Flash ......... you take your finger off the trigger. Things stop melting. LOL. 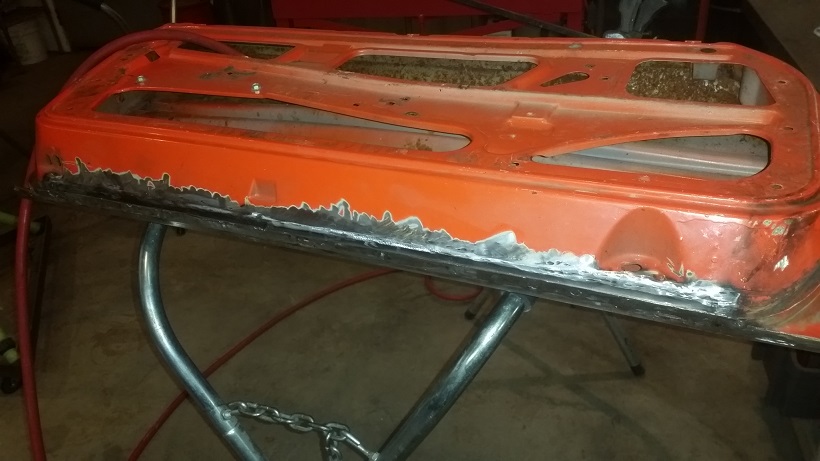 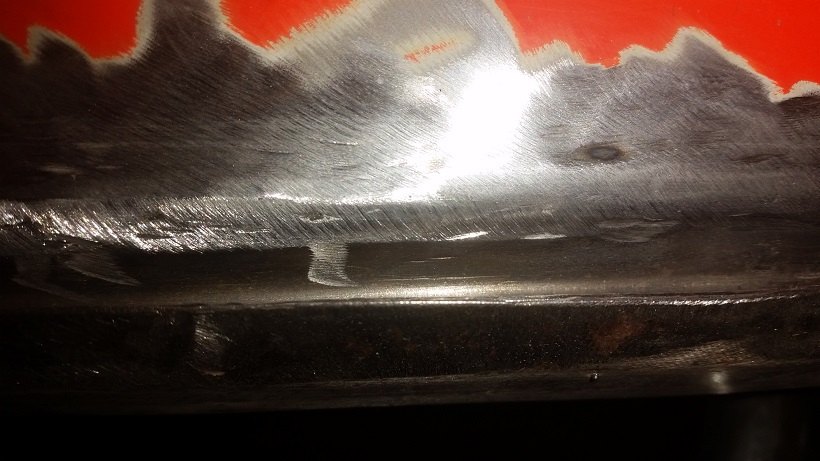 |
|
|
|
| cary |
Jan 17 2016, 07:35 PM
Post
#648
|
|
Advanced Member Group: Members Posts: 3,900 Joined: 26-January 04 From: Sherwood Oregon Member No.: 1,608 Region Association: Pacific Northwest |
Found another issue with the left door. I found a rip in the door closer mounting hole area. Almost looked like it was cut. Hmmm ?
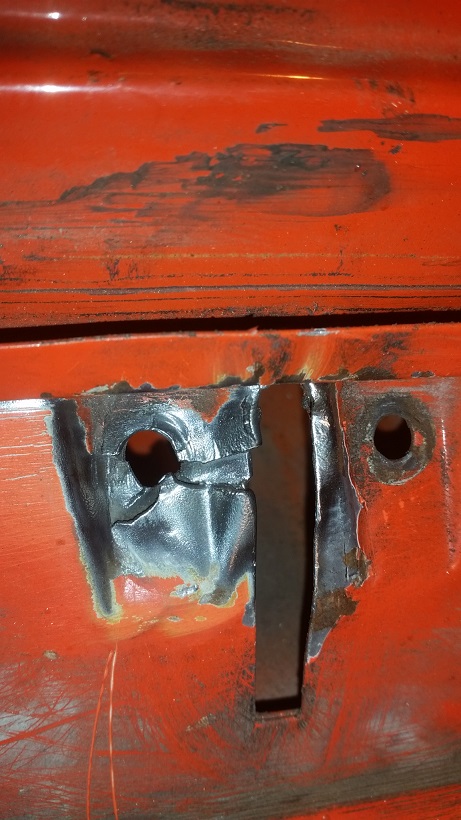 I marked the welded area with survey tape. It will be a reminder that I need a smaller ground down disc. One that will fit down into the groove. Might have to get after it with the Dremel. 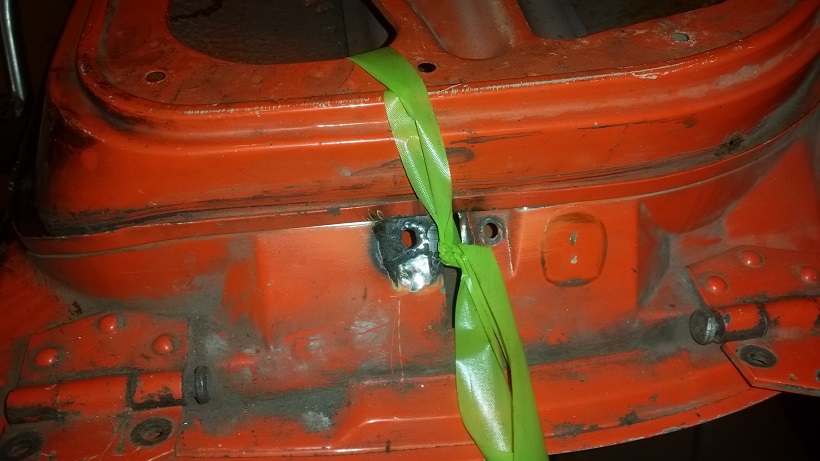 The rest of the day was spent on my good friend Harry's Magic Bus. We MacGyvered a type 1 engine to type 4 heater cable arrangement. We figured it out. Left side is working fine. Right (passenger) we kind of buggered up. Stretched the outer tube. 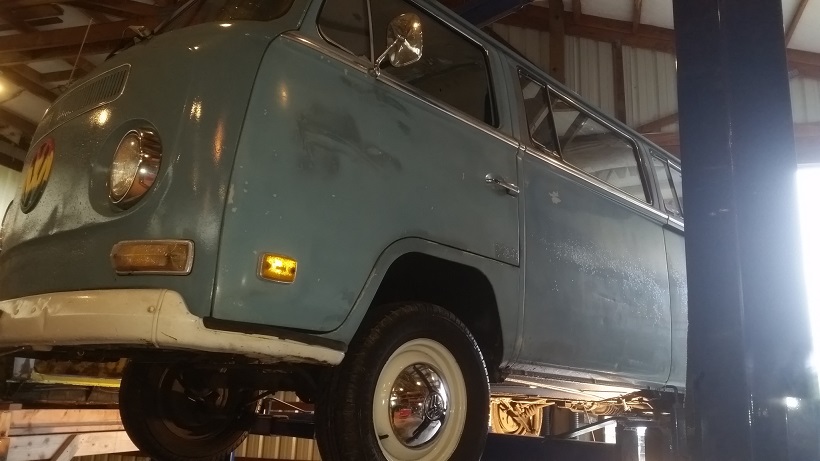 |
|
|
|
| cary |
Jan 19 2016, 09:15 AM
Post
#649
|
|
Advanced Member Group: Members Posts: 3,900 Joined: 26-January 04 From: Sherwood Oregon Member No.: 1,608 Region Association: Pacific Northwest |
Looks like we'll have a small break in the PDX drizzle. So I decide we'll do some bead blasting. I think if we stay at this spot much longer we'll need to pour an apron on the front of the building. That will allow us to lay down a large trap and recover more of the media. Right now we recover about 1/2 with a shovel and the kiddie pool.
I figured I might as well work on the doors first. I need to strip out the remainder of the seal channel looking for more foam damage. 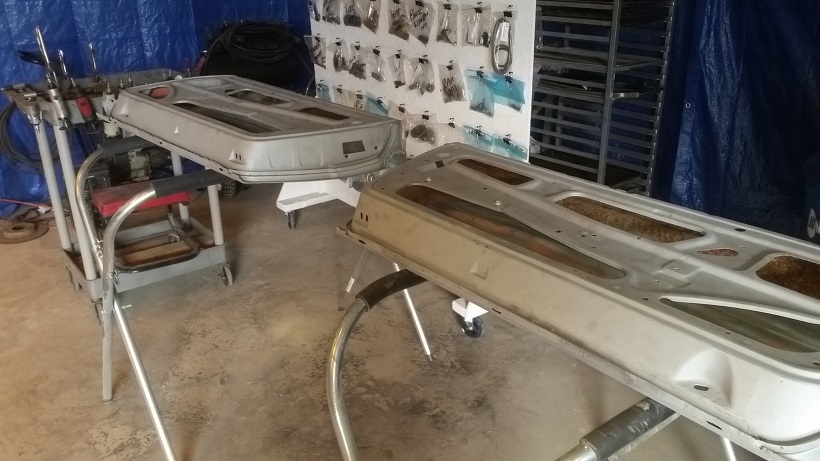 I find one spot on the door with the larger repair. It was on one of the upright sides. Seems kind of odd when any moisture should have rolled down to the bottom. So I assume it was over filled with adhesive which hindered it's drainage. On the good door I find 4 spots that will need patches. I'd planned on using JB weld on that door to see if it holds up. I was thinking someone could reread this 20 years from now and look at the difference. But I think I'll surgically remove and patch them. Then we roll out the rotisserie and get back to blasting. All thats really left is the front trunk and the gas tank cavity. But I ran out of cleaned and dried media. The last bag of new stuff was a bit chunky. And we have three 5 gallon gallon buckets of recovered material to be screened and dried. Weather report said the rain would start at 4:30. 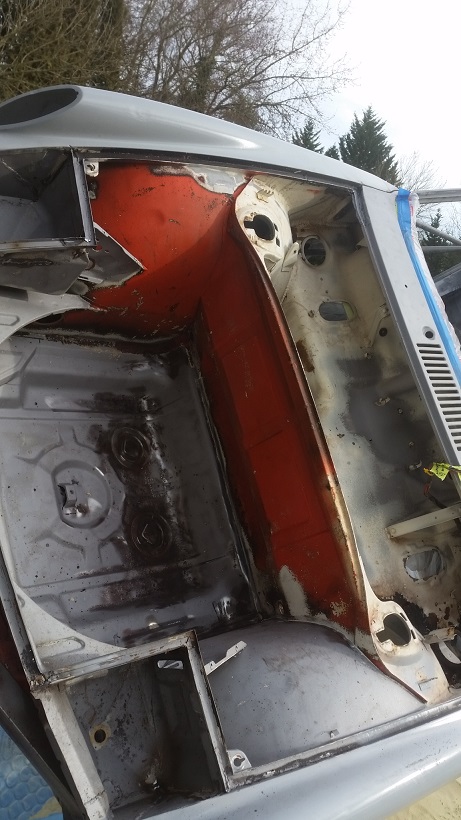 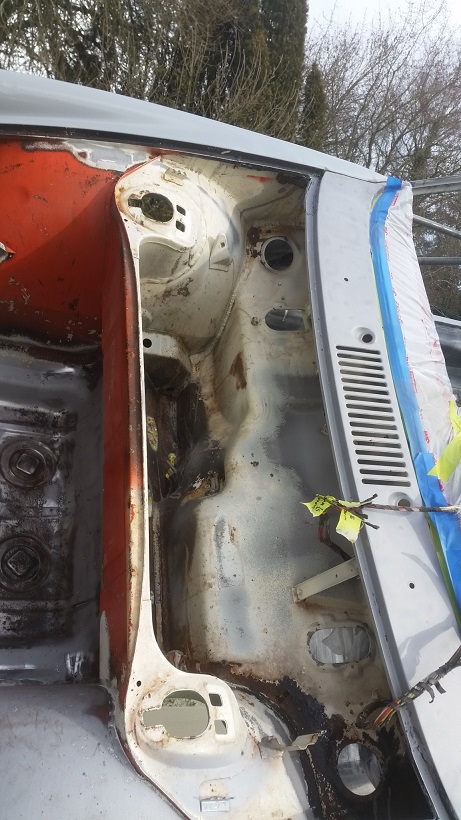 Just a little bit to go ................. 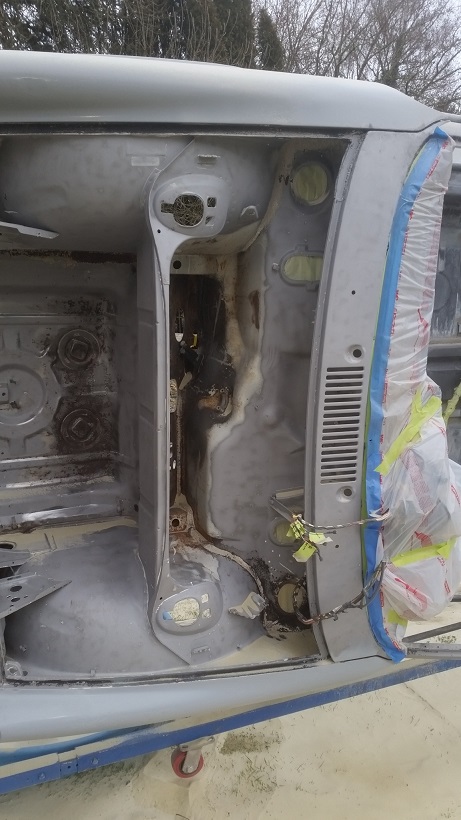 |
|
|
|
| cary |
Jan 20 2016, 11:08 PM
Post
#650
|
|
Advanced Member Group: Members Posts: 3,900 Joined: 26-January 04 From: Sherwood Oregon Member No.: 1,608 Region Association: Pacific Northwest |
Looks like we'll have another break in the weather. No rain forecasted until 3pm.
But we need to dry and screen our 4 buckets of reclaimed media. So why'll Super In Law is tending to the media I get after the spot I missed on the repaired door. 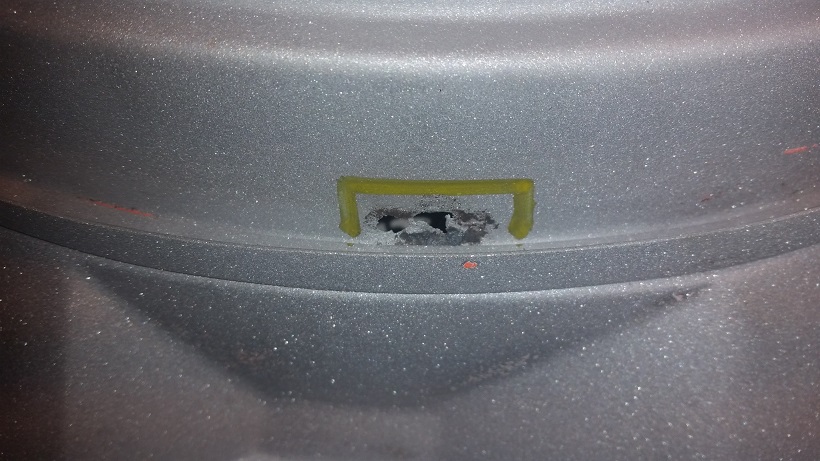 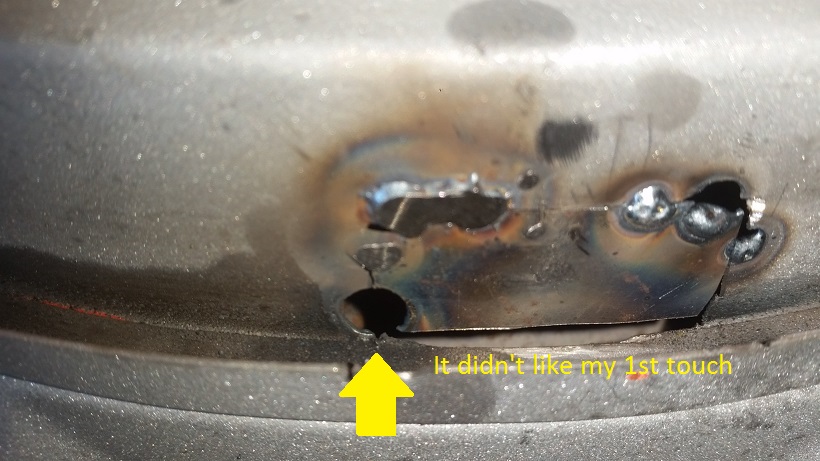 My first touch blew a giant hole in the project. (IMG:style_emoticons/default/mad.gif) The gap at the bottom could be pushed up tight with a screw driver from behind. A little touchy, but all in all it welded ok. Now the grinding, not so much. 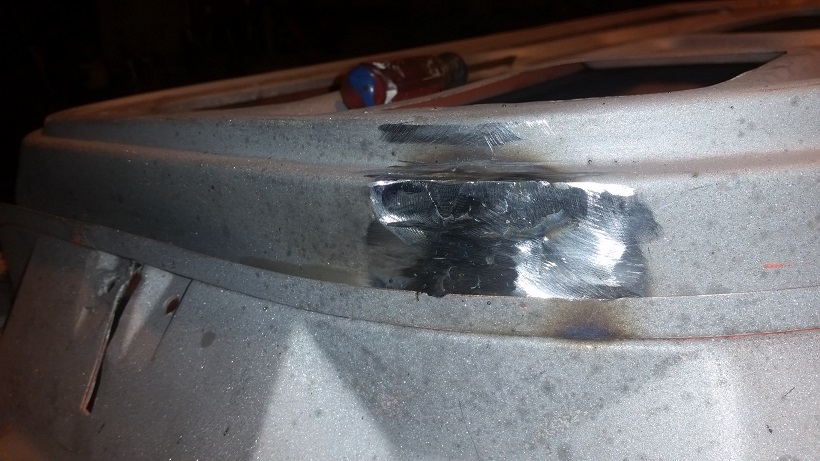 Ground thru in a couple spots. Be extra careful grinding on an outside radius curve. (IMG:style_emoticons/default/sad.gif) After my grind thru issue I broke into my new Cubitron discs. OMG ............ I'm going to have to do a cost analysis on only using them. The 80 grit leaves a beautiful finish. |
|
|
|
| cary |
Jan 20 2016, 11:15 PM
Post
#651
|
|
Advanced Member Group: Members Posts: 3,900 Joined: 26-January 04 From: Sherwood Oregon Member No.: 1,608 Region Association: Pacific Northwest |
Get back from lunch and push her outside.
Got R' Done ................ (IMG:style_emoticons/default/piratenanner.gif) (IMG:style_emoticons/default/piratenanner.gif) (IMG:style_emoticons/default/piratenanner.gif) Blasting down into the gas tank hole was the worst media flashback that I've had on the entire car. No where the media to go other ran right back at you. There will still be quite a bit of seam sealer removal work to do. 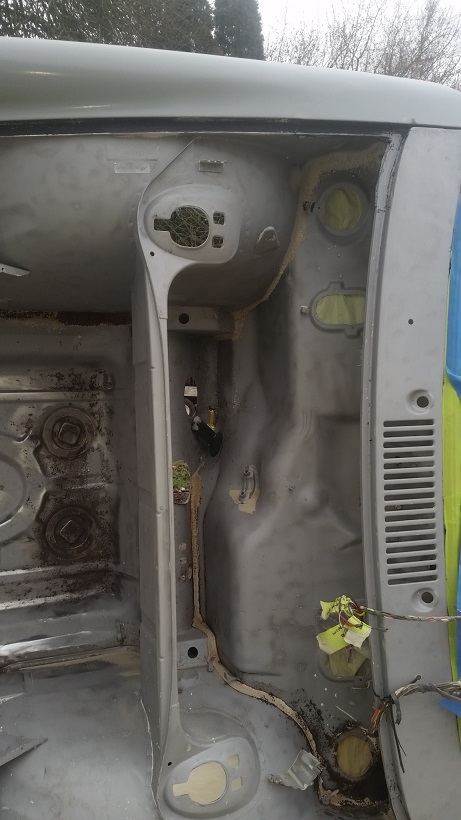 Here's where the project should have started ............... 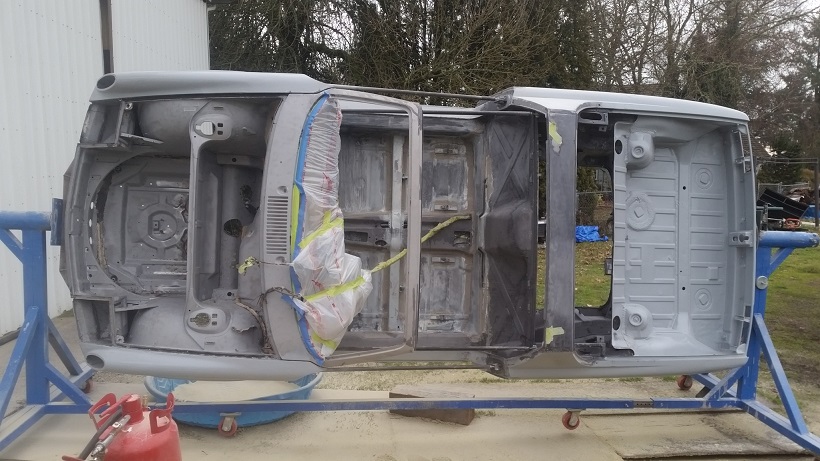 |
|
|
|
| cary |
Jan 20 2016, 11:32 PM
Post
#652
|
|
Advanced Member Group: Members Posts: 3,900 Joined: 26-January 04 From: Sherwood Oregon Member No.: 1,608 Region Association: Pacific Northwest |
Oh yeah ................ the rain started at 2:45.
Now on to the better door. After close examination I'll need to do four patches. I'm doing the cut outs a little different. I'm drilling a 3/8" hole in the top corners so I can cut with the air hacksaw. Not real happy with how straight I can cut with the saw, but it's ok. I used the hacksaw on the vertical cuts and the die grinder on the mandrel on the horizontal cuts. 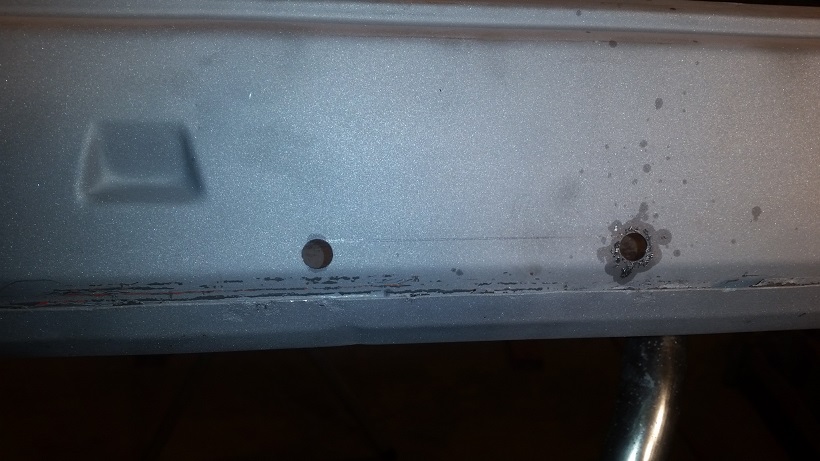 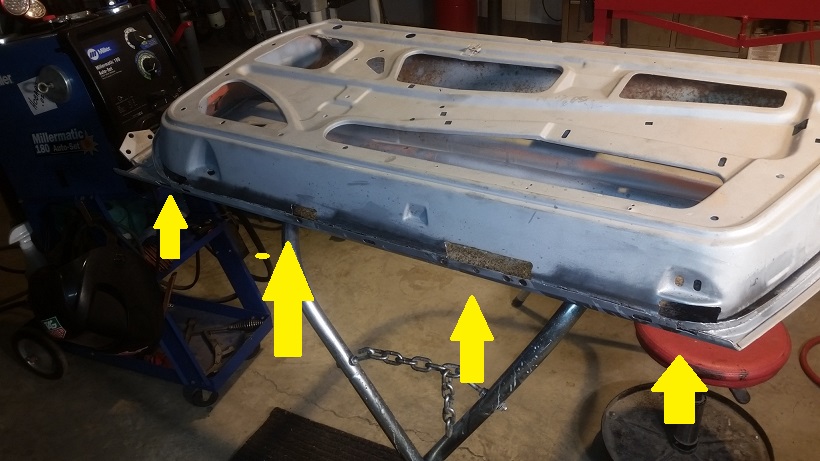 Then I saw some rust creeping out from under the spot welded channel lip. 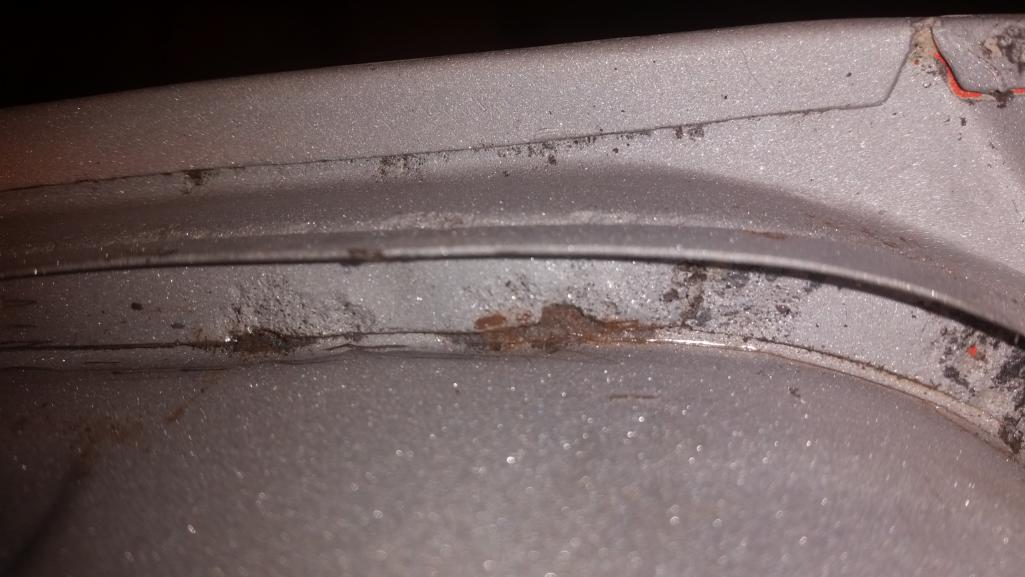 But I could get my hands up under the bottom of the channel. It was solid. So I used the edge of the die grinder on the mandrel to peel off the top layer of the channel. BEFORE 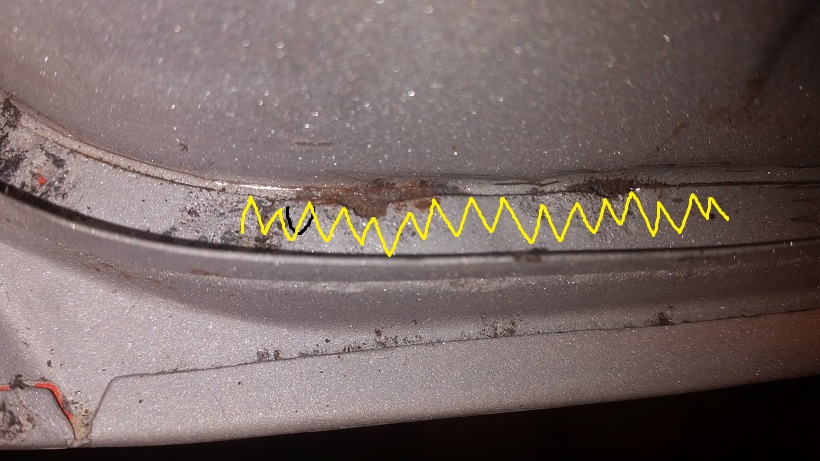 AFTER Peeled back and OSPHOed 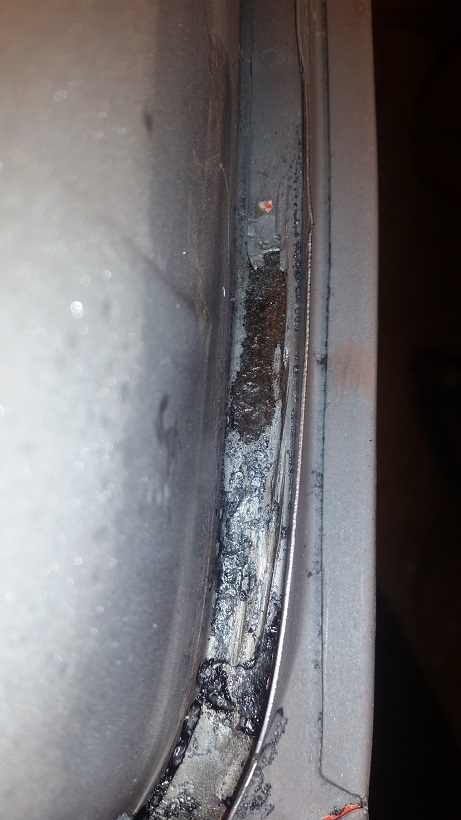 This post has been edited by cary: Jan 22 2016, 10:12 PM |
|
|
|
| worn |
Jan 21 2016, 11:59 AM
Post
#653
|
|
Winner of the Utah Twisted Joint Award Group: Members Posts: 3,609 Joined: 3-June 11 From: Madison, WI and North Bend WA Member No.: 13,152 Region Association: Upper MidWest |
QUOTE(cary @ Jan 20 2016, 09:32 PM)  Oh yeah ................ the rain started at 2:45. You are really cooking! It has been subzero all the past week after a mild December. Finally cold-soaked the foundation of the attached garage so I get chilled there. So I have made a tactical retreat to the basement. Discovery: you can treat masonite for new door cards with acetone-thinned epoxy for table tops. Goes on and soaks right in like shellac but is water resistant. It is a trick I started using for wood-turning hard/soft spalted maple. Soaks a long way into soft fibers I have to do a bit of welding on the door in the same spot, but less than I expected. |
|
|
|
| saigon71 |
Jan 21 2016, 02:14 PM
Post
#654
|
|
Advanced Member Group: Members Posts: 2,026 Joined: 1-June 09 From: Dillsburg, PA Member No.: 10,428 Region Association: MidAtlantic Region |
Your attention to detail is superb! (IMG:style_emoticons/default/beerchug.gif) Nice patch work on those doors - that's a tricky area!
|
|
|
|
| Cairo94507 |
Jan 21 2016, 03:21 PM
Post
#655
|
|
Michael Group: Members Posts: 10,678 Joined: 1-November 08 From: Auburn, CA Member No.: 9,712 Region Association: Northern California |
Terrific documentation and work. (IMG:style_emoticons/default/smilie_pokal.gif)
|
|
|
|
| cary |
Jan 21 2016, 06:49 PM
Post
#656
|
|
Advanced Member Group: Members Posts: 3,900 Joined: 26-January 04 From: Sherwood Oregon Member No.: 1,608 Region Association: Pacific Northwest |
Thanks for the words of encouragement ............
I was going to add. Be careful with the top edge. That's where I had serious issues. 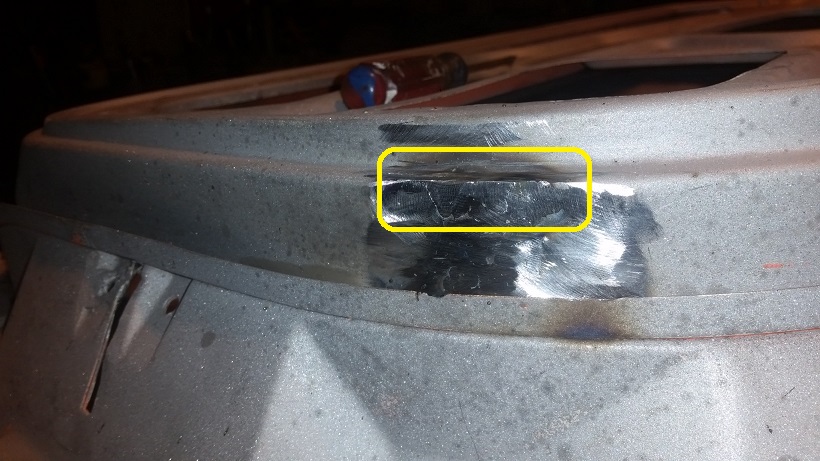 |
|
|
|
| JoeDees |
Jan 21 2016, 07:37 PM
Post
#657
|
|
Senior Member Group: Members Posts: 515 Joined: 10-November 14 From: Northern Kentucky Member No.: 18,106 Region Association: None |
QUOTE(worn @ Jan 21 2016, 12:59 PM) It has been subzero all the past week after a mild December. Finally cold-soaked the foundation of the attached garage so I get chilled there. So I have made a tactical retreat to the basement. I teach the new LTs to avoid the word "retreat" in their briefings unless they're talking about the bugle call while lowering the colors... I would suggest you use the term "retrograde" and for this particular instance "retrograded to a defensive posture". (IMG:style_emoticons/default/biggrin.gif) (IMG:style_emoticons/default/flag.gif) |
|
|
|
| cary |
Jan 22 2016, 09:42 PM
Post
#658
|
|
Advanced Member Group: Members Posts: 3,900 Joined: 26-January 04 From: Sherwood Oregon Member No.: 1,608 Region Association: Pacific Northwest |
Beautiful day here is PDX.
Super In Law went to work cutting and fitting the door patches ........... While he was doing that Tool Whore went to work on some air line drain modifications. Built a new one for the blaster cabinet and new one under the racks in the big open shop. Then added 3 foot drain pipes to the existing drains. Patch #1 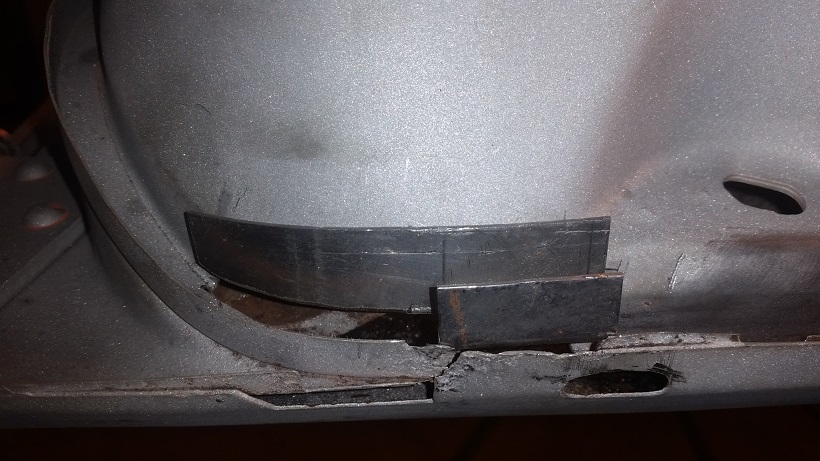 Really pretty easy welding. The right side welds are little too big. Buts that's caused by having to have a 2" wire lead. The Millermatic helps, but doesn't totally take care of it. The big gap in the bottom of the channel needed a brass backer. 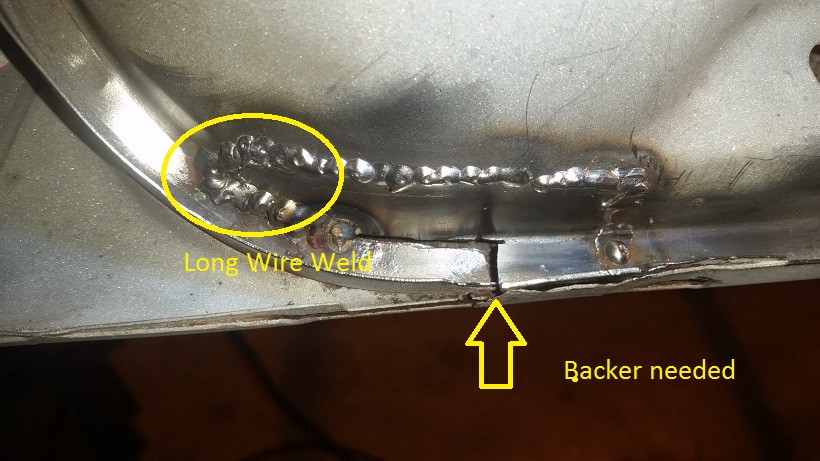 We left the channel run wild. I trimmed it on the yellow line after everything was welded into place and tidied up. 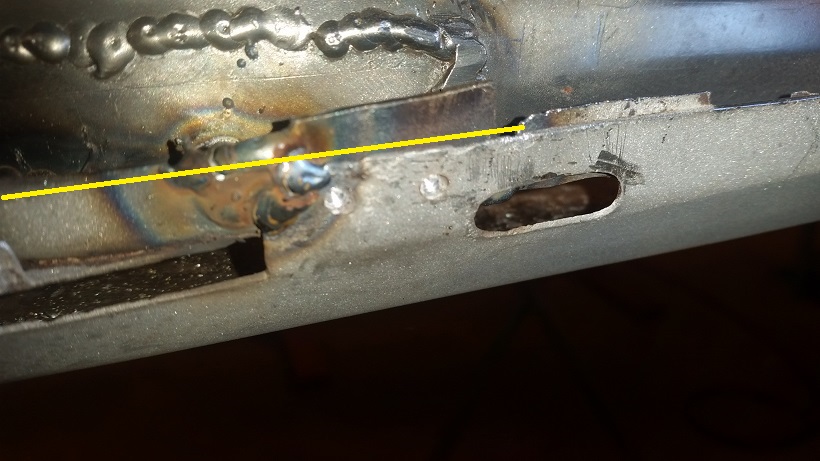 Patch #2 Not real happy with it. I should have bent the top a bit before I started welding. 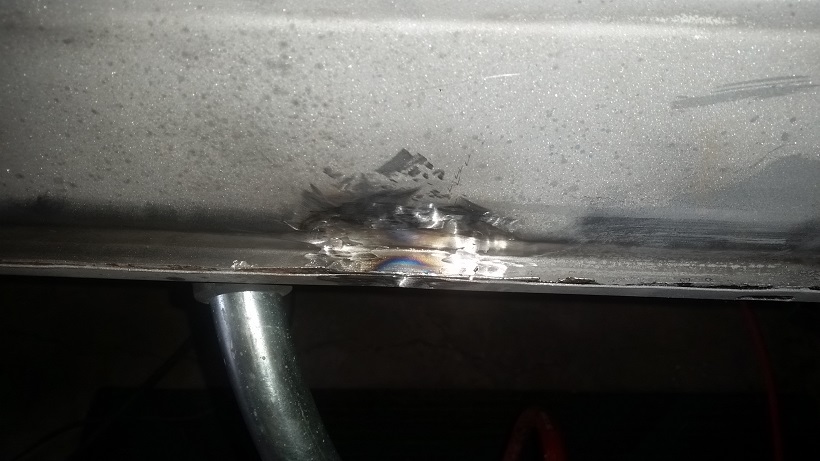 Sabbatical Side Note for those that have been following along. The job I've been waiting for should be posted first part of the week ............... Things got held up a couple weeks for a couple different reasons. But we're back on track. |
|
|
|
| cary |
Jan 23 2016, 09:30 AM
Post
#659
|
|
Advanced Member Group: Members Posts: 3,900 Joined: 26-January 04 From: Sherwood Oregon Member No.: 1,608 Region Association: Pacific Northwest |
I think we'll start the day by switching to the roll of EasyGrind MIG wire that I bought. Not a lot of welding still do, but I'm sure I'll find some spots I want to strength and or touch up.
Oh yeah the Magic Bus is returning today to get its new heater cables installed. |
|
|
|
| cary |
Jan 23 2016, 10:39 PM
Post
#660
|
|
Advanced Member Group: Members Posts: 3,900 Joined: 26-January 04 From: Sherwood Oregon Member No.: 1,608 Region Association: Pacific Northwest |
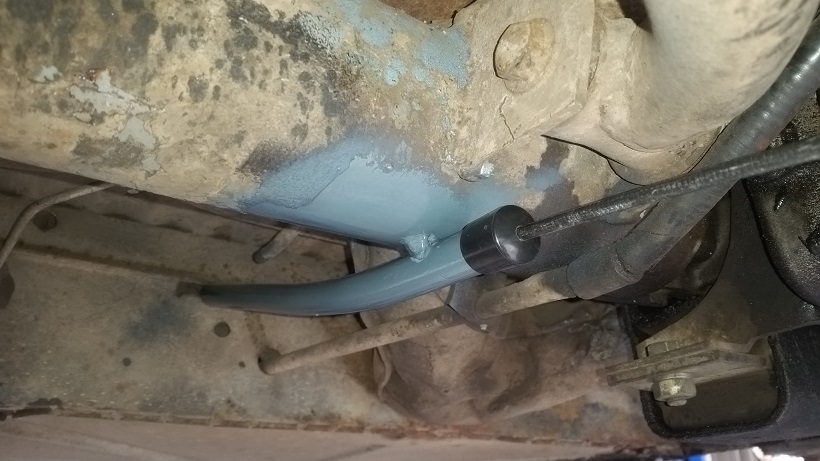
Here's the tubes we fabricated for the heater cables for the Magic Bus.
 |
|
|
|
|
1 User(s) are reading this topic (1 Guests and 0 Anonymous Users)
0 Members:

|
Lo-Fi Version | Time is now: 24th June 2026 - 09:49 AM |
Invision Power Board
v9.1.4 © 2026 IPS, Inc.