|
|
|
Porsche, and the Porsche crest are registered trademarks of Dr. Ing. h.c. F. Porsche AG.
This site is not affiliated with Porsche in any way. Its only purpose is to provide an online forum for car enthusiasts. All other trademarks are property of their respective owners. |
|
|

  |

| cary |
 Jan 23 2016, 10:52 PM Jan 23 2016, 10:52 PM
Post
#661
|
|
Advanced Member  Group: Members Posts: 3,900 Joined: 26-January 04 From: Sherwood Oregon Member No.: 1,608 Region Association: Pacific Northwest |
Finished up the door patches. Had trouble with the grinding. I'm sure the pitting on the backside is causing the issues. Weak spots.
  Corner was a bit of work. The channel is two layers and pitted so it was either too hot or too cold. 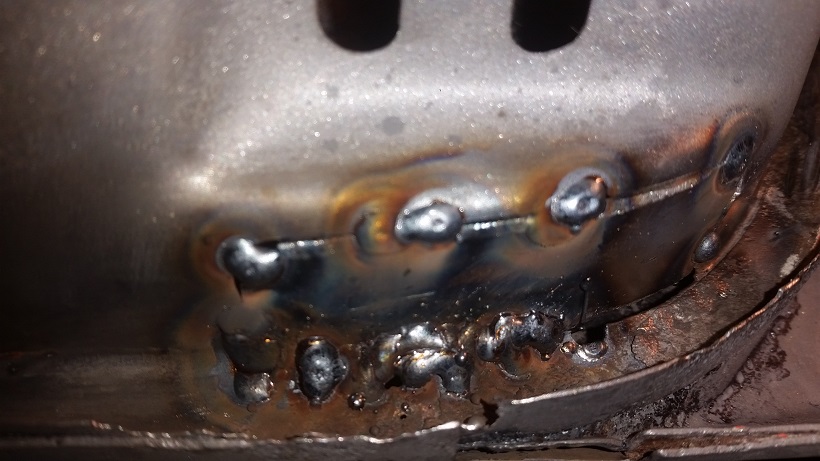 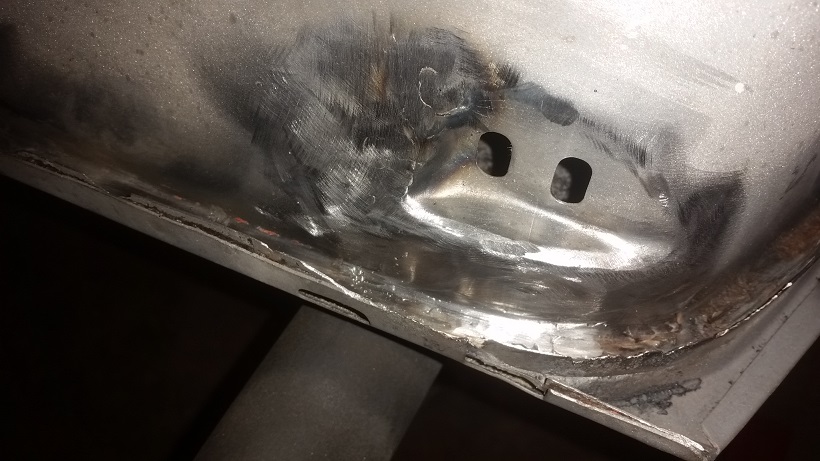 Blew thru this area about 5 times over grinding.  Ended the day with hanging the door in Super In Laws new fixture. This allowed me to spray down the inside with OSPHO. Drip drying over the old mat. 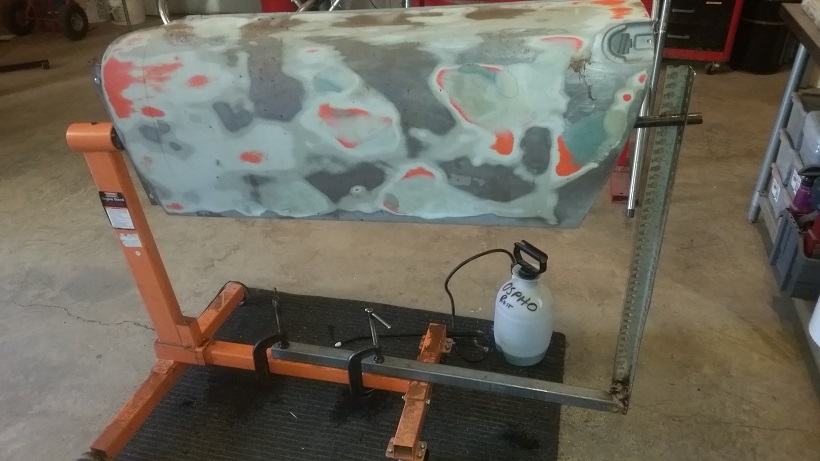 |
   |

 
|
| cary |
Jan 23 2016, 10:54 PM
Post
#662
|
|
Advanced Member Group: Members Posts: 3,900 Joined: 26-January 04 From: Sherwood Oregon Member No.: 1,608 Region Association: Pacific Northwest |
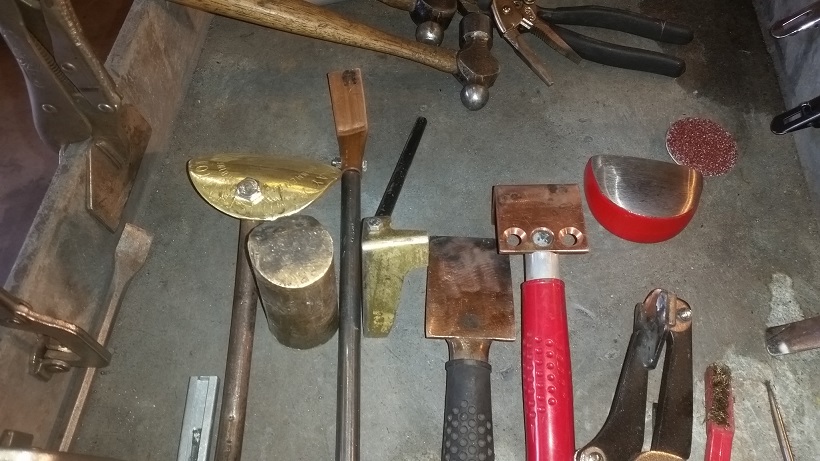
Here is my assortment of different types/shapes of brass.
 |
|
|
|
| cary |
Jan 24 2016, 11:14 AM
Post
#663
|
|
Advanced Member Group: Members Posts: 3,900 Joined: 26-January 04 From: Sherwood Oregon Member No.: 1,608 Region Association: Pacific Northwest |
On to the next task ................
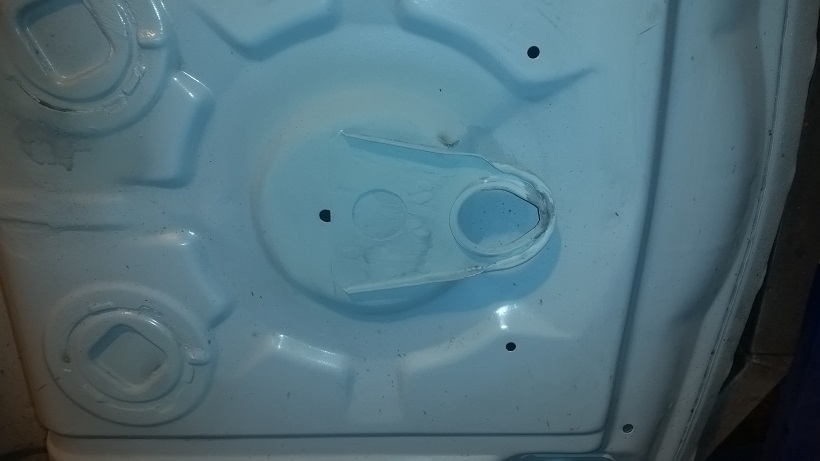
After bead blasting the trunk I found some more disturbing rust. It is the portion behind the front pair of steering rack mounts. Yellow circles 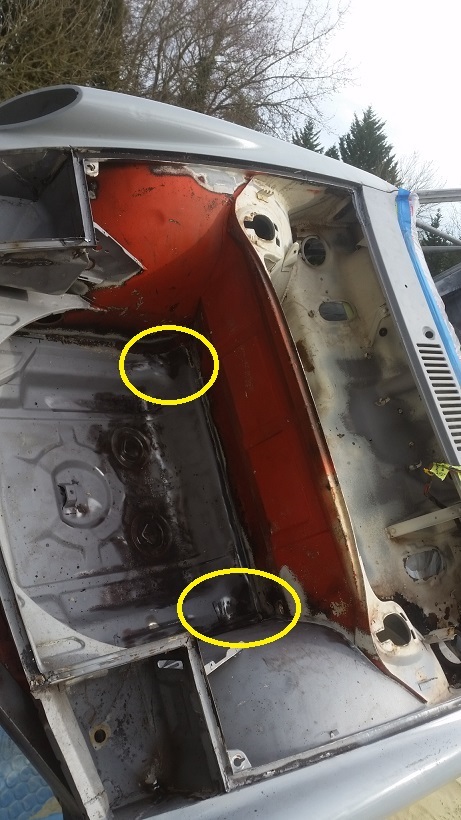 CLOSE UP The dark portion is the backside of the mount. 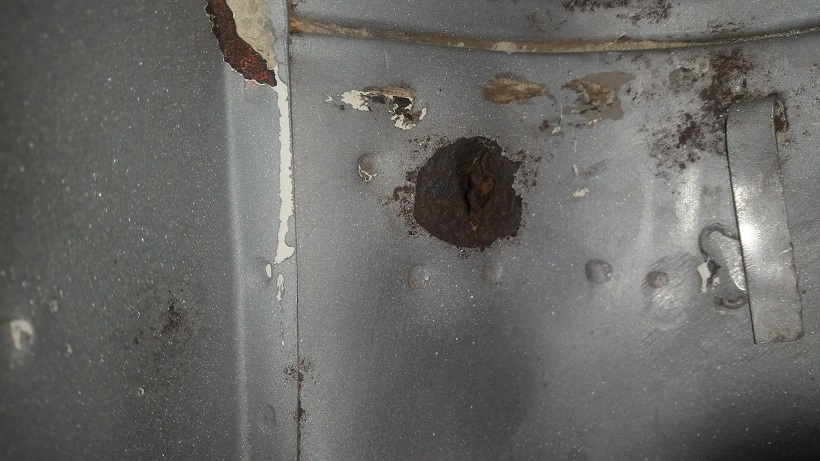 Mount pictures  This is a piss poor design. No Drain so the air could flow thru. 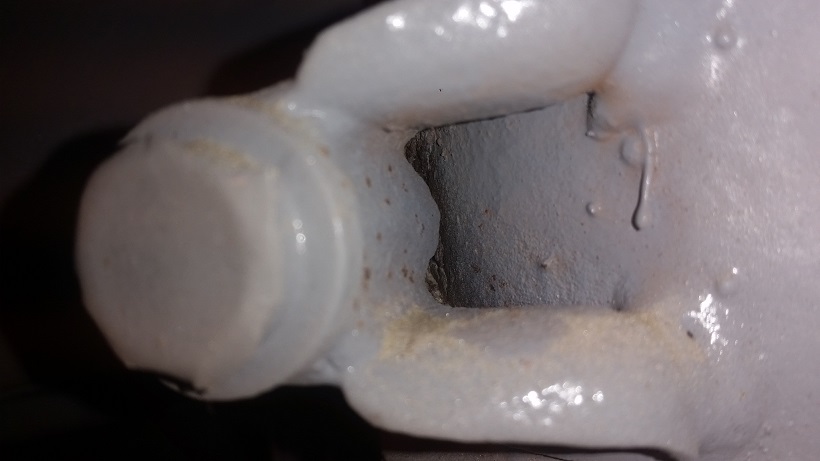 The ? is. Do we take the support off and make a big patch? Or cut out the portion between the spot welds and patch it? I'm leaning on the big patch. But that will mean creating some kind of jig for returning it to right place. I've got just the right guy for that, LOL. I'll need to take off the tow hook and patch under it. And there's a couple tears/cracks that will need to be strengthened. After closer inspection it did have a drain. It just didn't work too well. |
|
|
|
| cary |
Jan 29 2016, 10:59 AM
Post
#664
|
|
Advanced Member Group: Members Posts: 3,900 Joined: 26-January 04 From: Sherwood Oregon Member No.: 1,608 Region Association: Pacific Northwest |
Took a time out ..................
1. Bought some 6" steel wheels for the rotisserie. The 4" poly ones just take too much effort to get started rolling. The 4" ones will get moved to the body dolly. 2. Doing some maintenance on the PCA AX event trailer. 3. Installed my new SeatBelt Planet seat belts on my white car. 4. After rebuilding the door stays on the white car I decided to replace the door cam actuators. They just weren't strong to finish opening the door. Just a little to much flex as they were trying to push open the latch. |
|
|
|
| cary |
Jan 31 2016, 08:55 AM
Post
#665
|
|
Advanced Member Group: Members Posts: 3,900 Joined: 26-January 04 From: Sherwood Oregon Member No.: 1,608 Region Association: Pacific Northwest |
I've been under the weather the last couple days. But Saturday we're back at it.
I installed the new steel wheels on the rotisserie. Now one person can move it with one hand. 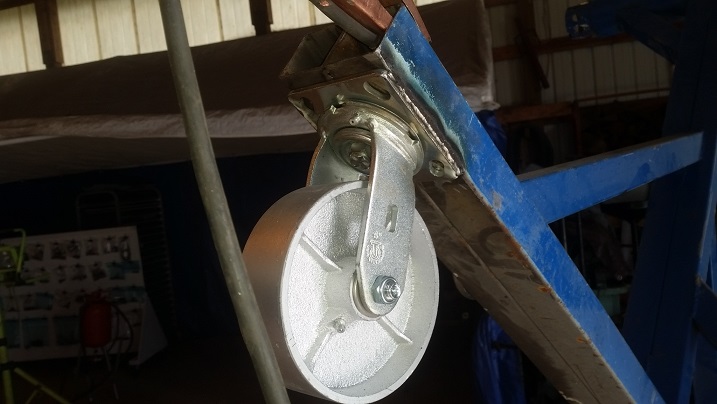 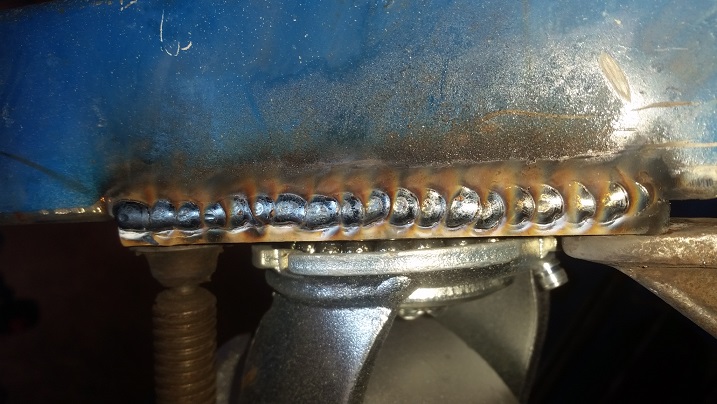 While I'm doing that, Super In Law was converting our body jig into a bolt on body dolly. We scavenged some legs off some old produce display tables years ago. 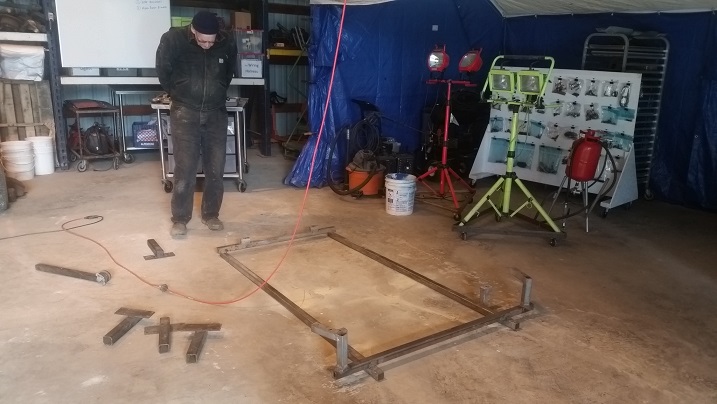 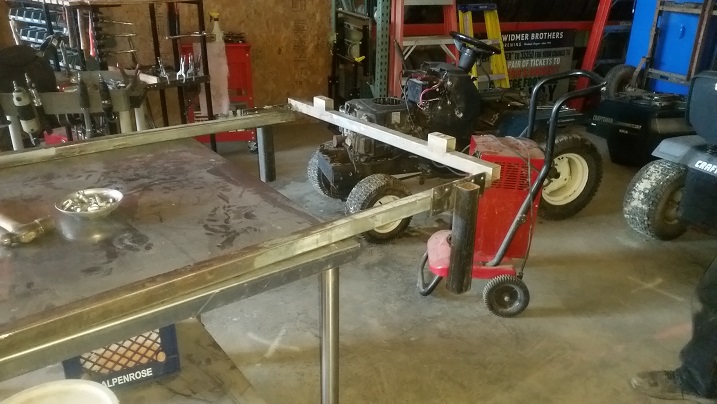 These will be the legs with the old wheels bolted to the small tube on the bottom. 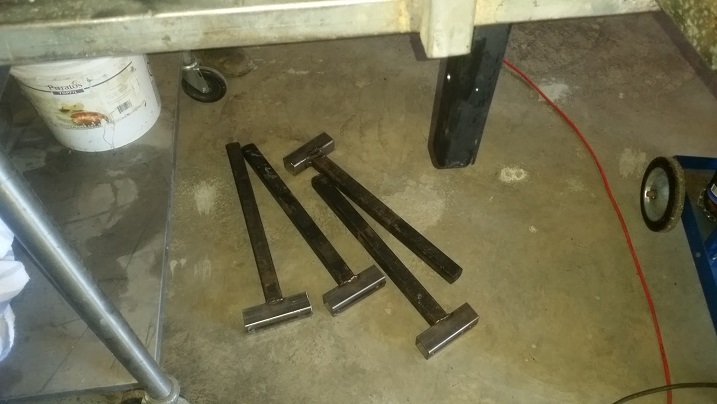 Here we are all finished up. Added ending 2/2/16 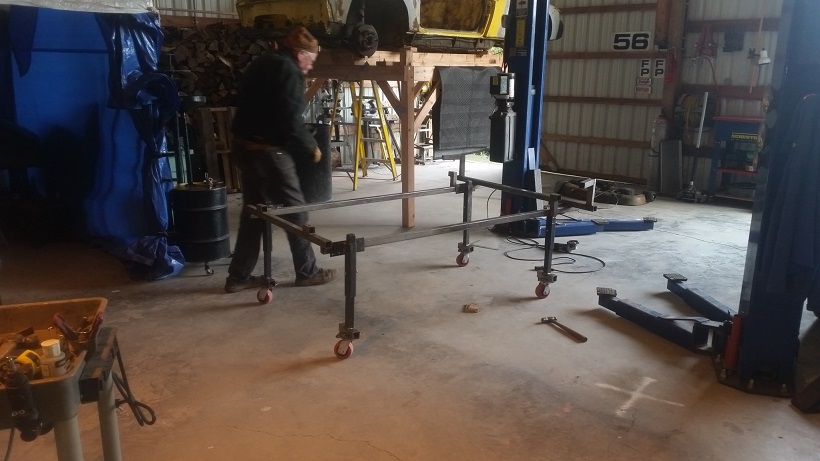 |
|
|
|
| cary |
Jan 31 2016, 09:00 AM
Post
#666
|
|
Advanced Member Group: Members Posts: 3,900 Joined: 26-January 04 From: Sherwood Oregon Member No.: 1,608 Region Association: Pacific Northwest |
Another word of wisdom for those just getting into fabrication.
PLEASE cover all the glass on all your cars in the spray area when you you start to grind or weld. Those innocent little sparks will pit/melt the glass. 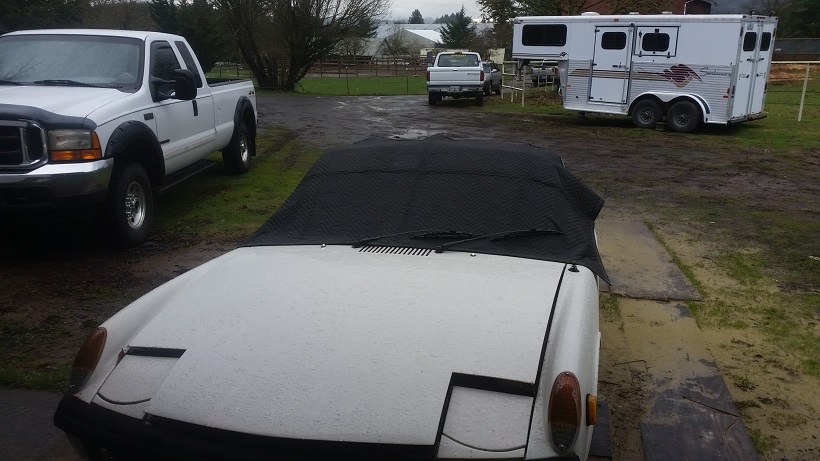 HF moving blankets are cheap. |
|
|
|
| cary |
Jan 31 2016, 09:43 AM
Post
#667
|
|
Advanced Member Group: Members Posts: 3,900 Joined: 26-January 04 From: Sherwood Oregon Member No.: 1,608 Region Association: Pacific Northwest |
After the rotisserie was finished I went after the rust holes in the spare tire well.
After about 3 hours I had one of the suspension mounts off without too much collateral damage. Only one of the spot weld holes went thru. (IMG:style_emoticons/default/biggrin.gif) The trick is to watch the color of the shavings. Generally they'll be a bit of rust between the layers. You'll see just a short blip of brown in the shaving. That's when you've passed thru the first layer. 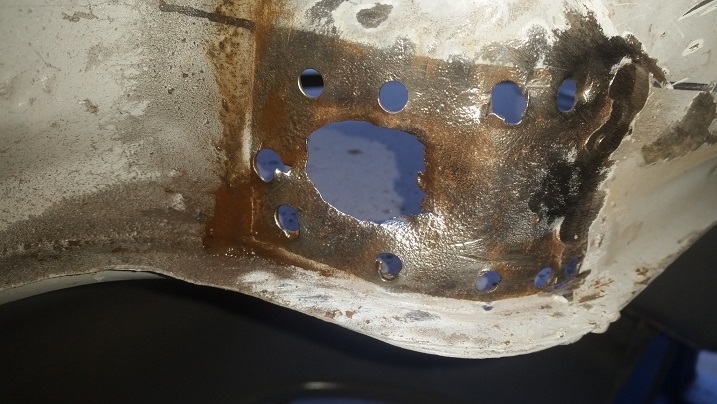 Because of the tight fit I used a 7/64 HF drill bit to drill thru both layers of each of the spot welds I could see. Because they seam welded after the spot welding, a couple were hard to locate. I drilled some from the inside, some from the outside. 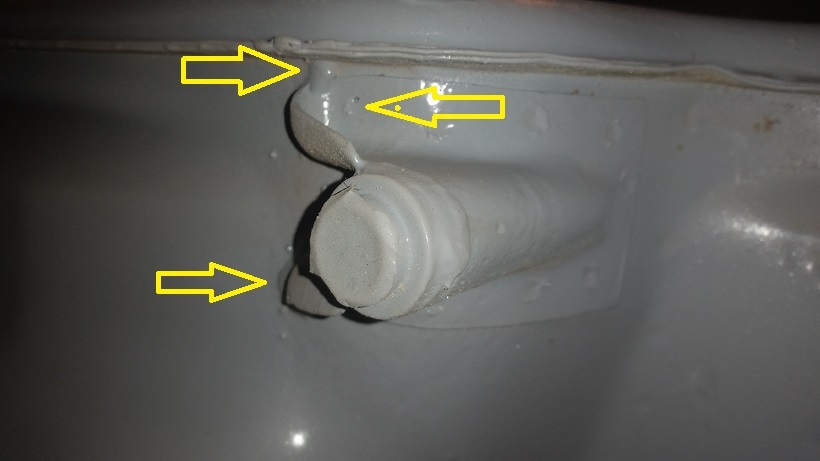 Getting the seam welds cut without too much damage was a bitch. Most was done with the air hack saw bent like a noodle. After taking the guard/guide off. This was after I made a many and as big of cuts as I could make with the air grinder on the mandrel. I'm always thinking would the time I just spent be worth the money I would be paying or charging ............ three hours to get a part off without damaging the part ? The problem was exasperated by the fact that there was a spot weld under the seam weld. (IMG:style_emoticons/default/sad.gif) 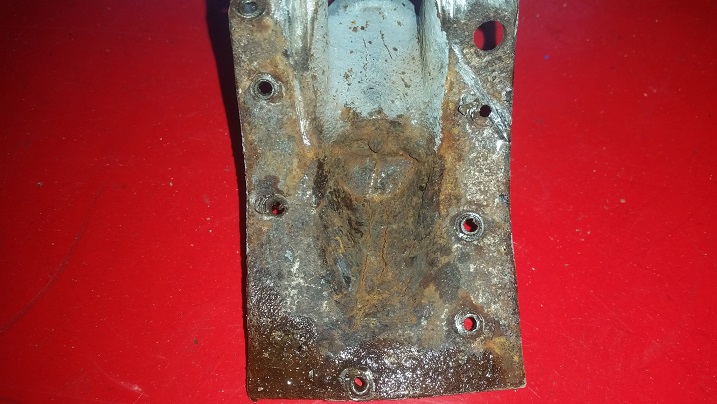 This is a shot pre bead blaster cabinet. The mount is solid as a rock. Measured 13 gauge. Was left in the OSPHO pan drying. The metal in the rusted hole gets pretty solid right close to the rusted edge. The welding in of the patch will determine how I proceed. Completely rosette weld in the 1/4" spot weld cutter holes? Or fill in and drill a new 3/16 holes? |
|
|
|
| cary |
Feb 2 2016, 09:31 AM
Post
#668
|
|
Advanced Member Group: Members Posts: 3,900 Joined: 26-January 04 From: Sherwood Oregon Member No.: 1,608 Region Association: Pacific Northwest |
Decided to seal up the inside of the OSPHO'd door. I used the HD Eastwood stuff that I already had. Kind of messy, but should do the trick. I'll probably still seam seal the joint using my finger later. I'll wait till both doors are done.
camera lens must have had a smudge on it 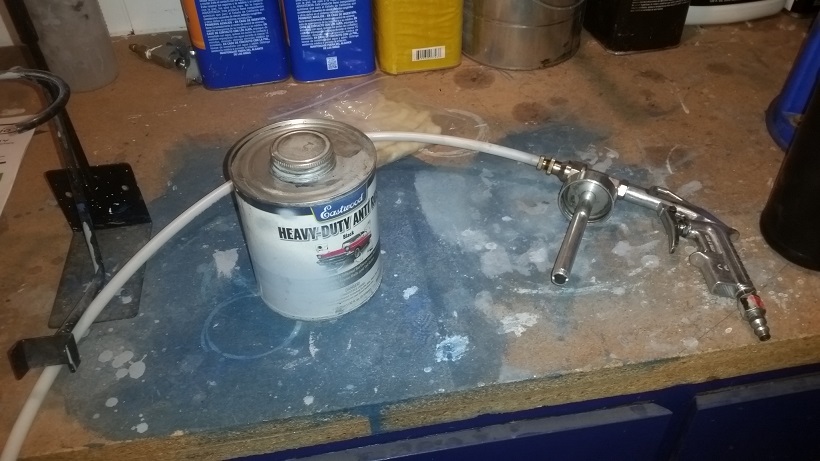 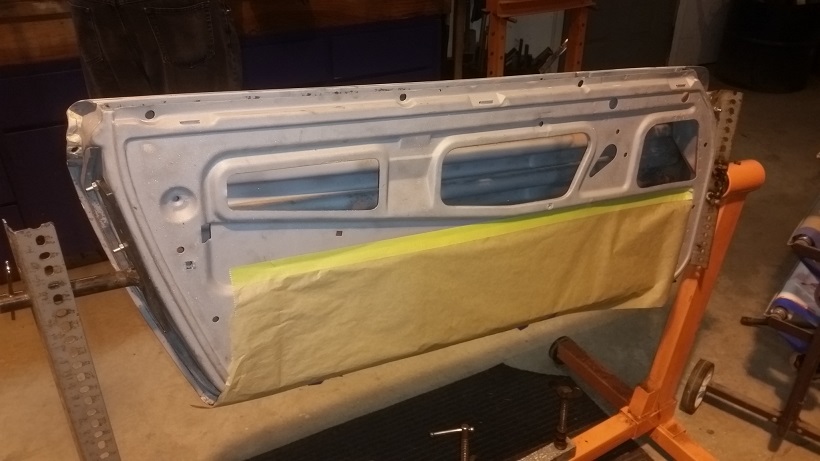 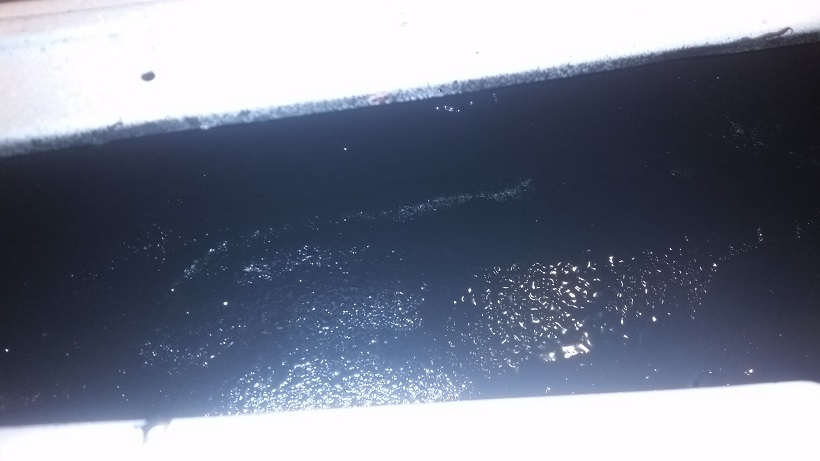 I'll add a picture of the lap joint if I can take it |
|
|
|
| cary |
Feb 2 2016, 09:18 PM
Post
#669
|
|
Advanced Member Group: Members Posts: 3,900 Joined: 26-January 04 From: Sherwood Oregon Member No.: 1,608 Region Association: Pacific Northwest |
New season of Tool Whore ...............
Nike Hydraulics Dataliner 80 Frame Bench with homemade drive on rails. It was on my retirement wishlist (10-12 years out), but it fell in my lap. It came with a Blackhawk Quadri-Clamp. 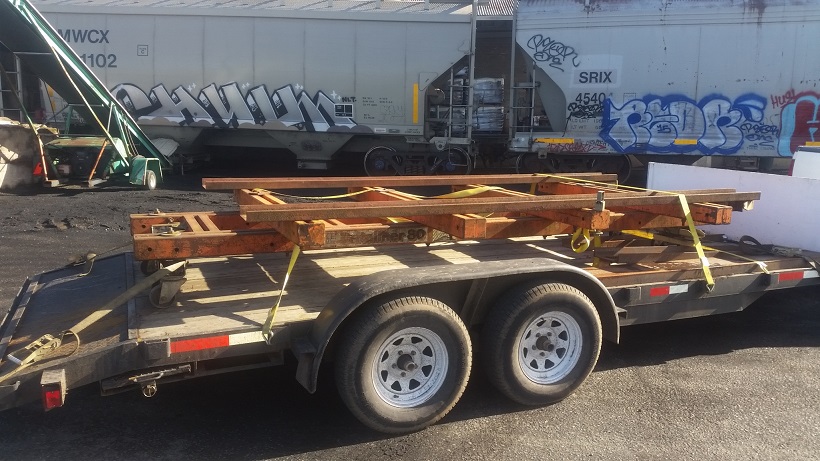 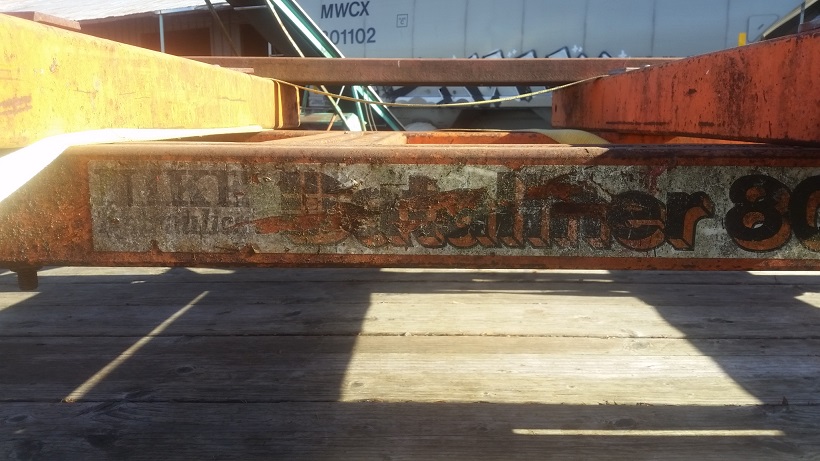 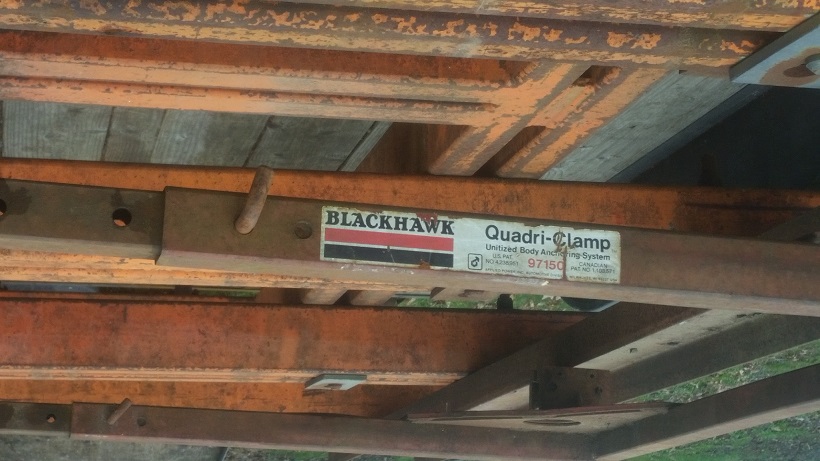 I have no intention of doing any frame pulling. Just a fixture to hold the tub in place when replacing longitudinals. For the short term it will give me endless hours of internet research time to figure out how I'll build the 6 or 8 tub mounting fixtures. |
|
|
|
| PlantMan |
Feb 3 2016, 02:45 PM
Post
#670
|
|
Member Group: Members Posts: 462 Joined: 14-May 14 From: Mission Viejo Member No.: 17,352 Region Association: Southern California |
QUOTE(cary @ Jan 23 2016, 08:52 PM)  Finished up the door patches. Had trouble with the grinding. I'm sure the pitting on the backside is causing the issues. Weak spots. Corner was a bit of work. The channel is two layers and pitted so it was either too hot or too cold. Blew thru this area about 5 times over grinding. Ended the day with hanging the door in Super In Laws new fixture. This allowed me to spray down the inside with OSPHO. Drip drying over the old mat. Cary, Newbie question I know, but what is the thickness of the sheet metal on the doors, 22ga? I have similar issues to deal with. What is going on with the job BTW? I worked in the grocery biz for 10 years while going to school....I do miss it sometimes. Thanks! |
|
|
|
| Andyrew |
Feb 3 2016, 02:50 PM
Post
#671
|
|
Spooling.... Please wait Group: Members Posts: 13,380 Joined: 20-January 03 From: Riverbank, Ca Member No.: 172 Region Association: Northern California |
22ga is about the same as HVAC ducting...
Its about 18ga. |
|
|
|
| cary |
Feb 3 2016, 08:46 PM
Post
#672
|
|
Advanced Member Group: Members Posts: 3,900 Joined: 26-January 04 From: Sherwood Oregon Member No.: 1,608 Region Association: Pacific Northwest |
What Andyrew said .................
As for the job hunt. Not really hunting. I still consider myself on sabbatical. I'd like to have a signed job offer, but it hasn't come yet. Wheels of progress move pretty slow. The process lost 30 days. 1. Negotiating a job change for the person I'm going to replace. 2. New boss took an emergency FMLA to care for his wife after surgery. But thanks for asking .............. |
|
|
|
| cary |
Feb 4 2016, 10:18 AM
Post
#673
|
|
Advanced Member Group: Members Posts: 3,900 Joined: 26-January 04 From: Sherwood Oregon Member No.: 1,608 Region Association: Pacific Northwest |
* Switched doors on the engine stand and sprayed it down with OSPHO.
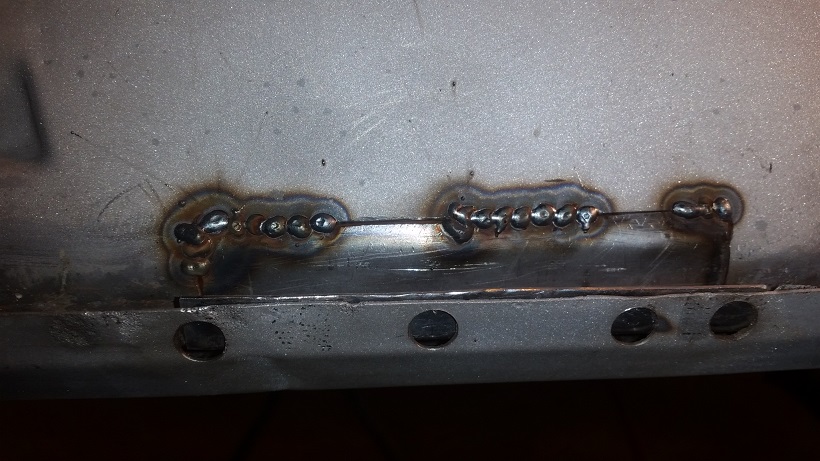
* Super In Law is working on the landlords lawnmower. He finally got it running. Looks like it will need a fuel pump dealy, engine vacuum diaphragm gadget. Now back to the front suspension repairs. Patch plate went in without too much of a fuss. 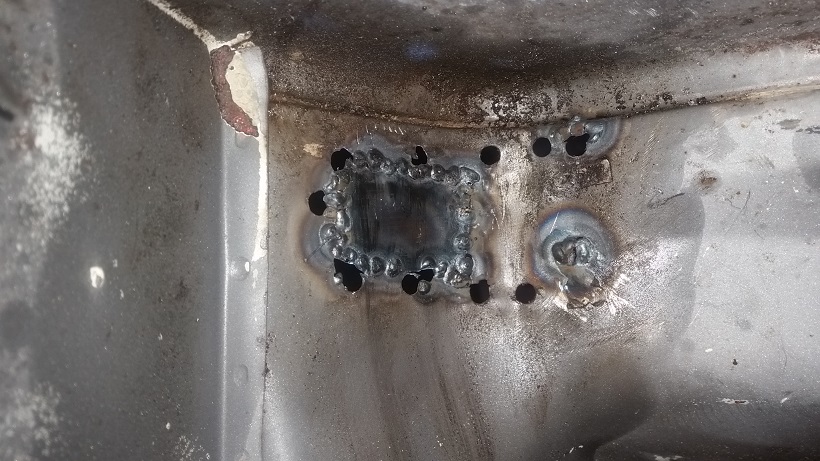 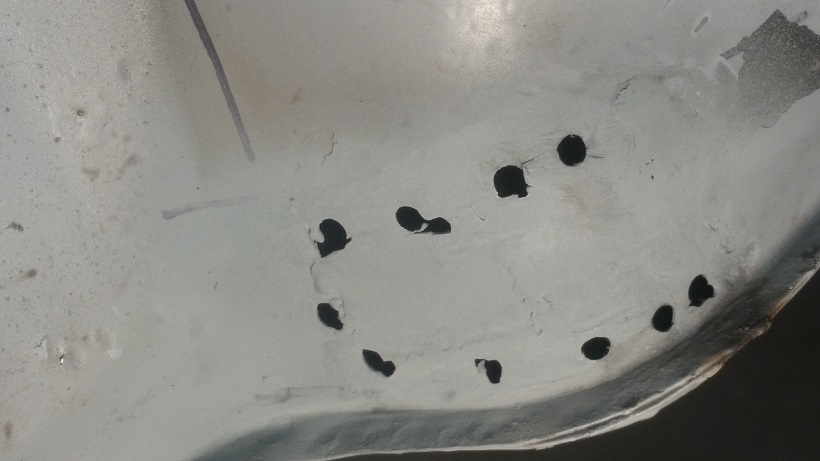 Decided to use the Clecos to hold it in place. Because you cant get your hand in behind the panel to hold it, it took two people. (IMG:style_emoticons/default/sad.gif) I almost bought a one man body shop in Montana years ago. So it kills when it takes two people to do something. What would I have done in that shop. Yellow circled items are the business end of the Cleco coming thru.  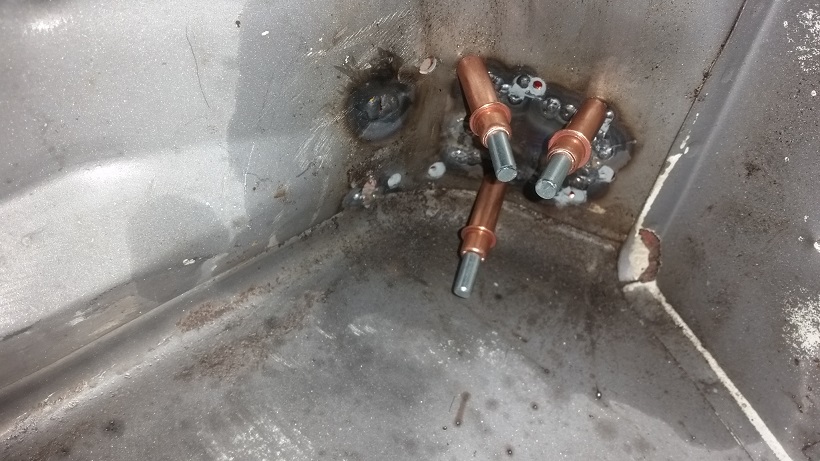 Welding was a little tricky. 1. Dumbass used too much weld thru primer again. Should have taped off the welding surfaces and brushed those on after the sprayed on had dried. 2. Once again welding the 14 gauge mount to the 18 gauge tub. 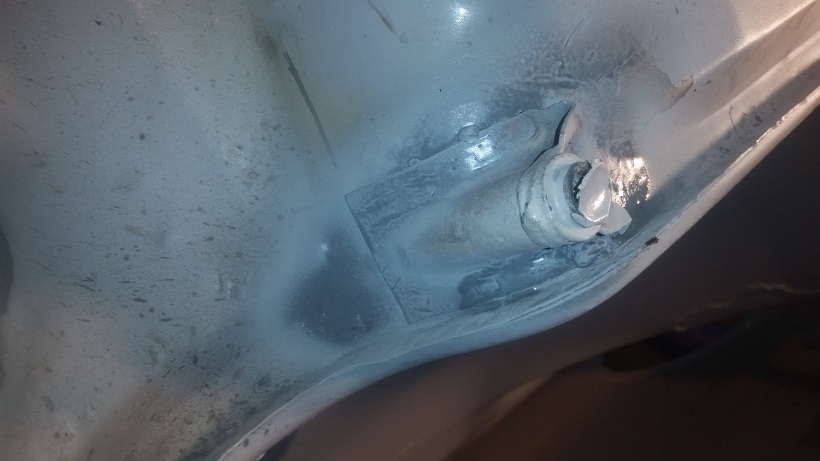 Gooder as new .................... |
|
|
|
| cary |
Feb 4 2016, 10:25 AM
Post
#674
|
|
Advanced Member Group: Members Posts: 3,900 Joined: 26-January 04 From: Sherwood Oregon Member No.: 1,608 Region Association: Pacific Northwest |
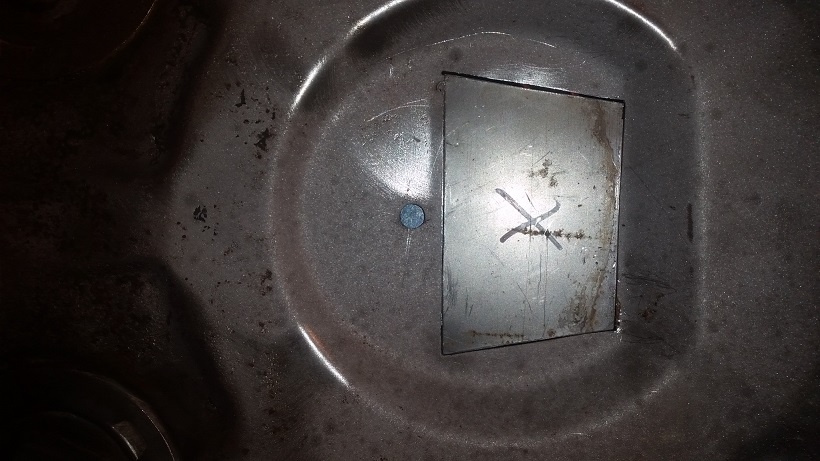
Now to the other side ................
Cut out the hole from inside the trunk. It looks like theres a second layer of metal. No, just a completely connected layer of rust. Chiseled it out with a screw driver and the air chisel turned down low. 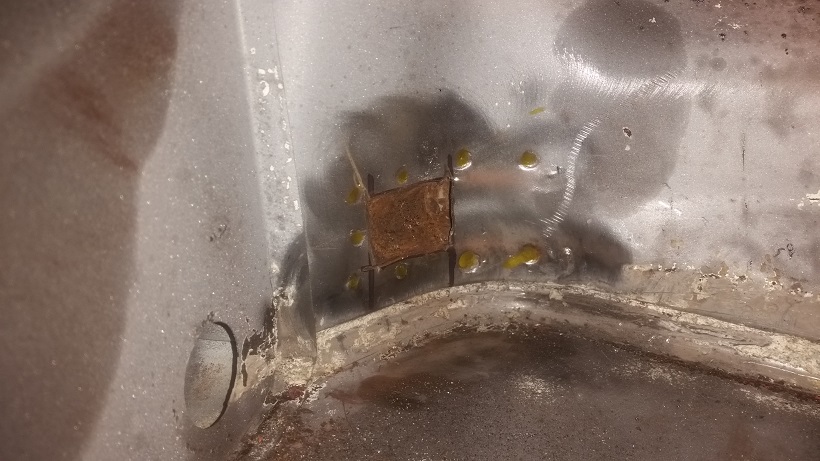 Filled the spot blaster with glass and cleaned it up. 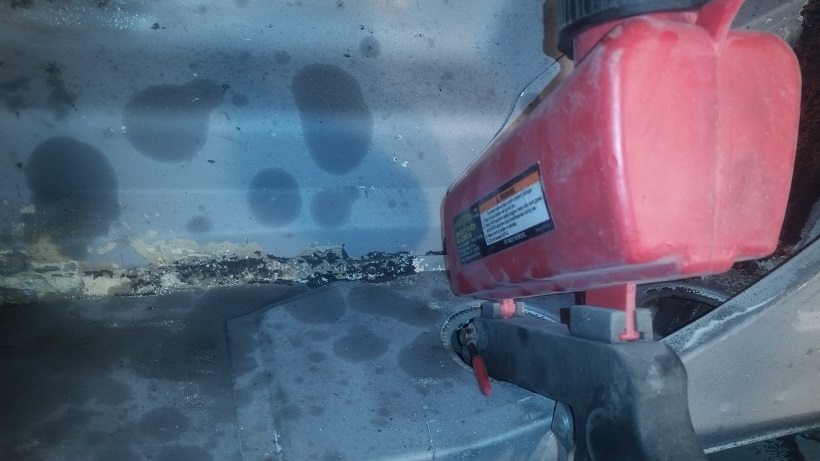 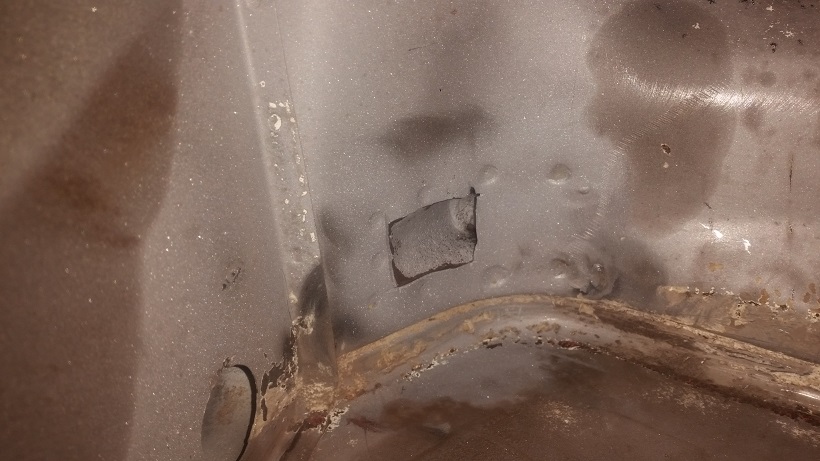 To be continued. Letting OSPHO dry 24 hours Welding didn't go too well. Didn't cut out a big enough hole. Edges of the hole were too thin and too much unseen rust under the edge. (IMG:style_emoticons/default/barf.gif)  But it cleaned up ok. 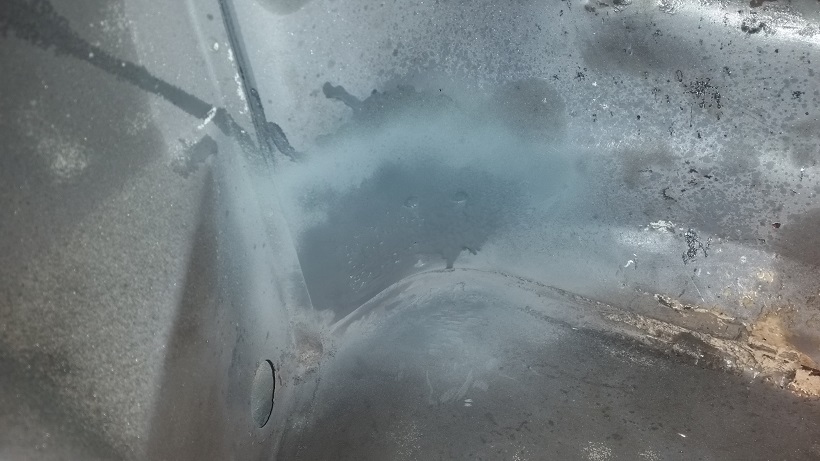 If I was to do it a third time I'd do it in two pieces. The area called out with the star gave me all kinds of trouble. Doing it in two pieces allows for a complete refresh without removing the suspension mount. (IMG:style_emoticons/default/biggrin.gif) 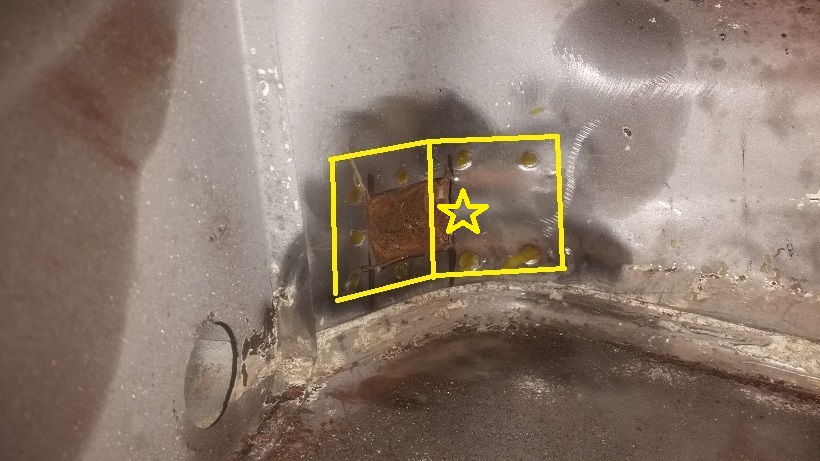 |
|
|
|
| cary |
Feb 4 2016, 10:36 AM
Post
#675
|
|
Advanced Member Group: Members Posts: 3,900 Joined: 26-January 04 From: Sherwood Oregon Member No.: 1,608 Region Association: Pacific Northwest |
On to the tow hook.
I was bound and determined not to drill thru with the spot weld cutter this time. Didn't make any difference I ended up cutting it all out anyway. 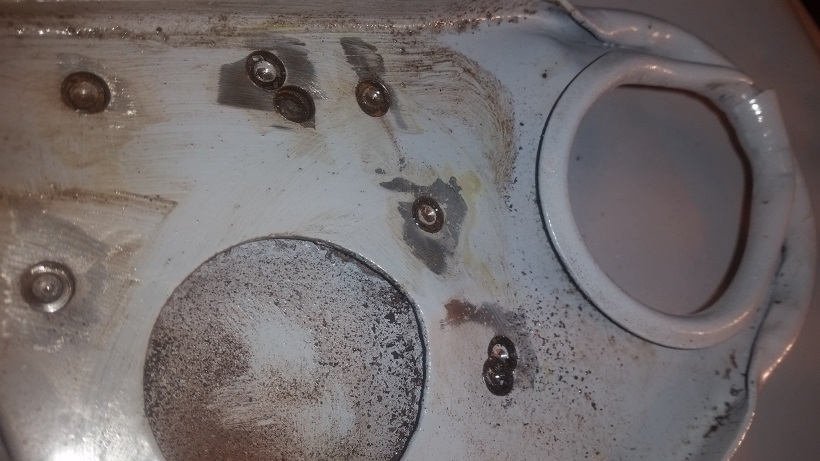 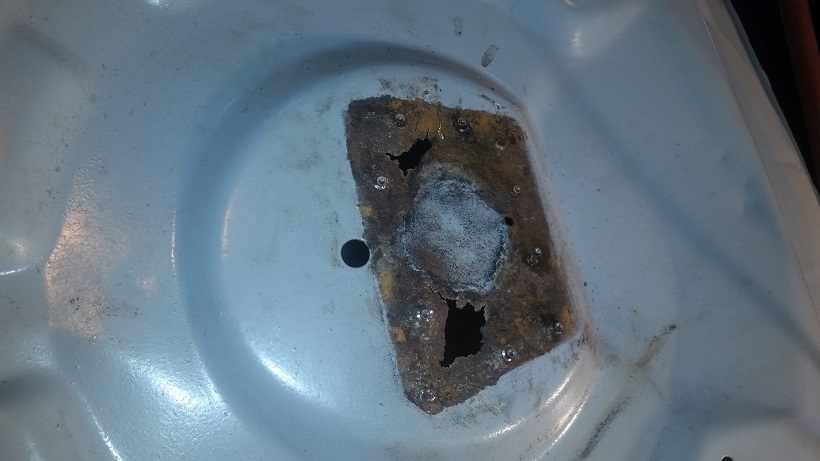 Didn't shoot a picture at the end of the day after I cut it out. I could have cut it a little close to the cancer hole. Patch will be easy. 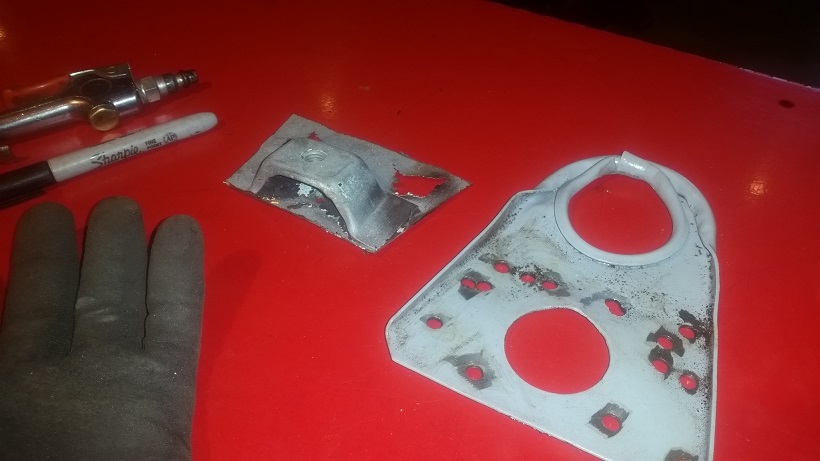 We'll do a little work on the tow hook and transfer the tire tie down to the patch panel. |
|
|
|
| cary |
Feb 4 2016, 11:10 PM
Post
#676
|
|
Advanced Member Group: Members Posts: 3,900 Joined: 26-January 04 From: Sherwood Oregon Member No.: 1,608 Region Association: Pacific Northwest |
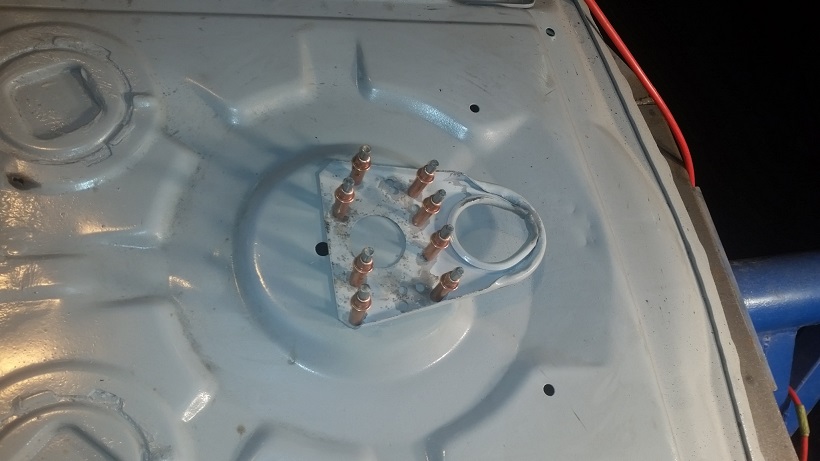
Patch might be a bit over sized. But that will make it easy to weld in. (IMG:style_emoticons/default/welder.gif)
 Blip, blip, blip ............... Three blips then cool with air. 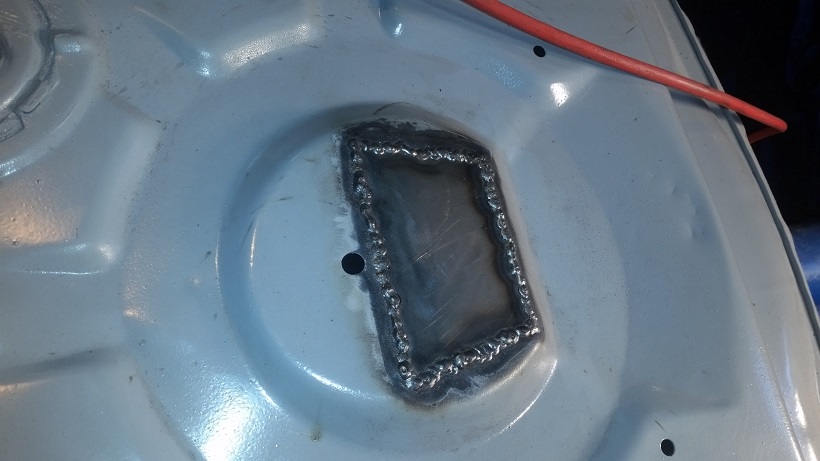 I'm really liking the EasyGrind wire and the Cubitron discs. 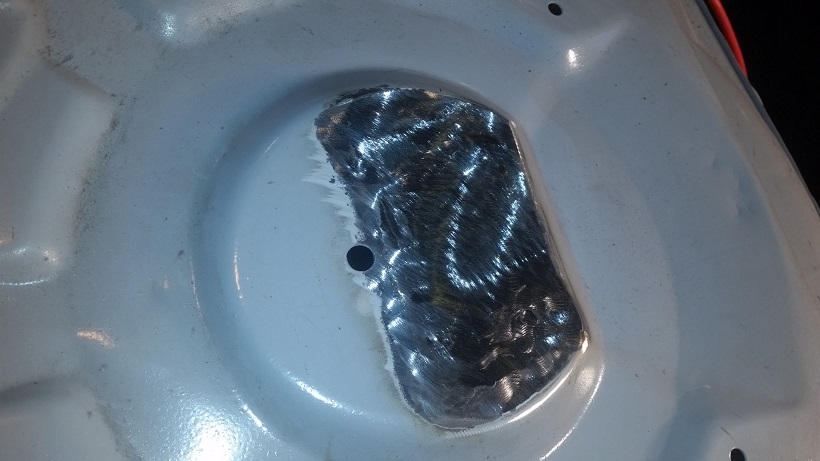 Prepping for the tire tie down. 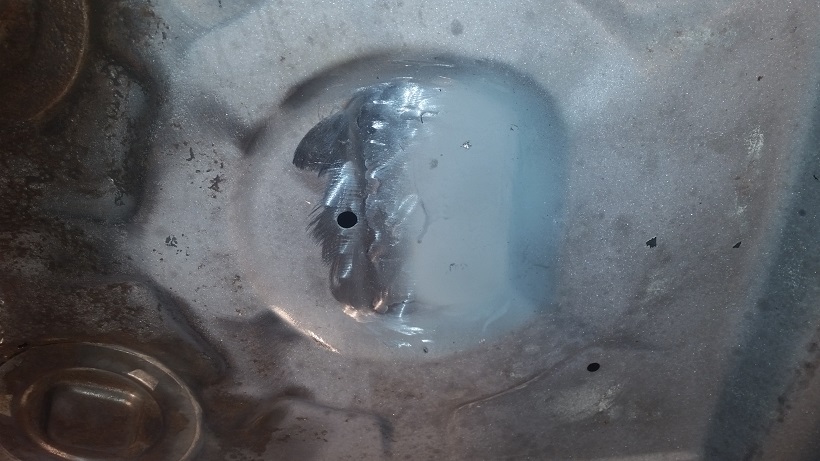 Used self tappers this time. Too easy. 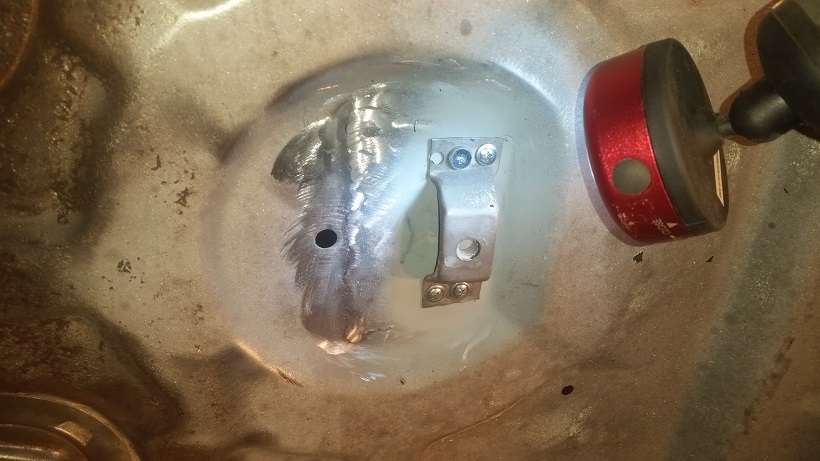 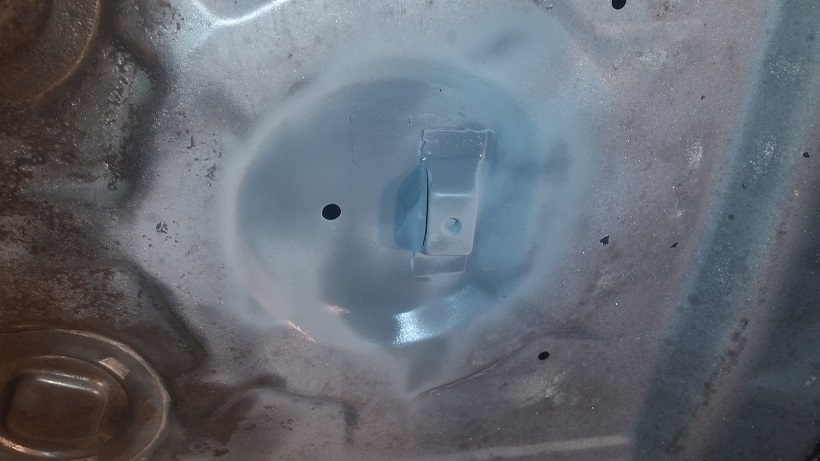 Moving right along ............... (IMG:style_emoticons/default/beer.gif) (IMG:style_emoticons/default/beer.gif) Note : I really like the way the NAPA Weld Thru Zinc Primer sprays out, but its too thick. I need to find the UPOL product. They say it lays down just the right thickness. |
|
|
|
| cary |
Feb 4 2016, 11:17 PM
Post
#677
|
|
Advanced Member Group: Members Posts: 3,900 Joined: 26-January 04 From: Sherwood Oregon Member No.: 1,608 Region Association: Pacific Northwest |
Now time to install the toe hook. Used the Clecos this time .............
  Great Day ...................... |
|
|
|
| raynekat |
Feb 4 2016, 11:36 PM
Post
#678
|
|
Advanced Member Group: Members Posts: 2,171 Joined: 30-December 14 From: Coeur d'Alene, Idaho Member No.: 18,263 Region Association: Pacific Northwest |
|
|
|
|
| cary |
Feb 6 2016, 12:29 PM
Post
#679
|
|
Advanced Member Group: Members Posts: 3,900 Joined: 26-January 04 From: Sherwood Oregon Member No.: 1,608 Region Association: Pacific Northwest |
My middle son texted me yesterday and asked what I was doing today.
Answer : Pulling seam sealer from the front trunk. Boring 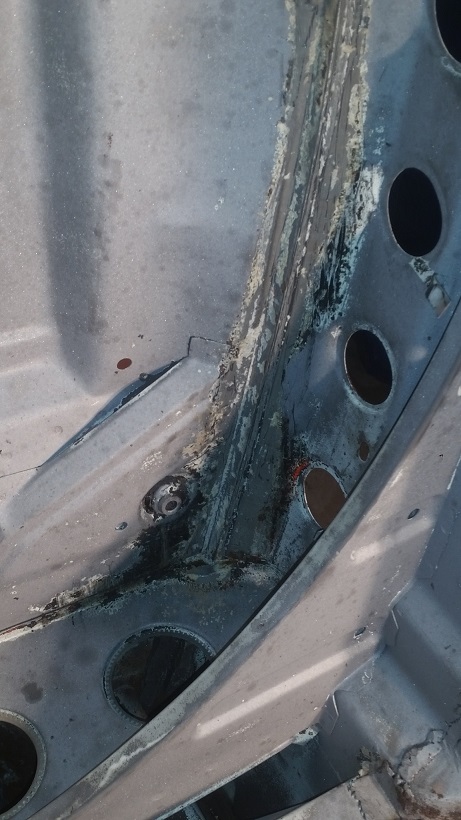 Pretty easy with the heat gun and the air scraper. Then come behind with a medium straight bladed screwdriver and the heat gun to clean out the seams. 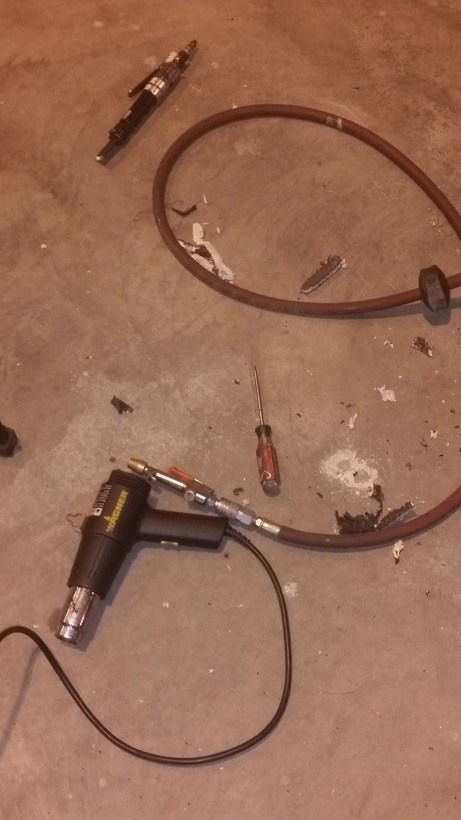 * Super In Law found a dropped exhaust valve seat on lawnmower #2. Opened up the cylinder head, froze the seat for a couple hours and peened it back in. Kind of hillbilly. But idea came off the Briggs & Stratton website. |
|
|
|
| cary |
Feb 6 2016, 01:03 PM
Post
#680
|
|
Advanced Member Group: Members Posts: 3,900 Joined: 26-January 04 From: Sherwood Oregon Member No.: 1,608 Region Association: Pacific Northwest |
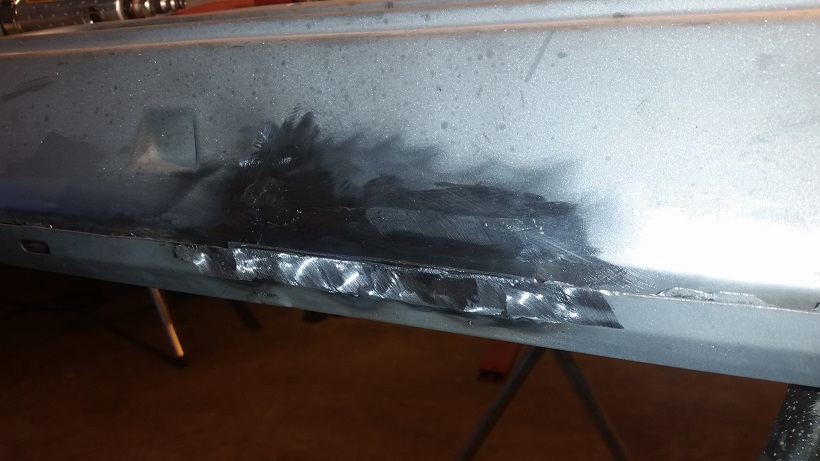
But as I began to work on the seam sealer in the gas tank area I find my next major rust challenge. Looks like one of the POs did a fine temporary leak repair above the front trunk cable pull. In the close quarters blasting I thought it was just some of the POR15 work we did when we got the car.
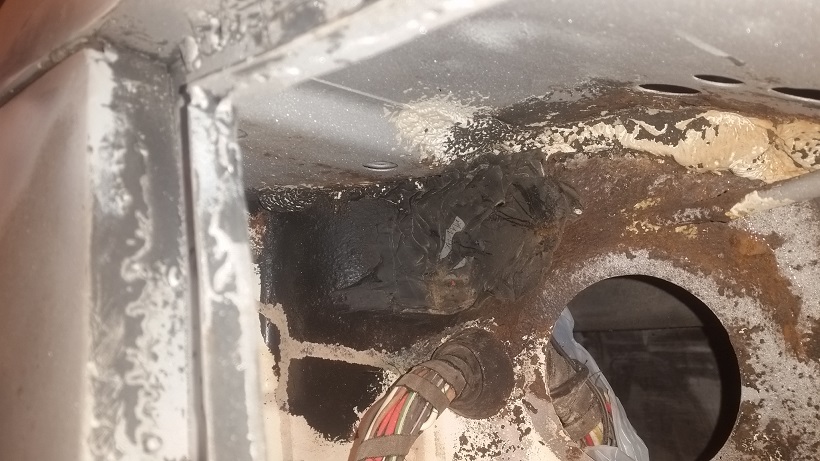 Looks like a steel plate and some seam sealer/tar. Don't thinks its tar. It's set up pretty hard. Here's what It should look like. From 74 2L over in next building. 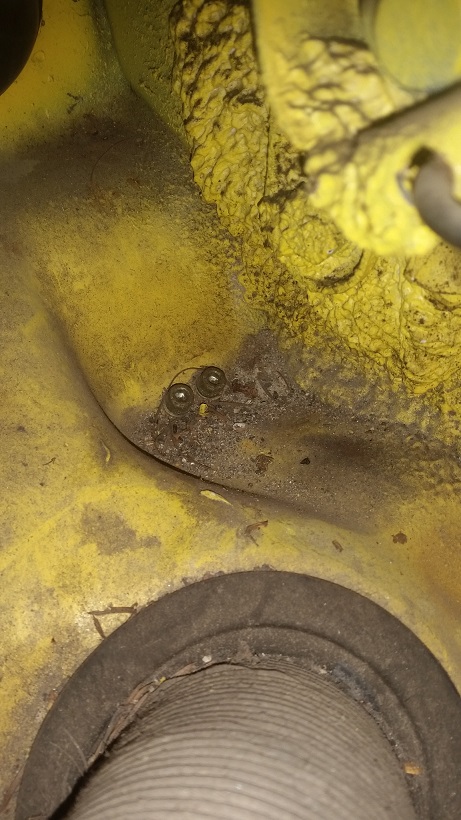 Here's what the parts car looks like. About the same as the project. 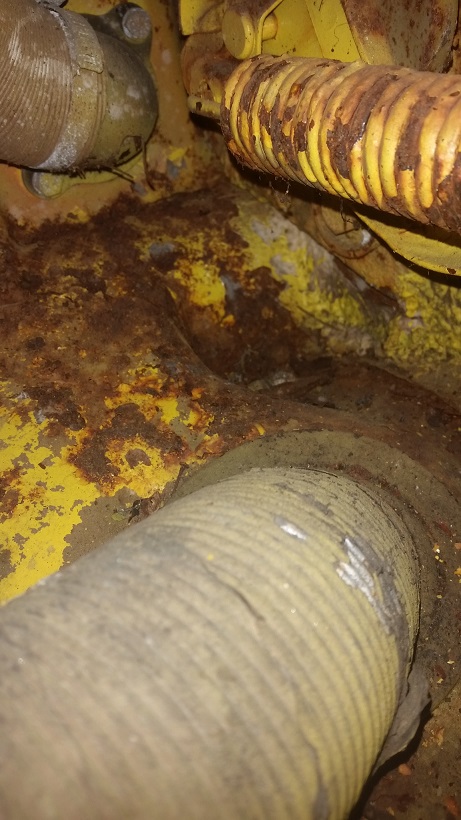 |
|
|
|
|
2 User(s) are reading this topic (2 Guests and 0 Anonymous Users)
0 Members:

|
Lo-Fi Version | Time is now: 24th June 2026 - 11:26 AM |
Invision Power Board
v9.1.4 © 2026 IPS, Inc.