|
|
|
Porsche, and the Porsche crest are registered trademarks of Dr. Ing. h.c. F. Porsche AG.
This site is not affiliated with Porsche in any way. Its only purpose is to provide an online forum for car enthusiasts. All other trademarks are property of their respective owners. |
|
|

  |

| cary |
 Feb 6 2016, 01:29 PM Feb 6 2016, 01:29 PM
Post
#681
|
|
Advanced Member  Group: Members Posts: 3,900 Joined: 26-January 04 From: Sherwood Oregon Member No.: 1,608 Region Association: Pacific Northwest |
Here's the cut out piece that I'll use as a pattern.
 Consolation prize : Complete front trunk pull. Handle, mount and tube. 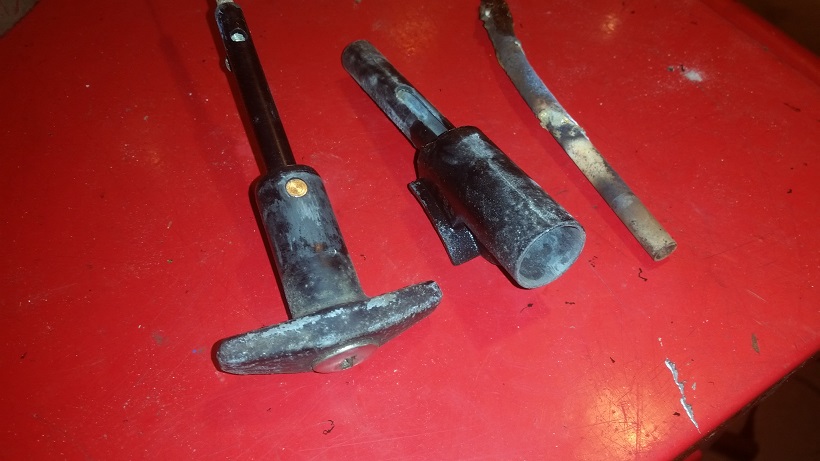 Another odd observation while doing the cutting. The parts car's front trunk seal channel is almost perfect, no rust blow outs. |
   |

 
|
| cary |
Feb 9 2016, 10:16 AM
Post
#682
|
|
Advanced Member Group: Members Posts: 3,900 Joined: 26-January 04 From: Sherwood Oregon Member No.: 1,608 Region Association: Pacific Northwest |
We start the week with a beautiful day here in PDX. 60+ degrees and beautiful sunshine.
* Super In Law got the second lawnmower running. Still might have issues with the switch and starter relay. * A while later I see him out at the trailer scoping out the frame bench. 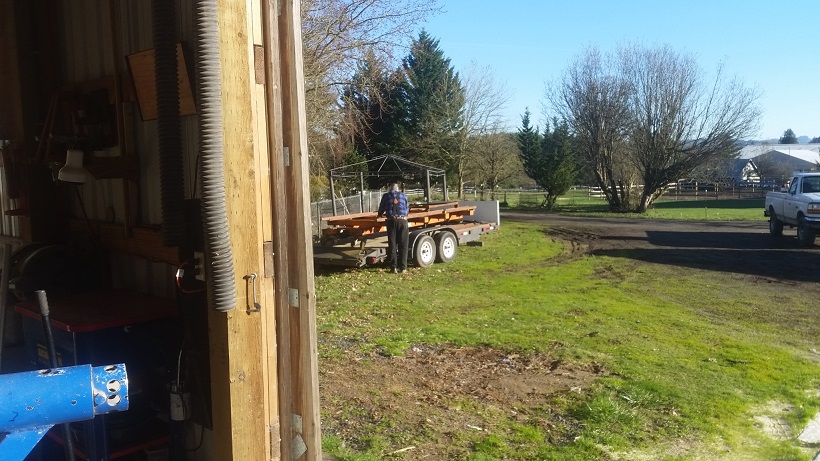 I gave him a couple shots of the Celette fixtures to start thinkng about. 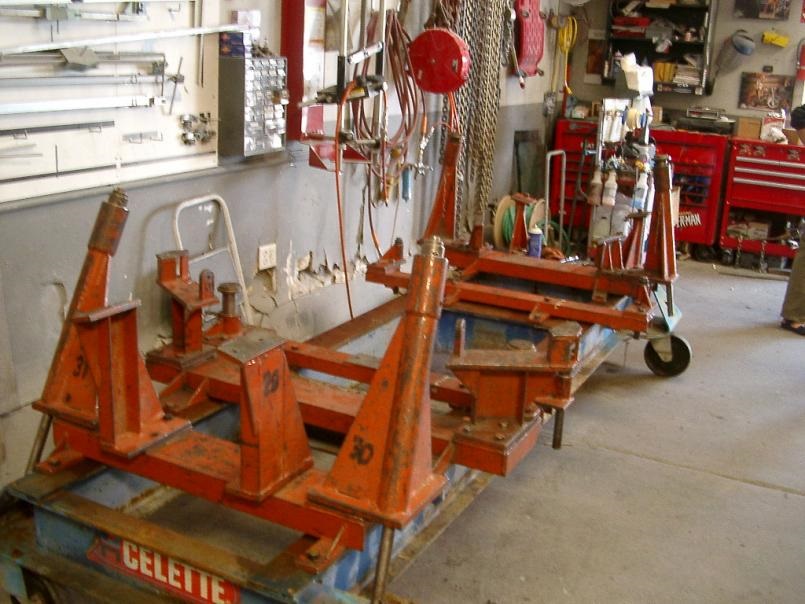  Plan is to give it a quick paint job before we bring it inside. I'll use implement paint from one of the farm stores. Orange for the bench. Ford blue for the fixture. |
|
|
|
| cary |
Feb 9 2016, 10:36 AM
Post
#683
|
|
Advanced Member Group: Members Posts: 3,900 Joined: 26-January 04 From: Sherwood Oregon Member No.: 1,608 Region Association: Pacific Northwest |
So the surgery begins. Kind of a tough spot to work in.
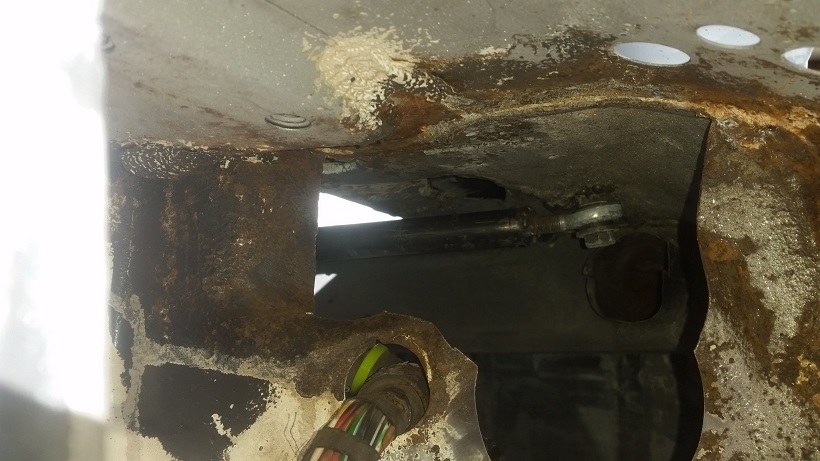 After cutting it out I should have left the hose hole intact. At the time it looked easier. I just couldn't get a good starting point with the air saw. 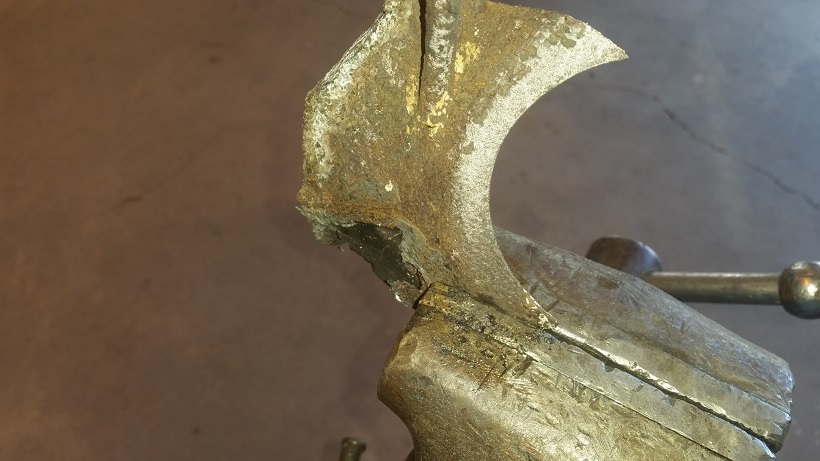 Lots of pitting from water being left laying in there. (IMG:style_emoticons/default/sad.gif) Which makes for tough welding. 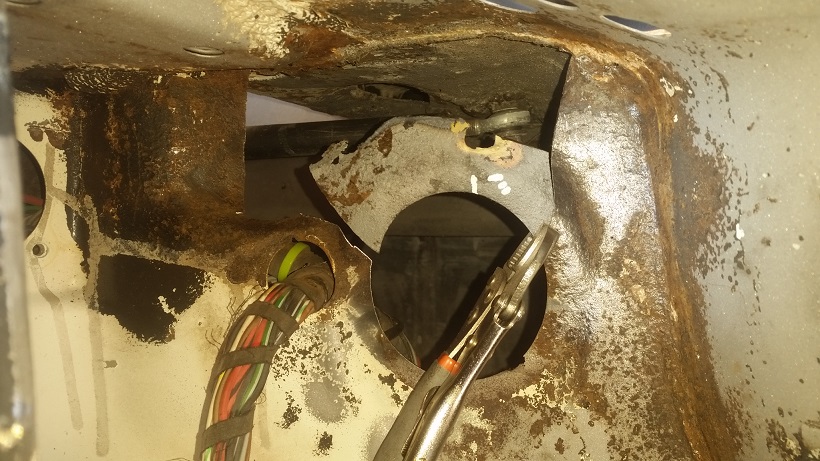 I did run the piece thru the blast cabinet to clean it up. The white 1" tells me were the hole is if I cut that portion off. 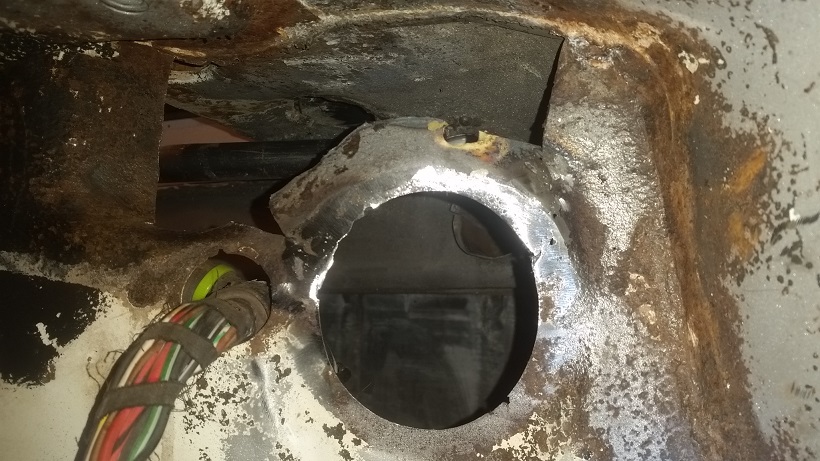 I'll finish up the rest of the seam sealer removal then take it out and blast the seams an the this area. Then we'll start the pattern making. Should be another beautiful day .................. (IMG:style_emoticons/default/welder.gif) |
|
|
|
| cary |
Feb 9 2016, 10:25 PM
Post
#684
|
|
Advanced Member Group: Members Posts: 3,900 Joined: 26-January 04 From: Sherwood Oregon Member No.: 1,608 Region Association: Pacific Northwest |
I finished removing the seam sealer in the gas tank trunk. Doing so I did open up 3 holes that were hidden under the seam sealer that looked perfectly fine. (IMG:style_emoticons/default/mad.gif)
EDIT : Added a picture of rust holes that came out with the seam sealer. Circled in yellow. 2/10/16 This is right above the pedal cluster. 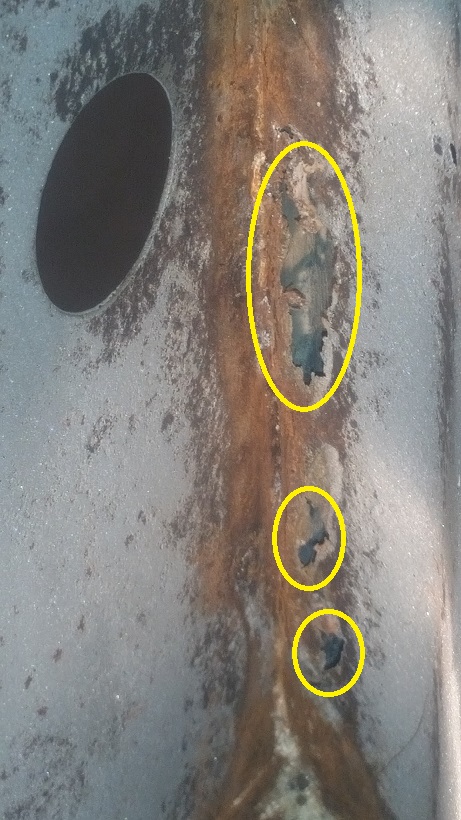 When we got back from lunch I put on my Big Boy pants and started removing the wiring harness. It's in the way working on our new rust hole. And it will make spraying the primer much easier. I should have bit the bullet earlier ............. It wasn't all that bad. Was hoping to save the snorkel, but my fuel line fittings made it too tough. 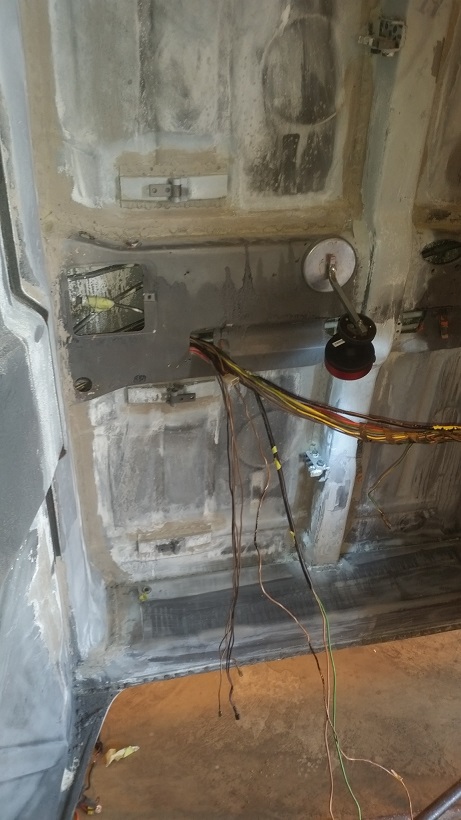 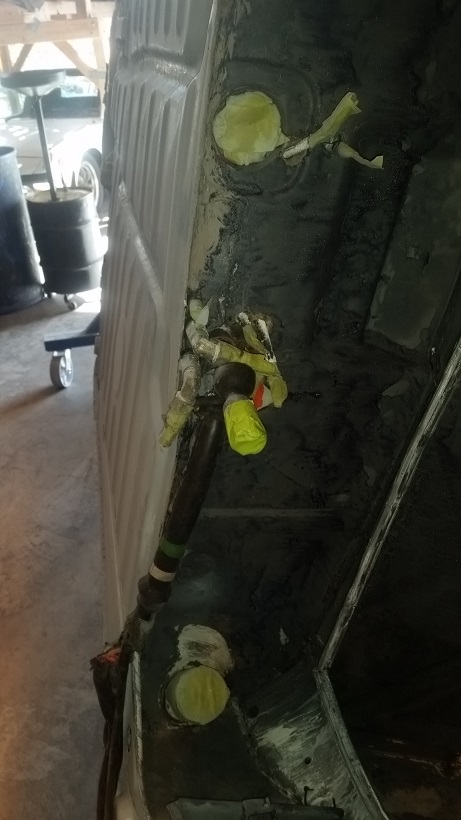 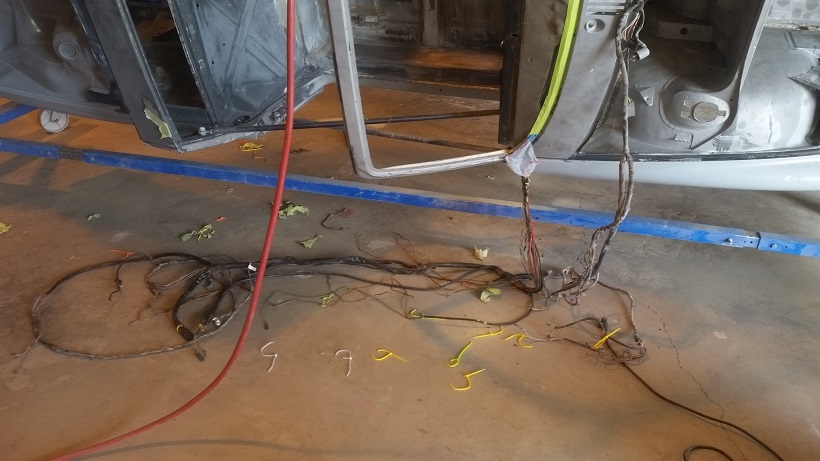 Here's a shot of the nut that holds in the glove box. 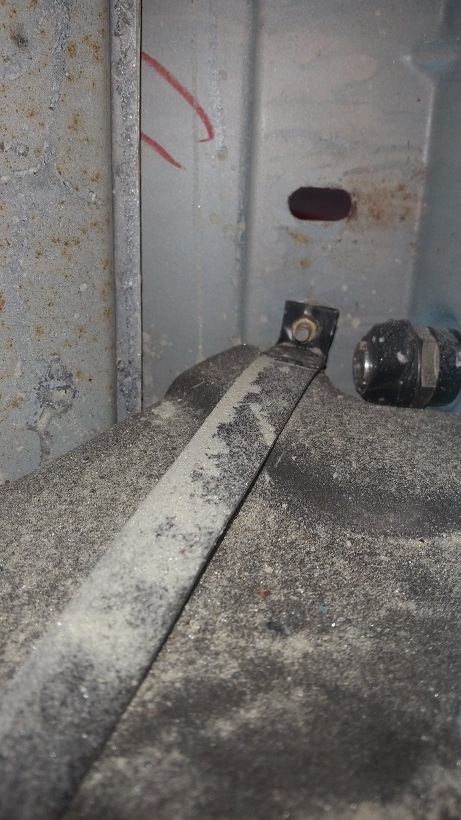 While I was doing that Super In Law was working on fabricating the patch panel. Not quite done yet ............ but it should come together. 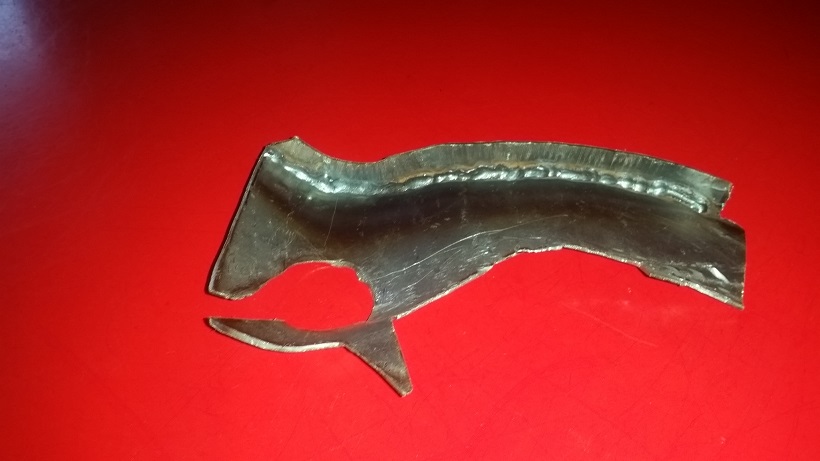 |
|
|
|
| cary |
Feb 11 2016, 12:56 AM
Post
#685
|
|
Advanced Member Group: Members Posts: 3,900 Joined: 26-January 04 From: Sherwood Oregon Member No.: 1,608 Region Association: Pacific Northwest |
* Ran downtown to buy 5 new wheels for my rolling stool.
Then set about removing the steering column and the dash. This will give us more room for welding in our rust repair panel. 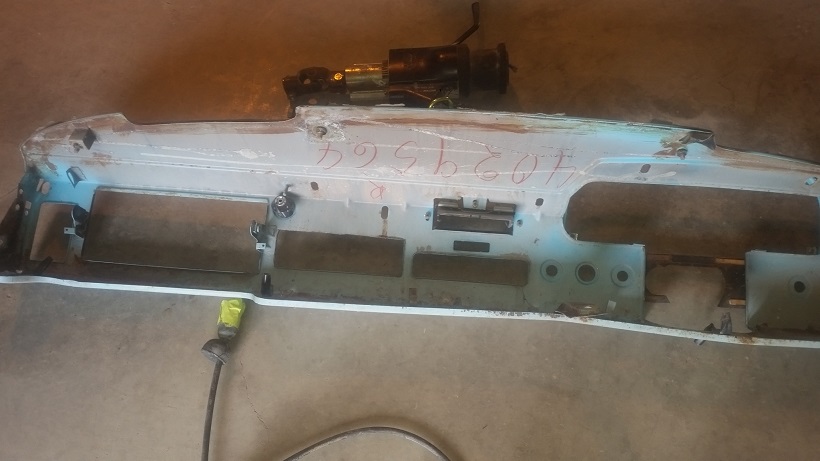 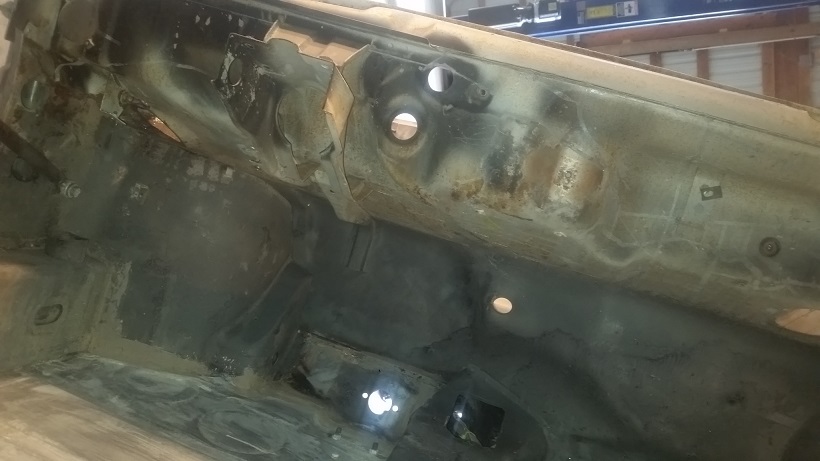 Plus it will allow me to do a better job of blasting and spraying epoxy primer. |
|
|
|
| cary |
Feb 12 2016, 09:58 AM
Post
#686
|
|
Advanced Member Group: Members Posts: 3,900 Joined: 26-January 04 From: Sherwood Oregon Member No.: 1,608 Region Association: Pacific Northwest |
* Rolled the car outside as soon we got organized and started blasting the trunk(s) and dash. Rain was scheduled to start around 1pm. Damn weather, it started at 11am.
I just about got it all. I'll still need to blast under the cowl. Then we puttered on the two patch panels. Here's a shot of the front trunk pull mounting area all cleaned up. We may start over and cut out beyond the bottom of the picture. The area in the box is paper thin. If I can get a nice weld on the weld called out with the area we might be able to get away with what we have already created. 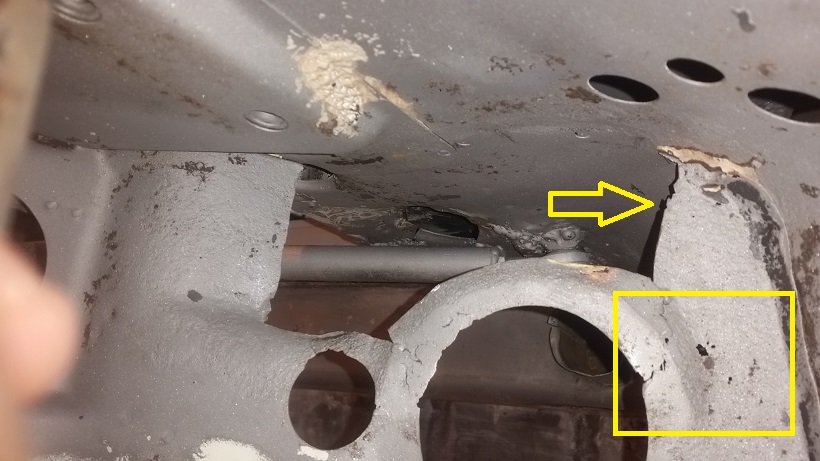 Here's a couple new shots of the spot that was created/reveled by removing the seam sealer. It's right above the master cylinder mounting location behind the pedal assembly. I tried a smaller patch, made a frikking mess. Couldn't see where the end of the wire was. 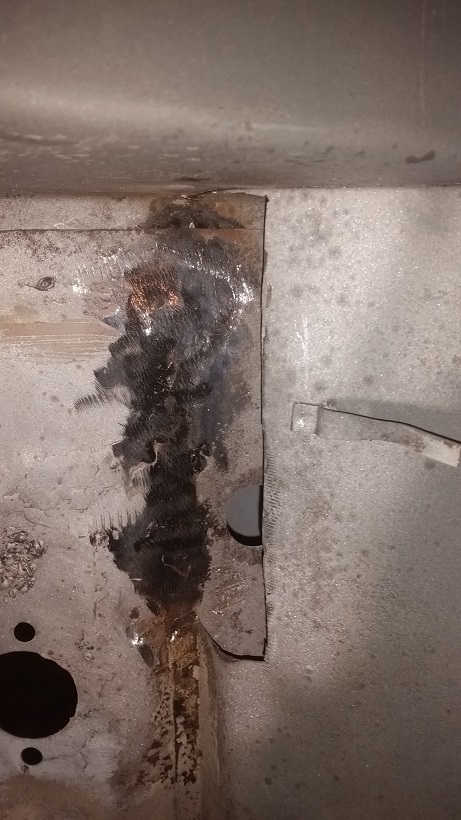 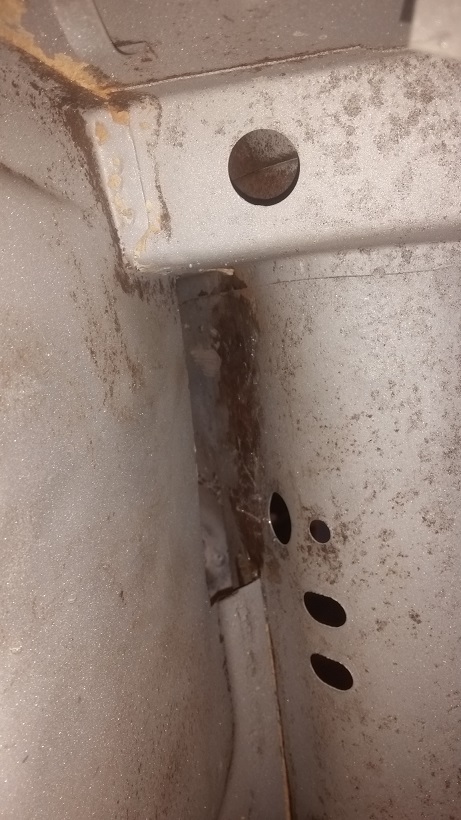 Today, Friday should be a fun day. (IMG:style_emoticons/default/welder.gif) Last night was the monthly Pelican PDX get together at the Taproom. Always a good time. For those following along. My new job has been approved and should be posted any day. Based on what I've been seeing, I'm thinking Monday or Tuesday. I did have a brief interview yesterday on a work from home sales rep position. Went well. They're looking into the being in Oregon ramifications. |
|
|
|
| bigkensteele |
Feb 12 2016, 04:37 PM
Post
#687
|
|
Major Member Group: Members Posts: 2,200 Joined: 30-August 04 From: Cincinnati, OH Member No.: 2,660 Region Association: South East States |
Great work! (IMG:style_emoticons/default/sawzall-smiley.gif) (IMG:style_emoticons/default/welder.gif)
Good luck with the new job. I am looking as well, and there isn't much out there right now in my little corner of the IT world. Glad you have a couple of leads. |
|
|
|
| cary |
Feb 12 2016, 10:23 PM
Post
#688
|
|
Advanced Member Group: Members Posts: 3,900 Joined: 26-January 04 From: Sherwood Oregon Member No.: 1,608 Region Association: Pacific Northwest |
The patch next to the master cylinder went in without too many issues. I did have one stitch blow out a little. But it tidied right up with the next stitch.
Here's what it looked like after the welding was finished. Welds are a little proud. But I was still concerned about the condition of the metal. Maybe I could have been just a bit hotter but it tidied up pretty nice. 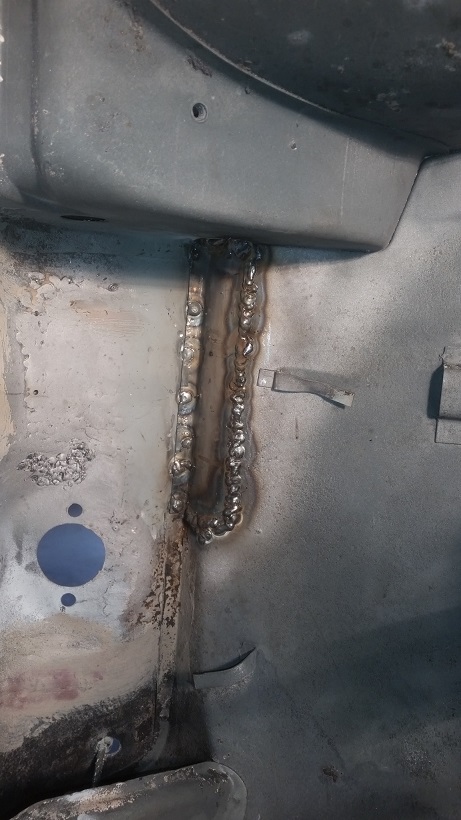 Here's the finished product. 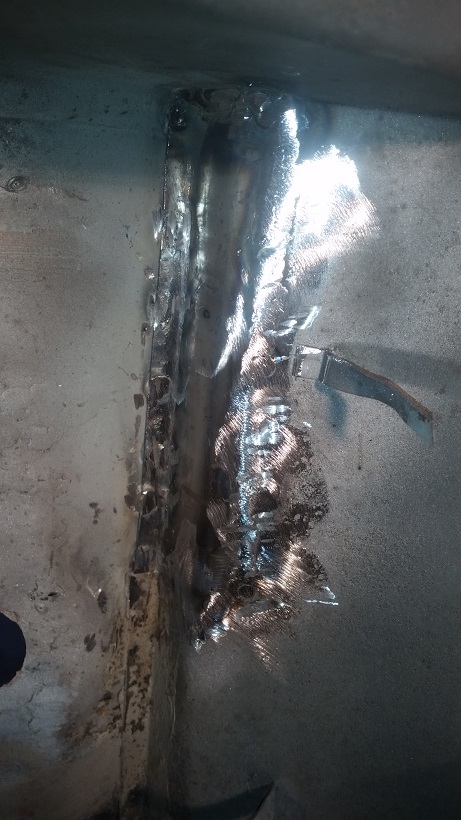 Here's a shot of the backside. Down inside the gas tank cavity. 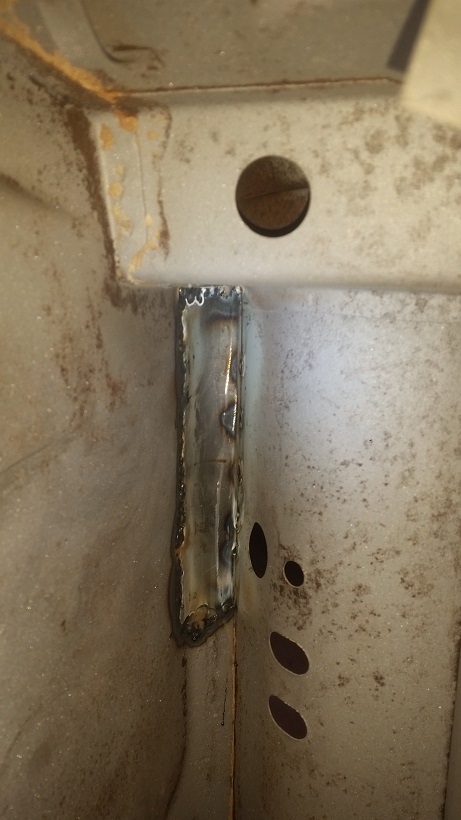 |
|
|
|
| cary |
Feb 12 2016, 10:39 PM
Post
#689
|
|
Advanced Member Group: Members Posts: 3,900 Joined: 26-January 04 From: Sherwood Oregon Member No.: 1,608 Region Association: Pacific Northwest |
I decided that bigger was better when it came to patches. So I went back after the front trunk pull rust area.
Here's the new hole ............... (IMG:style_emoticons/default/sawzall-smiley.gif) 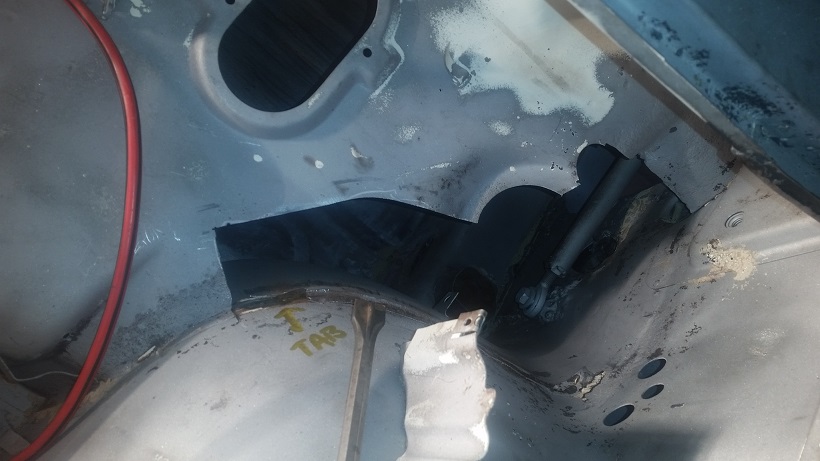 Then I needed to remove the spot welded flange that was left behind. Usually I go straight to the spot weld cutter. But considering how thin it was I decided to peel it off using my seam riper. 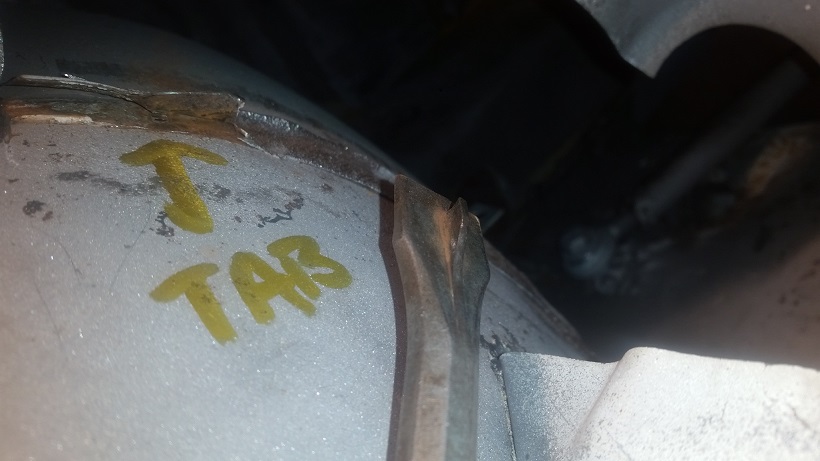 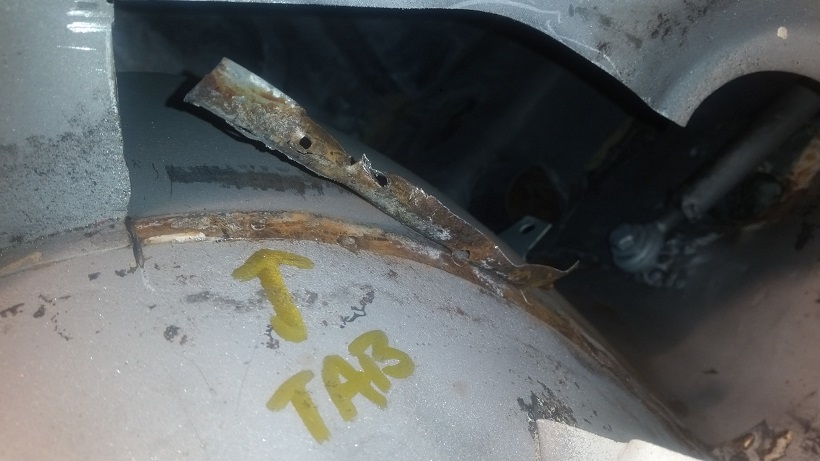 Here's where Super In Law ended the day with the patch panel. 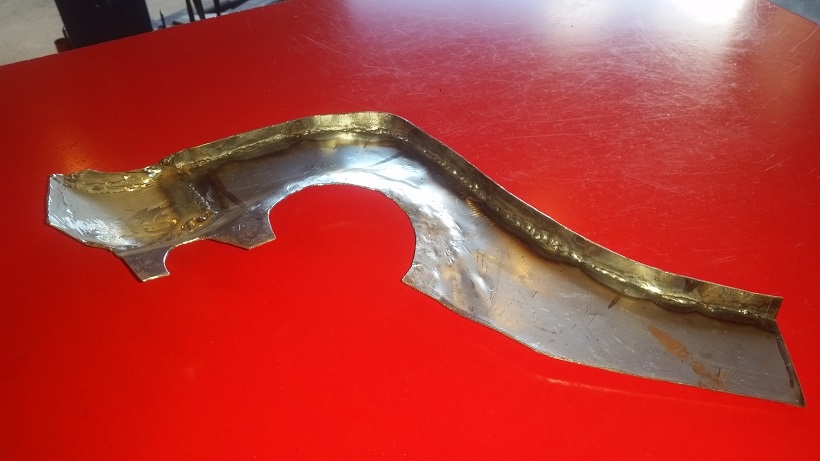 |
|
|
|
| cary |
Feb 14 2016, 11:22 AM
Post
#690
|
|
Advanced Member Group: Members Posts: 3,900 Joined: 26-January 04 From: Sherwood Oregon Member No.: 1,608 Region Association: Pacific Northwest |
Here's the next area slated for surgery after the front trunk pull is finished.
Originally I'd planned on just cutting out the rust and filling it with JB Weld. But my welding and metal fabricating skills have improved greatly. So I'm thinking I'll fix it the right way. Probably a mistake. 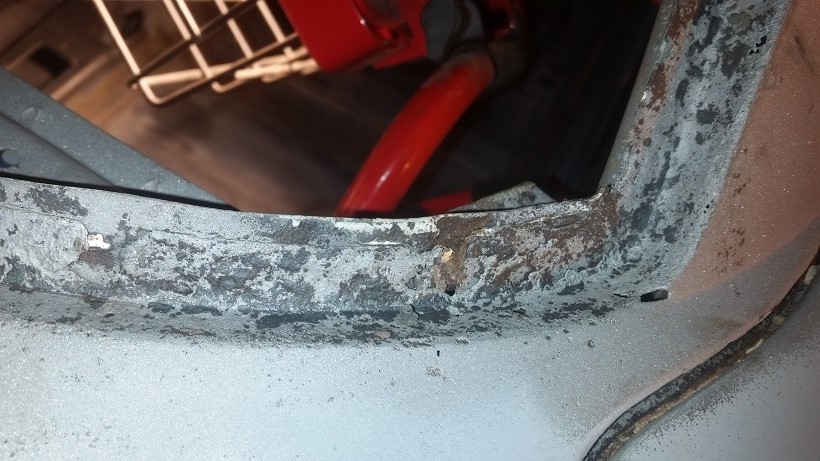 I did add it (both L&R) to the Restoration Design wish list on the vendor forum. |
|
|
|
| cary |
Feb 16 2016, 11:03 PM
Post
#691
|
|
Advanced Member Group: Members Posts: 3,900 Joined: 26-January 04 From: Sherwood Oregon Member No.: 1,608 Region Association: Pacific Northwest |
Yesterday was spent on my 911. I was getting it ready for the upcoming AX season.
Problem Area : Drivers door handle. Tough to open the door. Super In Law continued with creating the front trunk pull area patch panel. I start by welding in the rosettes that attach the patch panel to the fender. Holes were punched 1" apart with the HF flange/punch tool. 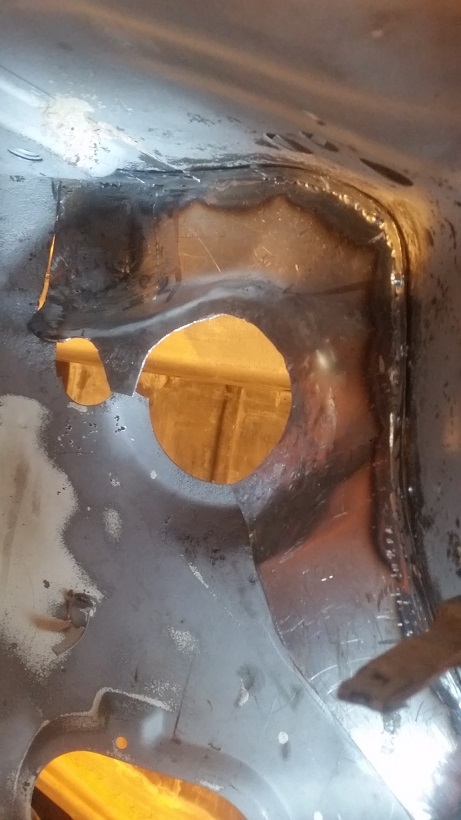 Other than the 4 rosettes under the trunk hinge the self tapping screw holes were backed up with brass. 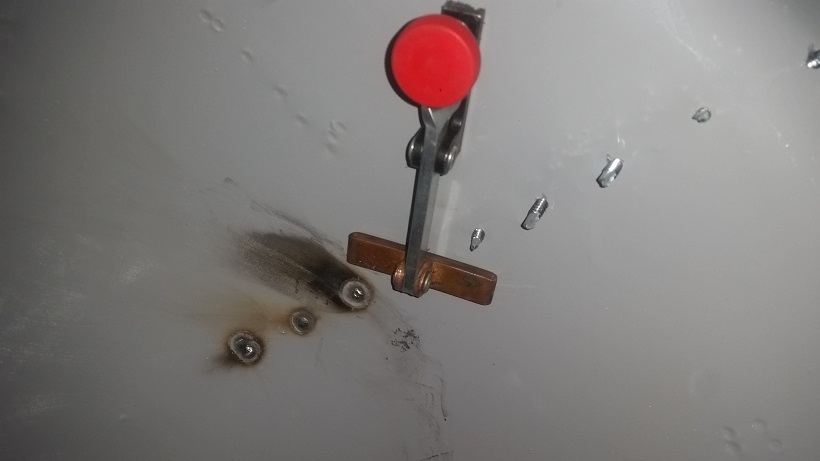 Now the fun begins. Two hours of leveling over and over again. The old metal was in much better shape than I expected. Most of the time I was doing two stitches. Then letting it cool down to 100 degrees. Two stitches, etc ....... 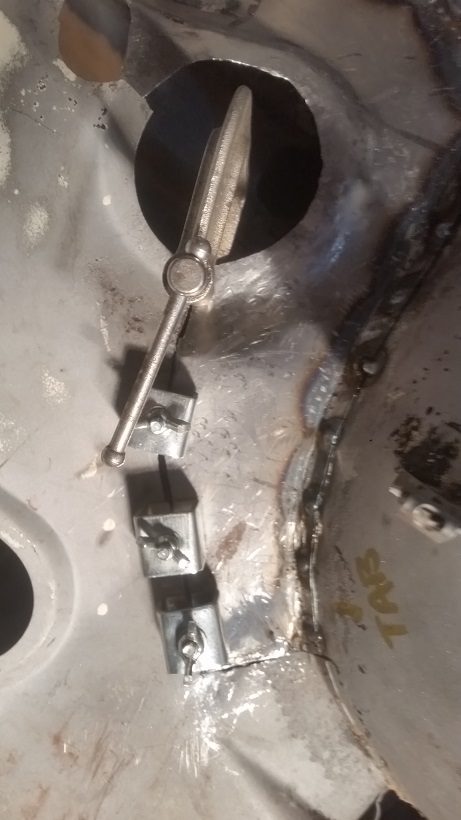 Weakest area was the edges of the old holes cut for the heater hose and the harness. 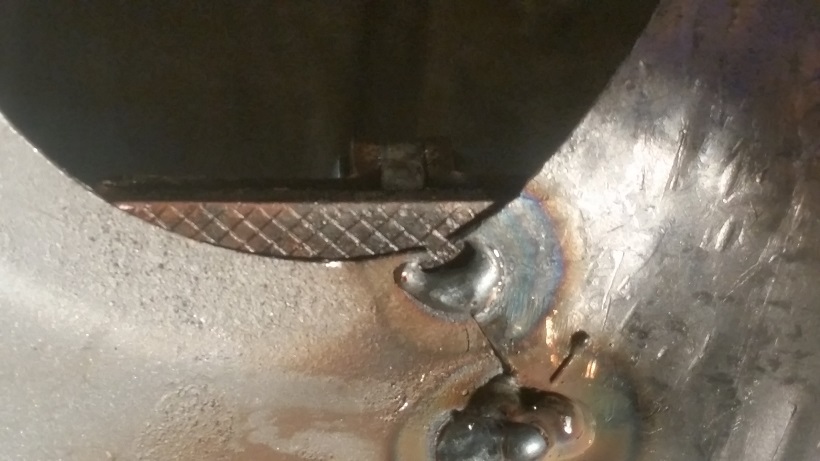 Still needs some grinding work in the circled area and on the back side. But it went together pretty well. The holes will need some additional fabrication tomorrow. 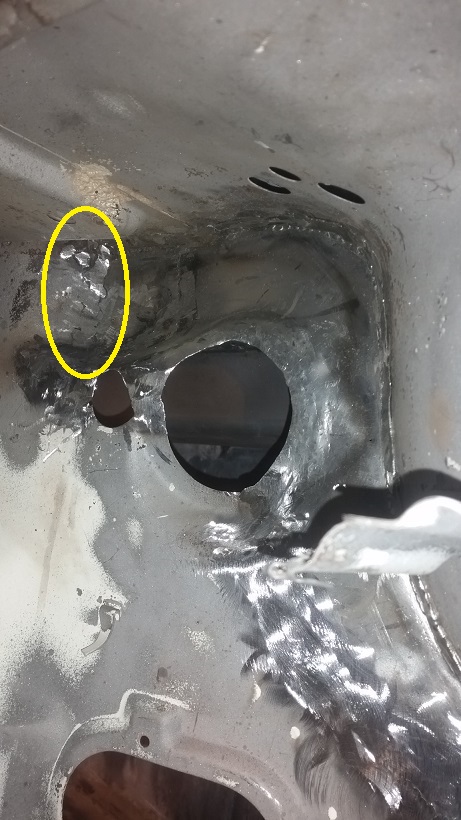 |
|
|
|
| cary |
Feb 17 2016, 09:02 PM
Post
#692
|
|
Advanced Member Group: Members Posts: 3,900 Joined: 26-January 04 From: Sherwood Oregon Member No.: 1,608 Region Association: Pacific Northwest |
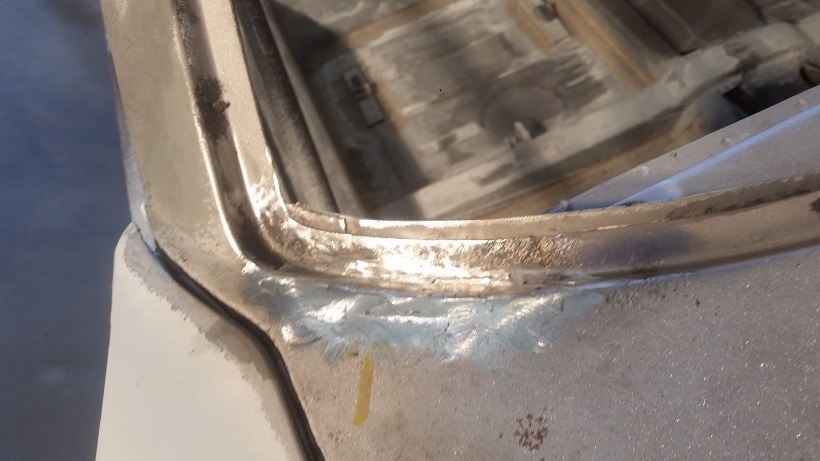
On to the windshield frame rust .......... Started on the smaller patch on the right side.
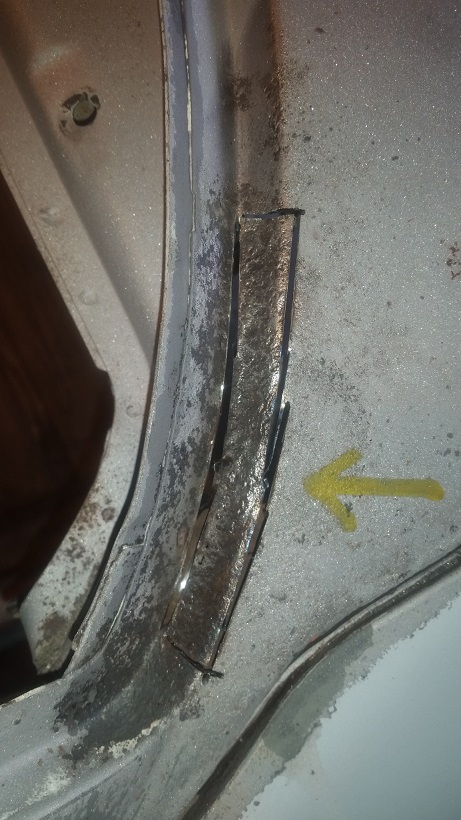 Created the patch using the shear and the shrinker/stretcher and a hammer and vice. 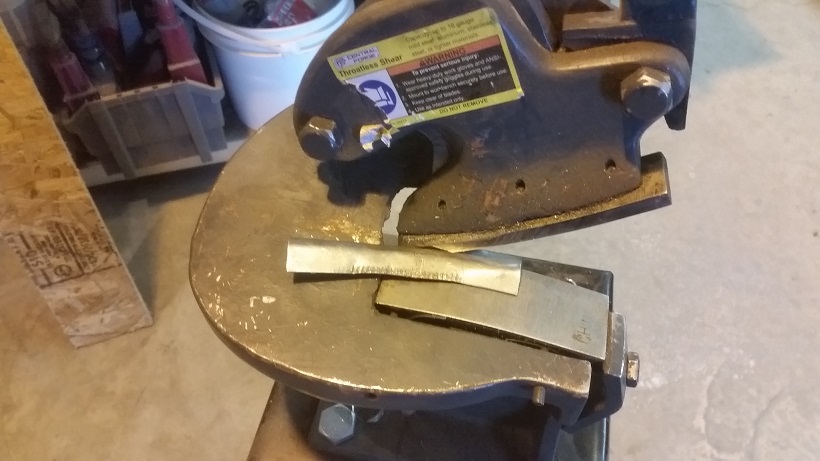 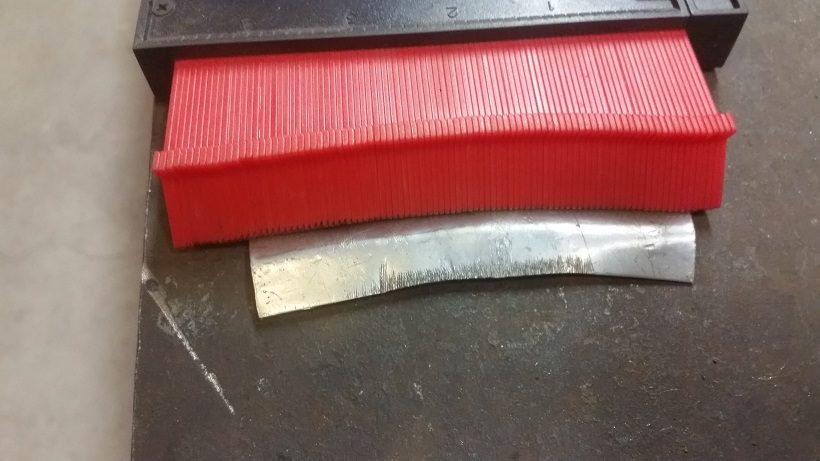 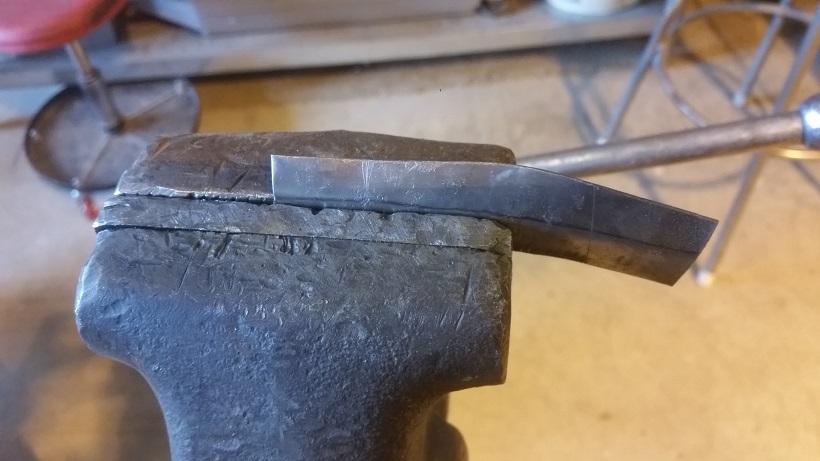 Here's the final product. The radius under the yellow will need to be moved forward a bit. 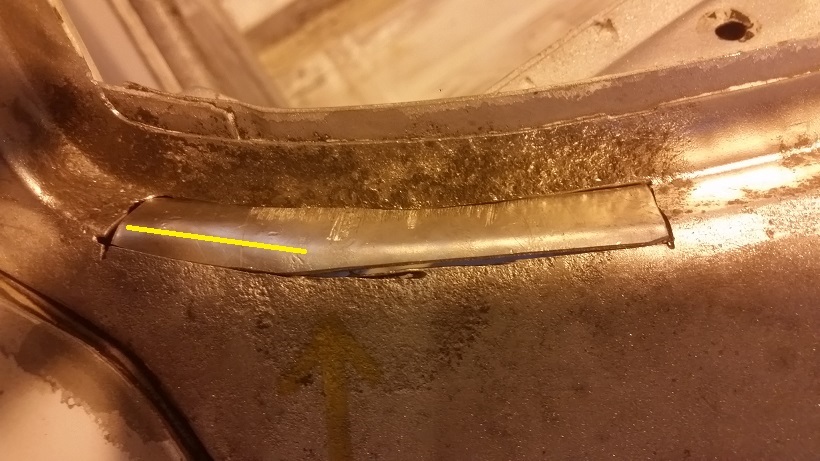 |
|
|
|
| cary |
Feb 17 2016, 09:33 PM
Post
#693
|
|
Advanced Member Group: Members Posts: 3,900 Joined: 26-January 04 From: Sherwood Oregon Member No.: 1,608 Region Association: Pacific Northwest |
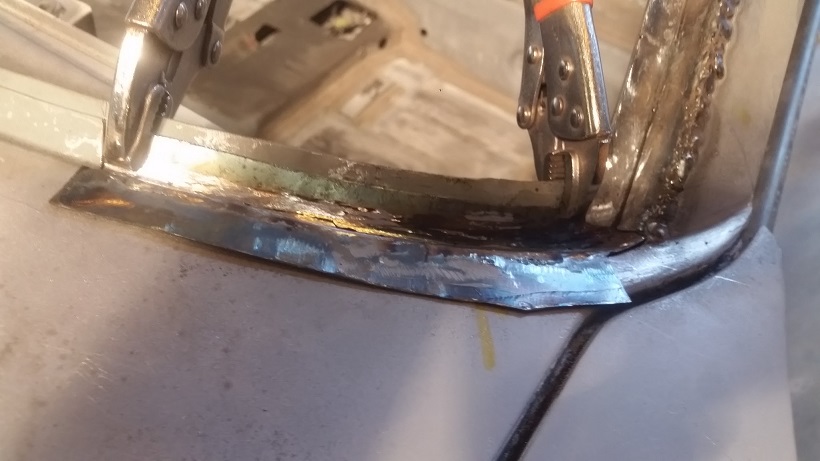
Now on to welding in the patch. I'm always paranoid when welding metal with this much degradation.
After spending quite a bit of time fine tuning the patch I finally had it ready for the first tack. That first tack put a smile on my face. (IMG:style_emoticons/default/biggrin.gif)  I thought I'd give you a shot of how I stitch. The wire tip is where I usually start. I start on the new metal, pull the puddle over to the old material then up to the previous stitch. 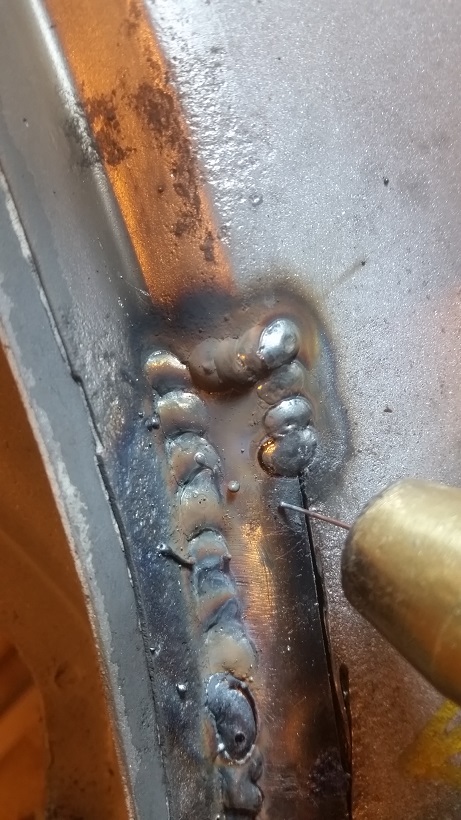 I did have one corner that blew out just a bit. But it tidied up with a couple more stitches. 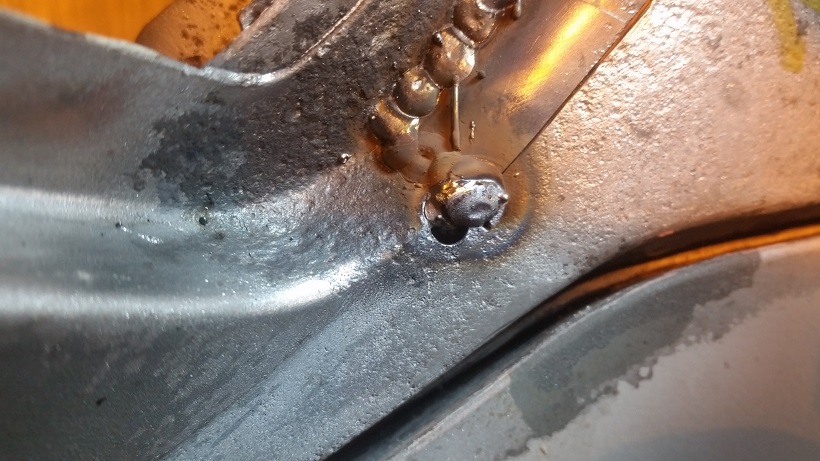 Here's the final result before I get after it with the grinder.  |
|
|
|
| cary |
Feb 17 2016, 10:12 PM
Post
#694
|
|
Advanced Member Group: Members Posts: 3,900 Joined: 26-January 04 From: Sherwood Oregon Member No.: 1,608 Region Association: Pacific Northwest |
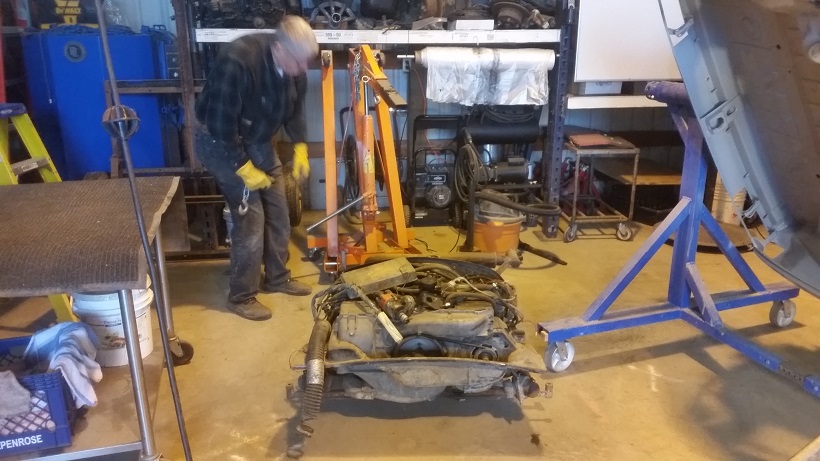
But most of the day was spent housekeeping. First task was breaking down the a complete 2 Liter power plant that was taking up space on the floor. Removed the muffler and transmission. Then put it on the engine stand in order to remove the heat exchangers. No broken exhaust studs. (IMG:style_emoticons/default/piratenanner.gif) Three did back out. But none snapped off.
 My project will take a time out for a bit. Give you a break from my obnoxious daily posting. I'm going to do some sheet metal work on a World members car. At first glance. 1. Replace the rear panel in its entirety. 2. Replace rear portion on the rear trunk. 3. A little bit of work around both door handle pockets. 4. One patch panel on one of the rear fenders. 4. Quite a bit of hammer, dolly and shrinker disc work smoothing out some wrinkles. Prepping for epoxy primer. 5. I'll need to do some research on a couple rust spots on the outer portion of the upper long on the right side. (IMG:style_emoticons/default/mad.gif) 6. Replace one side of the inner lower firewall.  |
|
|
|
| Jacob |
Feb 17 2016, 10:45 PM
Post
#695
|
|
Member Group: Members Posts: 131 Joined: 12-February 08 From: Mansfield, Oh Member No.: 8,705 Region Association: Upper MidWest |
Thank you for taking the time to post all of the pictures! I really appreciate seeing all the details come together. Keep up the good work and keep the pictures coming!
|
|
|
|
| cary |
Feb 18 2016, 10:34 PM
Post
#696
|
|
Advanced Member Group: Members Posts: 3,900 Joined: 26-January 04 From: Sherwood Oregon Member No.: 1,608 Region Association: Pacific Northwest |
Spent the day finishing up the housekeeping.
1. Got the extra 2.0 power plant up on the third shelf. Yellow Arrow. Combination of chain hoist and ladder stairs. 2. Took down the never used hillbilly paint booth. Best laid plans of mice and men 3. Project car is ready to go. I'll check and see if the Member owner wants the work chronicled with a thread 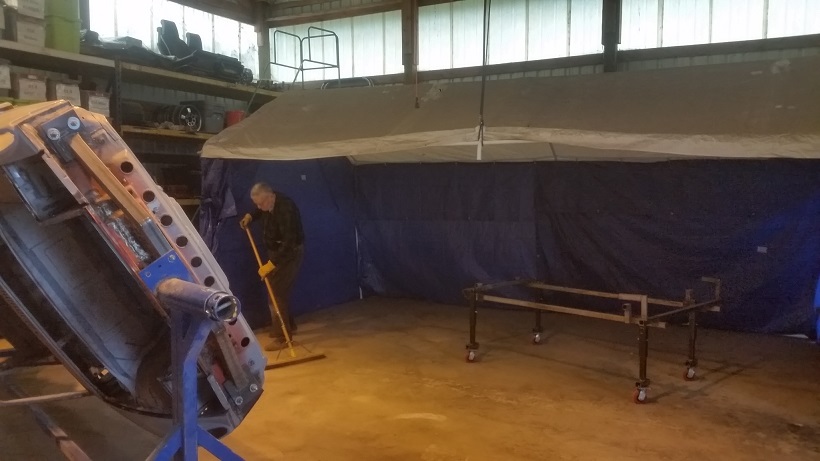 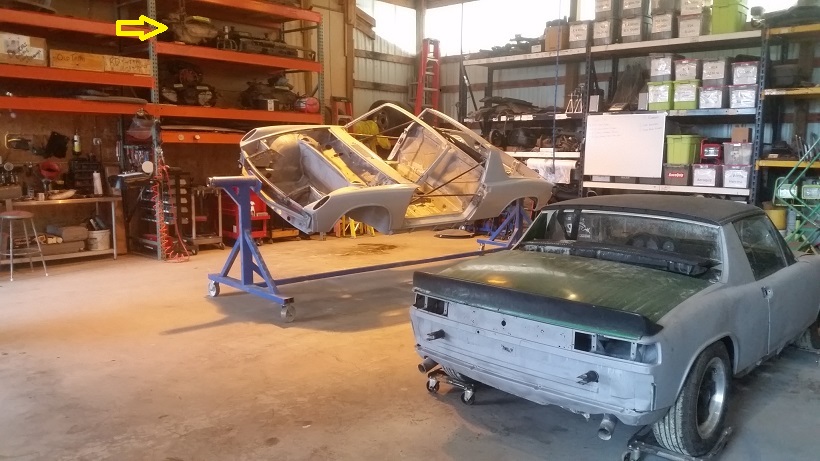  |
|
|
|
| cary |
Feb 20 2016, 11:41 PM
Post
#697
|
|
Advanced Member Group: Members Posts: 3,900 Joined: 26-January 04 From: Sherwood Oregon Member No.: 1,608 Region Association: Pacific Northwest |
Finished up the right side of the windshield frame.
 Covered it up with self etching primer for the short term. 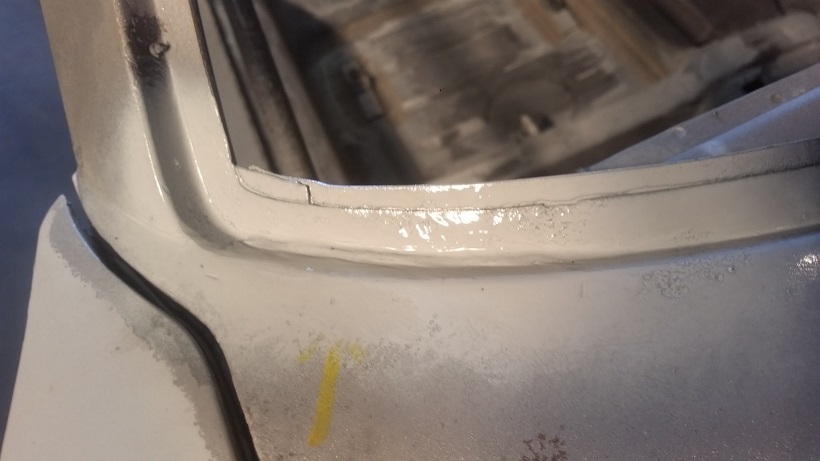 |
|
|
|
| cary |
Feb 20 2016, 11:45 PM
Post
#698
|
|
Advanced Member Group: Members Posts: 3,900 Joined: 26-January 04 From: Sherwood Oregon Member No.: 1,608 Region Association: Pacific Northwest |
Then we had a break in our record rainfall .......... (IMG:style_emoticons/default/barf.gif) (IMG:style_emoticons/default/barf.gif)
So I painted the car dolly with VanSickle farm implement paint. Sprays out real easy. 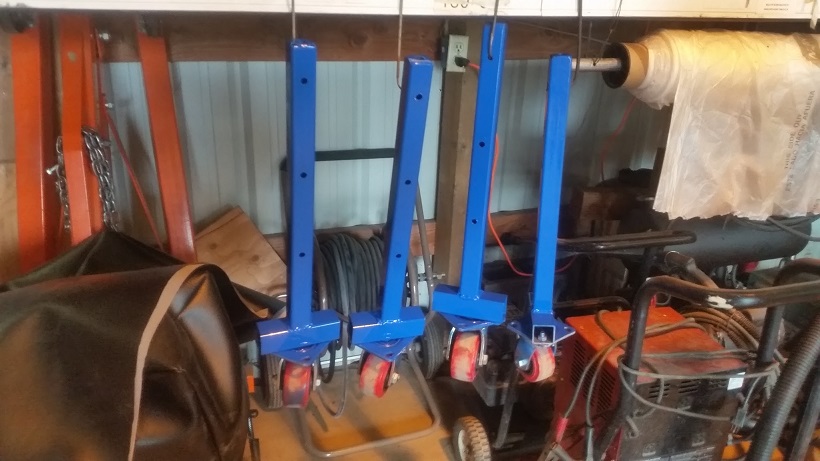  |
|
|
|
| cary |
Feb 21 2016, 12:02 AM
Post
#699
|
|
Advanced Member Group: Members Posts: 3,900 Joined: 26-January 04 From: Sherwood Oregon Member No.: 1,608 Region Association: Pacific Northwest |
Super In Law was working on the patch for the left side.
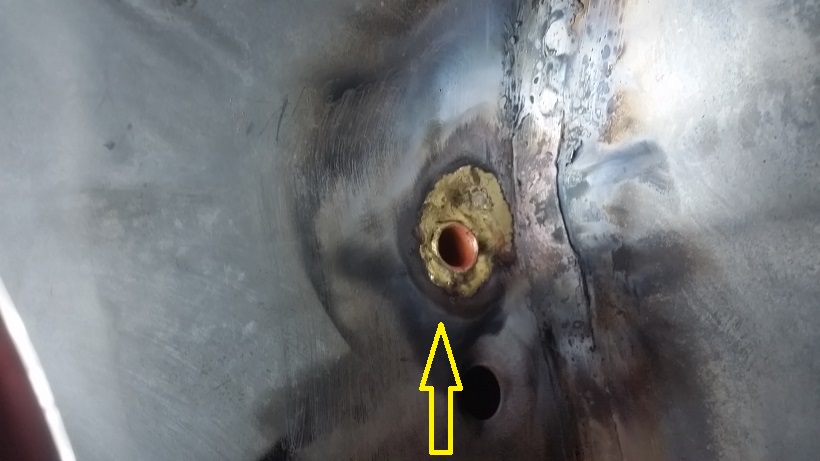
 While he was doing that I started working on replacement brass tubes for the e-brake cables. Here's the weapons I used. 1/2 inch tubing bender. A little too strong for the refrigeration tubing that I bought. 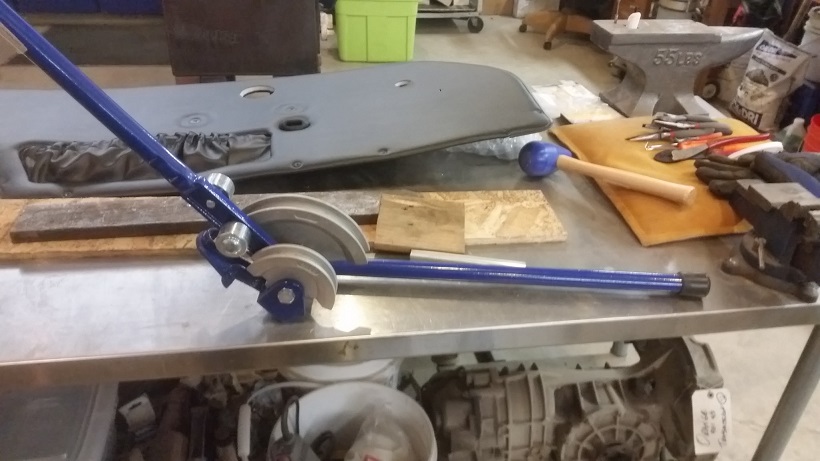 Flaring tool. 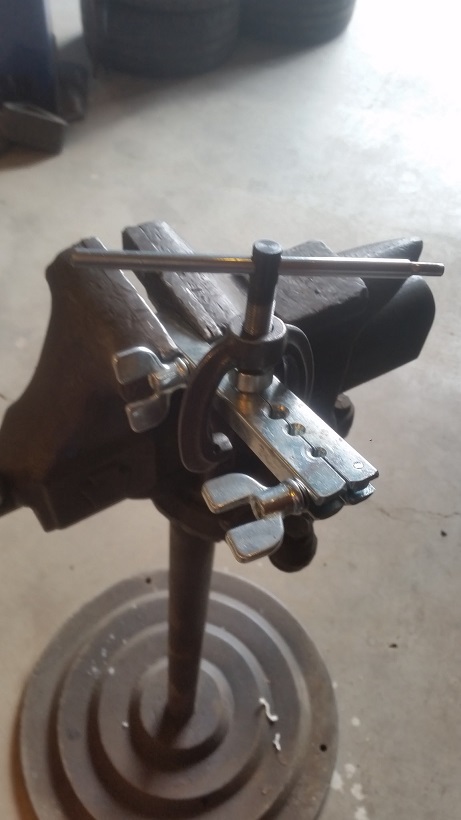 Flexible tubing bender. 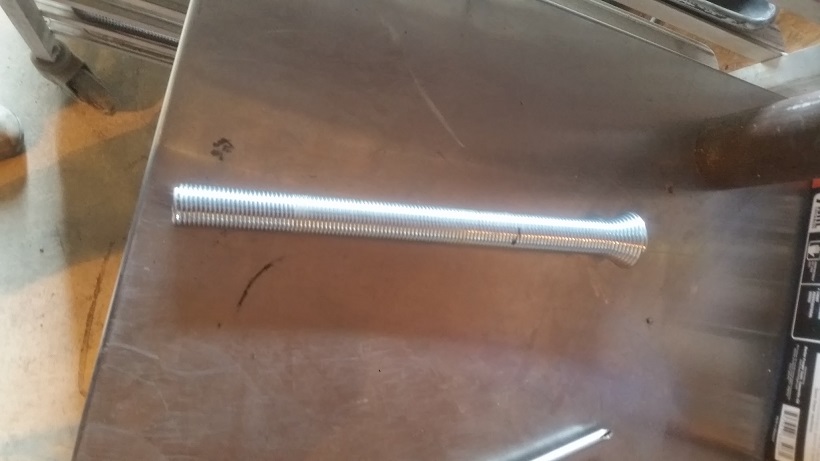 Here's what I ended up with. 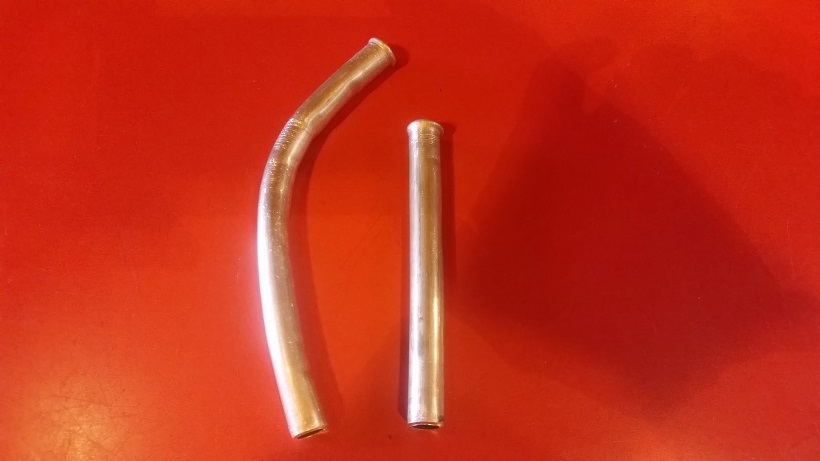 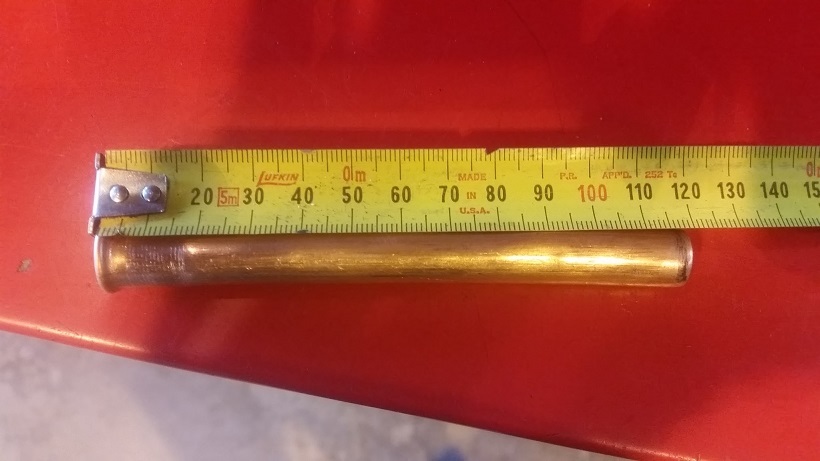 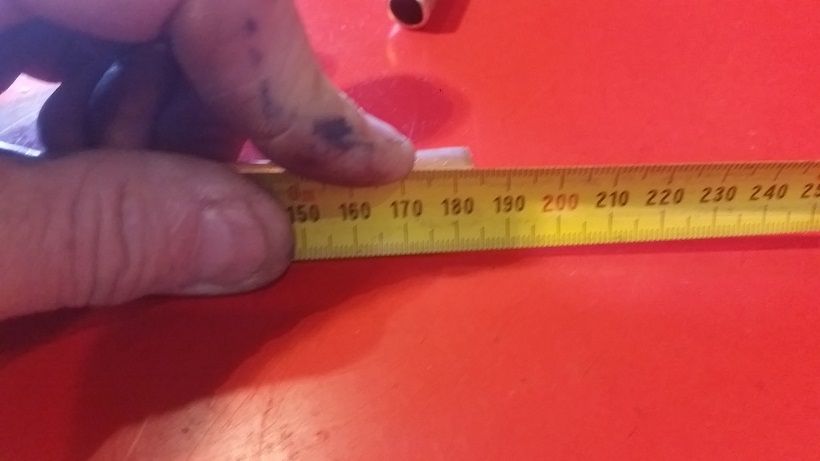 I'll probably buy a foot of stiffer tubing to redo the longer rounded one. The bender put a kink in it. (IMG:style_emoticons/default/mad.gif) Plus it should be another 4-5 mm longer, 188 -189mm. |
|
|
|
| cary |
Feb 22 2016, 09:46 PM
Post
#700
|
|
Advanced Member Group: Members Posts: 3,900 Joined: 26-January 04 From: Sherwood Oregon Member No.: 1,608 Region Association: Pacific Northwest |
I did get the small short left pipe brazed in. I had a little trouble figuring out the torch temp settings. Once I did, things went well.
 The car is settings on its side on the rotisserie. I also created a new right side pipe. Added the 5mm. It will go in first thing in the am. |
|
|
|
|
1 User(s) are reading this topic (1 Guests and 0 Anonymous Users)
0 Members:

|
Lo-Fi Version | Time is now: 24th June 2026 - 08:20 AM |
Invision Power Board
v9.1.4 © 2026 IPS, Inc.