|
|
|
Porsche, and the Porsche crest are registered trademarks of Dr. Ing. h.c. F. Porsche AG.
This site is not affiliated with Porsche in any way. Its only purpose is to provide an online forum for car enthusiasts. All other trademarks are property of their respective owners. |
|
|

  |

| cary |
 Nov 19 2012, 09:23 PM Nov 19 2012, 09:23 PM
Post
#81
|
|
Advanced Member  Group: Members Posts: 3,900 Joined: 26-January 04 From: Sherwood Oregon Member No.: 1,608 Region Association: Pacific Northwest |
Well decided against moving on to the passenger long.
Don't want to detach both sides at once. I do have confidence in my measurements and bracing but I don't want to push my luck. LOL. With that being said. I'm going to build a couple new door braces. This time with Hiem joints. I don't like what I see when its flipped over on the rotisserie. |
   |

 
|
| cary |
Nov 19 2012, 09:32 PM
Post
#82
|
|
Advanced Member Group: Members Posts: 3,900 Joined: 26-January 04 From: Sherwood Oregon Member No.: 1,608 Region Association: Pacific Northwest |
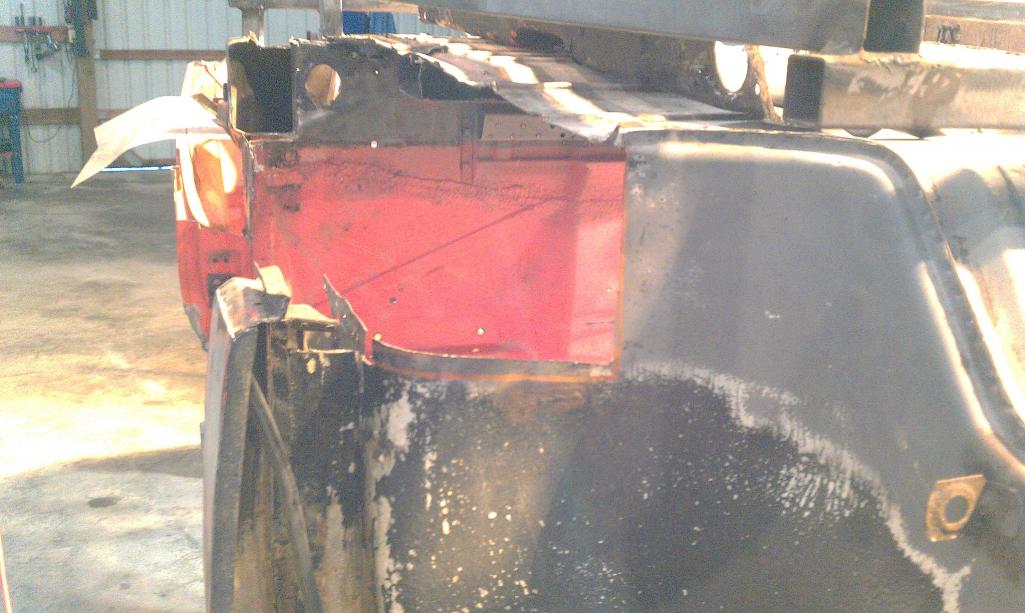
So I moved on the recreating the bottom corner of the front inner fender where it ties into the long.
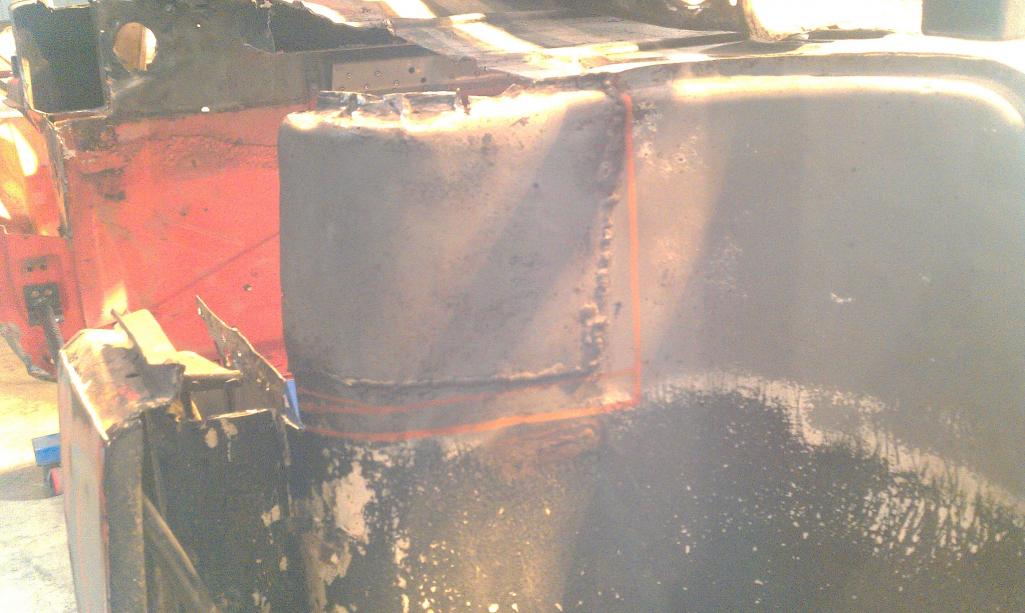 Shows prior repairs from 10 years ago. |
|
|
|
| cary |
Nov 19 2012, 09:37 PM
Post
#83
|
|
Advanced Member Group: Members Posts: 3,900 Joined: 26-January 04 From: Sherwood Oregon Member No.: 1,608 Region Association: Pacific Northwest |
Here's where we start.
 This is going to take some creativity. Some lap welds and some butt welds should get me where I want to go. |
|
|
|
| cary |
Nov 19 2012, 09:41 PM
Post
#84
|
|
Advanced Member Group: Members Posts: 3,900 Joined: 26-January 04 From: Sherwood Oregon Member No.: 1,608 Region Association: Pacific Northwest |
Using some of Mark's work as a pattern.
I'm taking a bigger bite. But the picture gives me a good start. 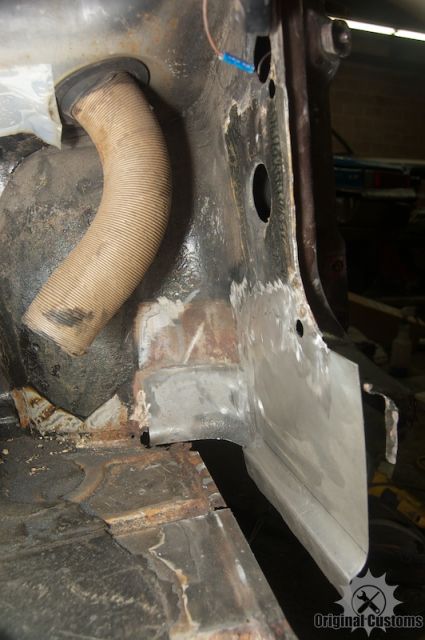 |
|
|
|
| cary |
Nov 19 2012, 09:46 PM
Post
#85
|
|
Advanced Member Group: Members Posts: 3,900 Joined: 26-January 04 From: Sherwood Oregon Member No.: 1,608 Region Association: Pacific Northwest |
First attempt with the shrinker we made the apex of the corner too tight.
Won't give me a tight enough fit for spot welding. That's were the day ended. |
|
|
|
| cary |
Nov 25 2012, 09:24 PM
Post
#86
|
|
Advanced Member Group: Members Posts: 3,900 Joined: 26-January 04 From: Sherwood Oregon Member No.: 1,608 Region Association: Pacific Northwest |
Holiday festivities are over. So we had a couple hours to head out to the shop.
So I decide to relocate my door braces to the inside of the door. Kind of a Jeff Hail location. That way I can have the door braces to adjust the distance and the door to measure the fit. Oh yeah. Decided against the Hiem joints. The ones at the farm/horsey store had too much available travel. Ended the night with needing a little more 1/2 black pipe. |
|
|
|
| cary |
Nov 26 2012, 09:40 AM
Post
#87
|
|
Advanced Member Group: Members Posts: 3,900 Joined: 26-January 04 From: Sherwood Oregon Member No.: 1,608 Region Association: Pacific Northwest |
Had scheduled a short vacation to work on the car. Hoping to get a good jump on things.
But after deciding to completely change out the long. Things aren't going exactly as planned. So Super In Law is reworking the door braces and I'm finishing up the parts washer. Off this am to find a couple needle bearing for the rotating tray sleeve, the power washer store for some parts washer soap and the electrical supply for a new 12 hour timer for the heating elements. Hopefully the parts washer will be up and running today. |
|
|
|
| Socalandy |
Nov 26 2012, 05:39 PM
Post
#88
|
|
Its got to be Yellow!!! Group: Members Posts: 2,432 Joined: 29-August 09 From: Orange Member No.: 10,742 Region Association: Southern California |
Great work (IMG:style_emoticons/default/first.gif) makes my rust repairs look like a cake walk. (IMG:style_emoticons/default/popcorn[1].gif)
|
|
|
|
| cary |
Nov 26 2012, 11:06 PM
Post
#89
|
|
Advanced Member Group: Members Posts: 3,900 Joined: 26-January 04 From: Sherwood Oregon Member No.: 1,608 Region Association: Pacific Northwest |
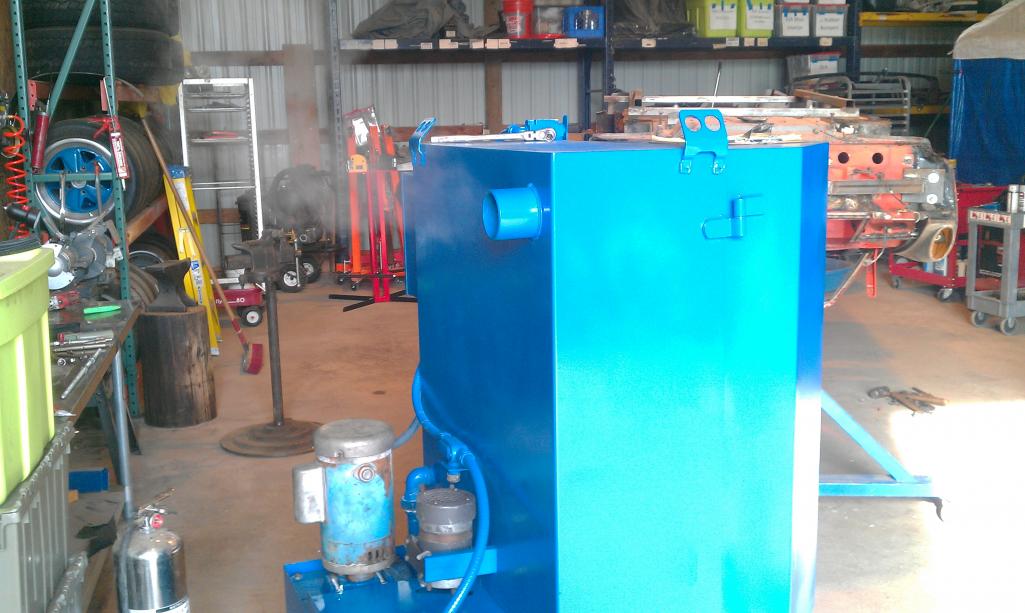
The parts washer lives.
Have a small leak at the pump union. I'll reset that tomorrow. Could see the table turning and hear the jet streaming water. Heaters fired up. But didn't leave them on long enough to fully determine that they'll heat up 65 gallons of water. Thanks Andy. It's ended up being a little more than I planned on. But it's all about building an Oregon daily driver. Lots of Ospho, POR15, Rust Encapsulator and epoxy primer is in the future. |
|
|
|
| cary |
Nov 26 2012, 11:23 PM
Post
#90
|
|
Advanced Member Group: Members Posts: 3,900 Joined: 26-January 04 From: Sherwood Oregon Member No.: 1,608 Region Association: Pacific Northwest |
I guess its going to be a Popsicle. White with blue bumpers, wheels and rocker panels. The 914 mate to me Carrera 3.0RS clone. |
|
|
|
| cary |
Nov 27 2012, 09:16 PM
Post
#91
|
|
Advanced Member Group: Members Posts: 3,900 Joined: 26-January 04 From: Sherwood Oregon Member No.: 1,608 Region Association: Pacific Northwest |
Well the heater elements work great.
The turntable motor gave up the ghost after about 1/2 hour. (IMG:style_emoticons/default/sad.gif) (IMG:style_emoticons/default/sad.gif) I'll stop by this little electric motor shop after lunch tomorrow to see what he can do. I can buy a new one on Amazon. So all is not lost. It did work pretty cool while it lasted. Changed my mind on the Heim joints. I'm going to build something like Chris makes. But mine will be inside the door. Welded a 7/16-20 nut on the inside. |
|
|
|
| cary |
Nov 28 2012, 10:05 PM
Post
#92
|
|
Advanced Member Group: Members Posts: 3,900 Joined: 26-January 04 From: Sherwood Oregon Member No.: 1,608 Region Association: Pacific Northwest |
Steam coming out the vent pipe.
 |
|
|
|
| cary |
Nov 28 2012, 10:08 PM
Post
#93
|
|
Advanced Member Group: Members Posts: 3,900 Joined: 26-January 04 From: Sherwood Oregon Member No.: 1,608 Region Association: Pacific Northwest |
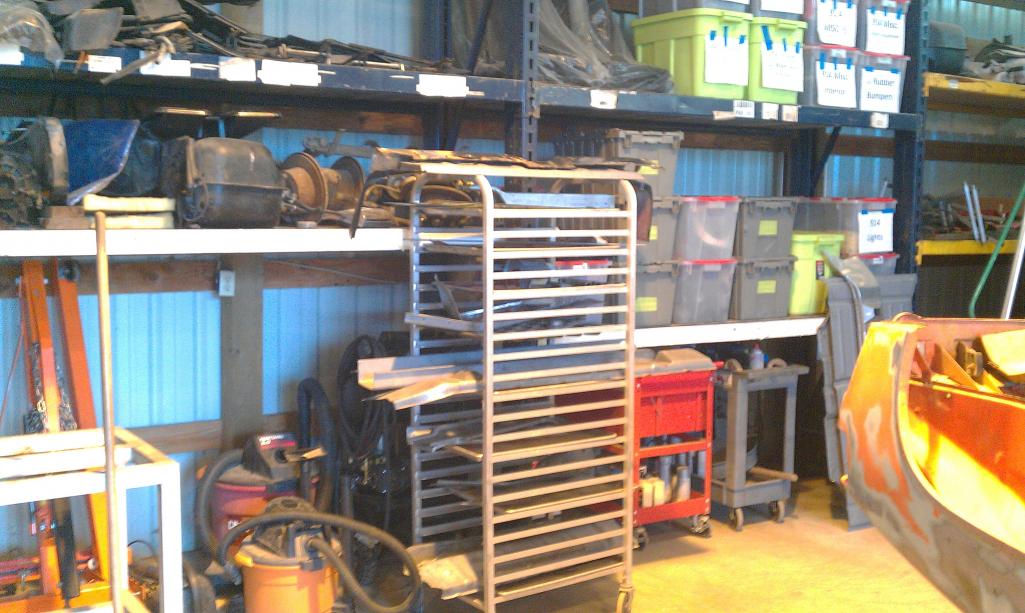
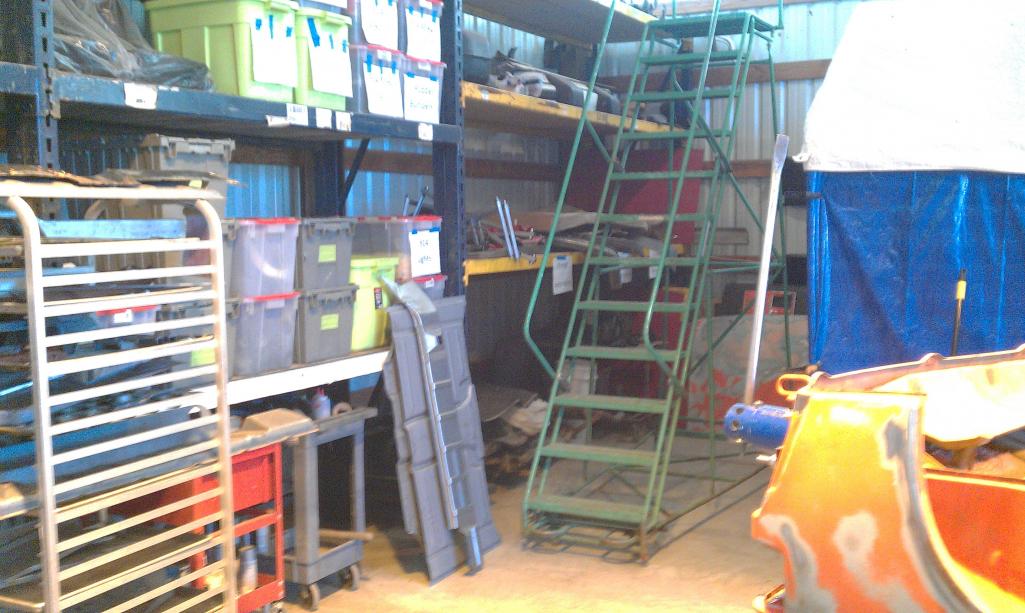
Clean up day at the shop. Hadn't really tidied up the place since taking apart the project.
  |
|
|
|
| cary |
Nov 28 2012, 10:19 PM
Post
#94
|
|
Advanced Member Group: Members Posts: 3,900 Joined: 26-January 04 From: Sherwood Oregon Member No.: 1,608 Region Association: Pacific Northwest |
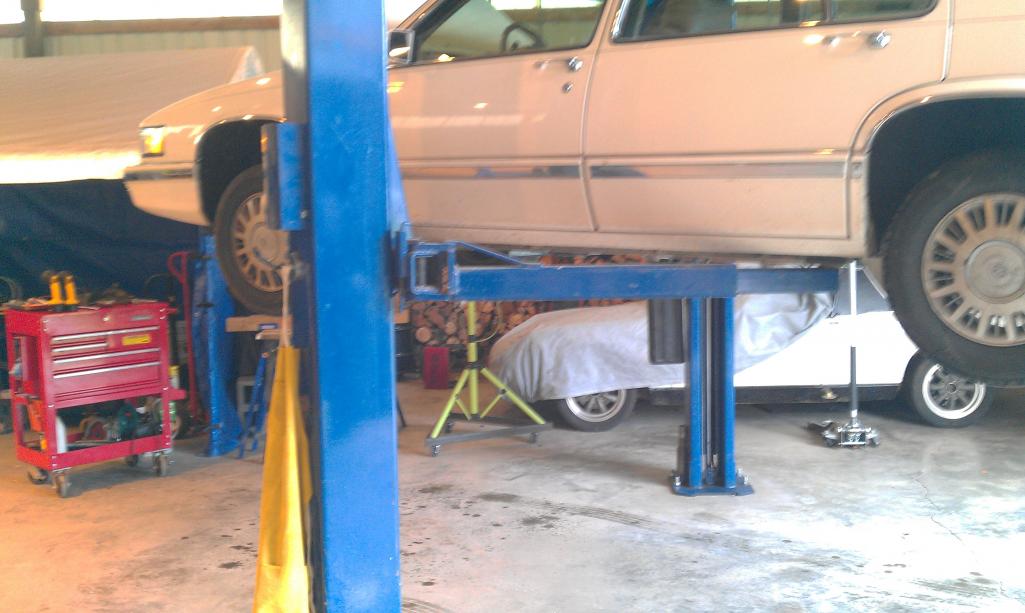
  I did finally find the oil leak in the Cadillac. Probably had been there for 15 years. The oil cooler line coming off the filter flange was about an 1/16 of a turn loose. Drip, drip, drip. About a quart every 2000 miles. |
|
|
|
| cary |
Nov 29 2012, 10:30 PM
Post
#95
|
|
Advanced Member Group: Members Posts: 3,900 Joined: 26-January 04 From: Sherwood Oregon Member No.: 1,608 Region Association: Pacific Northwest |
Well getting back to it. Removed the engine tray we fabricated 10 years ago.
Now to get the right suspension console and engine mount ready to remove. Removed the MPS bracket. That will allow us to get at the upper spot welds on the console. Console looks to be in pretty good shape. A little pitted where we covered it with patches. (IMG:style_emoticons/default/sad.gif) (IMG:style_emoticons/default/sad.gif) Can't get into the brake line bracket spot welds. That will have to wait. The engine mount is going to be tough. Looks like it was removed and seam welded somewhere in its past. 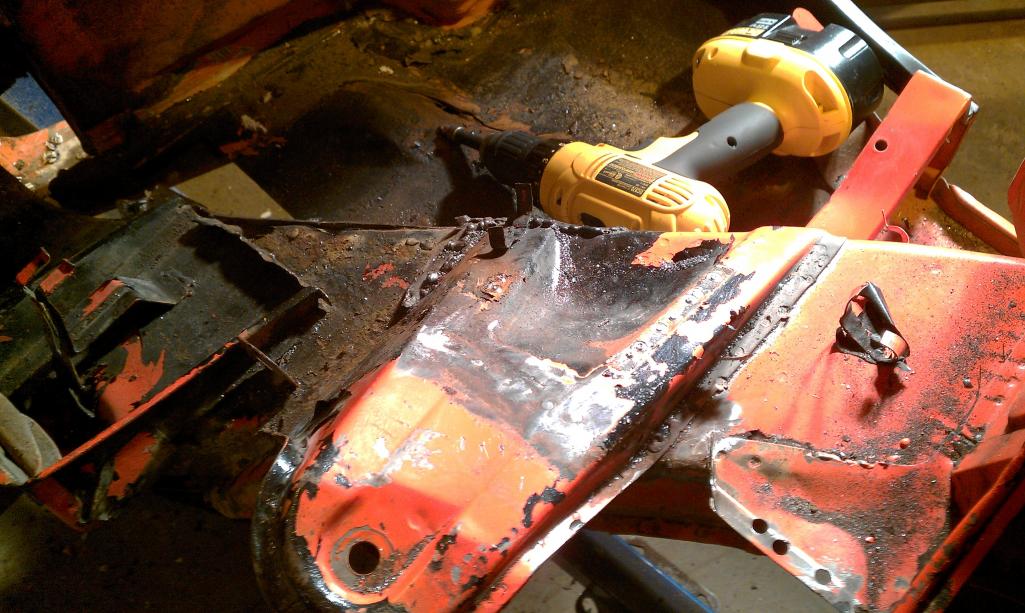 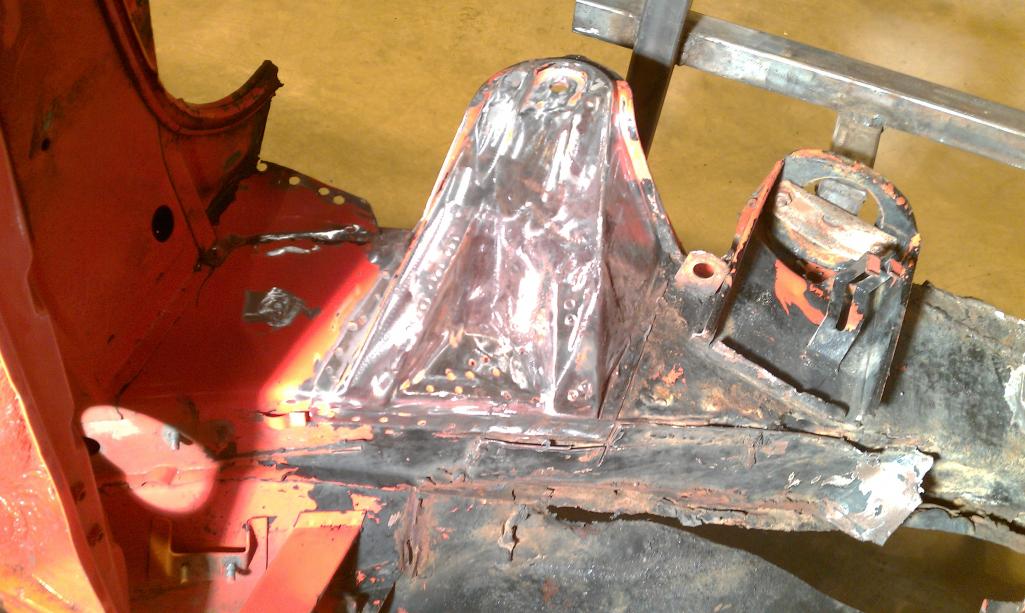 |
|
|
|
| cary |
Nov 29 2012, 10:56 PM
Post
#96
|
|
Advanced Member Group: Members Posts: 3,900 Joined: 26-January 04 From: Sherwood Oregon Member No.: 1,608 Region Association: Pacific Northwest |
Woke up last night and read 18 pages of "engine console" search.
In doing so. I decided that the upper wheelhouse will not be removed. Its not that bad. Just need to tidy up a couple deep cuts I created when I removed the battery tray. Was thinking the inner engine long might be saved. I kept looking at all the patching that everyone has done. It would just take too many patches to get back to good clean steel. I have some really bad rust on the inner layer all the way up to the engine support. To me it's just too important to the structural integrity of the entire car to not change it. Hopefully my grand kids will be driving this car long after I'm gone. LOL. |
|
|
|
| cary |
Dec 3 2012, 11:09 PM
Post
#97
|
|
Advanced Member Group: Members Posts: 3,900 Joined: 26-January 04 From: Sherwood Oregon Member No.: 1,608 Region Association: Pacific Northwest |
Installed the new door braces. Complete with Heim joints.
Works like a charm. Much better. Holds the setting, even upside down. (IMG:style_emoticons/default/smile.gif) (IMG:style_emoticons/default/smile.gif) The 7/16-20 threads work real smooth. 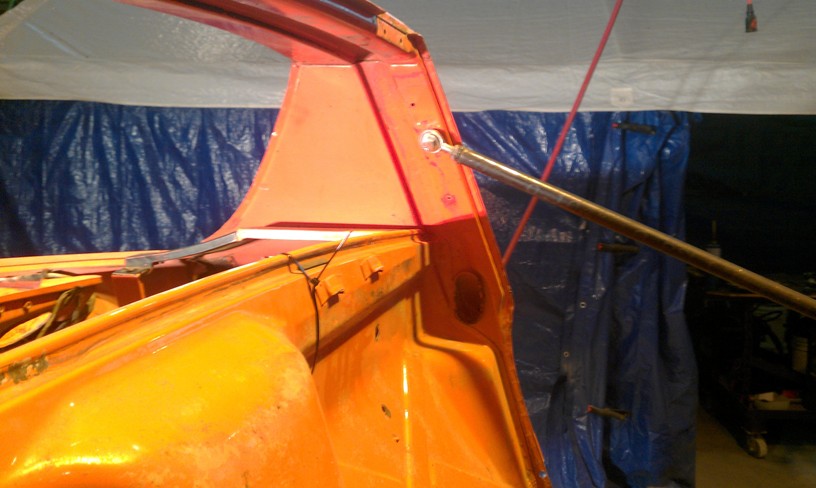 |
|
|
|
| cary |
Dec 3 2012, 11:35 PM
Post
#98
|
|
Advanced Member Group: Members Posts: 3,900 Joined: 26-January 04 From: Sherwood Oregon Member No.: 1,608 Region Association: Pacific Northwest |
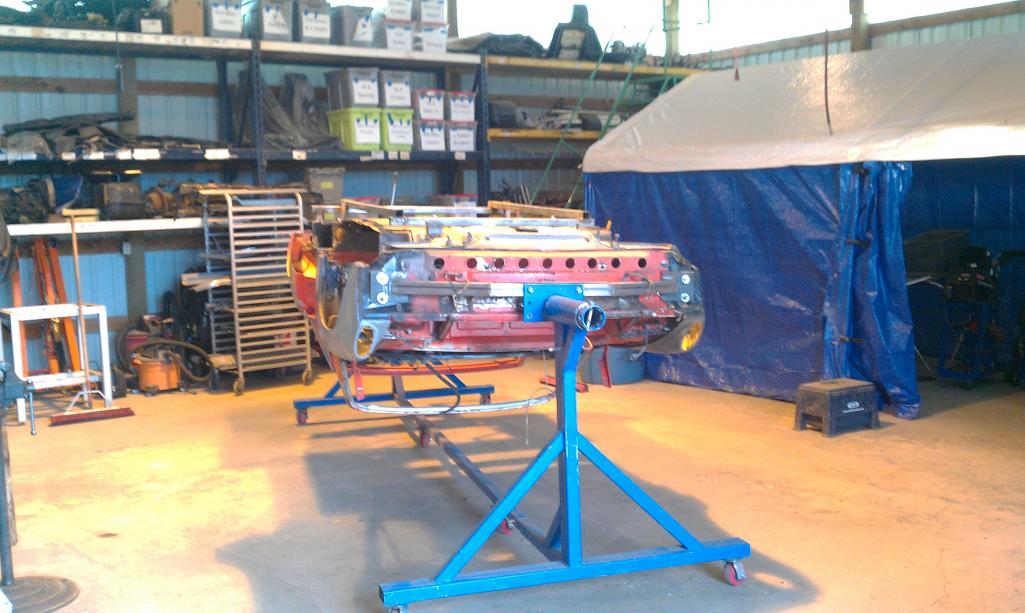
With the new braces installed and dialed in.
The frame jig was removed so I could get at the engine and suspension console. Off came the engine console.  As you can see it has some extra ventilation. (IMG:style_emoticons/default/sad.gif) (IMG:style_emoticons/default/sad.gif) Another manufacturing error. Why didn't they seam seal the top? You should have seen the debri that came out from behind that thing. I guess its official name is, engine mounting. I'm thinking that's it's repairable? I think I saw Mark rebuild one. |
|
|
|
| cary |
Dec 3 2012, 11:41 PM
Post
#99
|
|
Advanced Member Group: Members Posts: 3,900 Joined: 26-January 04 From: Sherwood Oregon Member No.: 1,608 Region Association: Pacific Northwest |
Next is the removal of the suspension console.
Can I get some hints and BTDT's on removing the reinforcements that are lapped over the front and rear suspension consoles? 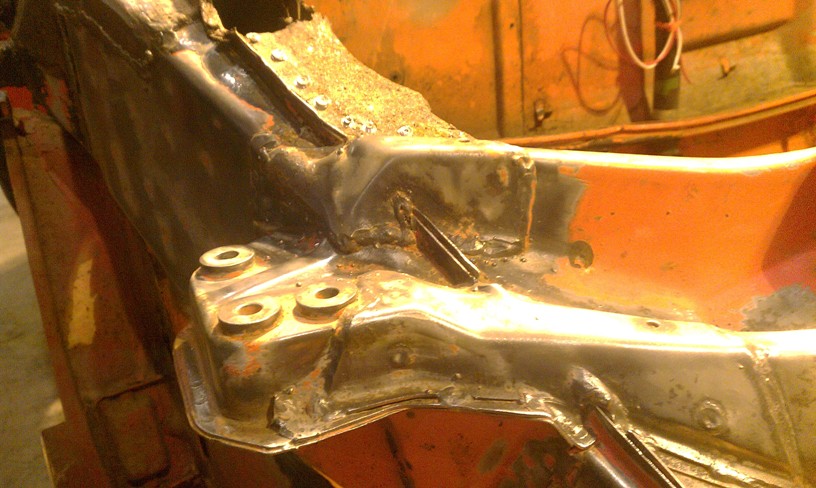 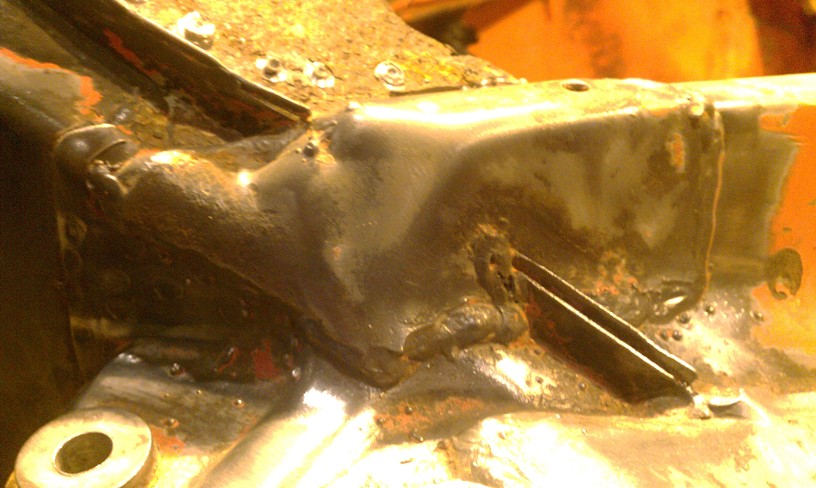 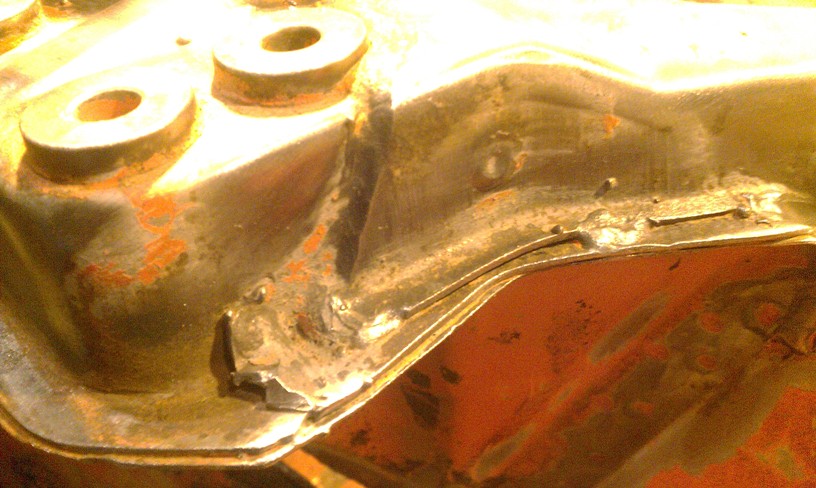 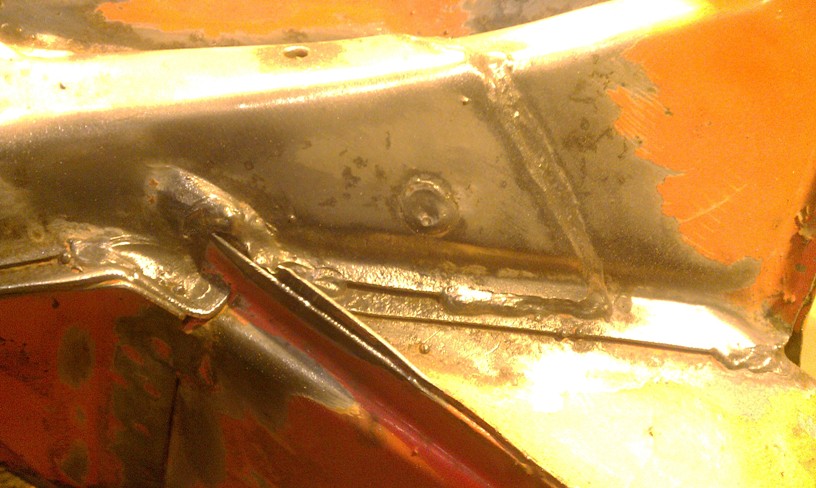 |
|
|
|
| cary |
Dec 3 2012, 11:54 PM
Post
#100
|
|
Advanced Member Group: Members Posts: 3,900 Joined: 26-January 04 From: Sherwood Oregon Member No.: 1,608 Region Association: Pacific Northwest |
I also chiseled off the seam sealer on the outer fire wall seam in about 15 minutes.
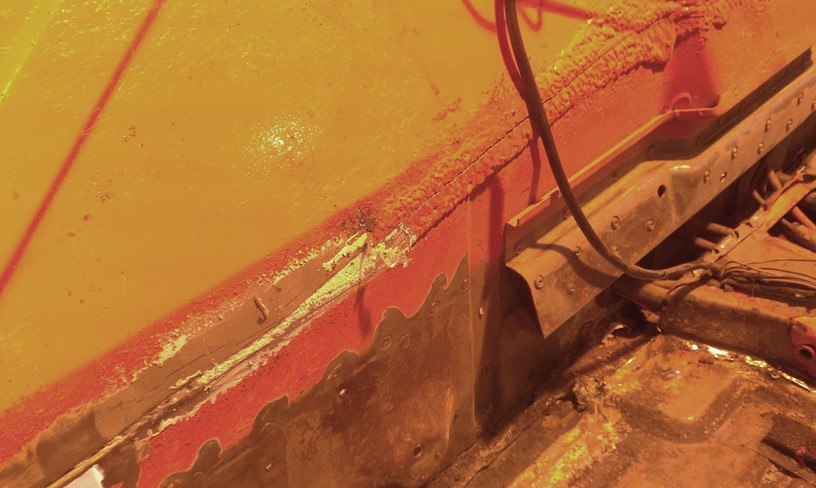 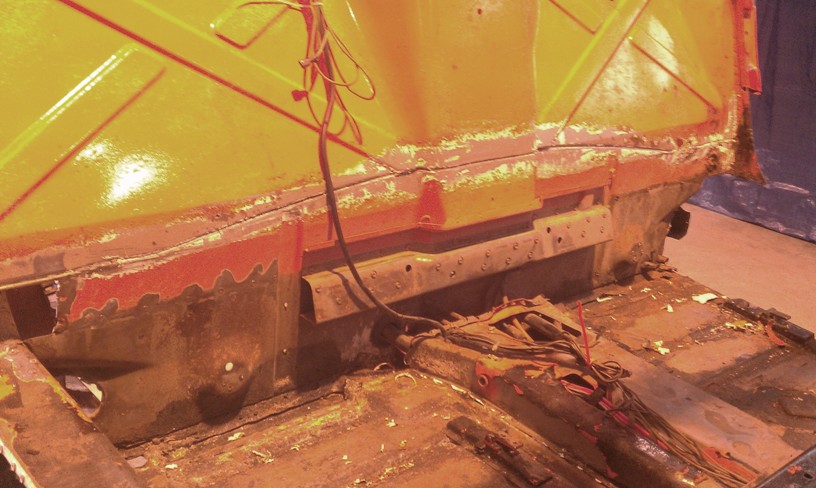 This was all done with the air chisel. A tool that Jeff Hail turned me on too. First words of wisdom. 1. Don't cover up the vent hole with your thumb. Kills the pressure. 2. When you hear the tone change. Stop, you've hit a weld. 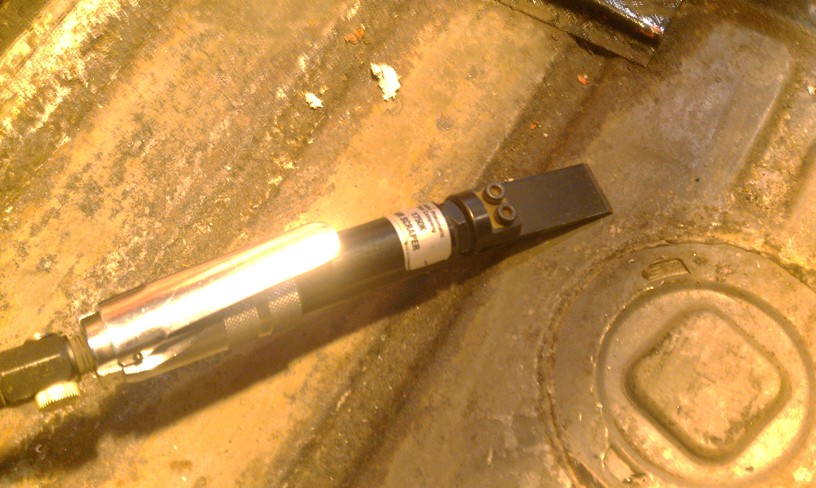 |
|
|
|
|
1 User(s) are reading this topic (1 Guests and 0 Anonymous Users)
0 Members:

|
Lo-Fi Version | Time is now: 7th March 2026 - 12:29 AM |
Invision Power Board
v9.1.4 © 2026 IPS, Inc.