|
|
|
Porsche, and the Porsche crest are registered trademarks of Dr. Ing. h.c. F. Porsche AG.
This site is not affiliated with Porsche in any way. Its only purpose is to provide an online forum for car enthusiasts. All other trademarks are property of their respective owners. |
|
|

  |

| worn |
 Dec 6 2016, 10:51 AM Dec 6 2016, 10:51 AM
Post
#861
|
|
Winner of the Utah Twisted Joint Award  Group: Members Posts: 3,609 Joined: 3-June 11 From: Madison, WI and North Bend WA Member No.: 13,152 Region Association: Upper MidWest |
QUOTE(cary @ Nov 28 2016, 06:59 AM)  Looking ahead to changing out the jack points on Doug's car I'm going to try and devise a tool plan to drill/cut those top spot welds so it can be changed without cutting a hole in the door jam. There's got to be a way .............. I would have used a carbide ball cutter on a 1/4" straight die cutter. I like the electric one from HF set on a dimmer for speed control. The ball cuts side ways. No angle needed. Faster than the dremel but the same idea. |
   |

 
|
| cary |
Dec 6 2016, 02:46 PM
Post
#862
|
|
Advanced Member Group: Members Posts: 3,900 Joined: 26-January 04 From: Sherwood Oregon Member No.: 1,608 Region Association: Pacific Northwest |
Hmmmmm......
Another twist. I have an extended length die grinder. I'll measure that too on Thursday. |
|
|
|
| cary |
Dec 11 2016, 09:05 AM
Post
#863
|
|
Advanced Member Group: Members Posts: 3,900 Joined: 26-January 04 From: Sherwood Oregon Member No.: 1,608 Region Association: Pacific Northwest |
Doug's car is on the rotisserie so it's time to get after the jack points.
I decided not to clutter Doug's thread with this jack point removal conversation. I started with the portion that is exposed on the rocker panel.  I'm using what I call the Rick (rick 918-s) method when I can can discard the outer layer/panel. I've covered this before. But here's a little more detail. The thing I'd like to add. When you get comfortable with the cutting disk on the mandrel. 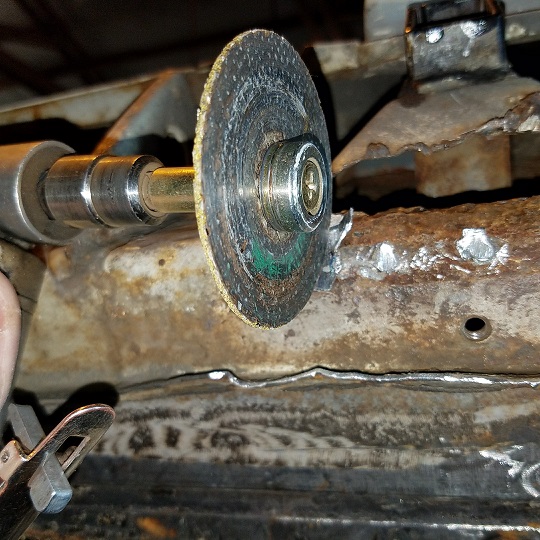 I cut down each spot weld with the cutting wheel like I've discussed before. But what I've learned over these many projects is too take it out in small portions. But you have to be real careful when making cross cuts in the outer layer. Sometimes I make a bowed portion to make the cross cut. You don't want to cut/damage the primary material. 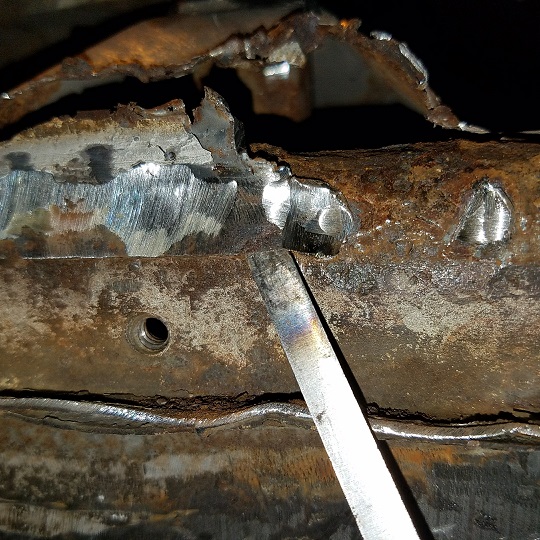 Don't put too much leverage on the screw driver. You can rip the spot weld out which would leave you an unnecessary hole. 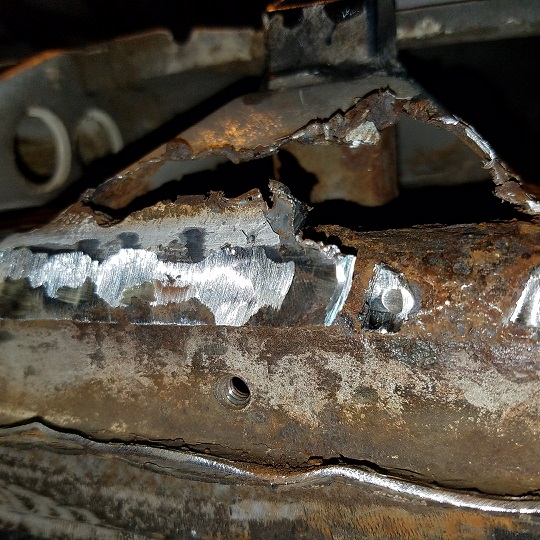  Had to bring out the big guns for the cut across the top of the jack tube. It allows you to use a sawzall blade. 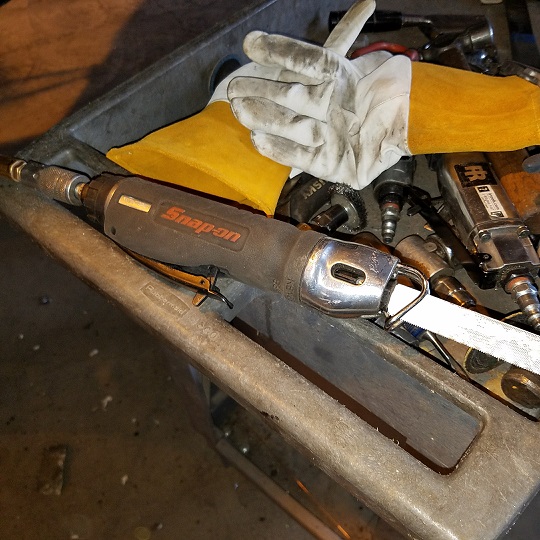 |
|
|
|
| cary |
Dec 11 2016, 09:26 AM
Post
#864
|
|
Advanced Member Group: Members Posts: 3,900 Joined: 26-January 04 From: Sherwood Oregon Member No.: 1,608 Region Association: Pacific Northwest |
I went with Worn's suggestion of using an extended length carbide cutter.
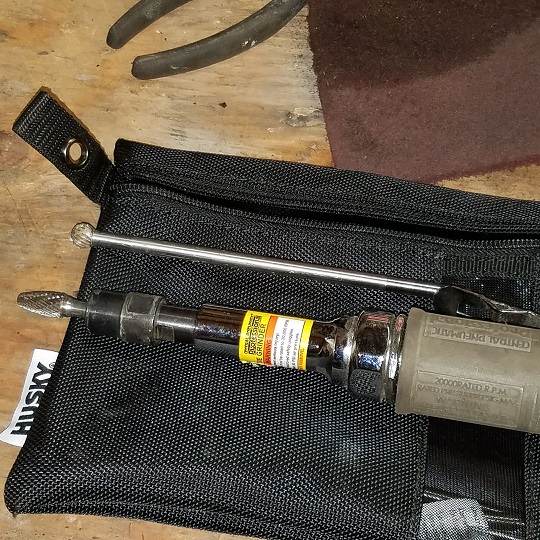 Air tool is a little wild. I might take a look at Worn's suggestion of the HF electric one. But think I'll try the regulator that I use for paint guns for a start. When I ran out of length I added a tube to the extra Steck spot weld cutter Doug bought for me. 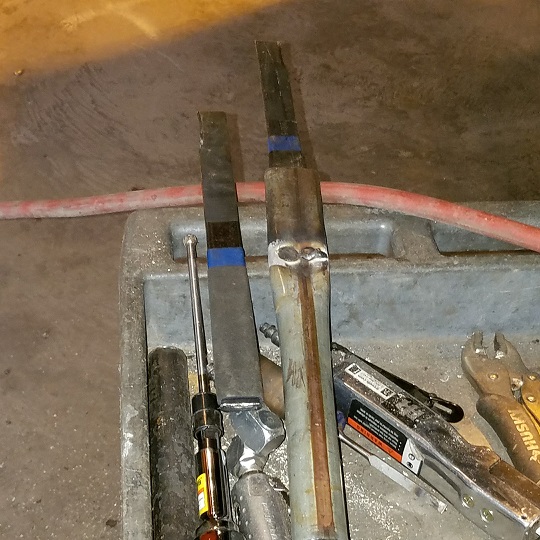 First couple popped off pretty easy. The inside couple took quite a while. 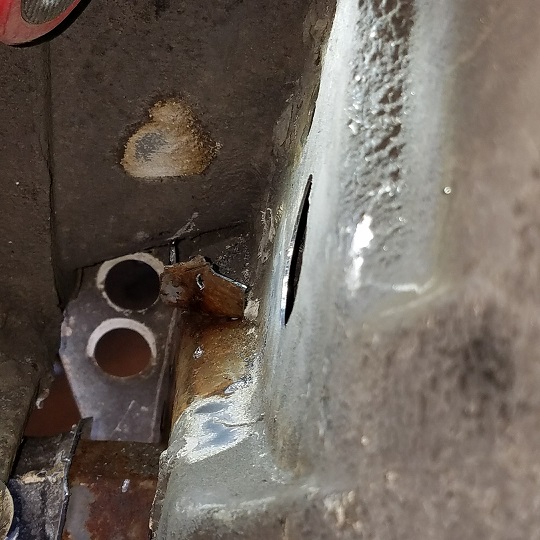 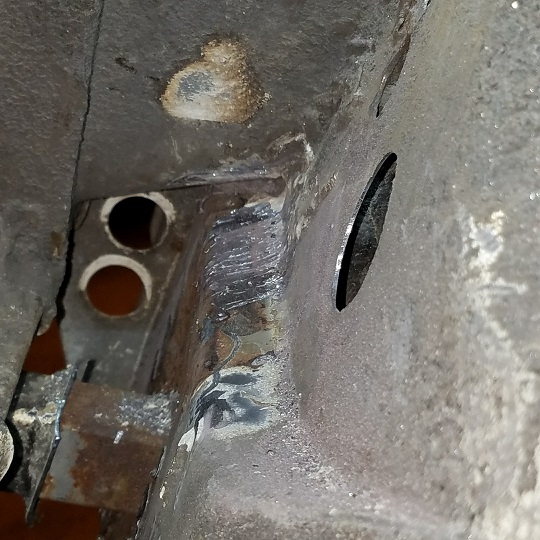 I'll probably still buy the 24" belt sander. The 24" will be 1/2 inch wide which should just about cover the entire shelf. Nice finish There's just a little tidbit right under the door jamb I couldn't get at with the 13". 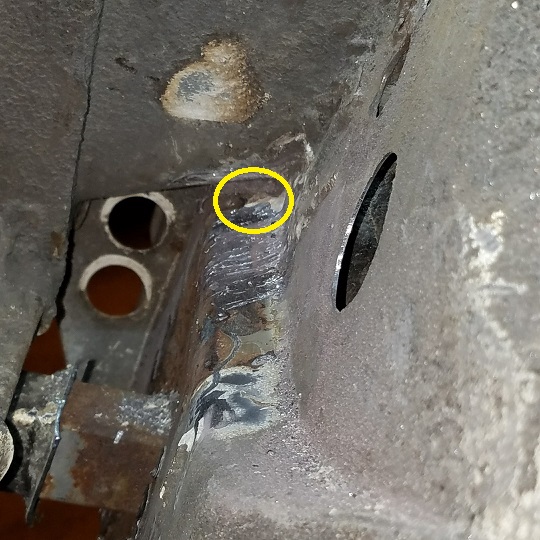 This one took about 3 1/2 hours. Next one should be faster if the rust is about the same. |
|
|
|
| cary |
Dec 12 2016, 10:01 PM
Post
#865
|
|
Advanced Member Group: Members Posts: 3,900 Joined: 26-January 04 From: Sherwood Oregon Member No.: 1,608 Region Association: Pacific Northwest |
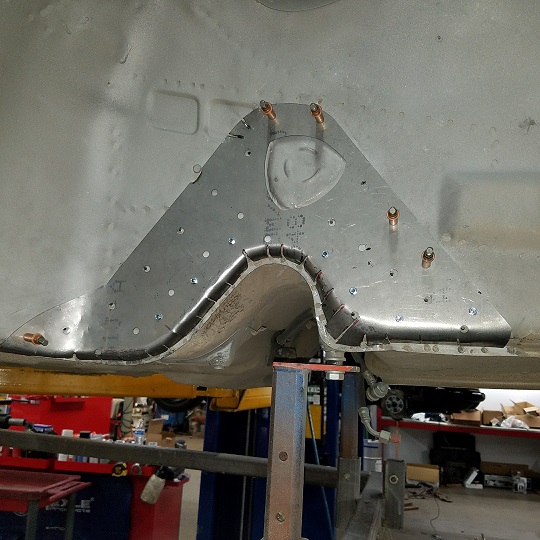
Installing a Front Arch Fill In from Tuthill Racing on our G body rental rally car.
 Getting lots of practice ....... practice .................. practice 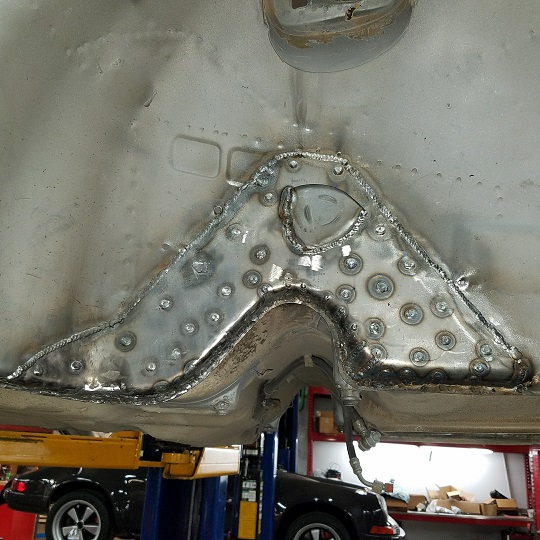  |
|
|
|
| cary |
Dec 18 2016, 06:03 PM
Post
#866
|
|
Advanced Member Group: Members Posts: 3,900 Joined: 26-January 04 From: Sherwood Oregon Member No.: 1,608 Region Association: Pacific Northwest |
Sunday Morning Episode of Dad's Garage .................
 Changed out the fuel pump on the Audi in the St. Johns Safeway parking lot. It's under the passenger back seat. Fairly simple procedure. I came out a couple weeks ago and did the diagnosis. Power to the pump with ignition on. Pump no go. 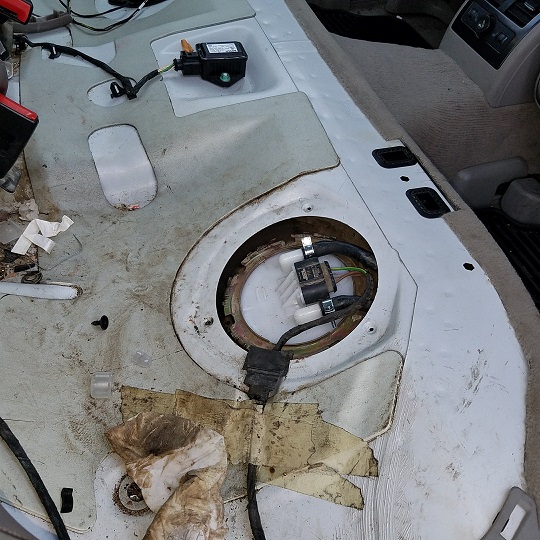 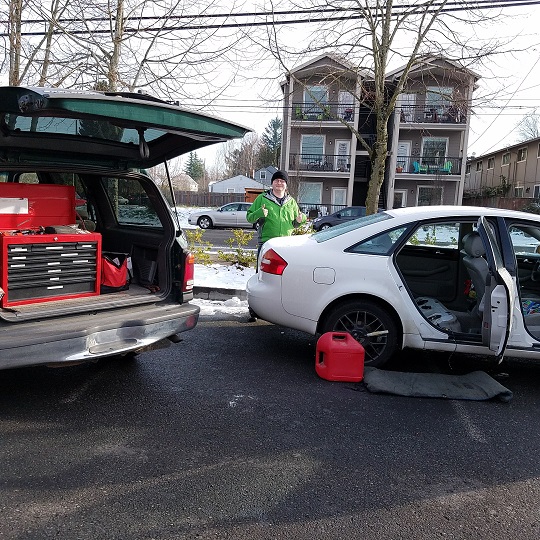 After the system pressurized she fired right up ................... |
|
|
|
| 76-914 |
Dec 19 2016, 10:34 AM
Post
#867
|
|
Repeat Offender & Resident Subaru Antagonist Group: Members Posts: 13,905 Joined: 23-January 09 From: Temecula, CA Member No.: 9,964 Region Association: Southern California |
You can't take too many tools for a mobile repair. (IMG:style_emoticons/default/beerchug.gif)
|
|
|
|
| cary |
Dec 20 2016, 07:34 AM
Post
#868
|
|
Advanced Member Group: Members Posts: 3,900 Joined: 26-January 04 From: Sherwood Oregon Member No.: 1,608 Region Association: Pacific Northwest |
It's my at home/AX tool box. It will probably go to Mexico in my Mexican 1000 service vehicle. Fit's nicely in the old Explorer. 220k.
Firm believer : More is Better |
|
|
|
| cary |
Dec 21 2016, 11:13 PM
Post
#869
|
|
Advanced Member Group: Members Posts: 3,900 Joined: 26-January 04 From: Sherwood Oregon Member No.: 1,608 Region Association: Pacific Northwest |
Things are kind of quite so I'd thought post a couple shots of my work on the rally cars at Rothsport.
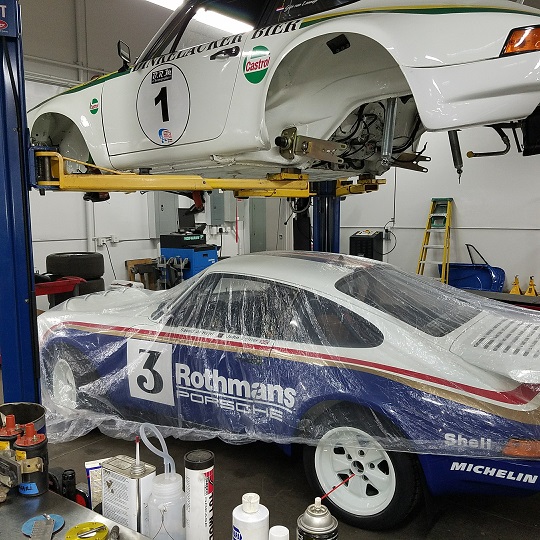
Top car is an 81 SC, the rental car. Bottom is Jeff's personal 964. Jeff's car is going back to the blaster for some rework. (IMG:style_emoticons/default/sad.gif) They're really struggling with the seam sealer and undercoating. I'm kind of picky. 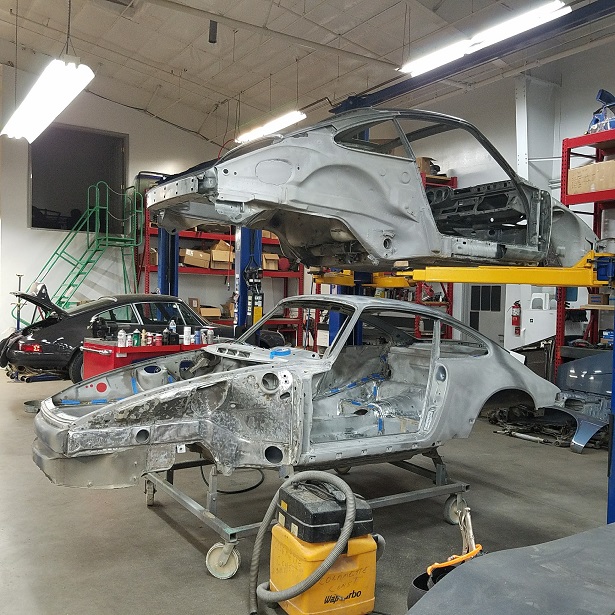 I've started seam welding the SC. 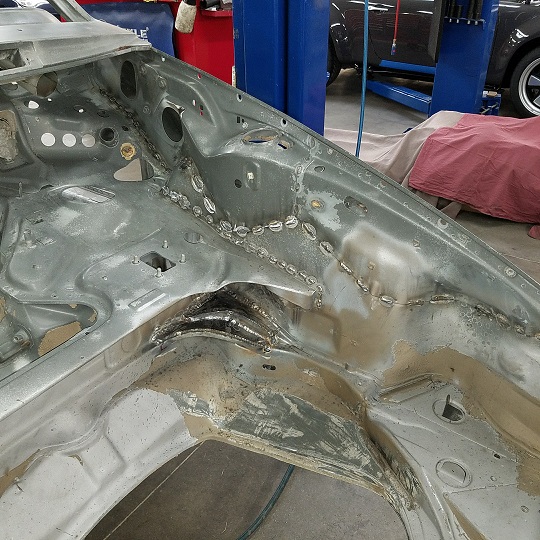 Tuthill steering rack stiffeners. 10 gauge. Pallet of FIA roll cages arrived Monday. (IMG:style_emoticons/default/piratenanner.gif) 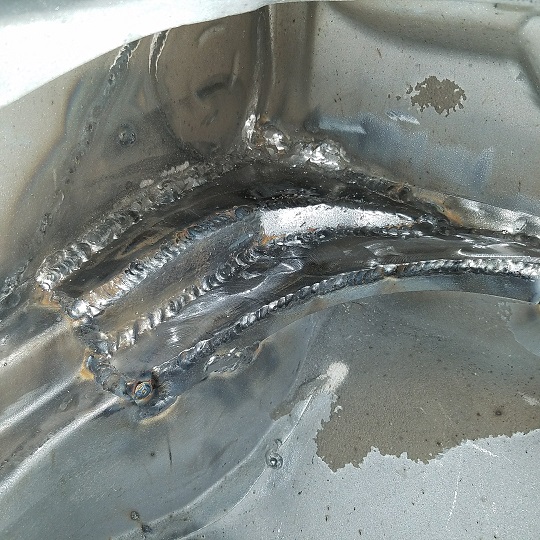 Prodrive SCRS #7 is in the house. Because of my messy work it went under cover. It came in for some longer gearing. It was completely restored by Rothsport a couple years ago. 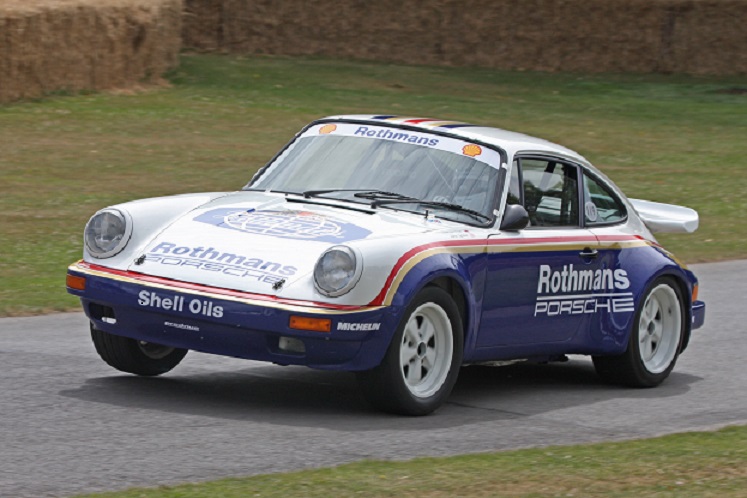 |
|
|
|
| cary |
Dec 25 2016, 09:27 AM
Post
#870
|
|
Advanced Member Group: Members Posts: 3,900 Joined: 26-January 04 From: Sherwood Oregon Member No.: 1,608 Region Association: Pacific Northwest |
Undercover ....................
 At this point the plan is to livery the rental car along the lines of the Rothmans. But insert Rothsport in place of Rothmans. Mexican 1000 Press Release https://www.excellence-mag.com/resources/events/33 |
|
|
|
| cary |
Dec 25 2016, 09:36 AM
Post
#871
|
|
Advanced Member Group: Members Posts: 3,900 Joined: 26-January 04 From: Sherwood Oregon Member No.: 1,608 Region Association: Pacific Northwest |
This coming week at Rothsport.
Rental car heads to body shop to install new left rear qtr. panel and a Fenn Lane Motorsports sunroof delete panel. Jeff's car heads off to have its FIA roll cage installed. Hopefully this will allow me a few solid days to get Doug's car to the media blaster. |
|
|
|
| cary |
Dec 25 2016, 03:12 PM
Post
#872
|
|
Advanced Member Group: Members Posts: 3,900 Joined: 26-January 04 From: Sherwood Oregon Member No.: 1,608 Region Association: Pacific Northwest |
Lull between Christmas day events. (IMG:style_emoticons/default/santa_smiley.gif)
I thought I'd add some insight into the issues we're having with removing the undercoating and seam sealer on the 964's. It's kind of uncharted territory. Not too many 964's have been totally stripped down to a body in white. The G body was easily stripped with media and walnuts. Old School. But that stuff didn't make a dent in the 1/4" of undercoating on the 964's. We're thinking the folks that Singer uses bake the tub in the powder coating oven, then blast it. But they do not remove the seam sealer. I need the seam sealer removed so I can seam weld the spot welded seams. I even torch the seams with a MAPP torch before I start welding and I still pull impurities into the welds. (IMG:style_emoticons/default/barf.gif) (IMG:style_emoticons/default/barf.gif) (IMG:style_emoticons/default/welder.gif) They quoted $3500. So it takes lots of grinding with wire wheels and cup brushes to get the undercoating down and out of the seams. Doesn't set to well with the chassis room boys. (IMG:style_emoticons/default/smash.gif) (IMG:style_emoticons/default/sawzall-smiley.gif) (IMG:style_emoticons/default/smash.gif) (IMG:style_emoticons/default/sawzall-smiley.gif) So were going to try an induction heating pad. Heat , scrape , heat & scrape. http://www.autobodytoolmart.com/inductor-p...u3-p-13991.aspx https://www.youtube.com/watch?v=gXIk_1tmt8c I'll let you can how it goes. |
|
|
|
| BillC |
Dec 25 2016, 05:04 PM
Post
#873
|
|
Senior Member Group: Members Posts: 737 Joined: 24-April 15 From: Silver Spring, MD Member No.: 18,667 Region Association: MidAtlantic Region |
Have you considered trying some dry ice? You put it on the coating to freeze it and then scrape/chisel it off. It works well to remove undercoating, but I don't know how it will work on seam sealer. Same idea, though -- make it cold and brittle, and it pops off with little effort.
|
|
|
|
| cary |
Dec 26 2016, 08:54 AM
Post
#874
|
|
Advanced Member Group: Members Posts: 3,900 Joined: 26-January 04 From: Sherwood Oregon Member No.: 1,608 Region Association: Pacific Northwest |
Rothsport had sent one out to the ice blaster in the past and it didn't do any better. So that wasn't tried again.
|
|
|
|
| BillC |
Dec 26 2016, 11:50 AM
Post
#875
|
|
Senior Member Group: Members Posts: 737 Joined: 24-April 15 From: Silver Spring, MD Member No.: 18,667 Region Association: MidAtlantic Region |
QUOTE(cary @ Dec 26 2016, 09:54 AM) Rothsport had sent one out to the ice blaster in the past and it didn't do any better. So that wasn't tried again. Hmm, okay then. Nevermind (IMG:style_emoticons/default/headbang.gif) I have heard of places that will bake the chassis to about 900 degrees F in a low-oxygen atmosphere. This is supposed to turn everything not made of steel to ash. That should take care of the seam sealer. Might be worth looking into. |
|
|
|
| cary |
Dec 28 2016, 08:43 AM
Post
#876
|
|
Advanced Member Group: Members Posts: 3,900 Joined: 26-January 04 From: Sherwood Oregon Member No.: 1,608 Region Association: Pacific Northwest |
Bill we saw that too. But we couldn't find anyone doing it on the west coast.
We demoed the Pro Max on Monday, it worked as described. It cooks a 4" * 6" area which then peels right off. Then move it along keeping the edge hot. Jeff ordered one yesterday .................. |
|
|
|
| cary |
Dec 28 2016, 08:49 AM
Post
#877
|
|
Advanced Member Group: Members Posts: 3,900 Joined: 26-January 04 From: Sherwood Oregon Member No.: 1,608 Region Association: Pacific Northwest |
https://www.excellence-mag.com/resources/events/33
What isn't mentioned in the press release is that Jeff Zwart is on team that will be driving the second 964. (IMG:style_emoticons/default/piratenanner.gif) (IMG:style_emoticons/default/piratenanner.gif) |
|
|
|
| jmitro |
Dec 28 2016, 11:47 AM
Post
#878
|
|
Senior Member Group: Members Posts: 713 Joined: 23-July 15 From: Oklahoma Member No.: 18,986 Region Association: None |
QUOTE(cary @ Dec 25 2016, 03:12 PM) I thought I'd add some insight into the issues we're having with removing the undercoating and seam sealer on the 964's. It's kind of uncharted territory. Not too many 964's have been totally stripped down to a body in white. The G body was easily stripped with media and walnuts. Old School. But that stuff didn't make a dent in the 1/4" of undercoating on the 964's. We're thinking the folks that Singer uses bake the tub in the powder coating oven, then blast it. But they do not remove the seam sealer. I need the seam sealer removed so I can seam weld the spot welded seams. I even torch the seams with a MAPP torch before I start welding and I still pull impurities into the welds. (IMG:style_emoticons/default/barf.gif) (IMG:style_emoticons/default/barf.gif) (IMG:style_emoticons/default/welder.gif) I'm probably too late to help you, but several years ago I had a BMW project dipped in caustic. Cost $1500 and EVERYTHING was completely gone; seam welding the chassis was easy. |
|
|
|
| cary |
Dec 28 2016, 12:22 PM
Post
#879
|
|
Advanced Member Group: Members Posts: 3,900 Joined: 26-January 04 From: Sherwood Oregon Member No.: 1,608 Region Association: Pacific Northwest |
Based on info we got, in portland it's around $3500.
Which wasn't an issue. 3 month waiting list was. But we heard it still didnt get it all off a 964. |
|
|
|
| cary |
Jan 10 2017, 09:59 AM
Post
#880
|
|
Advanced Member Group: Members Posts: 3,900 Joined: 26-January 04 From: Sherwood Oregon Member No.: 1,608 Region Association: Pacific Northwest |
I haven't fell off the map. Super In Law and I are running a new #6 wire run for my new 80 gal compressor. Going from 10.8 CFM at 90. To 25.3 CFM at 175.
Should be enough to keep up with the blast cabinet. And make some improvements on the outside blasting. |
|
|
|
|
2 User(s) are reading this topic (2 Guests and 0 Anonymous Users)
0 Members:

|
Lo-Fi Version | Time is now: 24th June 2026 - 12:59 PM |
Invision Power Board
v9.1.4 © 2026 IPS, Inc.