|
|
|
Porsche, and the Porsche crest are registered trademarks of Dr. Ing. h.c. F. Porsche AG.
This site is not affiliated with Porsche in any way. Its only purpose is to provide an online forum for car enthusiasts. All other trademarks are property of their respective owners. |
|
|

  |

| Speedo |
 Sep 27 2014, 11:01 AM Sep 27 2014, 11:01 AM
Post
#121
|
|
Senior Member  Group: Members Posts: 591 Joined: 7-November 06 From: Boulder Member No.: 7,170 Region Association: Rocky Mountains |
QUOTE(mbseto @ Sep 25 2014, 04:31 AM)  "Love this pic " Not to hijack, but have you climbed that rock in the background? Refresh my memory...what rock in what picture? |
   |

 
|
| Speedo |
Nov 30 2014, 08:04 PM
Post
#122
|
|
Senior Member Group: Members Posts: 591 Joined: 7-November 06 From: Boulder Member No.: 7,170 Region Association: Rocky Mountains |
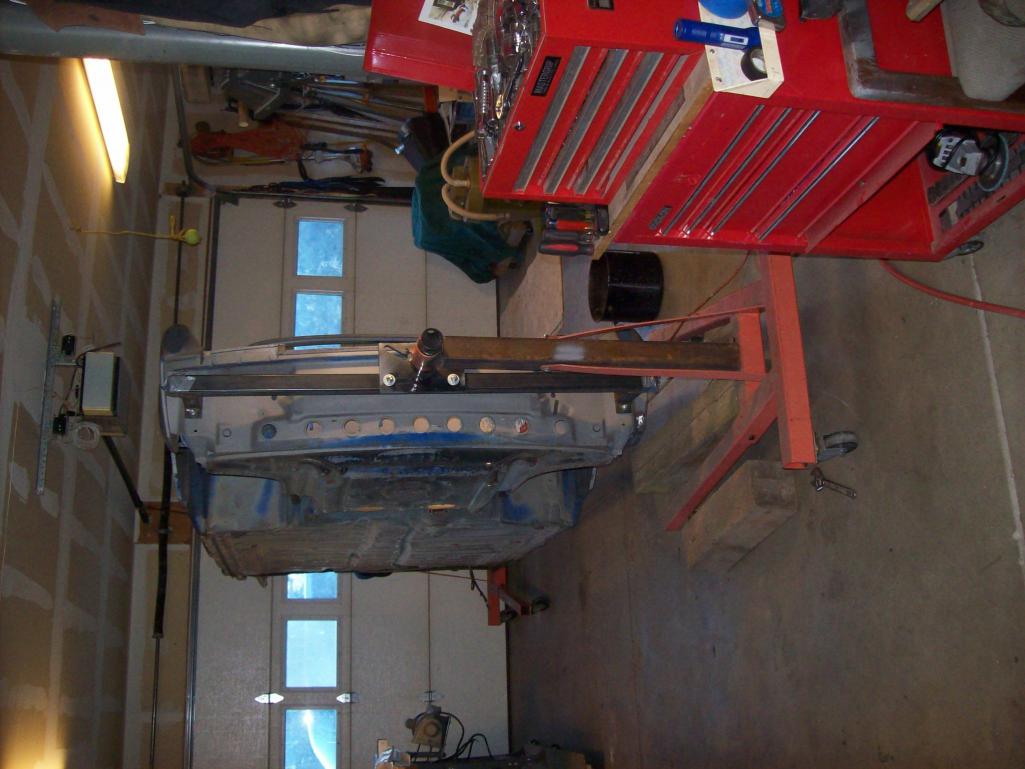
I have been procrastinating (I mean organizing). A tire shop went out of business in Boulder and he had a lot of industrial shelving...cheap. I bought two sets for the shop to get things off the ground. An engine on a dolly takes up the same space on the floor as three engines stacked on shelves. Great way to be economical with space, that's the good news. Bad news is that everything stashed against the walls of the garage on the floor needed to be pulled out for the shelves to be installed. Kind of like cleaning your room as a kid...absolutely hate the idea, but you are glad when it is done. All the cars are off to storage, and the only car in the shop is the 6 on the rotisserie. Frankly the order and space is really nice. Went to S Denver today to help a Pelican friend with the front hood latch gremlin on a car he is reassembling, and he has a huge shop/garage with 20 ft ceilings. But the floor was a disaster. Going vertical is a good thing. I have been practicing welding again...kind of a "girly thing" like ballroom dancing I guess. But I felt out of touch with my welding skills, so I spent a few days welding thin gauge steel to get my confidence level back up. I have a lot more welding to do on this car, and some of it is complicated. I circled the car a couple times to see what I could start with that was relatively easy. I didn't want to fabricate...so I needed to find something that I cut out of the donor car that I could use to repair a section. Left front lower corner behind the bumper is where I will start.
  I cut the area out and started to trim my replacement part 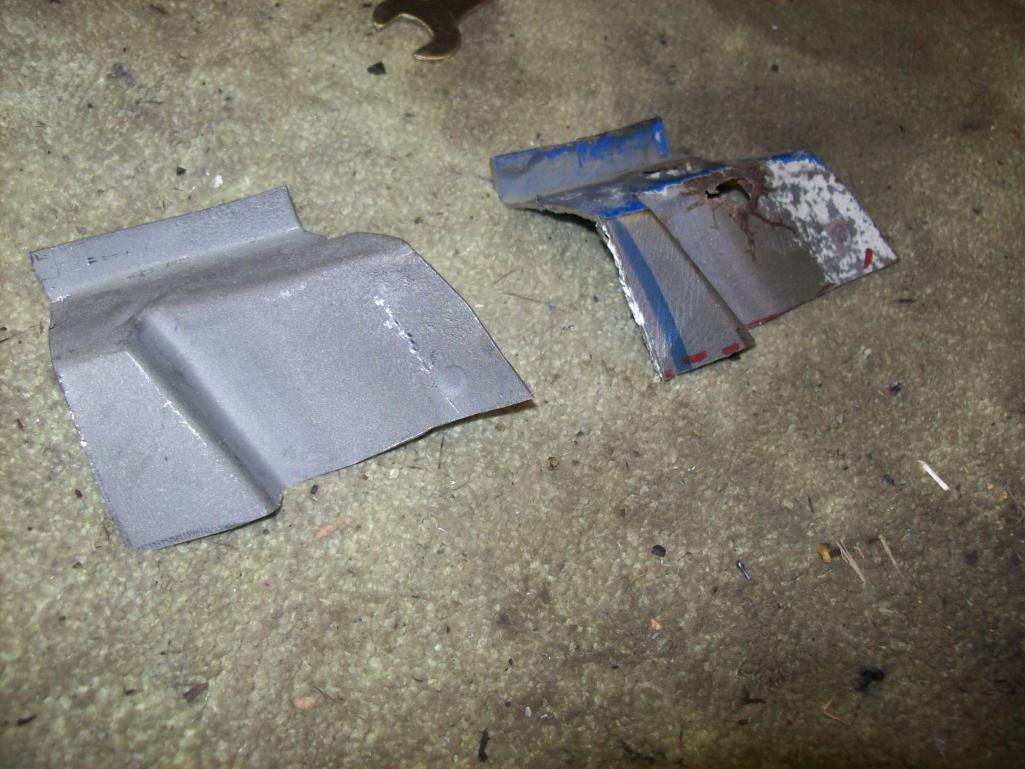 Cut and fit and cut and fit 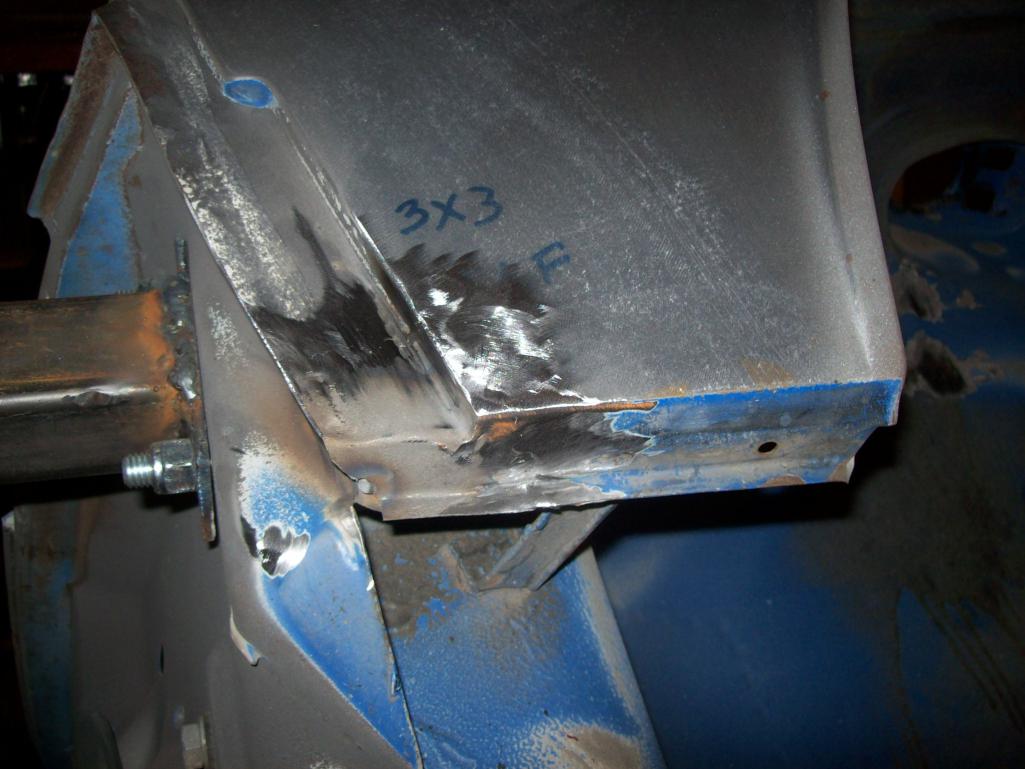 Ok...done. Haven't lost too much metal skill. More work to be done on this corner up top where the hood seal traps moisture next to the head light. Unfortunately, this little segment will need to be fabricated as it didn't get chopped out of the donor car. I think the plan is to go corner to corner clockwise. The 2.7 RS spec MFI engine is built and waiting. If someone want to chime in as to what I am going to need to do th prepare the chassis for MFI, let me know. I realize I will be running a high pressure MFI fuel pump, will I need to run a return line? I probably will start to come up with lots of induction questions... |
|
|
|
| Speedo |
Nov 30 2014, 09:04 PM
Post
#123
|
|
Senior Member Group: Members Posts: 591 Joined: 7-November 06 From: Boulder Member No.: 7,170 Region Association: Rocky Mountains |
Oh yeah...forgot, this kind of gets "my juices " going again...yeah, I am weird.
 Speedo |
|
|
|
| Ferg |
Nov 30 2014, 10:03 PM
Post
#124
|
|
914 Guru Group: Members Posts: 5,948 Joined: 8-January 03 From: Boulder CO Member No.: 116 Region Association: None |
(IMG:style_emoticons/default/piratenanner.gif) Nice work Lars!
I will visit soon. Ferg (IMG:style_emoticons/default/beerchug.gif) |
|
|
|
| Luke M |
Dec 1 2014, 08:10 AM
Post
#125
|
|
Senior Member Group: Members Posts: 1,500 Joined: 8-February 05 From: WNY Member No.: 3,574 Region Association: North East States |
Hey Lars,
The 6 is looking good so far and Keep up the great work. It's been a while since I saw a MFI setup running but it can't be too hard to make it work in a 914. Long ago a friend of mine had a 2.4 T MFI engine in his 914 but I can't recall how he did the fuel plumbing on it. If you are going the MFI route then just copy the system off a 911. I do remember him having some issues with trying to figure out the wiring. It can't be too hard now a days with all the info out on the web. (IMG:style_emoticons/default/beerchug.gif) |
|
|
|
| Speedo |
Dec 7 2014, 09:20 PM
Post
#126
|
|
Senior Member Group: Members Posts: 591 Joined: 7-November 06 From: Boulder Member No.: 7,170 Region Association: Rocky Mountains |
Weekend of welding. Cheaper than a weekend of wedding. Need to clean/dress up some welds and post pics. MFI question ; I am familiar with 911 gas tanks...some of which have a port in the tank for a return line. Does the 914-6 have a return line for the carbs...I can't remember? If It does, I am cool, if not I need to figure one out.
With all the trouble I have had in the last several years with painters...(Ferg, this is not about you) I have almost decided to create a booth and paint the car myself. Not looking forward to that, but unless an ethical, reasonable, non-meth-head-painting-fumed-brain painter surfaces soon, I will start to head down that highway. I am looking for an LE project guys...prefer a creamsickle vs a bumblebee but will consider all ideas. Brant, where are you? Hibernation? You are normally busting my chops about progress. The racecar may come home this winter to decide whether it gets tweaked for next year, or un-race-car-ed. Speedo QUOTE(Luke M @ Dec 1 2014, 07:10 AM) Hey Lars, The 6 is looking good so far and Keep up the great work. It's been a while since I saw a MFI setup running but it can't be too hard to make it work in a 914. Long ago a friend of mine had a 2.4 T MFI engine in his 914 but I can't recall how he did the fuel plumbing on it. If you are going the MFI route then just copy the system off a 911. I do remember him having some issues with trying to figure out the wiring. It can't be too hard now a days with all the info out on the web. (IMG:style_emoticons/default/beerchug.gif) |
|
|
|
| brant |
Dec 7 2014, 10:26 PM
Post
#127
|
|
914 Wizard Group: Members Posts: 12,179 Joined: 30-December 02 From: Colorado Member No.: 47 Region Association: Rocky Mountains |
The tank has a return nipple.
I've painted two cars. It's hard work. Got to be a guy somewhere |
|
|
|
| Speedo |
Dec 8 2014, 08:17 PM
Post
#128
|
|
Senior Member Group: Members Posts: 591 Joined: 7-November 06 From: Boulder Member No.: 7,170 Region Association: Rocky Mountains |
Ok,
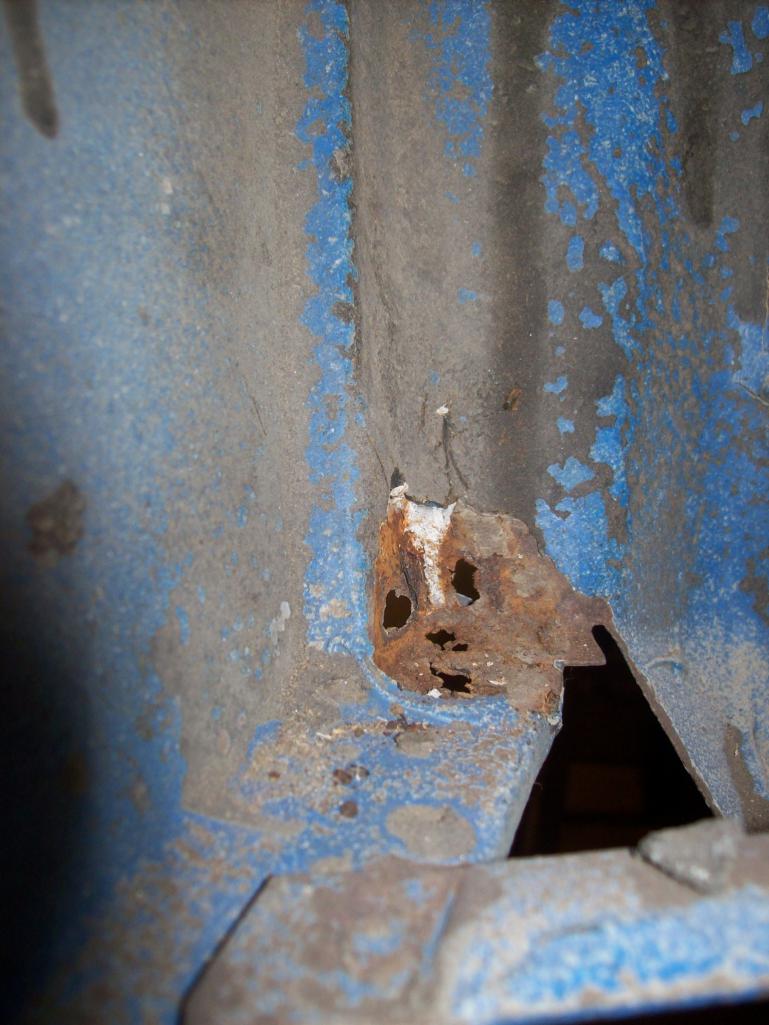
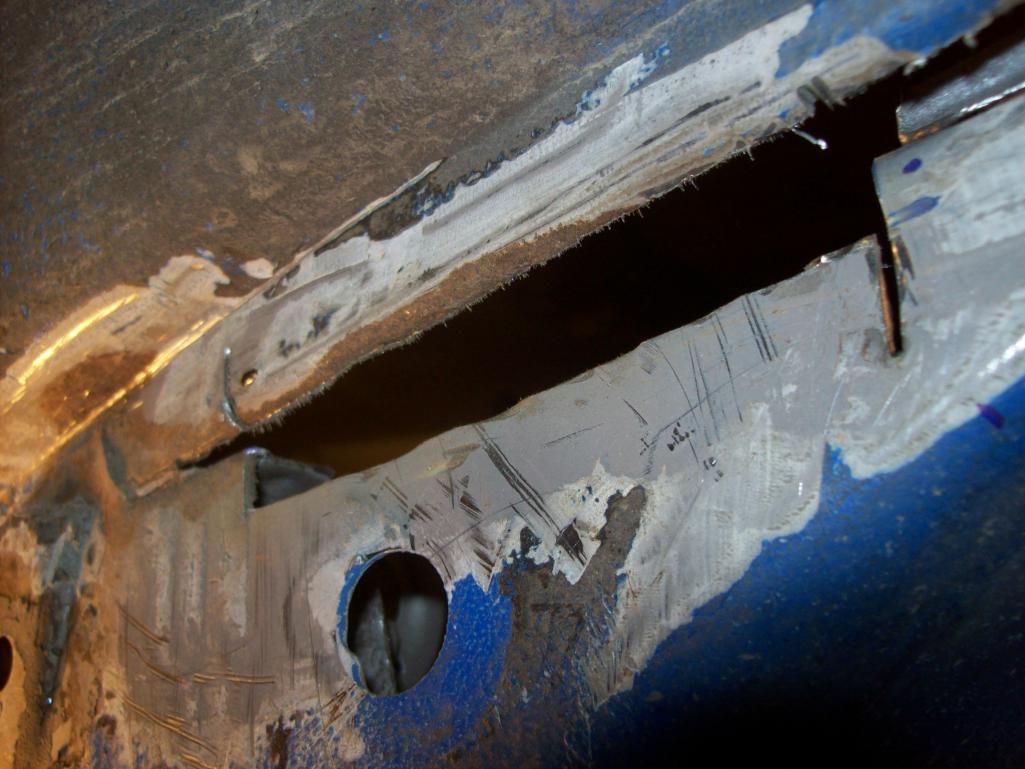
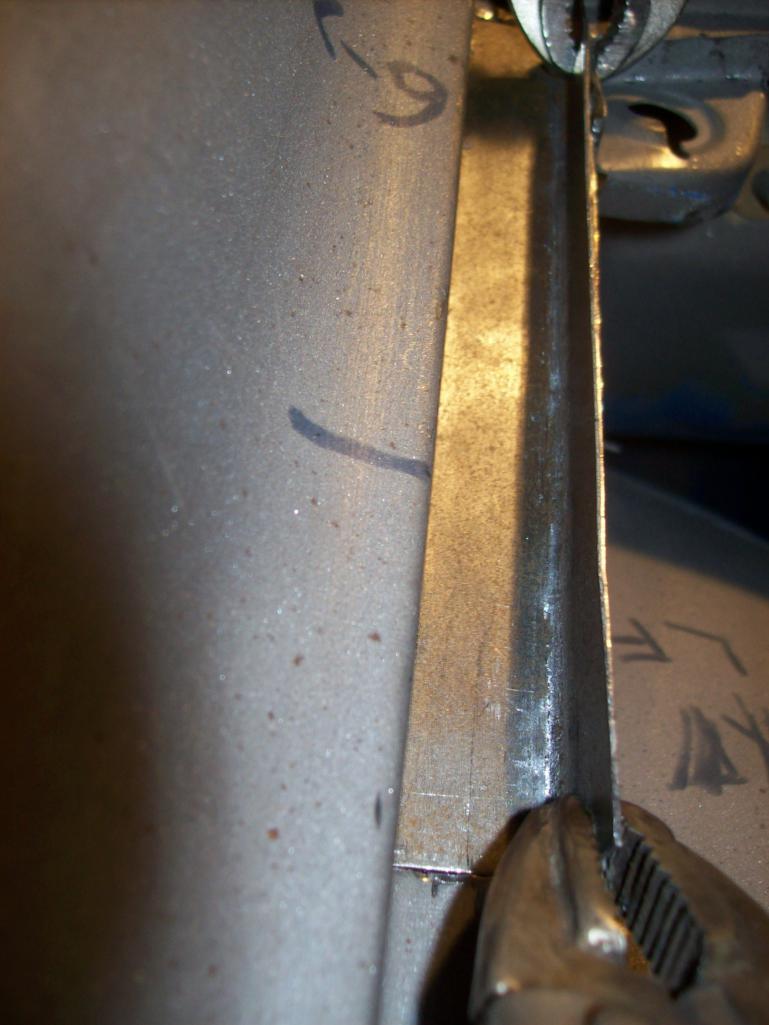
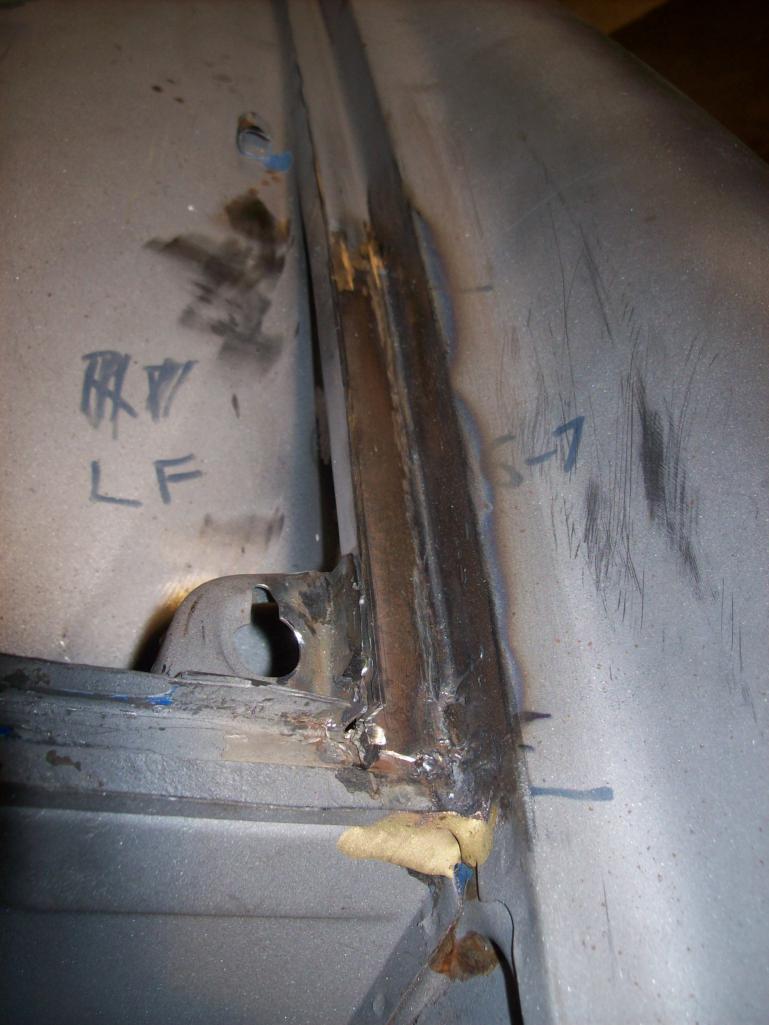
If you don't want to look at welding...stop here as that is pretty much all of what is going to be posted till this thing gets painted by Brant. BTW, thanks for sharing your experience Brant...and offer! For reference, I and going around the car clockwise and will finish at the A pillar on the drivers door. Still on the drivers side...channel where the fender is spot welded to the inner fender...not nice 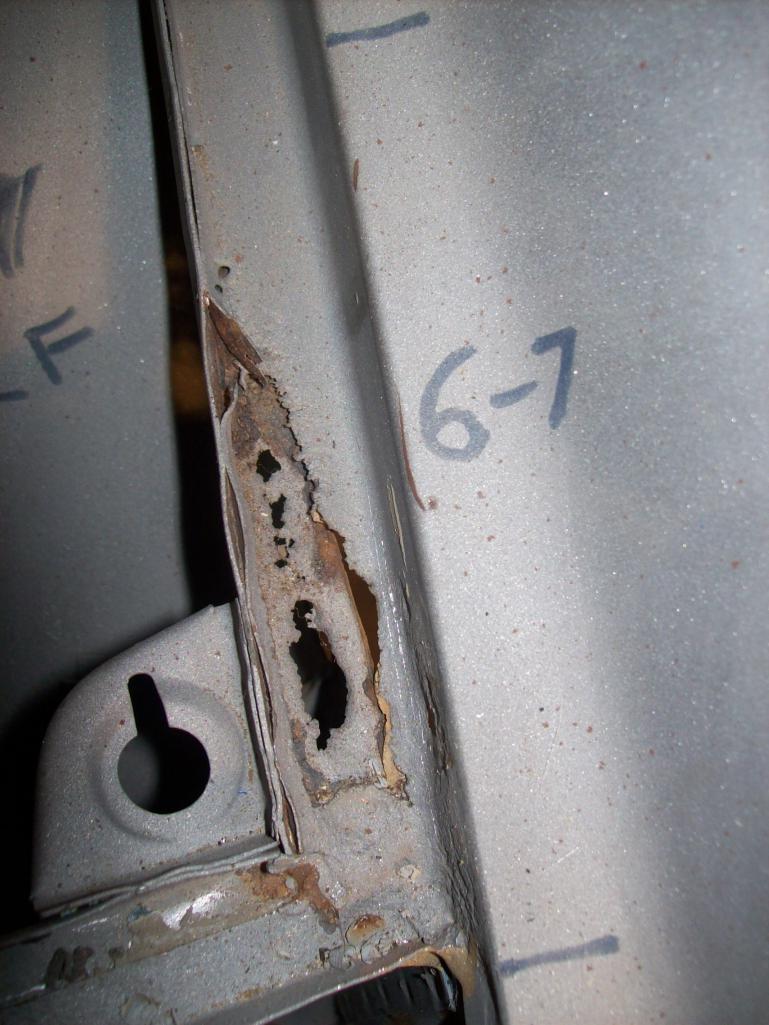  From the inside of the fender 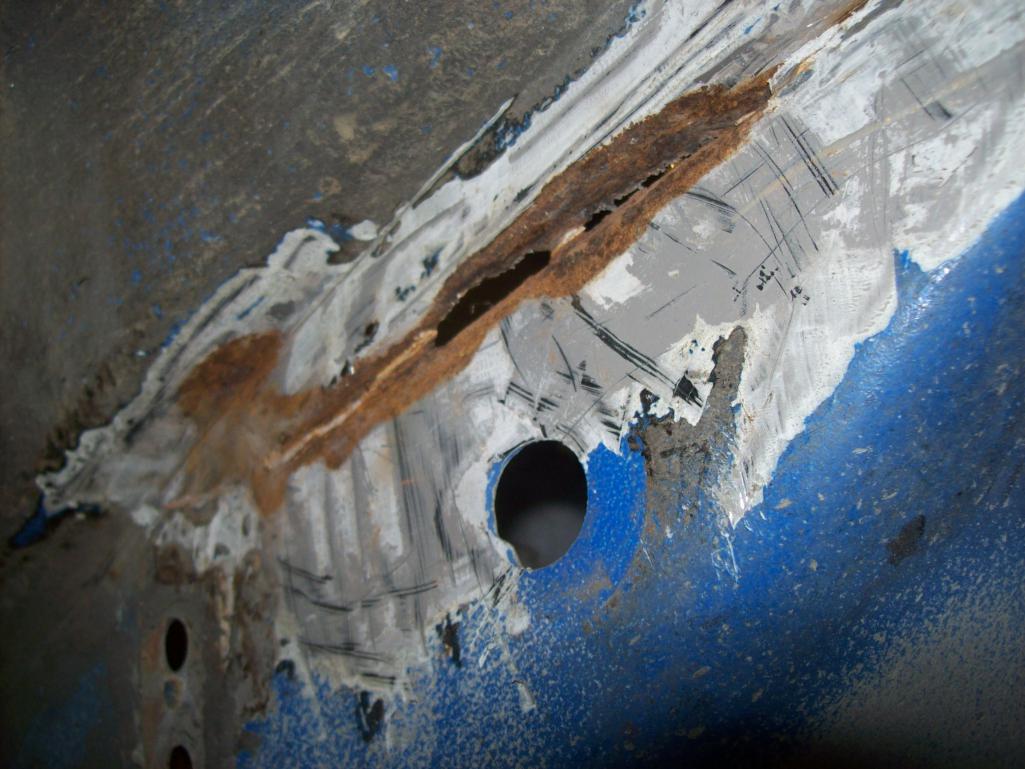 As I am learning on 914's you have to peel back the layers of the onion. First have to cut away the fender to repair the inner fender.  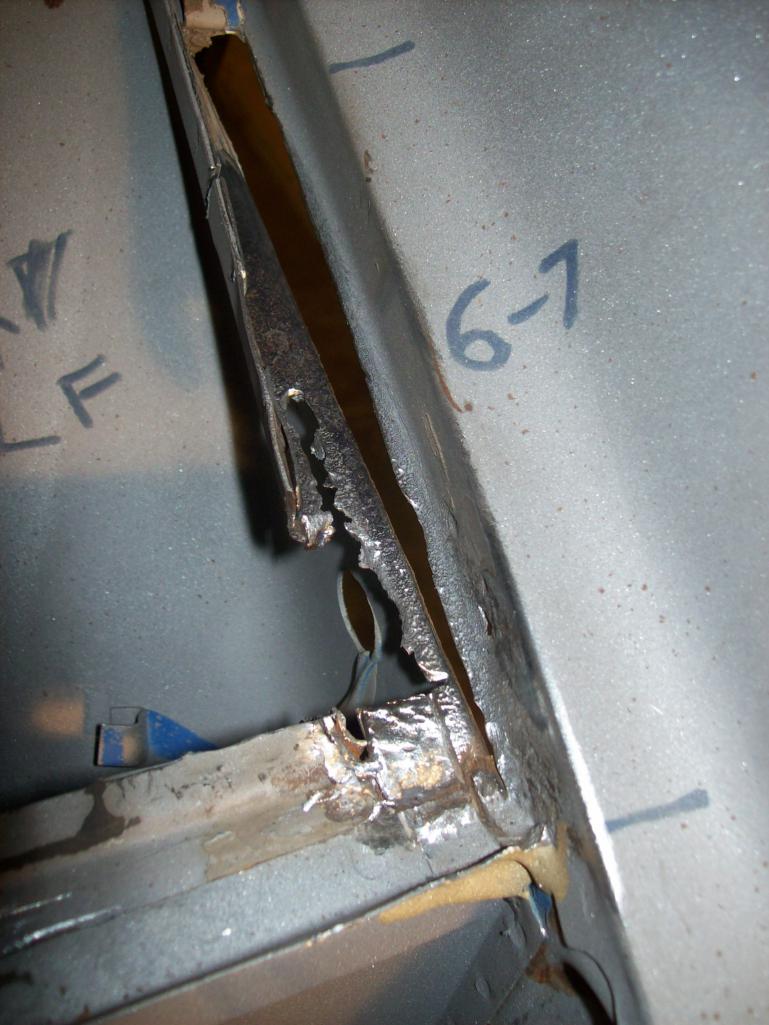 |
|
|
|
| Speedo |
Dec 8 2014, 08:25 PM
Post
#129
|
|
Senior Member Group: Members Posts: 591 Joined: 7-November 06 From: Boulder Member No.: 7,170 Region Association: Rocky Mountains |
Sorry for the double post...someone show me how to edit please. I am not going to do a running commentary...but I will just show the steps I had to go through and the finished product.
  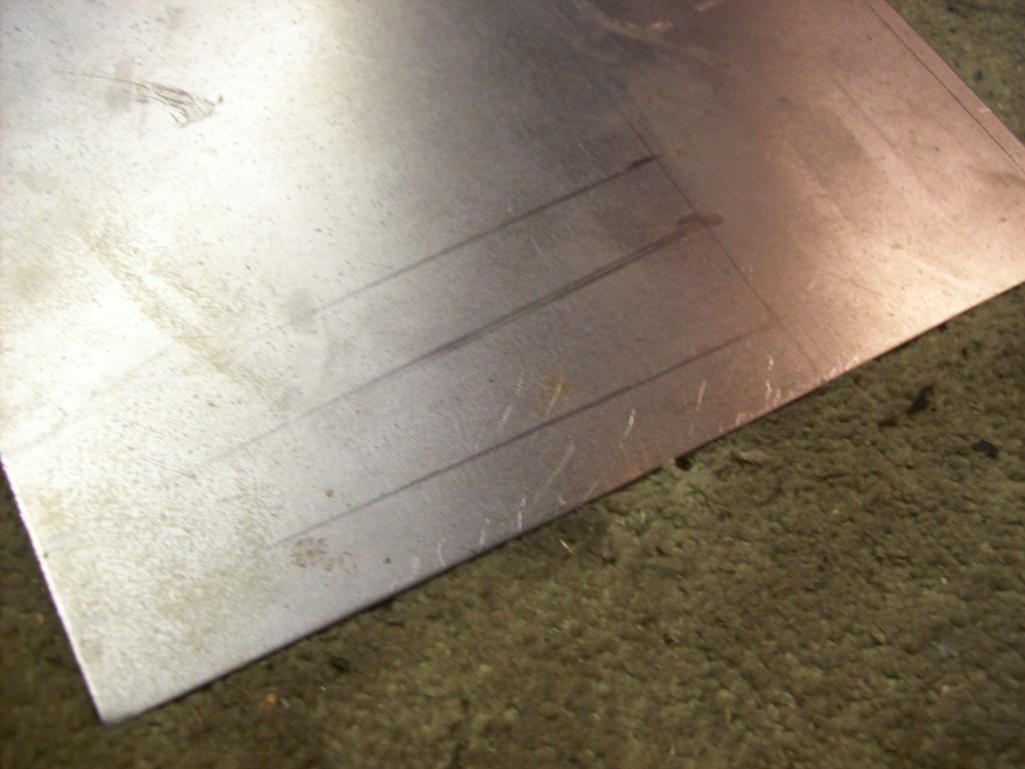   Getting the inner fender replacement part dialed in |
|
|
|
| Speedo |
Dec 8 2014, 08:31 PM
Post
#130
|
|
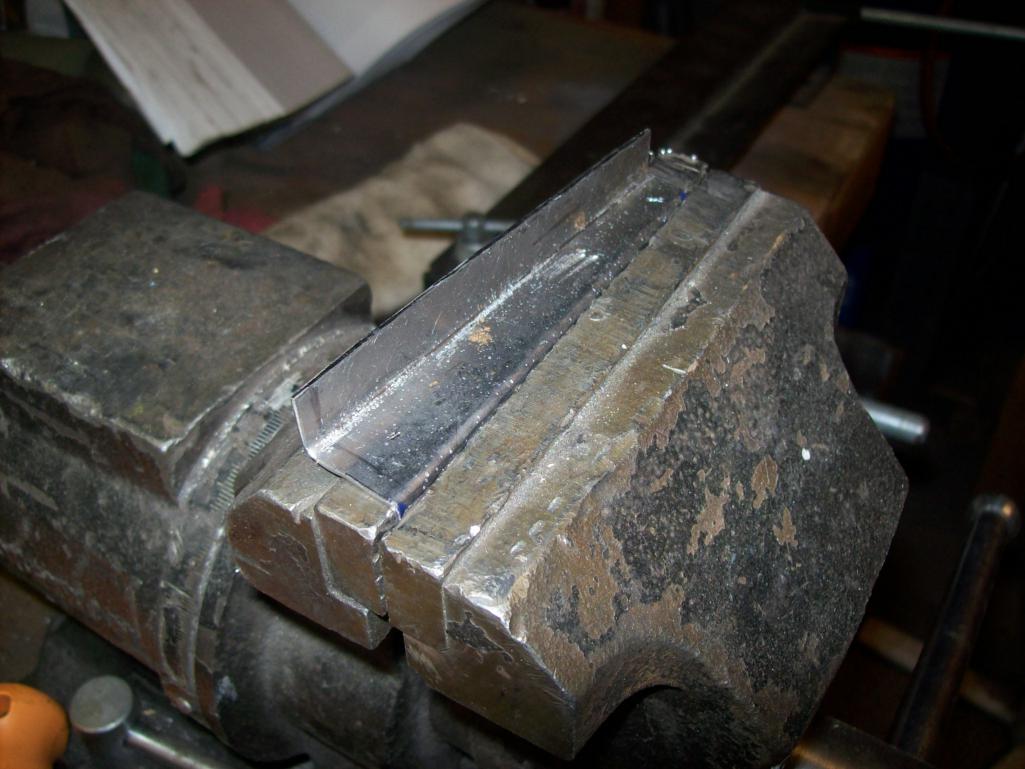
Senior Member Group: Members Posts: 591 Joined: 7-November 06 From: Boulder Member No.: 7,170 Region Association: Rocky Mountains |
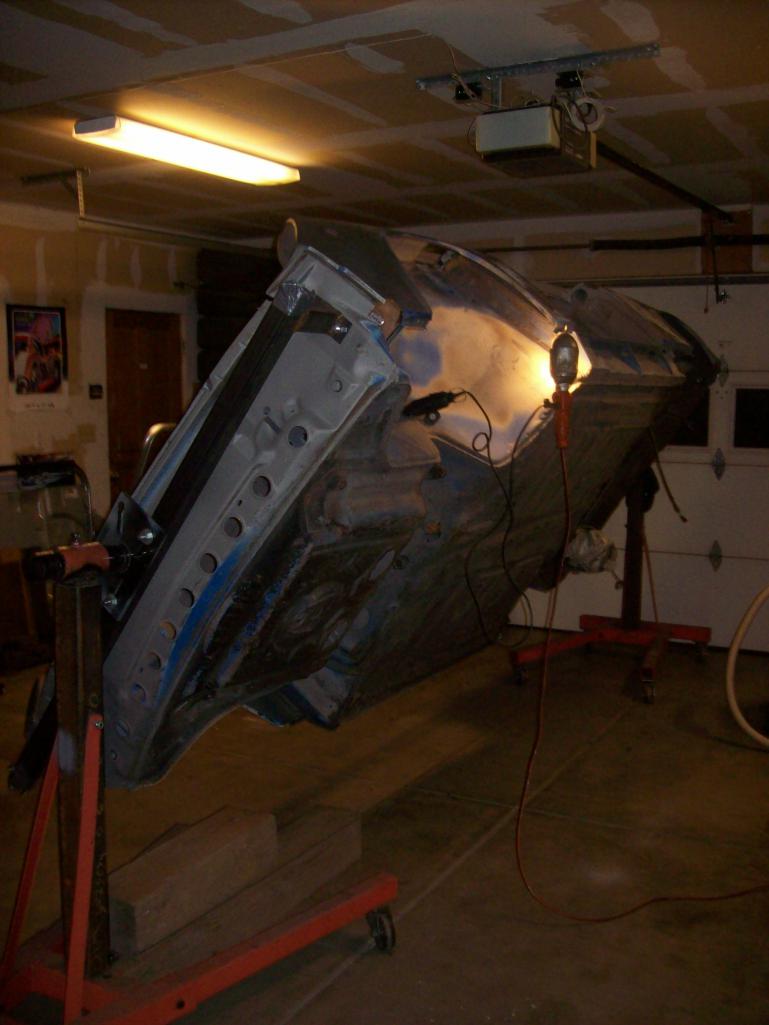
Easier to work on the car when it is horizontal on the rotisserie...no wait!
 Trial fit 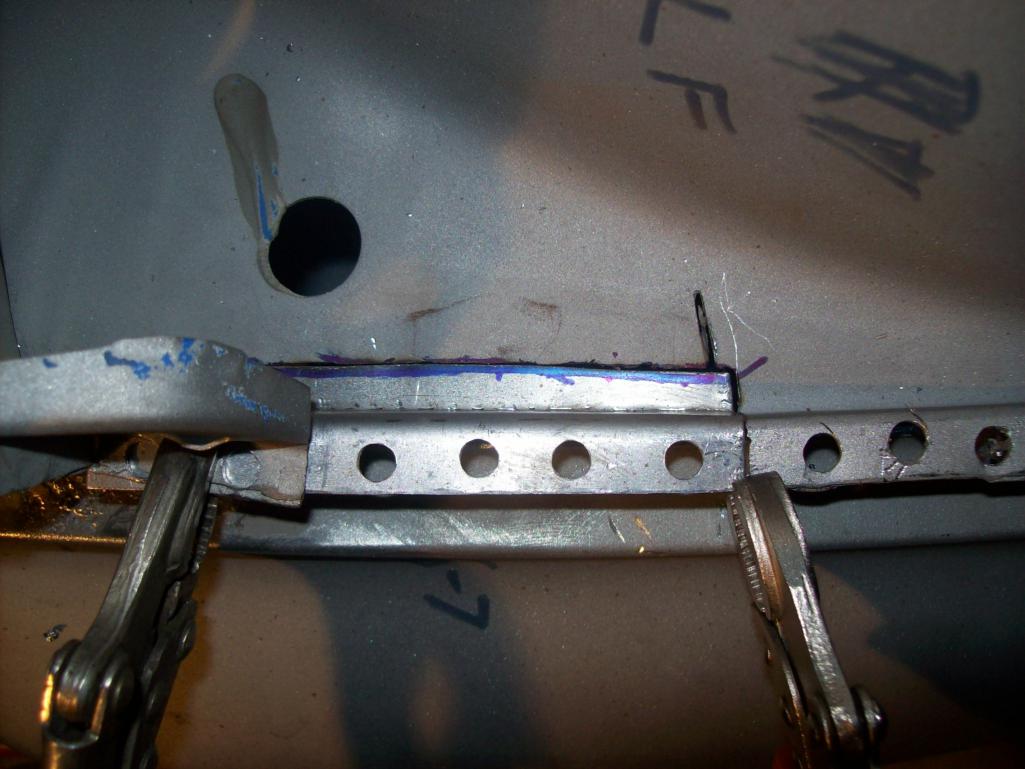 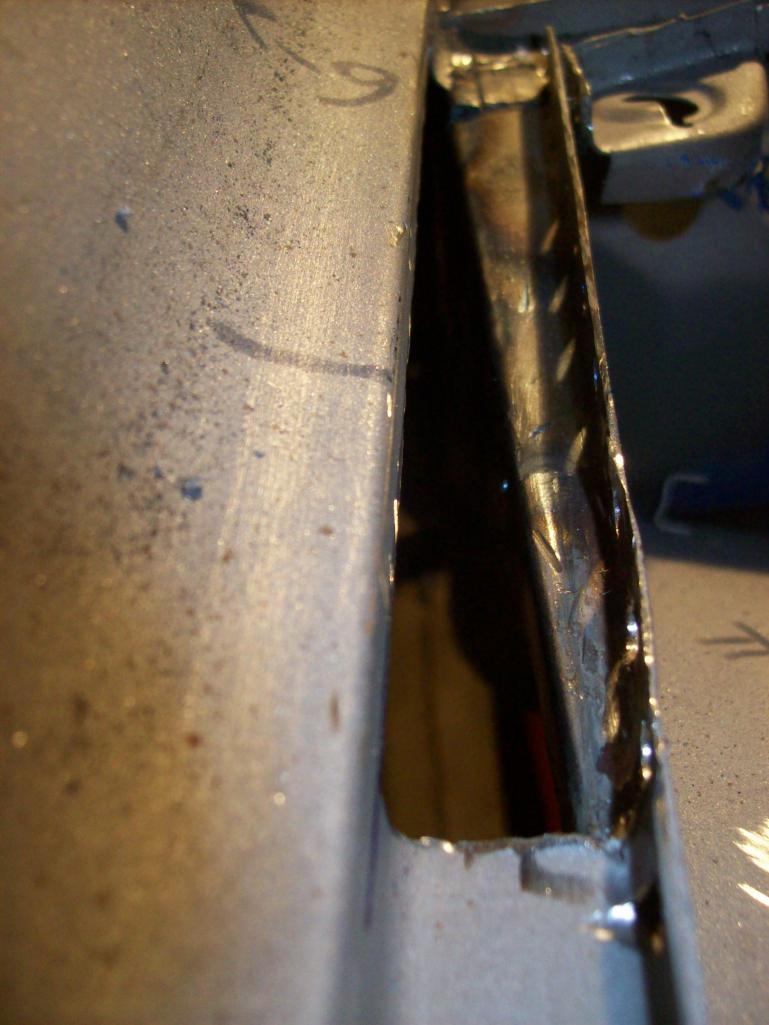 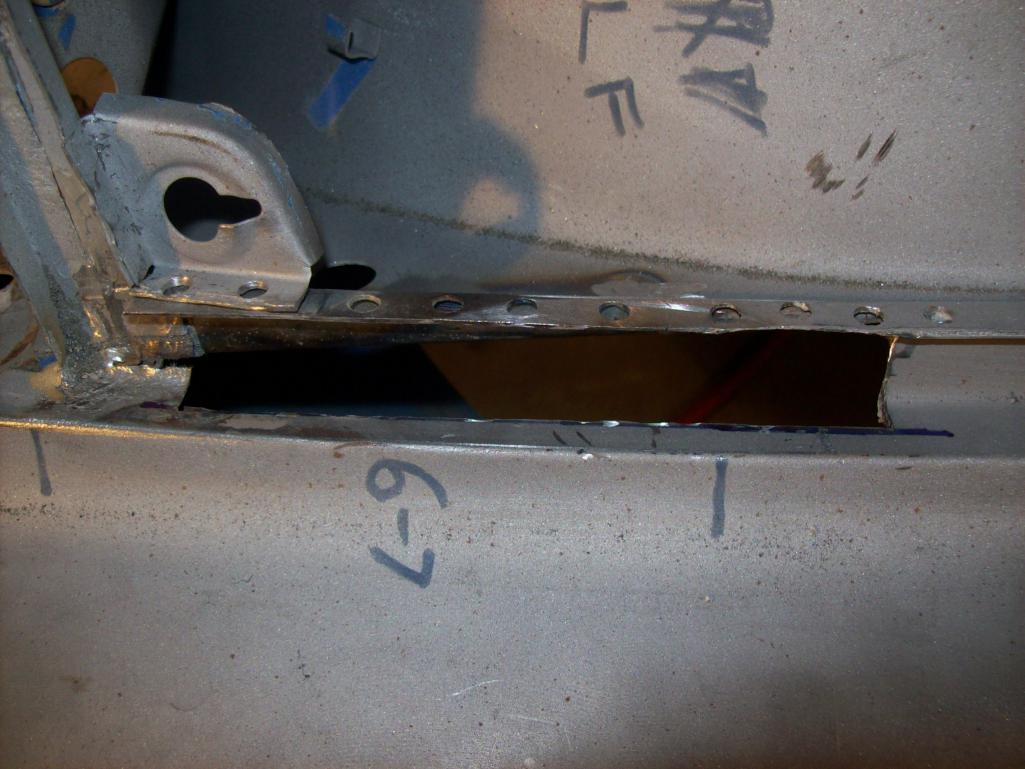 Fitting the fender side 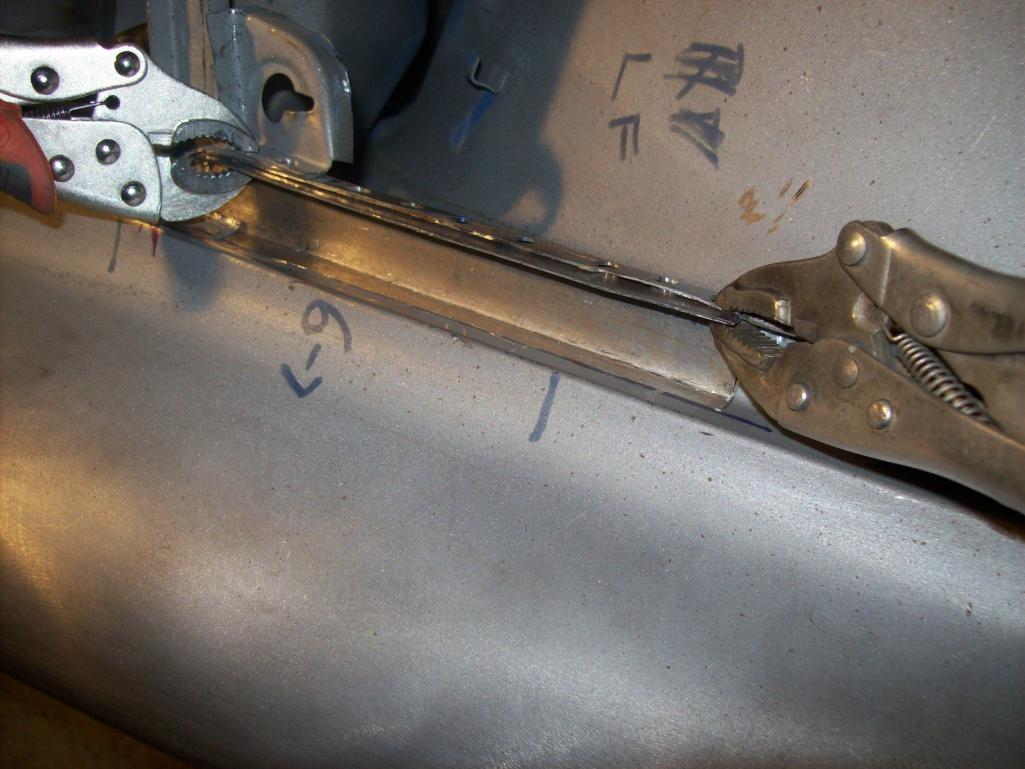 |
|
|
|
| Speedo |
Dec 8 2014, 08:43 PM
Post
#131
|
|
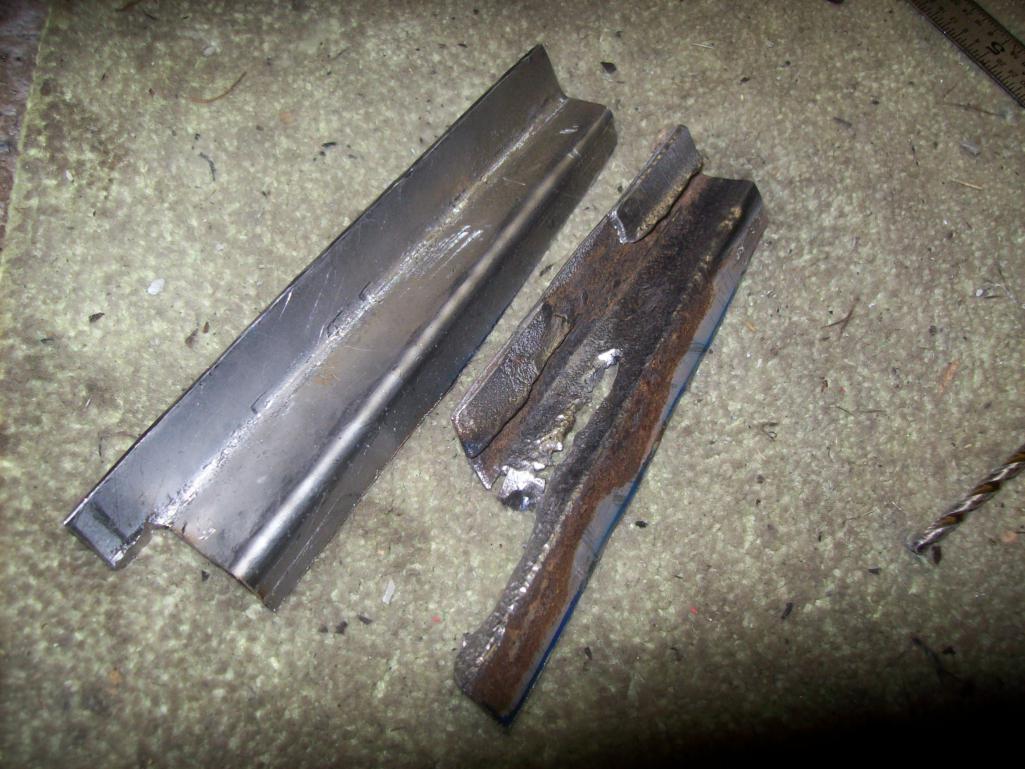
Senior Member Group: Members Posts: 591 Joined: 7-November 06 From: Boulder Member No.: 7,170 Region Association: Rocky Mountains |
All in...fender patch welded to inner fender patch
  Done. Now I have some weak areas on the channel that need to be replaced or repaired. I normally would replace the weak sections, but I have been experimenting with building up the steel by welding in material. Kind of like welding toilet paper. I am using a MIG not a TIG so I have to be careful not to breathe or burp. This is how I set it up...  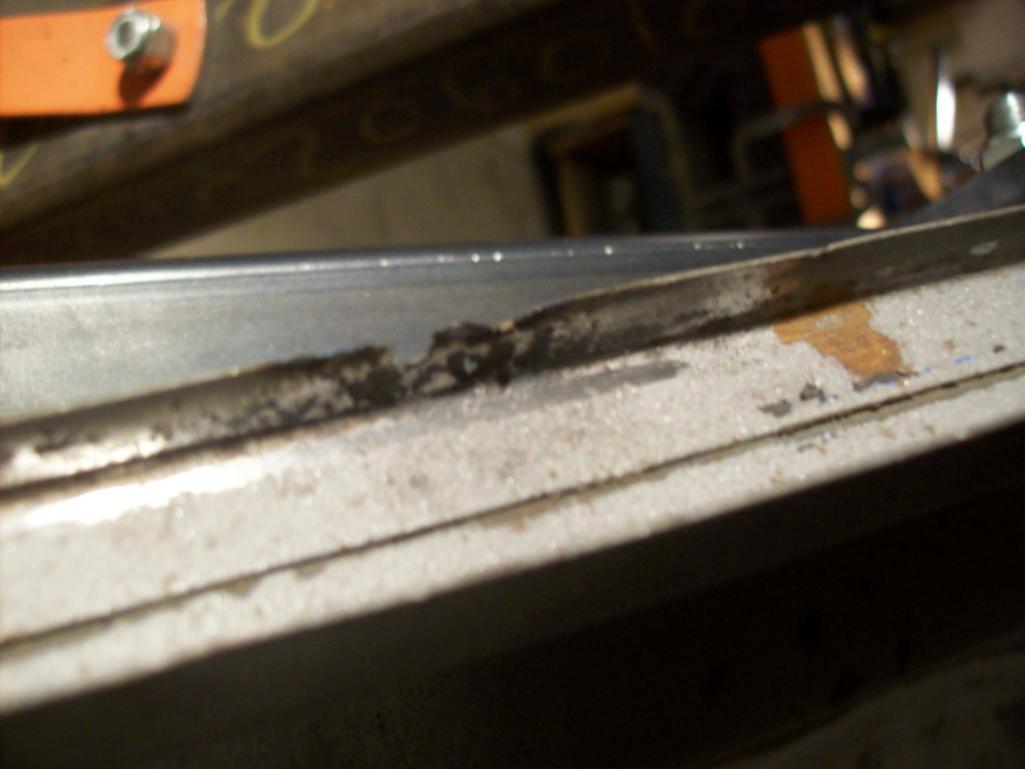 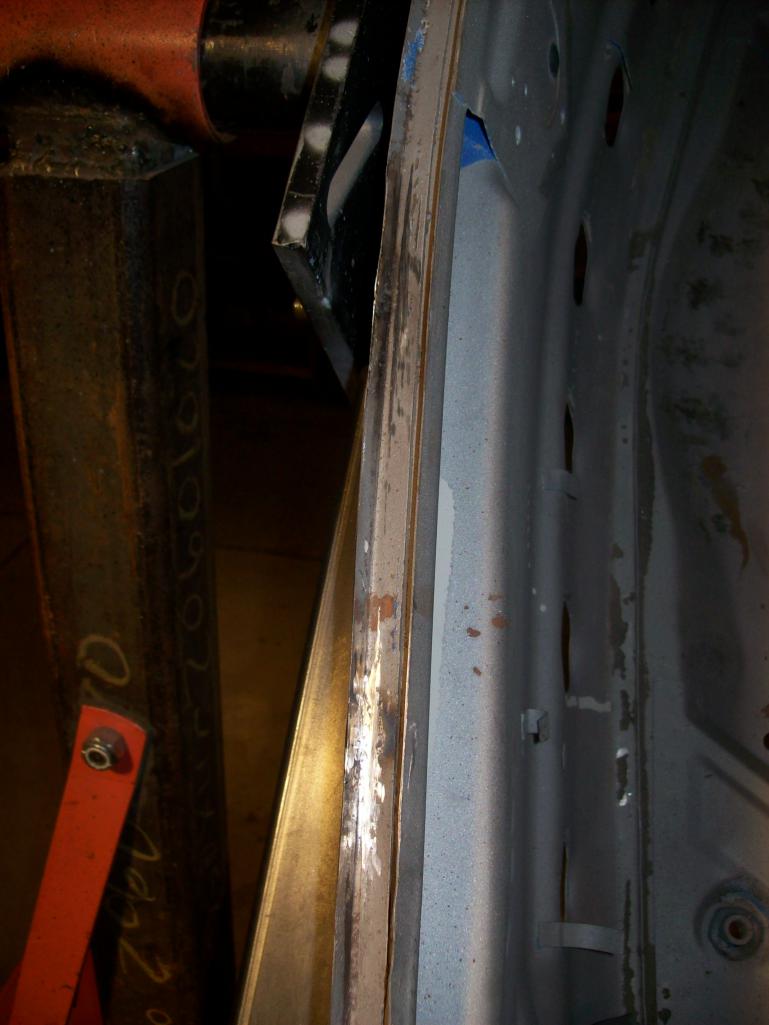 There were 6 areas in the front trunk area that had weak channels. I used the same copper back shield to build up material and a series of flapper wheels to take down the excess. Worked great. A lot easier than splicing in short pieces of angle. |
|
|
|
| Speedo |
Dec 8 2014, 08:49 PM
Post
#132
|
|
Senior Member Group: Members Posts: 591 Joined: 7-November 06 From: Boulder Member No.: 7,170 Region Association: Rocky Mountains |
Right side wiper divot is next as we go clockwise.
 I have a transplant candidate that wants to play... 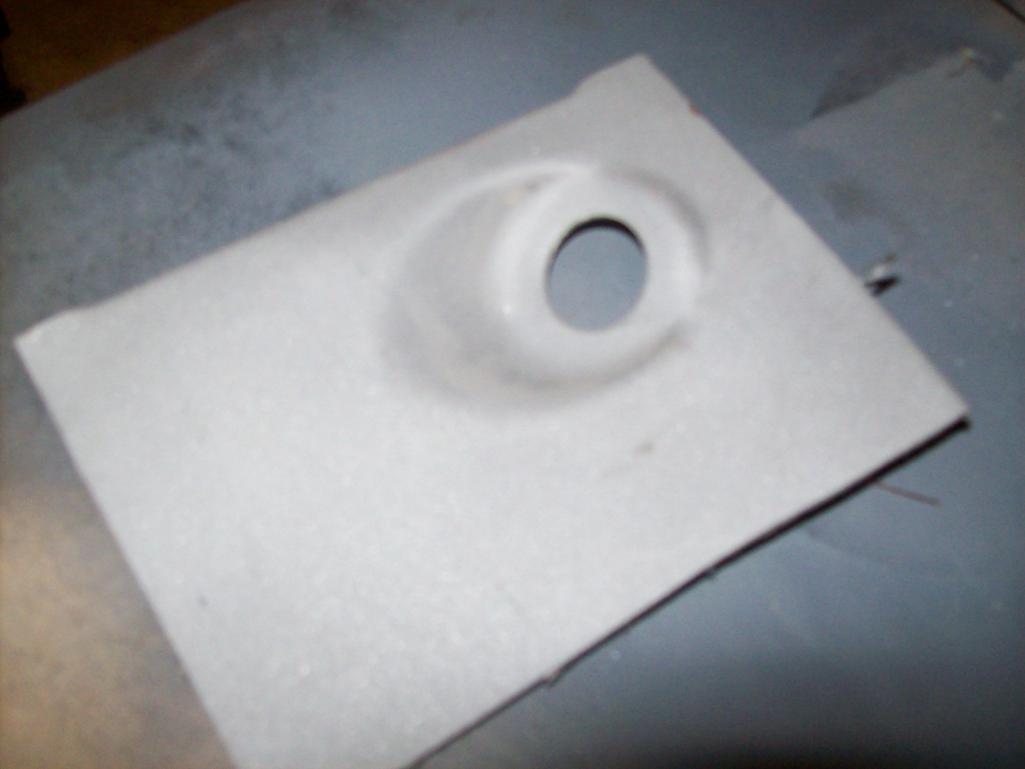 This will be tight. Need to figure out the smallest possible area to replace. Next on the list is the corrosion at the door release/wing area on the passenger side. Slowly but surely (IMG:style_emoticons/default/biggrin.gif) |
|
|
|
| altitude411 |
Dec 8 2014, 08:53 PM
Post
#133
|
|
I drove my 6 into a tree Group: Members Posts: 1,306 Joined: 21-September 14 From: montana Member No.: 17,932 Region Association: Rocky Mountains |
Nice work! Thank you for posting. (IMG:style_emoticons/default/beerchug.gif)
|
|
|
|
| haycait911 |
Dec 10 2014, 09:01 PM
Post
#134
|
|
Newbie Group: Members Posts: 9 Joined: 6-March 08 From: B.C., Canada Member No.: 8,782 Region Association: None |
you need some of these Lars. they keep a perfect gap and level the panels.
  |
|
|
|
| Speedo |
Dec 10 2014, 10:45 PM
Post
#135
|
|
Senior Member Group: Members Posts: 591 Joined: 7-November 06 From: Boulder Member No.: 7,170 Region Association: Rocky Mountains |
Ok wise-guy I have sets of those but they are only usefull in larger open areas. Not -so-much in tight areas with corners...have any cheap TTDs for sale?
Speedo |
|
|
|
| veekry9 |
Dec 10 2014, 10:56 PM
Post
#136
|
|
OldMember Group: Retired Members Posts: 3,068 Joined: 17-June 13 From: TO Member No.: 16,025 Region Association: Canada |
2 small thin washers+pop-rivet.
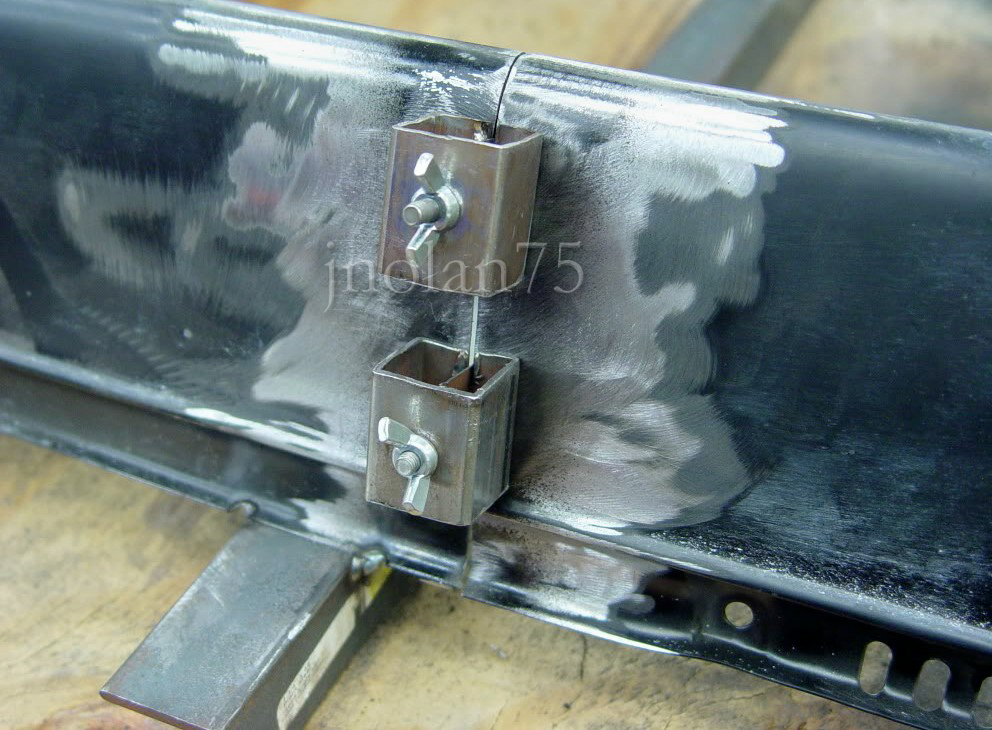
use small dia shank rivets. 3/8"-1/2"dia spot to clear. I used a rat tail file to clear the rivet shank if needed. Works. Any one here using Clecos? http://www.aircraftspruce.com/search/search.php |
|
|
|
| Speedo |
Dec 11 2014, 11:22 PM
Post
#137
|
|
Senior Member Group: Members Posts: 591 Joined: 7-November 06 From: Boulder Member No.: 7,170 Region Association: Rocky Mountains |
I use clecoes...but your gap is 1/8th inch. Great for lap welding...like flares, but I am doing less lap welding and more butt welding. Clecoes do a great job. Grew up with them building experimental aircraft...good old EAA. Mis my trips out to Oshkosh.
Speedo |
|
|
|
| Speedo |
Dec 13 2014, 08:01 PM
Post
#138
|
|
Senior Member Group: Members Posts: 591 Joined: 7-November 06 From: Boulder Member No.: 7,170 Region Association: Rocky Mountains |
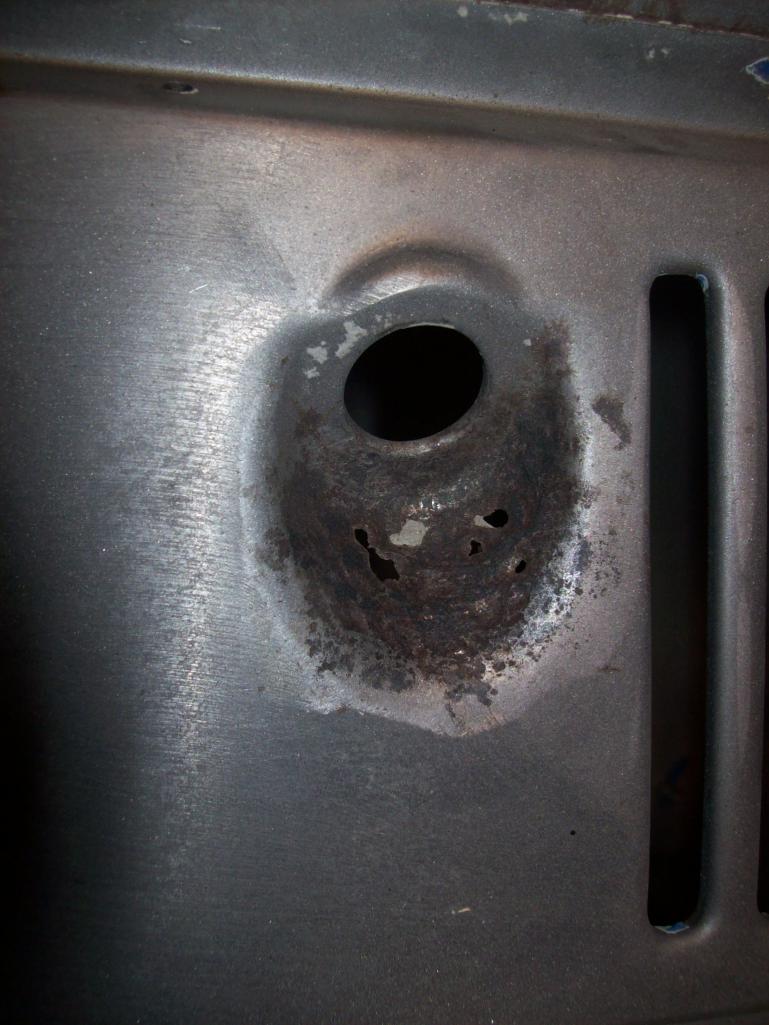
Trying to be better about documenting repairs. This one is tricky as it is non structural and visible. PO did a nice epoxy repair sometime in the past.
  My donor steel and trimmed using my new old school B1 shear 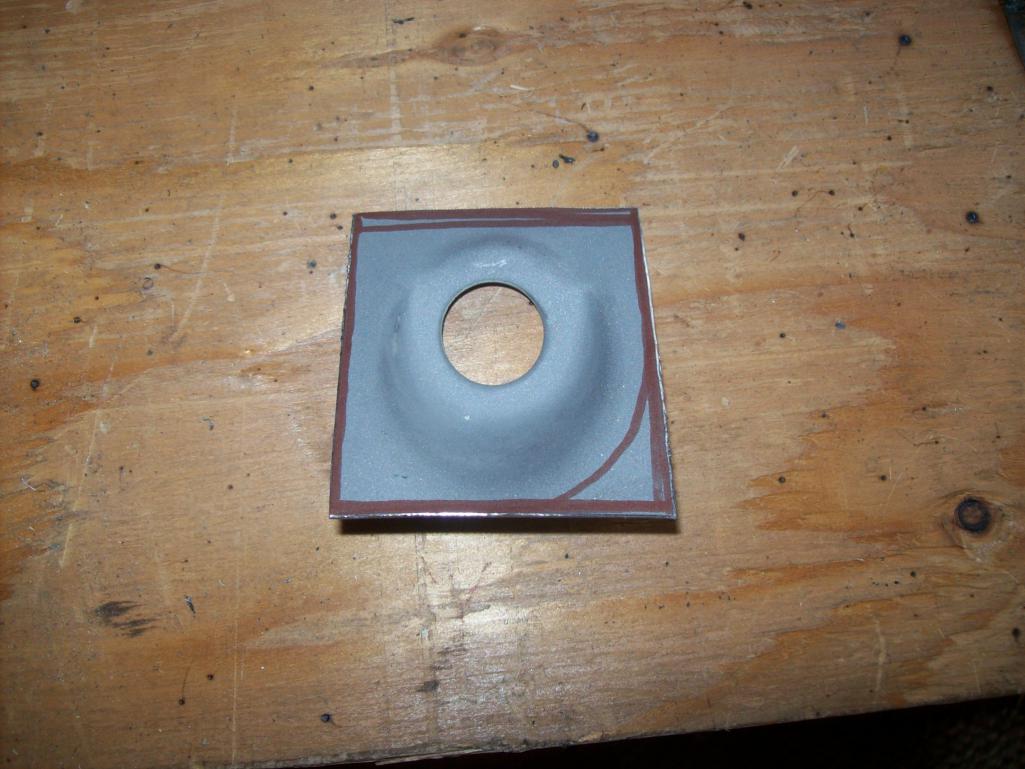 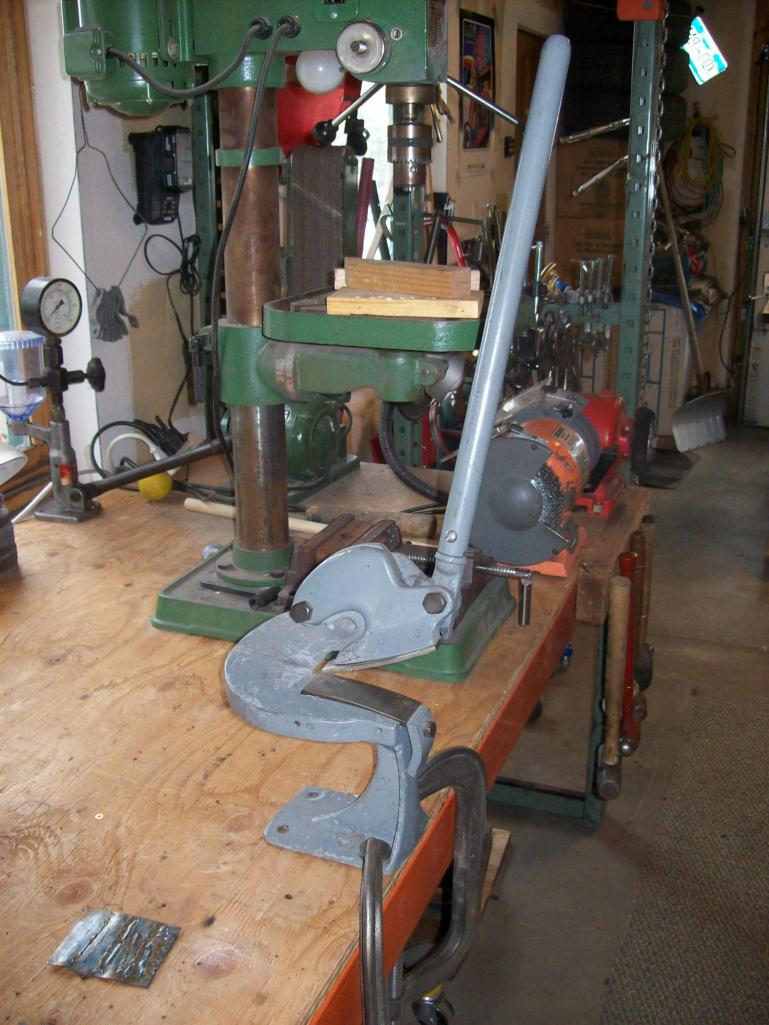 Attached thumbnail(s) 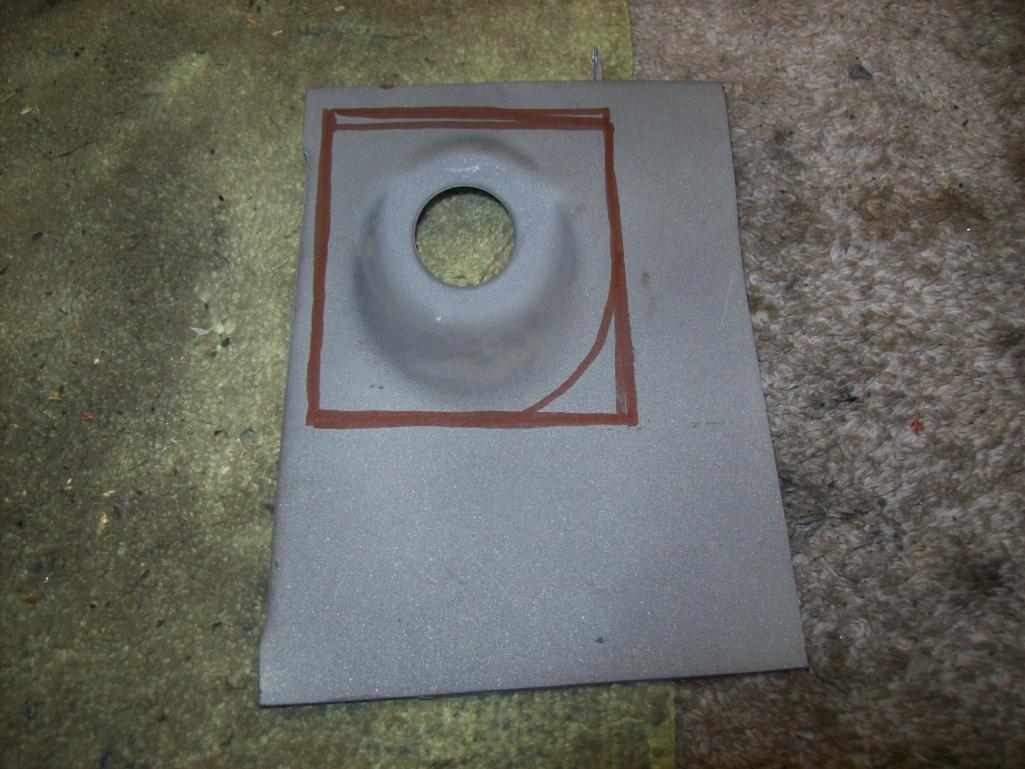
|
|
|
|
| Speedo |
Dec 13 2014, 08:09 PM
Post
#139
|
|
Senior Member Group: Members Posts: 591 Joined: 7-November 06 From: Boulder Member No.: 7,170 Region Association: Rocky Mountains |
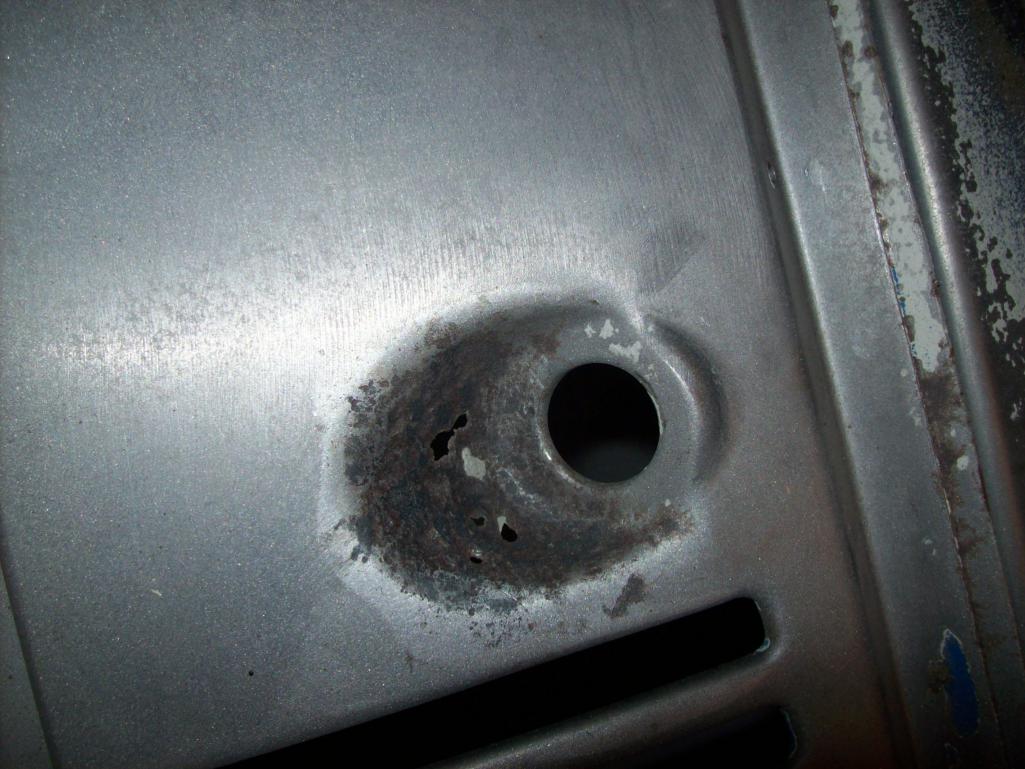
I was going to cut an oval to avoid the 90 degree corners but decided against it. Scribing using the donor to determine how much steel to remove...too little will be trying to weld rusted thin steel, too much will encroach on the vents in between the wipers.
 Comparing what was bad with the donor 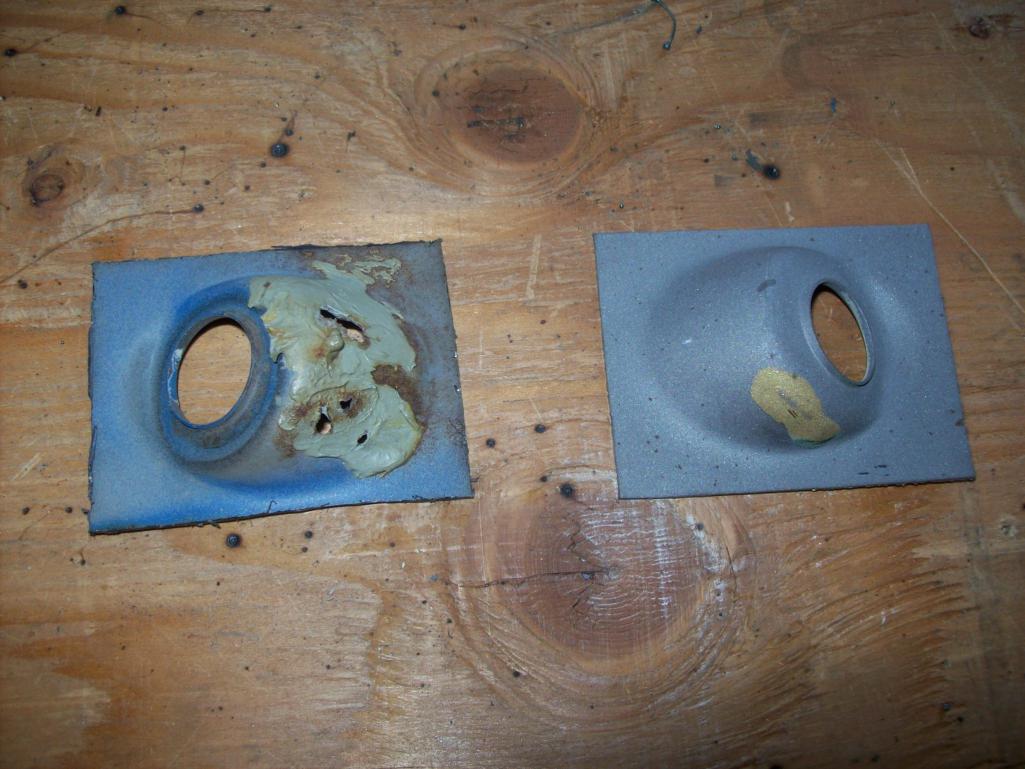 Trimmed and sized 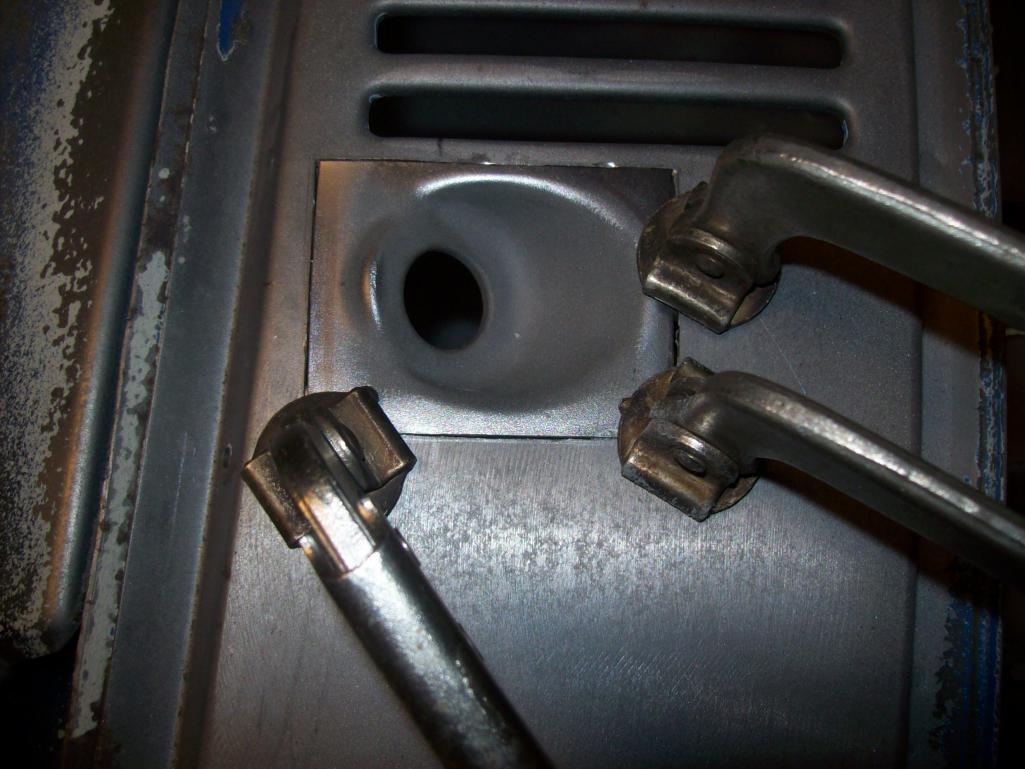 Tacked and welded 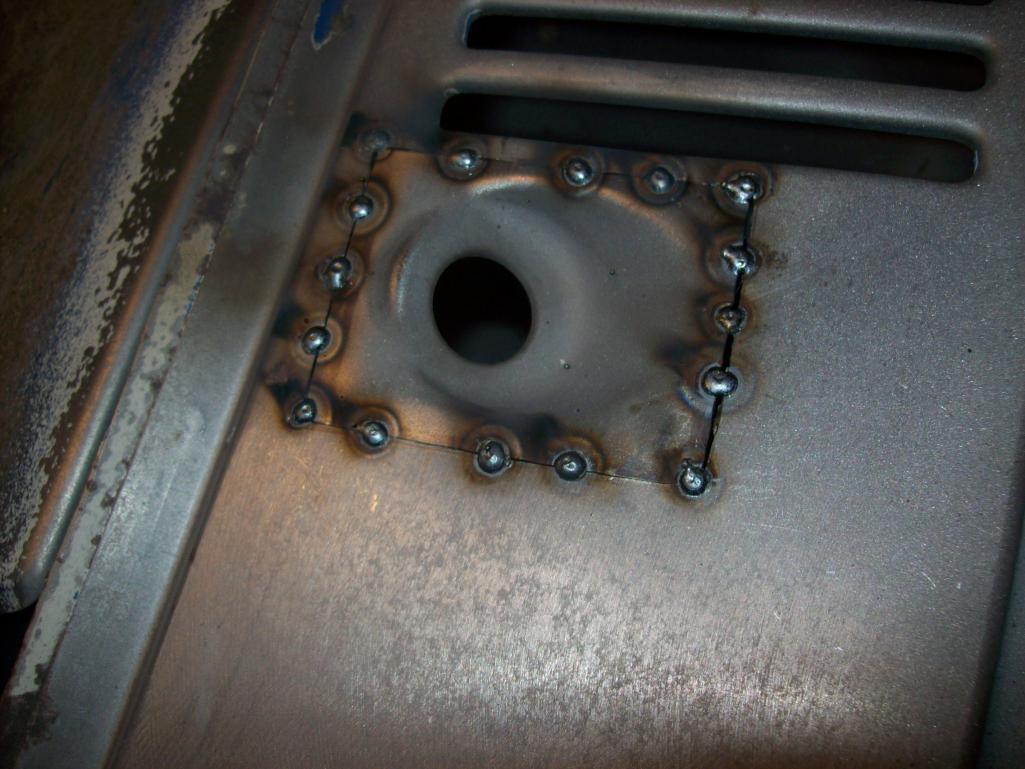 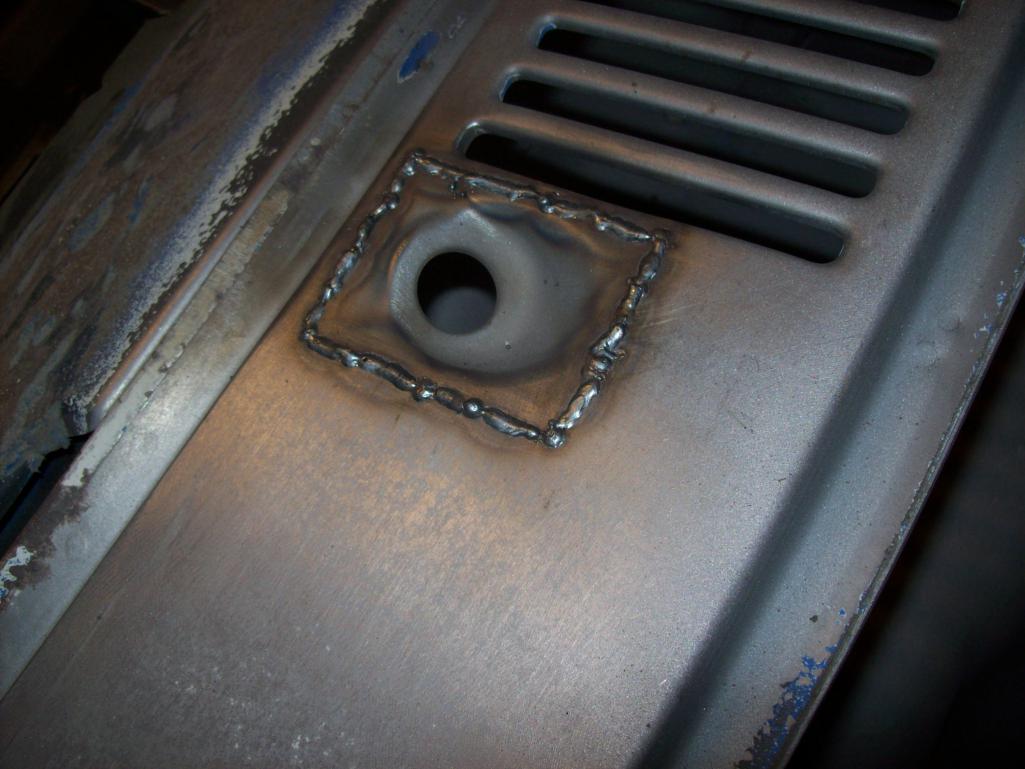 |
|
|
|
| Speedo |
Dec 13 2014, 08:23 PM
Post
#140
|
|
Senior Member Group: Members Posts: 591 Joined: 7-November 06 From: Boulder Member No.: 7,170 Region Association: Rocky Mountains |
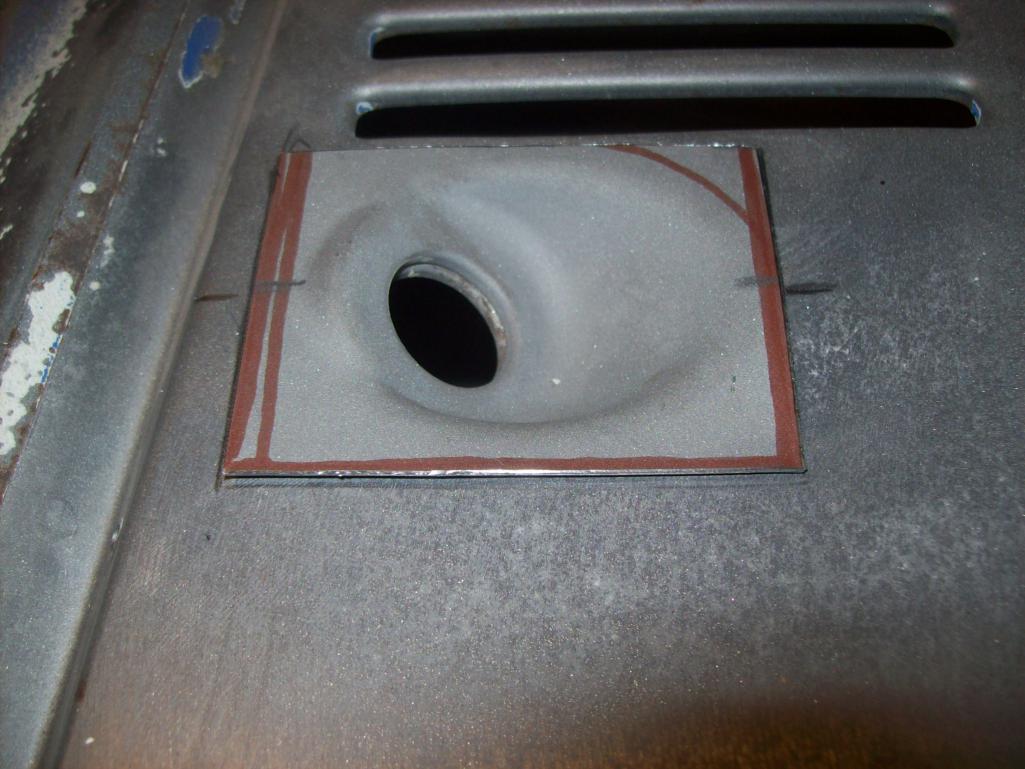
Cleaned up after massaging the welds
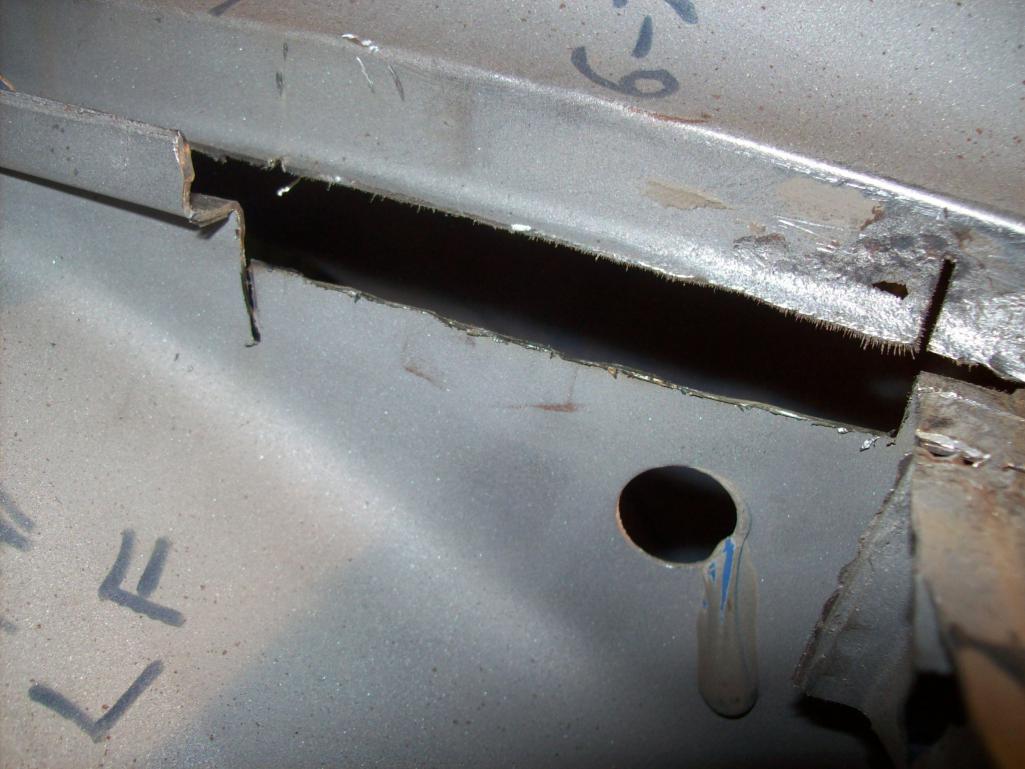
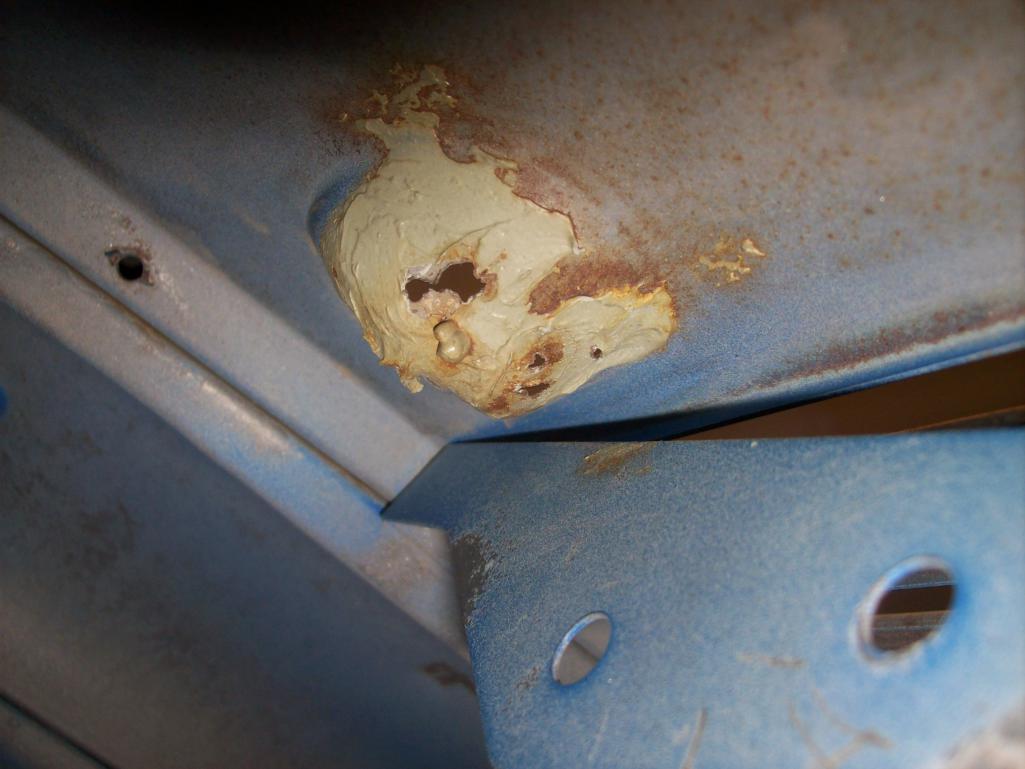
 Passenger hood corner is thin and I will use some copper backing to build it up. Rust is all gone, and it is non structural...plust it will be hidden by the hood gasket 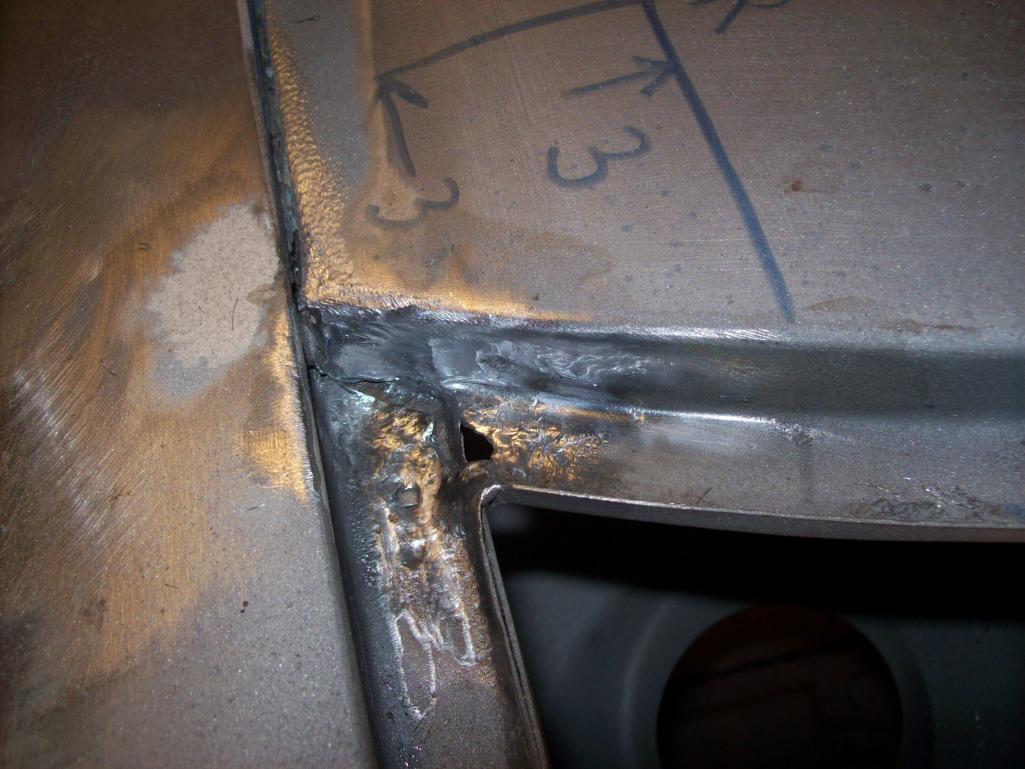 Backside shows that it is not serious  With a copper heat sink behind this was welded, cleaned up and we moved on 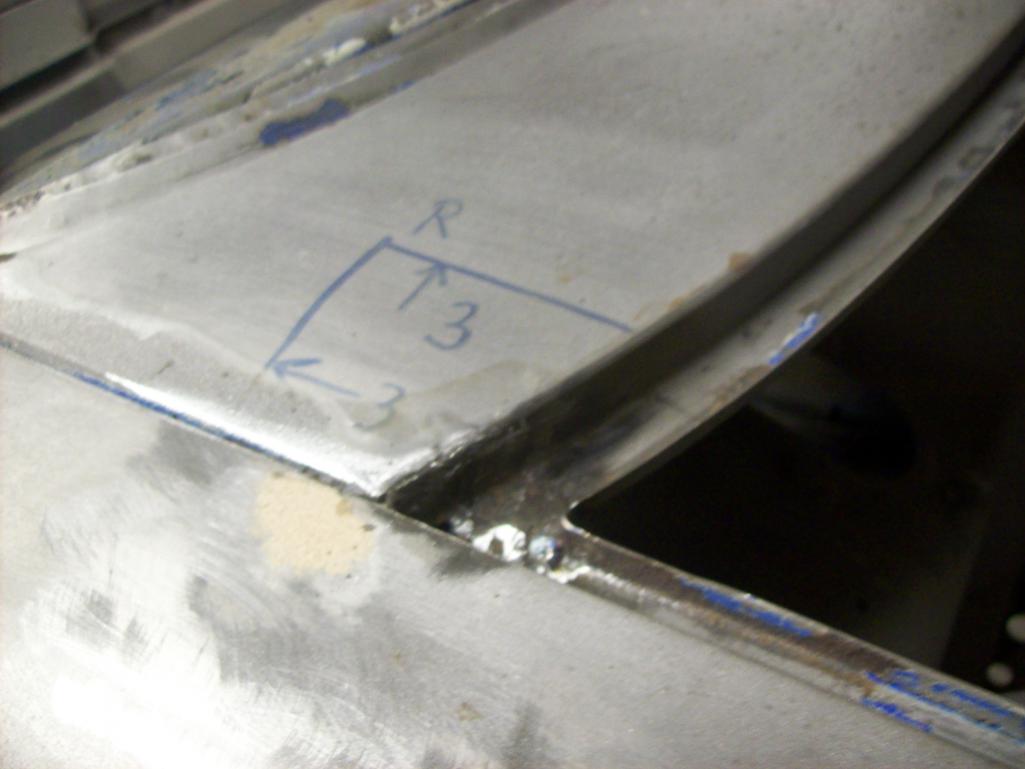 As we continue clockwise, I have an issue with the catch-all are behind the passenger door latch (I have the same issue on the drivers side). 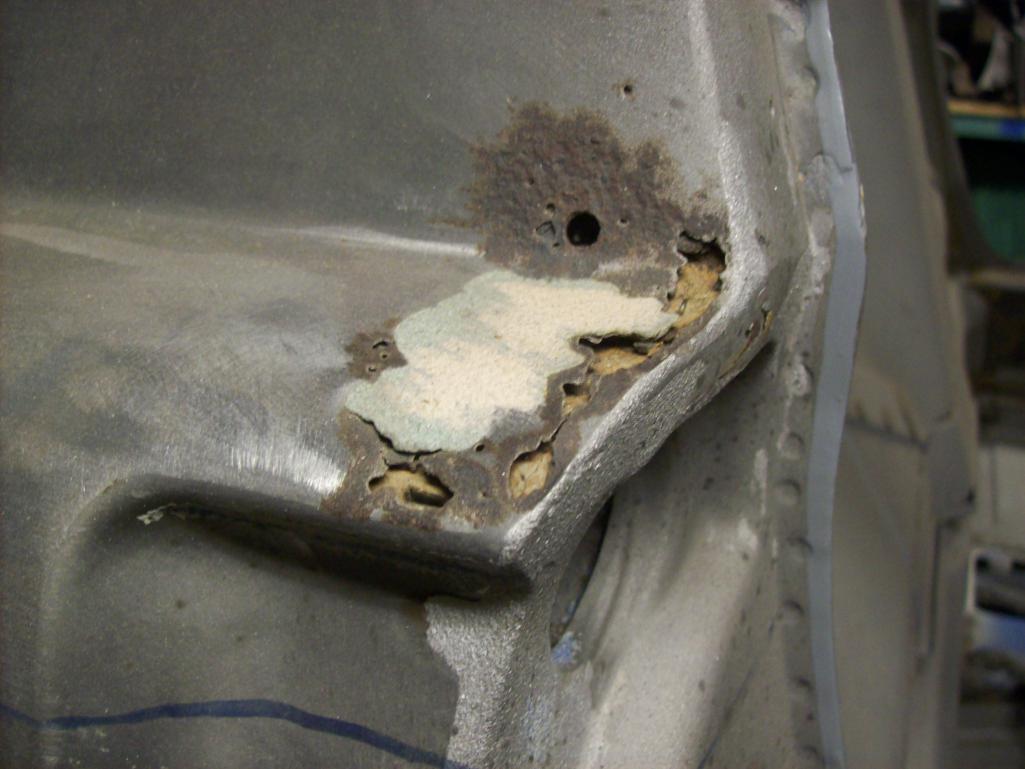 This too will be tricky as it is very visible and mistakes not easily hidden. I will peel back the layers of the onion tomorrow. Looking up from the forward side of the rear wheel well...there is a ton of factory under-coating and or seam sealer in this area. I am thinking I am going to be heating with a torch and scraping to get this area cleaned up so I can see exactly how far the rust has intruded. Speedo |
|
|
|
|
1 User(s) are reading this topic (1 Guests and 0 Anonymous Users)
0 Members:

|
Lo-Fi Version | Time is now: 13th April 2026 - 12:04 AM |
Invision Power Board
v9.1.4 © 2026 IPS, Inc.