|
|

|
Porsche, and the Porsche crest are registered trademarks of Dr. Ing. h.c. F. Porsche AG.
This site is not affiliated with Porsche in any way. Its only purpose is to provide an online forum for car enthusiasts. All other trademarks are property of their respective owners. |
|
|
  |
| Speedo |
 Mar 6 2016, 07:34 PM Mar 6 2016, 07:34 PM
Post
#161
|
|
Senior Member    Group: Members Posts: 559 Joined: 7-November 06 From: Boulder Member No.: 7,170 Region Association: Rocky Mountains 
|
|
| Speedo |
 Mar 6 2016, 07:37 PM Mar 6 2016, 07:37 PM
Post
#162
|
|
Senior Member    Group: Members Posts: 559 Joined: 7-November 06 From: Boulder Member No.: 7,170 Region Association: Rocky Mountains 
|
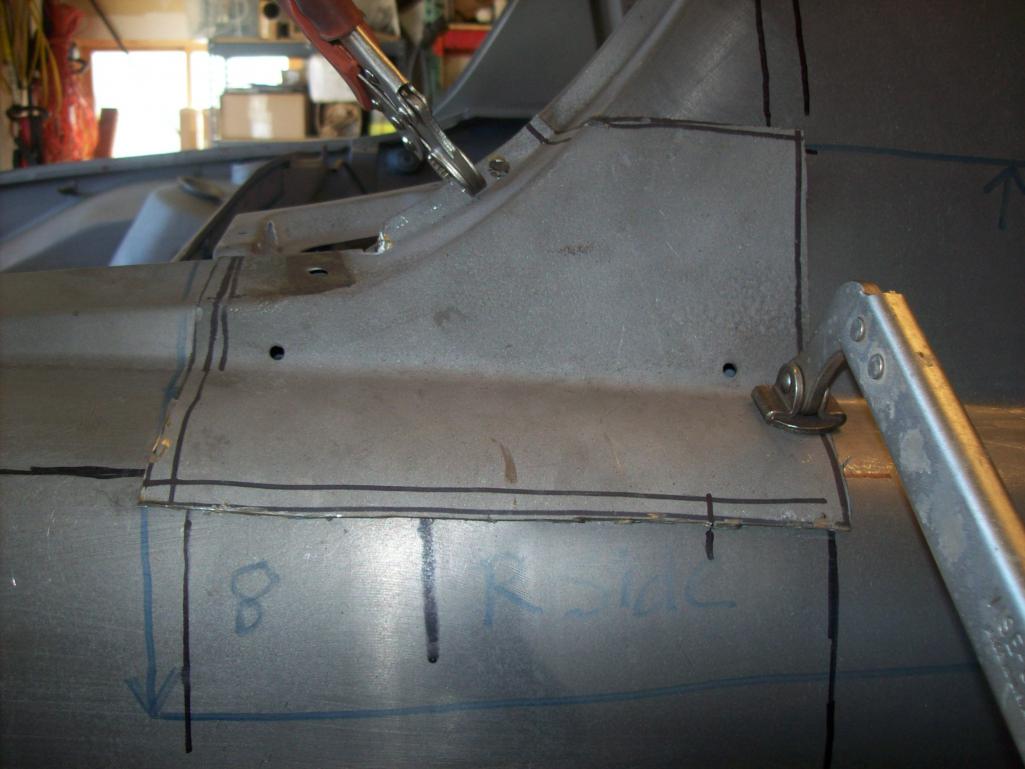
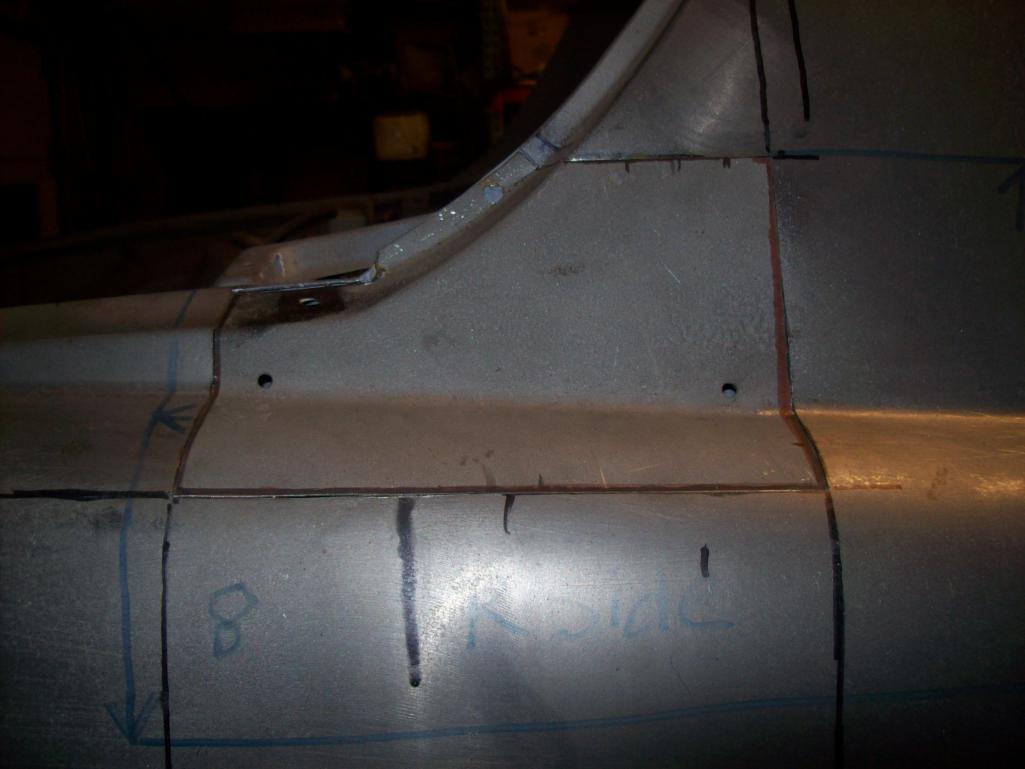
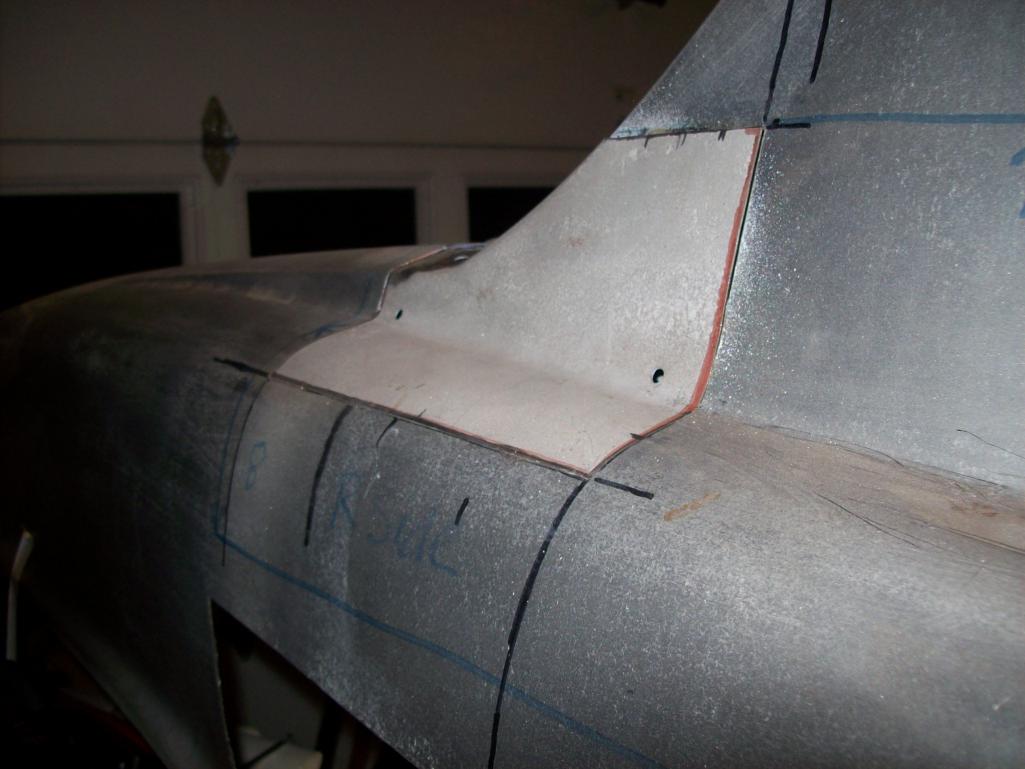
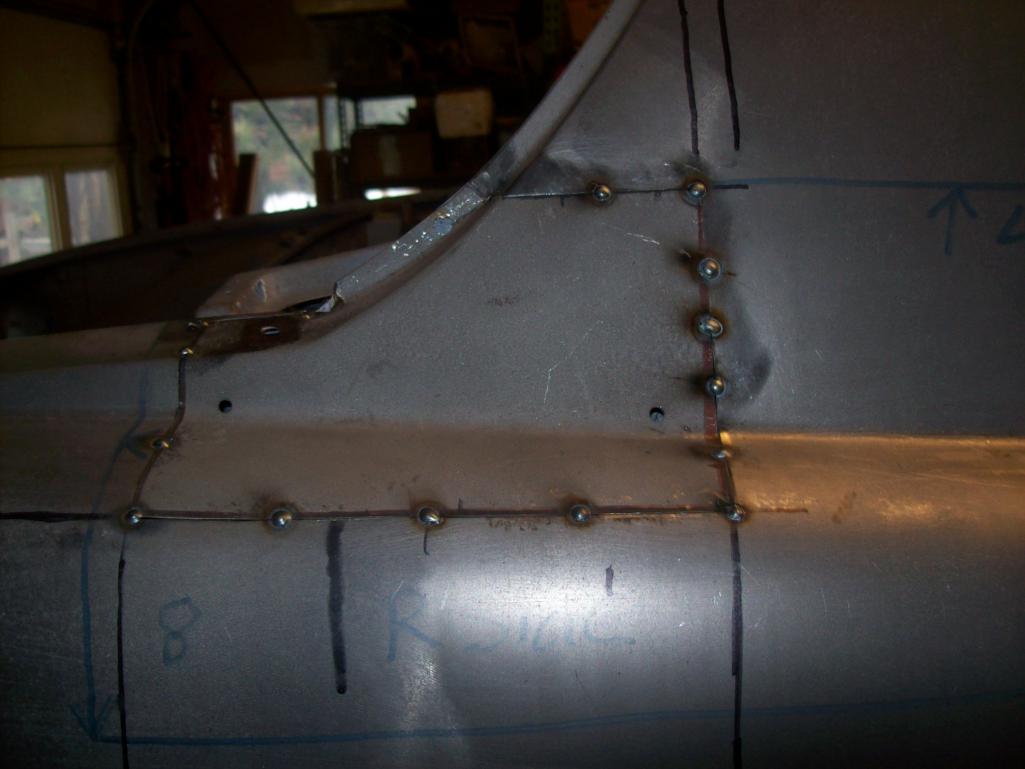
Now I need to close up the passenger rocker/jackpost repair. Spent way to long dinking around...with this. Picked up some 18 gauge steel at DenCol and I am on my way...pics of progress this week.
Speedo |
| haycait911 |
 Mar 6 2016, 08:48 PM Mar 6 2016, 08:48 PM
Post
#163
|
|
Newbie  Group: Members Posts: 9 Joined: 6-March 08 From: B.C., Canada Member No.: 8,782 Region Association: None |
that spray-on etch/weld-thru primer is shite. get some proper automotive epoxy, mix it up and use a brush to work in into all the nooks and crannies. it'll keep for a few days sealed in the fridge, but use the beer fridge, it'll make food taste funny.
|
| brant |
 Mar 6 2016, 11:06 PM Mar 6 2016, 11:06 PM
Post
#164
|
|
914 Wizard           Group: Members Posts: 12,092 Joined: 30-December 02 From: Colorado Member No.: 47 Region Association: Rocky Mountains 

|
Nice work!
|
| porschetub |
 Mar 7 2016, 03:58 AM Mar 7 2016, 03:58 AM
Post
#165
|
|
Advanced Member     Group: Members Posts: 4,954 Joined: 25-July 15 From: New Zealand Member No.: 18,995 Region Association: None |
sixnotfour, Wow! That's the car alright! No, not much has changed. There is a little rust at the top rear of the drivers fender by the bonnet and in your pic I can almost see it! And it was missing the front bumper top rubber trim 20 years ago. Thanks a bunch for posting. I will do the car justice. I picked up the square stock for the door jam braces today. I'll post better pics of the good, the bad and the ugly. This car (in terms of what I normally drag home) is in much better shape (at the outset). I will start to accumulate a list of needs...like to swap the later wrong rear bumper for a 1970 right bumper. Did any of the early 6s that were not GTs ever have 2 in 2 out sport exhausts? If I am out of line (purists) with the muffler...just shut me down. I make nice 2 in 2 out sport exhausts for my 911s. Speedo Good to see you over here man ,your 911 threads on Pelican supplied me with hours of great reading,you would never know what nasty bits can hide in these cars but you will be used to that ,the 914 just rusts in different places than the 911....same shit different day really. You have great skills ,go hard, (IMG:style_emoticons/default/beer.gif) will be watching this one. |
| Luke M |
 Mar 7 2016, 08:23 AM Mar 7 2016, 08:23 AM
Post
#166
|
|
Senior Member    Group: Members Posts: 1,438 Joined: 8-February 05 From: WNY Member No.: 3,574 Region Association: North East States 
|
(IMG:style_emoticons/default/aktion035.gif) Well it's about time... oh I guess I shouldn't talk..lol
Carry on (IMG:style_emoticons/default/sawzall-smiley.gif) (IMG:style_emoticons/default/smash.gif) (IMG:style_emoticons/default/welder.gif) |
| Luke M |
 Mar 7 2016, 10:35 AM Mar 7 2016, 10:35 AM
Post
#167
|
|
Senior Member    Group: Members Posts: 1,438 Joined: 8-February 05 From: WNY Member No.: 3,574 Region Association: North East States 
|
Hey Lars,
Did you happen to add a piece of foam/weather stripping along this strip to keep the outer panel from rattling against it ? I know the factory had something on there. Attached image(s) 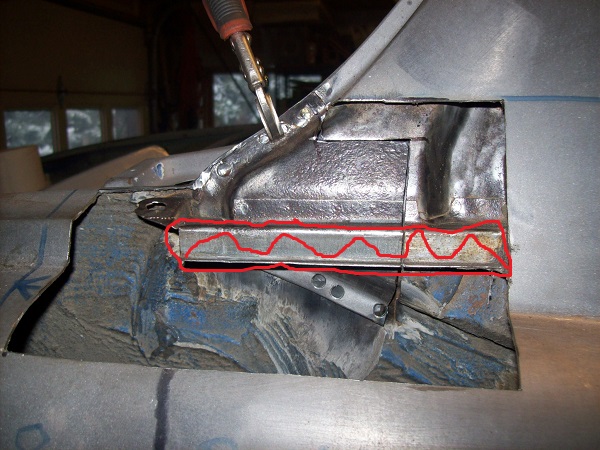
|
| Speedo |
 Mar 9 2016, 08:39 PM Mar 9 2016, 08:39 PM
Post
#168
|
|
Senior Member    Group: Members Posts: 559 Joined: 7-November 06 From: Boulder Member No.: 7,170 Region Association: Rocky Mountains 
|
Hey Lars, Did you happen to add a piece of foam/weather stripping along this strip to keep the outer panel from rattling against it ? I know the factory had something on there. Good question. Going out on a limb here...but all of the foam that Porsche put into the 914 tended to attract moisture and rot the steel. I am inclined to seal up areas with chemicals an not use any moisture "wanting" foam anywhere. If needed I can slide something up in that channel even after the skin is welded completely...if needed, I will. I am focusing on this area... 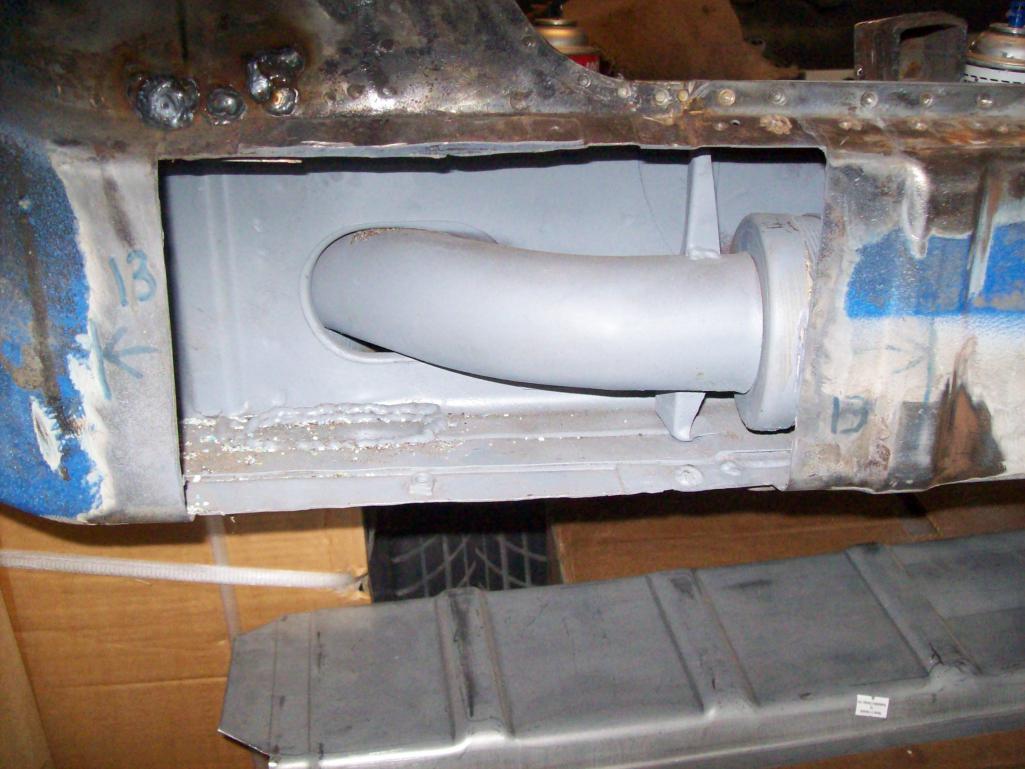 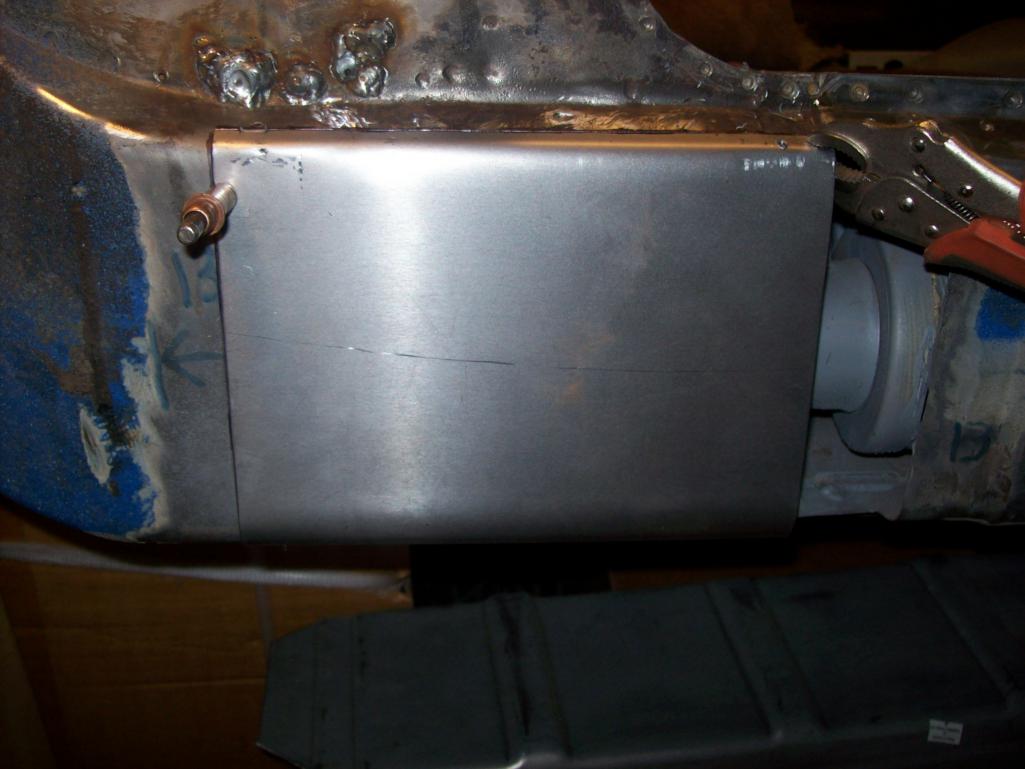 |
| Ferg |
 Mar 10 2016, 12:12 PM Mar 10 2016, 12:12 PM
Post
#169
|
|
914 Guru      Group: Members Posts: 5,948 Joined: 8-January 03 From: Boulder CO Member No.: 116 Region Association: None 
|
Nice work Lars!
|
| Speedo |
 Mar 18 2016, 06:18 PM Mar 18 2016, 06:18 PM
Post
#170
|
|
Senior Member    Group: Members Posts: 559 Joined: 7-November 06 From: Boulder Member No.: 7,170 Region Association: Rocky Mountains 
|
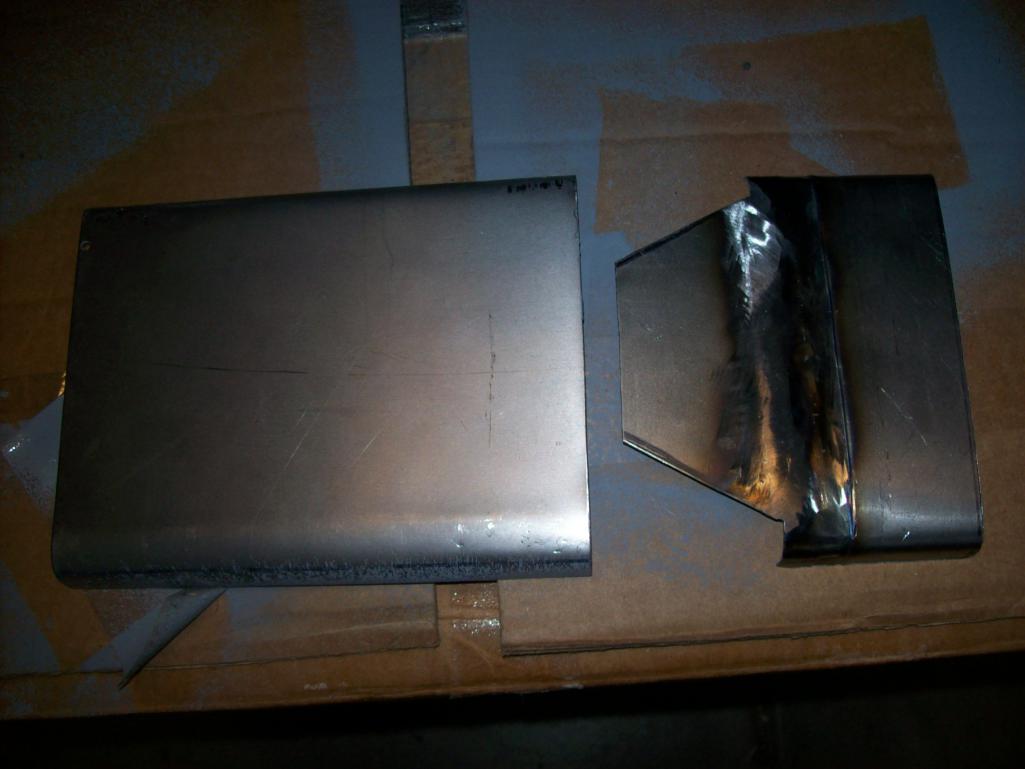
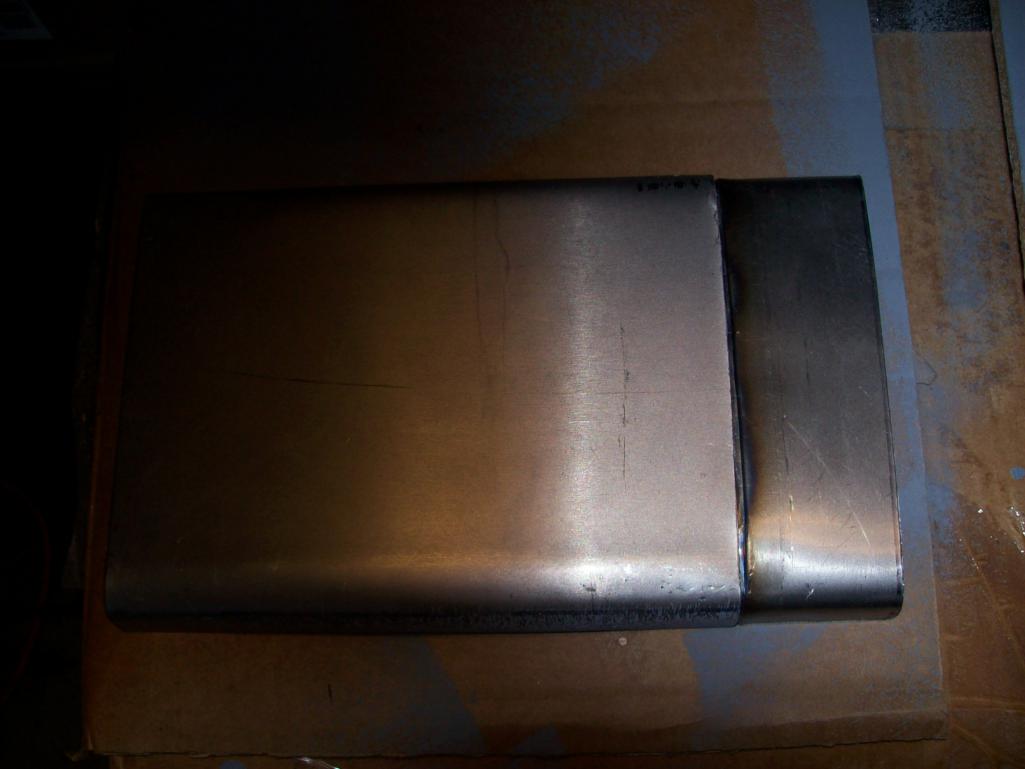
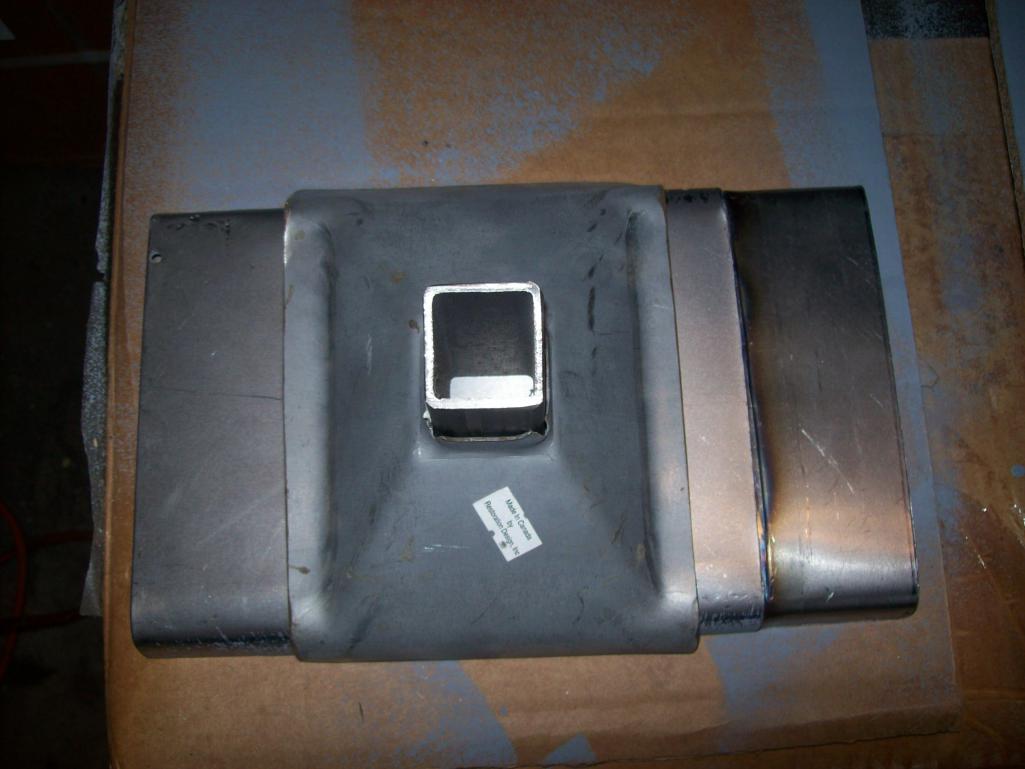
Turns out the inner rocker I received is for the drivers side which I don't need. I actually need the last six inches of the rocker on the passenger side. I called Alex at RD ad asked if they could stamp the last 12 inches and not trim it for me (good luck!)...nope. Yeah, well ok. I need to fabricate it then as it doesn't make sense to kill a perfectly good 4 ft inner rocker for the last few inches. This is what I need...
Like this end...but this is the drivers side. So I fabricated the last few inches. This will be spliced to the patch to the inner wheelhouse and then the jack support will complete the repair. 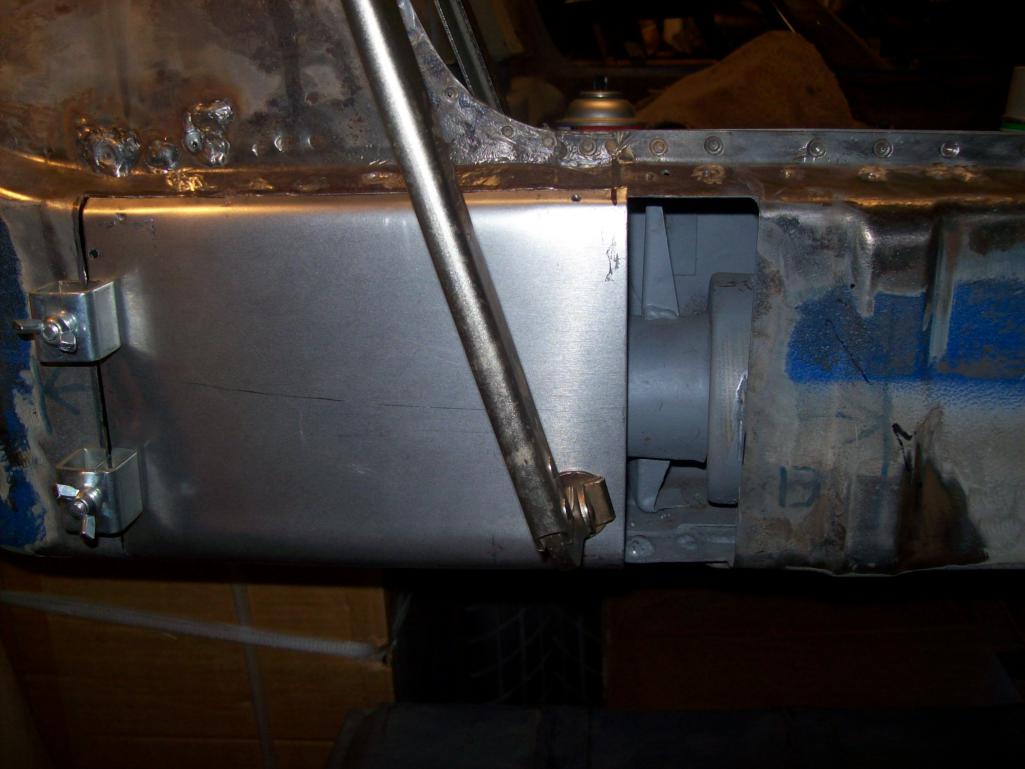 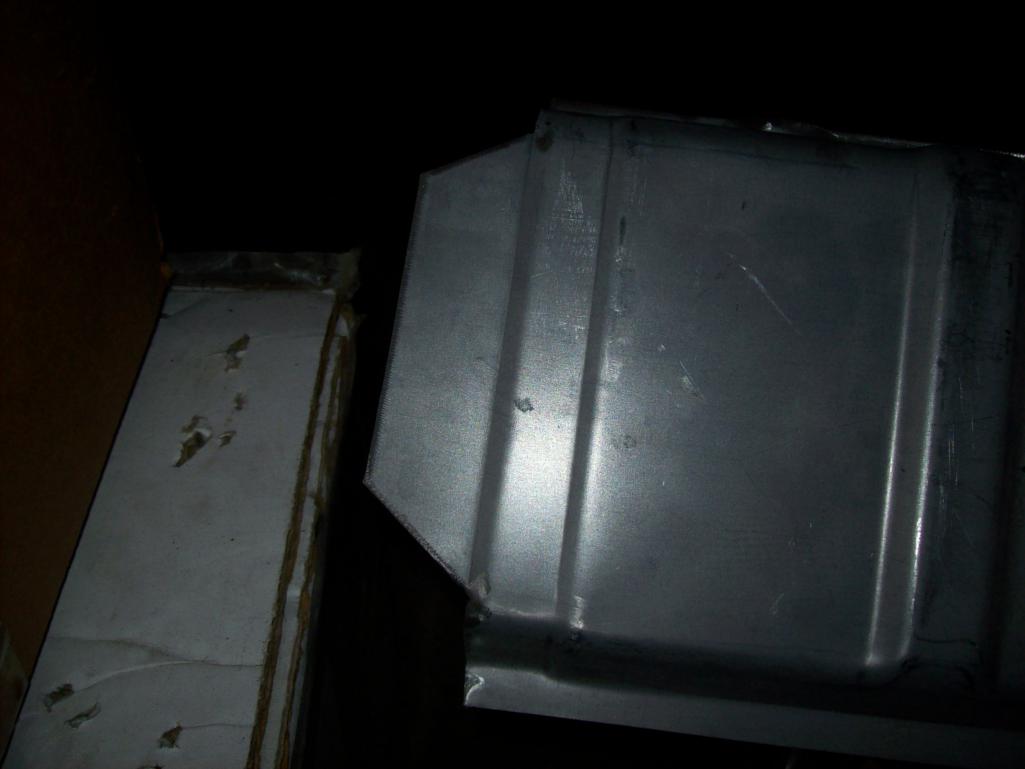 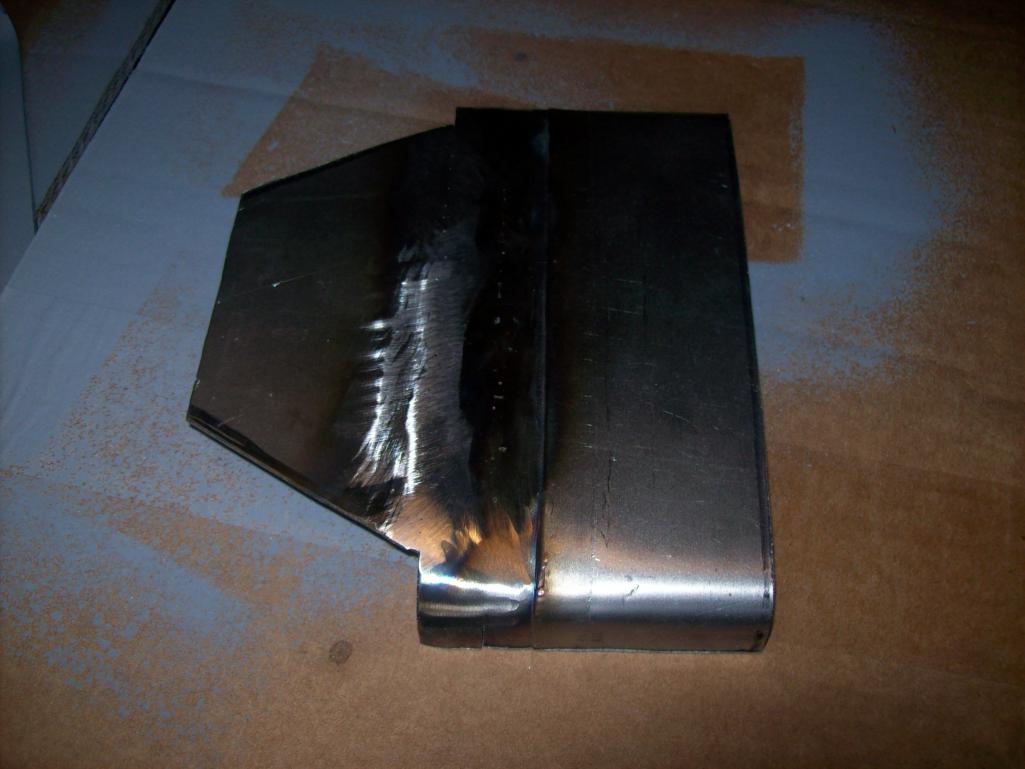 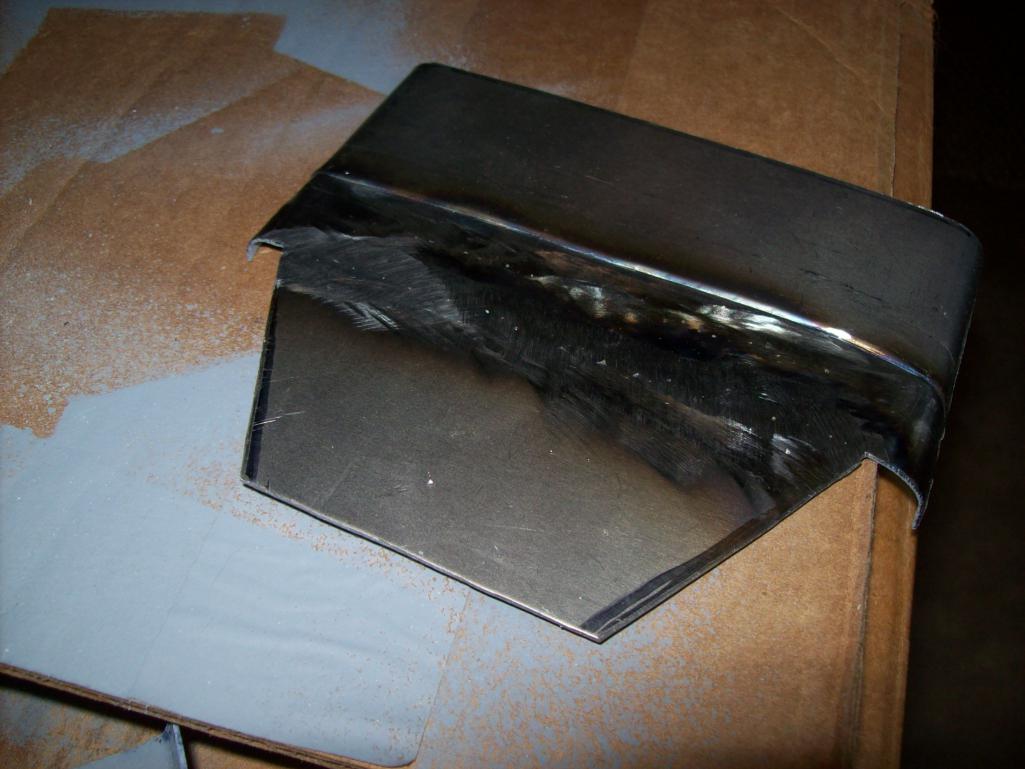 [attachmentid=546 [attachmentid=546364] Attached thumbnail(s) 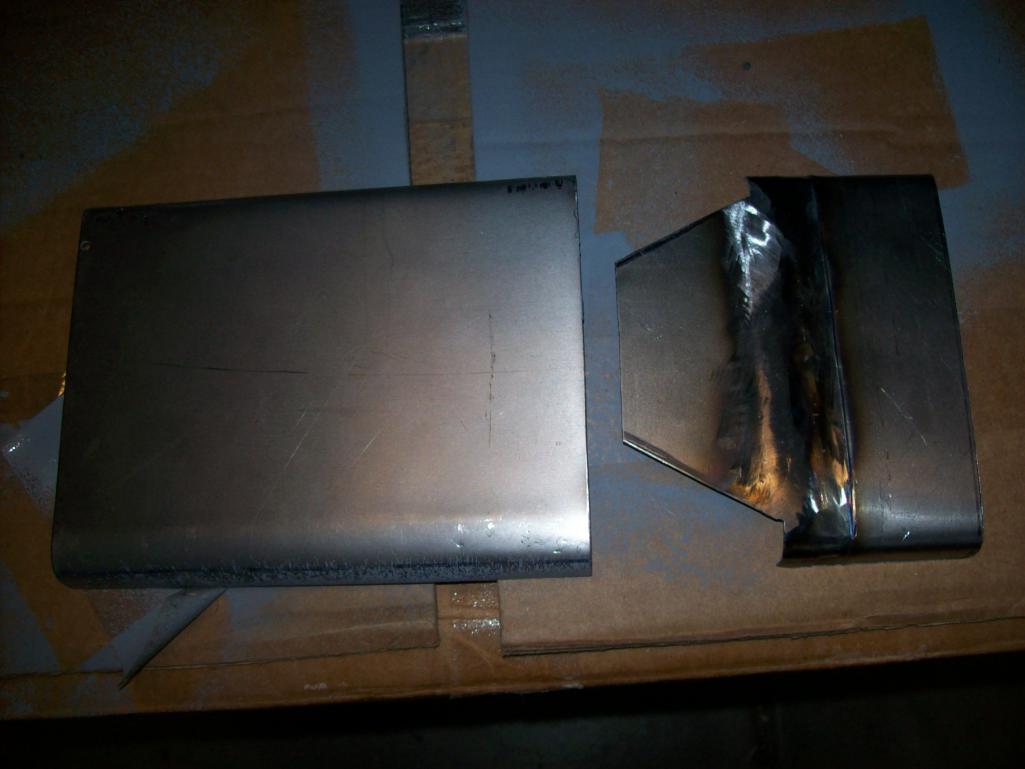
|
| Speedo |
 Mar 18 2016, 06:32 PM Mar 18 2016, 06:32 PM
Post
#171
|
|
Senior Member    Group: Members Posts: 559 Joined: 7-November 06 From: Boulder Member No.: 7,170 Region Association: Rocky Mountains 
|
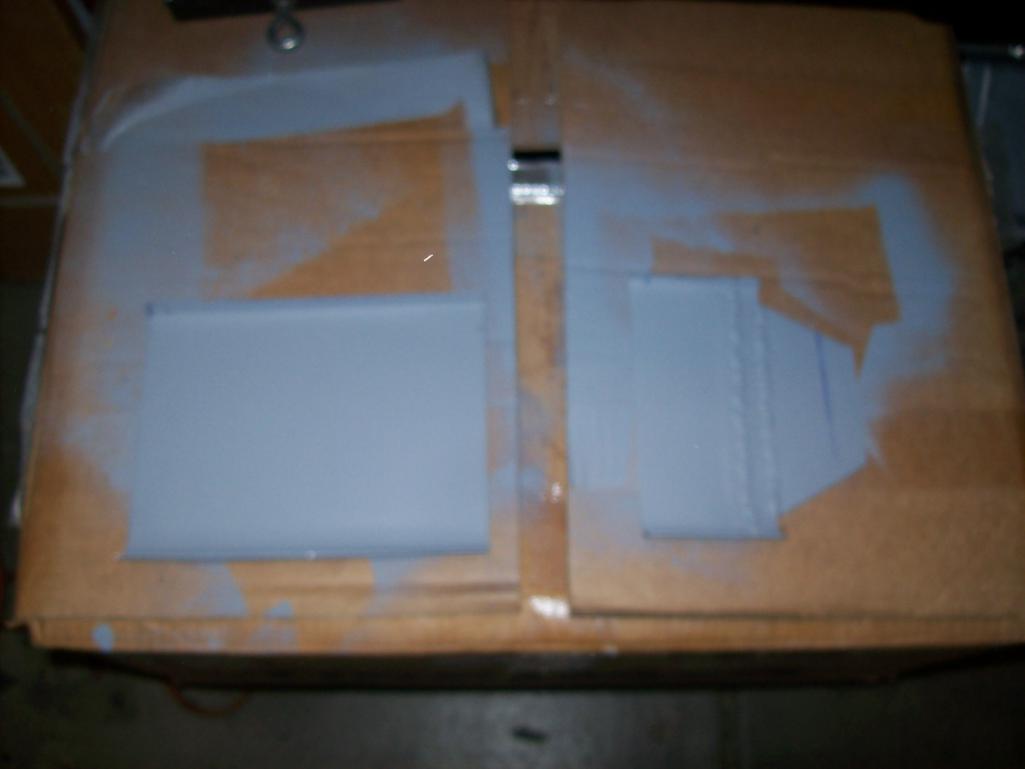
I want to get these pieces trimmed perfectly before welding in place. No room for error here. I guess the triangular extension/overlap on the inner rocker that slips behind the wheelhouse extension is to add some extra rigidity to the jack point? From my rusted removed parts, I couldn't see where the overlap was welded...so I will just plan to drill the wheelhouse repair to rosette weld to the inner rocker extension behind it. Cleaned, fitted, dressed and primed.
    |
| Luke M |
 Mar 19 2016, 09:21 AM Mar 19 2016, 09:21 AM
Post
#172
|
|
Senior Member    Group: Members Posts: 1,438 Joined: 8-February 05 From: WNY Member No.: 3,574 Region Association: North East States 
|
Hi Lars,
The work looks good. I looked at the same area on my 6 and it appears that it's spot welded like this.. Check this thread out where Rick fixed the same area on a 6. Start at post 72. Looks like Rick added an inner sleeve to help with rigidity. http://www.914world.com/bbs2/index.php?sho...26585&st=60 If you look at the RD part # 331 it has a sleeve welded to the inside of the part. Attached image(s) 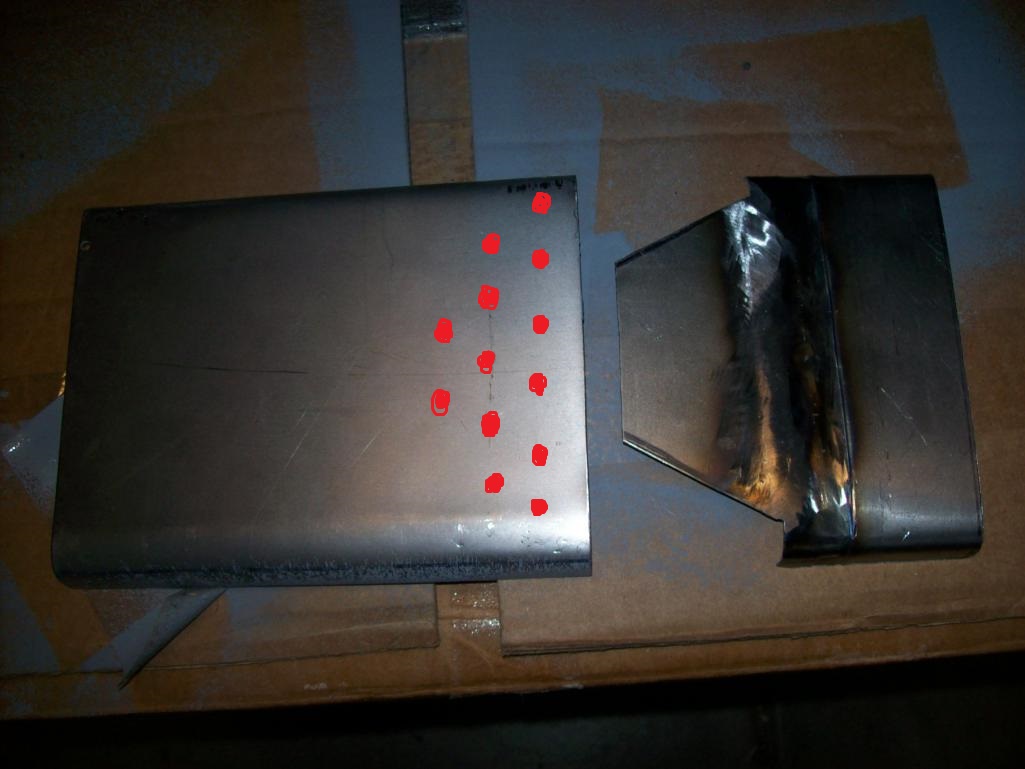 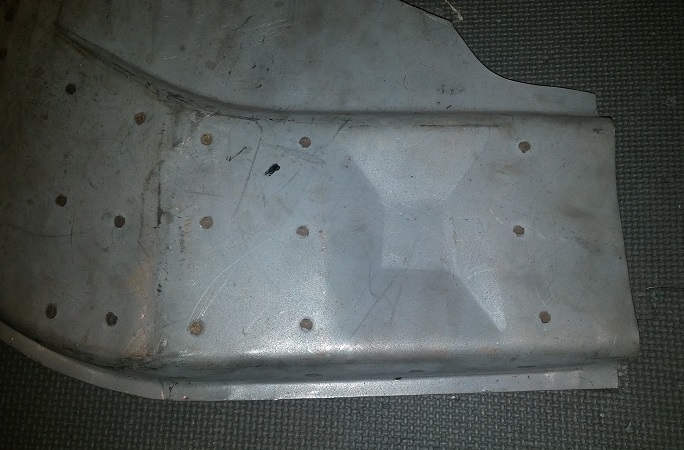 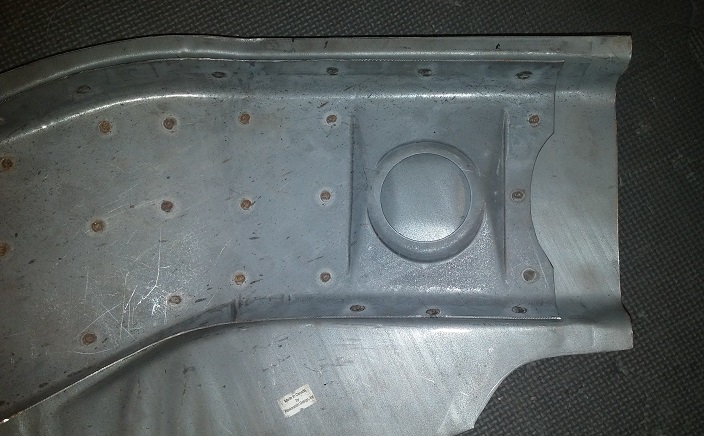
|
| Speedo |
 Mar 19 2016, 02:24 PM Mar 19 2016, 02:24 PM
Post
#173
|
|
Senior Member    Group: Members Posts: 559 Joined: 7-November 06 From: Boulder Member No.: 7,170 Region Association: Rocky Mountains 
|
Hi Lars, The work looks good. I looked at the same area on my 6 and it appears that it's spot welded like this.. Check this thread out where Rick fixed the same area on a 6. Start at post 72. Looks like Rick added an inner sleeve to help with rigidity. http://www.914world.com/bbs2/index.php?sho...26585&st=60 If you look at the RD part # 331 it has a sleeve welded to the inside of the part. Interesting...not sure who I talked with a week ago at RD, but I specifically asked if this area (behind the jackpoint was a single layer or if it was sleeved...nope, told it was single layer. Mine was too far gone to tell. Obviously their inner wheelhouse steel is sleeved. I wonder what gauge the sleeve is? Ricks fix with the sleeve makes sense. Mine is a bit more complicated as I am not replacing the entire inner rocker. But as I am replacing the wheelhouse area behind the jackpoint and mating it to the left end of the inner rocker, I suppose I could assemble them off the chassis, and weld a sleeve behind the welded pieces...then weld the unit to the chassis. Either way I get it done, it would be a bonus to have the reinforcement "doubler" behind the jackpoint. Thanks for the heads up Luke...glad I didn't weld this up yesterday : ) |
| Luke M |
 Mar 19 2016, 04:16 PM Mar 19 2016, 04:16 PM
Post
#174
|
|
Senior Member    Group: Members Posts: 1,438 Joined: 8-February 05 From: WNY Member No.: 3,574 Region Association: North East States 
|
You may want to run the sleeve behind all 4 pieces. That should tie things up really good. Glad you didn't weld it up too.. much easier to do it now vs later.
|
| Speedo |
 Mar 19 2016, 06:57 PM Mar 19 2016, 06:57 PM
Post
#175
|
|
Senior Member    Group: Members Posts: 559 Joined: 7-November 06 From: Boulder Member No.: 7,170 Region Association: Rocky Mountains 
|
A sleeve or doubler makes sense. I will need to do it differently than Rick as I am not replacing the entire inner rocker. I will sleeve the area from the inner wheel house to behind the jackpoint, and then the area behind my inner rocker repair. I want the sleeve to lay flush with the inner rocker and wheel house repair so I can get good welds. I think I can engineer the sleeve to fit up after welded to my repair.
I want to figure out where the jackpoint fits first. 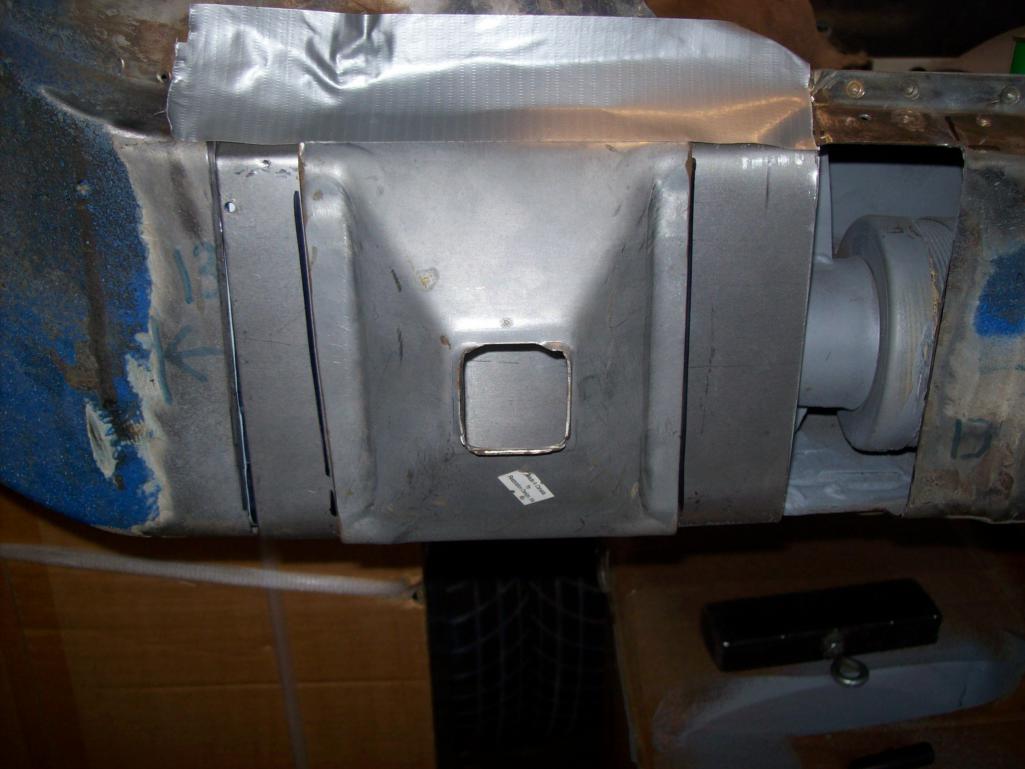 Then fit the sleeve behind my repairs Sleeve fitted behind wheel house repair 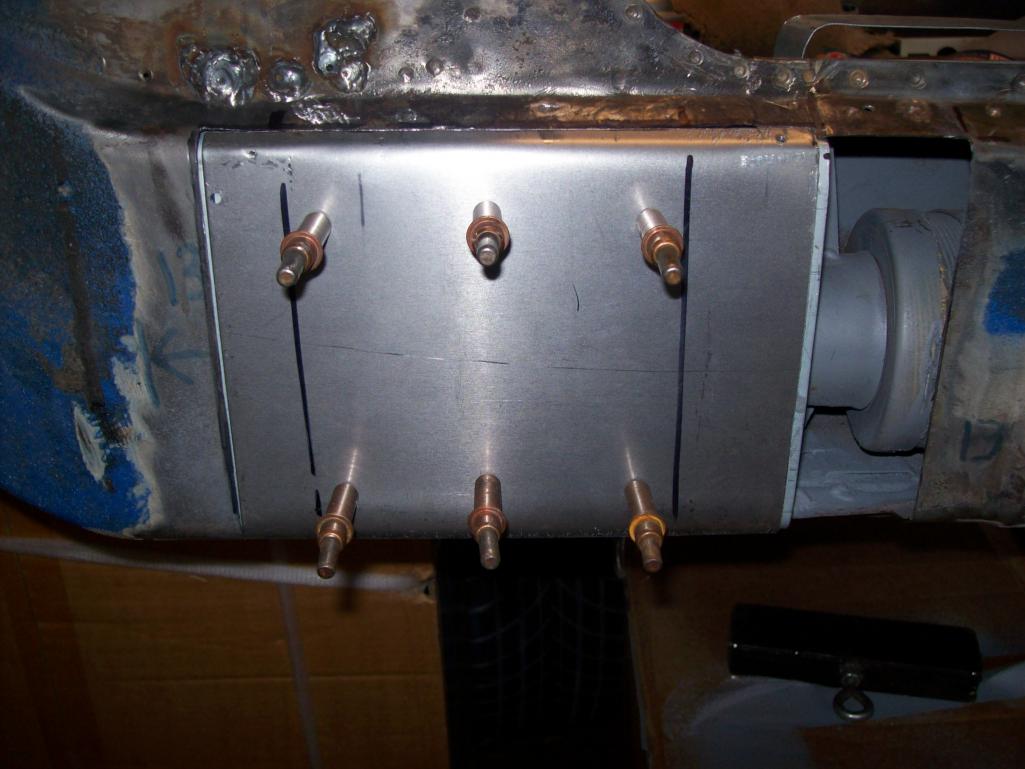 Inner rocker sleeve 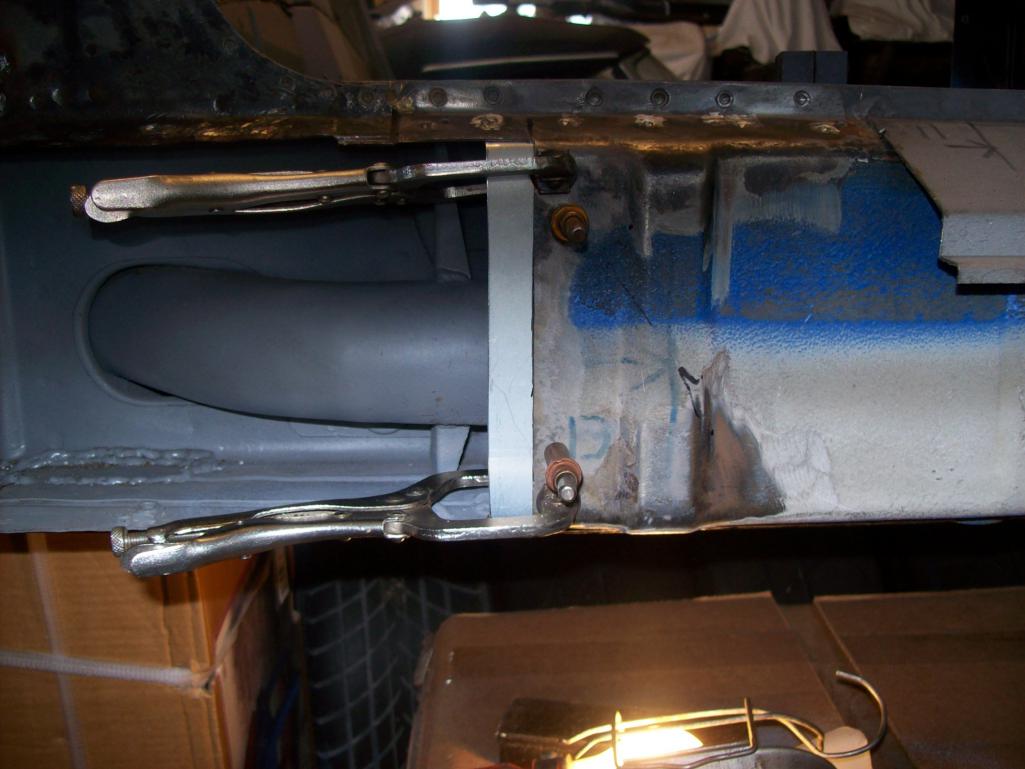 Everything tied in and fitted 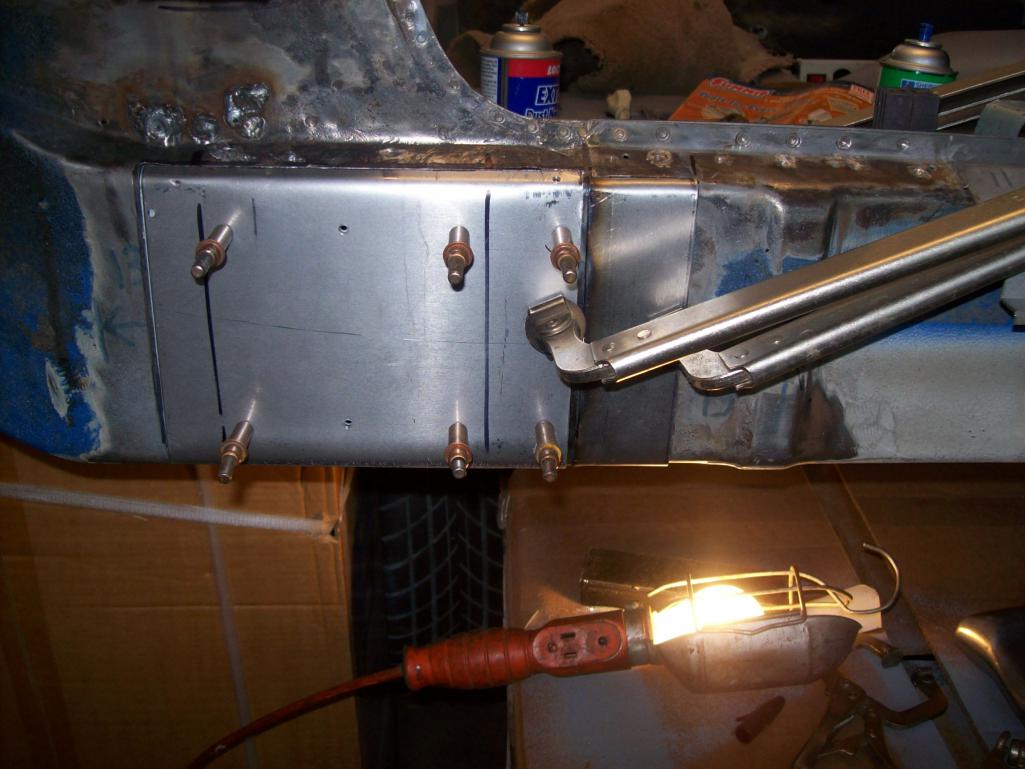 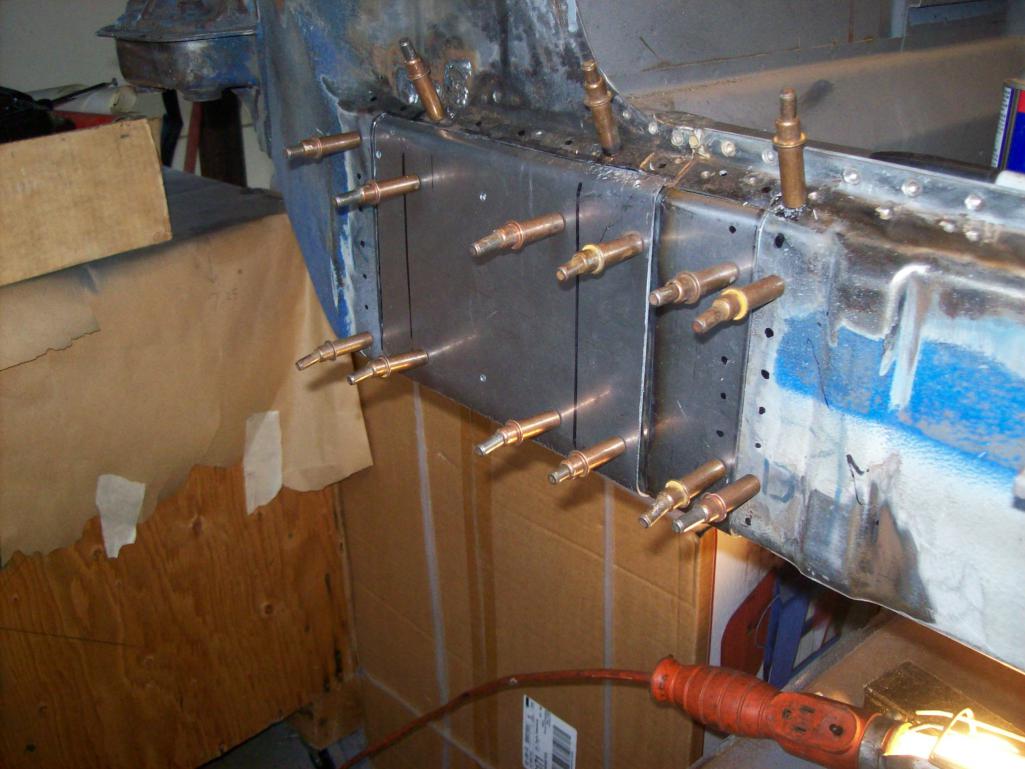 |
| Speedo |
 Mar 20 2016, 02:06 PM Mar 20 2016, 02:06 PM
Post
#176
|
|
Senior Member    Group: Members Posts: 559 Joined: 7-November 06 From: Boulder Member No.: 7,170 Region Association: Rocky Mountains 
|
So on a side note...the original engine is stored (pickled). The plan is to build up a 2.7 RS spec MFI engine. In fact it is all ready to be assembled. I don't want to cut the nose of the car. Is there room in either front fender (and airflow) that will allow me to put a cooler up there? What do most people do for cooling when they transplant engines?
Speedo |
| Cairo94507 |
 Mar 20 2016, 05:29 PM Mar 20 2016, 05:29 PM
Post
#177
|
|
Michael           Group: Members Posts: 10,489 Joined: 1-November 08 From: Auburn, CA Member No.: 9,712 Region Association: Northern California 
|
So maybe for a 2.7 you won't need an external additional cooler. I seem to recall that if you were 3.0 and up you needed some help with cooling.
I have a 3.2 going in my Six and went through all of the various cooler designed and permutations. Ultimately, I decided that if I had to have one, I wanted it to work really well and be bullet proof. I did the GT style cooler, lines, thermostat and shroud. As much as I did not want to cut up the front, I decided I would rather have it function as good as possible to keep the 3.2 cool. Good luck. |
| Luke M |
 Mar 20 2016, 07:43 PM Mar 20 2016, 07:43 PM
Post
#178
|
|
Senior Member    Group: Members Posts: 1,438 Joined: 8-February 05 From: WNY Member No.: 3,574 Region Association: North East States 
|
The factory 911 2.7rs came with a front fender mounted oil cooler.
That being said I'll be running a 2.7rs spec engine in my 6. My plan is to run a 914-6 GT shroud like the PMS setup. I will not be cutting my front panel . I'll be using the factory holes along with two fans attached to the cooler. I think that should work fine. |
| Ferg |
 Mar 21 2016, 08:19 AM Mar 21 2016, 08:19 AM
Post
#179
|
|
914 Guru      Group: Members Posts: 5,948 Joined: 8-January 03 From: Boulder CO Member No.: 116 Region Association: None 
|
Lars, you will need a cooler with a 2.7. I doubt the fender will have enough space and work well. Some (myself included) have had some success mounting one under the rear trunk above the axle shafts. Key would be directing some fresh air to it.
|
| Speedo |
 Mar 26 2016, 08:00 PM Mar 26 2016, 08:00 PM
Post
#180
|
|
Senior Member    Group: Members Posts: 559 Joined: 7-November 06 From: Boulder Member No.: 7,170 Region Association: Rocky Mountains 
|
Progress...you could put a Sherman tank on the right side of this car and jack it up. Sleeve inside the repair makes this stiff as hell (how stiff is hell?).
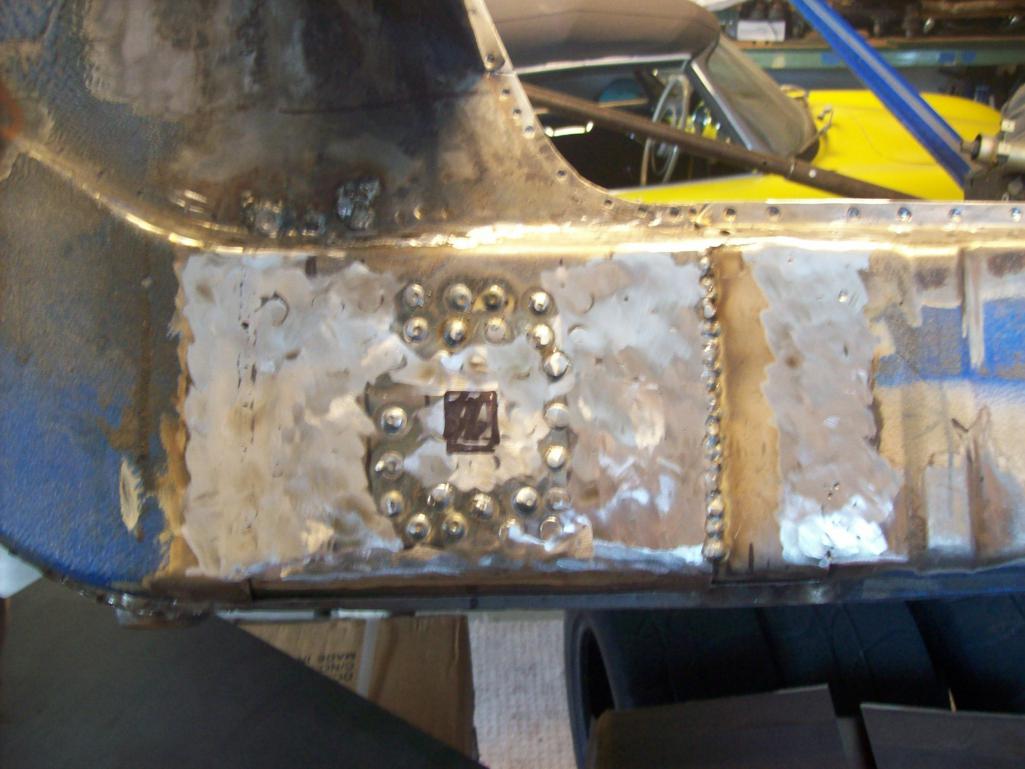 I need to position the new jackpoint. Checked the right side and looks as though the center of the jackpoint is directly above the outer rocker panel nut below it. The other means I have to find the location is using the new outer rocker from RD and trying to center the hole for the jackpoint in the opening. I measured the driver side and it appears to be centered above the outer rocker nut. 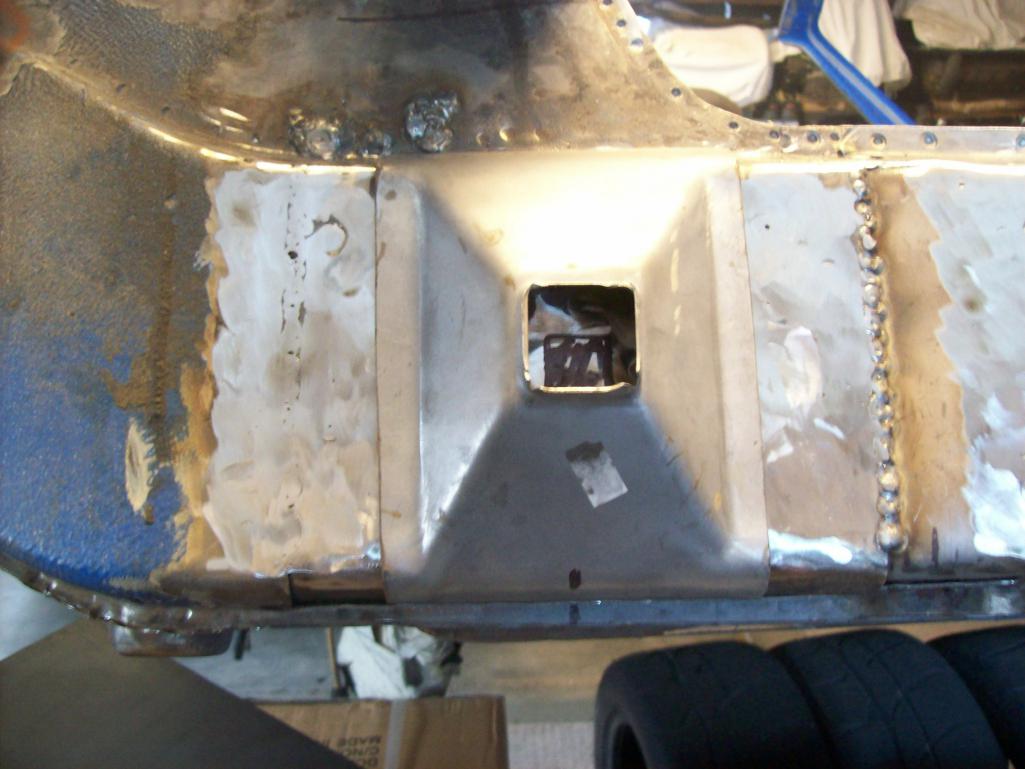 My fear is relying on the repro outer rocker....and having the rocker not be exact. There is not much margin for error. Suggestions would be helpful. The sill triangle needs to be massaged also...stamping is relatively correct, but does not fit my car well. The flange on the inside needs to be longer. Compared to the original... 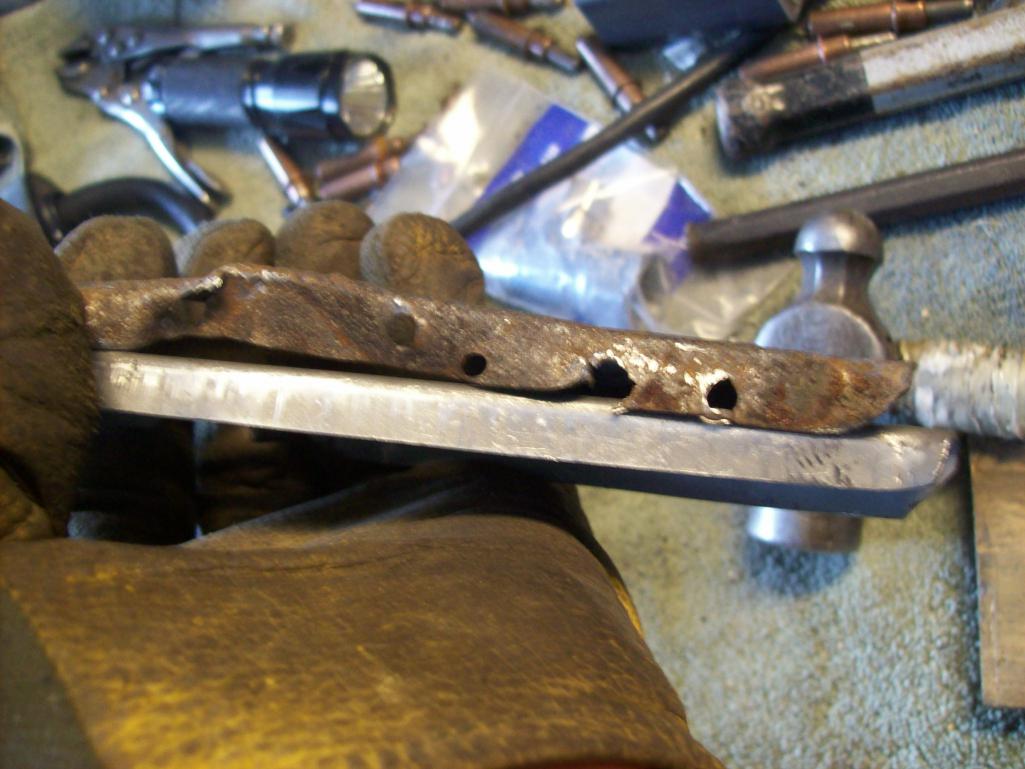 So I added 3/8ths to give me something to work with. 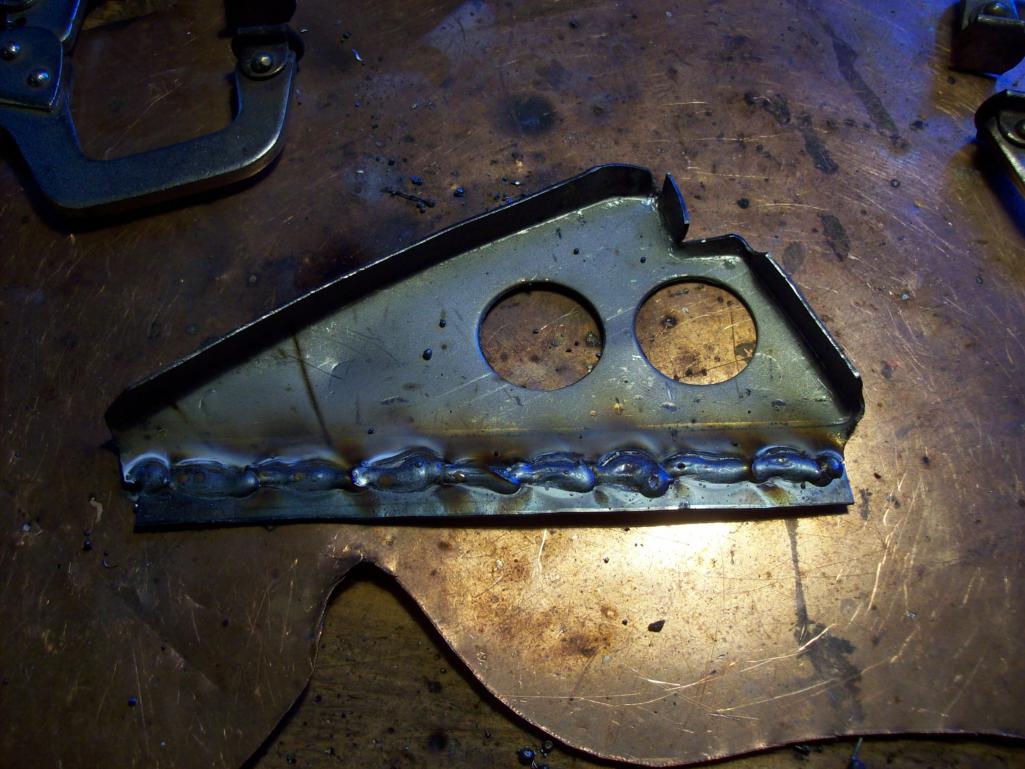 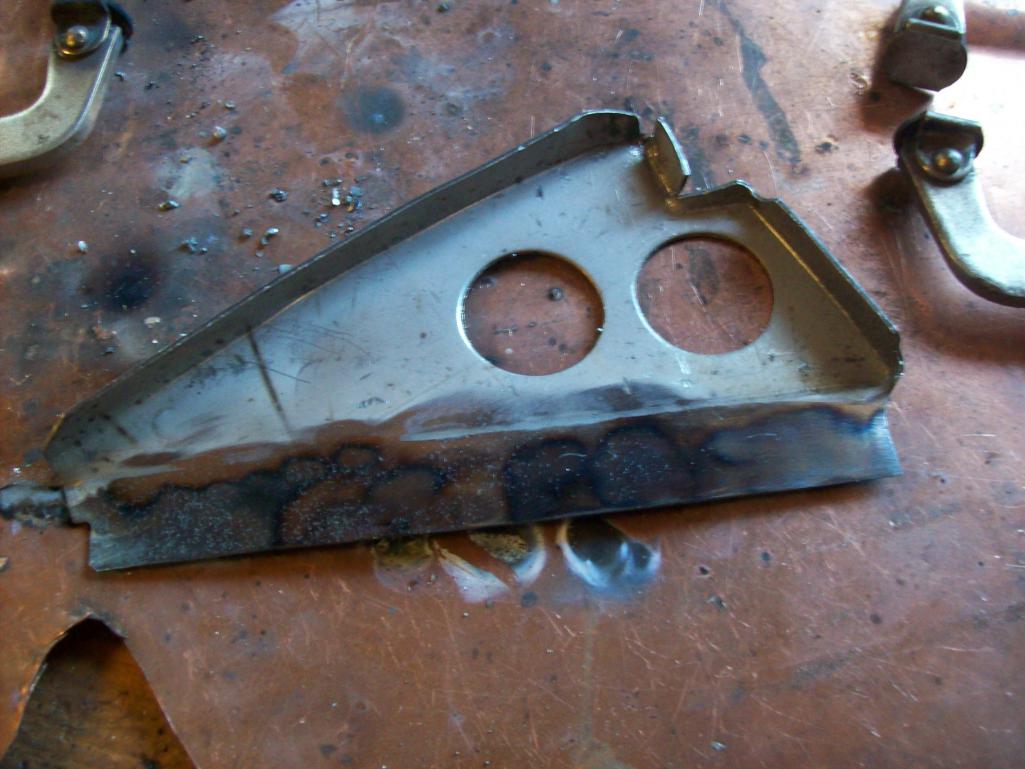 |
  |
1 User(s) are reading this topic (1 Guests and 0 Anonymous Users)
0 Members:

|
Lo-Fi Version | Time is now: 6th November 2025 - 03:36 PM |
Invision Power Board
v9.1.4 © 2025 IPS, Inc.


