|
|
|
Porsche, and the Porsche crest are registered trademarks of Dr. Ing. h.c. F. Porsche AG.
This site is not affiliated with Porsche in any way. Its only purpose is to provide an online forum for car enthusiasts. All other trademarks are property of their respective owners. |
|
|

  |

| Speedo |
 Mar 31 2016, 08:08 PM Mar 31 2016, 08:08 PM
Post
#201
|
|
Senior Member  Group: Members Posts: 591 Joined: 7-November 06 From: Boulder Member No.: 7,170 Region Association: Rocky Mountains |
QUOTE(DCJosh @ Mar 31 2016, 05:30 PM)  This thread has me afraid of what I might find. This was a "dry" car. I paid what I felt was fair given that I was pretty sure...what I was going to find. After sandblasting I found way more than I ever anticipated. Thank god this was not an east coast car...sorry Luke! But, there is a tremendous amount of satisfaction bringing the chassis back after finding all the "problems". These cars are "erector sets" for adults. And the restorations become addictive. Engine rebuilds are a piece of cake compared to bringing back a rusty chassis...me thinks. Speedo |
   |

 
|
| Speedo |
Mar 31 2016, 08:31 PM
Post
#202
|
|
Senior Member Group: Members Posts: 591 Joined: 7-November 06 From: Boulder Member No.: 7,170 Region Association: Rocky Mountains |
Oh and Brant.....
I am reminded. Maybe I have actually morphed? post Jun 20 2012, 06:57 PM Post #40 you're moving much too fast to be a real 914 guy... all this in 2 weeks and the thing isn't on jack stands yet you need to slow down for a year or two if you want to be a true teener fan.... |
|
|
|
| Ferg |
Apr 1 2016, 10:24 AM
Post
#203
|
|
914 Guru Group: Members Posts: 5,948 Joined: 8-January 03 From: Boulder CO Member No.: 116 Region Association: None |
QUOTE(Speedo @ Mar 31 2016, 06:31 PM) Oh and Brant..... I am reminded. Maybe I have actually morphed? post Jun 20 2012, 06:57 PM Post #40 you're moving much too fast to be a real 914 guy... all this in 2 weeks and the thing isn't on jack stands yet you need to slow down for a year or two if you want to be a true teener fan.... Whoops (IMG:style_emoticons/default/lol-2.gif) |
|
|
|
| Speedo |
Apr 3 2016, 01:05 PM
Post
#204
|
|
Senior Member Group: Members Posts: 591 Joined: 7-November 06 From: Boulder Member No.: 7,170 Region Association: Rocky Mountains |
Before I re-attach the bottom of the latch panel and outer rear quarter, I want to evaluate the access I need to finish up the longitudinal repair under the hell hole. I have looked through a lot of threads on this repair...many ways to skin this cat. RD steel for the inner longitudinal confused me. Top of mine appeared to be two layers, their panel was one layer and looked like my inner steel. This thread cleared it up...
http://www.914world.com/bbs2/index.php?sho...p;#entry2325382 I will now deconstruct and evaluate. |
|
|
|
| Speedo |
Apr 6 2016, 07:12 PM
Post
#205
|
|
Senior Member Group: Members Posts: 591 Joined: 7-November 06 From: Boulder Member No.: 7,170 Region Association: Rocky Mountains |
I realize that you guys have seen tons of hell hole repairs before. So if you are bored with this sitcom, don't watch. As I am new to 914s, and having never repaired this area...I am going to try to repair my car as true to the original construction process as possible, while strengthening this area. You have seen this before...
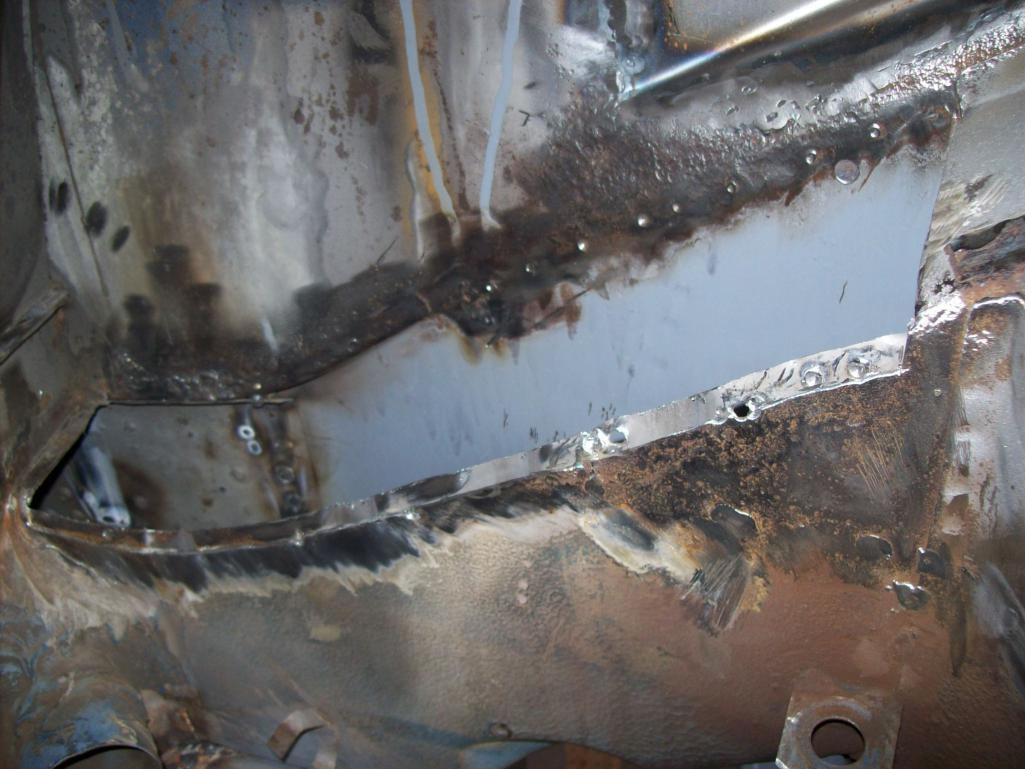 Outer top of the longitudinal and obviously why it was kicked off the team 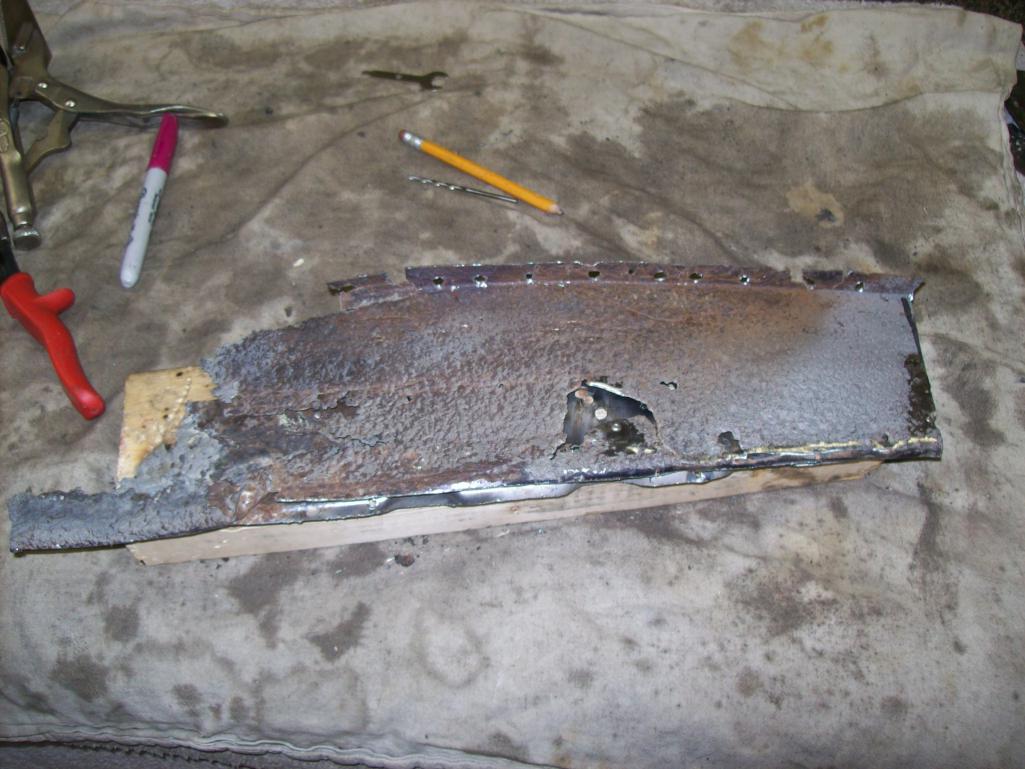 The inner reinforcement which I was considering reusing. However, it is swiss cheese currently. I could weld up the holes and extend a patch to replace the forward rusted area....but how much of its original reinforcement quality would remain? 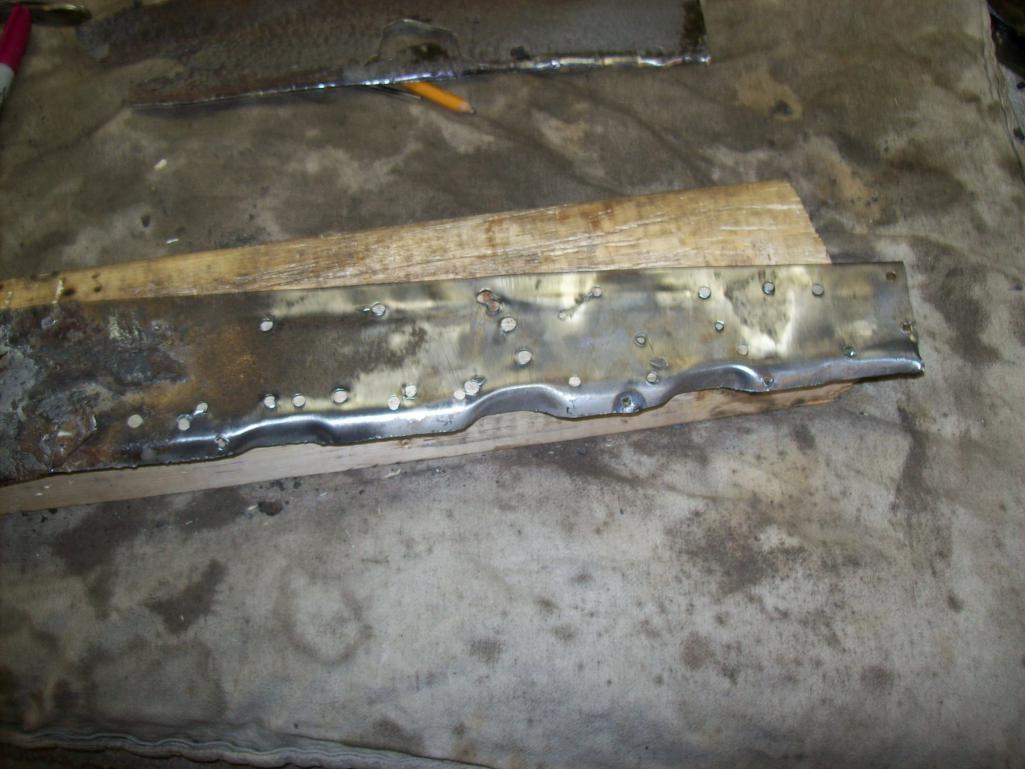 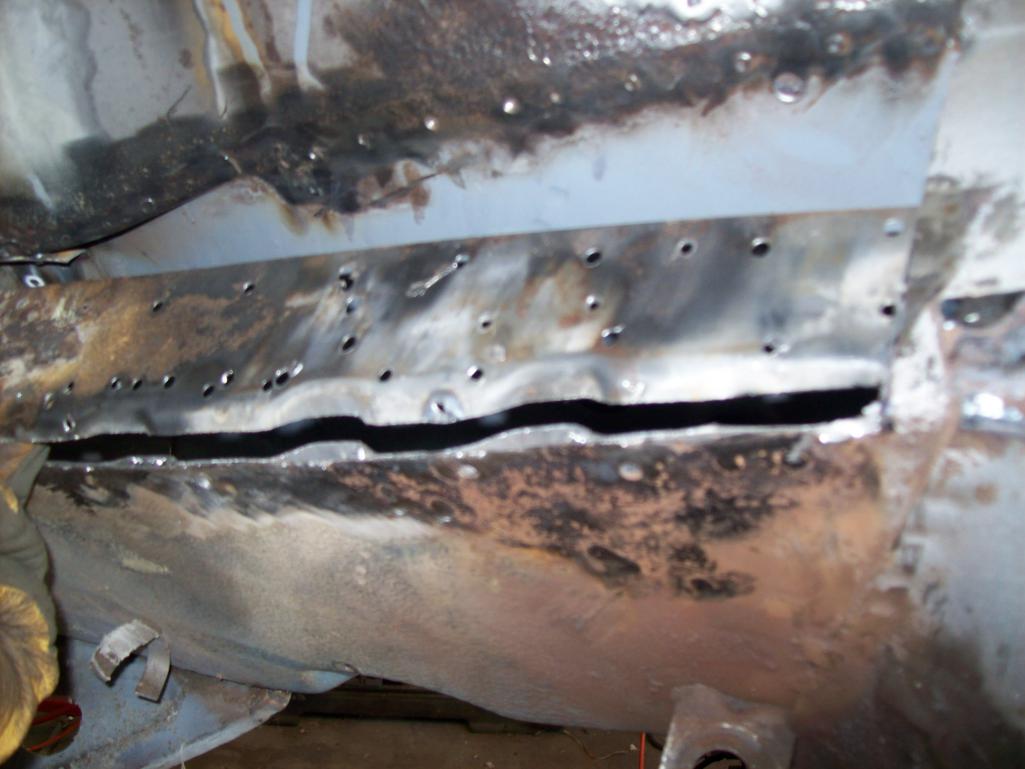 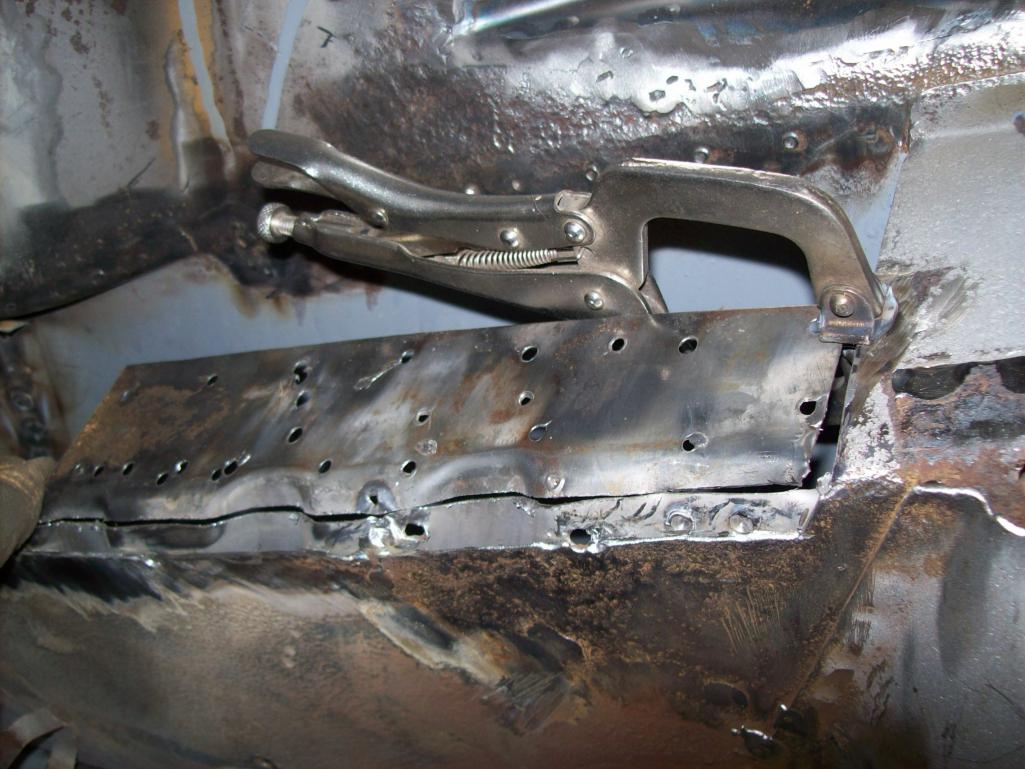 |
|
|
|
| Speedo |
Apr 6 2016, 07:35 PM
Post
#206
|
|
Senior Member Group: Members Posts: 591 Joined: 7-November 06 From: Boulder Member No.: 7,170 Region Association: Rocky Mountains |
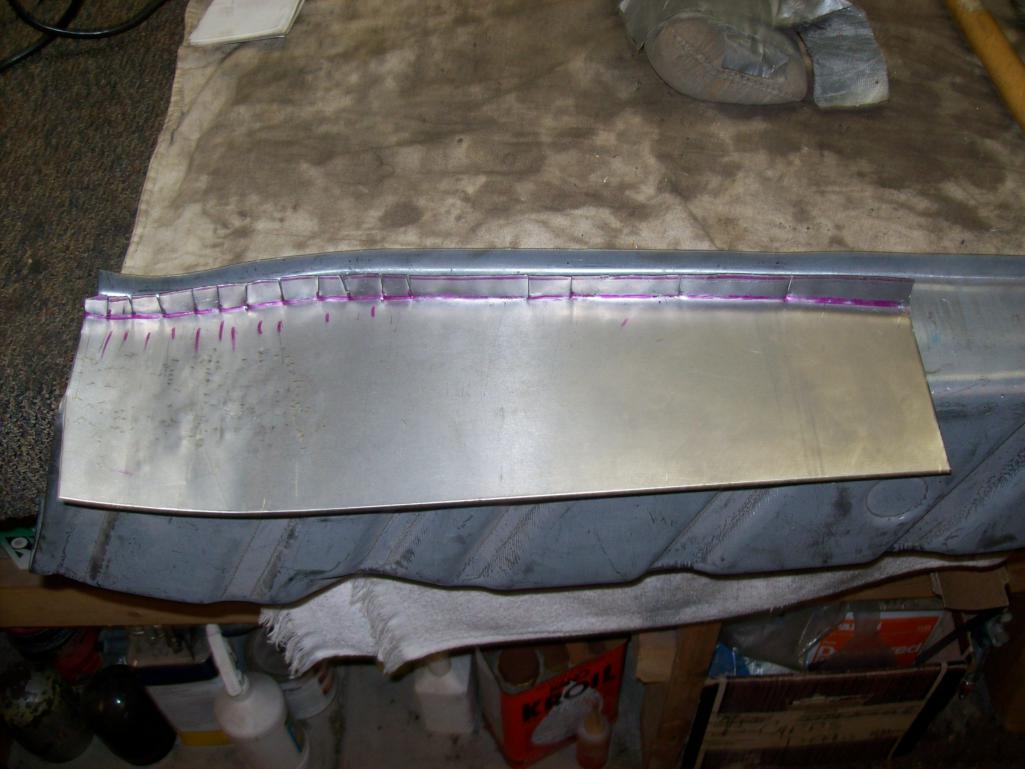
I made a buck to help shape the inner
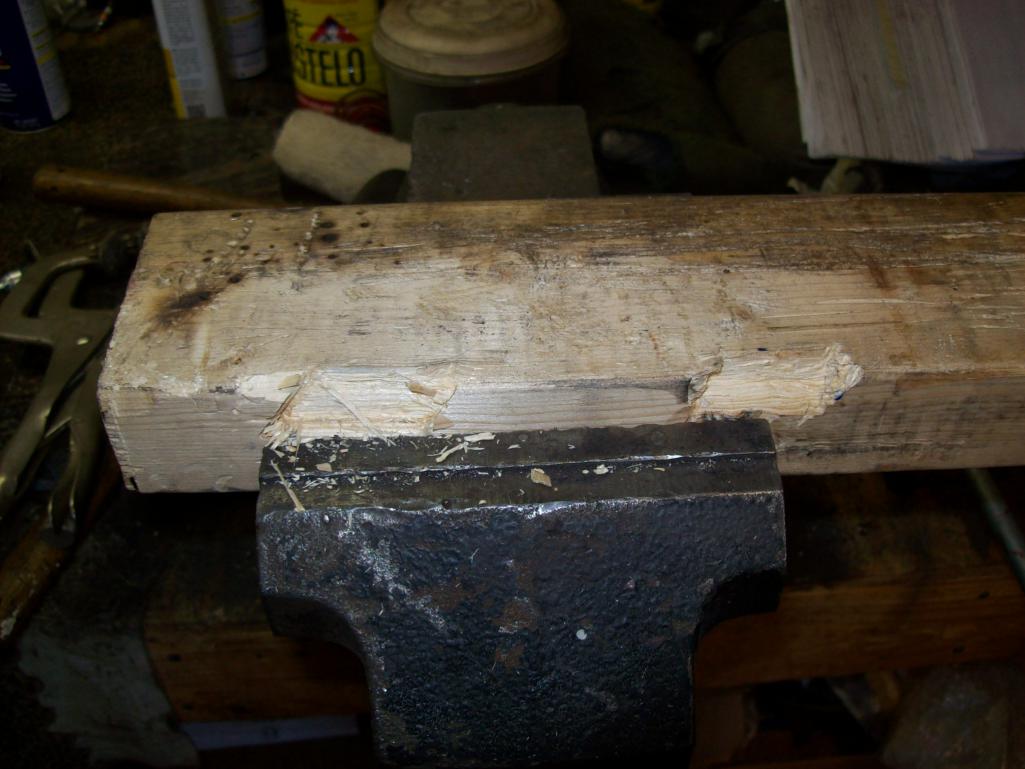  Fitted and trimmed but notice I had to trim the outer long lower to be able to attach the inner reinforcement. This will get spot welded/rossetted to the outer patch. I used the RD outer long as a template for the patch  This is a PIA but it will be stronger in the long run  Attached thumbnail(s) 
|
|
|
|
| Speedo |
Apr 6 2016, 07:45 PM
Post
#207
|
|
Senior Member Group: Members Posts: 591 Joined: 7-November 06 From: Boulder Member No.: 7,170 Region Association: Rocky Mountains |
Continuing with the outer patch
 Fitting the inner...which has to be exact so the outer lays snugly over the inner 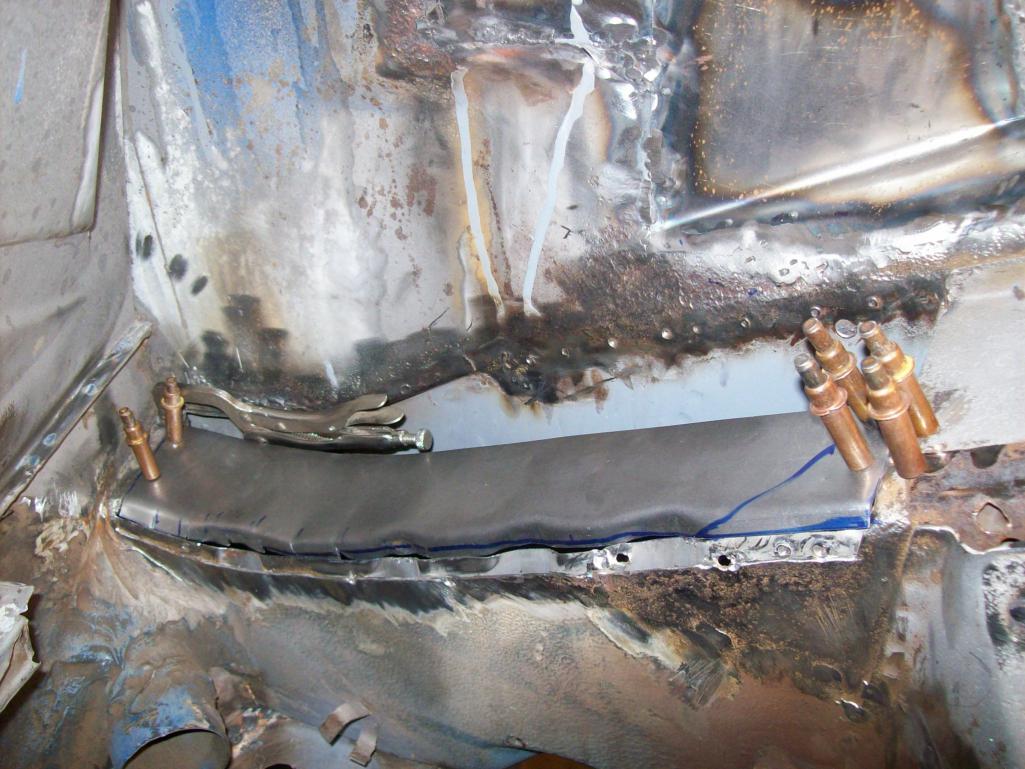 Trimmed  The inner needs to be carefully positioned so that when the outer patch is laid over it, the rosettes can be easily welded in creating the strength necessary. Yes it would have been easier to splice in the top of the RD repro piece and be done with it. Cleaned out the long and primed it for welding. I cannot shape and trim the outer patch till the inner is welded and finished. My pressure relief valve on my compressor crapped itself....today. Otherwise I would have been welding. |
|
|
|
| porschetub |
Apr 7 2016, 12:42 AM
Post
#208
|
|
914 Guru Group: Members Posts: 5,076 Joined: 25-July 15 From: New Zealand Member No.: 18,995 Region Association: None |
No one is bored speedo,having seen you carve up rotten 911's on the bird,what you are doing is same shit different car really.
Good work following with interest (IMG:style_emoticons/default/beerchug.gif) |
|
|
|
| Cairo94507 |
Apr 7 2016, 06:42 AM
Post
#209
|
|
Michael Group: Members Posts: 10,611 Joined: 1-November 08 From: Auburn, CA Member No.: 9,712 Region Association: Northern California |
I love these restoration threads. Talk about seeing behind the curtain to what makes our cars the wonders they are. The talent we all see here and other build threads is very impressive. (IMG:style_emoticons/default/smilie_pokal.gif)
|
|
|
|
| Luke M |
Apr 7 2016, 06:51 AM
Post
#210
|
|
Senior Member Group: Members Posts: 1,500 Joined: 8-February 05 From: WNY Member No.: 3,574 Region Association: North East States |
Hi Lars,
The repair looks good. The problem with the RD part (which is actually a AA part) is that it's missing the smooth outer sheet metal. I was told it's just a cosmetic piece that could be added by the end user. When that replacement part was designed it was made in a thicker gauge metal so there was no need for the outer sheet metal. Obviously anyone could tell that there was a repair done if it was left as is. RD was nice enough to offer building me an outer shell but I decided to look for an NOS replacement part. I did locate a new NOS right long but it's currently not for sale. So my backup plan is to buy a good or at least better section from a parts car. Keep up the good work ... (IMG:style_emoticons/default/beerchug.gif) |
|
|
|
| Speedo |
Apr 11 2016, 07:09 PM
Post
#211
|
|
Senior Member Group: Members Posts: 591 Joined: 7-November 06 From: Boulder Member No.: 7,170 Region Association: Rocky Mountains |
Inner reinforcement is done and trimmed...feels pretty solid. I used a sleeve on both ends.
 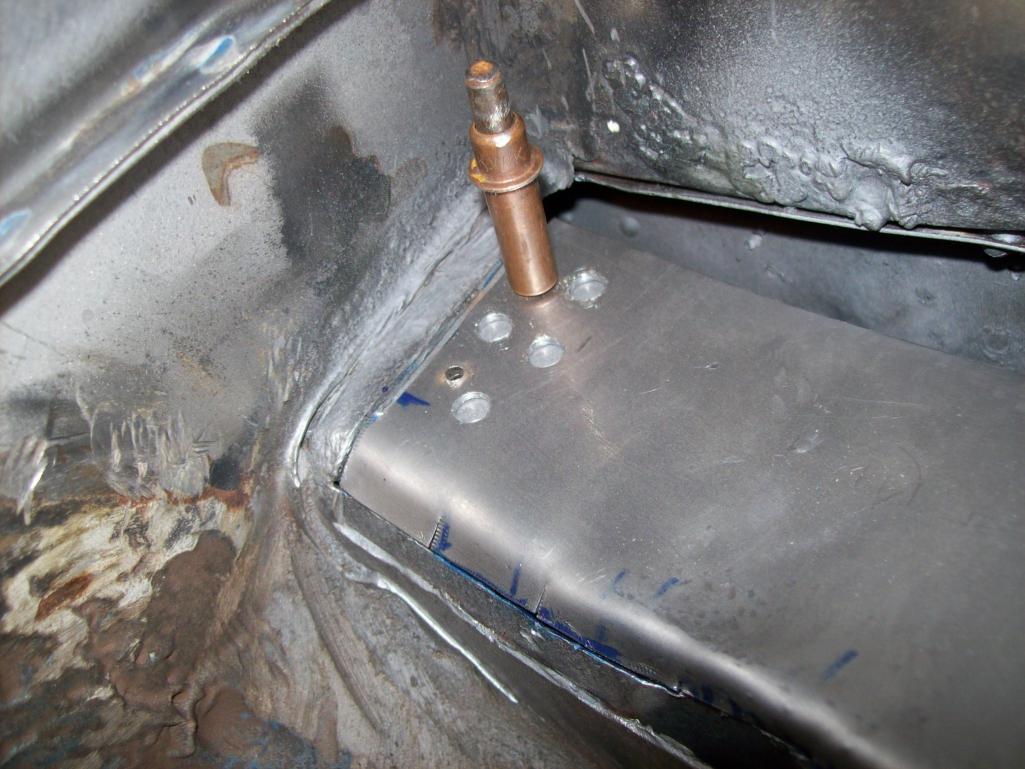 Which should add even more rigidity to the repaired area. Clecoes to align and rosettes to secure 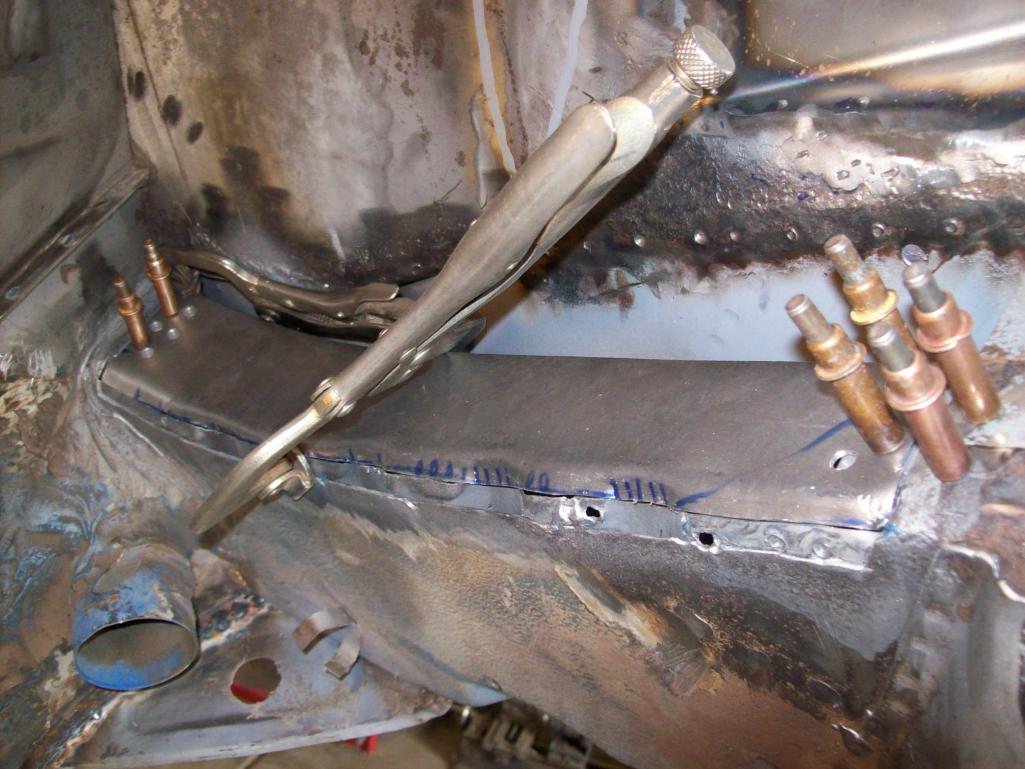 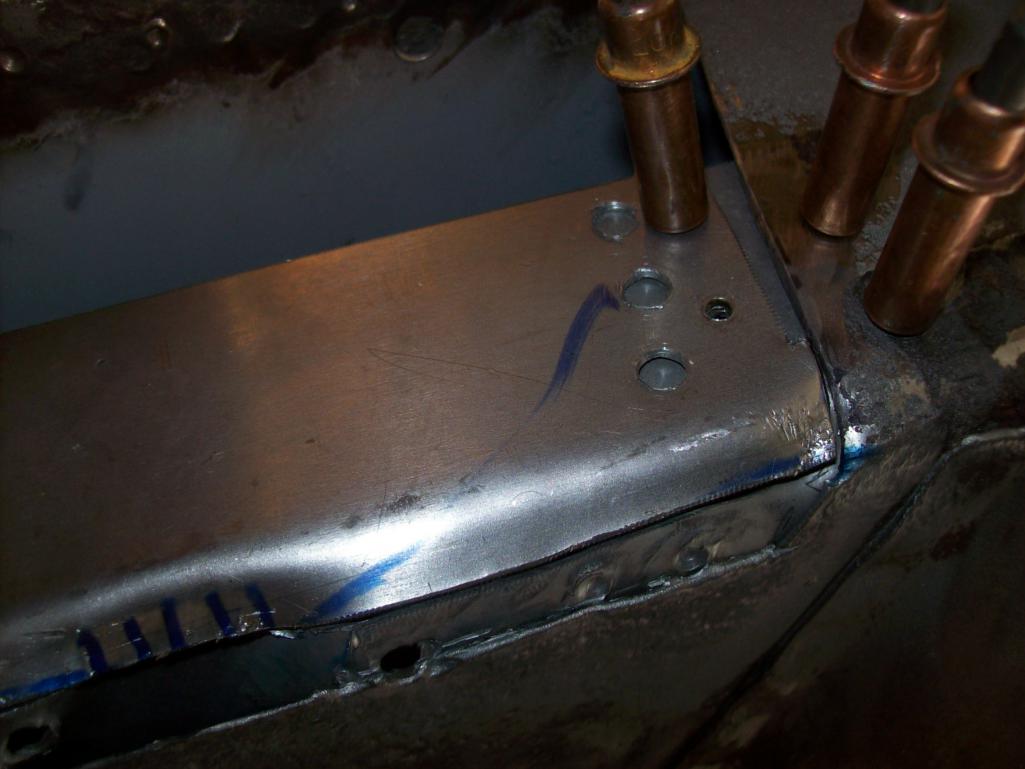 And secured and trimmed. I am pleased with how this inner panel turned out. It will provide a great form for fitting the outside longitudinal repair. 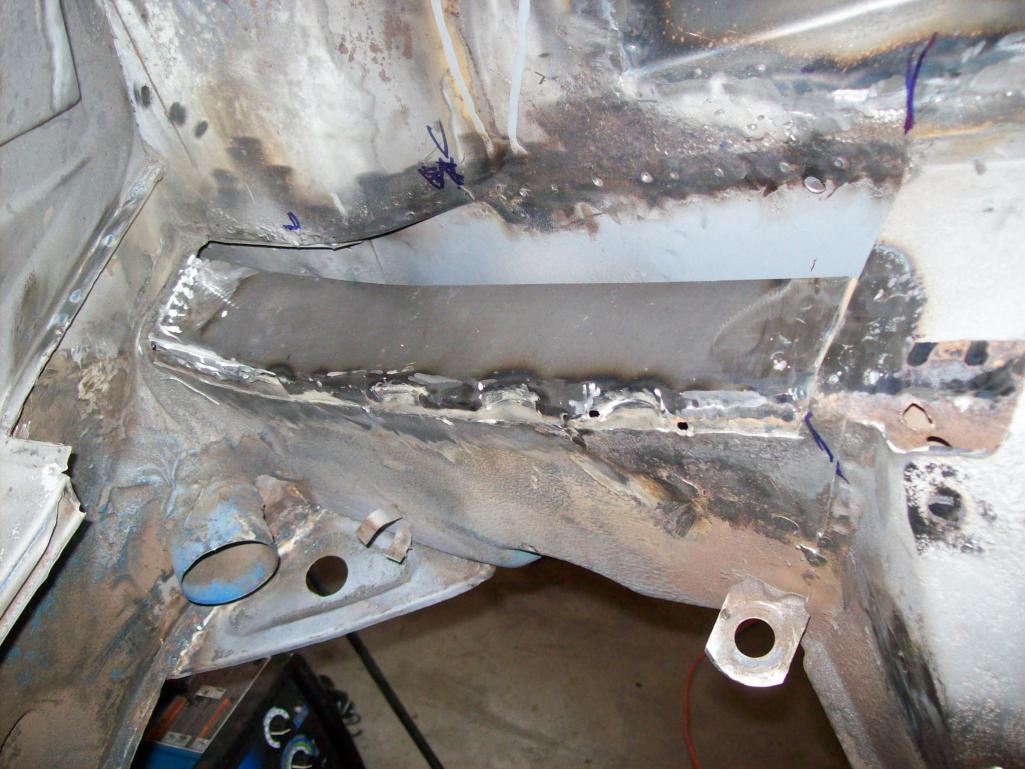 |
|
|
|
| Speedo |
Apr 11 2016, 07:29 PM
Post
#212
|
|
Senior Member Group: Members Posts: 591 Joined: 7-November 06 From: Boulder Member No.: 7,170 Region Association: Rocky Mountains |
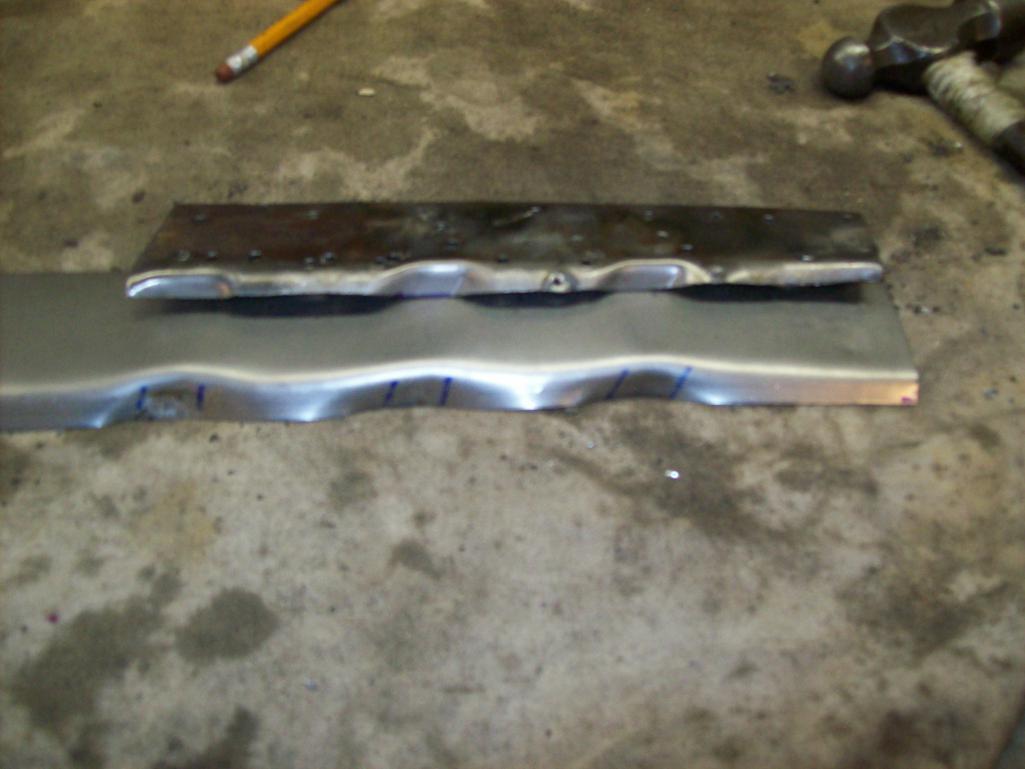
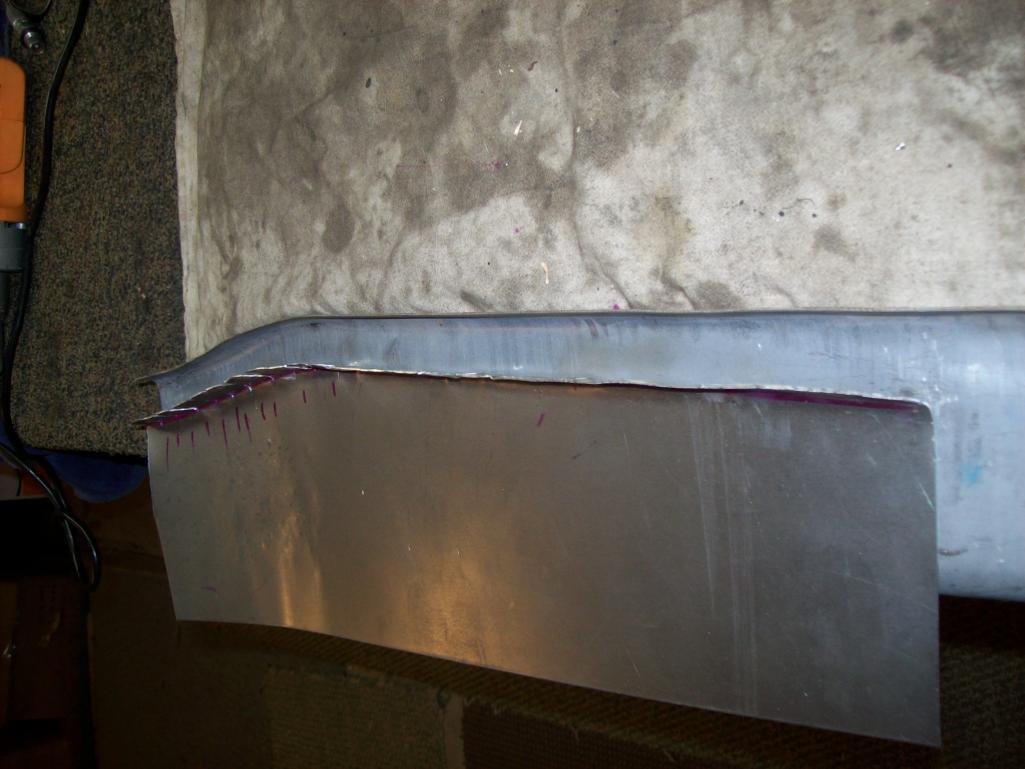
I now need to finish the outer patch to the longitudinal. My original piece fabricated using the RD 14 gauge "all in one" wasn't as close as I wanted...it ended up being short. I didn't have a way to fit the RD piece in that area to determine the fit, without cutting it up...so I went on faith. Here is the fit of my piece.
 And here is how short the fabricated piece is, fitting tight to the wheel housing wall 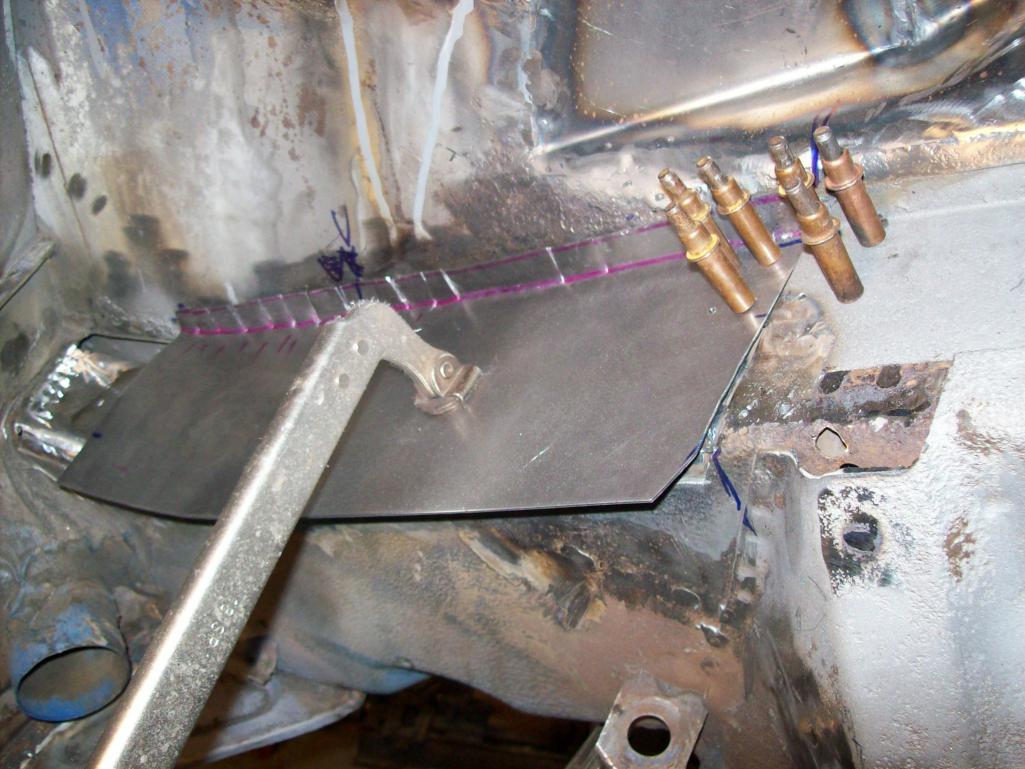 No big deal, I added an extension. Preliminary fitment 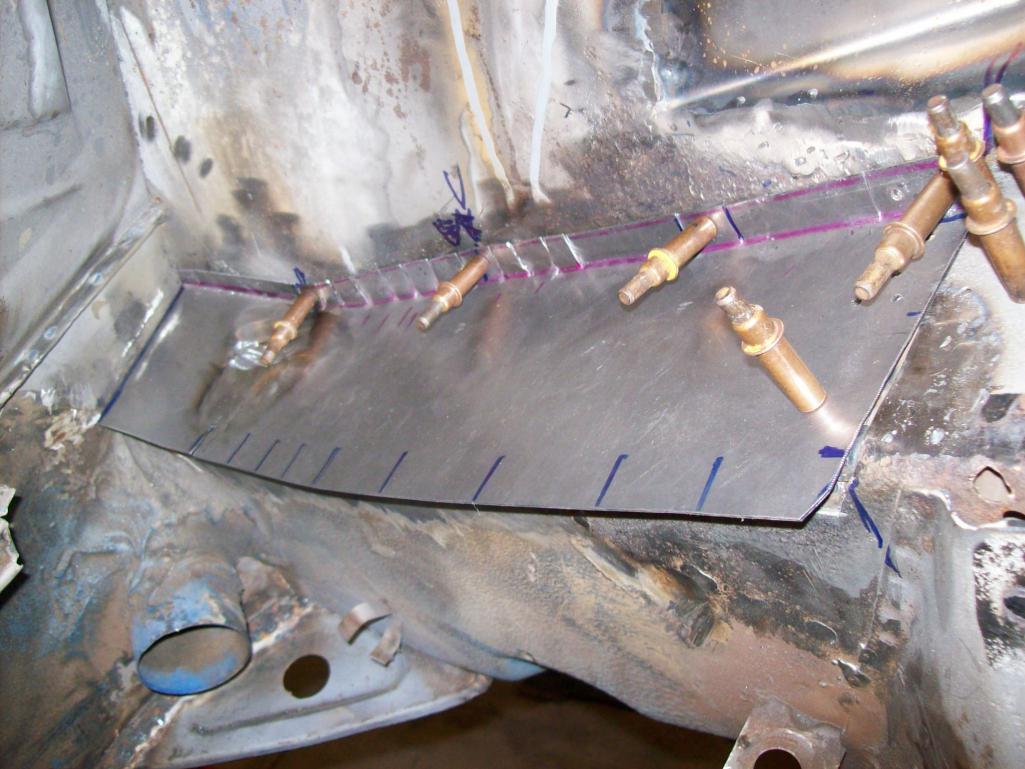 Massaged a bit 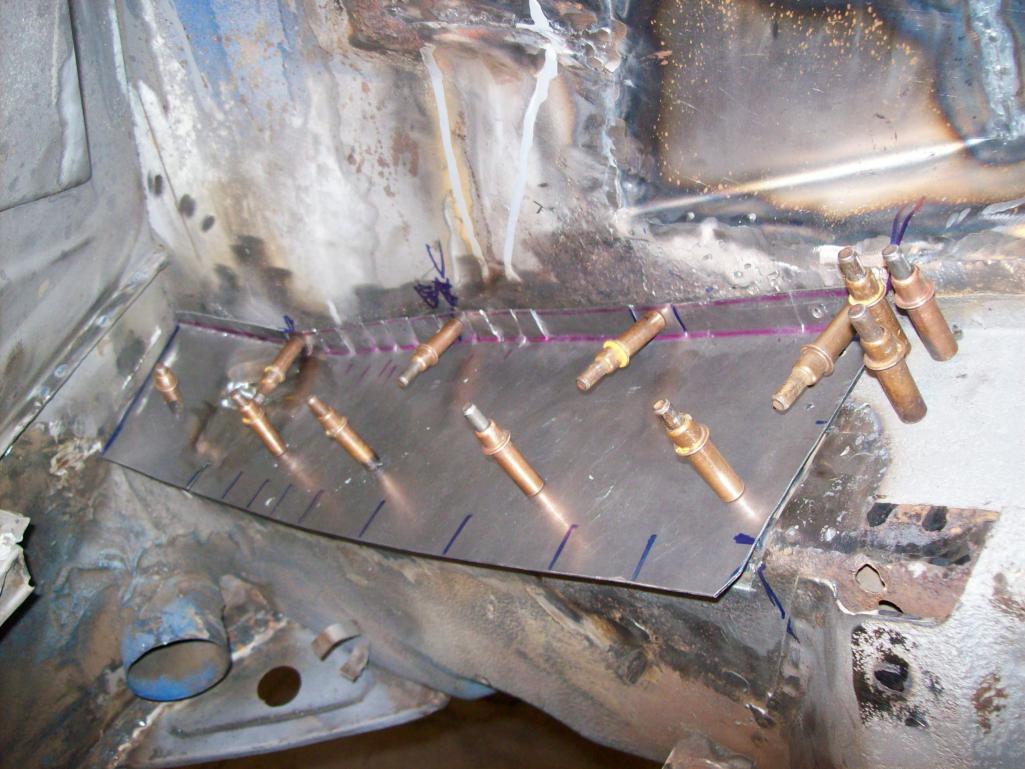 And starting to roll the edges to mimic the original contour of the factory outer longitudinal 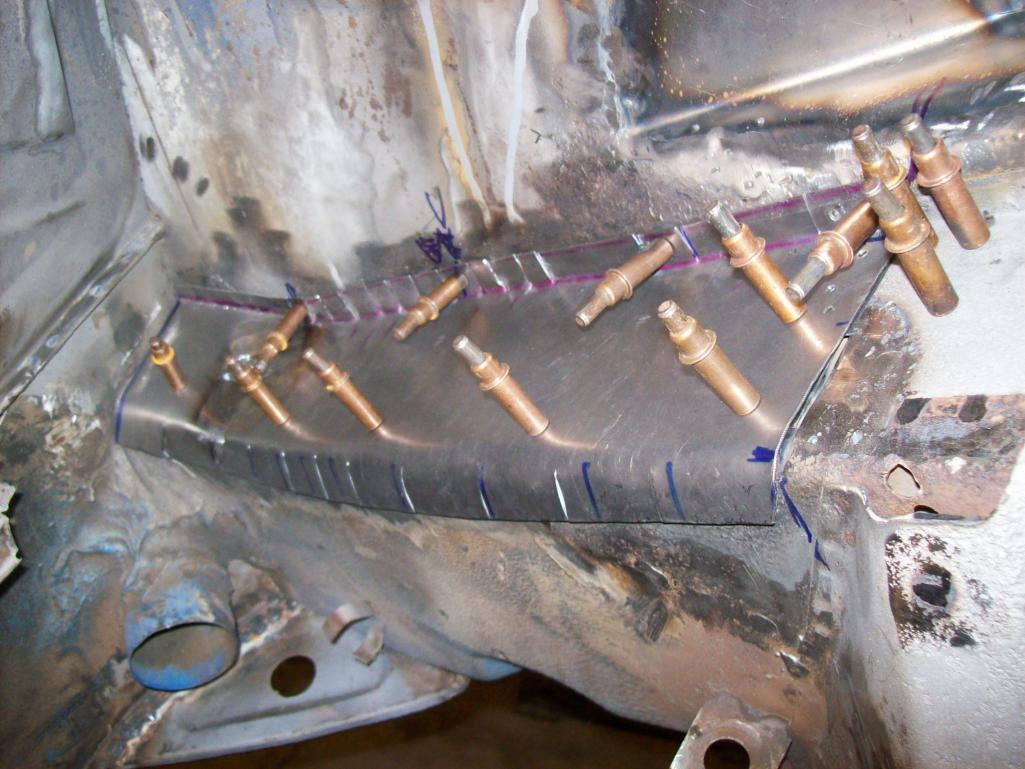 Once trimmed this will get buttoned up and I will be able to address the battery support and tray |
|
|
|
| brant |
Apr 12 2016, 07:13 AM
Post
#213
|
|
914 Wizard Group: Members Posts: 12,179 Joined: 30-December 02 From: Colorado Member No.: 47 Region Association: Rocky Mountains |
Great work.
|
|
|
|
| Speedo |
Apr 15 2016, 07:37 PM
Post
#214
|
|
Senior Member Group: Members Posts: 591 Joined: 7-November 06 From: Boulder Member No.: 7,170 Region Association: Rocky Mountains |
I'm about to close up the hellhole. I have a new pedestal and battery tray (thanks Ferg) and am wondering about positioning both on the repaired longitudinal. Are there any measurements I need to be concerned with?
Speedo |
|
|
|
| Speedo |
Apr 15 2016, 08:09 PM
Post
#215
|
|
Senior Member Group: Members Posts: 591 Joined: 7-November 06 From: Boulder Member No.: 7,170 Region Association: Rocky Mountains |
Looking forward to not working in the engine compartment. This longitudinal repair is going to be robust. I have not considered welding in the plate reinforcement kit for the car for a couple reasons...1) it is a real six, 2) it will be driven but not tracked, and 3) it will not receive a monster engine. Comments are welcome.
Wanted the outer long cap to fit tight. So I need to trim and massage it. 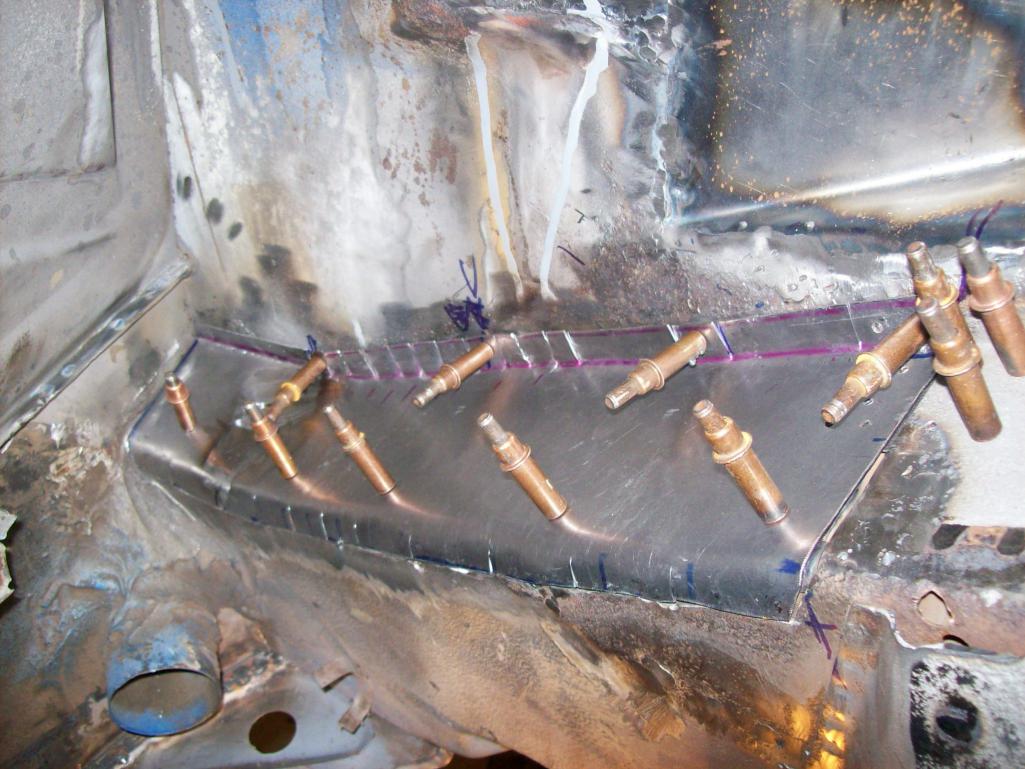 I want it to look clean (recognizing it is buried in the engine compartment and pretty much obscured by the battery tray) so everything needs to be close tolerance. 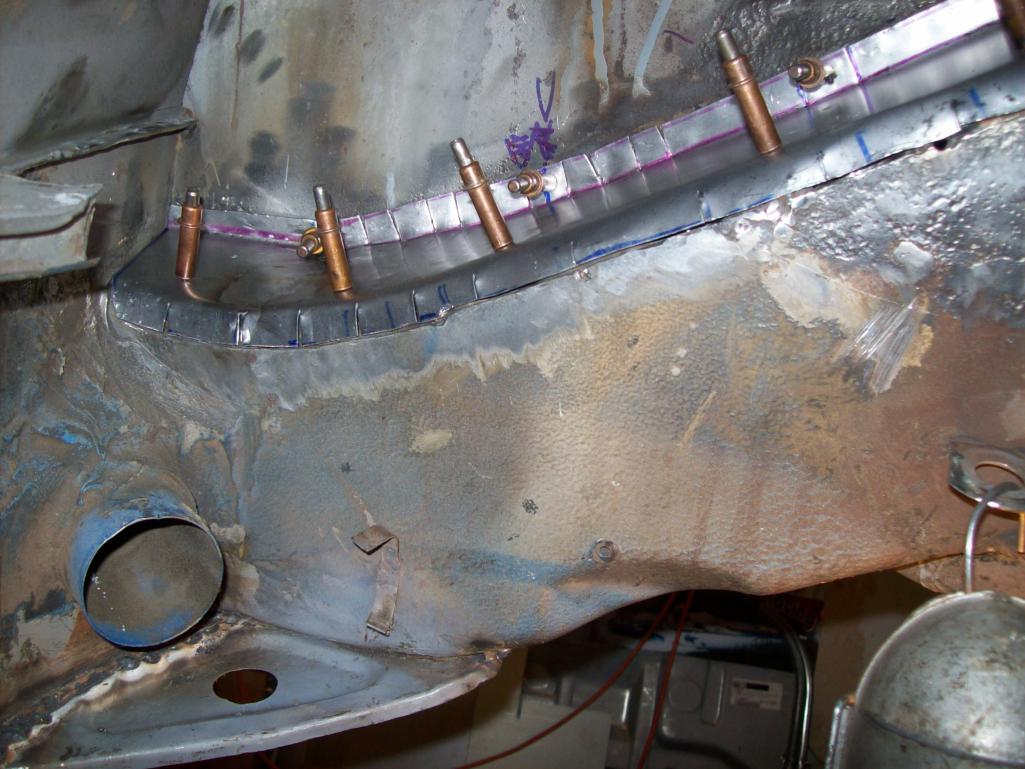 Fit, positioned and drilled for rosettes. 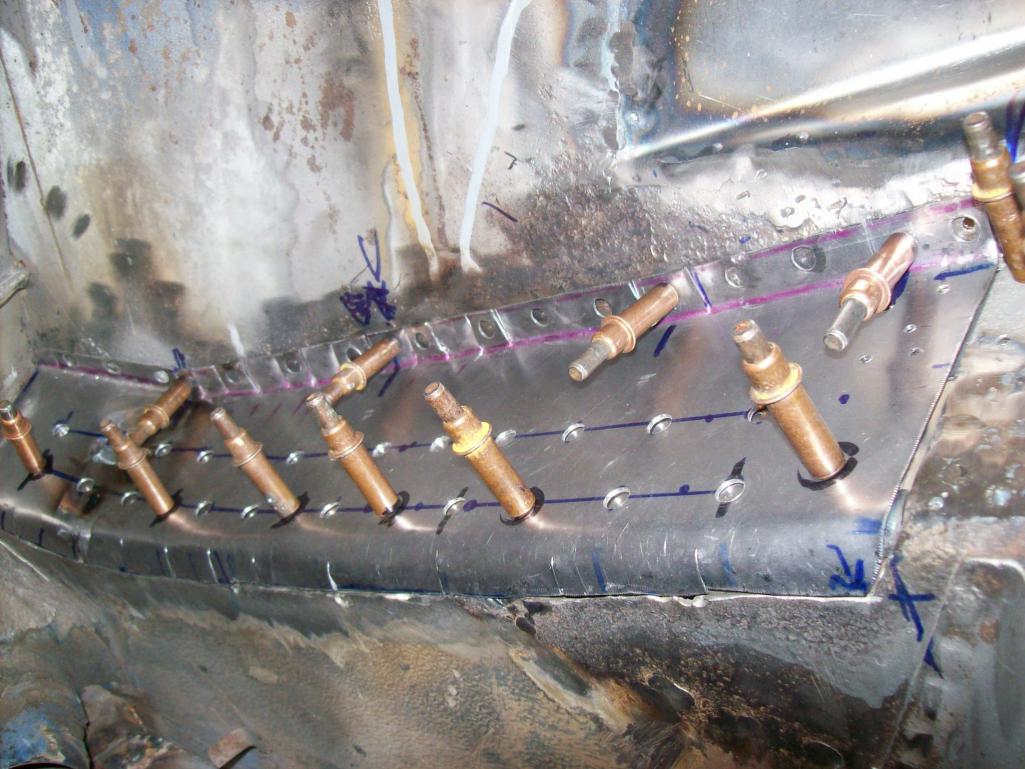 This is a long ways from what I started with...much different than the replacement one piece RD part 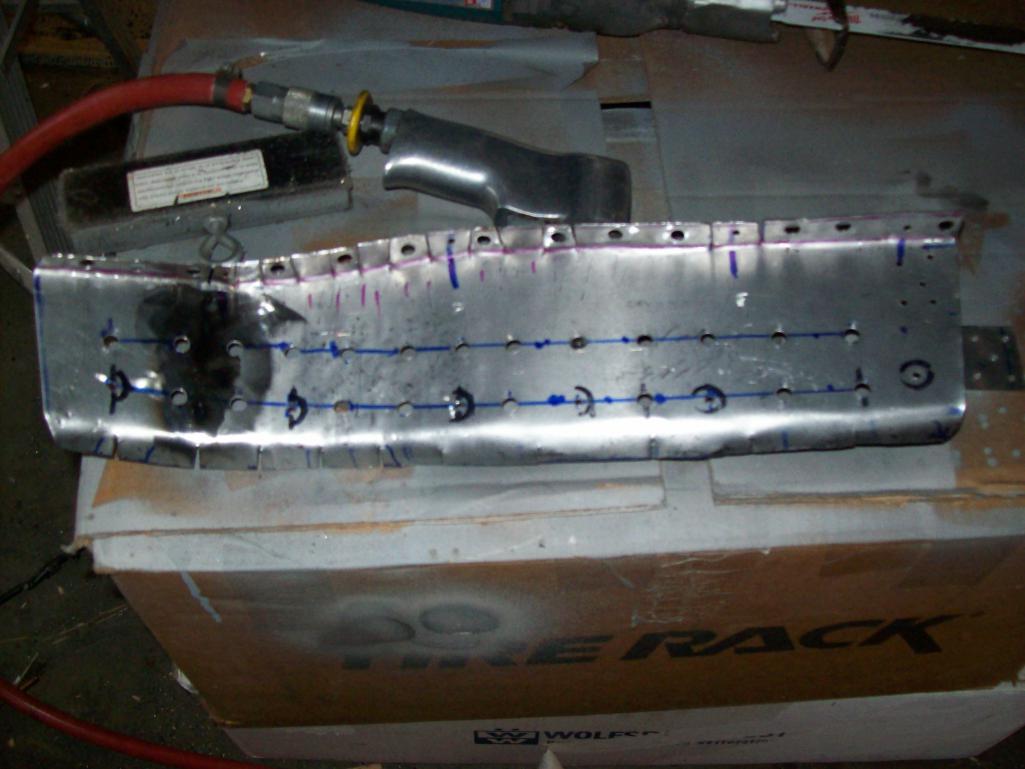  |
|
|
|
| Speedo |
Apr 15 2016, 08:20 PM
Post
#216
|
|
Senior Member Group: Members Posts: 591 Joined: 7-November 06 From: Boulder Member No.: 7,170 Region Association: Rocky Mountains |
A little bit more fitting is required. Comparison to the RD repro...
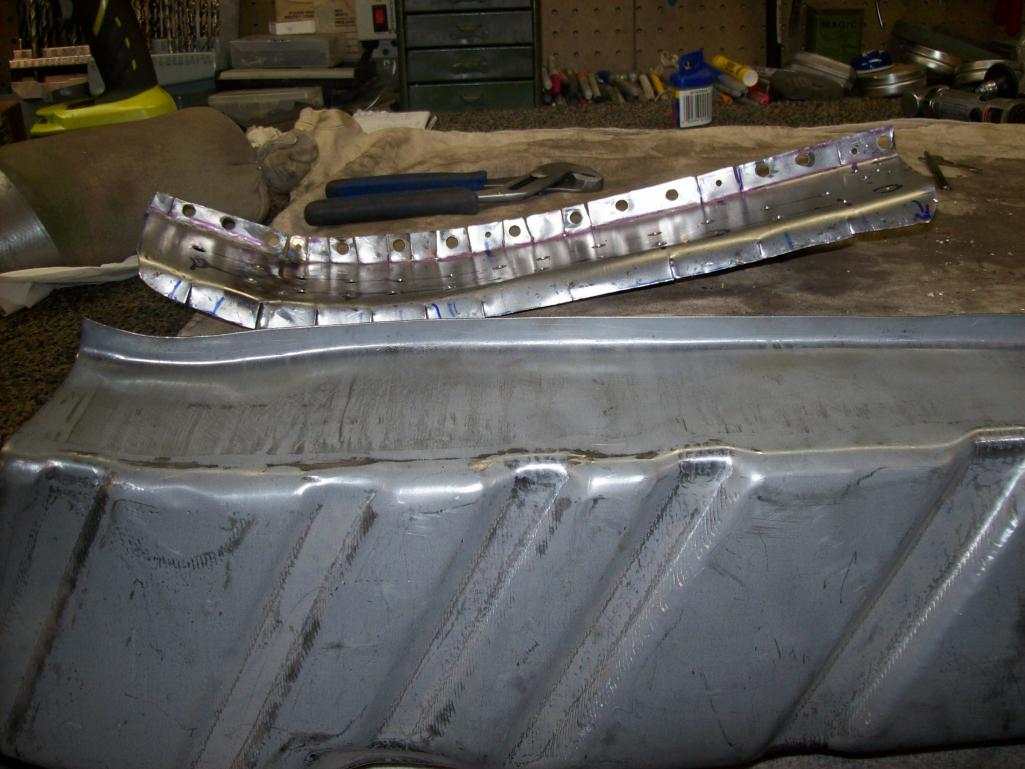 Not to dis RDs repro parts as they are what I consider to be the best repro parts out there...but they still are not perfect. My cap on the long is particular to my car which was built "sort of" by hand in the factory 46 years ago. 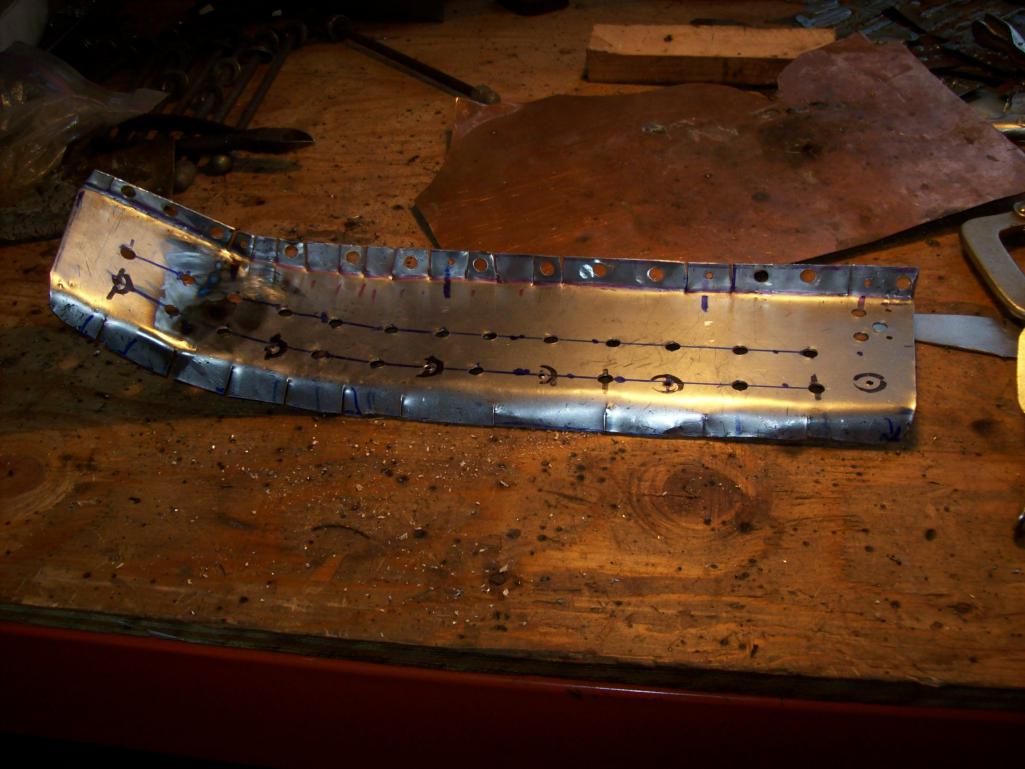 The assistant  |
|
|
|
| Cairo94507 |
Apr 15 2016, 09:43 PM
Post
#217
|
|
Michael Group: Members Posts: 10,611 Joined: 1-November 08 From: Auburn, CA Member No.: 9,712 Region Association: Northern California |
Terrific job. I appreciate the effort you are putting in, especially since it is a Six.
I added the inner Engman kit in my Six just because I know these cars can flex. I also am putting a 3.2 in mine and though I will not be racing the car, I know the 3.2 has double the HP and torque of the stock 2.0. I figured it goes on the inside and will be invisible when finished. Shhhhhh....don't tell anyone it is installed. |
|
|
|
| Speedo |
Apr 17 2016, 07:42 PM
Post
#218
|
|
Senior Member Group: Members Posts: 591 Joined: 7-November 06 From: Boulder Member No.: 7,170 Region Association: Rocky Mountains |
I continue to look at other longitudinal repair threads. People are all over the spectrum with how the repair is approached. I am very comfortable with my repair.
Replacing the inner sleeve...as well as "sleeving" the patch makes sense for me. New vs old 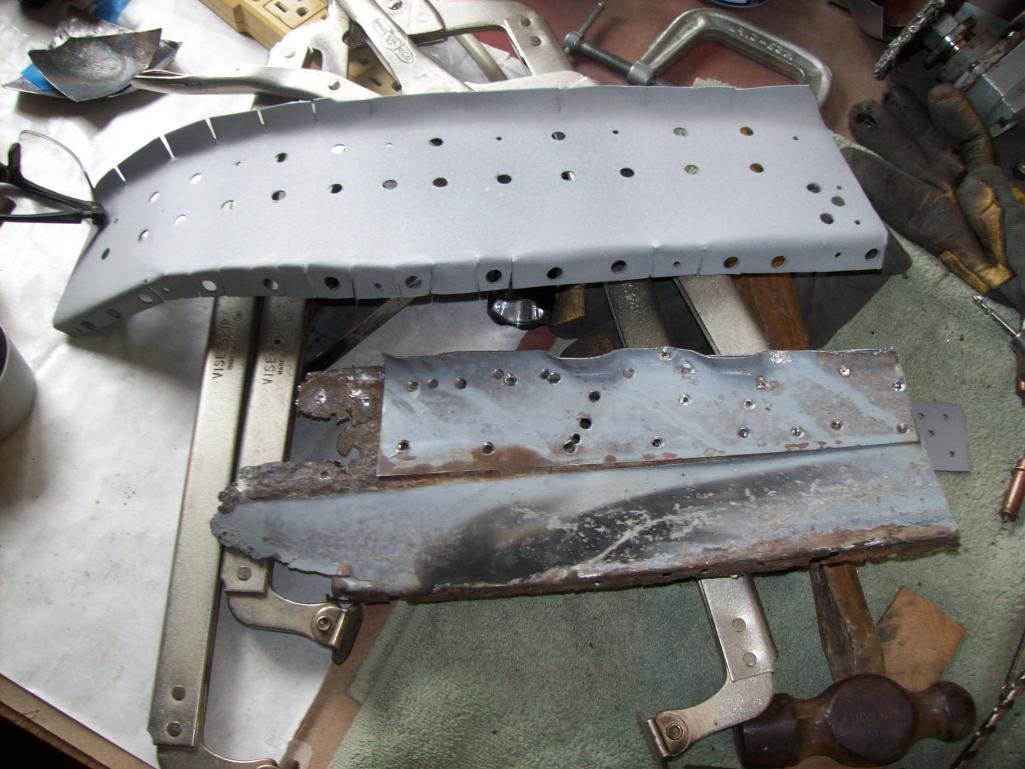 No reason not to make this permanent 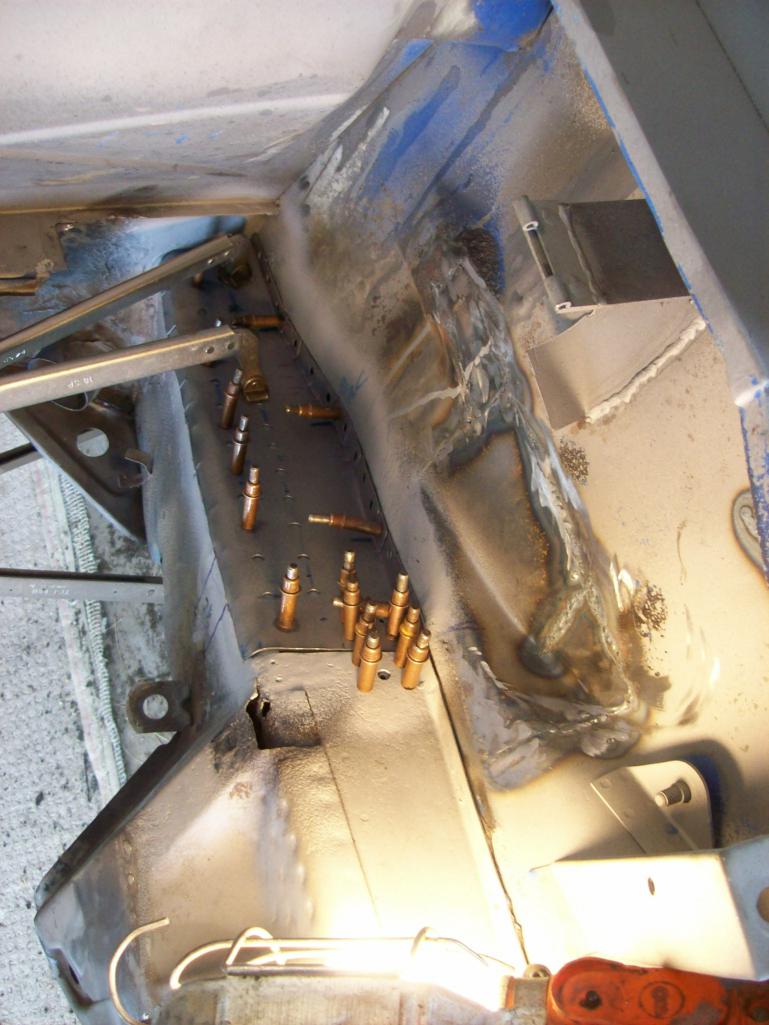 I am challenged with weather at this point...don't like to weld in a closed environment. But the garage door opened is about 29 degrees because of this... 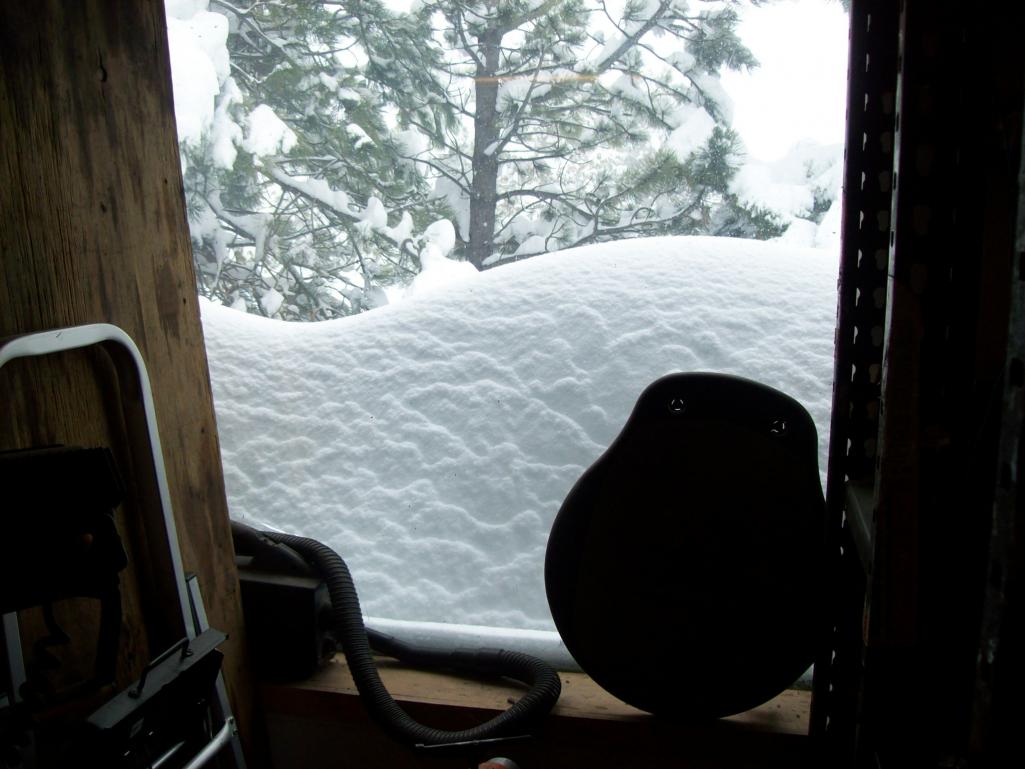   |
|
|
|
| Speedo |
Apr 17 2016, 07:59 PM
Post
#219
|
|
Senior Member Group: Members Posts: 591 Joined: 7-November 06 From: Boulder Member No.: 7,170 Region Association: Rocky Mountains |
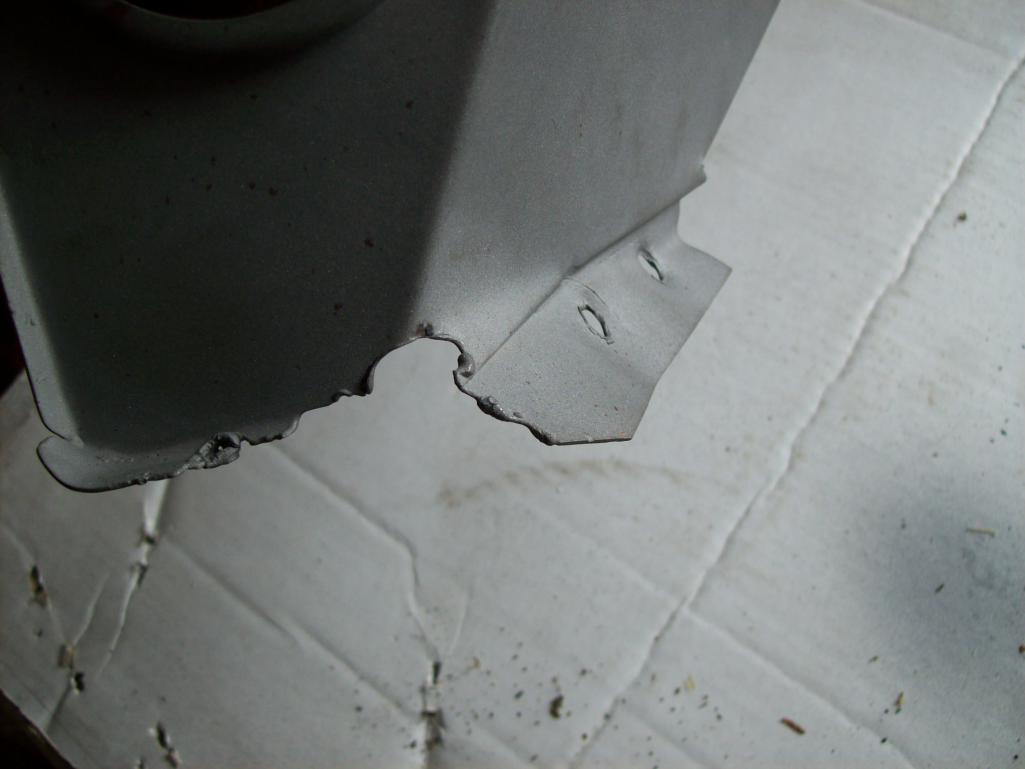
I will weld this in this afternoon...if I can open the garage door, but I need to accomplish a small repair to keep the juices flowing. Battery support was replaced at one point...and not very well. Here is my support and tray...
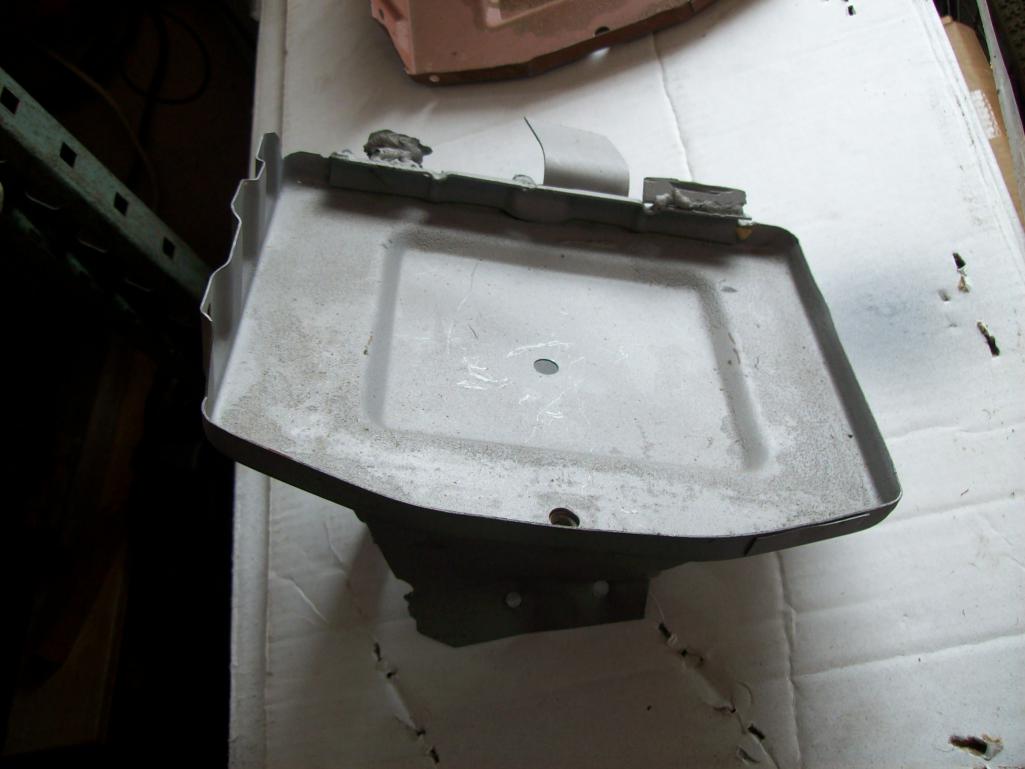 Not the best of shape Not the best of shape Part of the problem is the previous repair and part of the problem is what was needed to remove the stand from the weakened longitudinal. 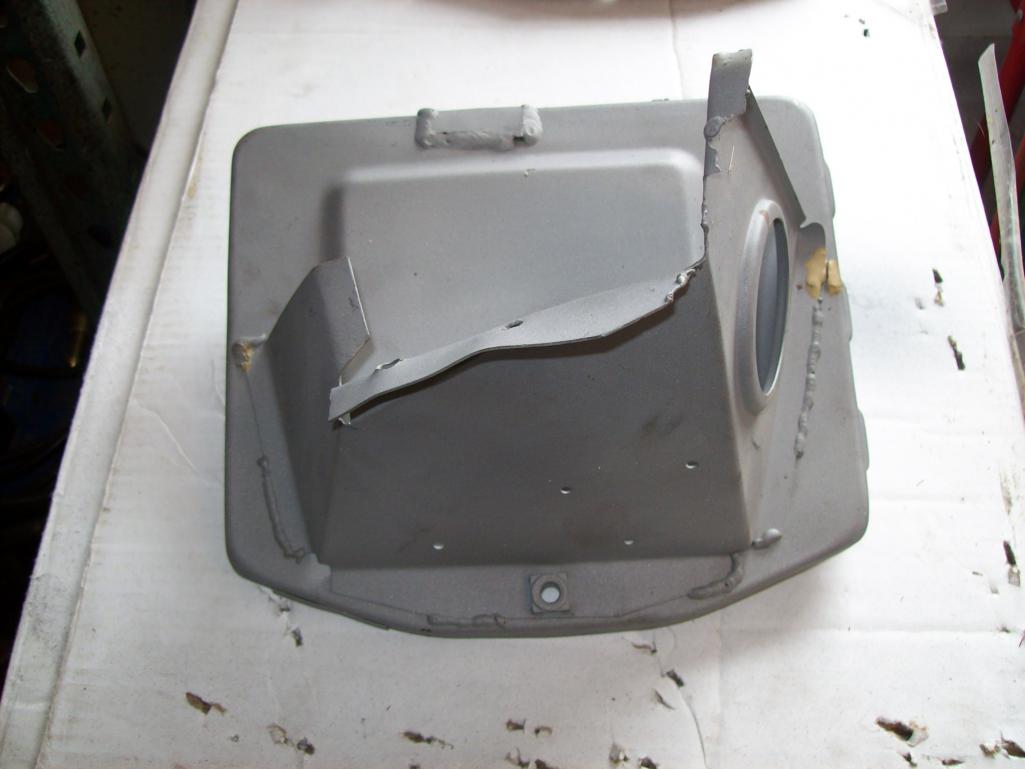  I removed the support from the tray 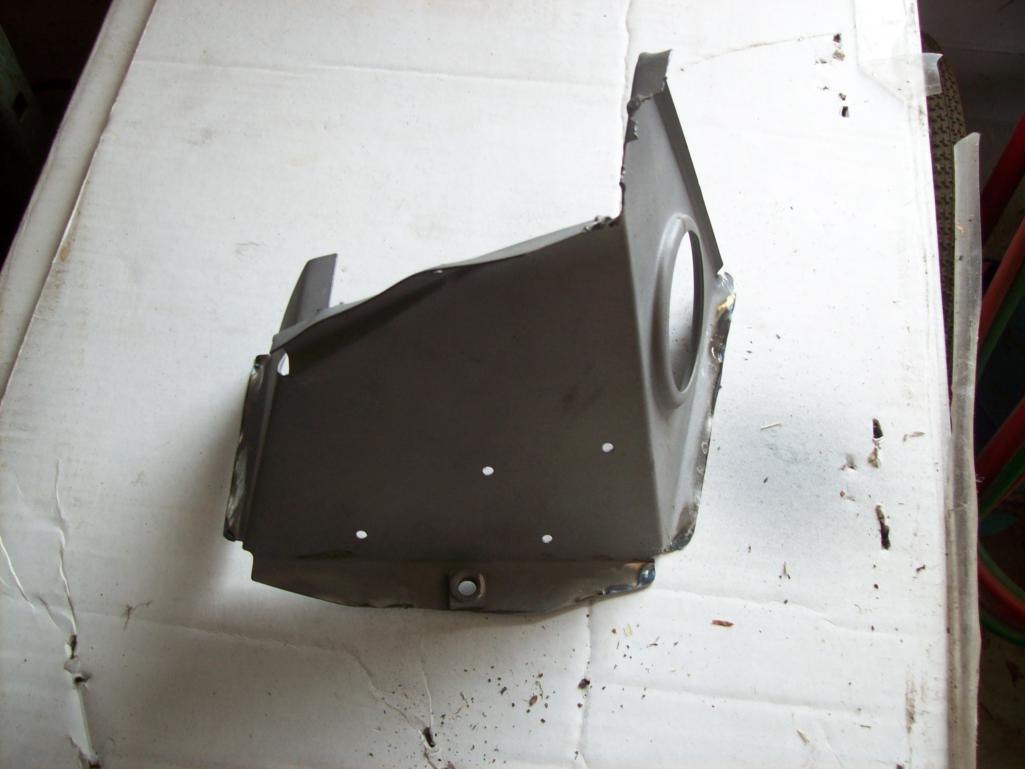 It wasn't in great shape. |
|
|
|
| Speedo |
Apr 17 2016, 08:33 PM
Post
#220
|
|
Senior Member Group: Members Posts: 591 Joined: 7-November 06 From: Boulder Member No.: 7,170 Region Association: Rocky Mountains |
So with the stand removed from the tray....there were some areas that needed attention. This needs to be repaired...
 And this 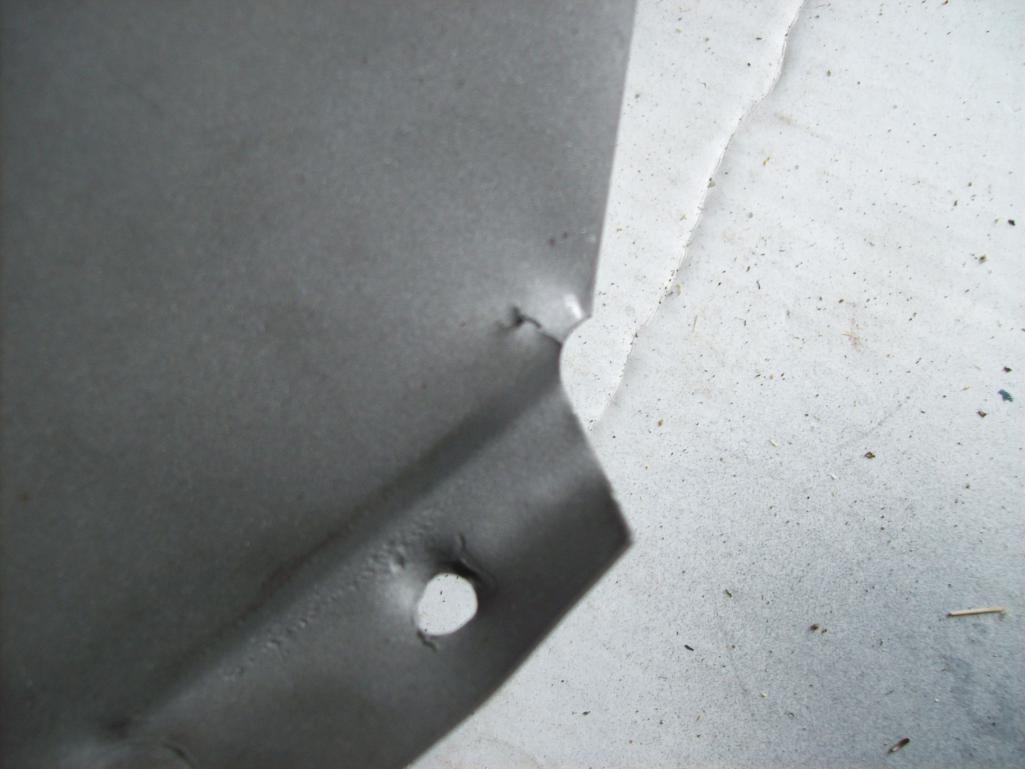 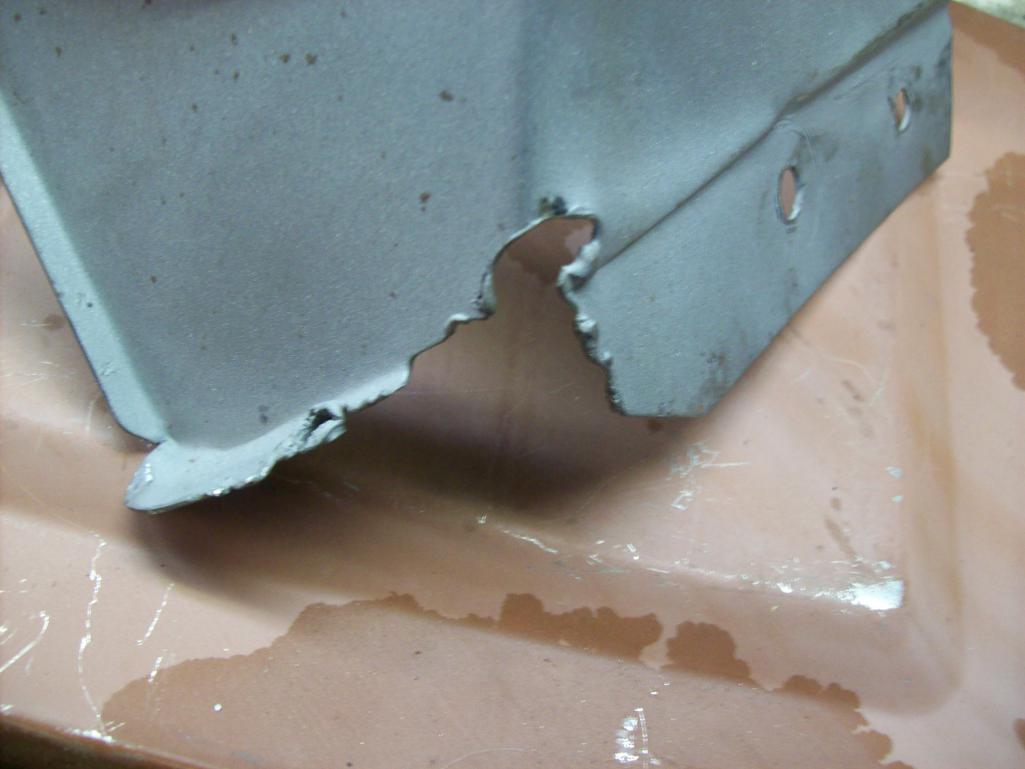 Made some repairs 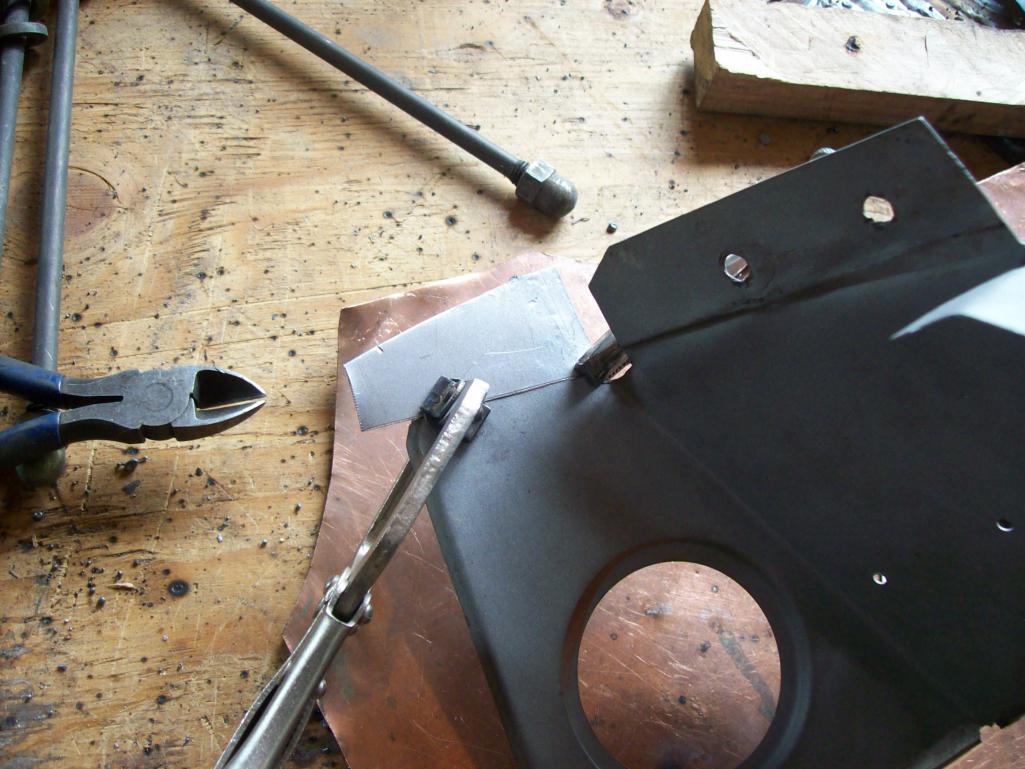 And reshaping  |
|
|
|
|
1 User(s) are reading this topic (1 Guests and 0 Anonymous Users)
0 Members:

|
Lo-Fi Version | Time is now: 13th April 2026 - 03:41 AM |
Invision Power Board
v9.1.4 © 2026 IPS, Inc.