|
|
|
Porsche, and the Porsche crest are registered trademarks of Dr. Ing. h.c. F. Porsche AG.
This site is not affiliated with Porsche in any way. Its only purpose is to provide an online forum for car enthusiasts. All other trademarks are property of their respective owners. |
|
|

  |

| Speedo |
 Apr 17 2016, 08:42 PM Apr 17 2016, 08:42 PM
Post
#221
|
|
Senior Member  Group: Members Posts: 591 Joined: 7-November 06 From: Boulder Member No.: 7,170 Region Association: Rocky Mountains |
And the repairs...
and totally repaired 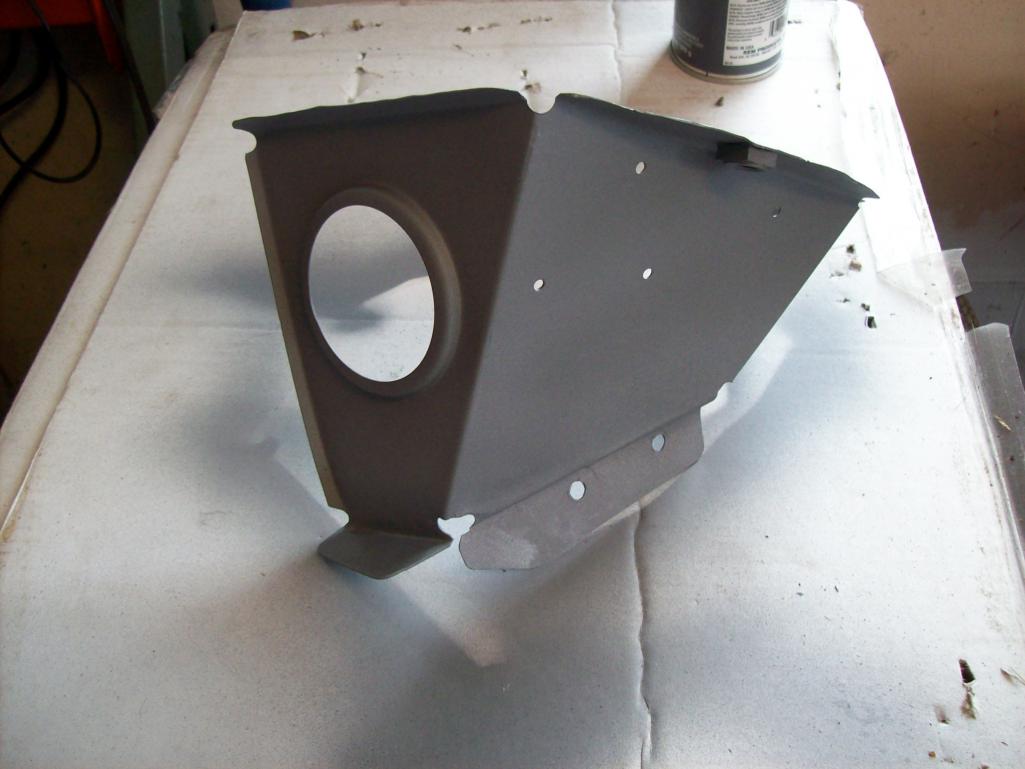 This needs to be dialed in for positioning on the longitudinal. And done 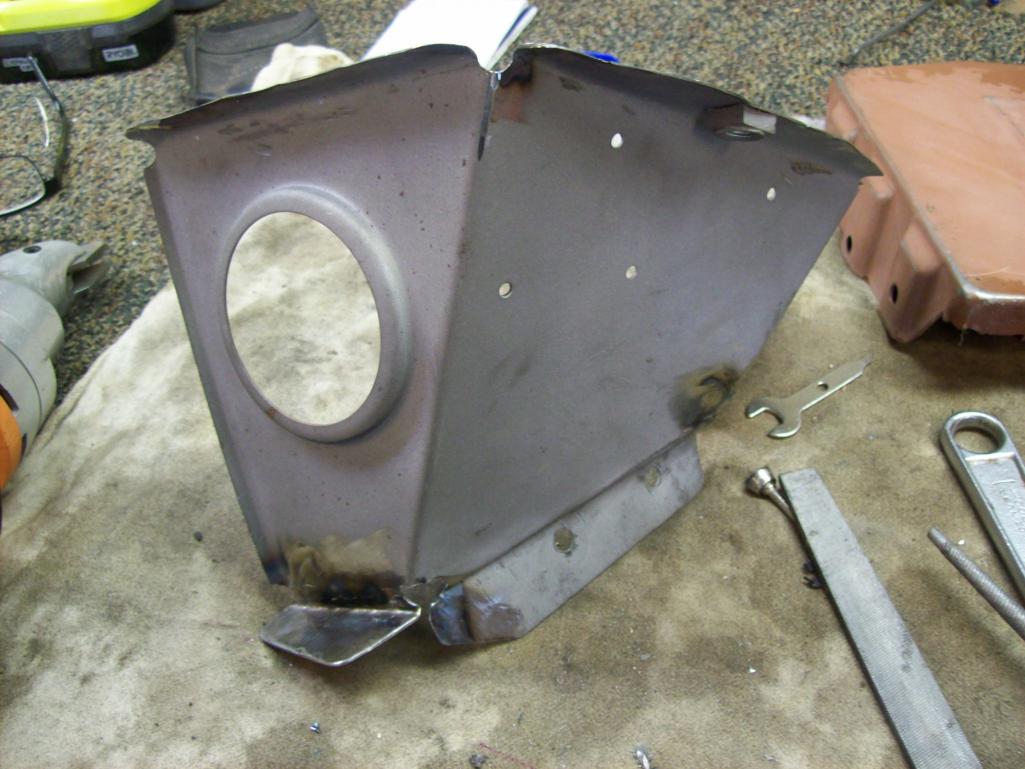 |
   |

 
|
| Speedo |
Apr 18 2016, 09:11 AM
Post
#222
|
|
Senior Member Group: Members Posts: 591 Joined: 7-November 06 From: Boulder Member No.: 7,170 Region Association: Rocky Mountains |
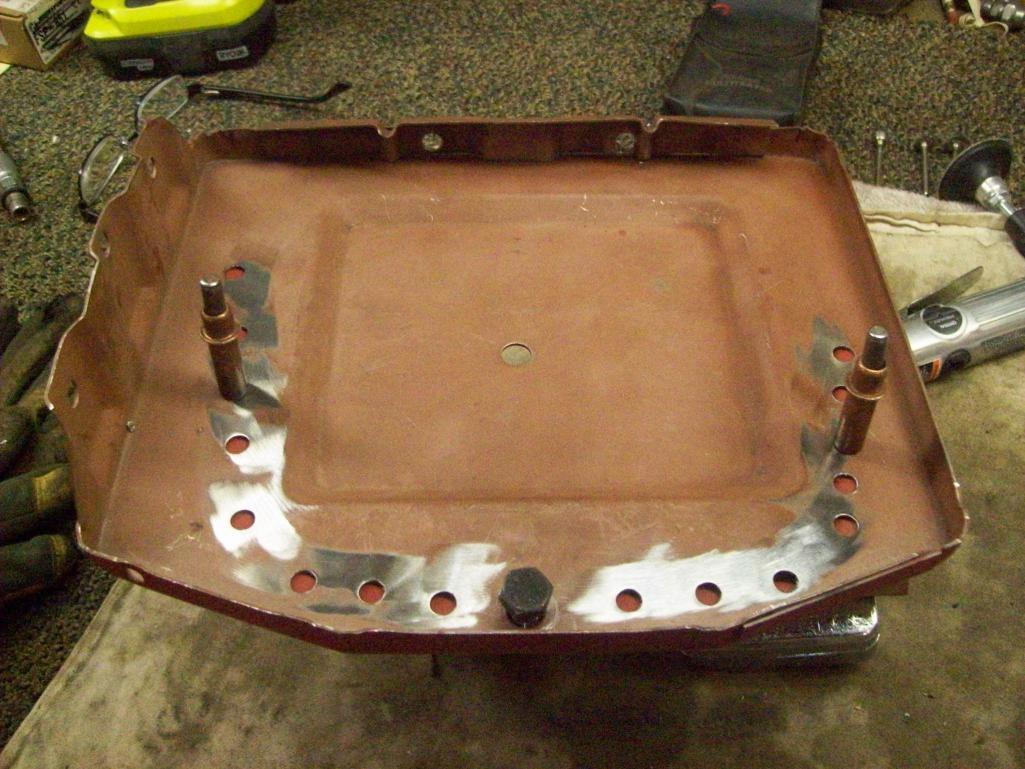
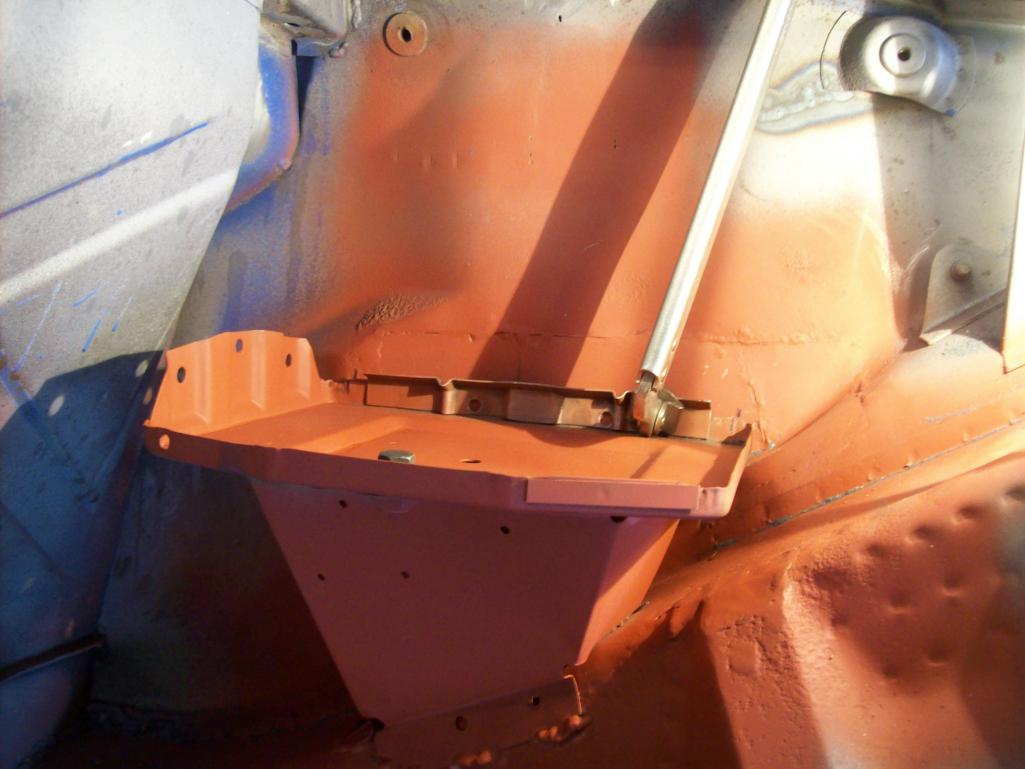
Mounting question for the battery support. I have no reason to believe the support I have is aftermarket. It is now repaired and ready to be reinstalled. There are three sides to it...downhill, engine side and uphill. The downhill and engine side flanges are pointing away from the support. The uphill side points into the support. I would think this should also point away? In fact it looks that the correct way to mount the tray would be to weld the tray to the support, then weld the combination to the longitudinal. With this flange pointing inside, the access to weld this flange would be very limited. If I welded the support first to the longitudinal, then access to weld the support to the underside of the tray would be very limited. I cannot tell from the RD website and picture of the support which way that uphill flange points...inside or outside. I am inclined to reverse the flange direction and have it point away from the support. Comments?
This picture is looking down at the inside of the support, showing the uphill flange pointing "in".  |
|
|
|
| 914fahrer |
Apr 18 2016, 10:35 AM
Post
#223
|
|
Member Group: Members Posts: 103 Joined: 12-November 14 From: Berlin/Germany Member No.: 18,115 Region Association: Germany |
Hello,
I only replace my Tray and drill a few holes for welding into the Tray ,this works fine . Biggest problem is the rust protection after welding in this Area.I use a little brush first. 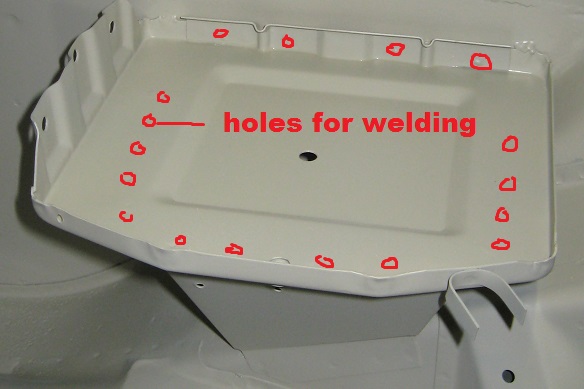 Ralf |
|
|
|
| Speedo |
Apr 18 2016, 05:47 PM
Post
#224
|
|
Senior Member Group: Members Posts: 591 Joined: 7-November 06 From: Boulder Member No.: 7,170 Region Association: Rocky Mountains |
914fahrer,
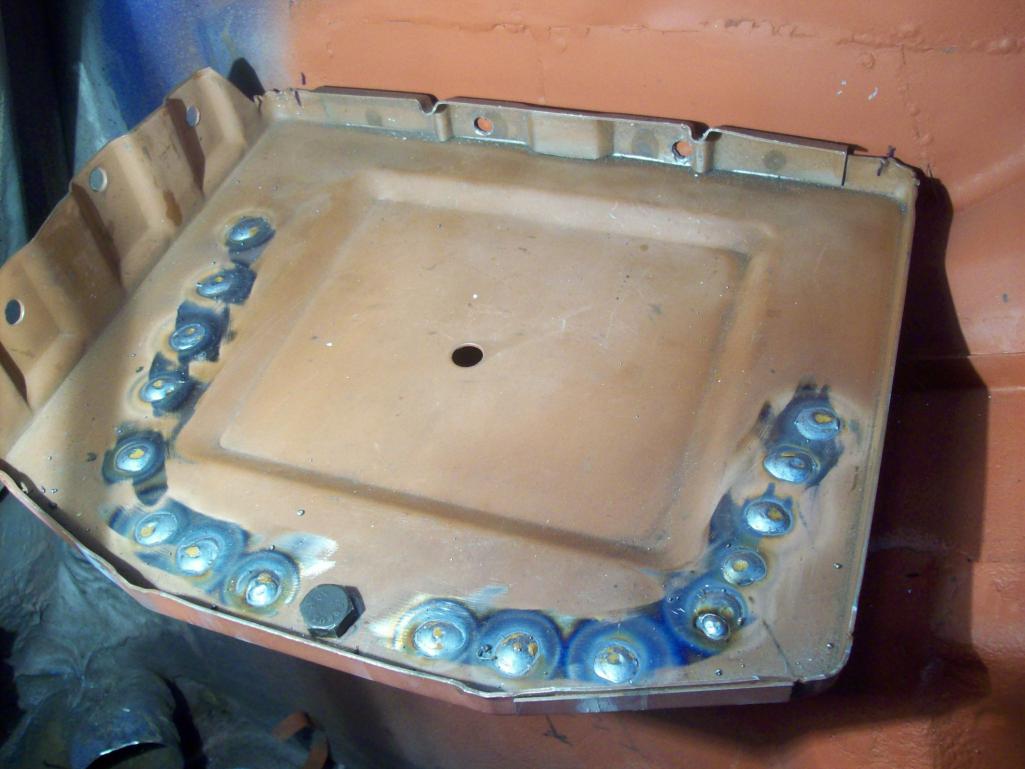
Thanks for the picture and suggestion...makes sense. I am thinking now that my battery support and tray were either modified (repaired) or replaced. The tray itself was poorly mig welded underneath to the support. And the same person repeated the poor welding when the tray was welded to the inner wheel house. I believe the factory spot welded the tray to the inner wheel house as well as put a small bead on both ends...which I will also do. I then called Peter at RD to ask if the "uphill" flange on my repaired battery support was pointing the wrong direction...in (to the left). He kindly sent me some pics of a factory longitudinal with the support, but without the battery tray. Voila! looking down into the support, the "uphill" flange did indeed point to the left. I then watched the RD battery support install on Youtube. Adam did spotweld the left and facing sides of the support, but as he had already assembled the tray to the support, he did not weld the uphill, flange as it was inside the support. He aslo did both spotweld the rear lip of the tray, and put a bead on both ends to connect it to the inner wheel house. My plan is to clecoe the tray to the support and line everything up. Once satisfied with the position on the long, I will spotweld the left and engine facing flanges. Then I will remove the clecoes and the tray, so I can weld a bead on the "uphill" flange inside the support. Finally I will spotweld the tray to the support, and the tray to the wheelhouse. Comments are welcome...criticism too! (IMG:style_emoticons/default/dry.gif) |
|
|
|
| Speedo |
Apr 20 2016, 08:32 PM
Post
#225
|
|
Senior Member Group: Members Posts: 591 Joined: 7-November 06 From: Boulder Member No.: 7,170 Region Association: Rocky Mountains |
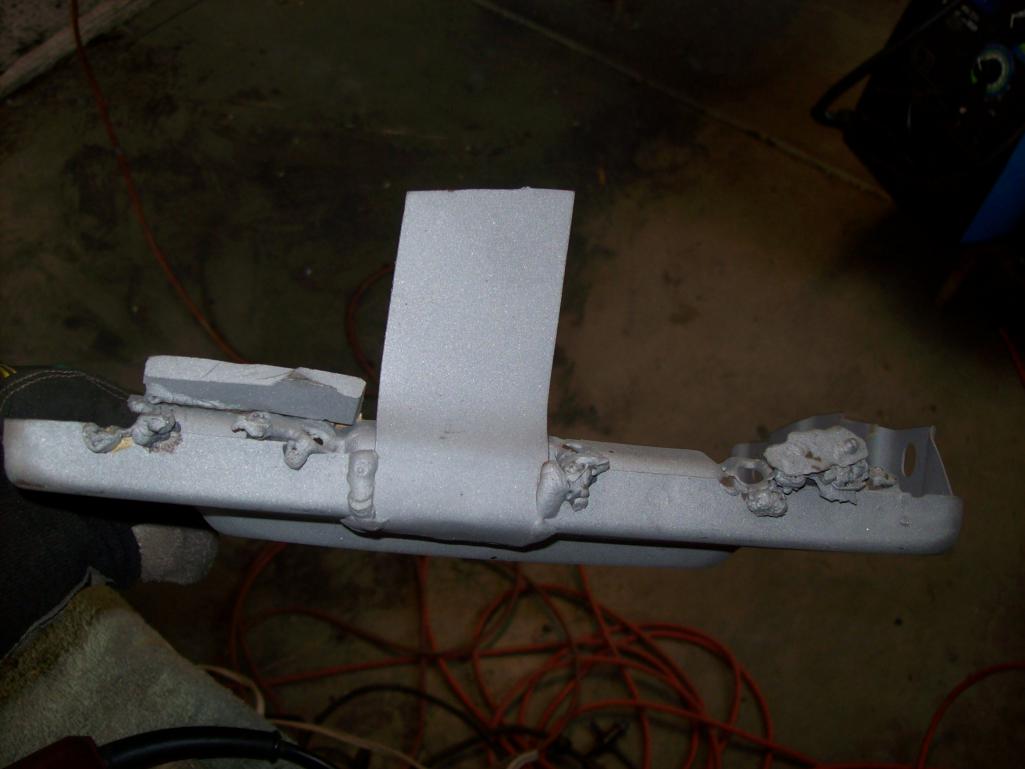
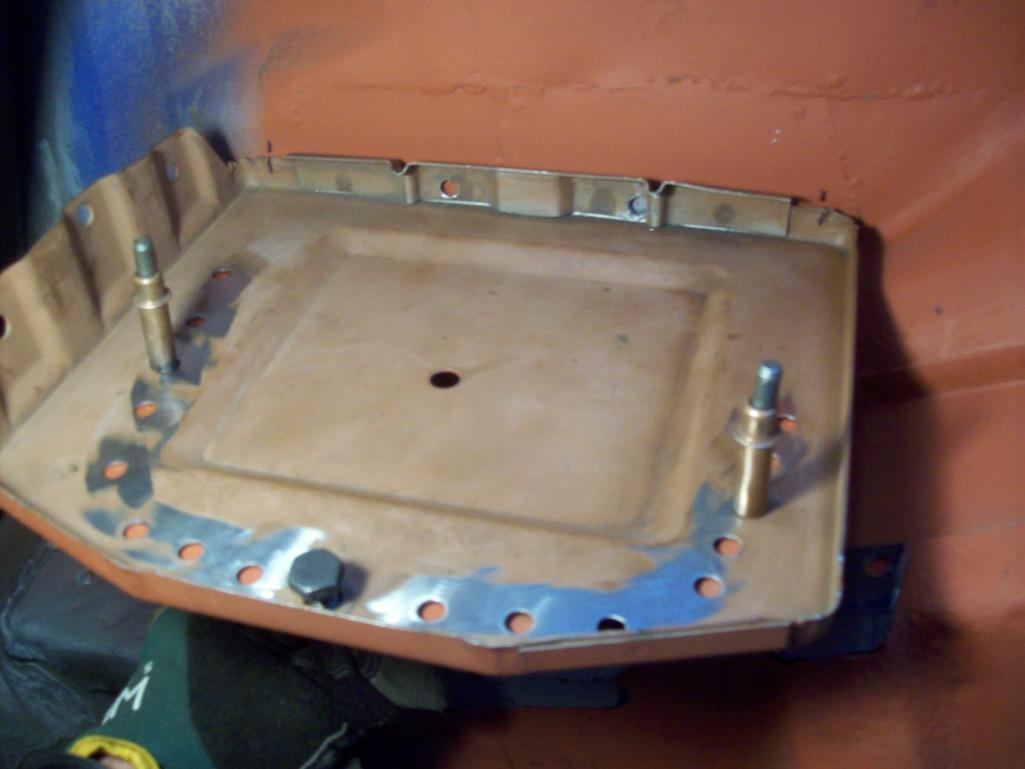
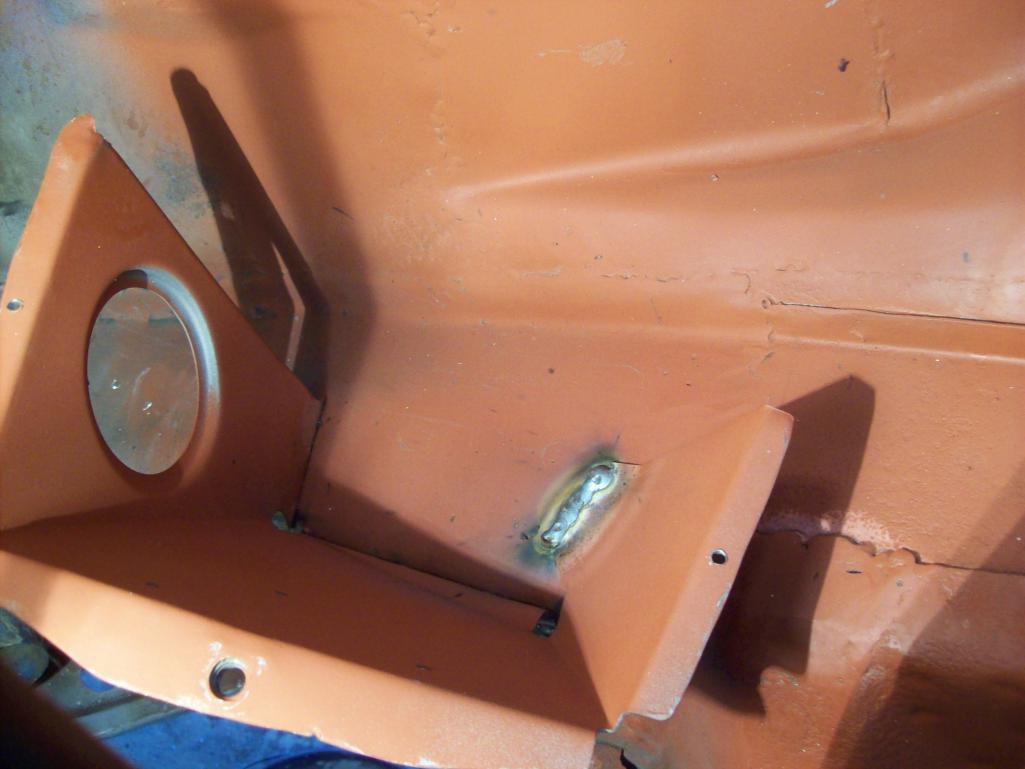
So the long repair is in place. I have posted some questions recently, with zero responses. I have come to realize that getting a response from this forum...involves beer, and I am ok with that...but you need to come pick up the beer. Not the case with other forums I associate with...but I am ok. So the damage to the hell hole is repaired and I am working on the battery support/tray and shelf. Is this the factory tie down for the battery? This is terrible.
 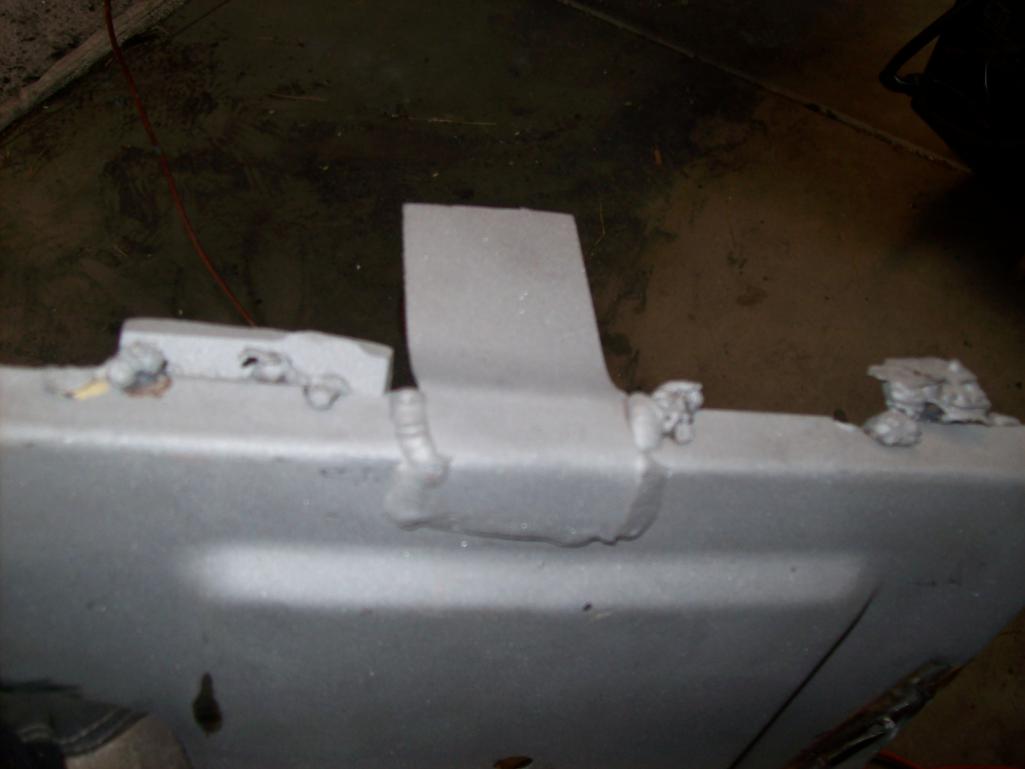  I am preparing the refurbished support to mate with the tray Ferg graciously handed me 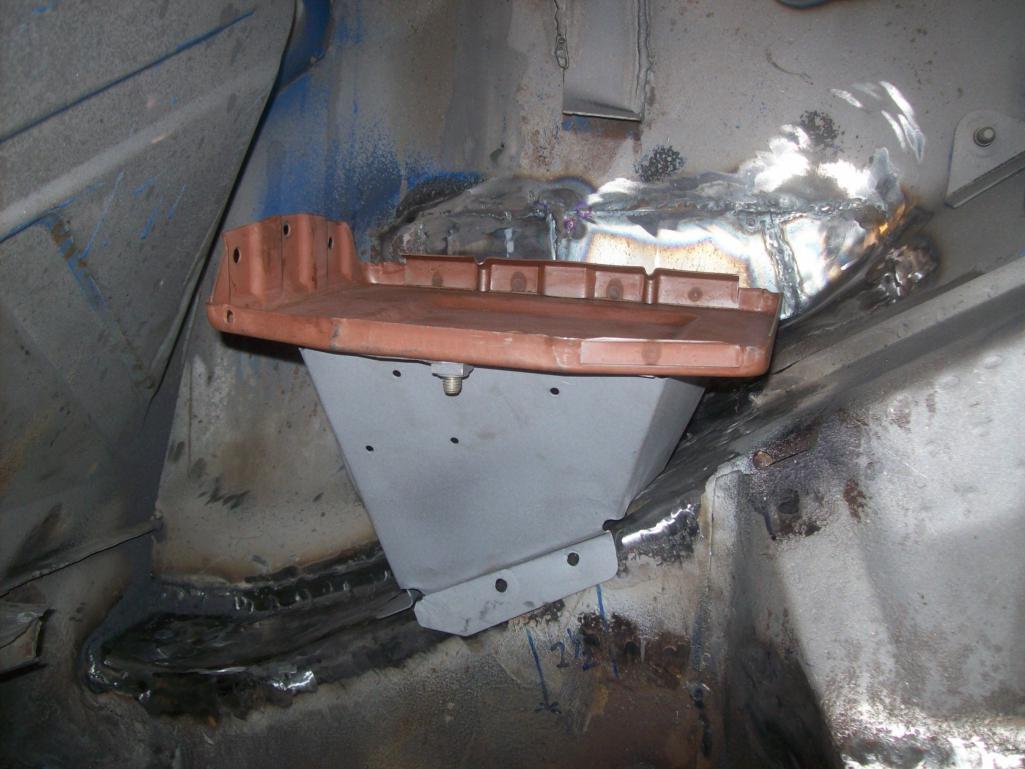 |
|
|
|
| Speedo |
Apr 20 2016, 08:34 PM
Post
#226
|
|
Senior Member Group: Members Posts: 591 Joined: 7-November 06 From: Boulder Member No.: 7,170 Region Association: Rocky Mountains |
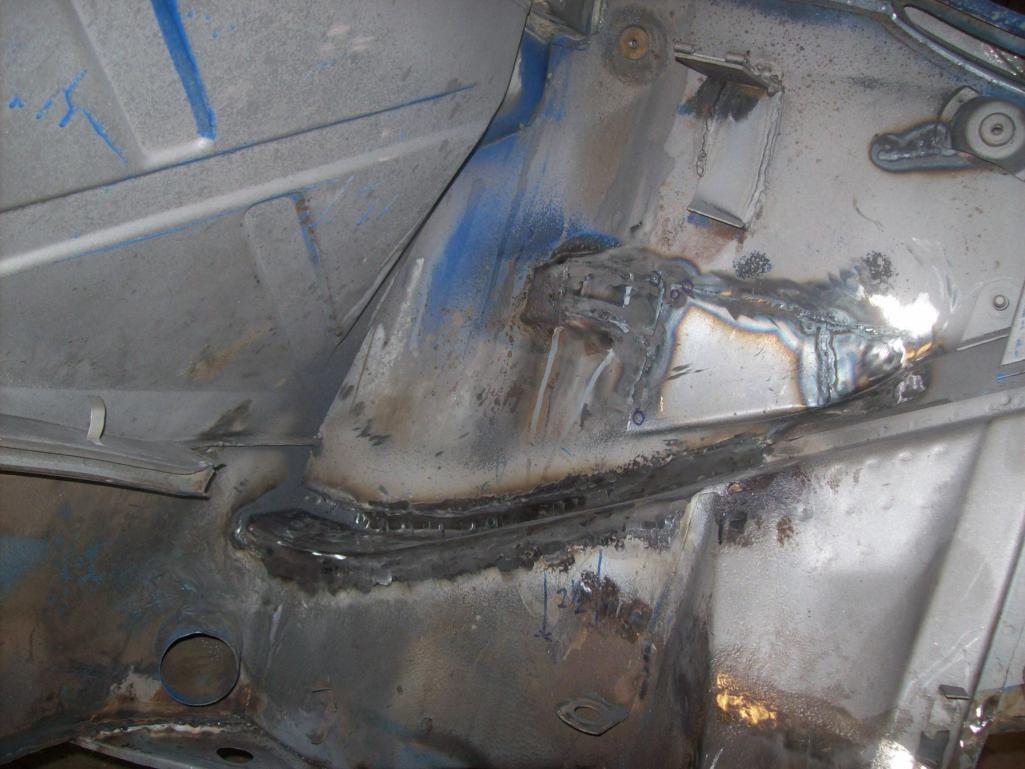
Here is the long repair
 |
|
|
|
| Luke M |
Apr 21 2016, 07:08 AM
Post
#227
|
|
Senior Member Group: Members Posts: 1,500 Joined: 8-February 05 From: WNY Member No.: 3,574 Region Association: North East States |
Hi Lars,
The repair looks good. That battery hold down is not factory. The battery is held in place by some tabs located on the upper part of the battery tray then you bolt down a clamp (P315) to the most inner (engine side) through the upper tray. That's all you get unless you go aftermarket. What other questions do you have as I may have the answer for you. (IMG:style_emoticons/default/beerchug.gif) Attached image(s) 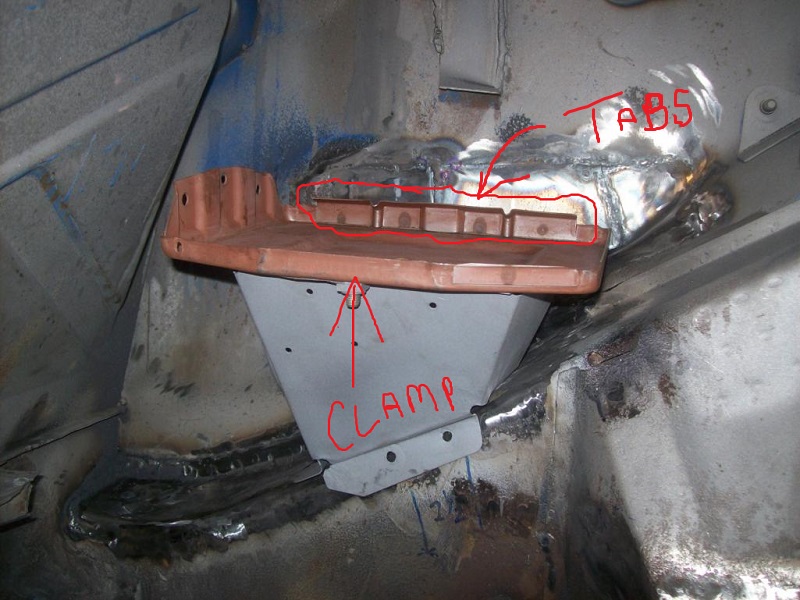 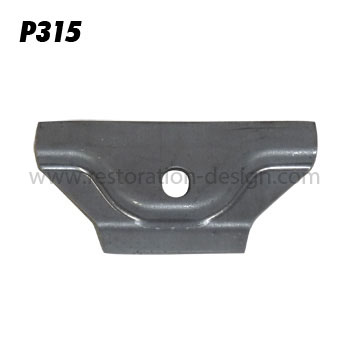
|
|
|
|
| Speedo |
Apr 21 2016, 10:20 AM
Post
#228
|
|
Senior Member Group: Members Posts: 591 Joined: 7-November 06 From: Boulder Member No.: 7,170 Region Association: Rocky Mountains |
Thanks Luke! I actually already have the P315! Funny, it looks like the piece of steel that holds the floorboards down in a 911. I ordered all my steel from RD a while back, and guess I had the premonition to order that part! So I need to remove the cruelly welded after market hold-down before I do anything else. What a disaster.
|
|
|
|
| Luke M |
Apr 21 2016, 11:44 AM
Post
#229
|
|
Senior Member Group: Members Posts: 1,500 Joined: 8-February 05 From: WNY Member No.: 3,574 Region Association: North East States |
QUOTE(Speedo @ Apr 21 2016, 09:20 AM)  Thanks Luke! I actually already have the P315! Funny, it looks like the piece of steel that holds the floorboards down in a 911. I ordered all my steel from RD a while back, and guess I had the premonition to order that part! So I need to remove the cruelly welded after market hold-down before I do anything else. What a disaster. Yup, cut this part off and grind smooth.. Attached image(s) 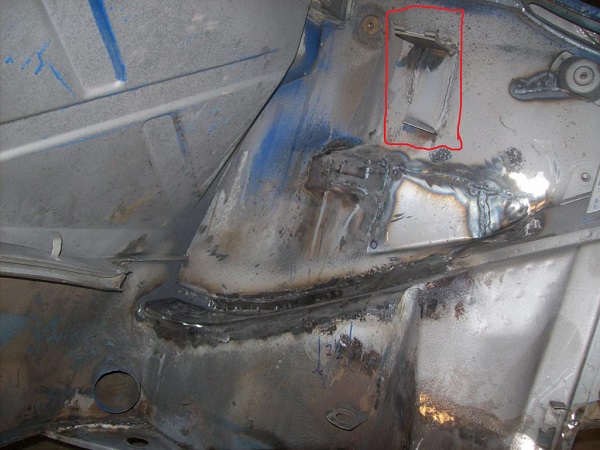
|
|
|
|
| Speedo |
Apr 22 2016, 06:57 PM
Post
#230
|
|
Senior Member Group: Members Posts: 591 Joined: 7-November 06 From: Boulder Member No.: 7,170 Region Association: Rocky Mountains |
Yessir...tomorrow. Will report back.
Need to guilt Mike and Brant (skinny man) into coming up to survey the damage. Luke...you should come up too! |
|
|
|
| Luke M |
Apr 23 2016, 06:30 AM
Post
#231
|
|
Senior Member Group: Members Posts: 1,500 Joined: 8-February 05 From: WNY Member No.: 3,574 Region Association: North East States |
QUOTE(Speedo @ Apr 22 2016, 05:57 PM) Yessir...tomorrow. Will report back. Need to guilt Mike and Brant (skinny man) into coming up to survey the damage. Luke...you should come up too! Don't tempt me... I could use a vaca. (IMG:style_emoticons/default/beer3.gif) I found some nos sheet metal at the Hershey swap meet but I'm still looking for the right long section to start on my car. I have a few inquiries out so see how that turns up. Thinking of going to the Stoddard meet also. Keep posting progress pics.. (IMG:style_emoticons/default/beerchug.gif) |
|
|
|
| Speedo |
Apr 30 2016, 01:52 PM
Post
#232
|
|
Senior Member Group: Members Posts: 591 Joined: 7-November 06 From: Boulder Member No.: 7,170 Region Association: Rocky Mountains |
So I see most of the trays have a small bead on both ends of the tray, welding the tray to the inner wheel house. This diagram shows the four spot welds across the back also. These spot welds are coincident with the spot welds that were used to weld the back support to the tray. Should I add four spot welds back there also or are the beads on the end sufficient?
QUOTE(914fahrer @ Apr 18 2016, 08:35 AM) Hello, I only replace my Tray and drill a few holes for welding into the Tray ,this works fine . Biggest problem is the rust protection after welding in this Area.I use a little brush first. Ralf |
|
|
|
| Speedo |
Apr 30 2016, 07:28 PM
Post
#233
|
|
Senior Member Group: Members Posts: 591 Joined: 7-November 06 From: Boulder Member No.: 7,170 Region Association: Rocky Mountains |
You guys must all be out playing golf. Too busy drinking beer and playing a game you will never get better at...instead of helping a "newbie" brother soldiering on in good faith. Oh well, at least the weather here is not conducive to golf...even if I were playing with an orange soccer ball, I would lose it.
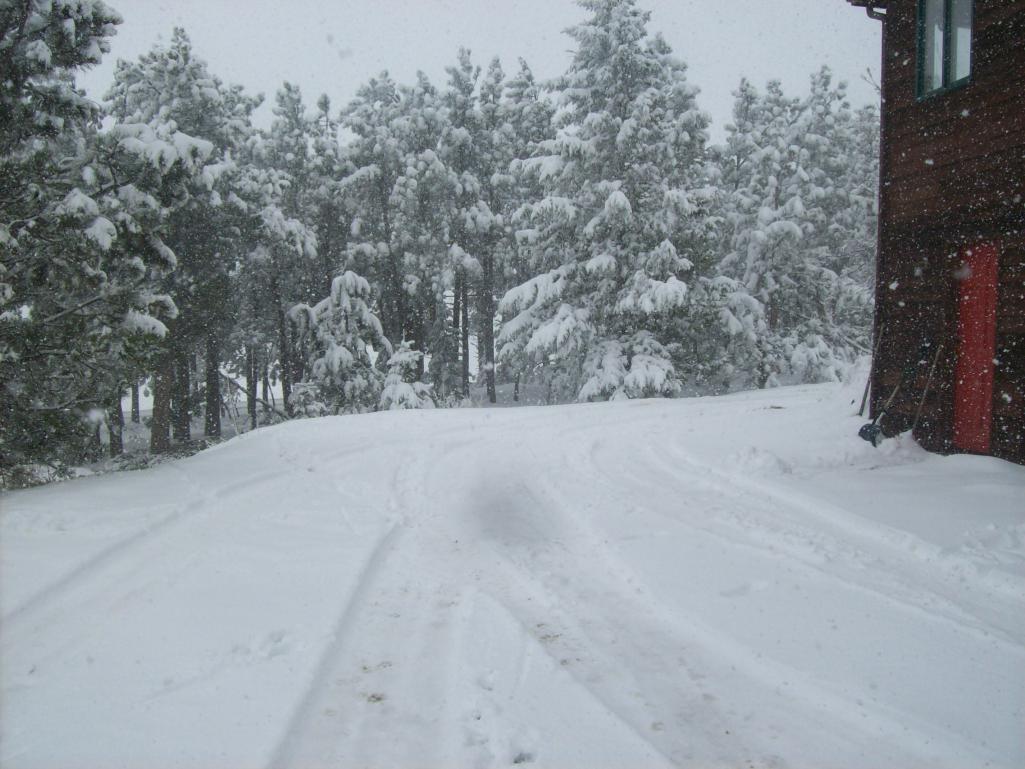 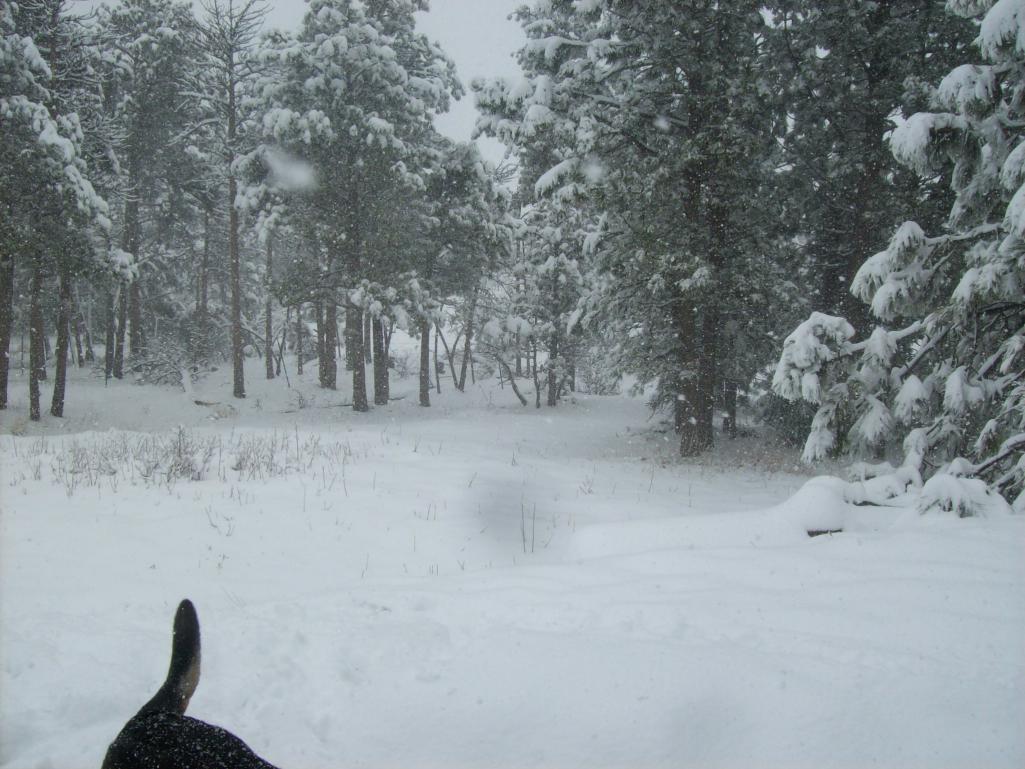 Thank god my dog has a tail...like in the second picture or I might have lost her. (IMG:style_emoticons/default/rolleyes.gif) So I will continue without help looking over my shoulder...fine. Oh yeah...BTW, tomorrow is May first and the snow is supposed to stop by Tuesday (IMG:style_emoticons/default/piratenanner.gif) |
|
|
|
| Speedo |
Apr 30 2016, 07:47 PM
Post
#234
|
|
Senior Member Group: Members Posts: 591 Joined: 7-November 06 From: Boulder Member No.: 7,170 Region Association: Rocky Mountains |
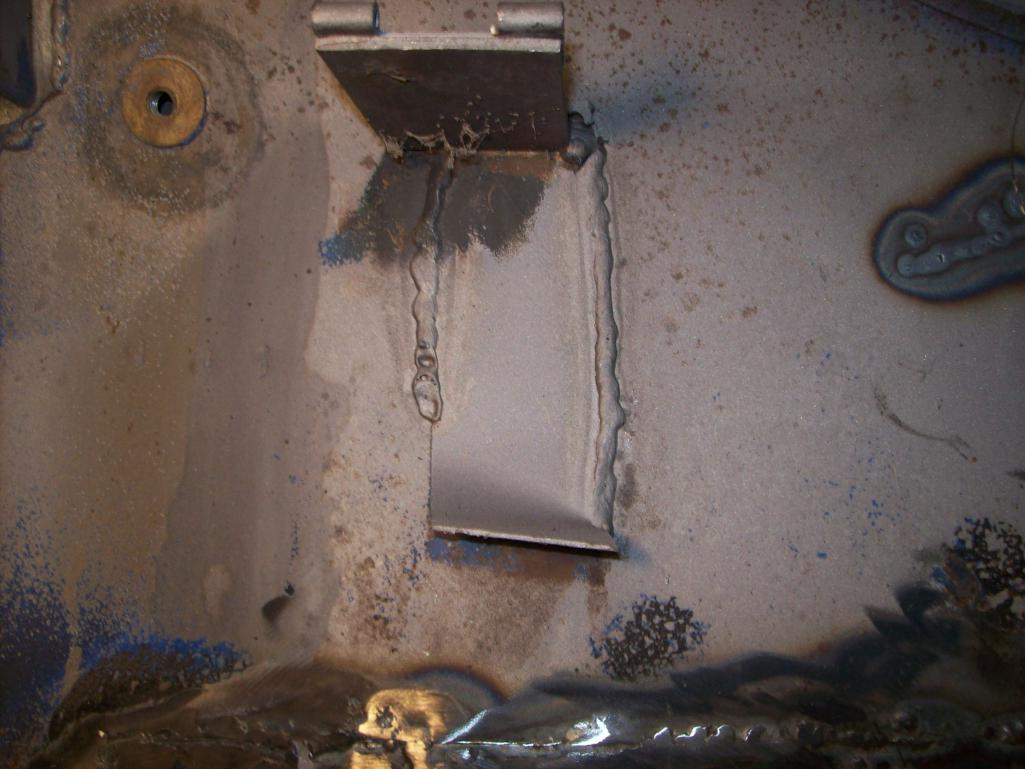
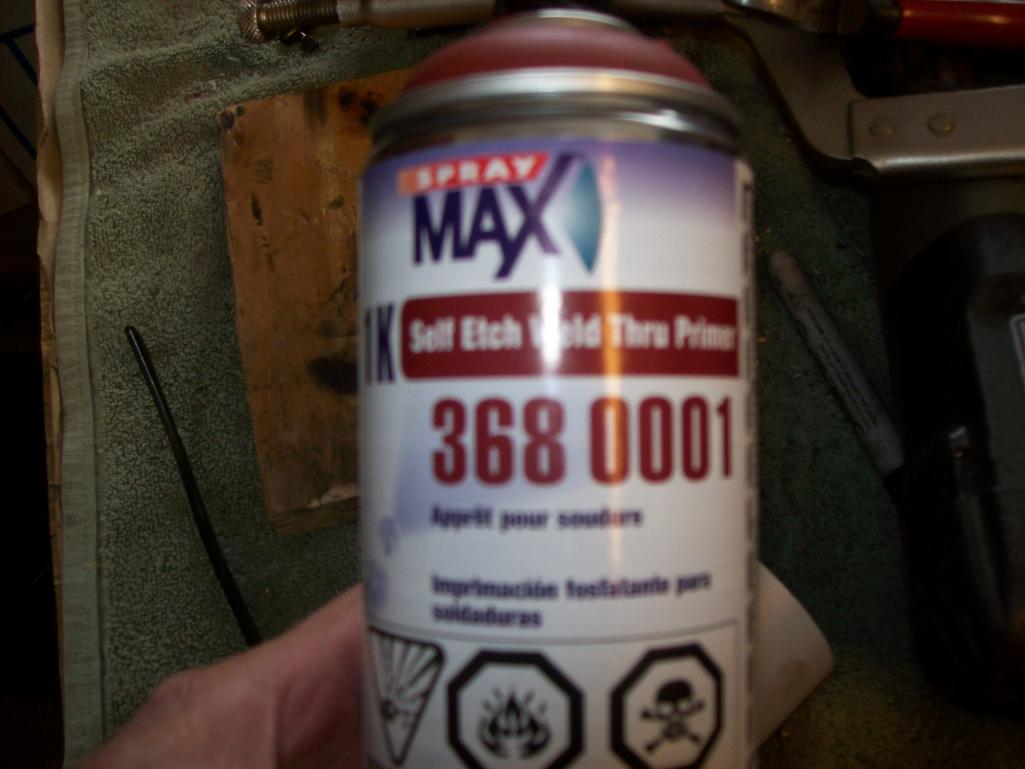
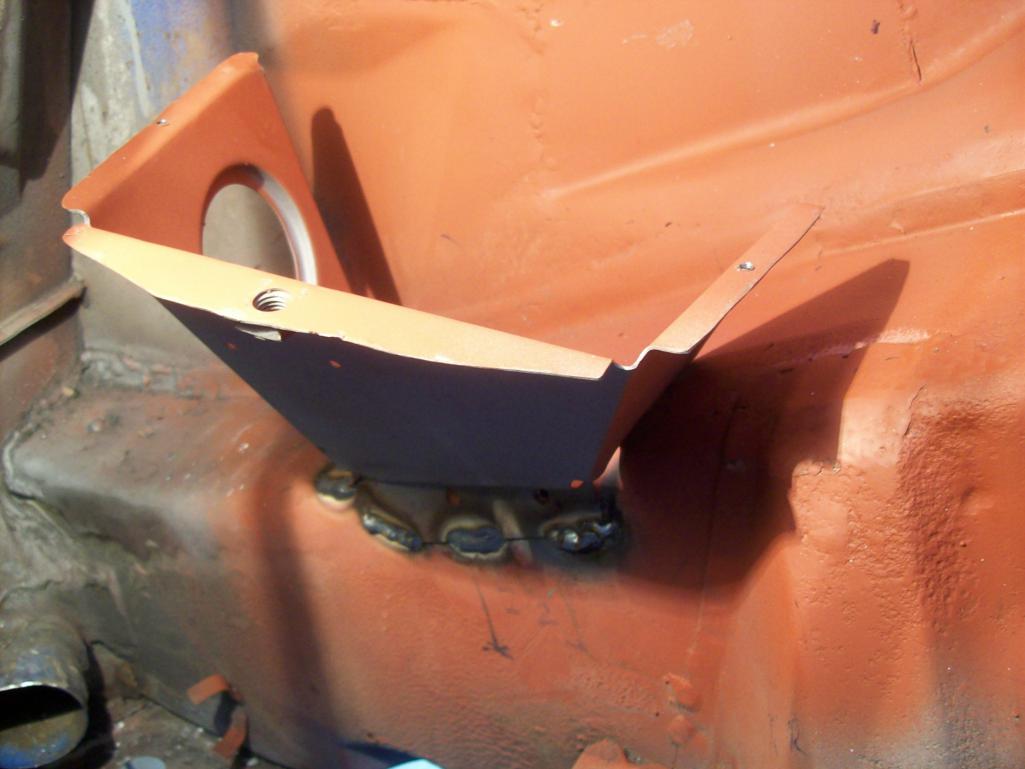
You guys have seen this a thousand time so I am going to skip the narrative. I am done with SEM weld through primer. Product sucks and I have wasted a lot of cans do to clogging. Sherwin Williams distributor is sorry, noting that they have received lots of complaints about the issue. Seems the paint congeals and screws up the nozzle. Anyway done with them. This is the new primer...and it works well.
 Small repair on the top of the suspension tower... Small repair on the top of the suspension tower... 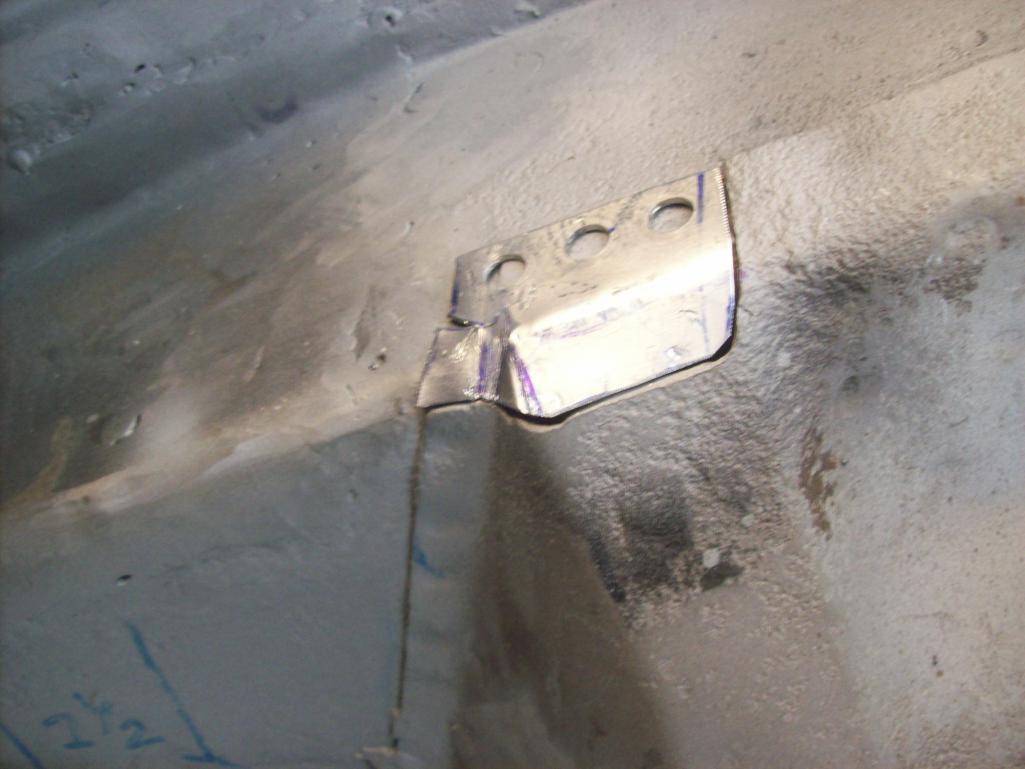 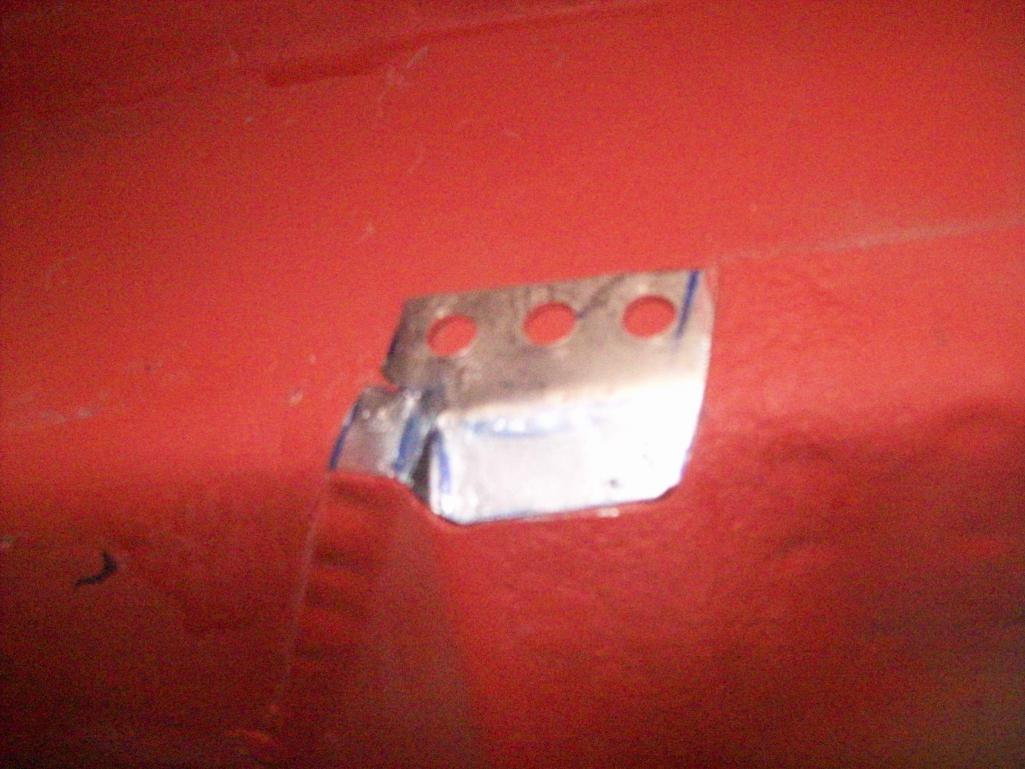 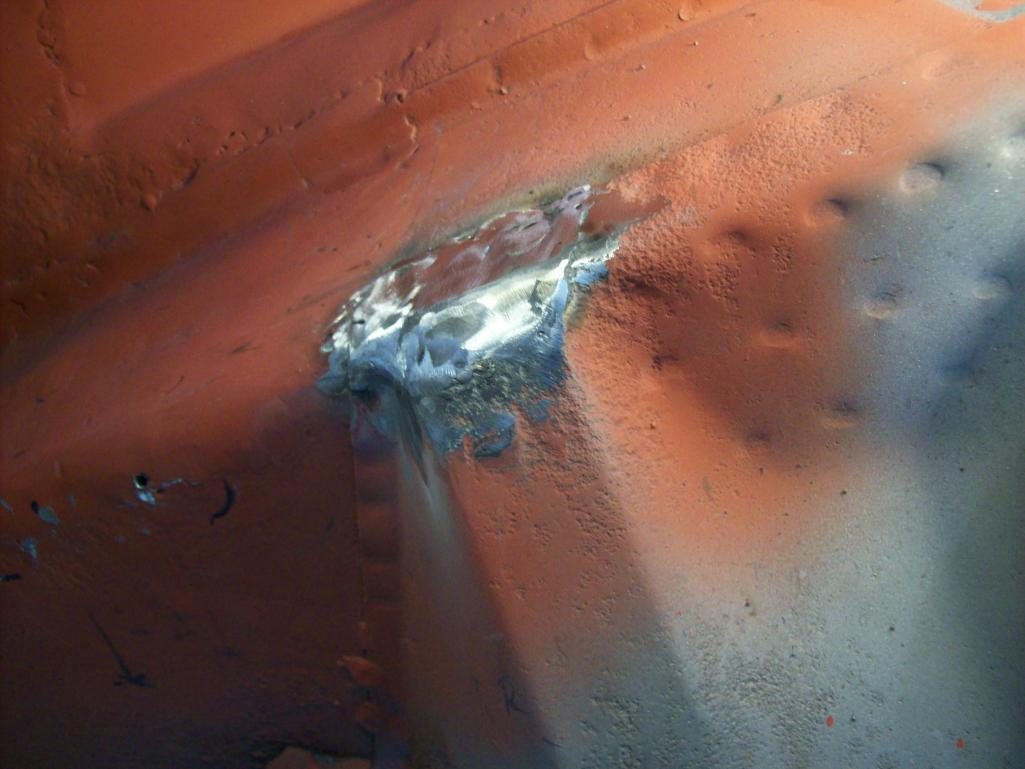 |
|
|
|
| Speedo |
Apr 30 2016, 07:51 PM
Post
#235
|
|
Senior Member Group: Members Posts: 591 Joined: 7-November 06 From: Boulder Member No.: 7,170 Region Association: Rocky Mountains |
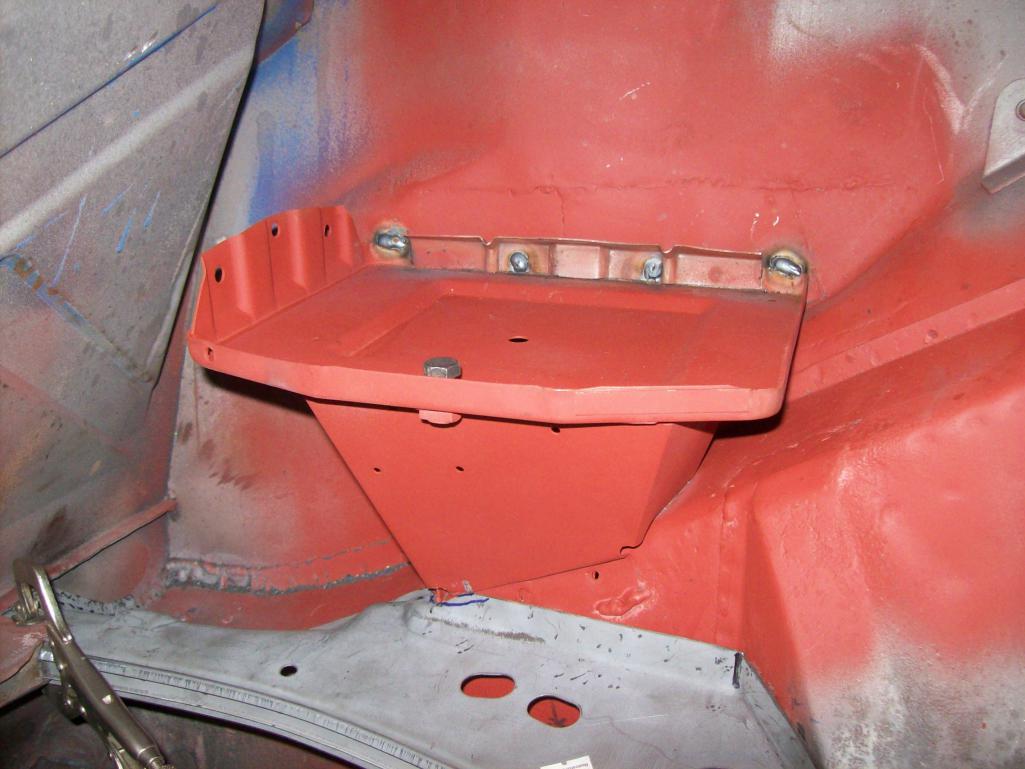
Support and battery tray.
    [attachmentid=553 [attachmentid=553235] Attached thumbnail(s) 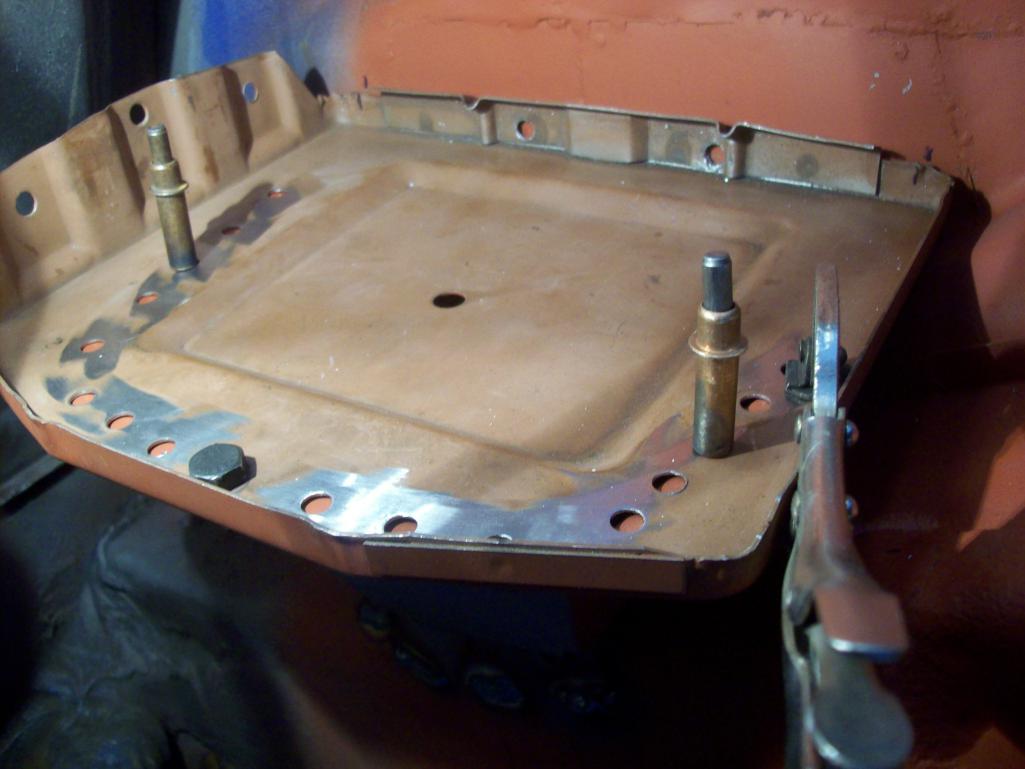
|
|
|
|
| Speedo |
Apr 30 2016, 07:57 PM
Post
#236
|
|
Senior Member Group: Members Posts: 591 Joined: 7-November 06 From: Boulder Member No.: 7,170 Region Association: Rocky Mountains |
The factory didn't weld in that uphill flange...but I decided to do it, we are tight except for the beads and spot to the inner wheelhouse. I need to roll the car on the rotisserie to get a good angle for those...tomorrow. Spot welded, flappered and primed.
  I want to get this engine compartment/hell hole done so that I can close up the quarter panel and finish the sail and lockpost repair. I am tired of this side of the car. |
|
|
|
| Luke M |
May 1 2016, 05:59 AM
Post
#237
|
|
Senior Member Group: Members Posts: 1,500 Joined: 8-February 05 From: WNY Member No.: 3,574 Region Association: North East States |
Hi Lars,
The battery tray install looks good. The engine shelf install is pretty straight forward. If you have time here's a install video from RD. https://www.youtube.com/watch?v=uZGf9yaFHEk BTW, you can keep all that snow. We had a mild winter here which was nice and long overdue. Take care, Luke |
|
|
|
| Cairo94507 |
May 1 2016, 06:51 AM
Post
#238
|
|
Michael Group: Members Posts: 10,611 Joined: 1-November 08 From: Auburn, CA Member No.: 9,712 Region Association: Northern California |
Nice job. (IMG:style_emoticons/default/smilie_pokal.gif) That is the only way to fix these cars IMHO; do it once, do it right, and never have to worry about it again.
|
|
|
|
| Speedo |
May 1 2016, 09:44 AM
Post
#239
|
|
Senior Member Group: Members Posts: 591 Joined: 7-November 06 From: Boulder Member No.: 7,170 Region Association: Rocky Mountains |
Right side engine shelf. Install looks basic. Thanks for the video link. When I removed my crusty shelf and battery box, I seem to remember the shelf had to come off first...meaning it was installed after the battery box support. But we saw how hacked up the whole battery box structure was. Does it matter which gets installed first or second? The support or the shelf. I had just planned to grind down the left corner bead weld on the support and lay the shelf over it.
|
|
|
|
| Speedo |
May 1 2016, 07:52 PM
Post
#240
|
|
Senior Member Group: Members Posts: 591 Joined: 7-November 06 From: Boulder Member No.: 7,170 Region Association: Rocky Mountains |
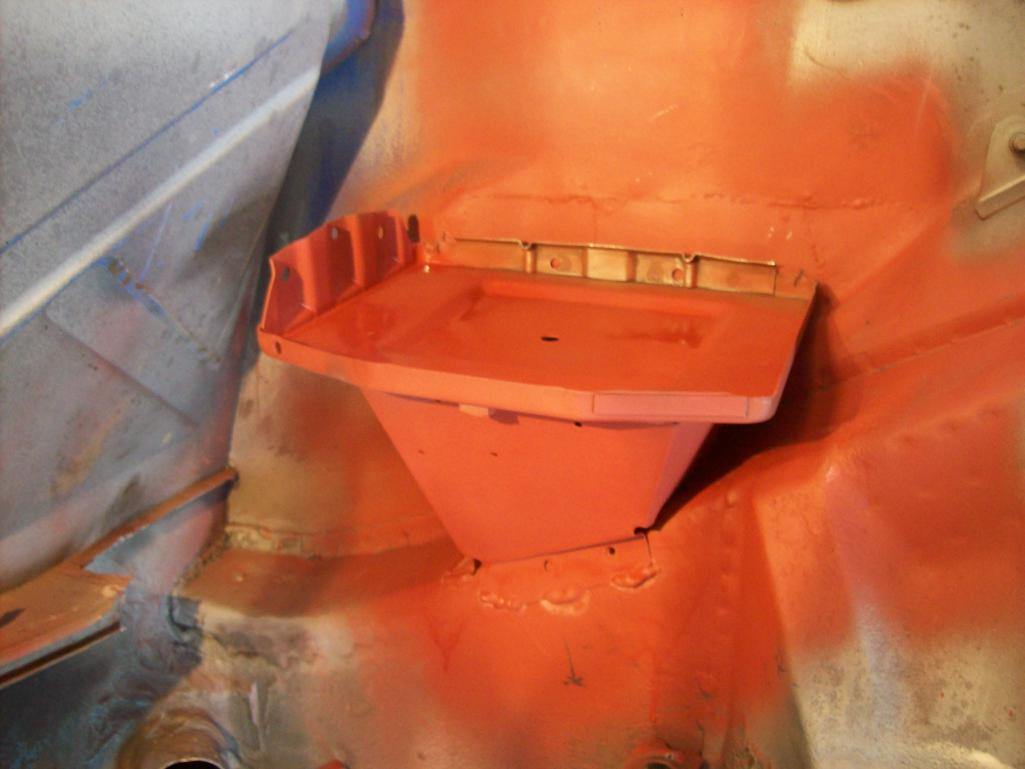
Welded to back of the tray...two end beads and two interior spots.
  Time to fit the shelf. Like the video says...needs to be massaged a bit while being fitted. This look to be positioned ok? 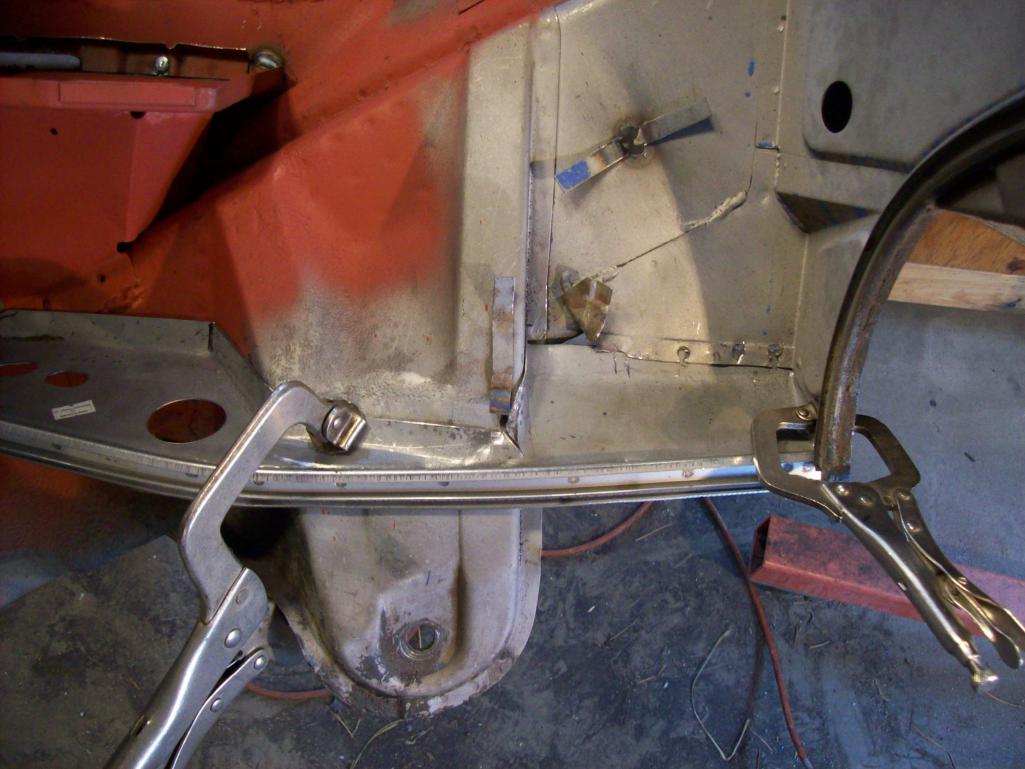 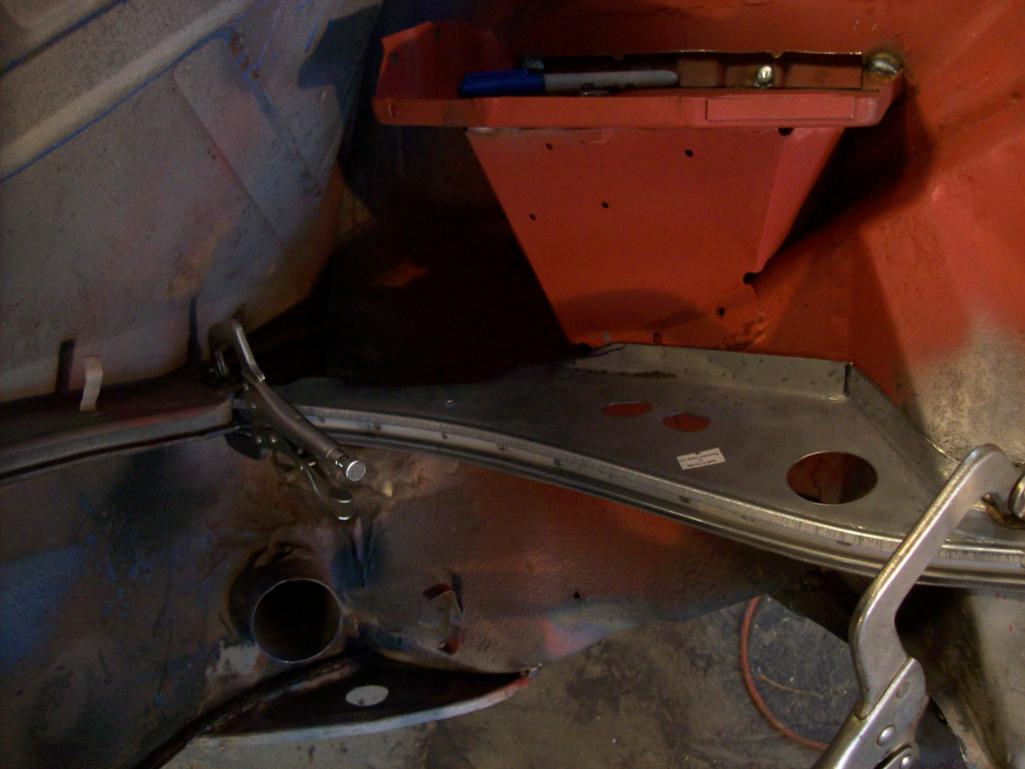 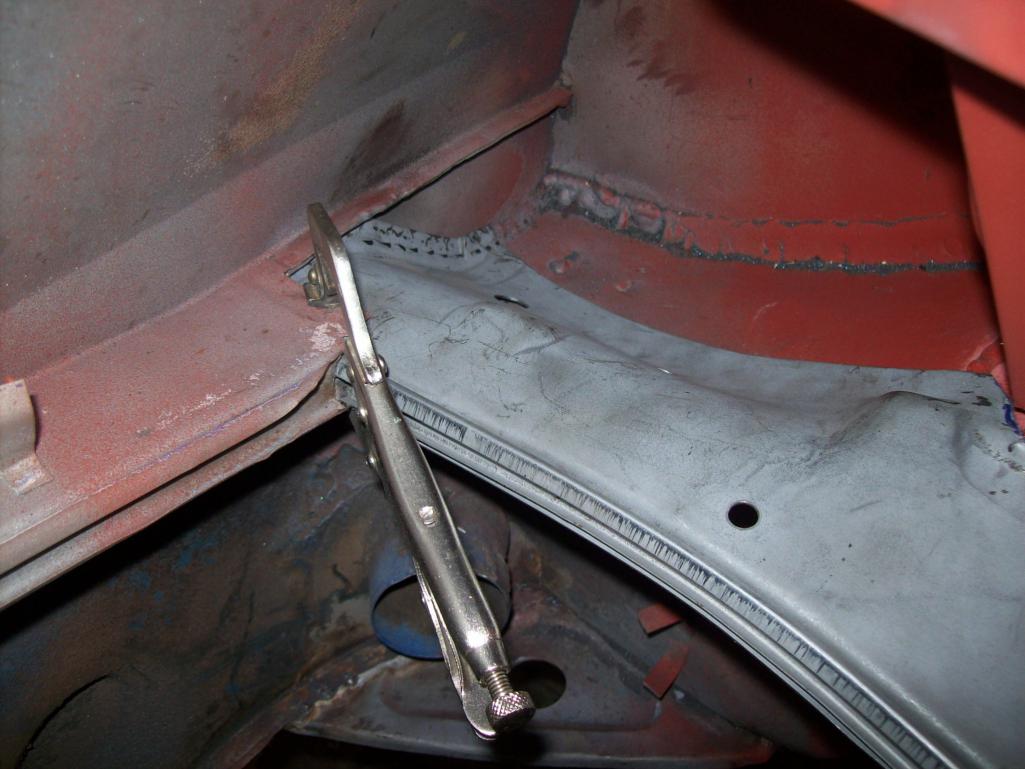 |
|
|
|
|
1 User(s) are reading this topic (1 Guests and 0 Anonymous Users)
0 Members:

|
Lo-Fi Version | Time is now: 13th April 2026 - 03:42 AM |
Invision Power Board
v9.1.4 © 2026 IPS, Inc.