|
|
|
Porsche, and the Porsche crest are registered trademarks of Dr. Ing. h.c. F. Porsche AG.
This site is not affiliated with Porsche in any way. Its only purpose is to provide an online forum for car enthusiasts. All other trademarks are property of their respective owners. |
|
|

  |

| bbrock |
 Jan 21 2019, 09:21 AM Jan 21 2019, 09:21 AM
Post
#301
|
|
914 Guru  Group: Members Posts: 5,269 Joined: 17-February 17 From: Montana Member No.: 20,845 Region Association: Rocky Mountains |
That is cool. Really nice work! I'd be getting excited too. (IMG:style_emoticons/default/beerchug.gif)
|
   |

 
|
| Speedo |
Mar 4 2019, 12:01 AM
Post
#302
|
|
Senior Member Group: Members Posts: 591 Joined: 7-November 06 From: Boulder Member No.: 7,170 Region Association: Rocky Mountains |
Working on my pre-paint checklist...
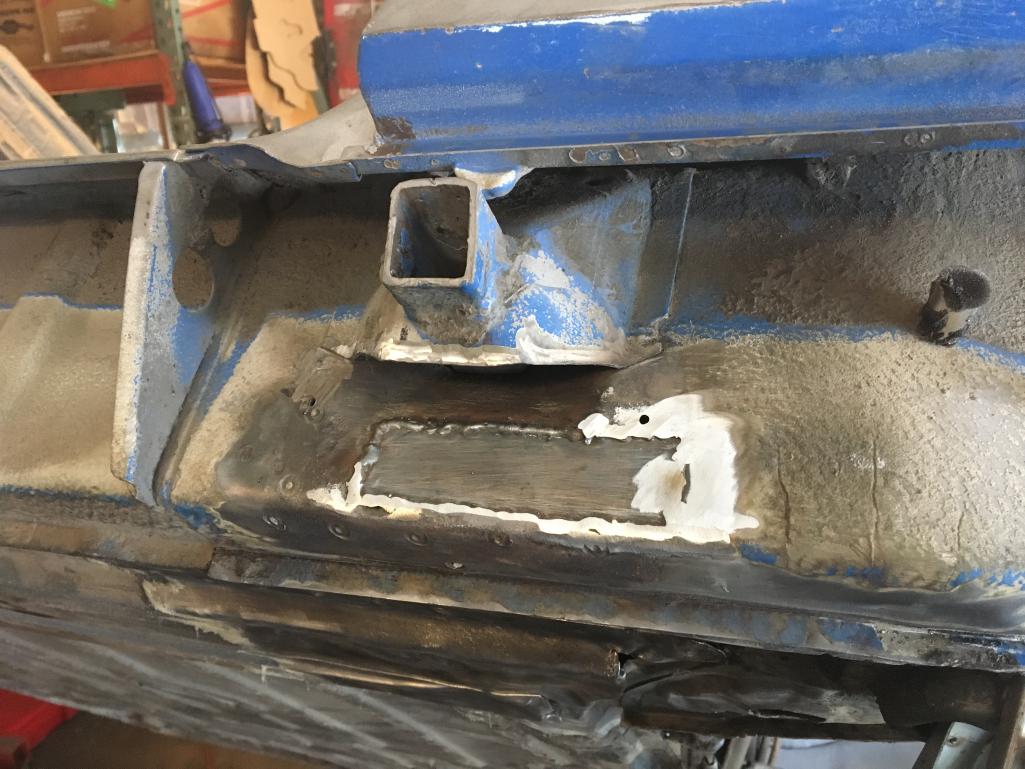
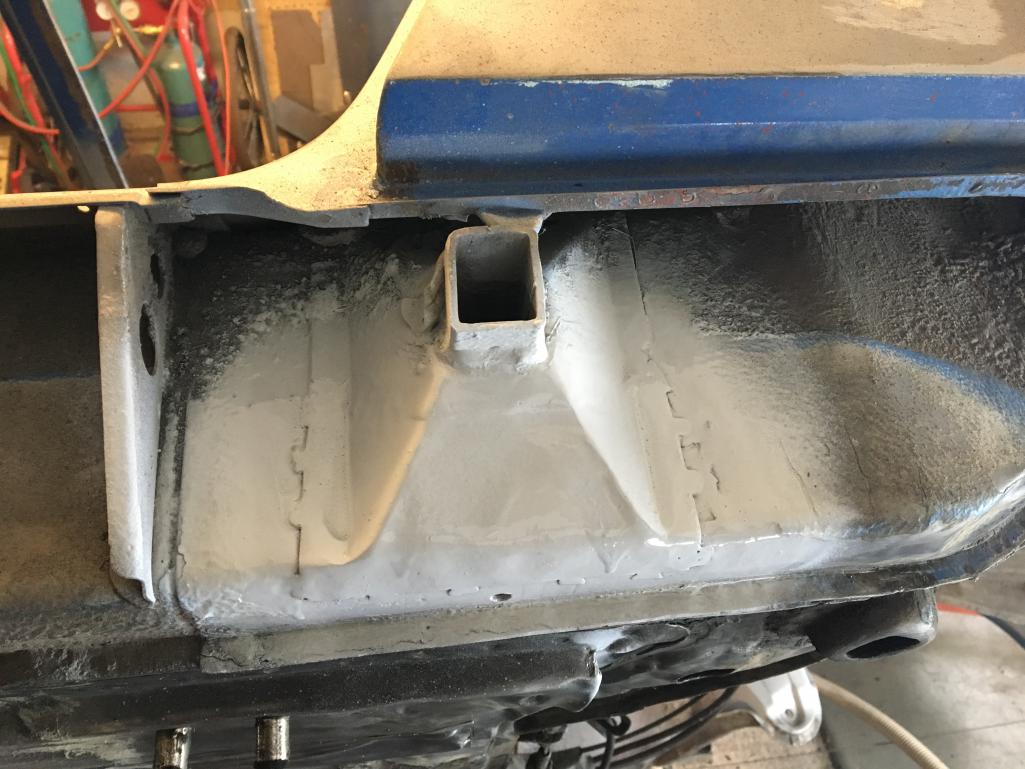
There was this nagging pinhole in the drivers jackpoint. I was sure it was just a flaw in the steel. No rust anywhere to be seen, so probably just a fluke. It was bugging me...and no sense working on massaging the body and ignoring this little bugger. I drilled a larger hole through the pinhole, and unfortunately the drill bit went right through with little resistance. Now looking inside, I see a lot of debris. Some of it is blast media (of course) but some of it is flaky and rust colored. I drill a couple more hole as I am in denial, and it looks worse. Dammit! I cut the lower half of the outer reinforcement off exposing the inside of the jackpoint. More pinholes, so I need to head into the rocker. Fortunately the weak steel is limited to an area 1.5 x 4.5 inches which I remove. I needed to get in here to vacuum media anyway. Once cleaned out, I was able to etch prime.  |
|
|
|
| Speedo |
Mar 4 2019, 12:03 AM
Post
#303
|
|
Senior Member Group: Members Posts: 591 Joined: 7-November 06 From: Boulder Member No.: 7,170 Region Association: Rocky Mountains |
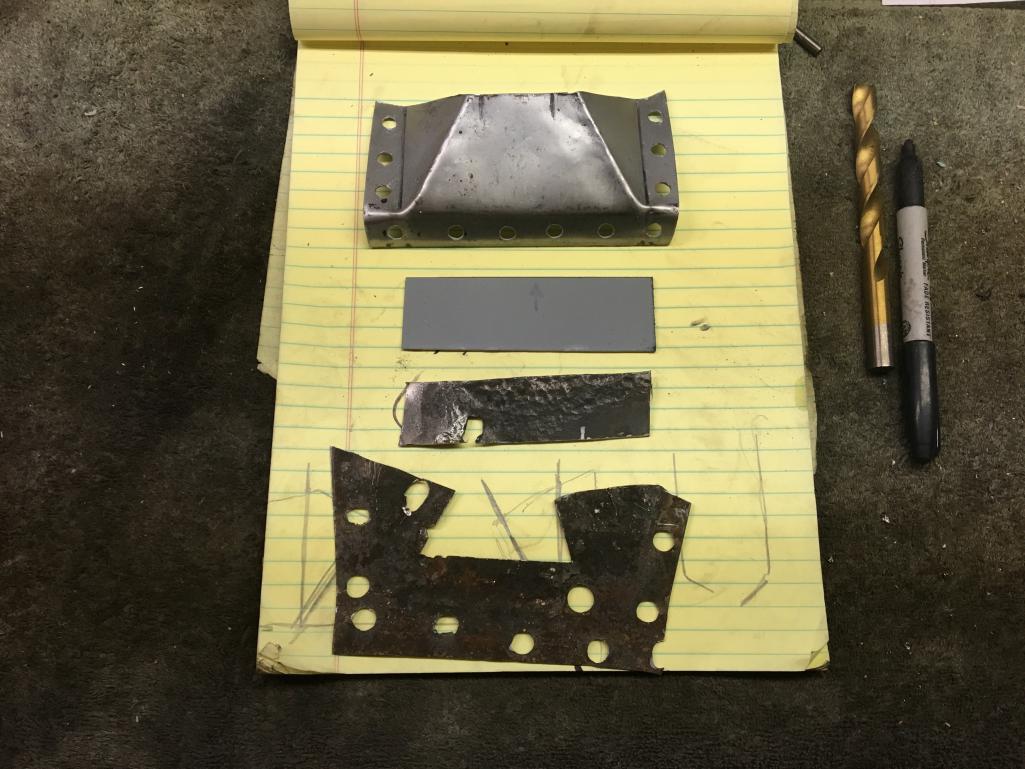
Created the inner rocker patch, and used the old lower reinforcement to fabricate the replacement.
 |
|
|
|
| Speedo |
Mar 4 2019, 12:05 AM
Post
#304
|
|
Senior Member Group: Members Posts: 591 Joined: 7-November 06 From: Boulder Member No.: 7,170 Region Association: Rocky Mountains |
Patch tacked and rough finished...
 |
|
|
|
| Speedo |
Mar 4 2019, 12:07 AM
Post
#305
|
|
Senior Member Group: Members Posts: 591 Joined: 7-November 06 From: Boulder Member No.: 7,170 Region Association: Rocky Mountains |
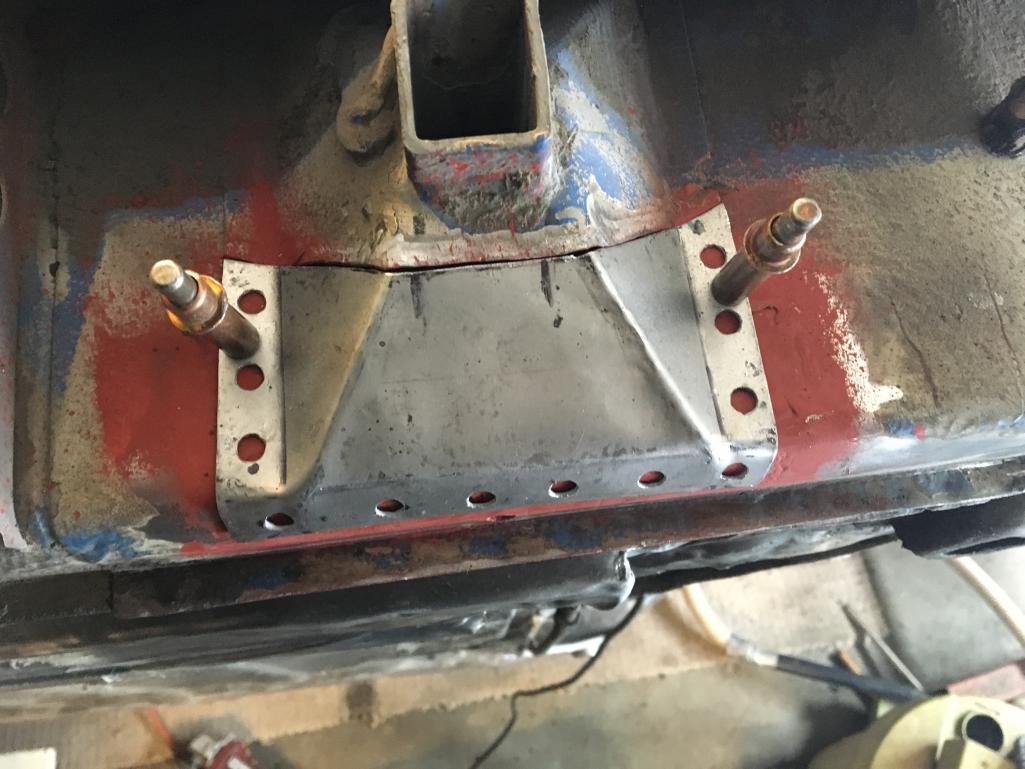
Fitting lower jackpoint replacement
 |
|
|
|
| Speedo |
Mar 4 2019, 12:08 AM
Post
#306
|
|
Senior Member Group: Members Posts: 591 Joined: 7-November 06 From: Boulder Member No.: 7,170 Region Association: Rocky Mountains |
Tacked in place
 |
|
|
|
| Speedo |
Mar 4 2019, 12:09 AM
Post
#307
|
|
Senior Member Group: Members Posts: 591 Joined: 7-November 06 From: Boulder Member No.: 7,170 Region Association: Rocky Mountains |
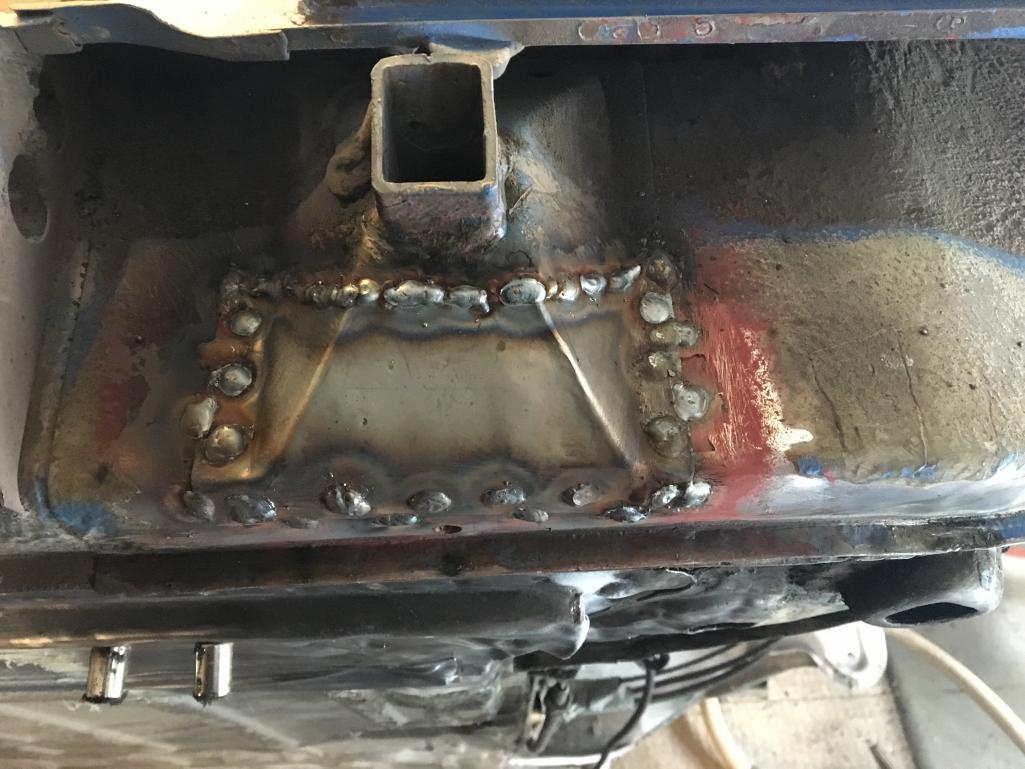
And finished. Bye bye pinhole...
 |
|
|
|
| Speedo |
Mar 4 2019, 12:23 AM
Post
#308
|
|
Senior Member Group: Members Posts: 591 Joined: 7-November 06 From: Boulder Member No.: 7,170 Region Association: Rocky Mountains |
Checked that box. I keep saying that I am done welding...but it ain't so just yet. There will be more issues of "hmmm, didn't notice that before" and in good conscience I can't ignore these little issues. I have another couple weekends of massaging my panel butt welds before the painter comes to take this off my hands. He wants to run the chassis back through the sandblaster one more time...mostly to remove the grunge from underneath the rear of the chassis where the first sandblaster missed/ignored. I'm ok with that...beats me heating and scraping.
I guess in the scheme of things, at least I don't have to worry about what color to paint it, as we are just going to keep it the original Adriatic blue. I am going to need guidance from the board with respect to paint ...where and what color. Plan is to prime, seam seal, and paint. Then under coat and paint black what is supposed to be black...fender wells, underside of pan etc. I'm ready for the paint wizards to weigh in. In addition, I'll need help with the inside of the cockpit...what gets body color and what gets black. If you have experience and an opinion...or just an opinion, feel free to advise. Some of my suspension is already powdercoated, but I have yet to do the front struts and rear shocks (Konis) and the rear control arms. Konis will be orange, and I am guessing the control arm is black? |
|
|
|
| djway |
Mar 4 2019, 01:00 AM
Post
#309
|
|
Senior Member Group: Members Posts: 787 Joined: 16-October 15 From: Riverside Member No.: 19,266 Region Association: Southern California |
On my dash the black was found around any area that could possibly catch light from a separation in the materials that covered that spot.
Behind the dash metal where the defrost vents pop up below the glass that area was also black on the firewall. The dash metal itself was a light coating of body color then painted the black in the areas mentioned above. The rest of the car is body color. |
|
|
|
| bbrock |
Mar 4 2019, 09:00 AM
Post
#310
|
|
914 Guru Group: Members Posts: 5,269 Joined: 17-February 17 From: Montana Member No.: 20,845 Region Association: Rocky Mountains |
QUOTE(Speedo @ Mar 3 2019, 11:23 PM)  In addition, I'll need help with the inside of the cockpit...what gets body color and what gets black. If you have experience and an opinion...or just an opinion, feel free to advise. I kind of went overboard with putting the flat black in the cockpit back the way the factory had it. You can see what I did starting here: http://www.914world.com/bbs2/index.php?s=&...t&p=2668463 Yes, control arms were semi-gloss black. The few, the rare thread in the O&H forum has lots of good reference shots I use a lot for figuring out correct finishes. |
|
|
|
| bbrock |
Mar 4 2019, 09:04 AM
Post
#311
|
|
914 Guru Group: Members Posts: 5,269 Joined: 17-February 17 From: Montana Member No.: 20,845 Region Association: Rocky Mountains |
QUOTE(Speedo @ Mar 3 2019, 11:23 PM) I am going to need guidance from the board with respect to paint ...where and what color. Plan is to prime, seam seal, and paint. Then under coat and paint black what is supposed to be black...fender wells, underside of pan etc. I'm ready for the paint wizards to weigh in. Also, there are also a few threads on undercarriage finishes, but for a six, I like the pics of Bob's ( @burton73 ) #41: http://www.914world.com/bbs2/index.php?s=&...t&p=2506810. There are more pics in his build thread. |
|
|
|
| Ferg |
Mar 5 2019, 11:21 AM
Post
#312
|
|
914 Guru Group: Members Posts: 5,948 Joined: 8-January 03 From: Boulder CO Member No.: 116 Region Association: None |
Looking good Lars, who is painting it? Is it going up north to Crusty?
|
|
|
|
| brant |
Mar 5 2019, 11:33 AM
Post
#313
|
|
914 Wizard Group: Members Posts: 12,179 Joined: 30-December 02 From: Colorado Member No.: 47 Region Association: Rocky Mountains |
Lars,
there is very little black on a stock car the interior floor boards are body color the wheel wells are body color everything is body color.... the original -6 did have a black coating (undercoating really... not paint) on the top of the front struts where they mount inside of the front trunk... otherwise everything on the chassis is body color the removable components... swing arms, suspension, etc... those are all black |
 |
|
| mepstein |
Mar 5 2019, 11:41 AM
Post
#314
|
|
914-6 GT in waiting Group: Members Posts: 20,625 Joined: 19-September 09 From: Landenberg, PA/Wilmington, DE Member No.: 10,825 Region Association: MidAtlantic Region |
QUOTE(brant @ Mar 5 2019, 12:33 PM) Lars, there is very little black on a stock car the interior floor boards are body color the wheel wells are body color everything is body color.... the original -6 did have a black coating (undercoating really... not paint) on the top of the front struts where they mount inside of the front trunk... otherwise everything on the chassis is body color the removable components... swing arms, suspension, etc... those are all black Little bit of black on the side of the engine lid under the screens but that gets added after it’s painted. |
|
|
|
| Speedo |
Mar 5 2019, 12:04 PM
Post
#315
|
|
Senior Member Group: Members Posts: 591 Joined: 7-November 06 From: Boulder Member No.: 7,170 Region Association: Rocky Mountains |
Thanks everyone...So I am ok instructing my painter to prime after blasting (again), allow me to seam-seal over primer, then undercoating? And for the undercoating (Wurth), obviously the floor and inner wheel wells, how about inside the front and rear fenders? And what about longitudinals and under the rear trunk? Then once undercoated where required...body color everywhere?
Ferg, my painter is a guy that has painted my 74 911 each time someone has used it for "parking target practice"...also known as "hang up and use your mirrors". He is local, experienced and has a 1.8 914 we will use as a reference. He also has a trailer and a rotisserie that will allow him to get the chassis to Blastec (in Denver) and back to his shop. My rotisserie will not accommodate that transfer. He will fit it in between jobs and I will give him 60 days leeway. That extra floor space in the shop for that two months will allow me to get "other cars" in queue. |
|
|
|
| Speedo |
Apr 13 2019, 05:13 PM
Post
#316
|
|
Senior Member Group: Members Posts: 591 Joined: 7-November 06 From: Boulder Member No.: 7,170 Region Association: Rocky Mountains |
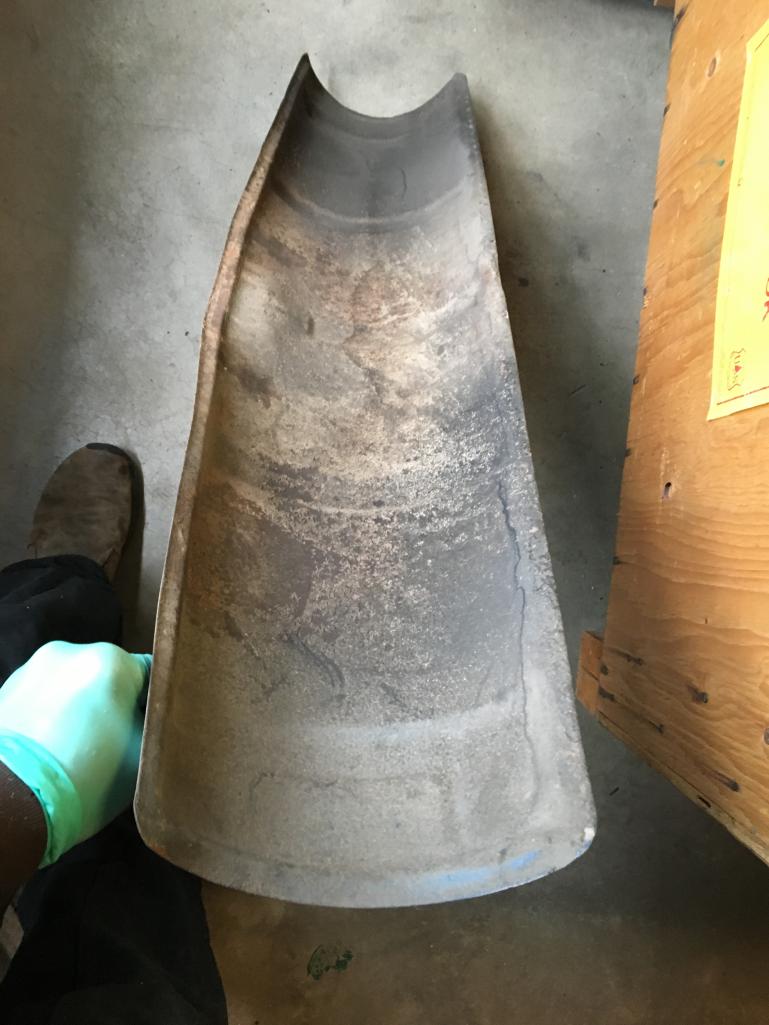
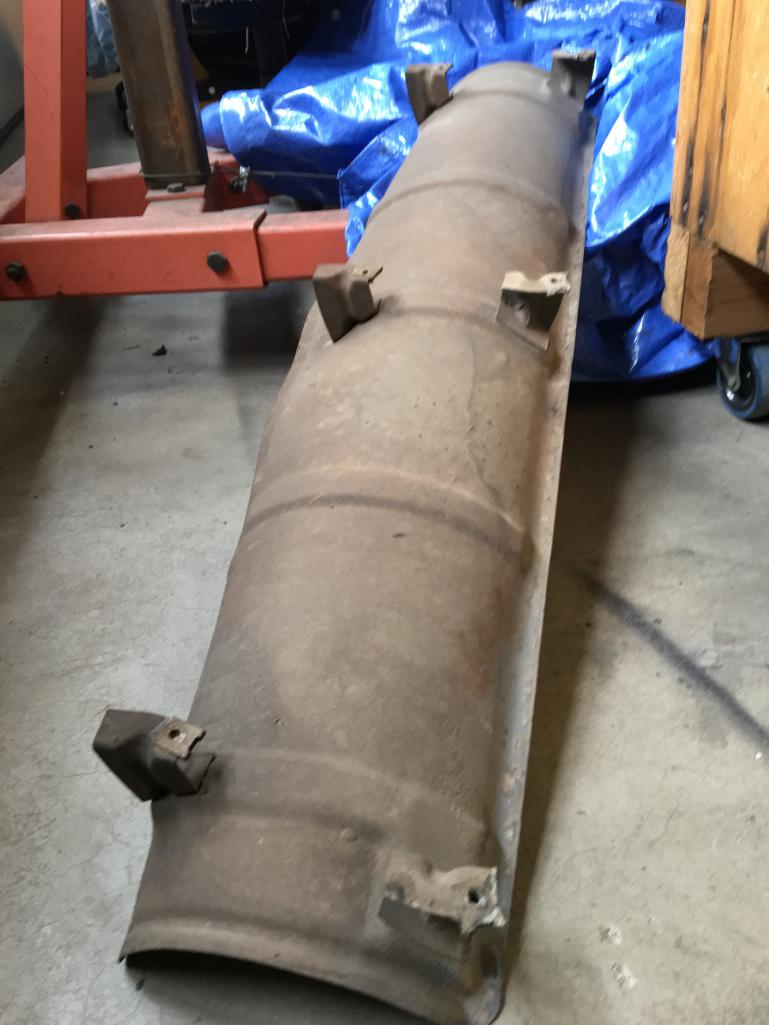
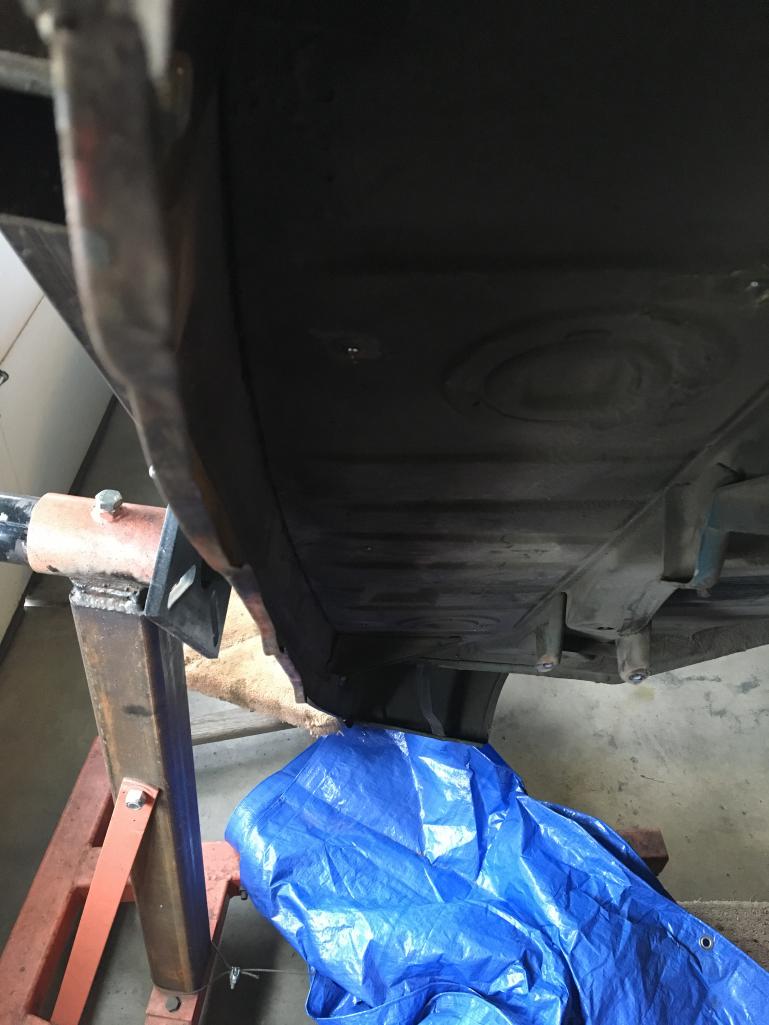
Tidying up the chassis for a hand-off. The heat shield for the muffler was impeding
my ability to straighten the rear valence behind the bumper. Not sure why it was wavy back there but it bugged me and I wanted to straighten it. Found phillips head screws under seam sealer in trunk that look to be supporting the shield? Really? Dug out the seam sealer and they came right out. Is the shield not supposed to be straight? Let me know before I attempt to straighten it. (IMG:style_emoticons/default/biggrin.gif) Trying to get one more painter to look at it before I commit...Apex in Denver has mixed reviews. Anybody here have anything to add? PM me if you don't want to publicly give them a thumbs up or down. 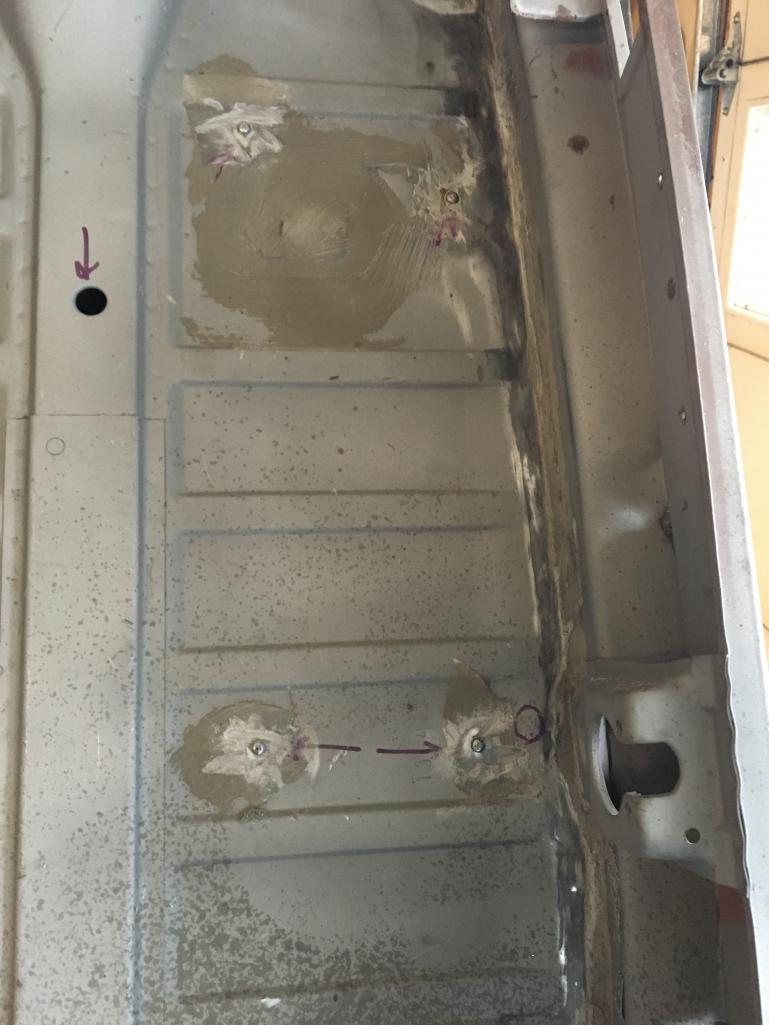 |
|
|
|
| Speedo |
Apr 13 2019, 05:15 PM
Post
#317
|
|
Senior Member Group: Members Posts: 591 Joined: 7-November 06 From: Boulder Member No.: 7,170 Region Association: Rocky Mountains |
And more...
  |
|
|
|
| Speedo |
Apr 13 2019, 05:16 PM
Post
#318
|
|
Senior Member Group: Members Posts: 591 Joined: 7-November 06 From: Boulder Member No.: 7,170 Region Association: Rocky Mountains |
What I needed access for to straighten...
 |
|
|
|
| sixnotfour |
Apr 14 2019, 08:49 AM
Post
#319
|
|
914 Wizard Group: Members Posts: 11,199 Joined: 12-September 04 Member No.: 2,744 Region Association: NineFourteenerVille |
QUOTE Trying to get one more painter to look at it before I commit...Apex in Denver has mixed reviews. Anybody here have anything to add? PM me if you don't want to publicly give them a thumbs up or down. http://www.themetalsurgeon.com/ has done a few 914s |
|
|
|
| Speedo |
May 5 2019, 10:43 AM
Post
#320
|
|
Senior Member Group: Members Posts: 591 Joined: 7-November 06 From: Boulder Member No.: 7,170 Region Association: Rocky Mountains |
Ok...closer to paint. Hand-off may be as soon as next week. Mean time sandblasting parts and rebuilding the pedal cluster. Today, starting to sort parts that have not been powder coated or plated. It would be incredibly convenient if there was a thread which listed parts and their correct finish (IMG:style_emoticons/default/dry.gif)
As I couldn't find one...I guess I have to start from scratch. Feel free to add to the list and/or comment. If I list a finish that isn't correct, please set me straight. Here goes... gas tank-black oil tank-black front struts-grey trailing arms-black steel front crossmember-black A arms-black hood and trunk latches-white zinc nuts bolts-yellow zinc brake dust shields-yellow zinc sway bars/drops-black sway body brackets-yellow zinc sway lever arms-yellow zinc rear mesh-black engine lid hinges-body color engine lid springs-black headlight assembly-who knows? strut tower tops-black strut tower hardware/yellow zinc dash face-satin black rocker decos-satin black You guys take it from here.... |
|
|
|
|
3 User(s) are reading this topic (3 Guests and 0 Anonymous Users)
0 Members:

|
Lo-Fi Version | Time is now: 13th April 2026 - 07:13 AM |
Invision Power Board
v9.1.4 © 2026 IPS, Inc.