|
|
|
Porsche, and the Porsche crest are registered trademarks of Dr. Ing. h.c. F. Porsche AG.
This site is not affiliated with Porsche in any way. Its only purpose is to provide an online forum for car enthusiasts. All other trademarks are property of their respective owners. |
|
|

  |

| Speedo |
 May 9 2021, 07:27 PM May 9 2021, 07:27 PM
Post
#541
|
|
Senior Member  Group: Members Posts: 559 Joined: 7-November 06 From: Boulder Member No.: 7,170 Region Association: Rocky Mountains |
All done...
 |
   |

 
|
| Speedo |
May 9 2021, 07:29 PM
Post
#542
|
|
Senior Member Group: Members Posts: 559 Joined: 7-November 06 From: Boulder Member No.: 7,170 Region Association: Rocky Mountains |
Competed...
 |
|
|
|
| Speedo |
May 9 2021, 07:30 PM
Post
#543
|
|
Senior Member Group: Members Posts: 559 Joined: 7-November 06 From: Boulder Member No.: 7,170 Region Association: Rocky Mountains |
 |
|
|
|
| Root_Werks |
May 11 2021, 08:53 AM
Post
#544
|
|
Village Idiot Group: Members Posts: 8,841 Joined: 25-May 04 From: About 5NM from Canada Member No.: 2,105 Region Association: Pacific Northwest |
More great progress! Meanwhile, I'm taking apart a 914-6 I didn't want to. Sigh, at least you are going in the right direction!
|
 |
|
| Speedo |
May 16 2021, 06:40 PM
Post
#545
|
|
Senior Member Group: Members Posts: 559 Joined: 7-November 06 From: Boulder Member No.: 7,170 Region Association: Rocky Mountains |
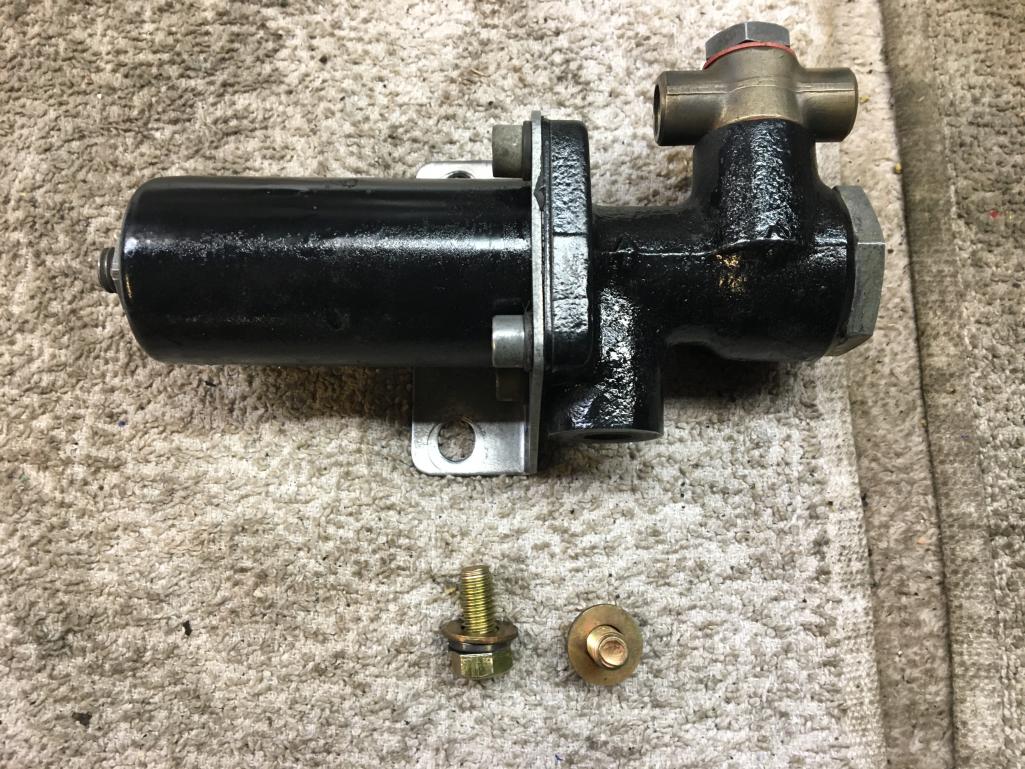
Brake lines, axles and suspension. Cleaned up (scotchbrite/paint-thinner/clearcoat) my brake lines and refurbed my pressure regulator. I'm pretty pissed off at the guy (me) that bent the crap outta the brake lines when he dis-assembled the car. Re-fitting the lines has been a challenge as none of them wanted to fit. Felt like I was trying to install Toyota brake lines on a 914. Pressure regulator rehab...
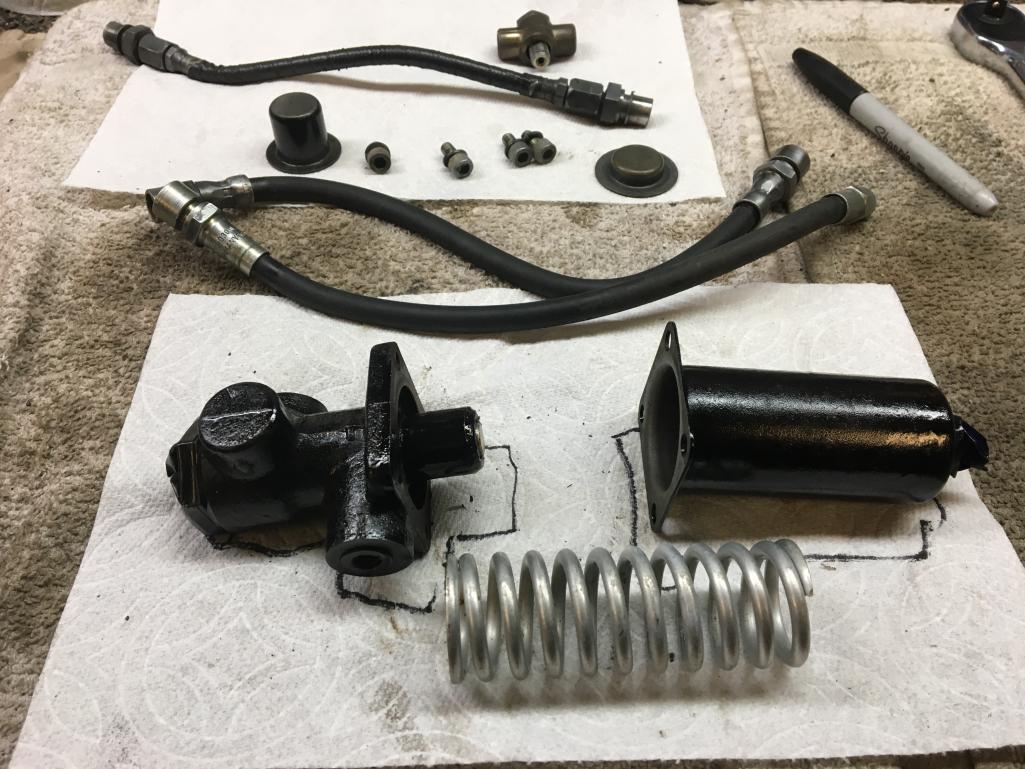 |
|
|
|
| Speedo |
May 16 2021, 06:42 PM
Post
#546
|
|
Senior Member Group: Members Posts: 559 Joined: 7-November 06 From: Boulder Member No.: 7,170 Region Association: Rocky Mountains |
Completed...
 |
|
|
|
| Speedo |
May 16 2021, 06:51 PM
Post
#547
|
|
Senior Member Group: Members Posts: 559 Joined: 7-November 06 From: Boulder Member No.: 7,170 Region Association: Rocky Mountains |
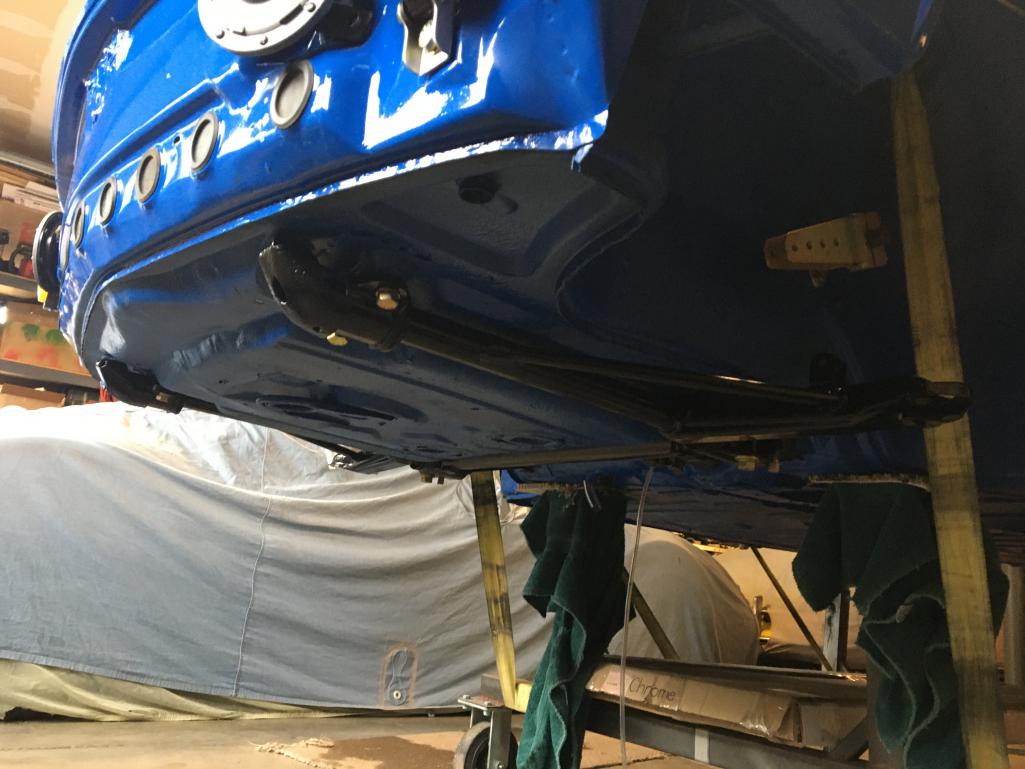
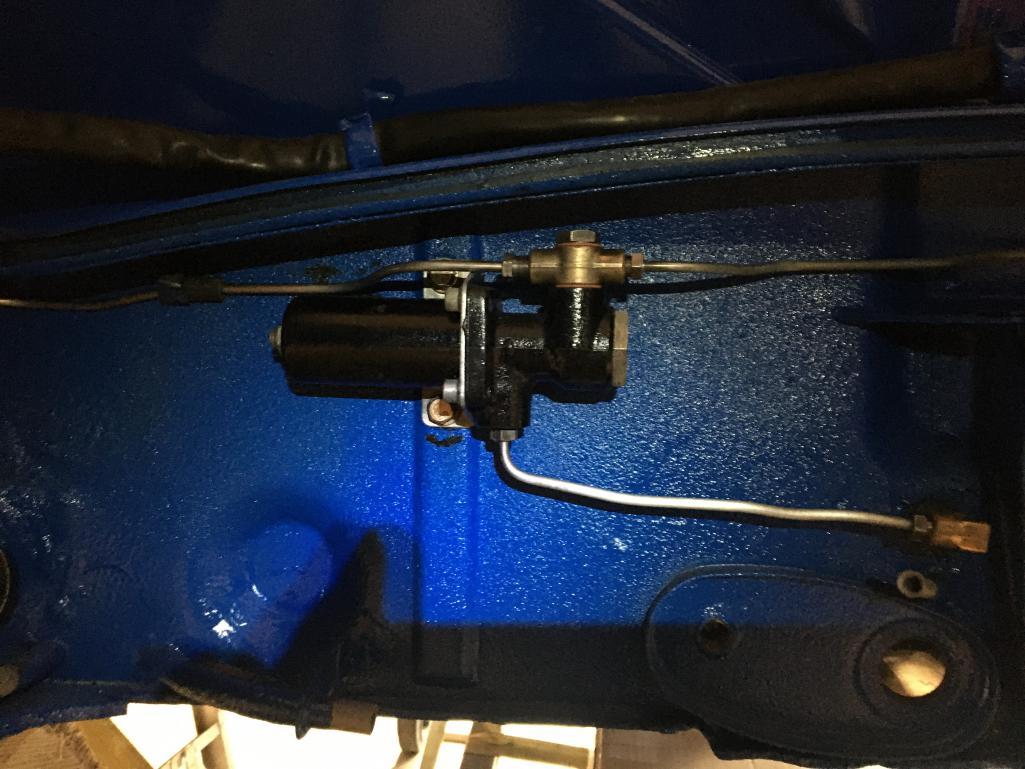
Installed with lines in the rear.
 |
|
|
|
| Speedo |
May 16 2021, 06:54 PM
Post
#548
|
|
Senior Member Group: Members Posts: 559 Joined: 7-November 06 From: Boulder Member No.: 7,170 Region Association: Rocky Mountains |
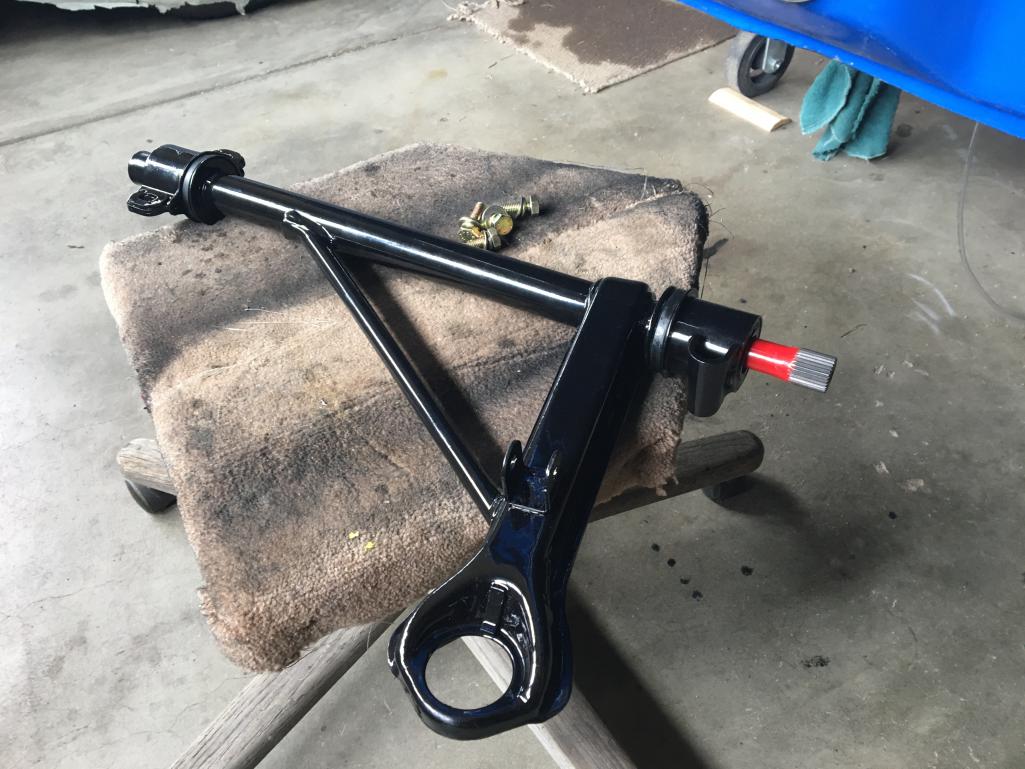
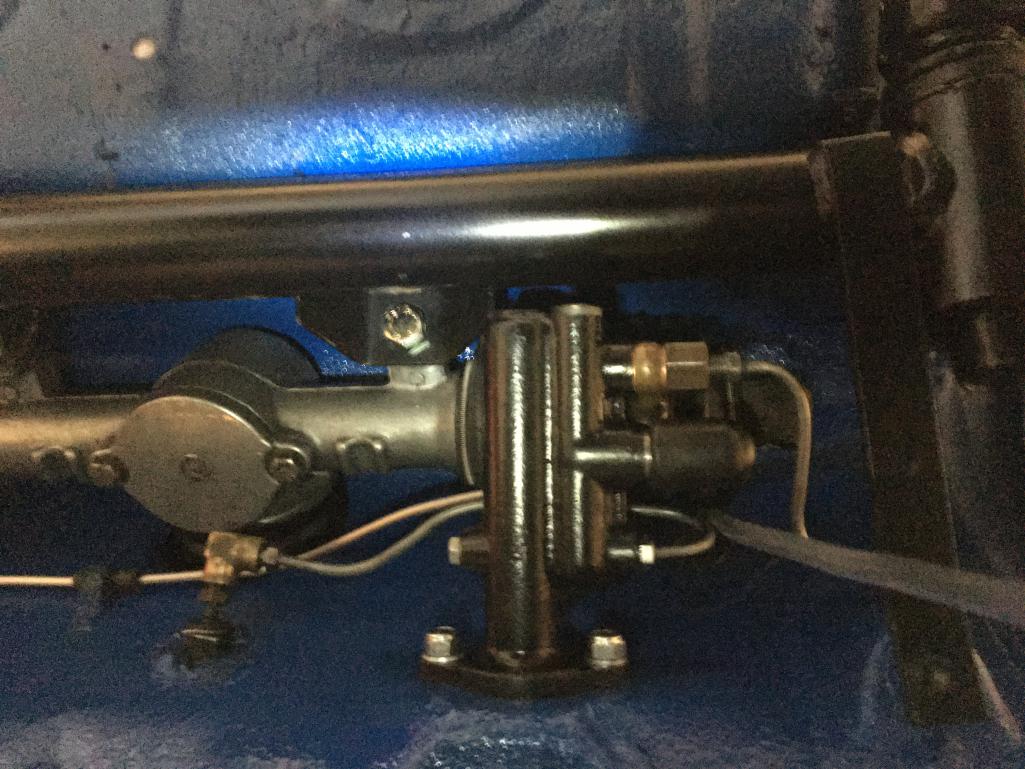
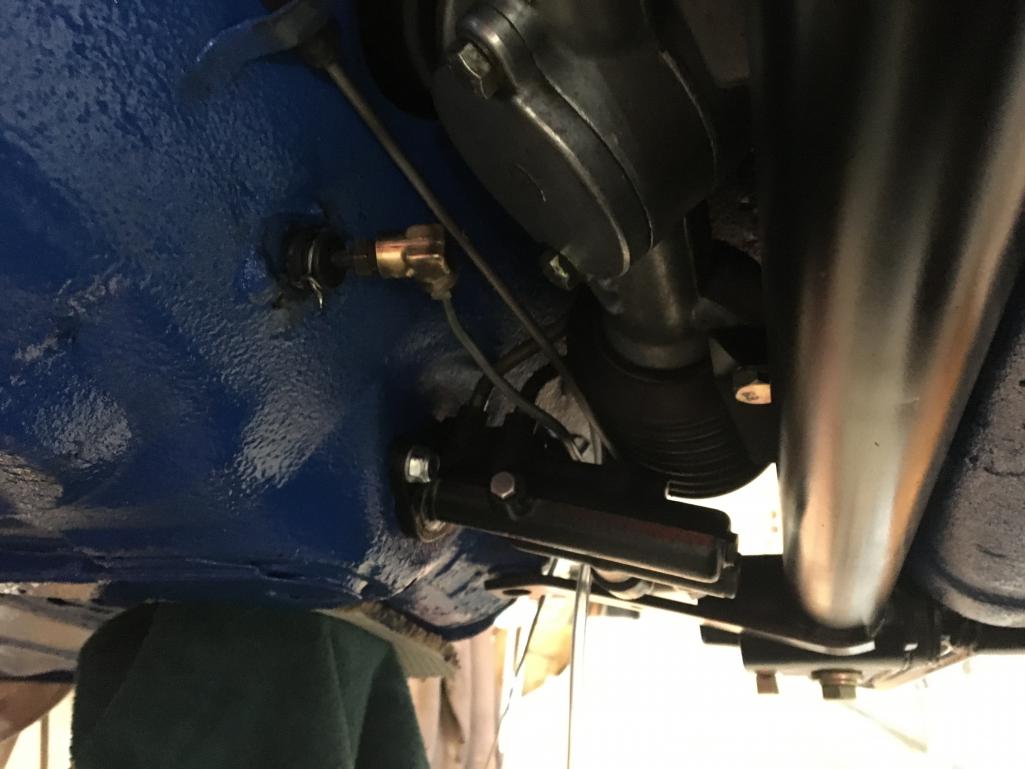
And the front. Installed bump steer bushings at the same time.
 |
|
|
|
| Speedo |
May 16 2021, 06:55 PM
Post
#549
|
|
Senior Member Group: Members Posts: 559 Joined: 7-November 06 From: Boulder Member No.: 7,170 Region Association: Rocky Mountains |
 |
|
|
|
| Speedo |
May 16 2021, 07:04 PM
Post
#550
|
|
Senior Member Group: Members Posts: 559 Joined: 7-November 06 From: Boulder Member No.: 7,170 Region Association: Rocky Mountains |
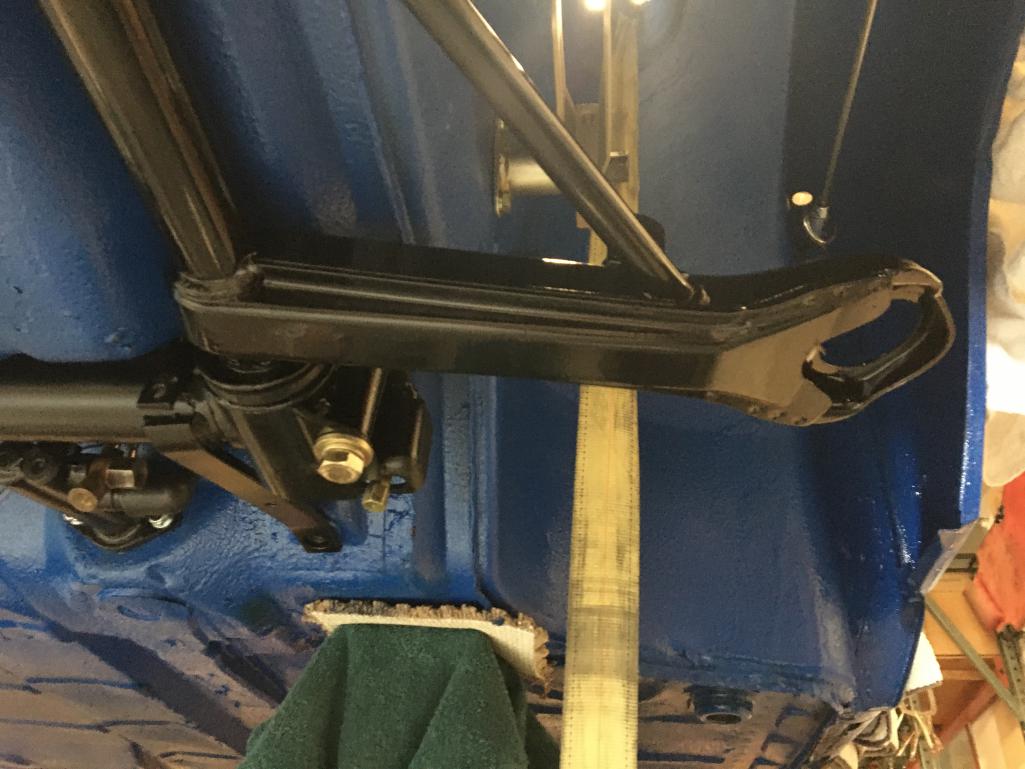
Ran into some trouble with the rear axles. Inner CVs were nasty but acceptable. Outer rubber boots were solid but the CVs were filled with crud...a mix of dirt and sand that made me wonder how they could have turned. Once everything was de-cruded, the inner race on the left side outer was badly pitted. I started a new thread on options and found that early 911 axles have the same diameter and splines as the 914-6. I had an extra 911 axle and stole the inner race from the CV. I am waiting for new boots and clamps to re-assemble.
The rear control arms are ready to re-assemble. 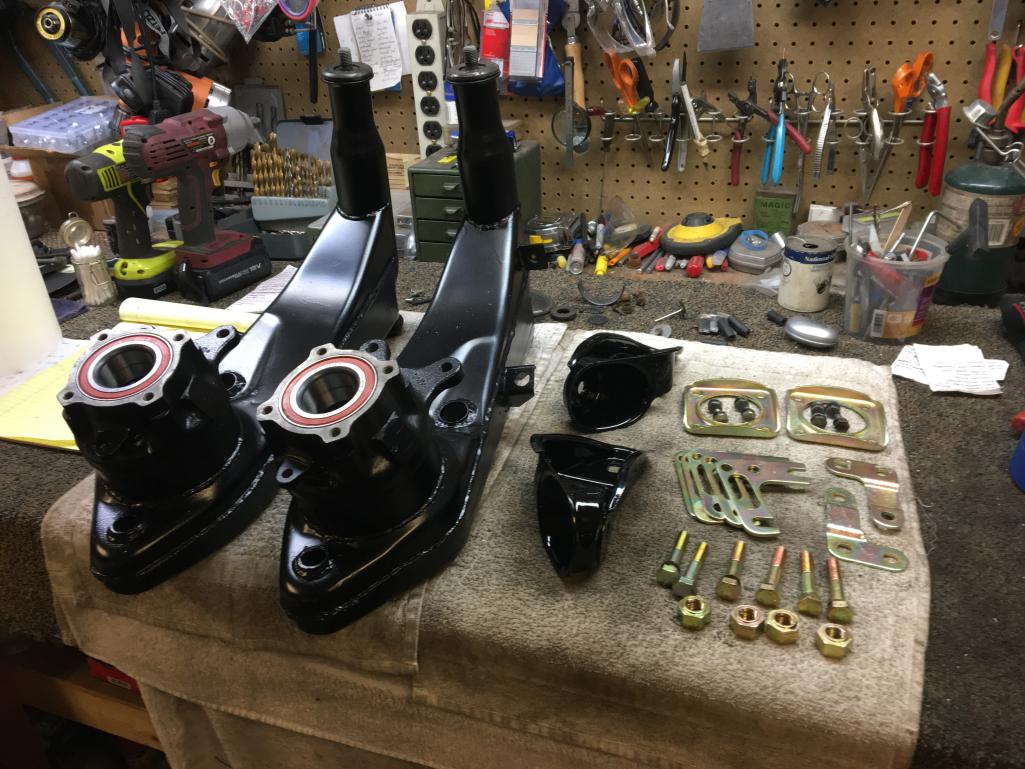 |
|
|
|
| Speedo |
May 16 2021, 07:11 PM
Post
#551
|
|
Senior Member Group: Members Posts: 559 Joined: 7-November 06 From: Boulder Member No.: 7,170 Region Association: Rocky Mountains |
But I have a couple questions. The PET is unclear as to where the washers go on the front of the control arms. It shows washers on only one side of the nuts shown on the bottom right of the previous picture. Shouldn't there be washers on both sides?
Second, the spacers/shims that mount on top of the link bearing...what is a default starting setup? I have three 4mm and two 3mm? Lastly, what is the "stopper" shown in item #4 on the PET illustration 501-00? Is that something to hold the shims in place? |
|
|
|
| Speedo |
May 22 2021, 12:46 PM
Post
#552
|
|
Senior Member Group: Members Posts: 559 Joined: 7-November 06 From: Boulder Member No.: 7,170 Region Association: Rocky Mountains |
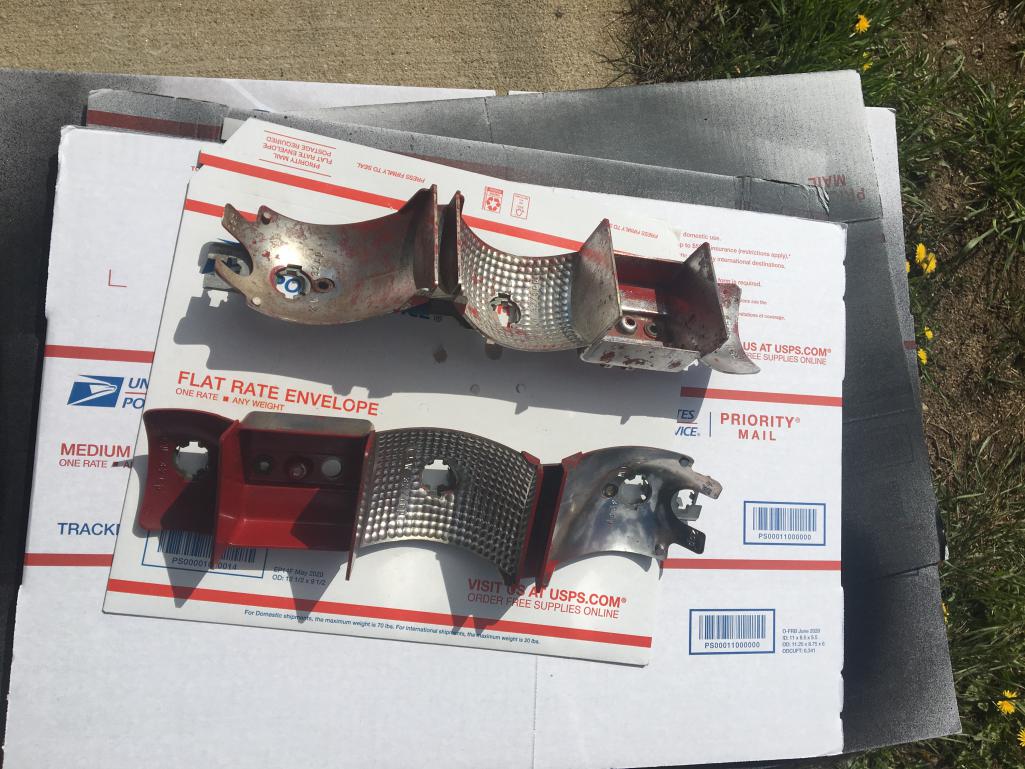
Sourced a better set of rear turns as mine were severely "heat compromised"...thanks Luke. I wanted to re-chrome the internals and while preparing to mask off the reflectors from the housings I realized that the reflectors could actually be removed from the housings entirely. This was good news as I had two different types of reflectors, and of the four (old set and new to me set) only two were undamaged. Being able to remove the reflectors allowed me to mix and match. So now I have two reflectors that are the same.
Cleaned them up and used chrome paint...big improvement. Housings separated from reflectors 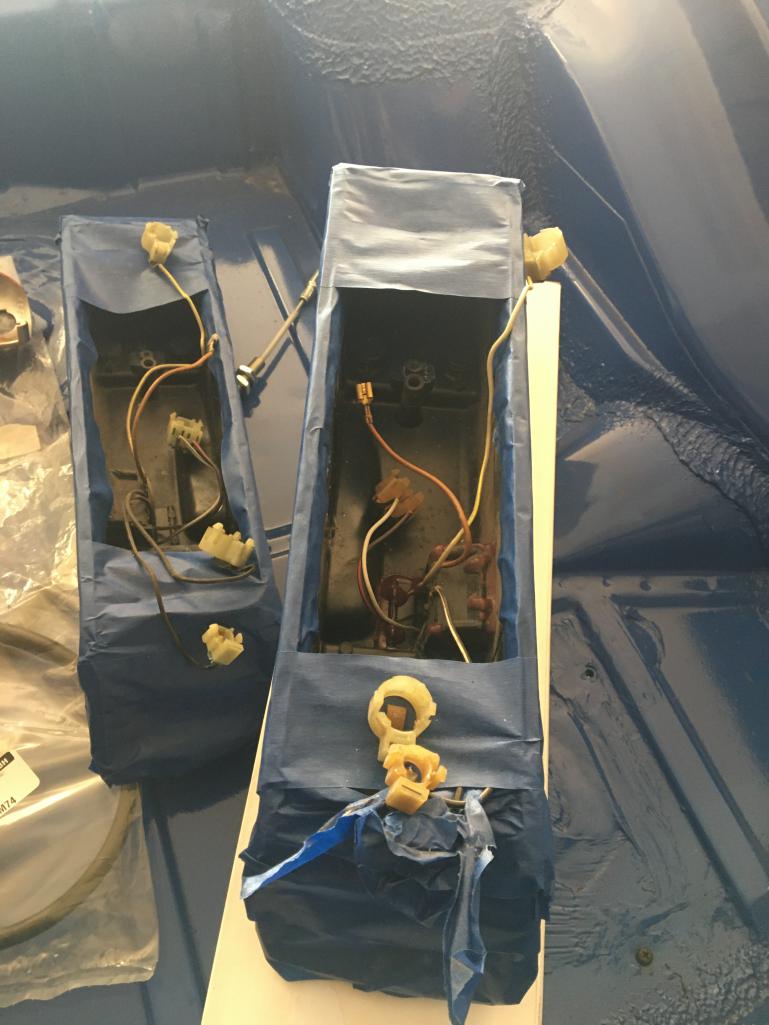 |
|
|
|
| Speedo |
May 22 2021, 12:48 PM
Post
#553
|
|
Senior Member Group: Members Posts: 559 Joined: 7-November 06 From: Boulder Member No.: 7,170 Region Association: Rocky Mountains |
Reflectors before...
 |
|
|
|
| Speedo |
May 22 2021, 06:13 PM
Post
#554
|
|
Senior Member Group: Members Posts: 559 Joined: 7-November 06 From: Boulder Member No.: 7,170 Region Association: Rocky Mountains |
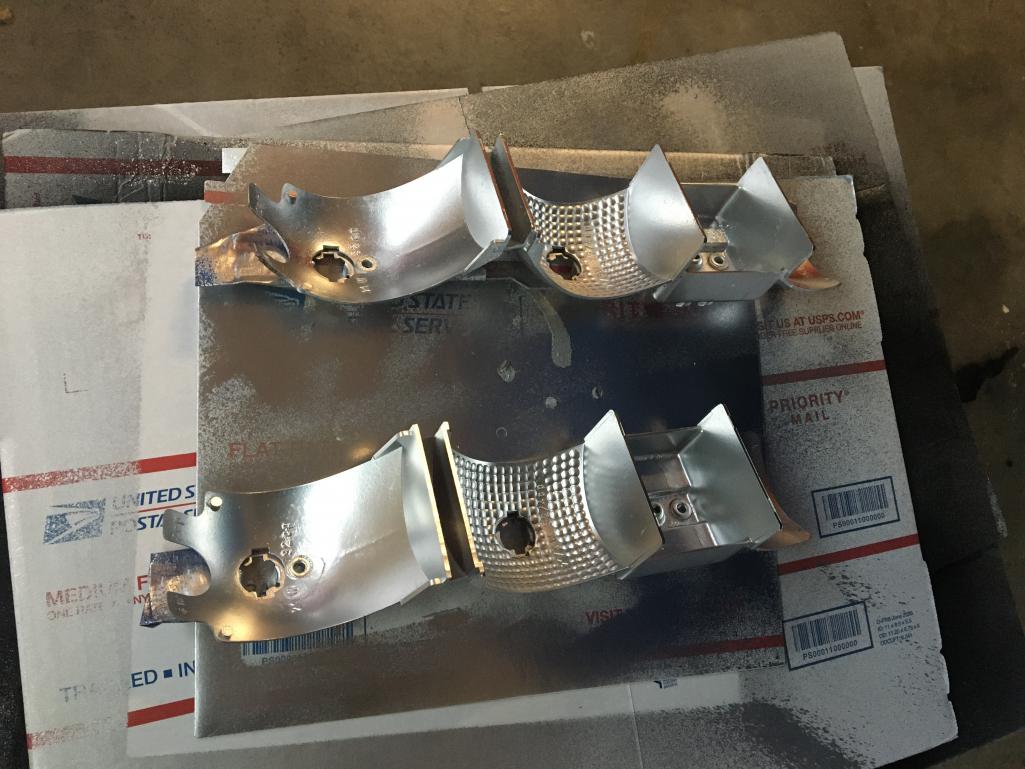
These look a lot better...
 |
|
|
|
| Luke M |
May 23 2021, 11:53 AM
Post
#555
|
|
Senior Member Group: Members Posts: 1,438 Joined: 8-February 05 From: WNY Member No.: 3,574 Region Association: North East States |
|
|
|
|
| raynekat |
May 23 2021, 03:41 PM
Post
#556
|
|
Advanced Member Group: Members Posts: 2,170 Joined: 30-December 14 From: Coeur d'Alene, Idaho Member No.: 18,263 Region Association: Pacific Northwest |
This car is getting somewhere....and it all looks great.
Well done! |
|
|
|
| Speedo |
May 30 2021, 04:54 PM
Post
#557
|
|
Senior Member Group: Members Posts: 559 Joined: 7-November 06 From: Boulder Member No.: 7,170 Region Association: Rocky Mountains |
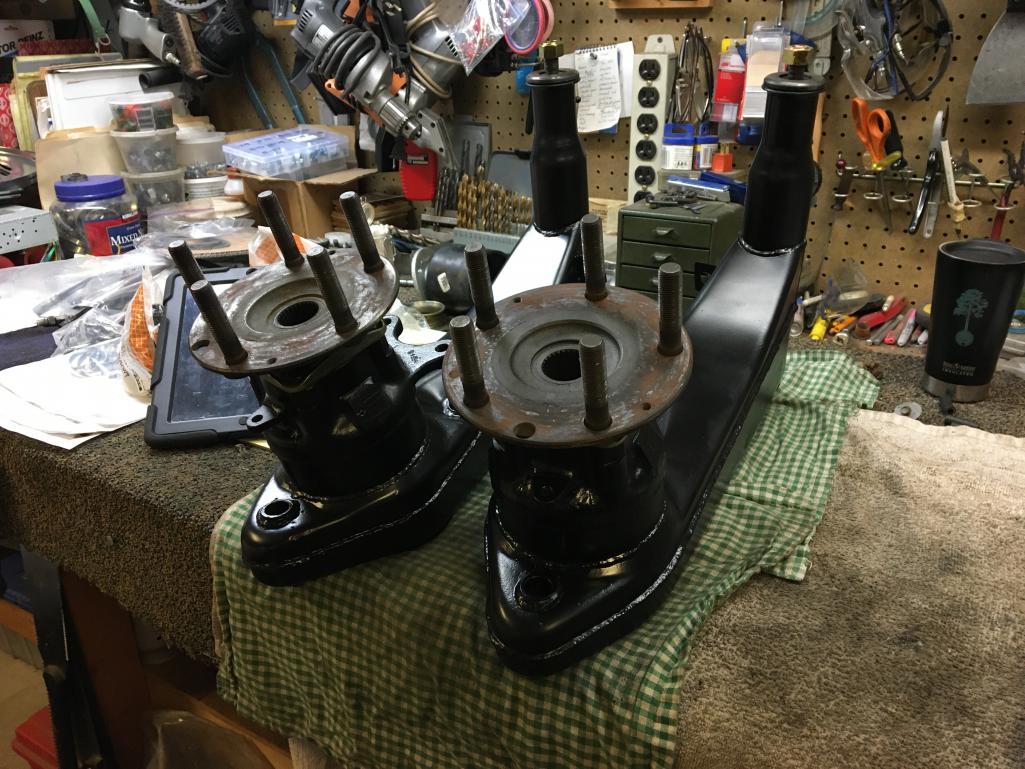
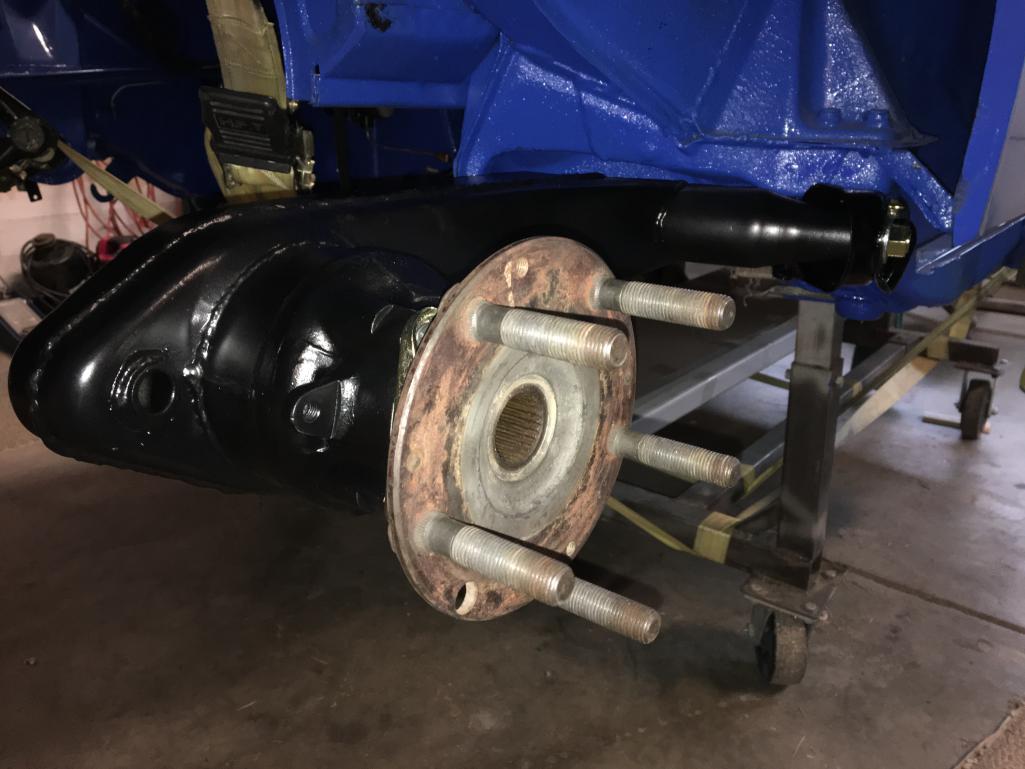
Managed to pull my hubs into the new bearings in the control arms without destroying the inner race. I had a large washer behind the bearing but I was still concerned. Really didn't want to ruin a bearing and start all over again.
 |
|
|
|
| Speedo |
May 30 2021, 04:59 PM
Post
#558
|
|
Senior Member Group: Members Posts: 559 Joined: 7-November 06 From: Boulder Member No.: 7,170 Region Association: Rocky Mountains |
And while I was at it, I went ahead and mounted things up. I want to mount the coil-overs but I don't want to get the chassis too heavy as the dolley wasn't designed to support an assembled car. I plan to do that when I get the car on the lift.
 |
|
|
|
| Speedo |
May 30 2021, 05:04 PM
Post
#559
|
|
Senior Member Group: Members Posts: 559 Joined: 7-November 06 From: Boulder Member No.: 7,170 Region Association: Rocky Mountains |
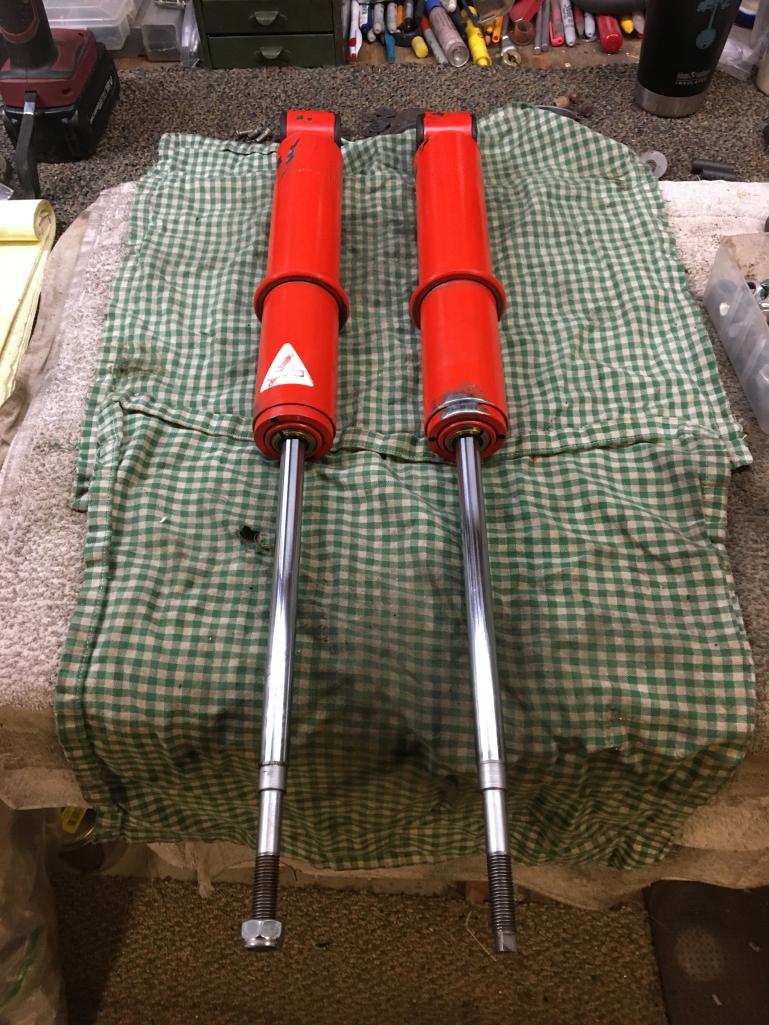
Speaking of coil-overs...This is my first experience with these. I disassembled planning to repaint the struts and coils and noticed that the cartridge in the strut had no "return" and basically the same resistance being pushed in or pulled out? Is this normal or do I need to get new cartridges? Or do I just send them back to Koni?
In.... 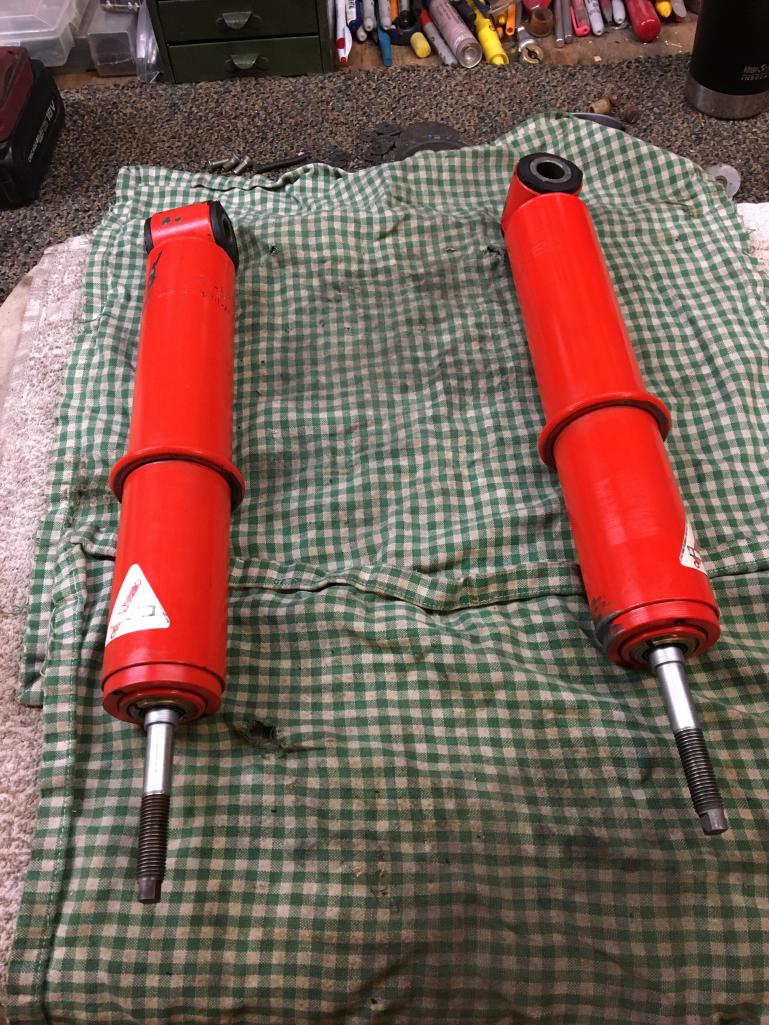 |
|
|
|
| Speedo |
May 30 2021, 05:05 PM
Post
#560
|
|
Senior Member Group: Members Posts: 559 Joined: 7-November 06 From: Boulder Member No.: 7,170 Region Association: Rocky Mountains |
And out...
 |
|
|
|
|
2 User(s) are reading this topic (2 Guests and 0 Anonymous Users)
0 Members:

|
Lo-Fi Version | Time is now: 6th November 2025 - 03:36 PM |
Invision Power Board
v9.1.4 © 2025 IPS, Inc.